Wbcom Designs WP Sell Services Docs
Back to product Buy Now

Getting Started

Welcome to WP Sell Services

WP Sell Services turns your WordPress site into a fully functional service marketplace -- think Fiverr or Upwork, but on your own website, under your brand, and with you earning commission on every sale.

Who Is This For?

Whether you are an entrepreneur launching a niche marketplace, an agency expanding into a platform model, or someone who sees an opportunity to connect service providers with clients -- WP Sell Services is built for you.

Here are some real-world examples of what people are building:

  • Freelancer marketplace -- Connect designers, writers, and developers with clients
  • Tutoring platform -- Let tutors list subjects and pricing, students book sessions
  • Consulting directory -- Business consultants offer packages, clients purchase directly
  • Coaching site -- Life coaches, fitness coaches, and mentors sell structured programs
  • Agency network -- Multiple agencies list services under one marketplace umbrella
  • Creative services hub -- Photographers, videographers, and musicians offer gig-based work

Why WP Sell Services?

Highlight What It Means for You
No WooCommerce required Your marketplace works out of the box with built-in Stripe, PayPal, and offline payments
3-tier pricing packages Vendors offer Basic, Standard, and Premium options so buyers can choose what fits
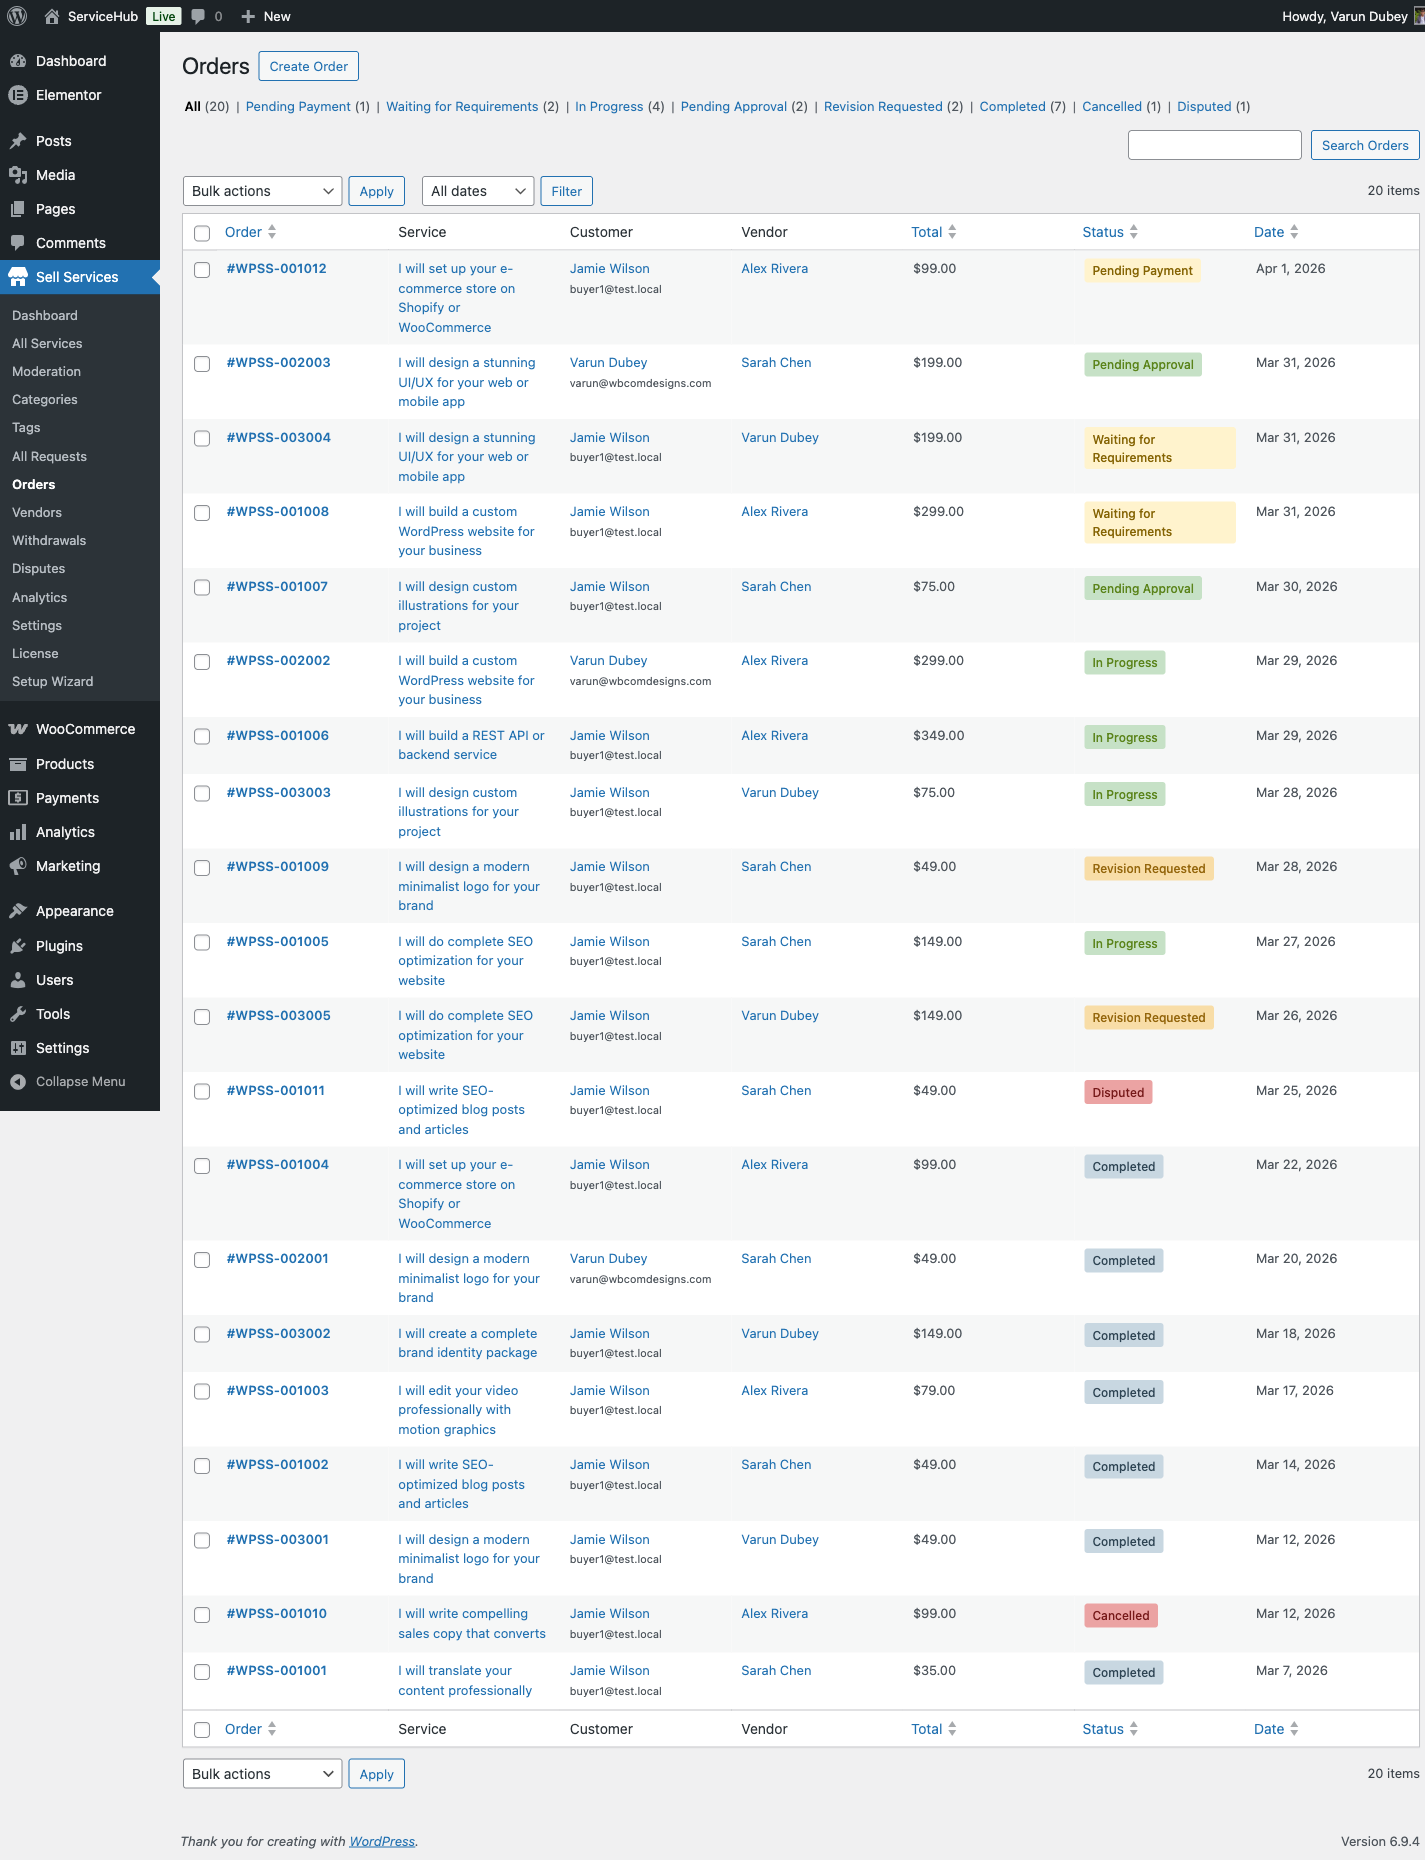
Built-in order system Full workflow from payment to delivery, with messaging, revisions, and deadlines
Reviews and ratings 5-star review system builds trust and helps buyers find top vendors
Dispute resolution Structured process with admin mediation when things go wrong
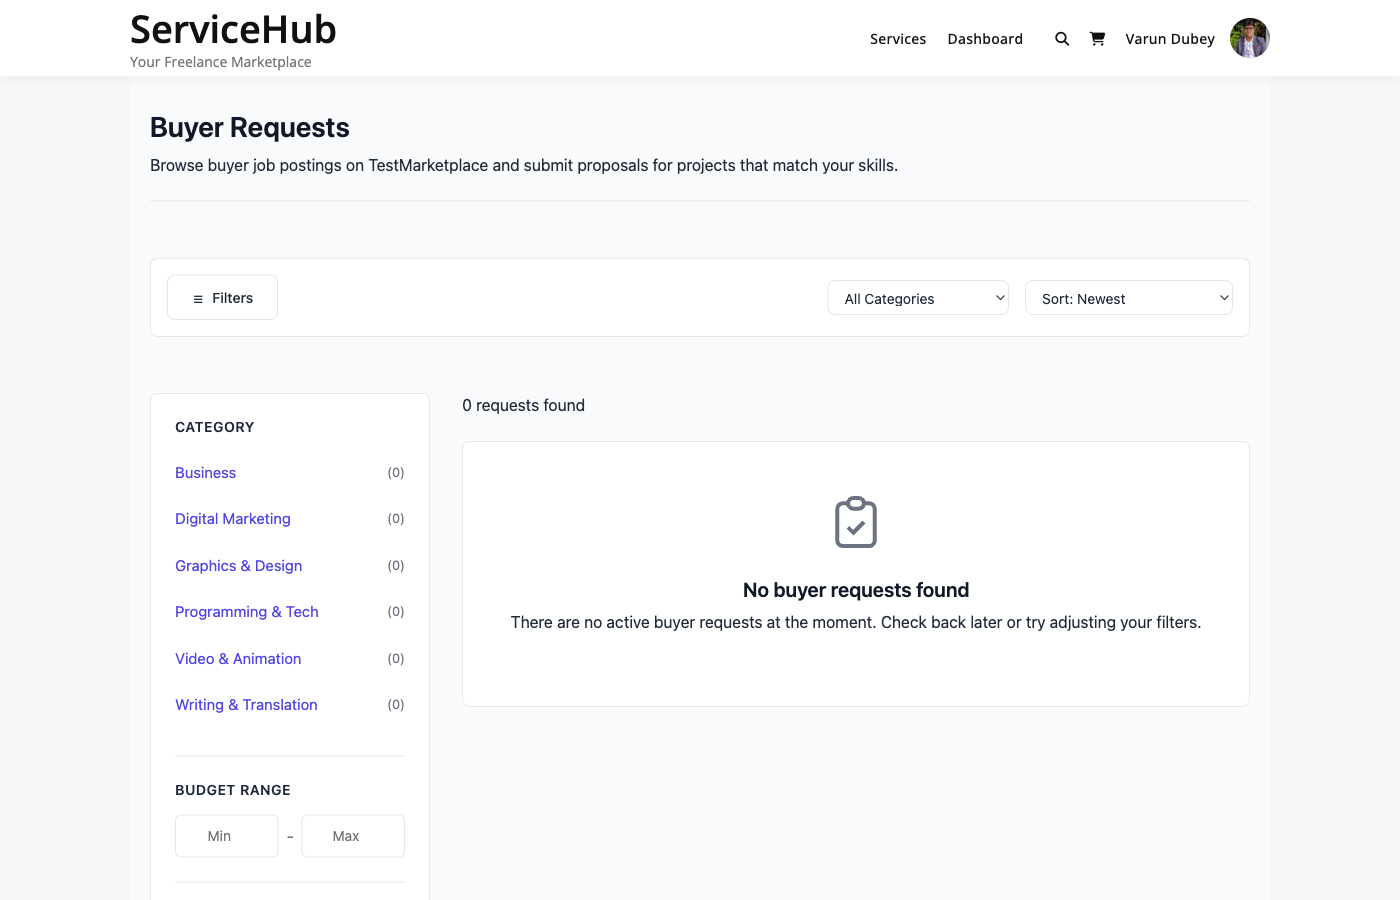
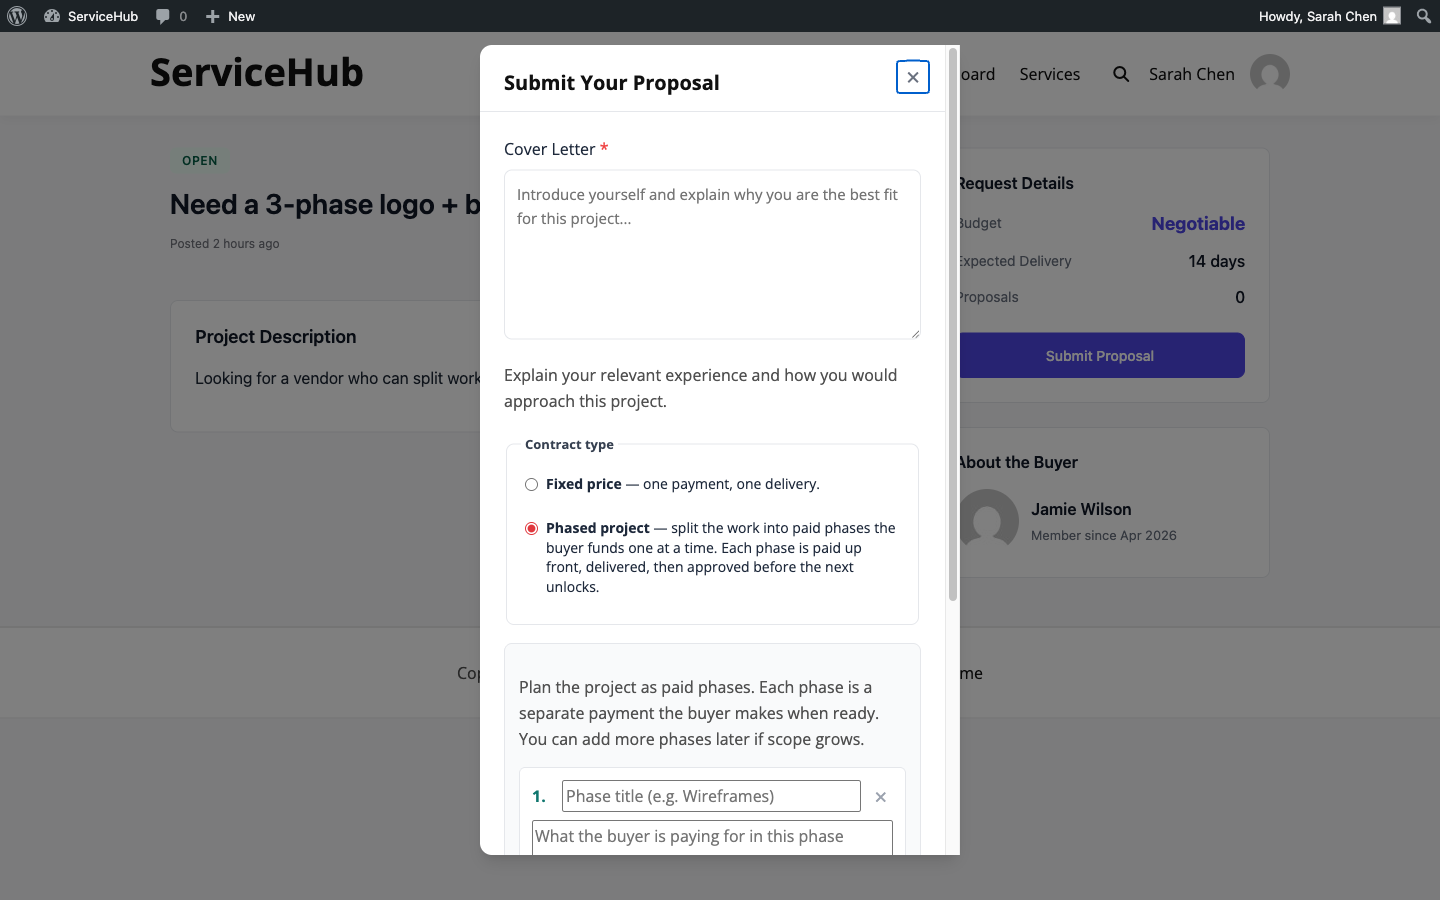
Buyer requests Buyers post what they need, vendors submit proposals -- like a job board
Mobile-ready design Responsive templates that look great on phones, tablets, and desktops
Vendor dashboard Vendors manage everything -- services, orders, earnings, messages -- from the frontend
4 seller levels New Seller, Rising Seller, Top Rated, and Pro Seller -- vendors level up based on performance

Feature Overview: Free vs Pro

Feature Free Pro
Service listings and categories Included Included
Order management and messaging Included Included
Reviews, disputes, and buyer requests Included Included
Vendor dashboard and seller levels Included Included
Built-in checkout (Stripe, PayPal, Offline) Included Included
Commission system with per-vendor rates Included Included
Gallery images per service Up to 4 Unlimited [PRO]
Service add-ons Up to 3 Unlimited [PRO]
FAQs per service Up to 5 Unlimited [PRO]
Video embeds 1 3 [PRO]
WooCommerce, EDD, FluentCart, SureCart -- [PRO]
Razorpay payment gateway -- [PRO]
Wallet integrations (TeraWallet, MyCred, etc.) -- [PRO]
Analytics dashboards with export -- [PRO]
Cloud storage (Amazon S3, Google Cloud, DO) -- [PRO]
AI title suggestions, service templates -- [PRO]
Scheduled publishing -- [PRO]

What You Can Build

  1. A Fiverr-style gig marketplace -- Vendors create service listings with packages, buyers browse and purchase, you earn a percentage on every order
  2. A tutoring platform -- Teachers list subjects with hourly rates, students pick a package and submit their learning goals
  3. A home services directory -- Plumbers, electricians, and cleaners offer fixed-price packages with clear delivery timelines
  4. A content creation marketplace -- Writers, designers, and video editors sell creative services with revision options
  5. A professional consulting hub -- Business advisors offer strategy sessions with tiered pricing (basic review, full audit, ongoing retainer)

Two Ways to Buy: Browse or Request

Your marketplace supports two complete buying modes -- both included in the free version.

Mode 1: Browse and Buy (Fiverr-style)

The classic marketplace flow. Vendors list services, buyers browse and purchase.

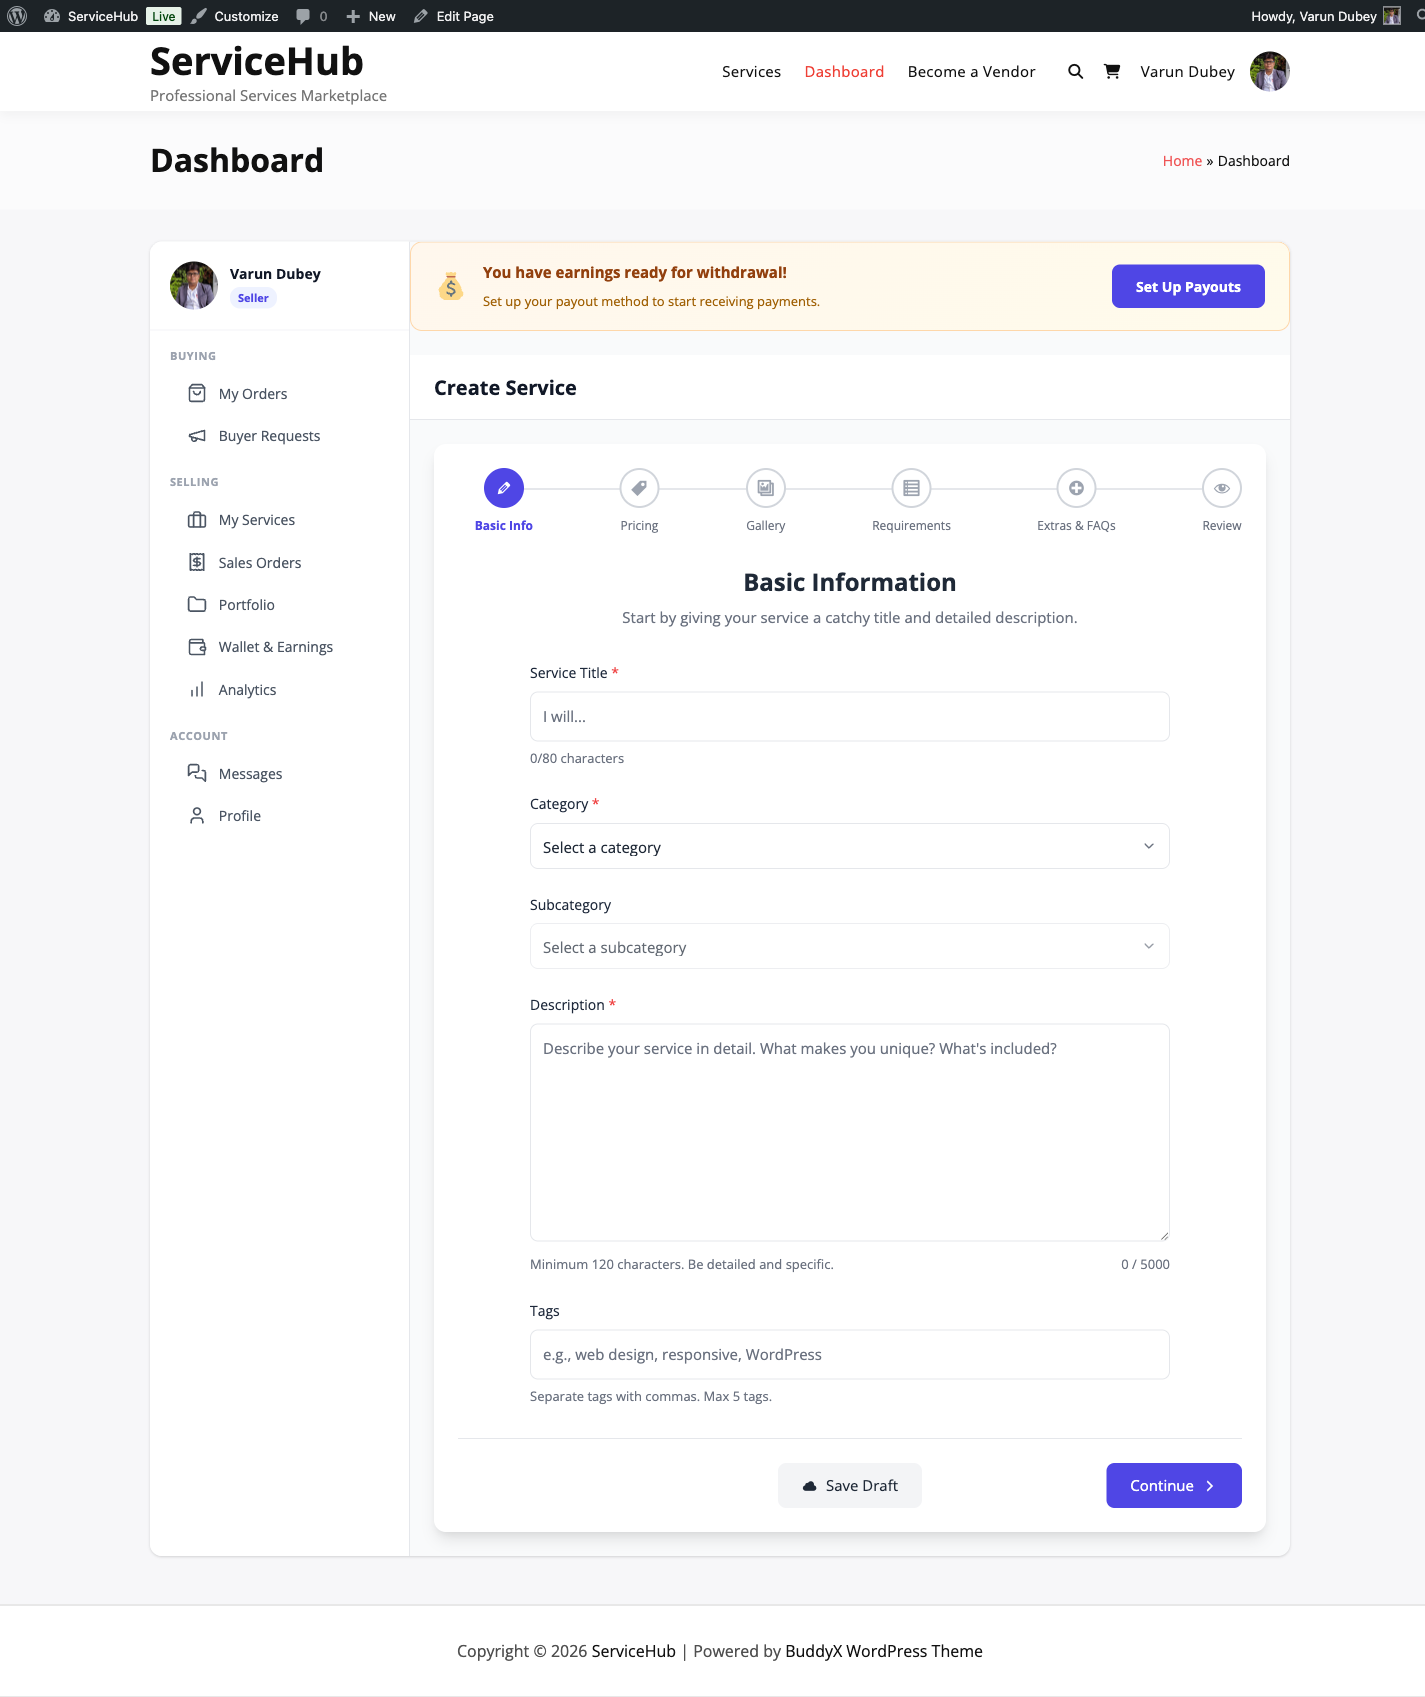
  1. Vendors create services -- They use a guided wizard to build professional listings with pricing packages, images, and FAQs
  2. Buyers browse and purchase -- They find services, pick a package (Basic, Standard, or Premium), add optional extras, and pay
  3. Orders flow automatically -- The system handles requirements collection, messaging, delivery, revisions, and reviews
  4. Everyone gets paid -- You earn your commission, vendors receive their earnings after a clearance period

Mode 2: Post a Request and Get Quotes (Upwork-style)

The reverse marketplace flow. Buyers describe what they need, vendors compete with proposals.

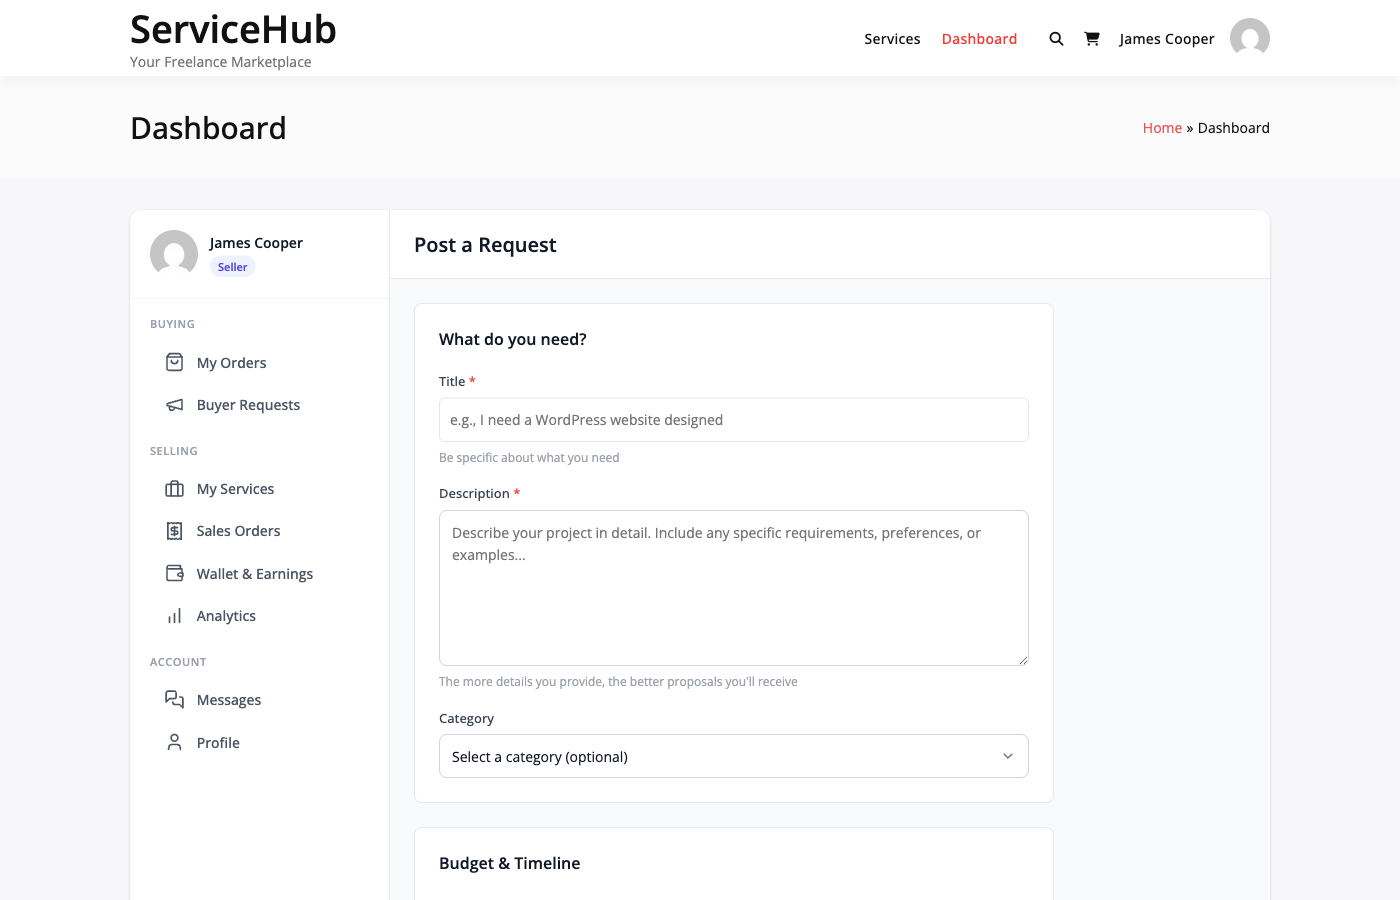
  1. Buyer posts a request -- They describe their project, set a budget range, pick a category, and upload reference files
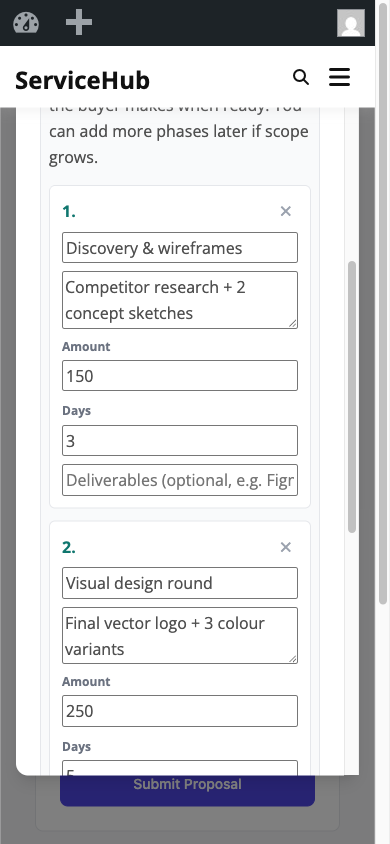
  2. Vendors submit proposals -- Qualified sellers see the request and pitch their services with a price, timeline, and cover letter
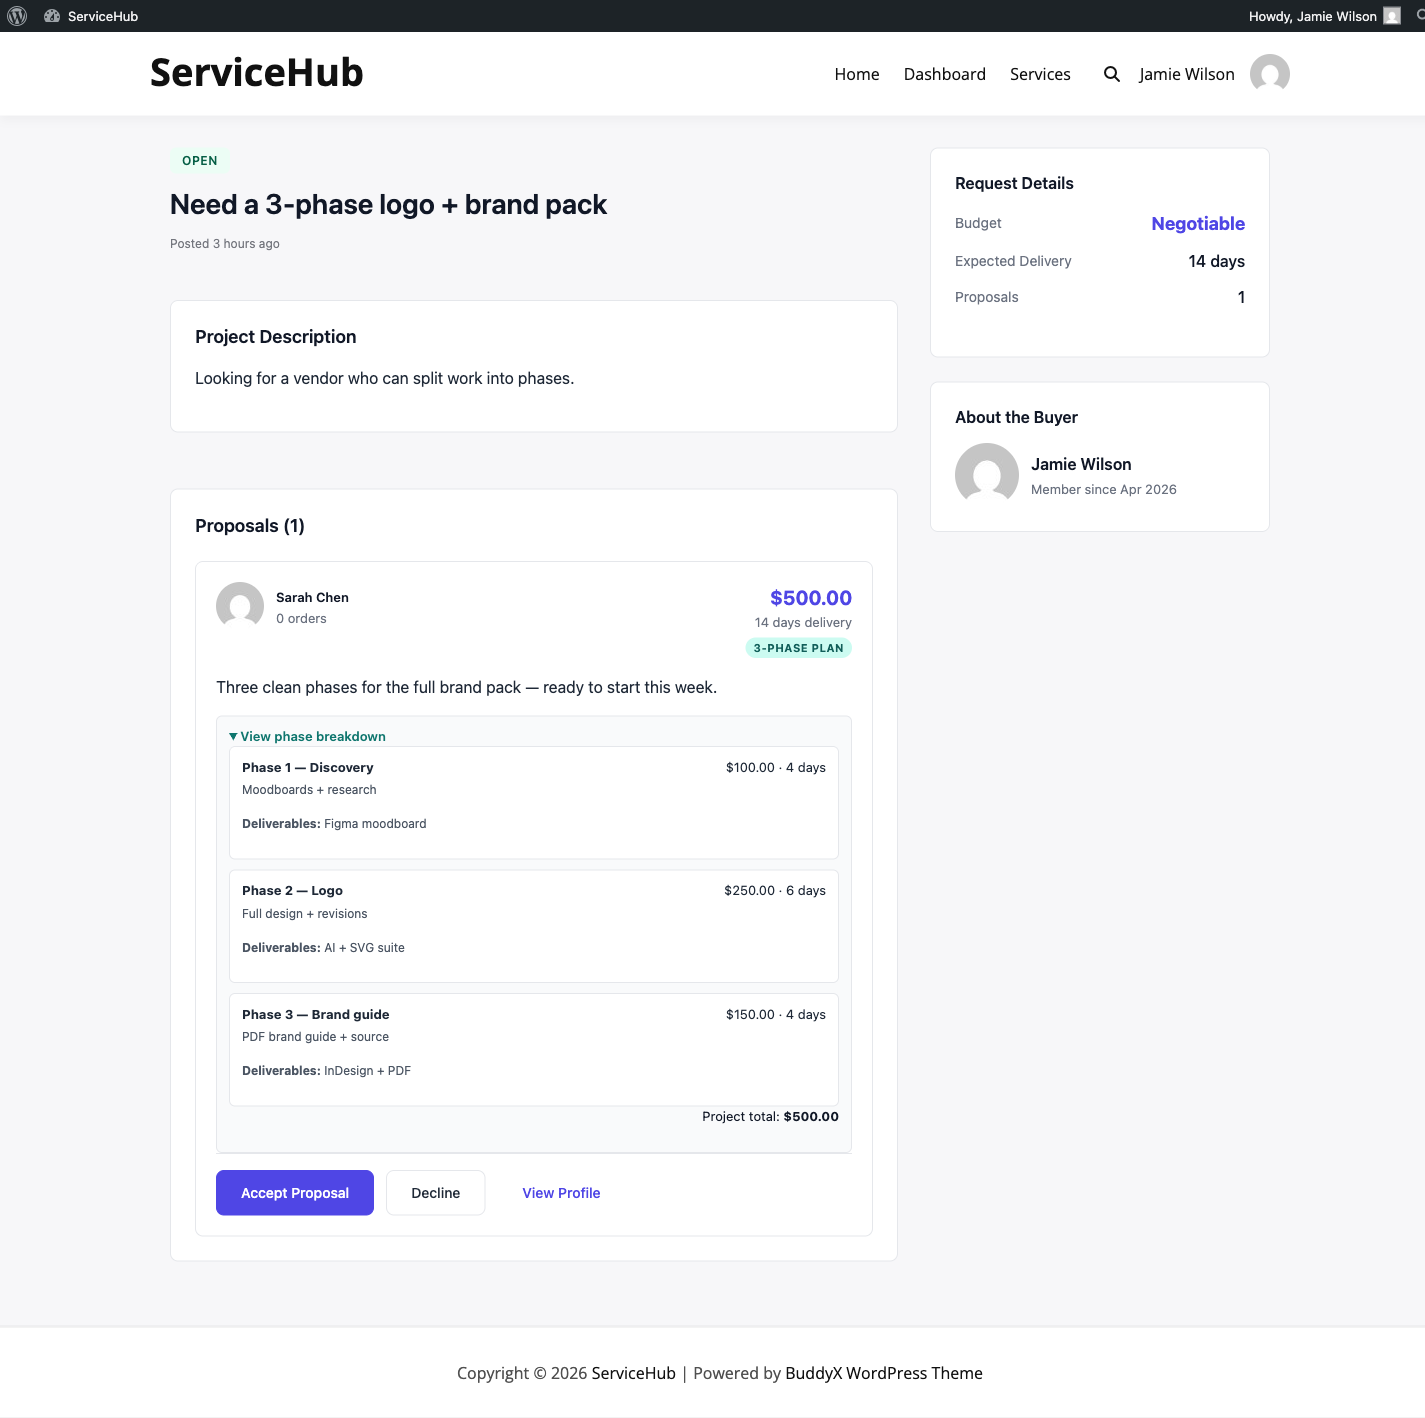
  3. Buyer compares and accepts -- They review all proposals side by side, check vendor ratings and portfolios, and accept the best fit
  4. Order is created and payment collected -- Accepting a proposal creates an order automatically, the buyer pays at checkout, and work begins
  5. Same order workflow from here -- Requirements, messaging, delivery, revisions, and reviews all work identically to Mode 1

This is not a light add-on -- it is a fully built-out feature with its own CPT (wpss_request), proposal management, status tracking (Open, In Review, Hired, Expired), automatic expiry after 30 days, email notifications for new proposals, and a dedicated dashboard section for both buyers and vendors.

Why Both Modes Matter

Mode Best For Example
Browse and Buy Standardized services with clear deliverables "I need a logo -- here are the packages"
Post a Request Custom projects where scope needs discussion "I need a website redesign -- what can you do for $2,000?"

Most successful marketplaces use both. Some buyers know exactly what they want (Mode 1). Others need to describe their project and let experts propose solutions (Mode 2). Supporting both means you never lose a potential transaction.

Getting Started

Ready to build your marketplace? Here is the path:

  1. Install the plugin -- Takes about 2 minutes
  2. Run initial setup -- Configure your marketplace name, currency, and commission
  3. Compare Free vs Pro -- See everything both versions offer

Your marketplace can be live today.

Guides by Role

For Buyers

For Vendors

Installing WP Sell Services

Getting WP Sell Services up and running takes just a few minutes. No technical experience required -- if you can install a WordPress plugin, you can do this.

Requirements

Before you install, make sure your hosting meets these minimums:

Requirement Minimum
WordPress 6.4 or higher
PHP 8.1 or higher

Most modern WordPress hosts already meet these requirements. If you are unsure, check with your hosting provider.

WP Sell Services Pro has the same minimums, and must run the same version number as the free plugin -- the two are released in lockstep.

Install the Plugin

  1. Go to Plugins > Add New in your WordPress dashboard
  2. Click Upload Plugin at the top
  3. Choose the wp-sell-services.zip file from your computer
  4. Click Install Now
  5. Click Activate Plugin

Option B: Upload via FTP

  1. Unzip the wp-sell-services.zip file on your computer
  2. Upload the wp-sell-services folder to your site's /wp-content/plugins/ directory
  3. Go to Plugins in your WordPress dashboard
  4. Find WP Sell Services in the list and click Activate

What Happens When You Activate

When you activate the plugin, everything sets up automatically:

  • Your marketplace pages are ready to be created with one click
  • The vendor role is created so people can register and start selling
  • Default settings are applied (10% commission, USD currency, open registration)
  • Automated tasks start running in the background (auto-completing delivered orders, updating vendor stats)

You do not need to touch any database settings or configure anything technical.

Installing the Pro Version [PRO]

The Pro version adds premium features on top of the free plugin. Both run together.

  1. Make sure the free version is installed and active first
  2. Go to Plugins > Add New > Upload Plugin
  3. Upload wp-sell-services-pro.zip
  4. Click Install Now, then Activate Plugin
  5. Go to Sell Services > License
  6. Enter your license key and click Activate License

Pro features become available immediately -- no migration or extra setup needed.

Troubleshooting

Service pages show "Page Not Found"

Go to Settings > Permalinks in your WordPress dashboard and click Save Changes. You do not need to change anything -- just saving refreshes the links.

Plugin will not activate

  • PHP error? Ask your host to upgrade PHP to 8.1 or higher
  • WordPress error? Update WordPress via Dashboard > Updates
  • "Invalid header" error? Make sure you are uploading the .zip file, not an extracted folder

Upload size too large

If the zip file is too big to upload through WordPress, use the FTP method instead (Option B above), or ask your hosting provider to increase the upload limit.

Next Steps

Your plugin is installed and active. Now let's configure your marketplace:

  1. Complete initial setup -- Set your marketplace name, currency, and commission rate
  2. Compare Free vs Pro -- See what each version offers
  3. Create your first service -- Test the vendor experience

Initial Setup Guide

After activating WP Sell Services, a quick setup gets your marketplace ready for vendors and buyers. Most of this takes under 10 minutes.

Setup Wizard

Setup Wizard

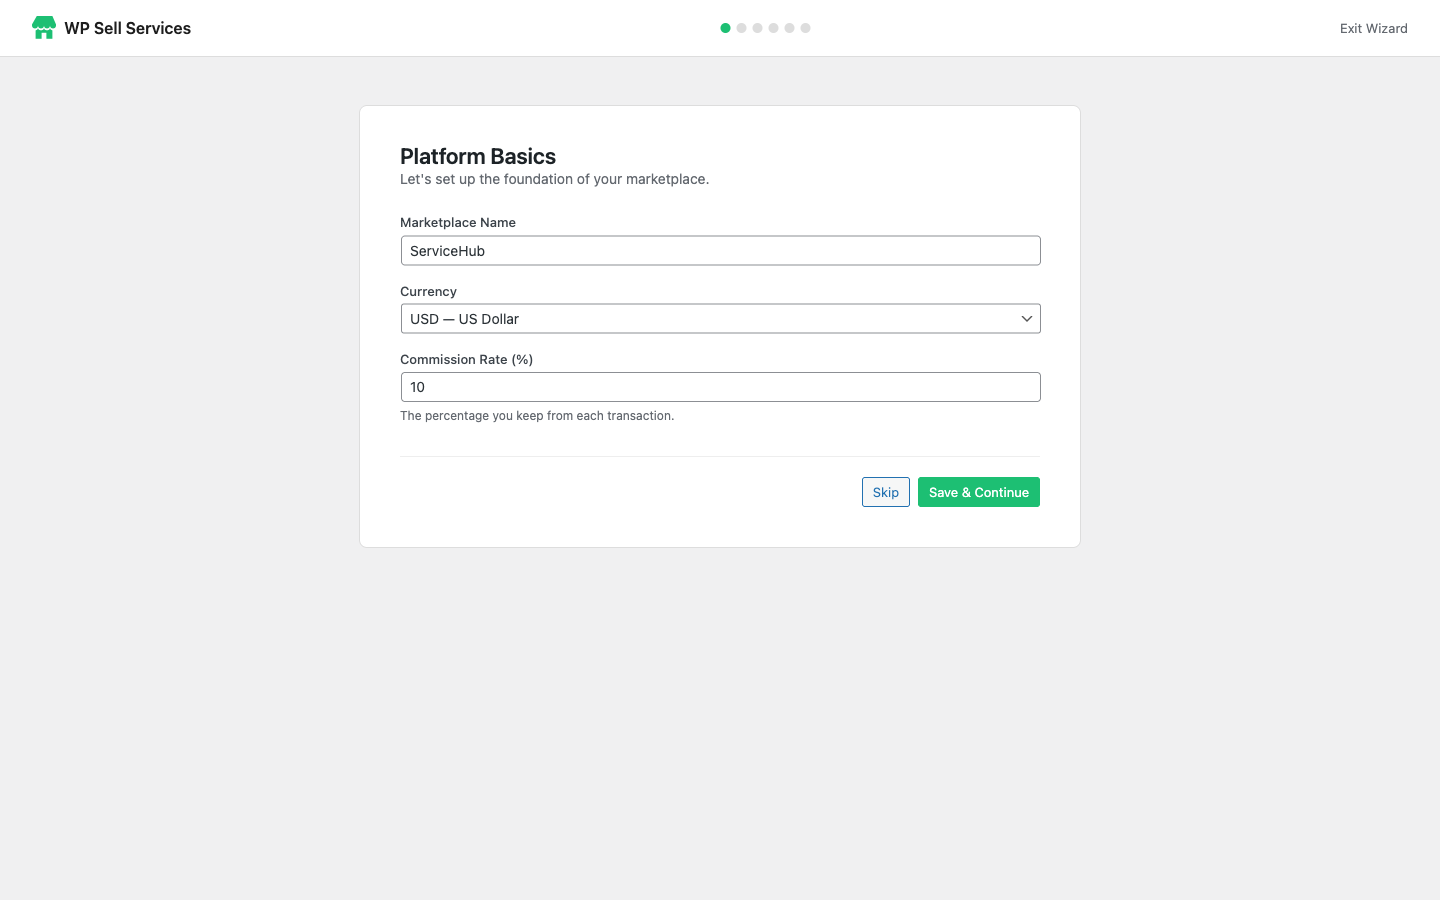
When you first activate the plugin, the Setup Wizard walks you through the essentials:

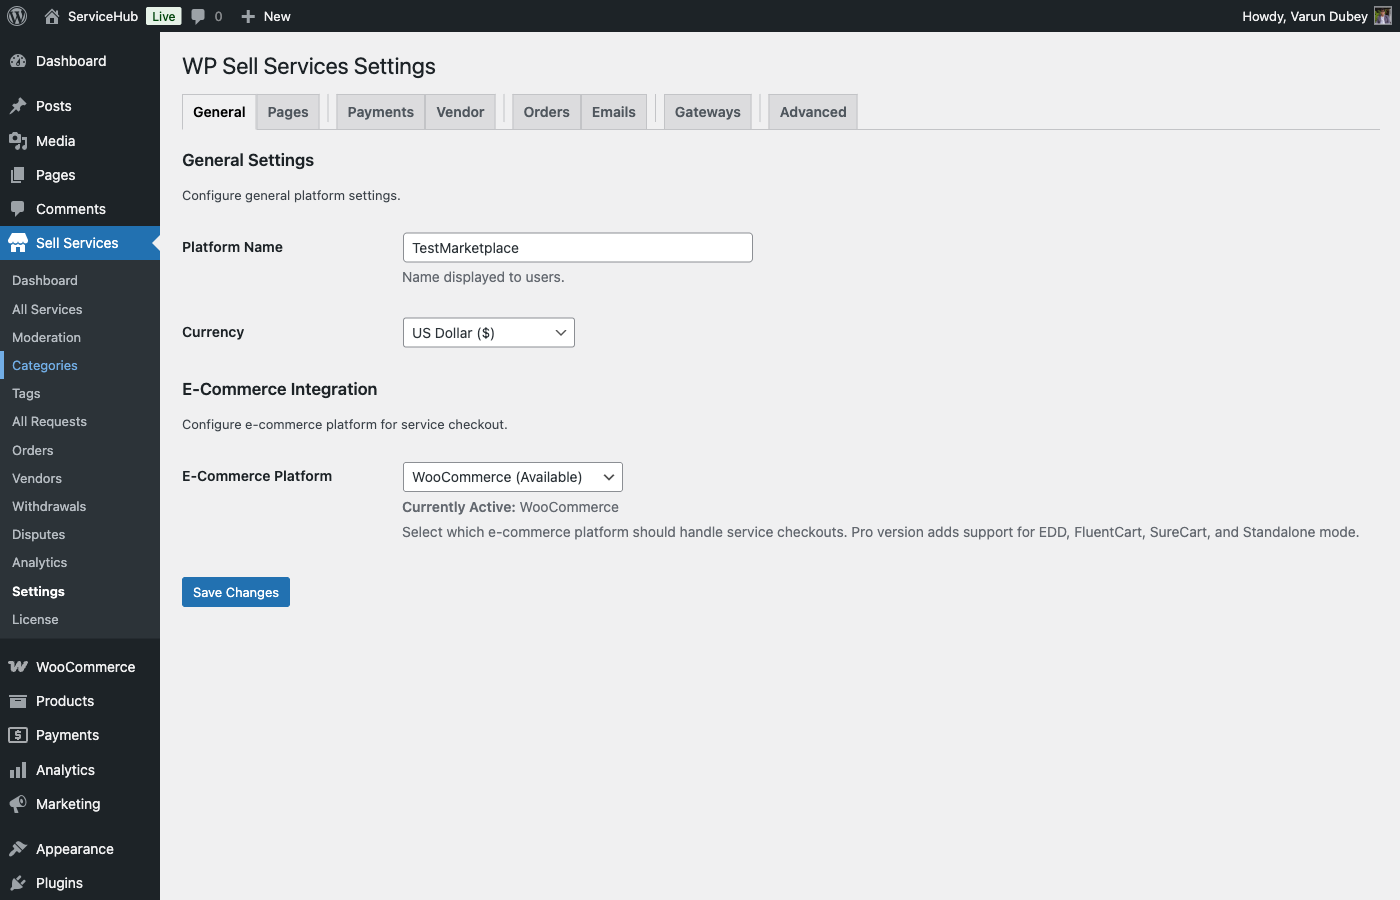
Platform Name

This is the name of your marketplace -- it appears in emails, notifications, and on the frontend. It defaults to your WordPress site name, but you can change it to something like "DesignHub" or "FreelanceMarket."

Currency

Choose the currency for your entire marketplace. All service prices, earnings, and payouts use this currency. Options include USD, EUR, GBP, CAD, AUD, INR, JPY, CNY, BRL, and MXN.

Tip: Set your currency before vendors start listing services. Changing it later can cause pricing confusion.

Commission Rate

This is the percentage you earn on every completed order. The default is 10%, meaning if a vendor sells a $100 service, you keep $10 and the vendor receives $90. You can set this anywhere from 0% to 50%.

Vendor Registration Mode

Choose how vendors join your marketplace:

Mode What Happens
Open Anyone can sign up as a vendor and start selling immediately
Requires Approval People apply to become vendors, and you approve or decline each application
Closed Only you (the admin) can create vendor accounts

Essential Pages

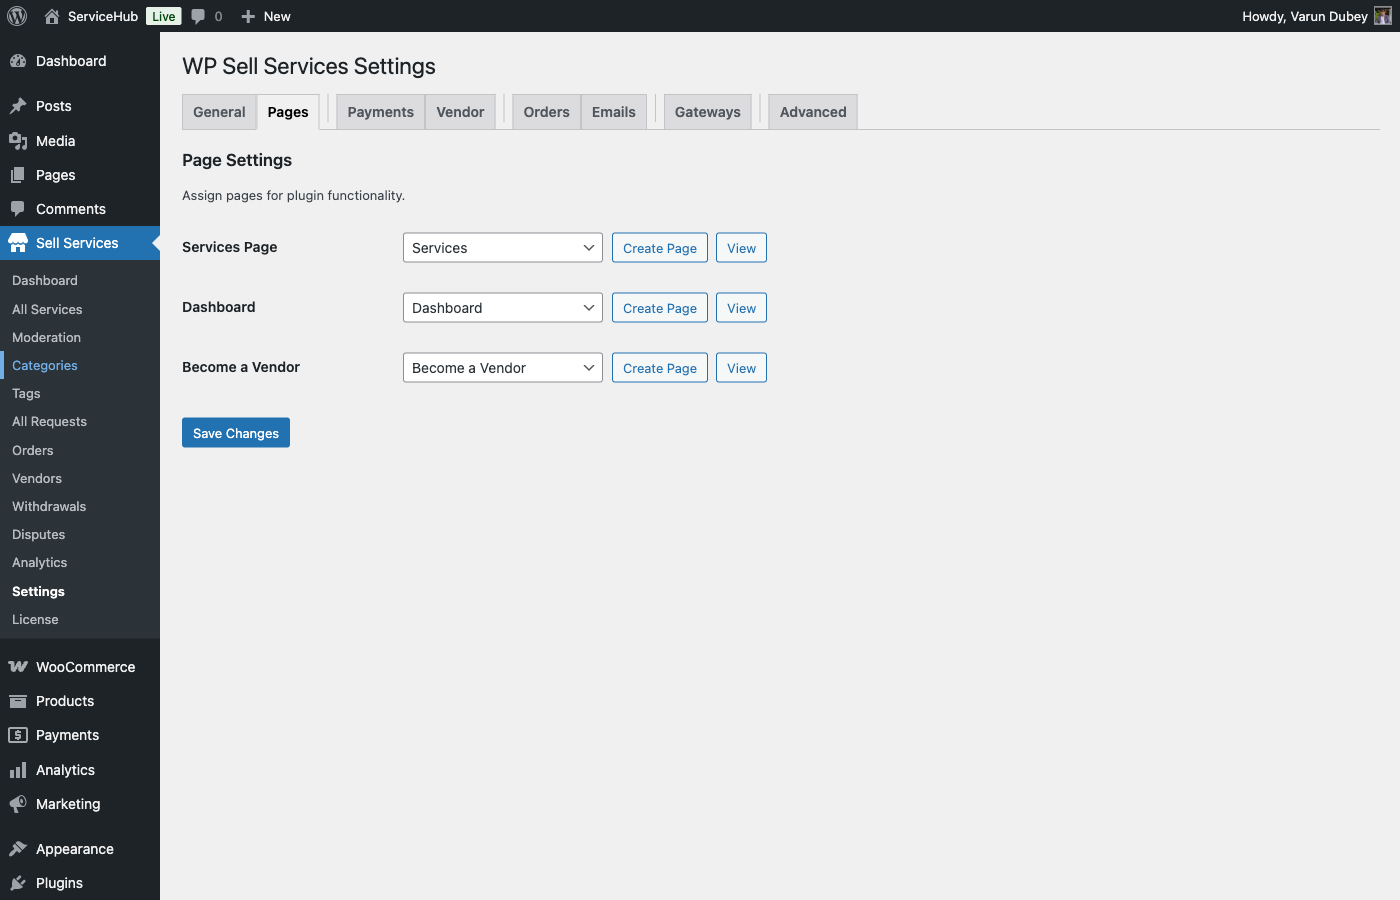
Your marketplace needs 4 pages to function. The plugin can create them for you automatically:

  1. Go to Sell Services > Settings > Pages
  2. Click the Create Page button next to each page
Page What It Does
Services The public browsing page where buyers discover and search for services
Dashboard Where both vendors and buyers manage orders, messages, earnings, and services
Become a Vendor The registration page for new vendors
Checkout Where buyers complete payment in standalone mode

The Become a Vendor page only appears in this list while vendor registration is open. If you have closed registration, the field is hidden and your existing mapping is left untouched.

After creating these pages, add the Services and Become a Vendor pages to your site's main menu at Appearance > Menus.

Quick Configuration Checklist

Here is everything you should review before inviting your first vendors:

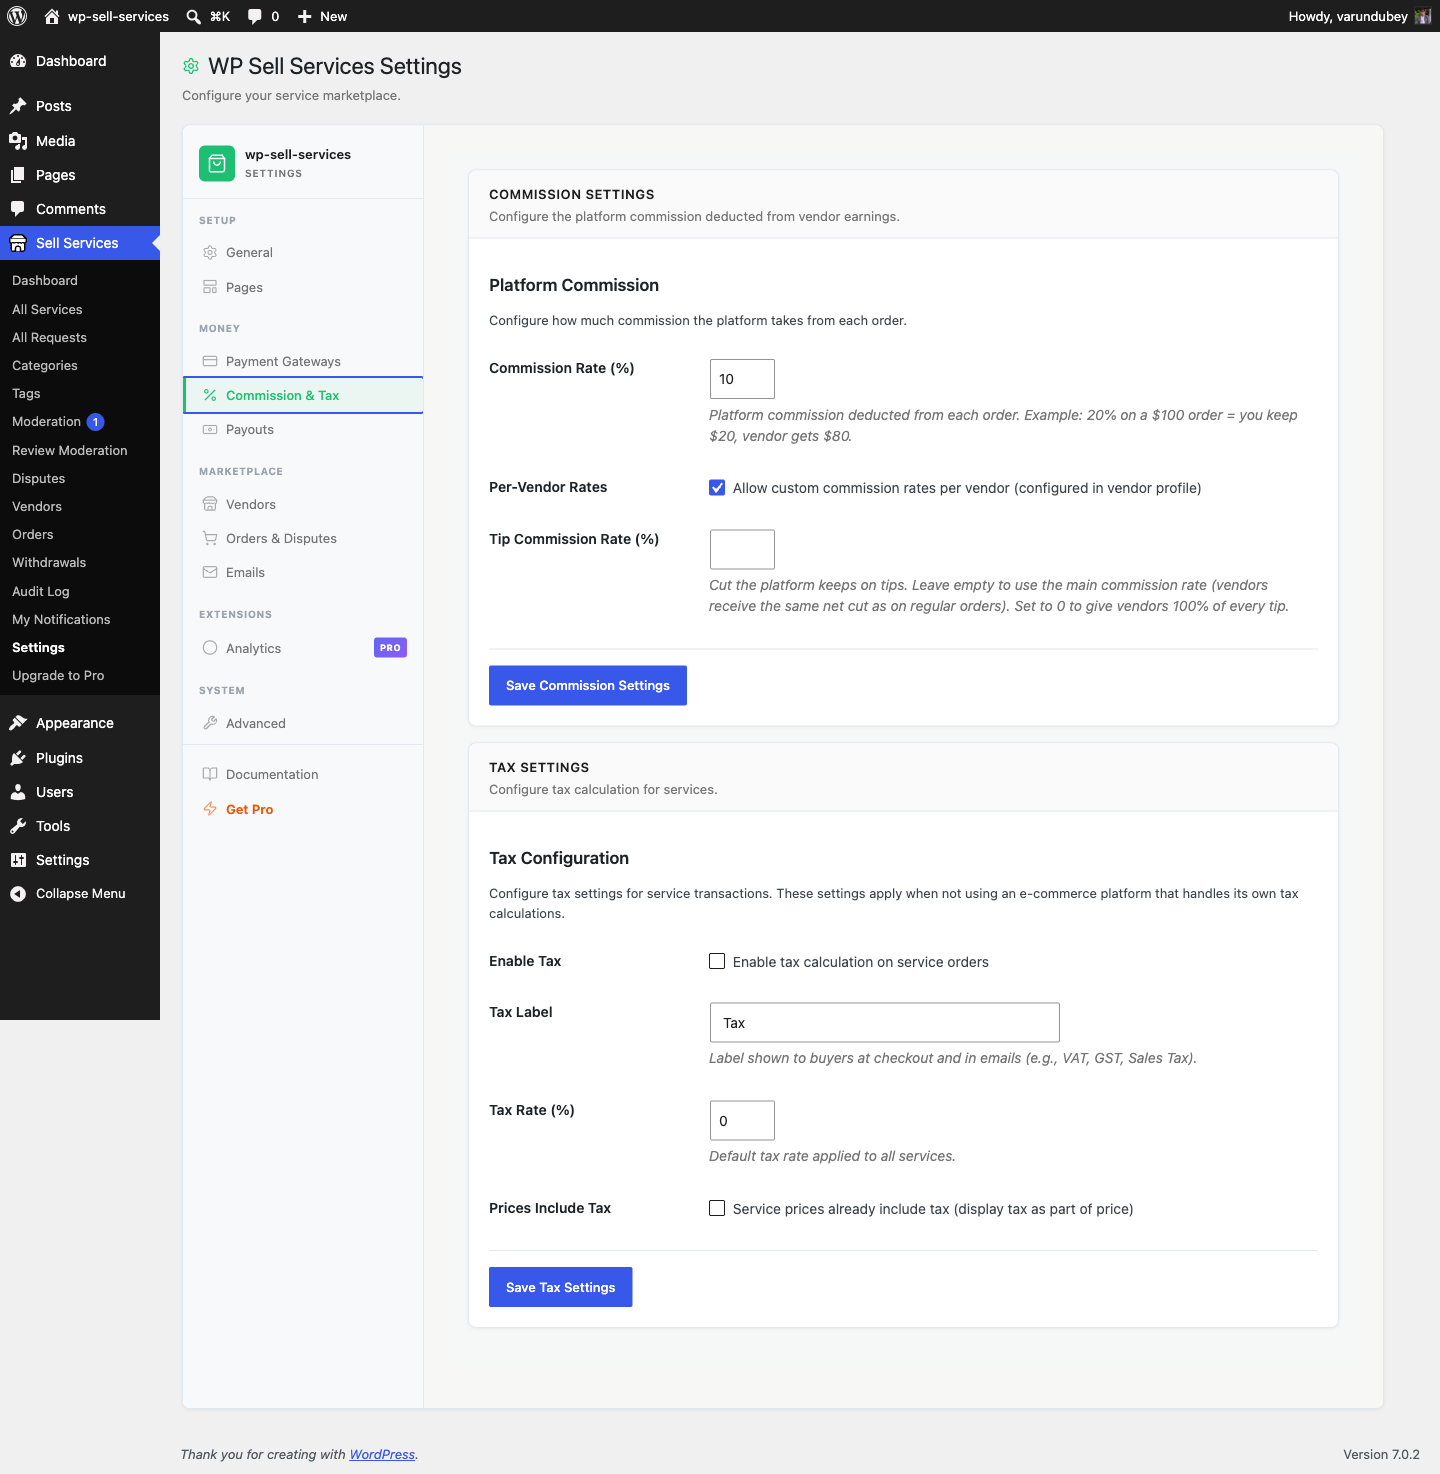
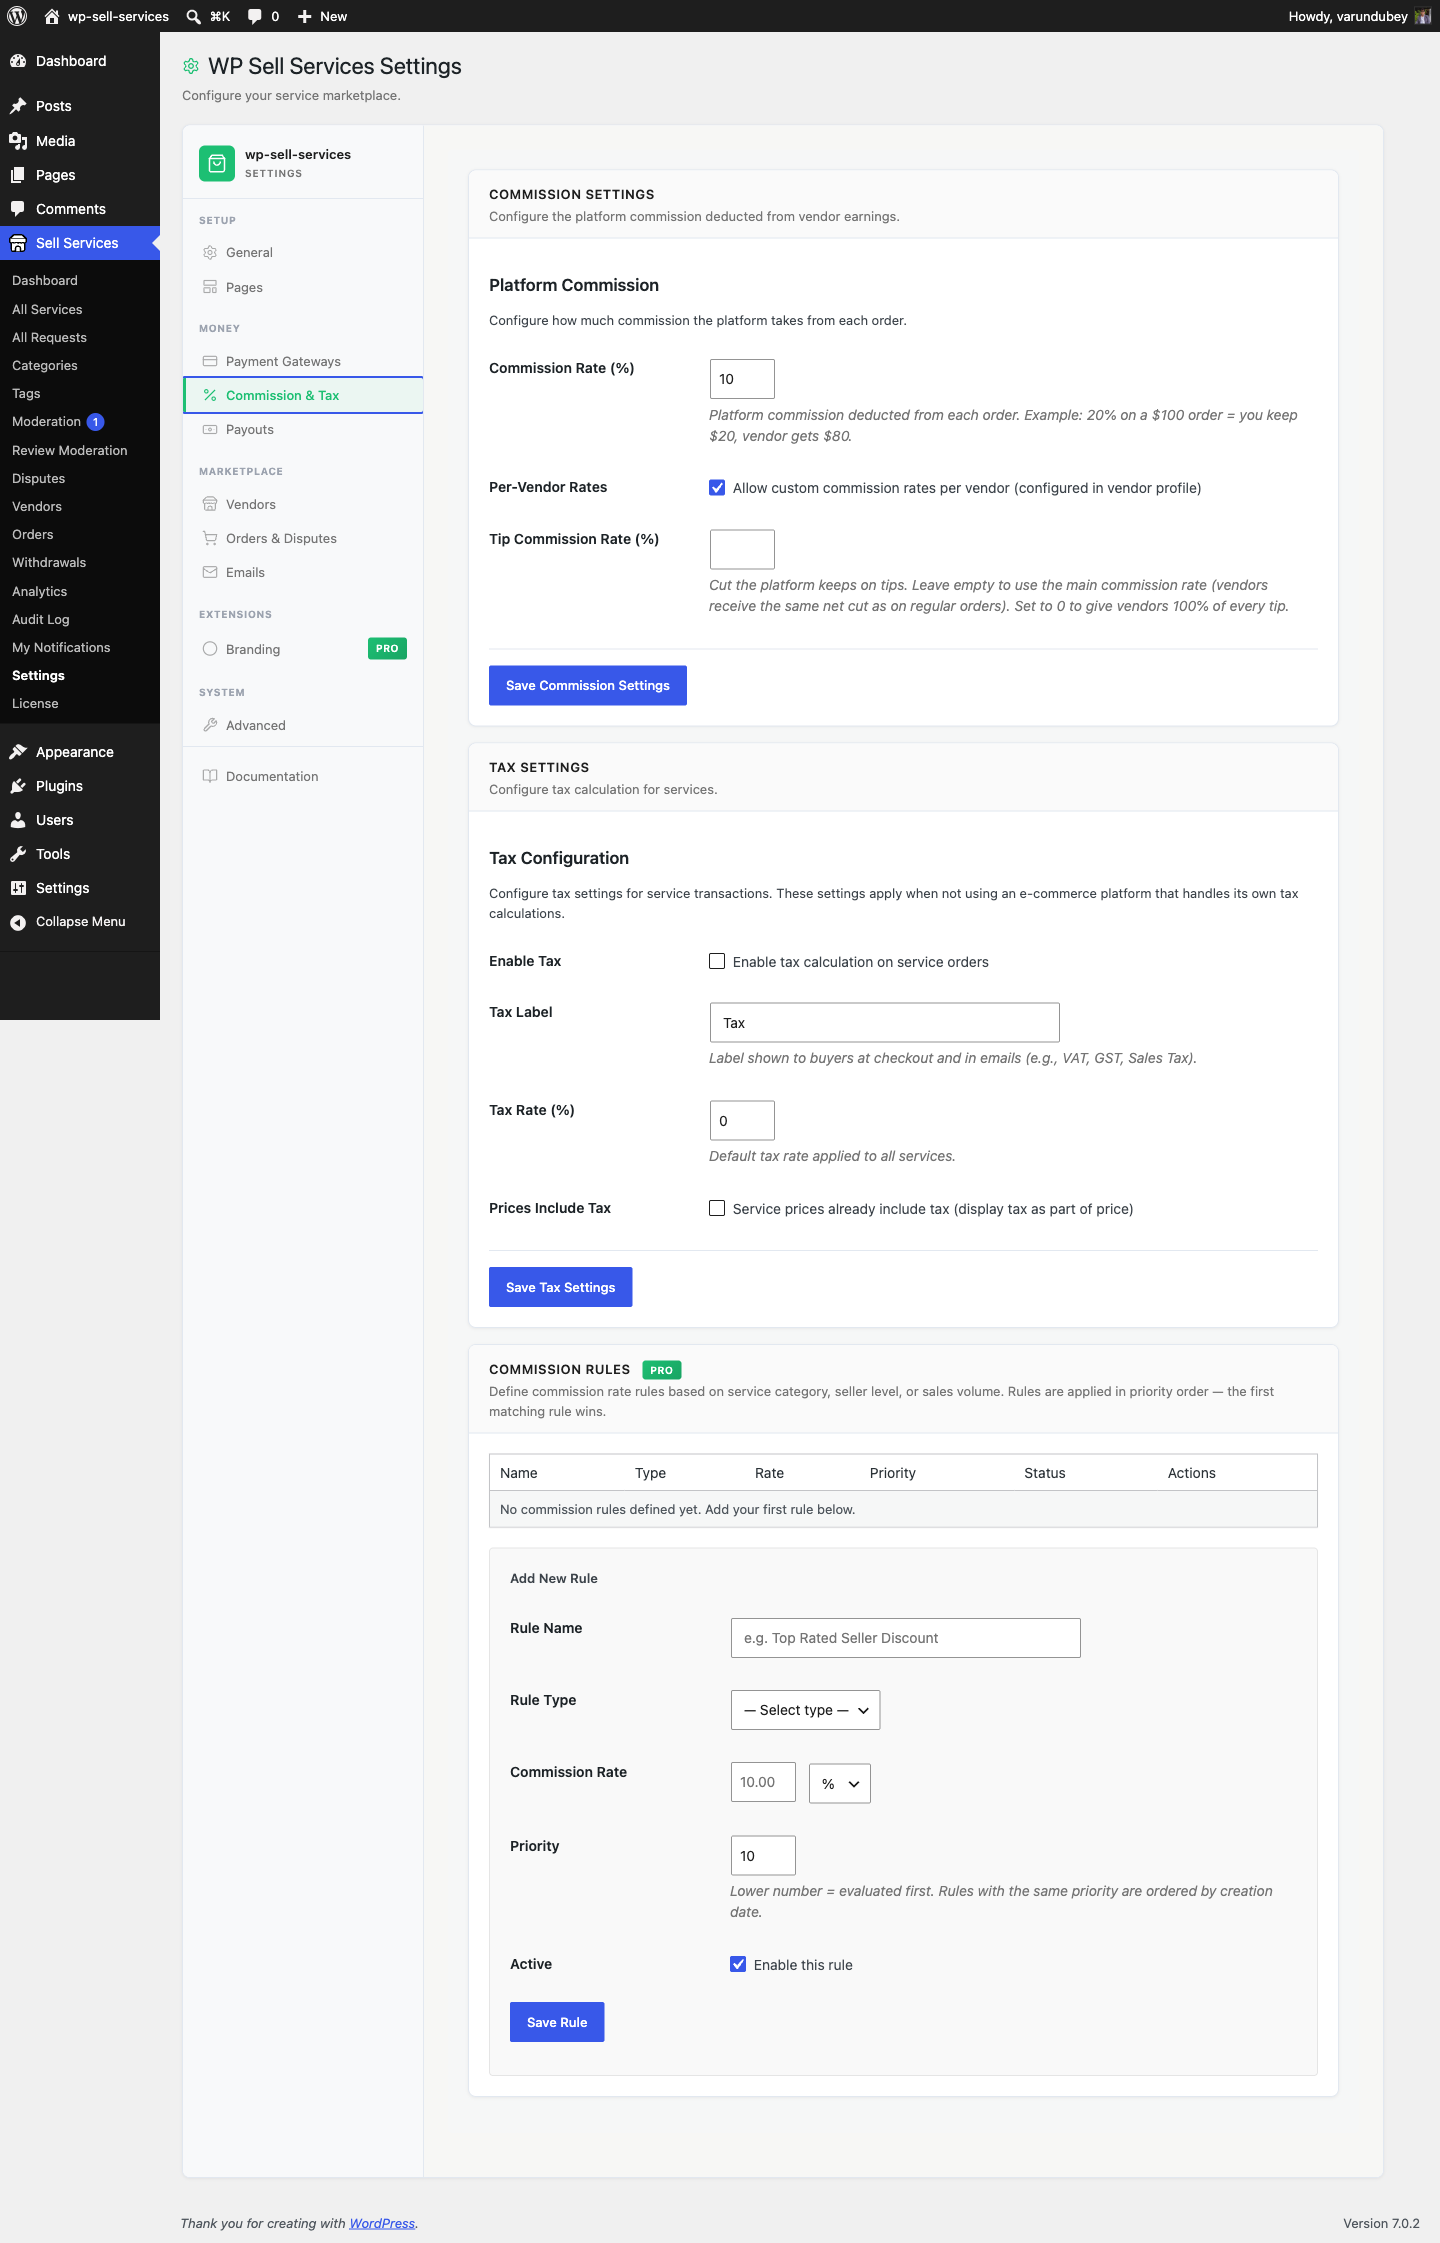
Commission and Tax

Go to Sell Services > Settings > Commission & Tax:

  • Commission rate -- Your platform's cut on each sale (default: 10%)
  • Per-vendor rates -- Set different rates for specific vendors (on by default)
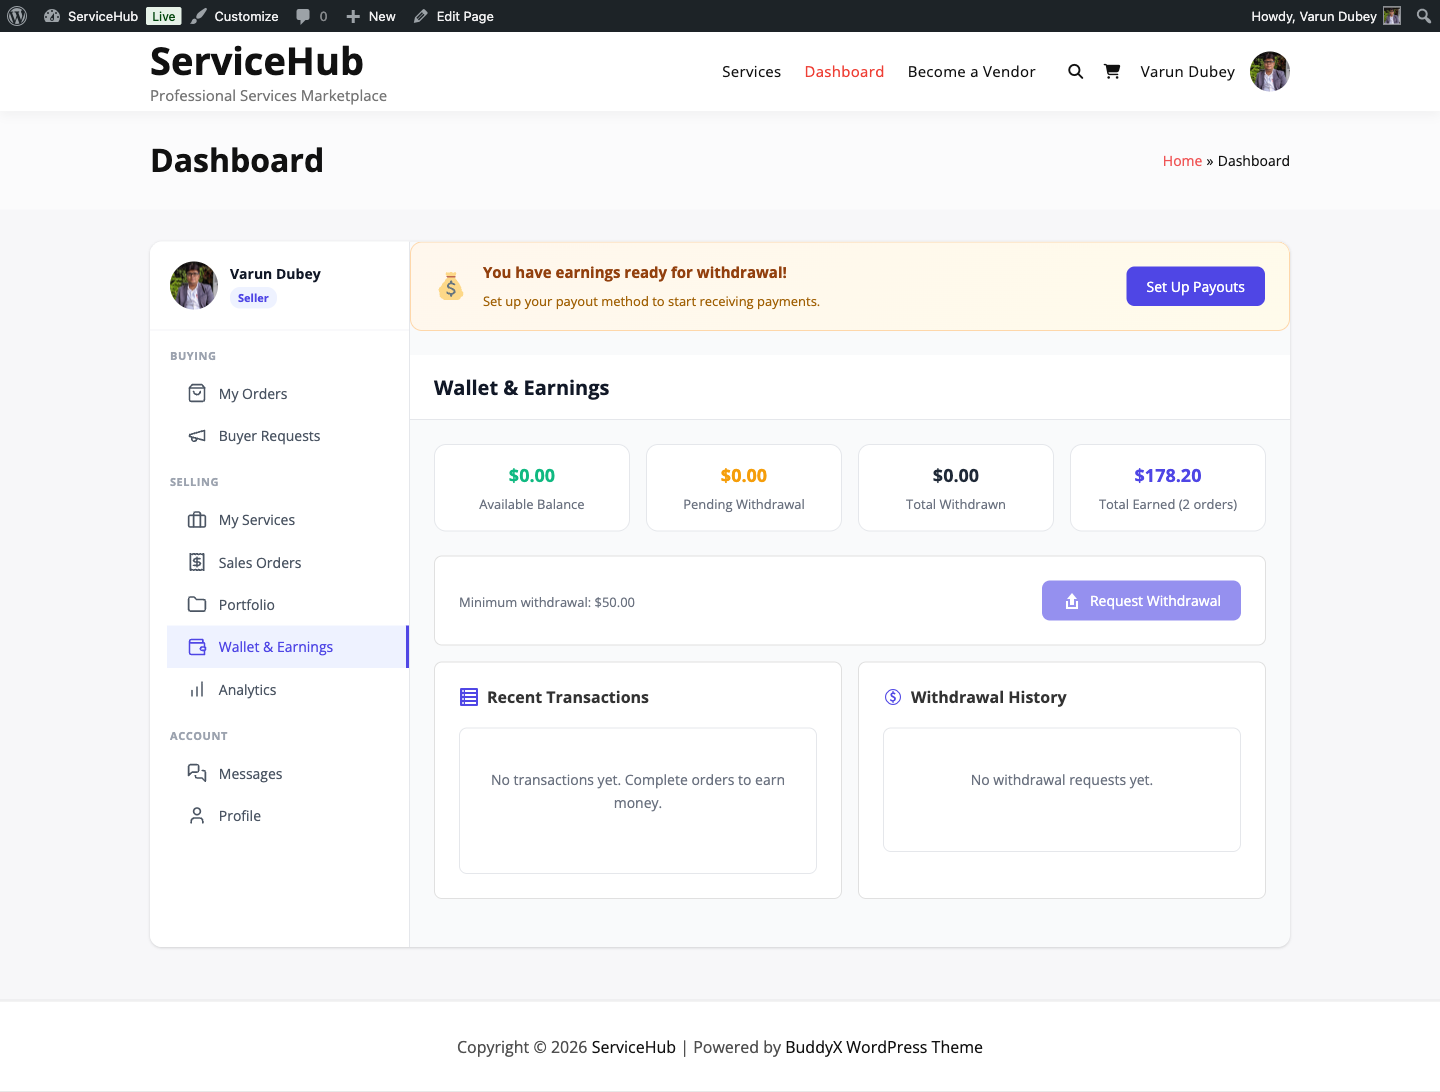
  • Tax -- Off by default. Turn it on to add a tax line at checkout

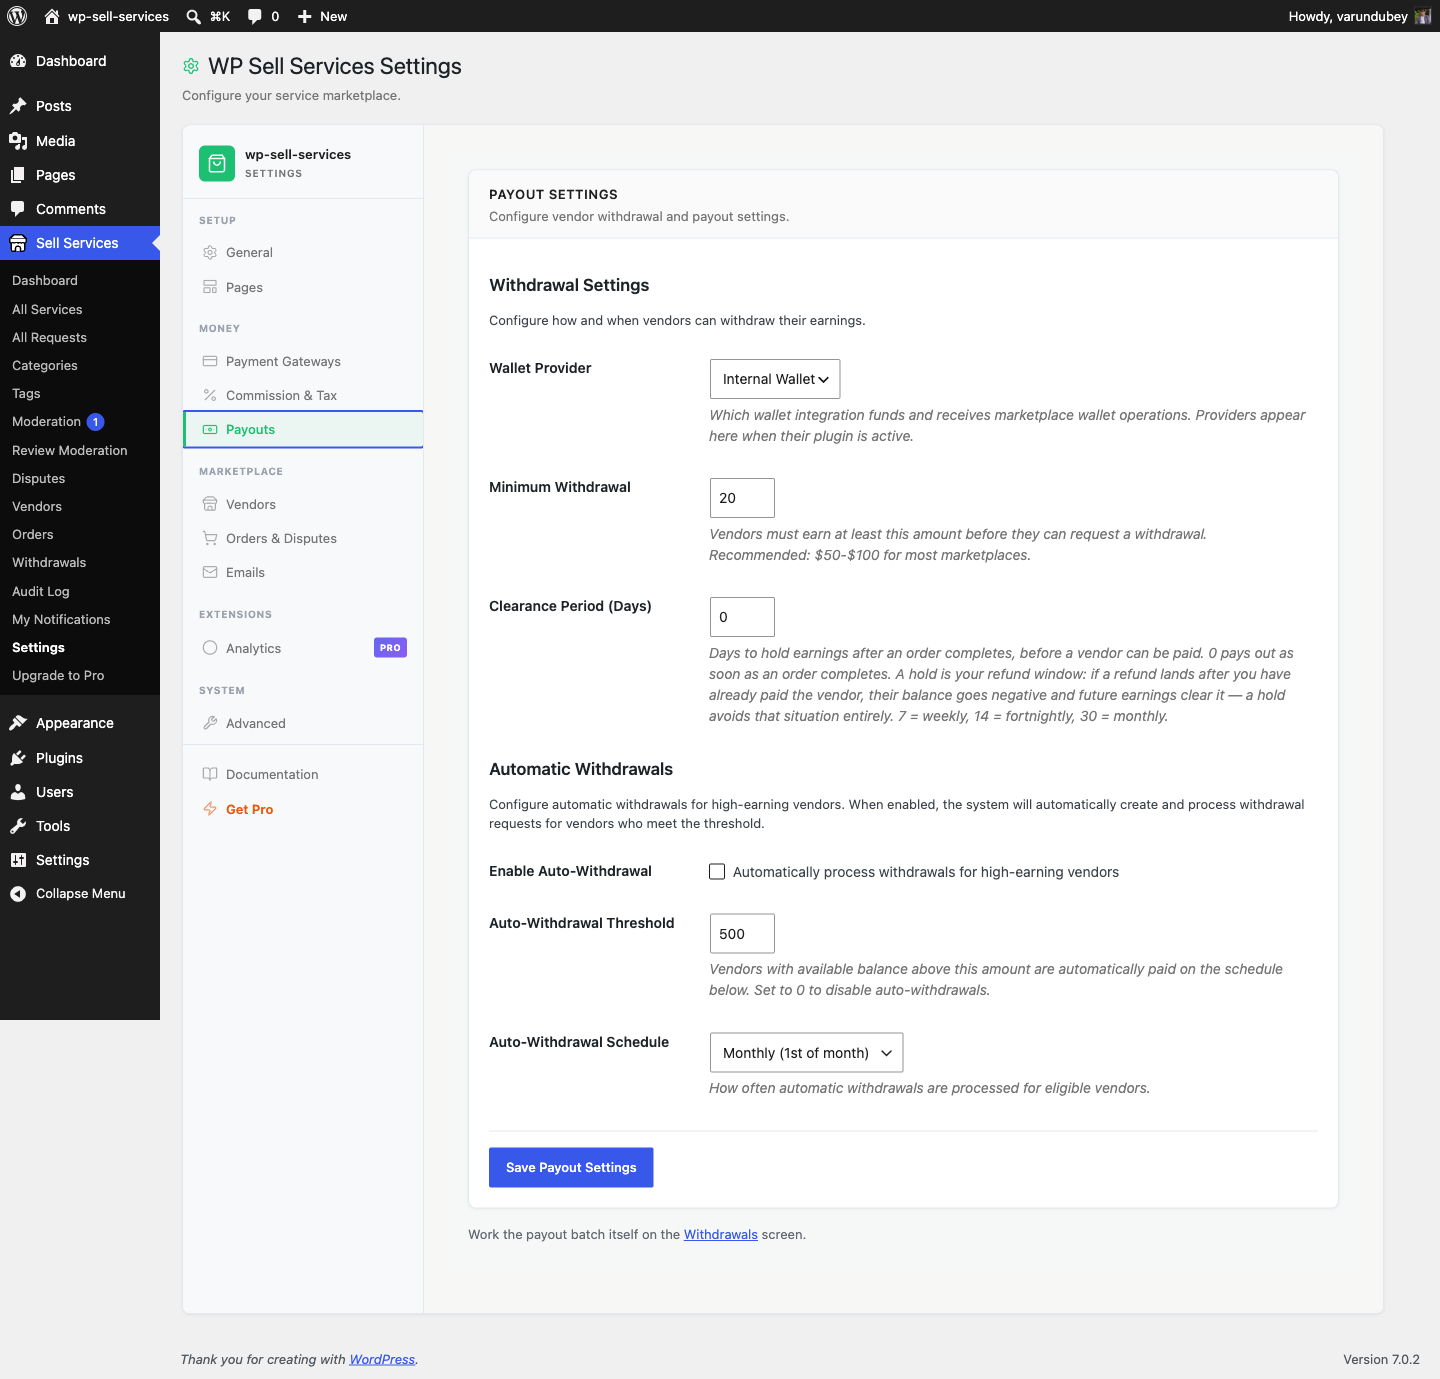
Payouts

Go to Sell Services > Settings > Payouts:

  • Minimum withdrawal -- The smallest amount a vendor can cash out (default: $25)
  • Clearance period -- How many days earnings are held after order completion before they become available (default: 0 days, meaning earnings clear immediately)
  • Wallet provider -- Where vendor balances are held
  • Automatic withdrawals -- Off by default. Turn on to pay out on a schedule instead of per request

If you want a buffer against refunds and chargebacks, raise the clearance period. It ships at 0 so a new marketplace does not hold vendor money by surprise.

Vendor Settings

Go to Sell Services > Settings > Vendors:

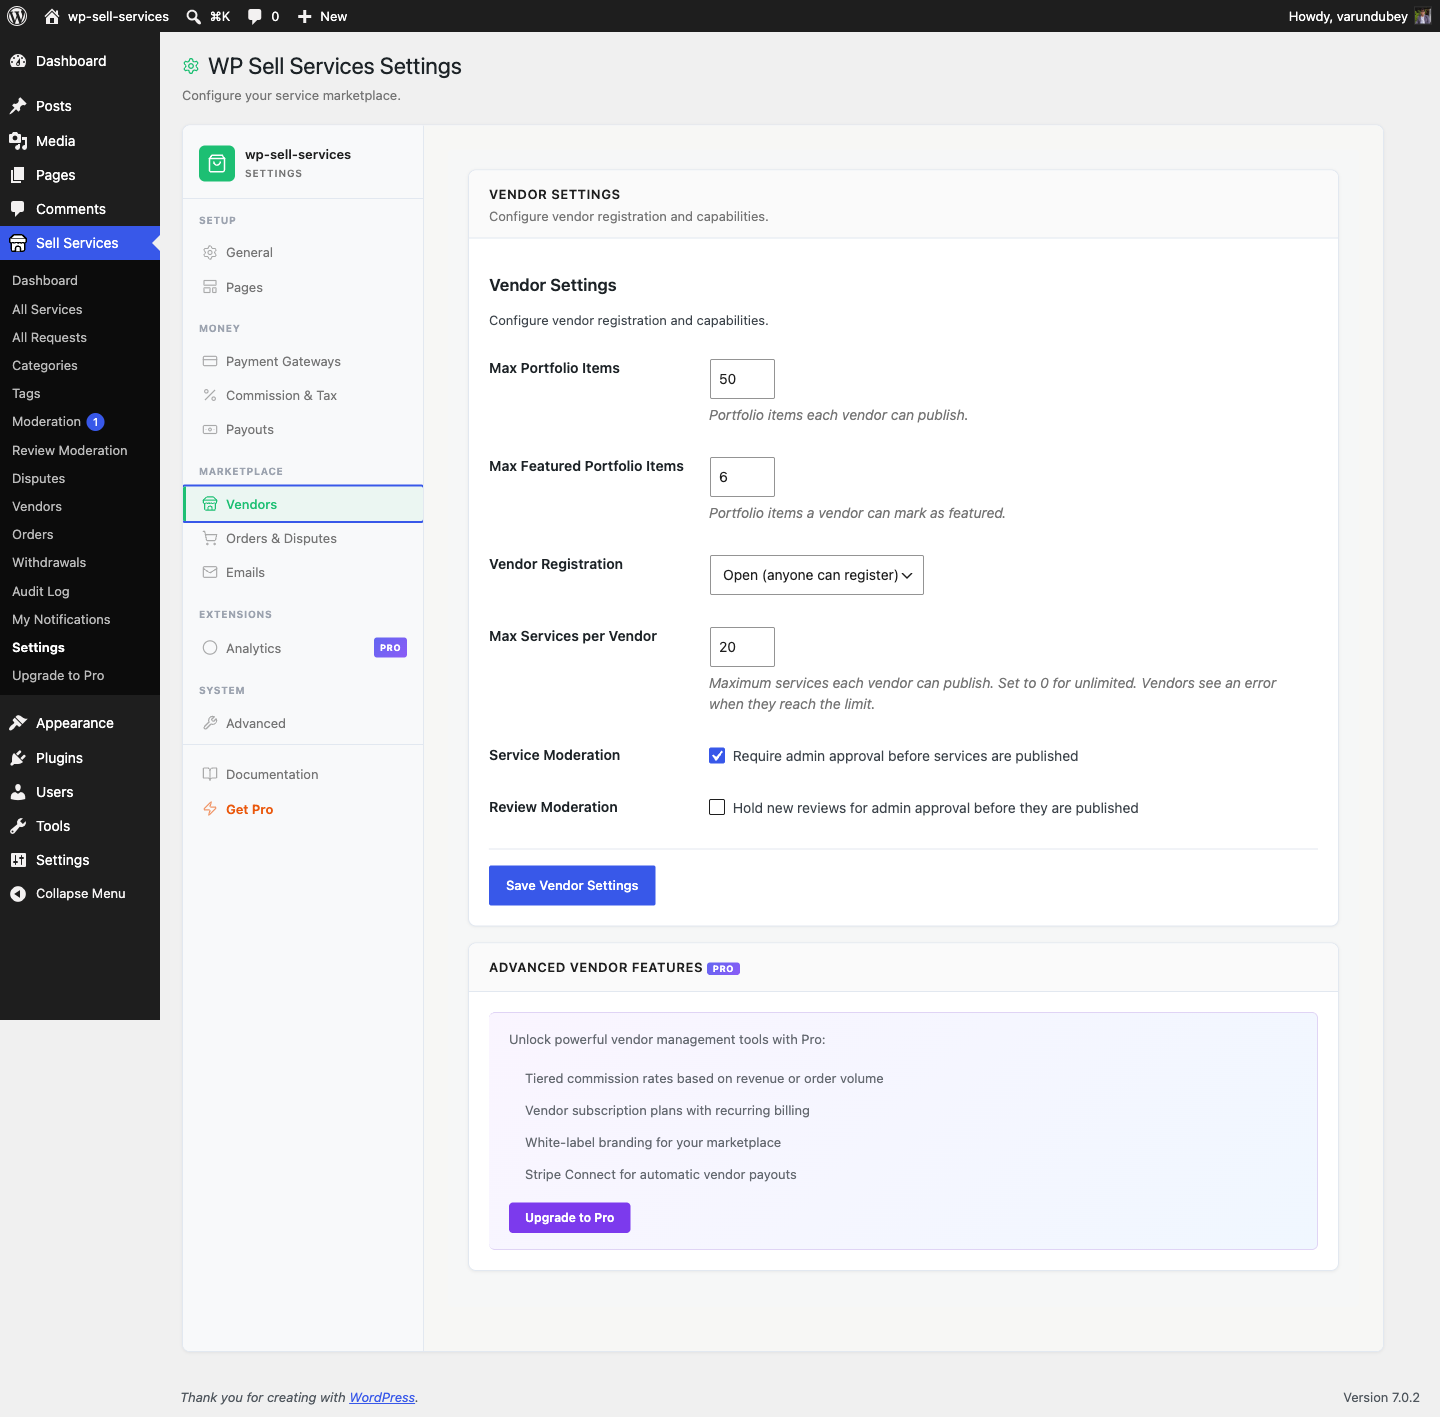
  • Max services per vendor -- How many active services each vendor can have (default: 20)
  • Require verification -- Whether vendors must verify their identity before selling (default: off)
  • Service moderation -- Whether you review and approve every new service before it goes live (default: off, so a new marketplace is not empty on launch day)

Order Settings

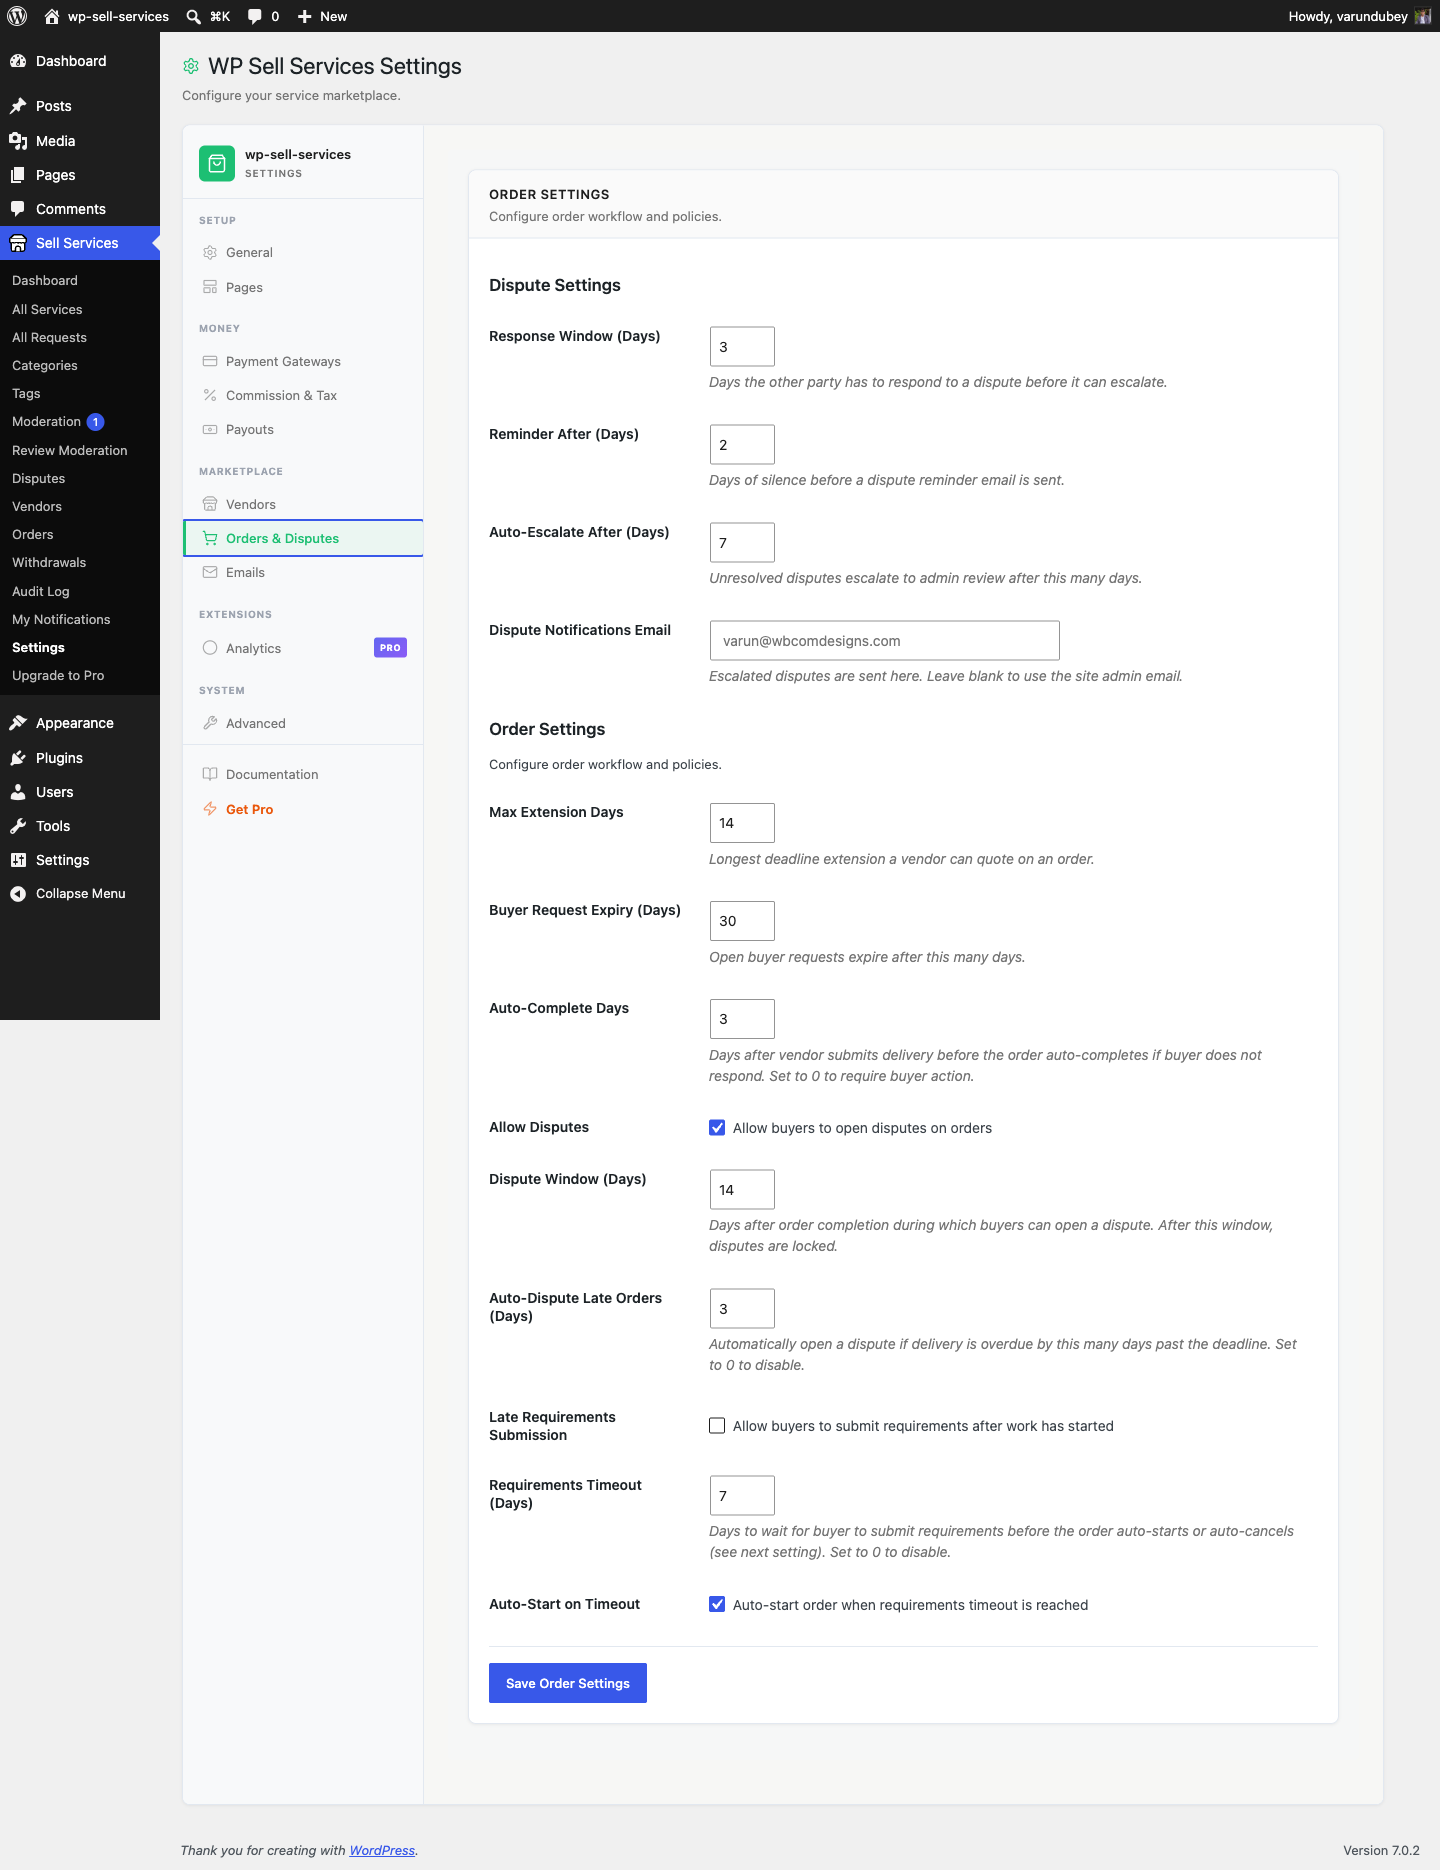
Go to Sell Services > Settings > Orders & Disputes:

  • Auto-complete days -- If a buyer does not respond after delivery, the order auto-completes after this many days (default: 3)
  • Requirements timeout -- How long a buyer has to submit order requirements (default: 7 days)
  • Allow disputes -- Whether buyers can open disputes (default: on)
  • Dispute window -- How many days after completion a buyer can dispute (default: 14)
  • Auto-dispute late orders -- Days past the deadline before an order is flagged (default: 3)

Revision limits are not a global setting -- vendors set them per package when they build a service. See Pricing Packages.

Email Notifications

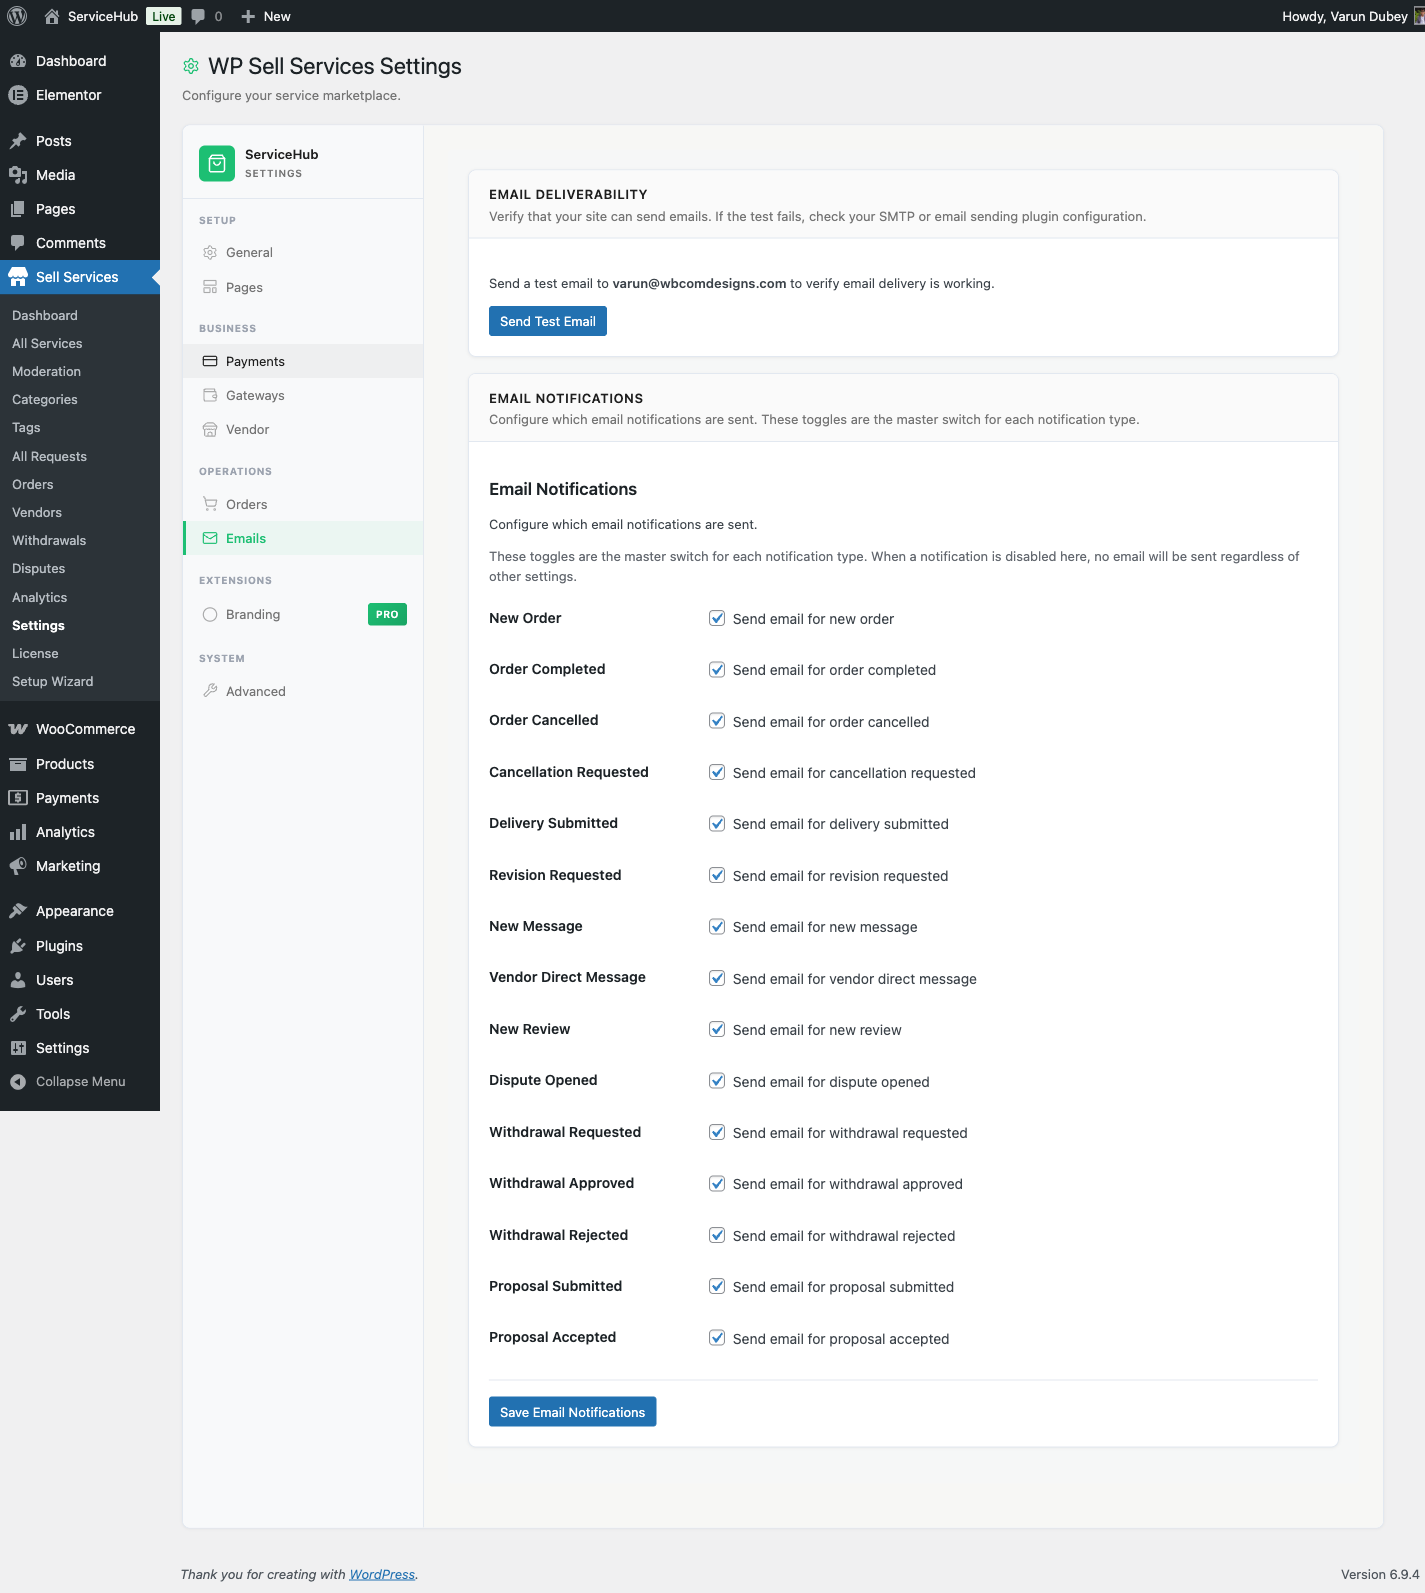
Go to Sell Services > Settings > Emails. There are 23 notification types, each with its own on/off switch, and all are enabled by default. The ones you will see most:

  • New order placed (sent to vendor)
  • Order completed, cancelled (sent to both)
  • Delivery submitted (sent to buyer)
  • Revision requested (sent to vendor)
  • New message (sent to recipient)
  • New review (sent to vendor)
  • Dispute opened (sent to both parties and admin)

The same screen has a Email Deliverability test. Send yourself a test email before launch -- if it does not arrive, no other notification will either. See Email Notifications for the full list.

Tax Settings (Optional)

Tax lives with commission, in Sell Services > Settings > Commission & Tax:

  • Enable tax and set a rate (off by default)
  • Choose a label (Tax, VAT, GST, etc.)
  • Decide whether your service prices already include tax

Test Your Marketplace

Before going live, run through a quick test:

  1. Create a test vendor account -- Visit the "Become a Vendor" page and register (or use your admin account, which is automatically a vendor)
  2. Create a test service -- Go to the Dashboard and walk through the service creation wizard
  3. Place a test order -- Log in as a different user, find the test service, and purchase it
  4. Complete the order -- Submit a delivery as the vendor, accept it as the buyer, and leave a review

This confirms your entire marketplace workflow is functioning.

Once your settings are in place:

  • Add service categories at Sell Services > Categories (e.g., Design, Writing, Marketing, Development)
  • Customize your homepage using the included blocks (Service Grid, Featured Services, Categories) in the block editor
  • Install an SMTP plugin like WP Mail SMTP or FluentSMTP for reliable email delivery

What's Next

Free vs Pro: Feature Comparison

The free version of WP Sell Services is a complete, production-ready marketplace. The Pro version removes limits and adds advanced tools for growing platforms. Here is exactly what you get with each.

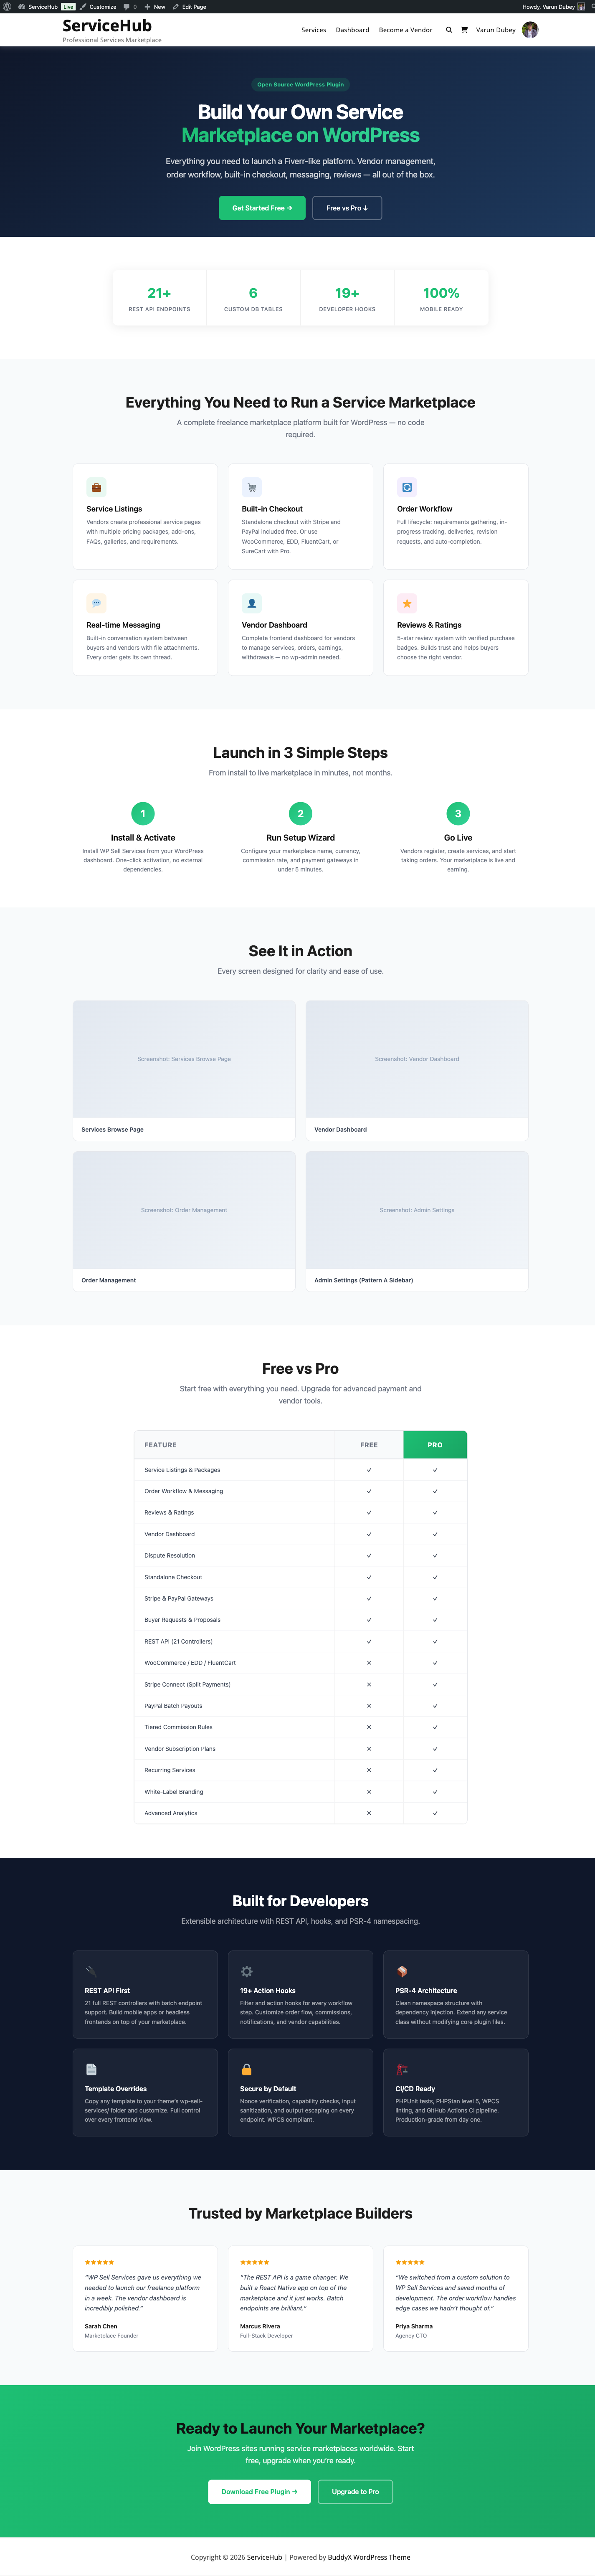
Landing Page with Free vs Pro Comparison

At a Glance

Free Pro
Marketplace Complete -- services, orders, messaging, reviews, disputes Everything in Free
Checkout Built-in standalone (no other plugins needed) + WooCommerce, EDD, FluentCart, SureCart
Payment gateways Stripe, PayPal, Offline + Razorpay
Service creation limits Conservative (see below) Unlimited
Analytics Basic stats Full dashboards with export
File storage Your server + Amazon S3, Google Cloud, DigitalOcean Spaces
Wallet integrations Built-in earnings tracking + TeraWallet, WooWallet, MyCred

Complete Feature Comparison

Core Marketplace (Included in Both Free and Pro)

All of these are fully available in both versions -- nothing is held back:

  • Service listings with categories, tags, and search
  • 3-tier pricing packages (Basic, Standard, Premium)
  • Complete order workflow (10+ statuses) with messaging and file attachments
  • Delivery management with revisions and deadline extensions
  • 5-star reviews, dispute resolution, and buyer requests with proposals
  • Vendor and buyer dashboards, 4 seller levels (New Seller, Rising Seller, Top Rated, Pro Seller), portfolios, vacation mode
  • Tipping system, in-app notifications, and 23 switchable email notification types
  • 6 page-building blocks, mobile-responsive templates, and theme customization

Service Creation Limits

Feature Free Pro
Pricing packages per service 3 3
Gallery images 4 Unlimited [PRO]
Video embeds 1 1
Add-ons/extras 3 Unlimited [PRO]
FAQs 5 Unlimited [PRO]
Buyer requirements 5 Unlimited [PRO]
Active services per vendor Configurable (default 20) Configurable (default 20)

Checkout and E-Commerce Platforms

Platform Free Pro
Standalone checkout (built-in, no plugins needed) Yes Yes
WooCommerce -- [PRO]
Easy Digital Downloads (EDD) -- [PRO]
FluentCart -- [PRO]
SureCart -- [PRO]

Payment Gateways

Gateway Free Pro
Stripe (with 3D Secure) Yes Yes
PayPal Yes Yes
Offline payments (bank transfer, cash, with proof upload) Yes Yes
Razorpay -- [PRO]
All WooCommerce-compatible gateways (via WC adapter) -- [PRO]

Commission and Earnings

Free covers the complete flat-commission and manual-withdrawal path: global commission rates (0-50%), per-vendor custom rates, earnings tracking, withdrawal management, minimum withdrawal amounts, clearance periods, automatic withdrawal scheduling, and a separate commission rate for tips. You can run a marketplace and pay every vendor on Free alone.

An owner can therefore pay every vendor with zero integrations using Free alone. Pro adds the commission rules engine and automated payout rails on top:

Feature Free Pro
Flat commission rate (global + per-vendor) Yes Yes
Earnings tracking and wallet ledger Yes Yes
Manual withdrawal requests and approvals Yes Yes
Mark a withdrawal paid (wallet-debiting, idempotent) Yes Yes
Export what is owed as CSV for bank / PayPal bulk upload Yes Yes
Tiered commission rules -- [PRO]
Subscription-plan commission override -- [PRO]
Stripe Connect automated vendor payouts -- [PRO]
PayPal mass payouts (batch) -- [PRO]
Per-vendor payout profiles and methods -- [PRO]

Wallet Integrations

Provider Free Pro
Built-in earnings and withdrawals Yes Yes
Internal Wallet -- [PRO]
TeraWallet -- [PRO]
WooWallet -- [PRO]
MyCred -- [PRO]

Analytics and Reporting

Feature Free Pro
Vendor stats (orders, earnings, rating) Yes Yes
Admin stats (total orders, revenue) Yes Yes
Analytics dashboards with widgets -- [PRO]
Revenue and performance charts -- [PRO]
Data export (CSV/PDF) -- [PRO]

Cloud Storage

Provider Free Pro
Local server storage Yes Yes
Amazon S3 -- [PRO]
Google Cloud Storage -- [PRO]
DigitalOcean Spaces -- [PRO]

Service Wizard

Feature Free Pro
6-step service creation wizard Yes Yes
Raised media, add-on, FAQ and requirement limits -- [PRO] (see the limits table above)

What Pro changes in the wizard is the limits, not the steps. Vendors get the same six-step flow either way; Pro simply stops capping how much they can add.

Earlier versions of this page listed AI title suggestions, service templates, bulk image upload, direct video upload, custom package fields, and scheduled publishing as Pro wizard features. They do not ship in 1.3.0 -- they are deferred to a future release and are not enabled in the plugin. They are listed here only so nobody buys Pro expecting them.

Advanced Pro Features

Feature Free Pro
Vendor Subscription Plans (paid vendor tiers) -- [PRO]
PayPal Mass Payouts (batch vendor payouts) -- [PRO]
Stripe Connect (direct vendor payments) -- [PRO]
Tiered Commission Rules (category/volume/level-based rates) -- [PRO]
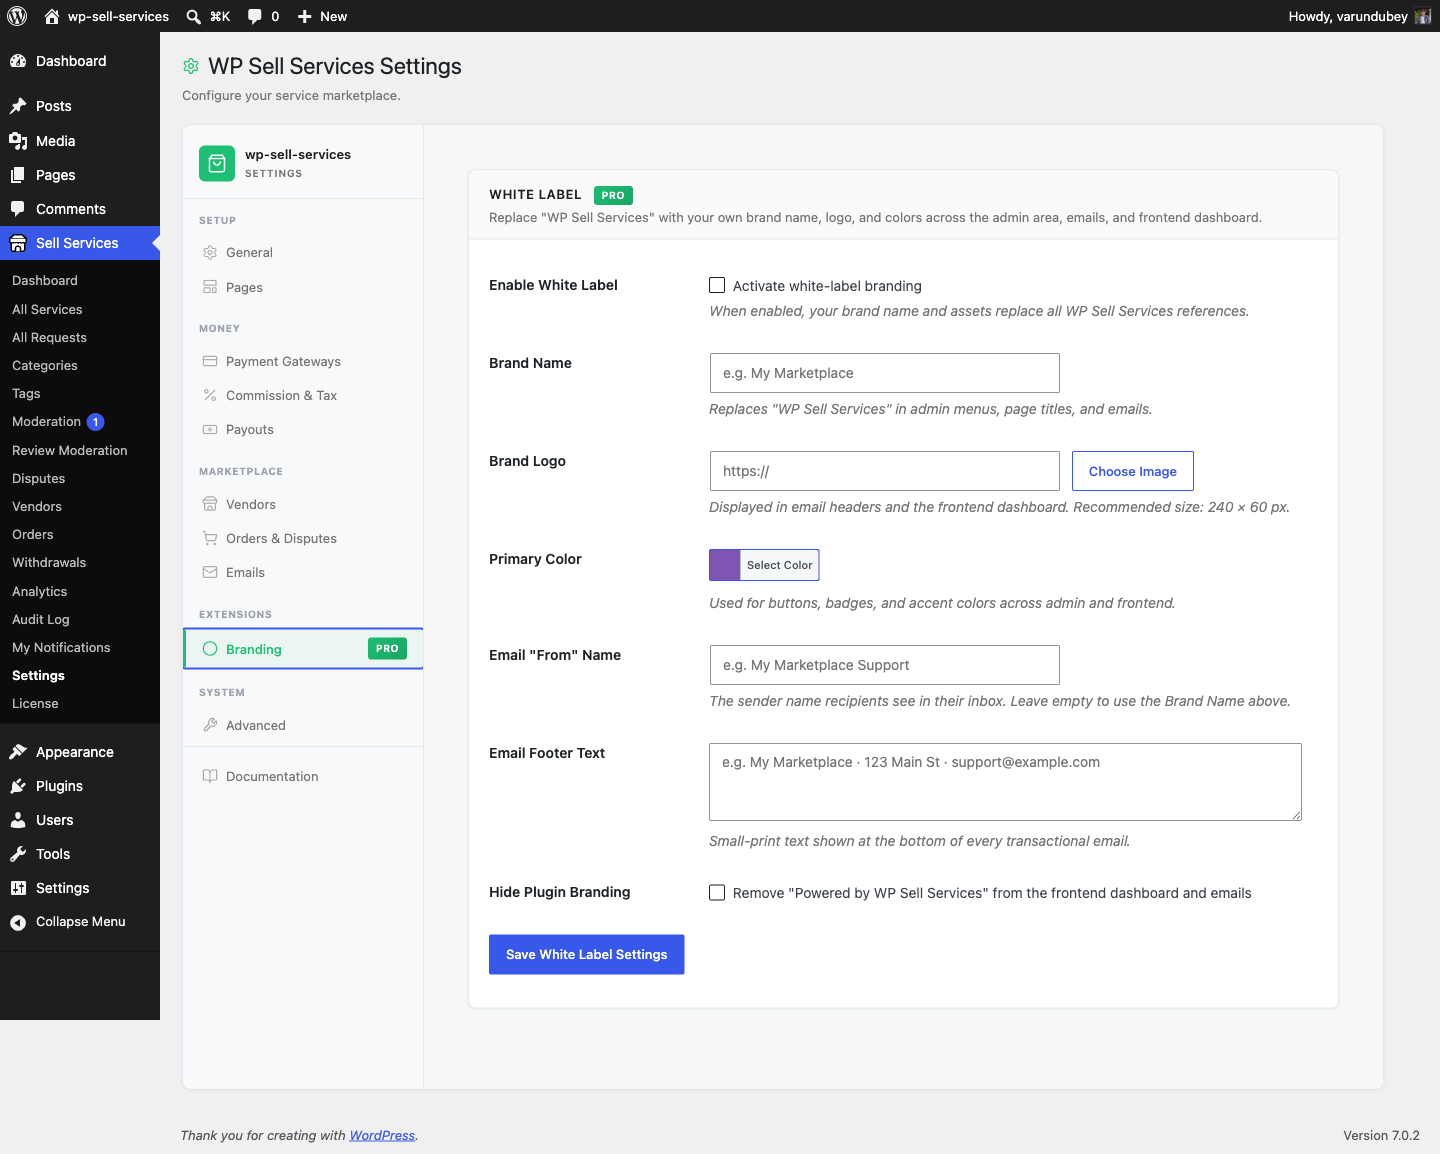
White-Label Branding (rebrand the marketplace) -- [PRO]
Display Currency (show prices in the shopper's currency) -- [PRO]
Recurring Services (subscription billing for services) -- Not enabled in 1.3.0

Recurring Services ships behind a default-off feature flag in 1.3.0 and its UI is hidden. Do not buy Pro for recurring billing yet -- see Recurring Services.


Who Should Use Free?

The free version is a strong choice if you are:

  • Launching a new marketplace and want to test the concept
  • Running a smaller platform where 4 gallery images and 3 add-ons per service are enough
  • Looking for a standalone solution that works without WooCommerce or any other e-commerce plugin
  • On a budget but still need a professional, complete marketplace

Who Should Upgrade to Pro?

Pro makes sense when you need:

  • Unlimited service media and add-ons -- Your vendors need more gallery images, videos, FAQs, or extras
  • WooCommerce or other e-commerce integration -- You already use WooCommerce, EDD, FluentCart, or SureCart
  • Razorpay payments -- Popular for marketplaces in India and Southeast Asia
  • Wallet-based payouts -- Integrate with TeraWallet, WooWallet, or MyCred for vendor balances
  • Detailed analytics -- Revenue charts, performance dashboards, and data export
  • Cloud file storage -- Store deliverables on Amazon S3, Google Cloud, or DigitalOcean Spaces

Upgrading from Free to Pro

Upgrading preserves all your existing data. Nothing is lost.

  1. Keep the free version active (both plugins run together)
  2. Upload and activate the Pro plugin
  3. Enter your license key in Sell Services > License
  4. Pro features are available immediately

Frequently Asked Questions

Can I start with Free and upgrade later? Yes. Install Pro at any time. All existing services, orders, vendors, reviews, and settings stay exactly as they are.

Do I need WooCommerce? No. The free version includes its own checkout with Stripe, PayPal, and offline payment support. WooCommerce is entirely optional and only available as a Pro integration.

What happens if my Pro license expires? Your marketplace keeps running -- services, orders, messaging, deliveries, disputes, reviews, commission, earnings, and withdrawals all live in the free plugin and are unaffected. But Pro features stop loading until you renew: Stripe Connect, wallets, tiered commission, vendor subscriptions, white label, cloud storage, analytics, display currency, and the raised service limits. No data is deleted, and reactivating restores everything as it was. See License Activation.

Is per-vendor commission a Pro feature? No. Per-vendor commission rates are included in the free version. You can set different rates for individual vendors right out of the box. Pro adds tiered rules that resolve automatically by category, seller level, or sales volume.

Are automatic withdrawals a Pro feature? No. Scheduled auto-withdrawals ship in the free plugin. Pro adds the bulk payment rails on top -- PayPal mass payouts and Stripe Connect.


Next Steps

WP Sell Services Pro Overview

WP Sell Services Pro extends the free WP Sell Services marketplace with the earnings, payout, subscription, currency, and analytics features a production marketplace needs. It requires WP Sell Services (free) to be installed and active, and the two are released in lockstep - always run the same version of both.

For a feature-by-feature breakdown, see Free vs Pro.

What Pro adds

Area Capability
Payouts Automated Stripe Connect payouts and PayPal mass payouts, plus per-vendor payout profiles. Free already lets you pay every vendor manually (export what is owed, mark it paid) - Pro automates that rail.
Commission Tiered commission rules and subscription-plan overrides on top of Free's flat rate; the split is computed once and persisted per order across every payment rail.
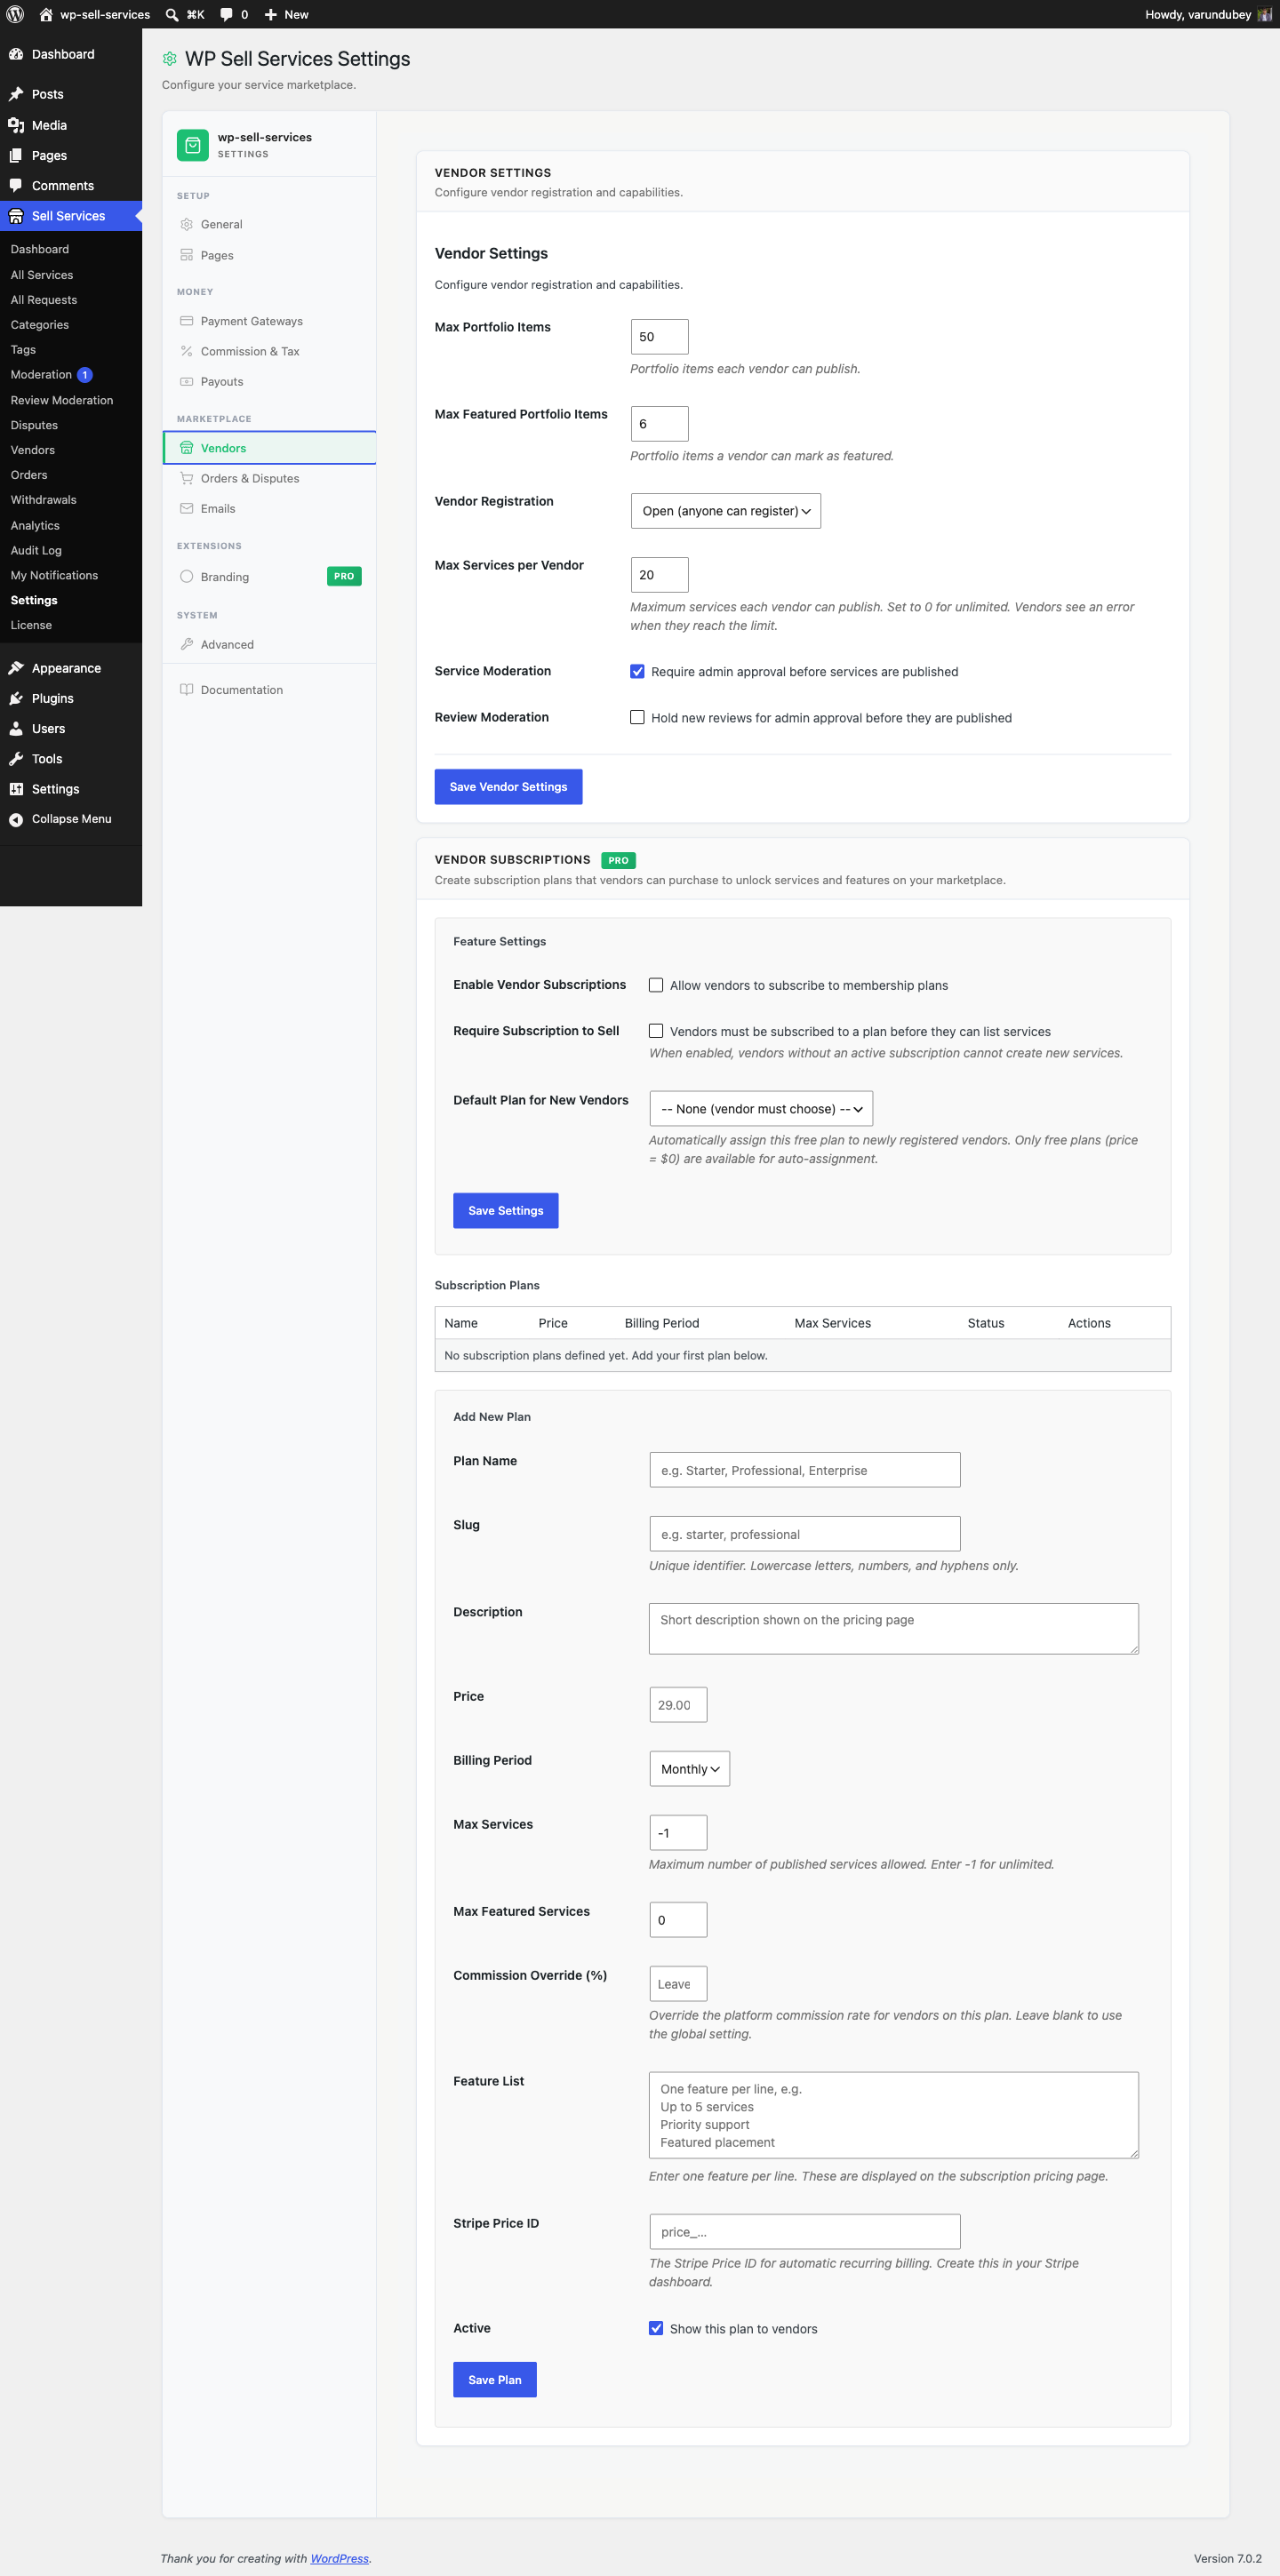
Vendor subscriptions Sell vendor membership plans billed through hosted Stripe Checkout, with plan switching and enforcement.
Currency Display-only multi-currency hint so shoppers see prices in their currency while your base currency stays authoritative.
Analytics Sales, earnings, and payout analytics with export.
Storage DigitalOcean Spaces / S3-compatible delivery storage.
White label Rebrand the marketplace admin surfaces.

The money journey

Pro owns the settlement engine end to end. A buyer's payment is split once into platform fee + vendor earnings, recorded on the order and the wallet ledger, and later paid out through whichever rail you choose. Refunds reverse the ledger and net against debt. The golden rule: an owner can always pay every vendor with no integrations at all - export what's owed, mark it paid - and automated rails are opt-in, never forced.

See Paying Your Vendors for the full flow, and Tiered Commission Rules for the rules engine.

Requirements

  • WP Sell Services (free) 1.3.0, active.
  • PHP 8.1+, WordPress 6.4+.
  • A valid Pro license key for updates and support.

Installing

  1. Install and activate WP Sell Services (free) first.
  2. Upload and activate WP Sell Services Pro.
  3. Enter your license key under the plugin's License screen.
  4. Configure payouts, commission, and (optionally) subscriptions and display currency from the plugin settings.

Buyer & Seller Dashboard Tour

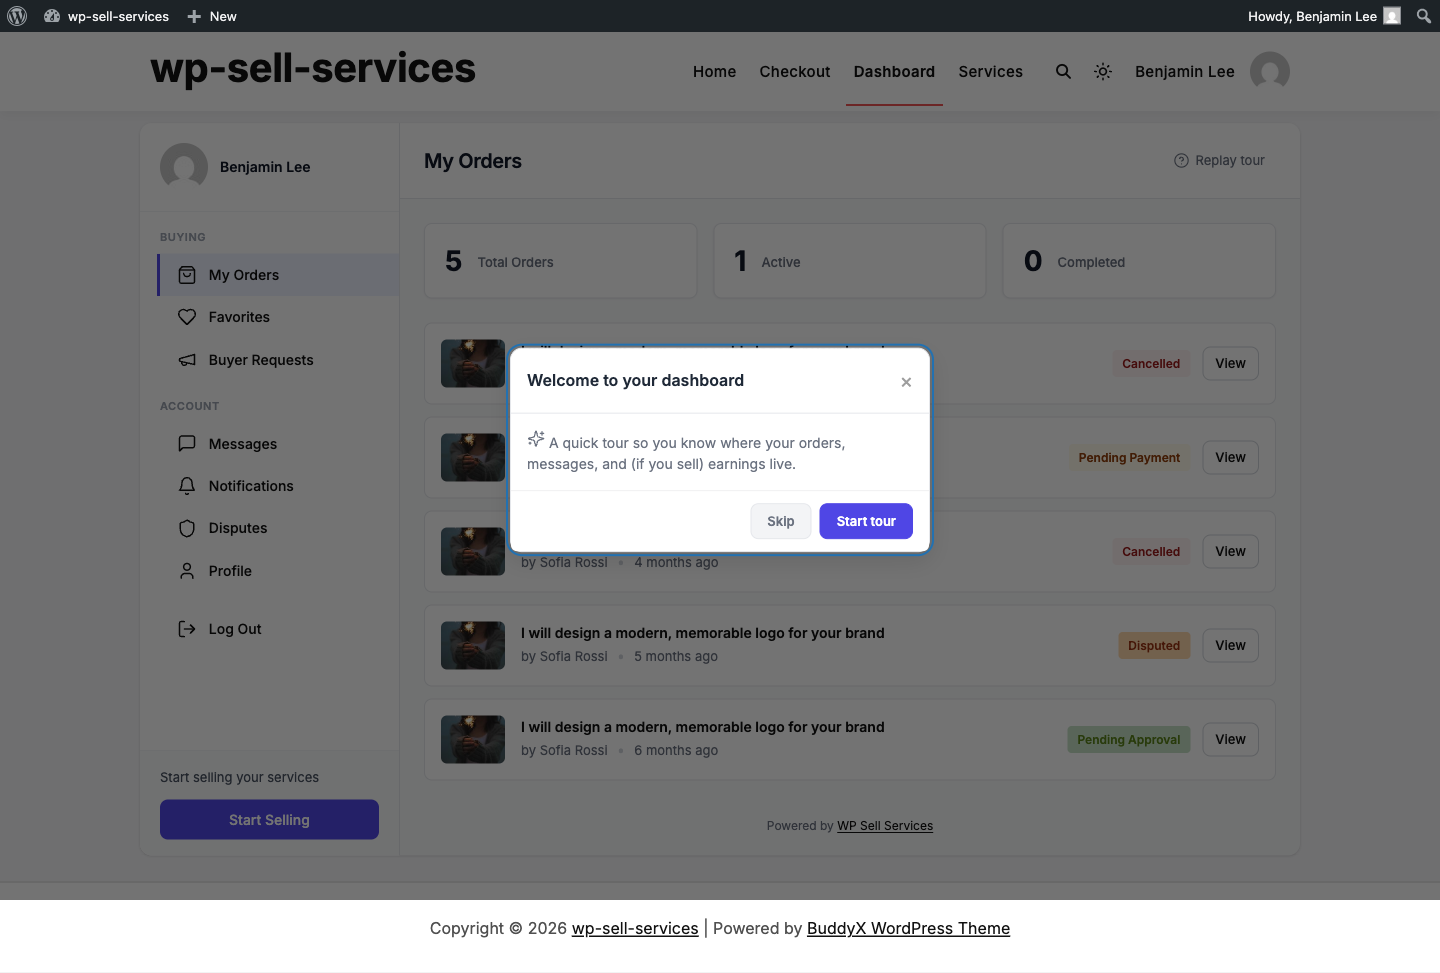
The [wpss_dashboard] shortcode - where buyers track orders and sellers manage services - ships with a role-aware onboarding tour. The first time a logged-in user opens the page they see a short Shepherd.js walkthrough that points out the sections they actually need.

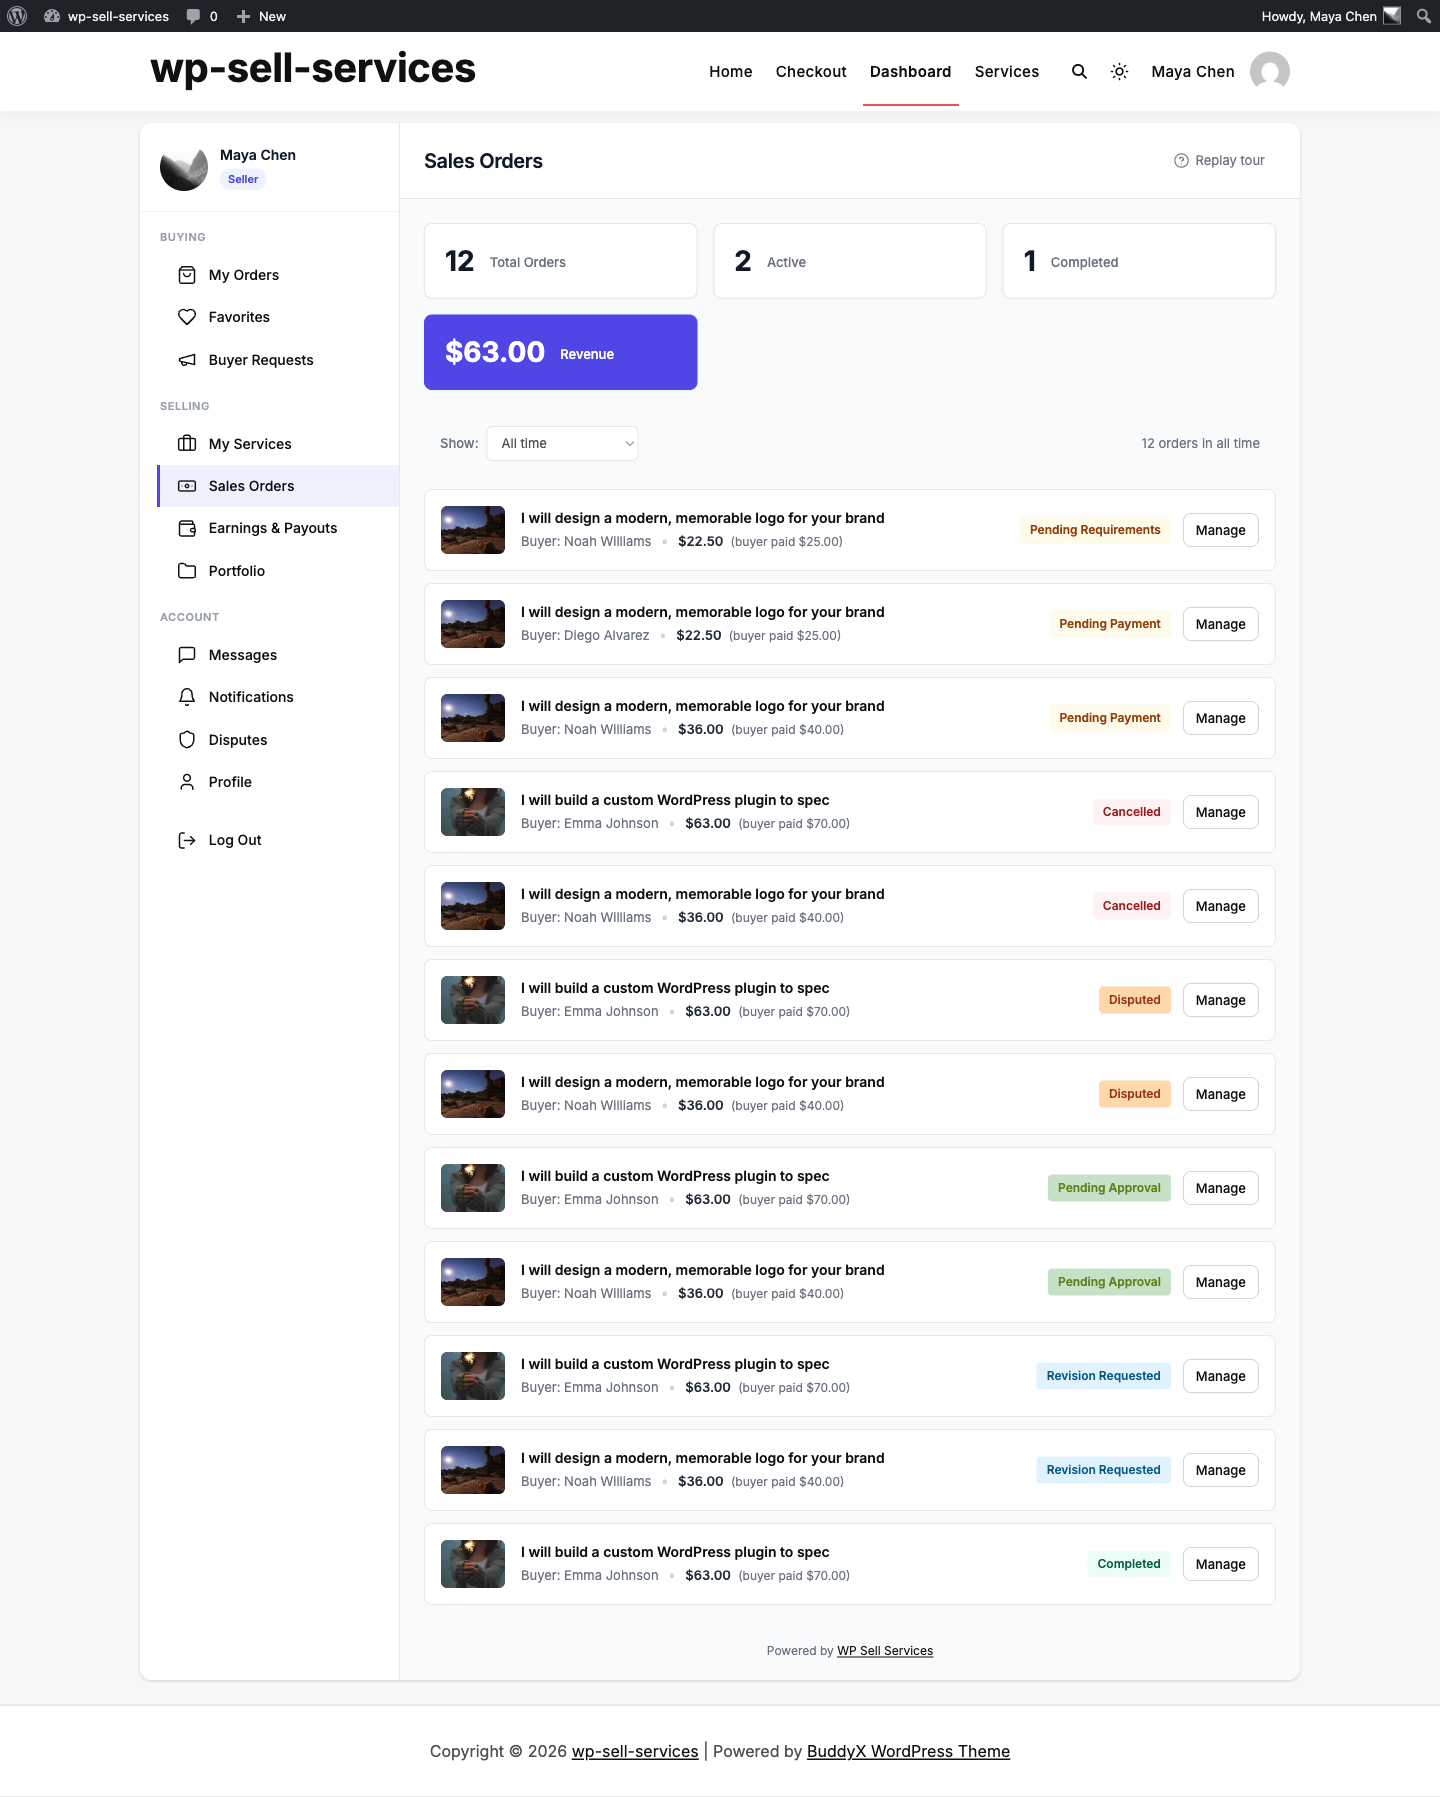
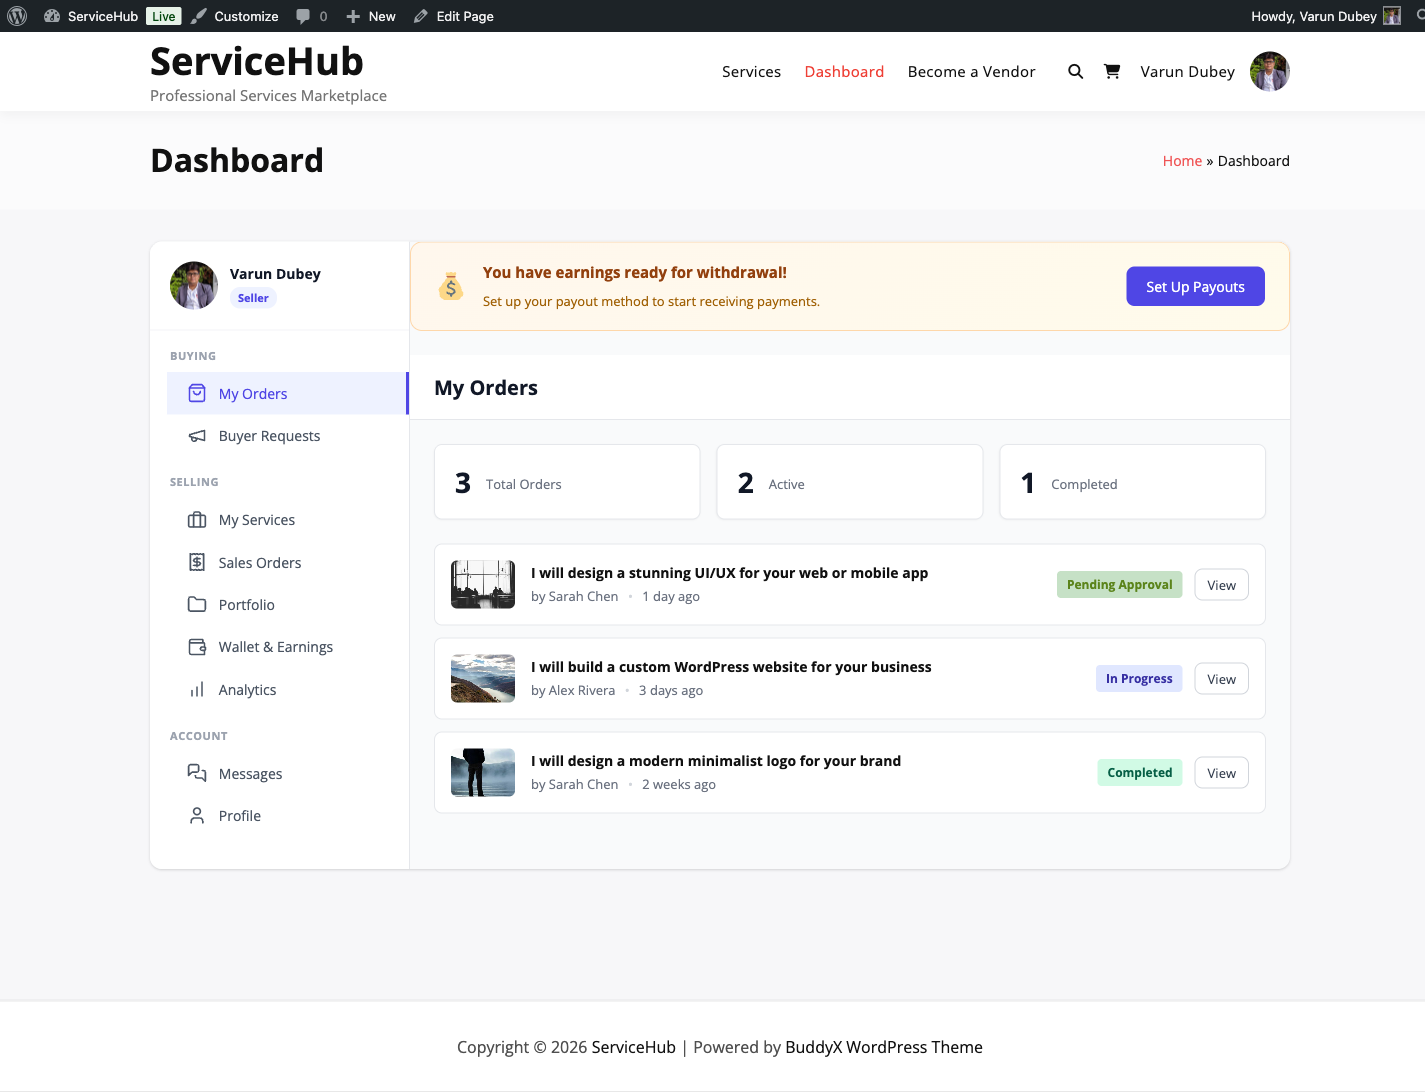
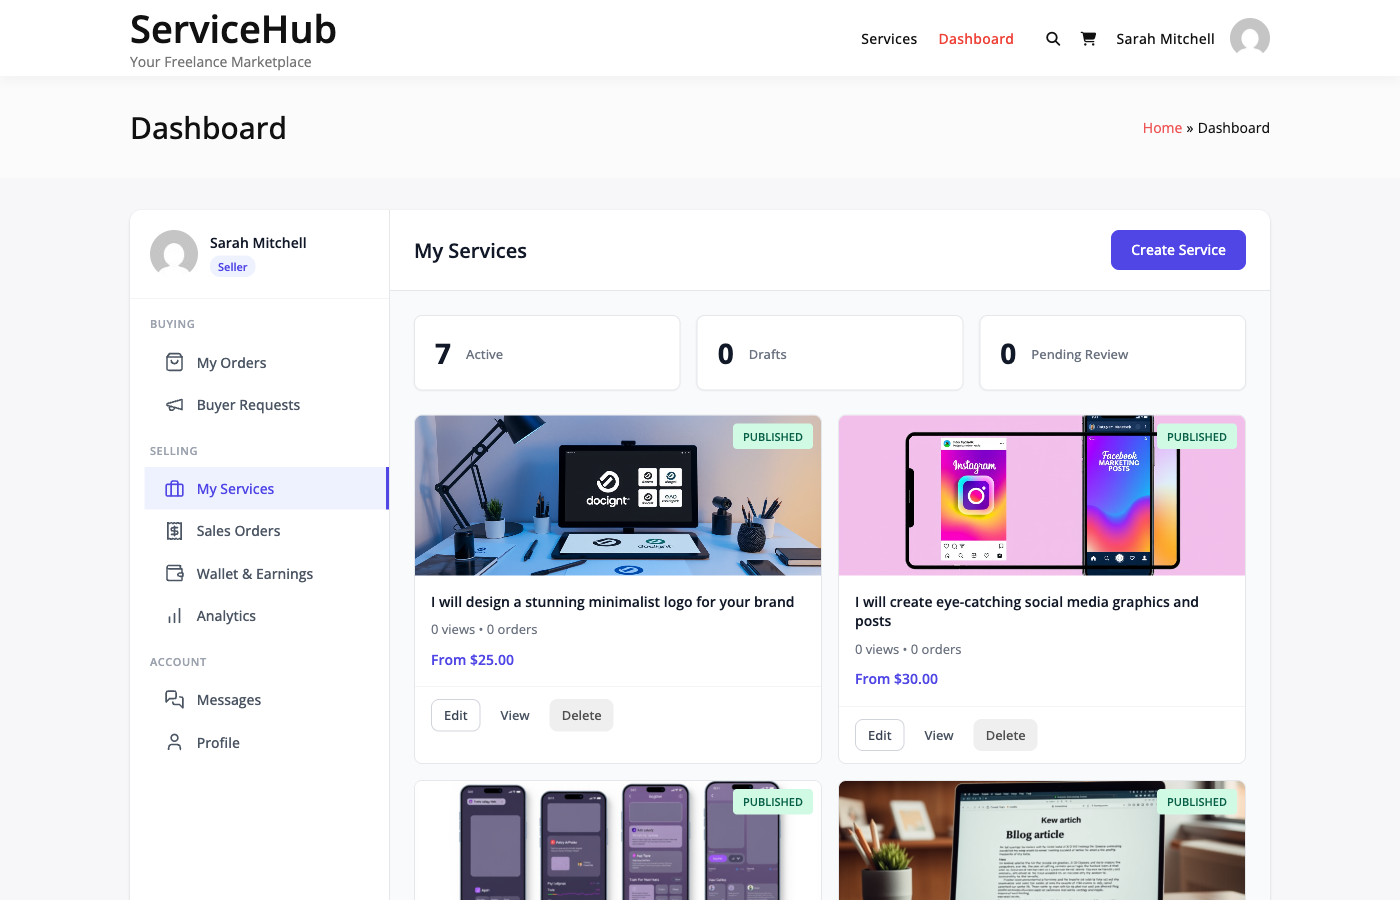
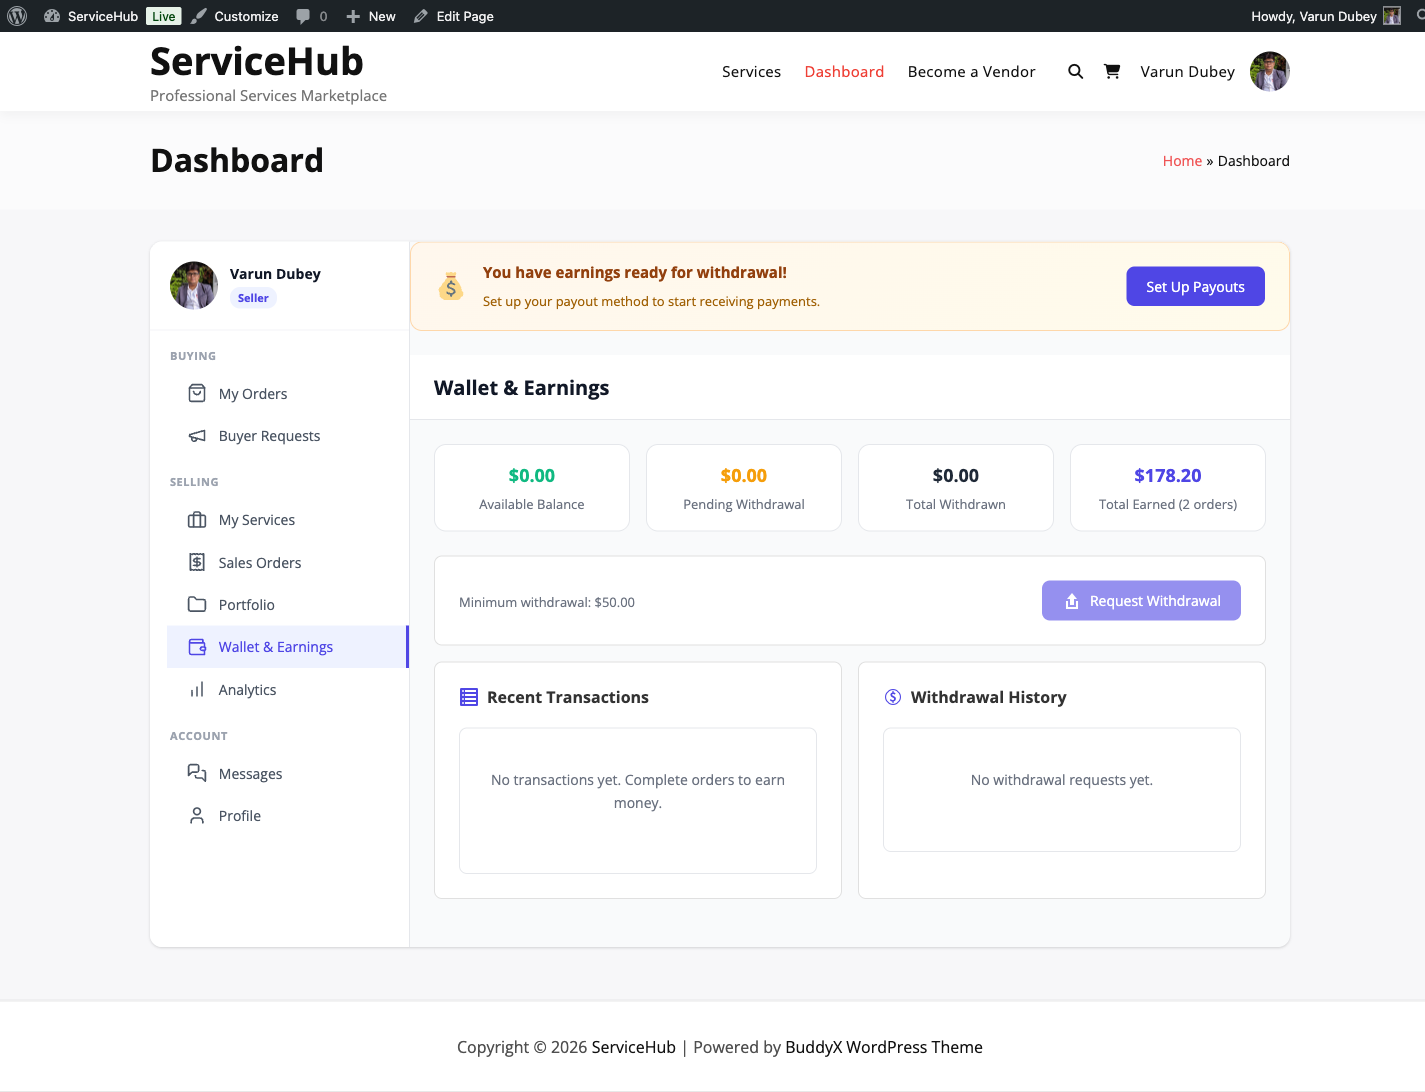
The unified dashboard, seller view

Who Sees What

The tour inspects the viewer's role and tailors the steps:

Active sellers see a 9-step walkthrough:

  1. Welcome
  2. Dashboard sidebar overview
  3. My Orders (things you've bought)
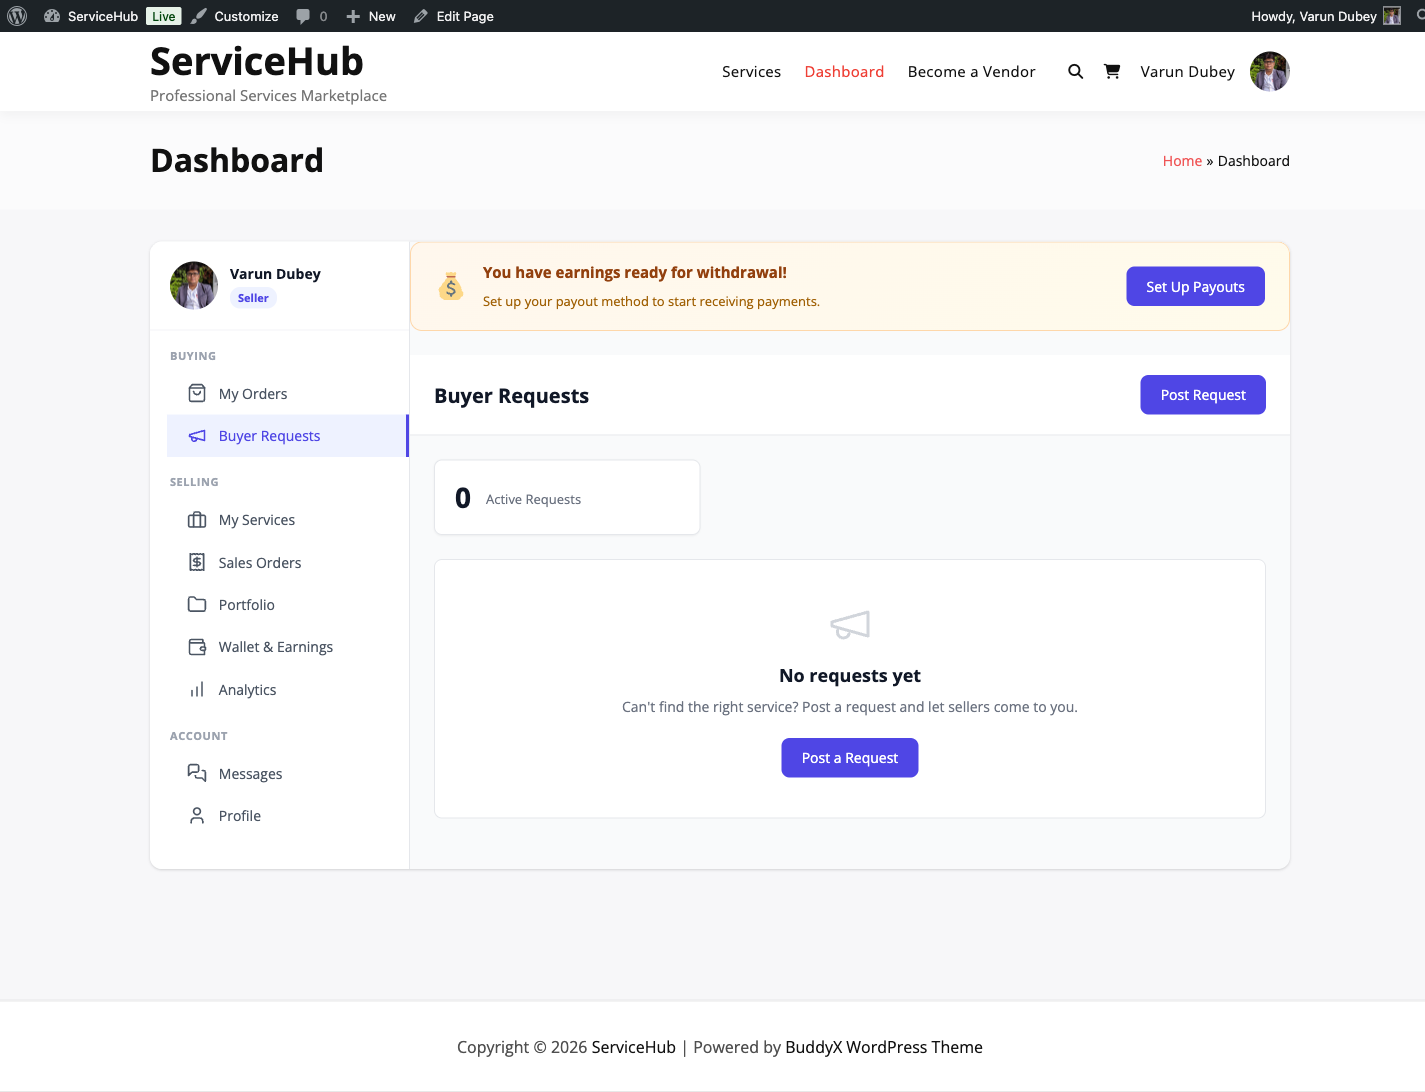
  4. Buyer Requests (posting custom jobs)
  5. My Services (your listings)
  6. Sales Orders (buyers who have purchased from you)
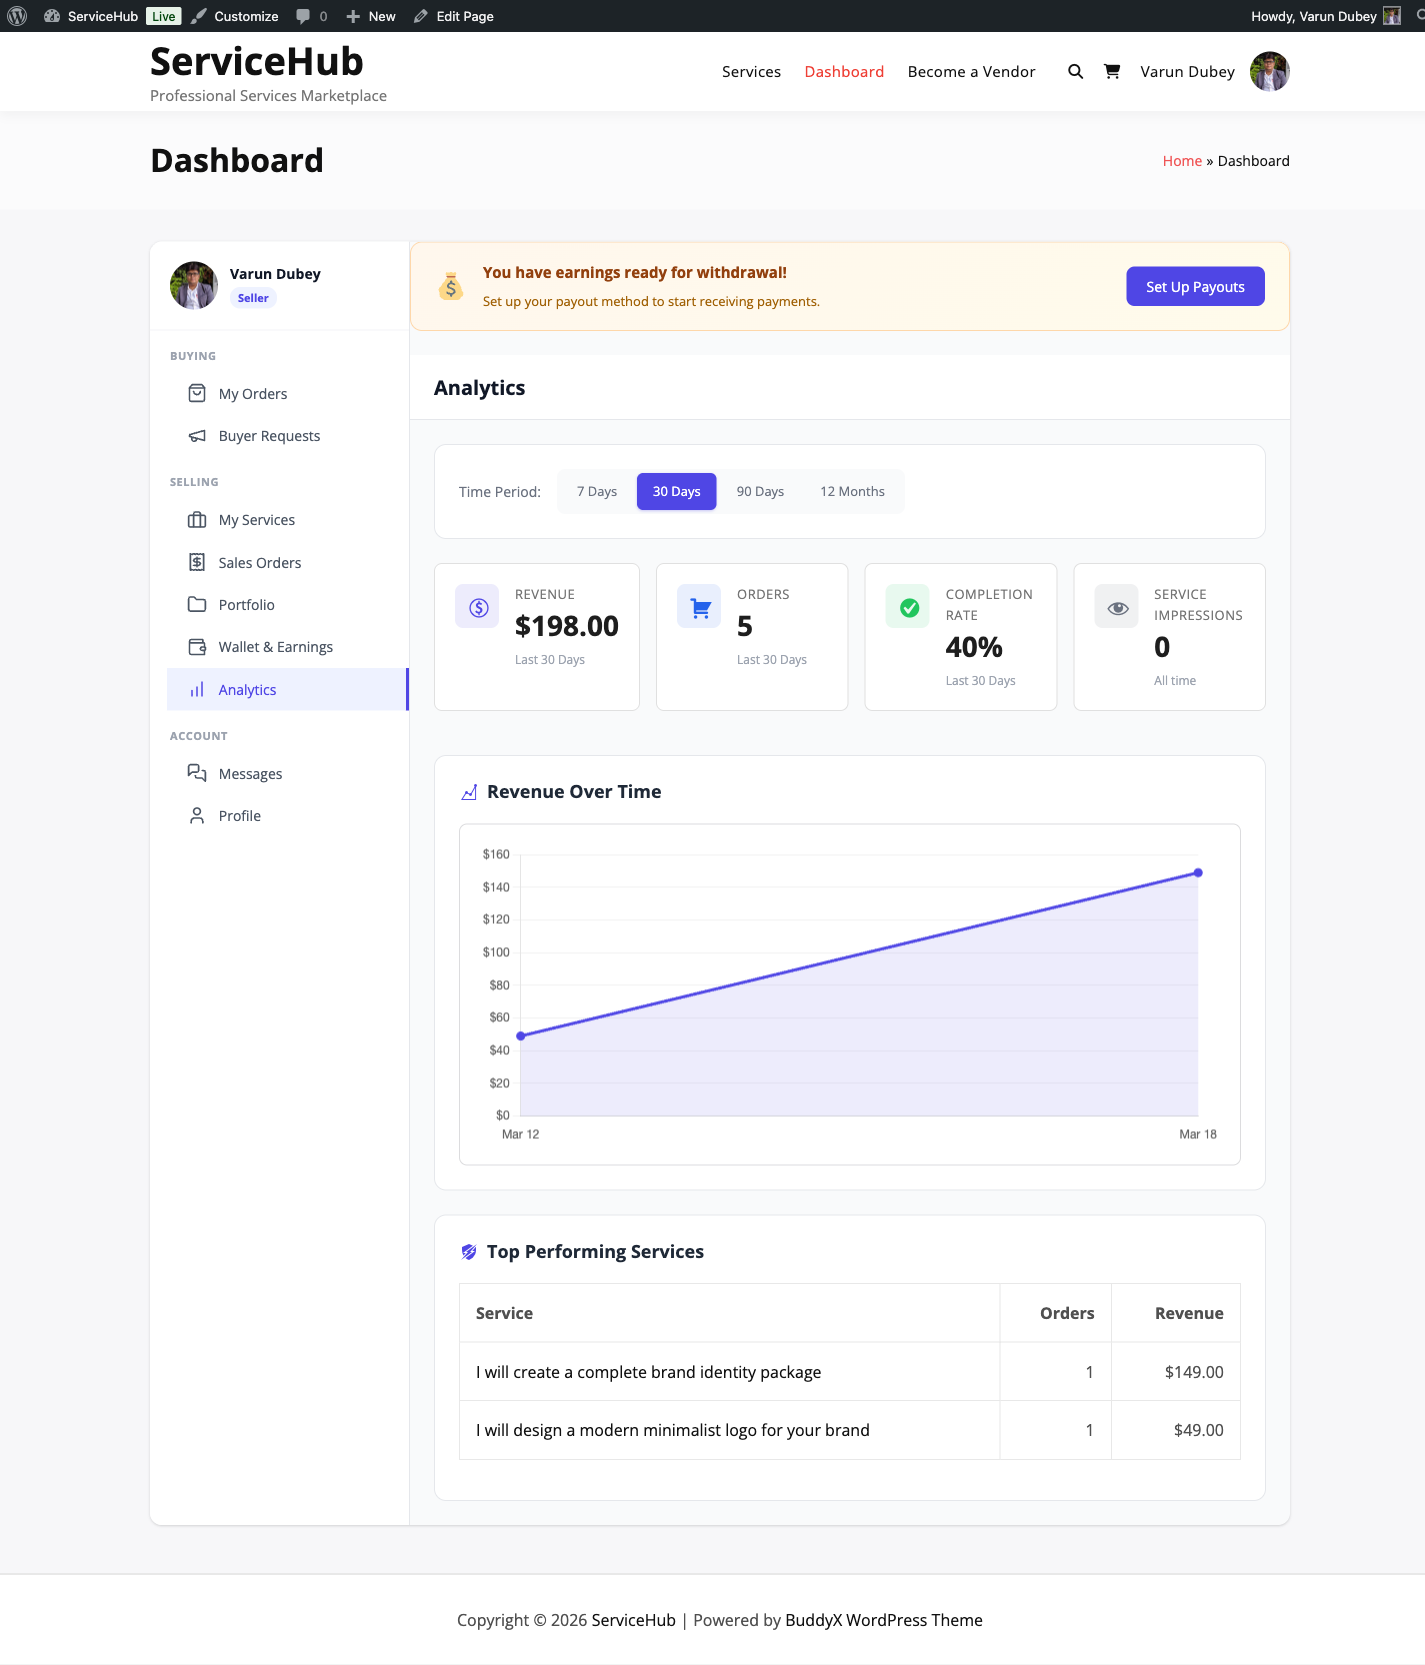
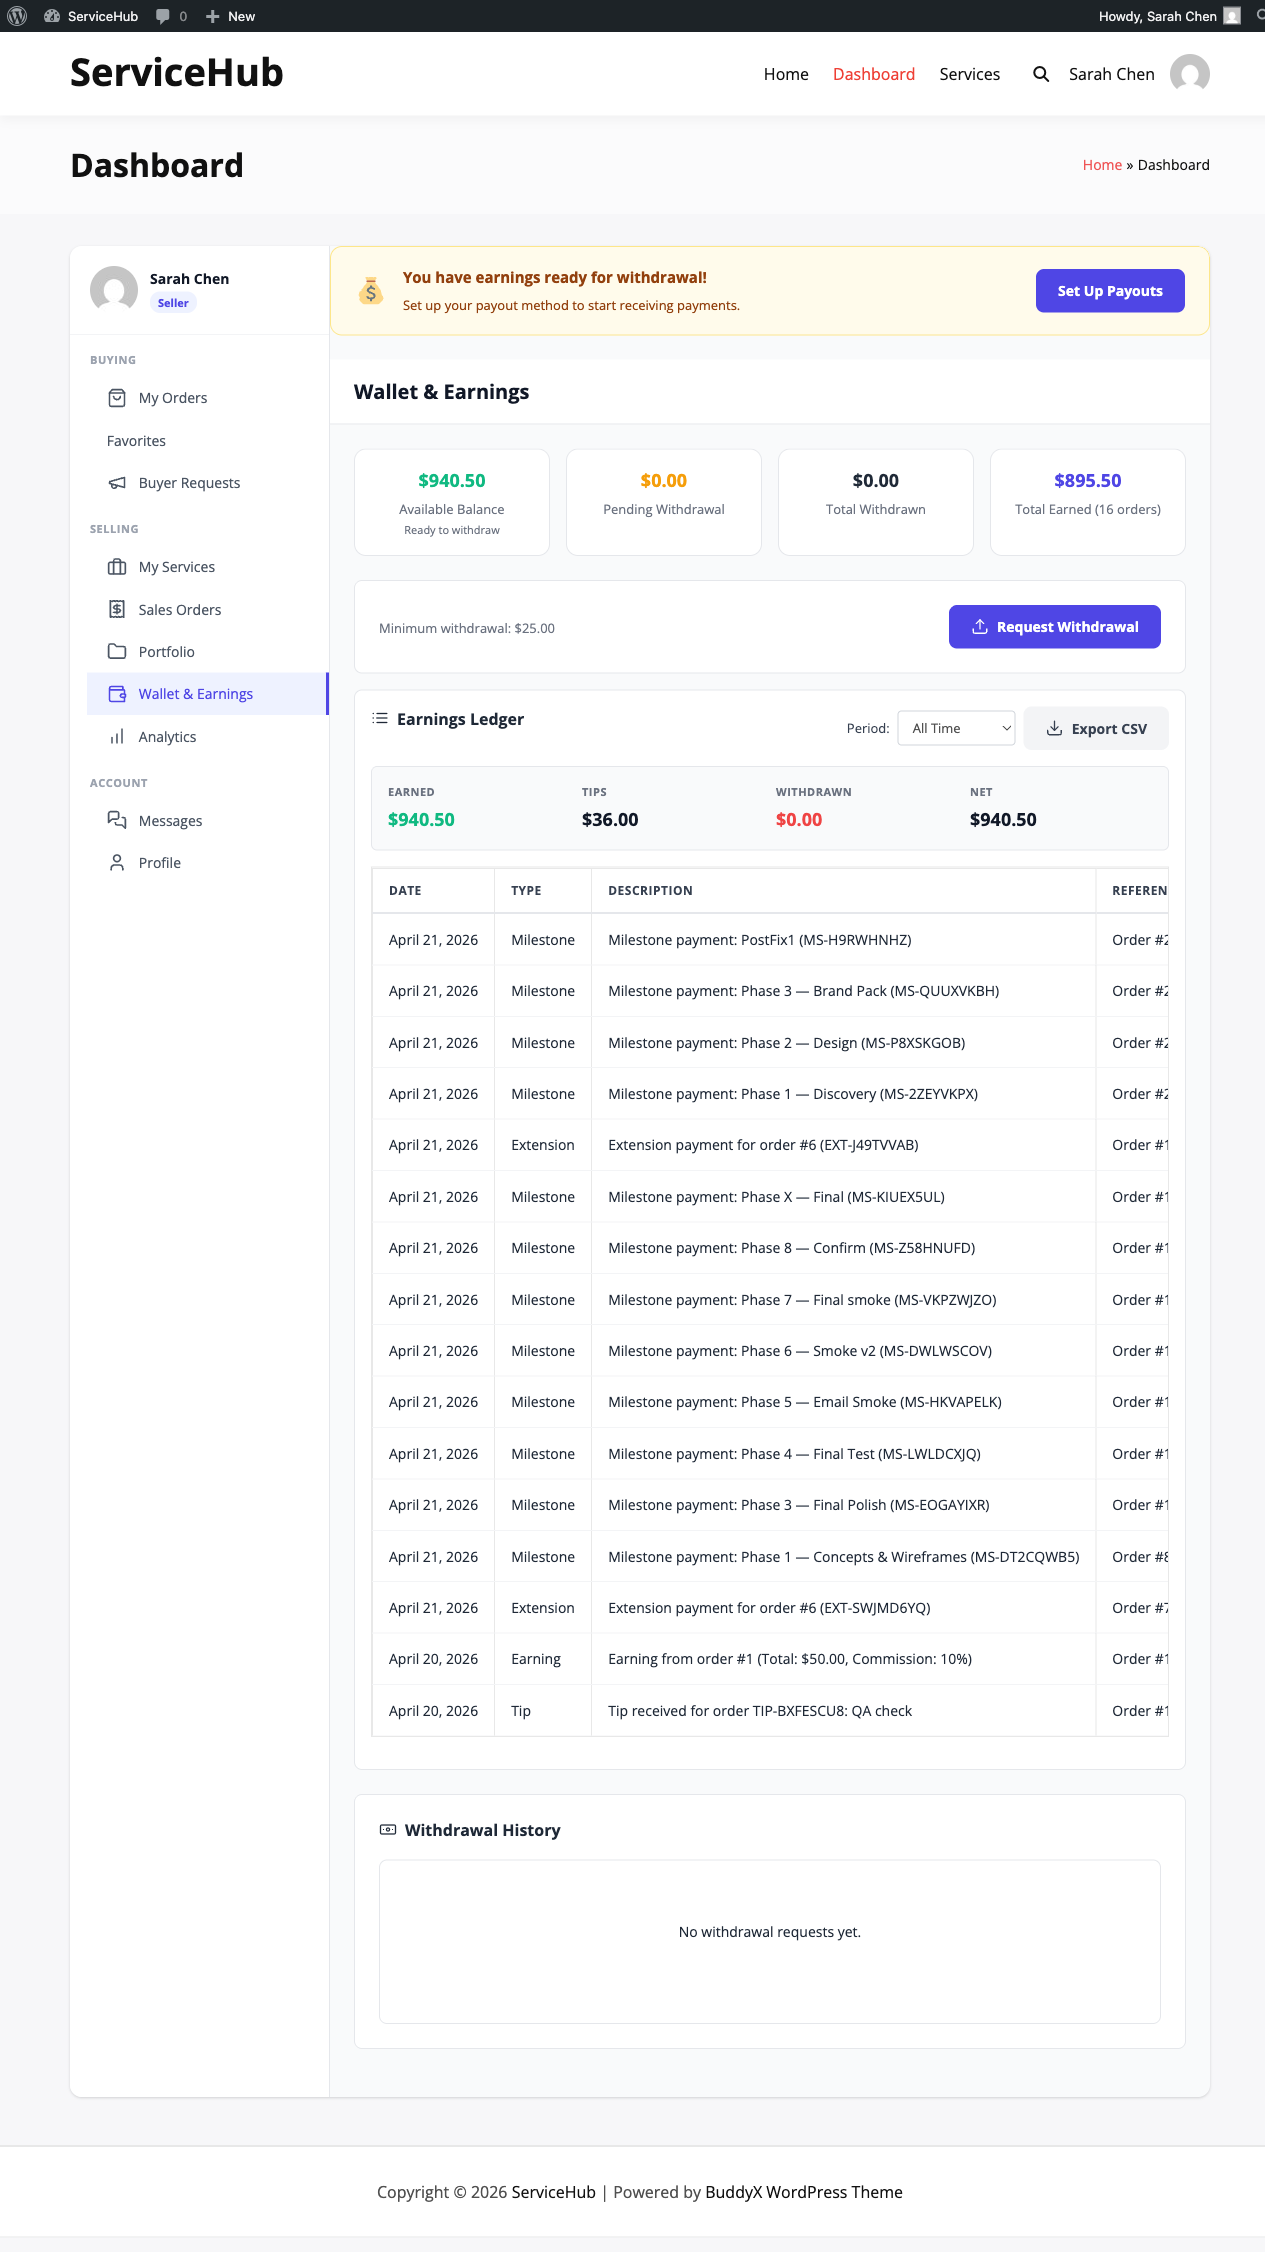
  7. Earnings & Wallet (NET earnings, ledger, CSV export)
  8. Messages (inbox for all order conversations)
  9. Finish

Buyers (no vendor role) see a shorter 7-step walkthrough that swaps the seller-specific steps for a single "Want to sell too?" step highlighting the Start Selling CTA in the sidebar.

Pending vendors (application submitted, waiting for admin approval) see the buyer flow without the "Start Selling" prompt - that button is already absent from their sidebar.

Logged-out visitors never see the tour - the shortcode renders a login prompt instead, so there's nothing meaningful to walk.

When It Opens

The tour auto-opens the first time a logged-in user hits any URL that renders the [wpss_dashboard] shortcode. Completion persists per-user through the wpss_tour_completed user meta, so it won't re-interrupt after that.

Clicking Skip, Finish, or the close icon all count as completion.

Replaying The Tour

The dashboard header has a subtle Replay tour button next to the primary CTAs (Create Service, Post Request). Click it any time to walk through again - no setting to toggle.

The replay uses window.wpssTour.start() under the hood, so you can also wire a theme-level "Take the tour" link anywhere on your site:

<a href="#" onclick="window.wpssTour && window.wpssTour.start(); return false;">
    Take the tour
</a>

Running The Tour For Your Users

Two good moments to nudge buyers/sellers toward the tour:

  1. Post-registration email - after a vendor is approved, link them to the dashboard with a line like "Not sure where to start? We'll walk you through it."
  2. Empty-state CTA - the buyer-orders empty state already has a Browse Services CTA; you can add a secondary "Take the tour" link via the wpss_dashboard_empty_orders filter.

Resetting Completion

If a user asks to see the tour again but doesn't notice the Replay button, reset their meta:

wp user meta delete <user_id> wpss_tour_completed

The next page load auto-opens the full walkthrough.

Customising The Steps

Pro plugins and theme integrations can hook wpss_tour_steps to append or replace steps. The filter runs AFTER the built-in role-aware step list is built, so you can safely add steps without reimplementing role detection:

add_filter( 'wpss_tour_steps', function ( array $steps ): array {
    // Only add on the frontend dashboard, not the admin tour.
    if ( ! is_admin() ) {
        $steps[] = array(
            'id'       => 'my-rewards',
            'title'    => __( 'Loyalty Rewards', 'my-addon' ),
            'text'     => __( 'Earn points on every order.', 'my-addon' ),
            'attachTo' => array(
                'element' => '.my-rewards-badge',
                'on'      => 'left',
            ),
            'buttons'  => array(
                array( 'text' => 'Back', 'action' => 'back', 'classes' => 'shepherd-button-secondary' ),
                array( 'text' => 'Next', 'action' => 'next', 'classes' => 'shepherd-button-primary' ),
            ),
        );
    }
    return $steps;
} );

If your selector doesn't match anything on the page, the step renders centered - the built-in fallback keeps the tour walking through instead of aborting.

License Activation & Updates [PRO]

WP Sell Services Pro uses a license key to unlock Pro features, deliver automatic updates, and give you priority support.

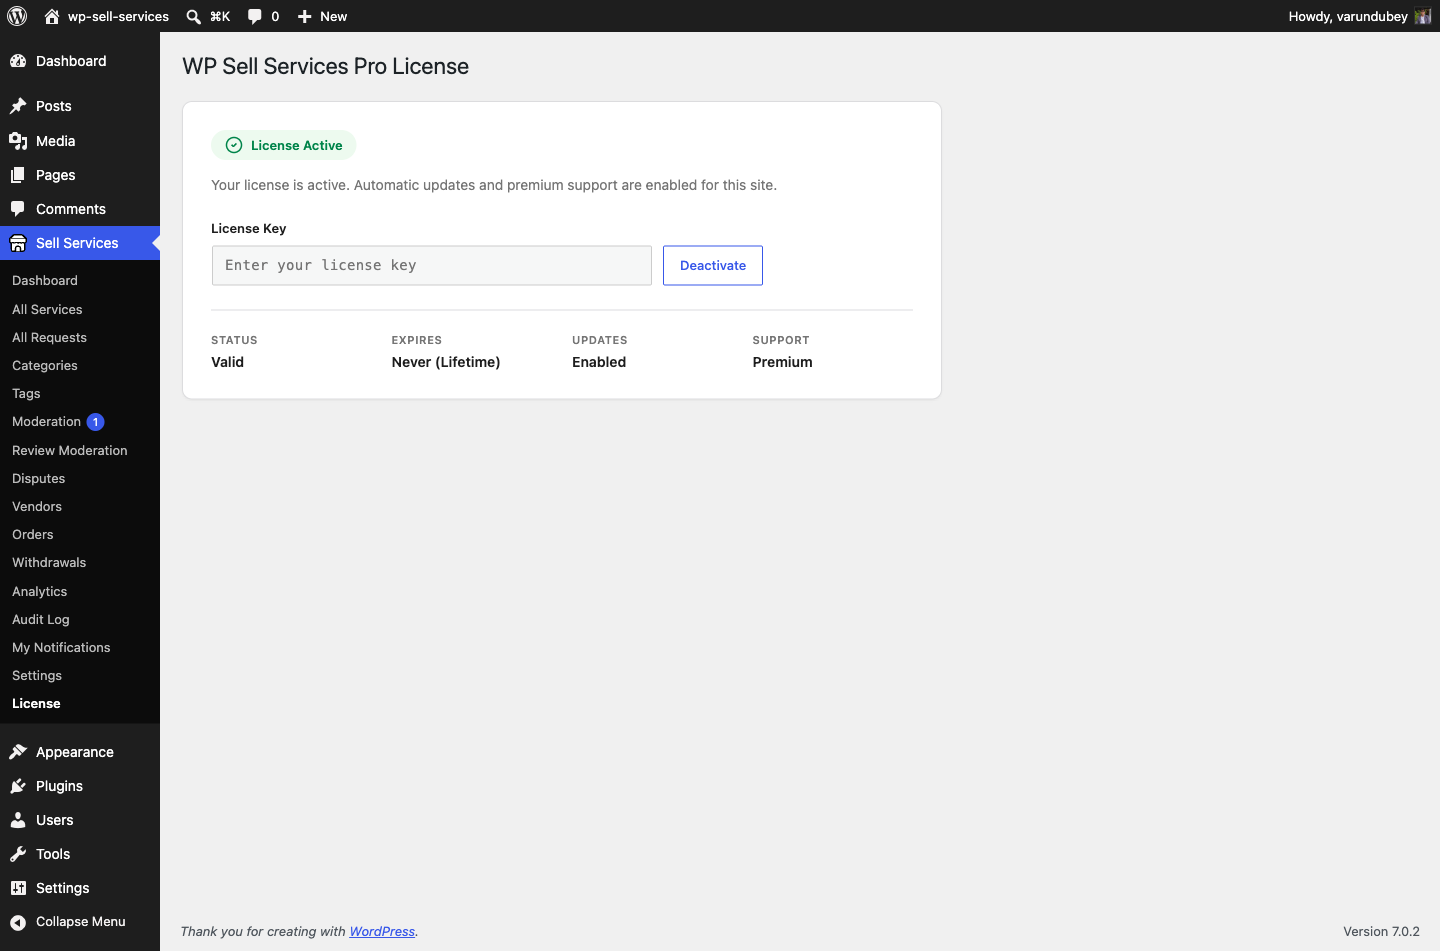
The License screen under Sell Services

Activate your license

  1. Buy Pro. Your key is in the purchase receipt email and on your account page at wbcomdesigns.com.
  2. Install and activate the free WP Sell Services plugin first, then Pro.
  3. In WordPress, go to Sell Services > License.
  4. Paste the key and click Activate License.

The License screen is its own menu item under Sell Services -- not a tab inside Settings.

Once the status reads active, your site receives Pro updates in Dashboard > Updates like any other plugin.

What the license controls

Important: an inactive or expired license disables Pro features.

This is not an updates-only license. When the key is missing, invalid, or past its expiry date, WP Sell Services Pro loads only its License screen -- every other Pro feature stops initialising.

That includes:

  • Stripe Connect, PayPal mass payouts, and the wallet providers
  • Tiered commission rules
  • Vendor subscriptions
  • White-label branding
  • Cloud storage (S3, GCS, DigitalOcean Spaces)
  • Analytics and data export
  • Display currency
  • The raised service limits (gallery, add-ons, FAQs, requirements)
  • WooCommerce, EDD, FluentCart, SureCart, and Razorpay integrations

Your data is not deleted. Commission rules, subscriptions, wallet balances, and connected Stripe accounts all stay in the database, and reactivating the license brings the features back exactly as they were.

But the behaviour changes immediately, and some of it is customer-visible. If you run Stripe Connect, new orders stop splitting to vendor accounts and start accruing to the standard ledger instead. Renew before expiry rather than after, and treat the renewal date as an operational deadline, not a billing one.

Your marketplace keeps running

The free plugin is unaffected. Services, orders, messaging, deliveries, disputes, reviews, commission, earnings, and withdrawals all keep working, because they live in the free plugin. What you lose is the Pro layer on top.

Checking status

The License screen shows the current state and, where the store provides it, the expiry date. A key marked lifetime never expires.

If activation fails, the screen reports the reason returned by the store -- an exhausted site limit and a mistyped key produce different messages, so read it before retrying.

"Active" with an empty key field is normal after an upgrade. Sites licensed on an older version of Pro carry a legacy activation flag, and the plugin honours it so that upgrading never silently switches Pro off. The key box renders empty because the current option has not been written yet -- Pro is genuinely active. Paste your key and activate again whenever convenient to move the site onto the current record.

Moving to a new site

Deactivate on the old site first, then activate on the new one:

  1. On the old site, go to Sell Services > License and click Deactivate License. This frees the site slot.
  2. On the new site, paste the same key and click Activate License.

If you no longer have access to the old site -- it was deleted, or a client took it over -- contact support and we will free the slot for you.

Site limits

How many sites one key covers depends on the plan you bought: typically a single site, a small bundle for developers, or unlimited for agencies. Your account page lists the limit and which sites are using it.

Staging and development copies count as sites unless your host serves them on a recognised staging domain. If you are unsure, deactivate before cloning.

Troubleshooting

Problem What to do
Pro features missing after activating the plugin Check Sell Services > License. Unlicensed, Pro registers only that screen.
"License key is invalid" Re-copy the key from your account page -- a trailing space is the usual cause.
"No activations left" Deactivate the key on a site you no longer use, or upgrade your plan.
Status active but no updates arrive Your host may block outgoing requests to wbcomdesigns.com. Ask them to allow it.
Features disappeared without warning The license has most likely expired. Check the expiry date on the License screen.

What's New in 1.3.0

Version 1.3.0 is a large stability and polish release: payments are hardened across every gateway, dark mode now works on every surface, and first-run setup is lighter.

Full dark mode on every surface

WP Sell Services now follows your theme's dark mode. When the active theme (BuddyX, BuddyX Pro, Reign, or any theme with a dark toggle) switches to dark, every plugin surface - dashboard, service pages, buyer requests, checkout - goes dark with it, at readable AA contrast. The plugin never darkens on top of a light theme, and it does not follow the OS setting independently of the theme.

Theme developers: see the Theme Integration guide for the token system and how to match your palette.

Lighter first-run setup

  • The Setup Wizard no longer forces you to configure a payment gateway before you can finish. Offline/manual payment works out of the box, and the wizard guides you to add a gateway when you are ready.
  • Fresh installs are sell-ready immediately: manual payment is enabled, default service categories are seeded, and new services publish without forced moderation.

Role-based menu visibility

Show or hide dashboard sections per user role, so different roles see only the areas that apply to them. Developers can gate any section with the wpss_can_access_dashboard_section filter.

Frontend dispute messaging

Buyers and vendors can now message each other and attach evidence directly on a dispute, without leaving the order.

Payments hardened

  • PayPal checkout sends the full context, handles multi-item carts correctly, and no longer shows a dead Pay button.
  • Money is formatted to each currency's precision (including 0- and 3-decimal currencies), and refunds round to the currency's precision.
  • The order call-to-action is guarded against zero-price or unpriced packages, paused services can no longer be ordered, and the purchased item is cleared from the cart after checkout.

Quality of life

  • A Log Out link now appears in the dashboard navigation.
  • Add-to-cart continues straight to checkout so "Continue to Checkout" matches its label.
  • Buyer request cards keep their actions on one line on mobile and tablet.
  • Accessibility pass: visible keyboard focus, form-field labels, and ARIA labels on search and category controls.

For developers

  • A gateway-agnostic CheckoutIntent seam (resolve → charge → settle) so any gateway plugs in the same way, with the amount always server-computed. See Custom Integrations.
  • Base currency is authoritative for all stored amounts; catalog display goes through the wpss_catalog_price_html filter.
  • New filters: wpss_pro_upgrade_url, wpss_docs_url, wpss_catalog_price_html, wpss_can_access_dashboard_section. See Hooks and Filters.
  • The plugin ships with zero wp i18n make-pot warnings; buyer-facing JavaScript strings are fully translatable.

See the full changelog in readme.txt. Pro users: install WP Sell Services Pro 1.3.0 alongside this release - the two are lockstep.

Launch Checklist

Everything between installing the plugin and taking real money, in order. Work top to bottom -- each stage assumes the one above it is done.

Defaults in brackets are what the plugin ships with, so you only need to change what does not suit you.

1. Install

  • WordPress 6.4+, PHP 8.1+ -- Installation
  • Free plugin installed and activated
  • Pro installed and license activated at Sell Services > License (if you bought Pro). Pro features do not load without it -- License Activation
  • Run wp wpss preflight if you have WP-CLI. Every check should print PASS

2. Core setup

  • Sell Services > Settings > General -- platform name, currency, and how checkout runs (standalone or an e-commerce platform)
  • Settings > Pages -- create and assign all 4 pages: Services, Dashboard, Become a Vendor, Checkout
  • Add Services and Become a Vendor to your site menu (Appearance > Menus)
  • Add service categories at Sell Services > Categories

Currency is worth deciding now. Everything is stored and settled in your base currency, and changing it later does not convert existing records.

3. Money

Get this right before a single real order.

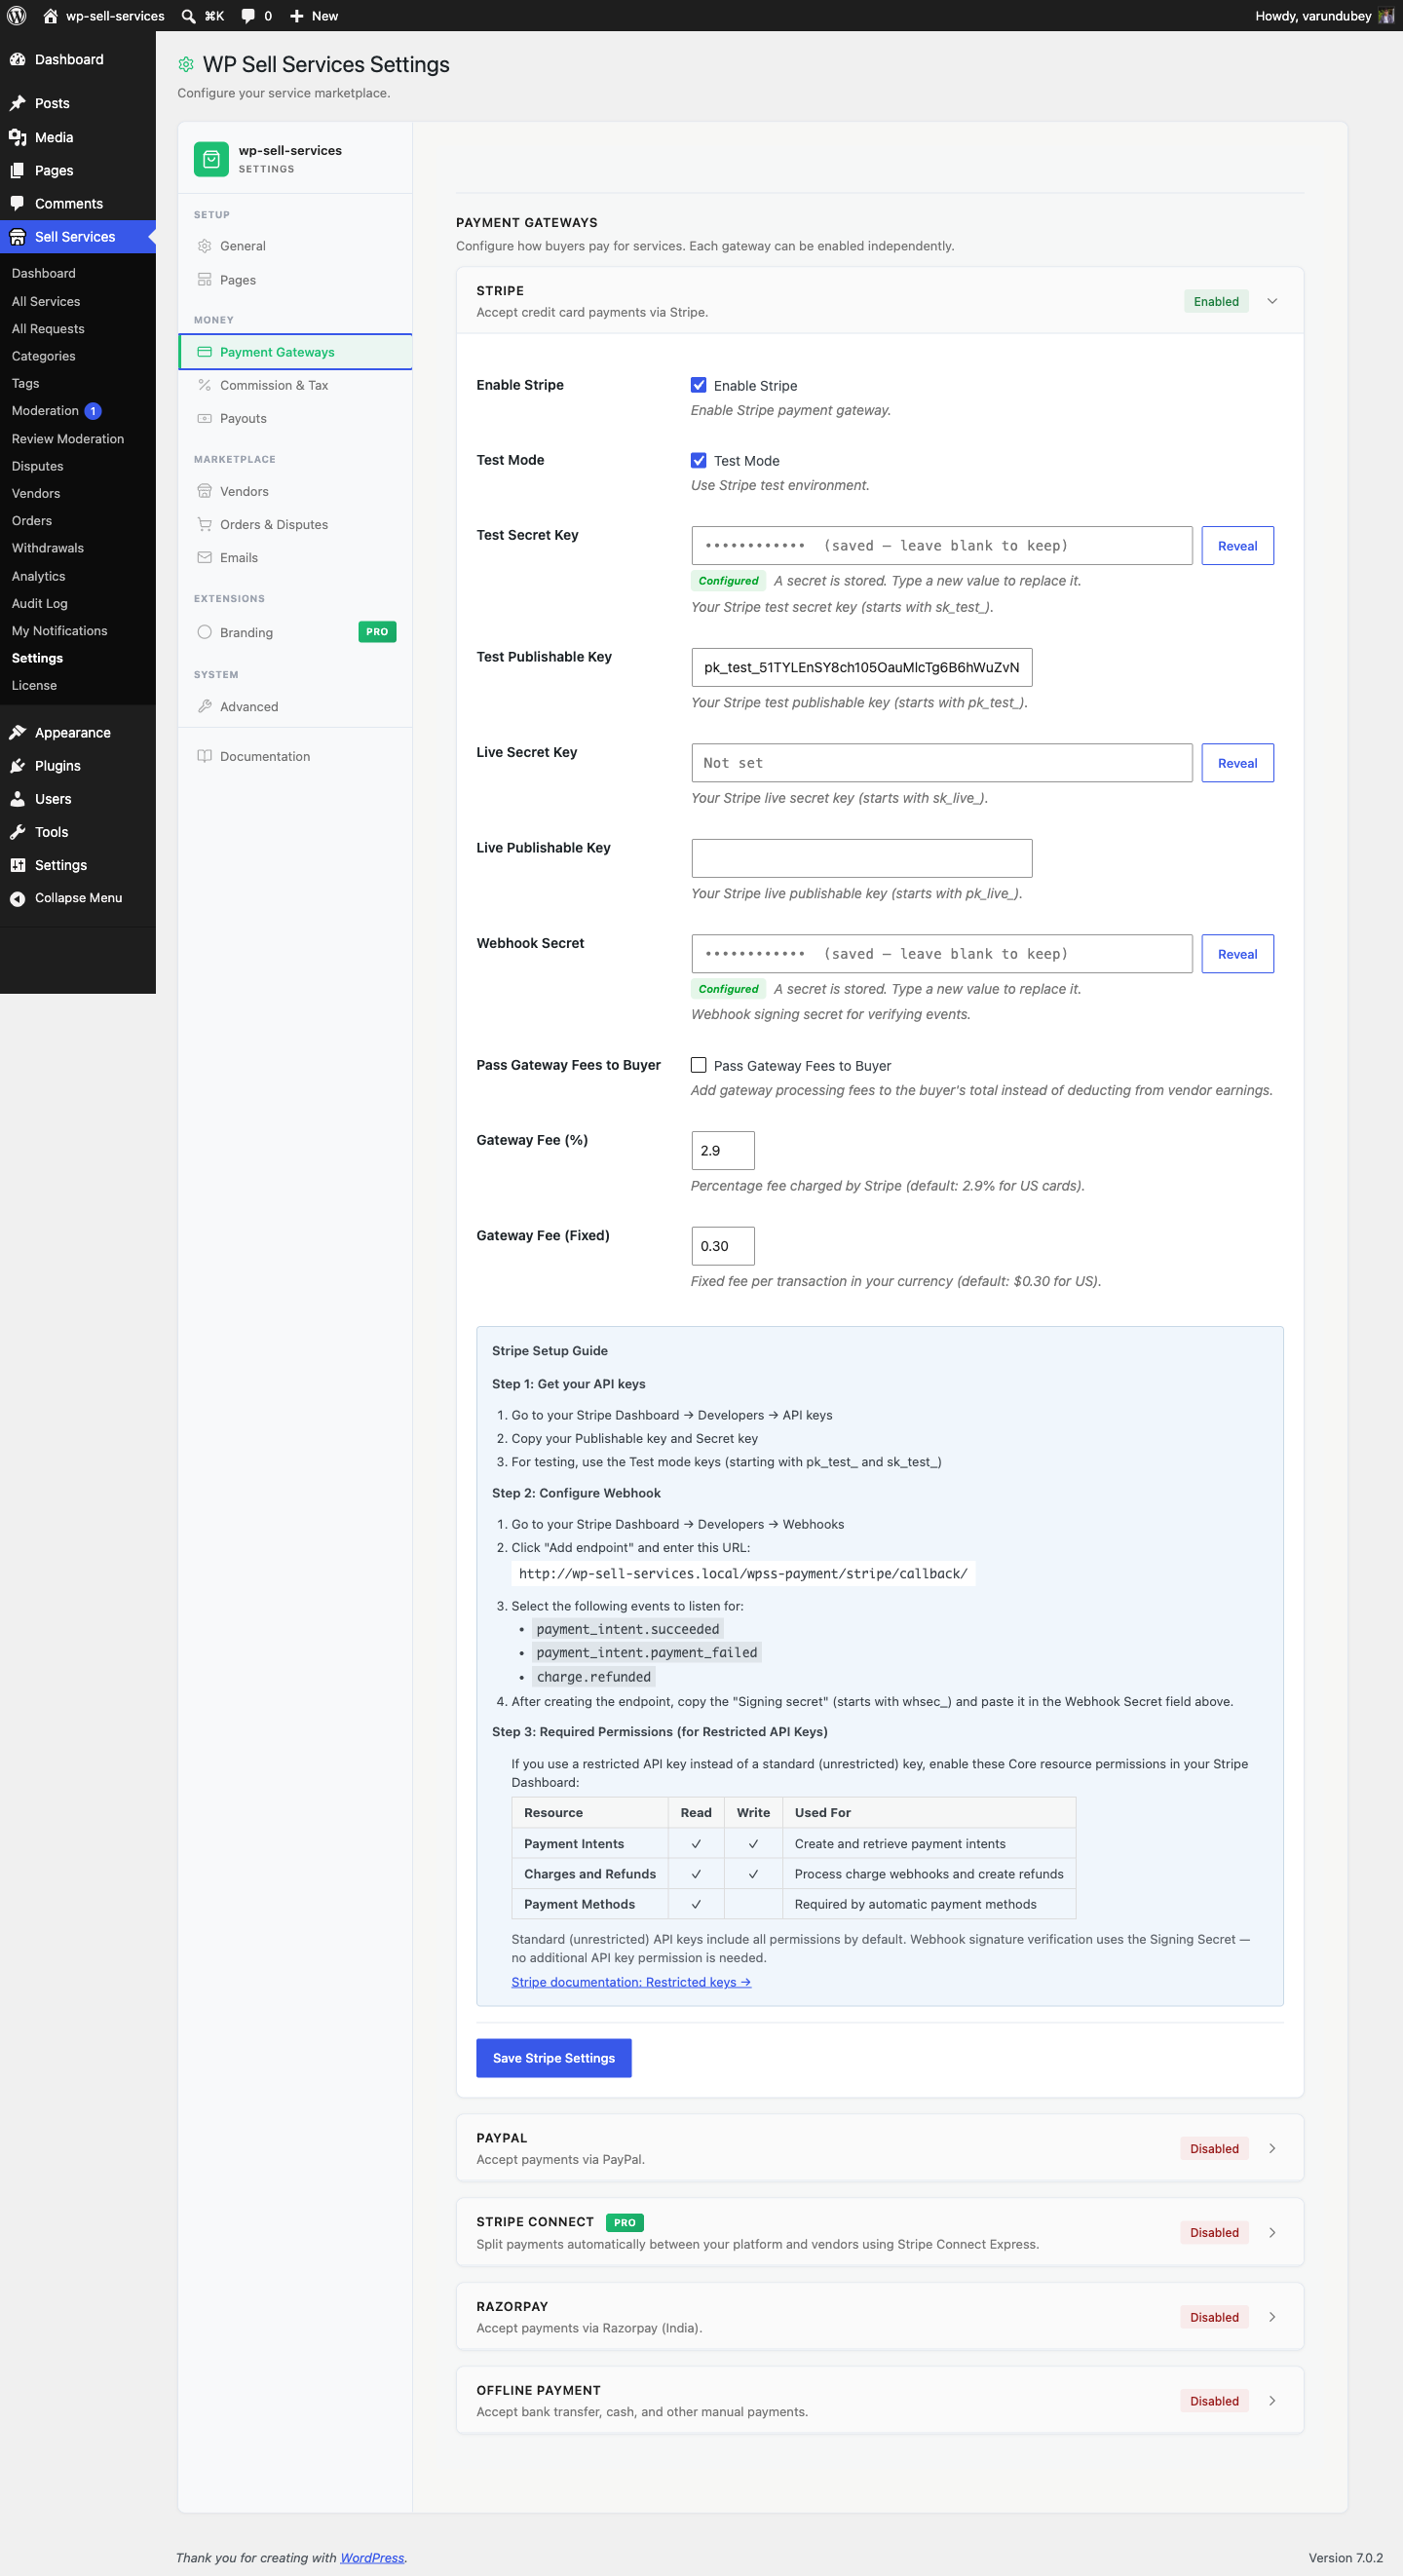
  • Settings > Payment Gateways -- enable at least one gateway and complete its credentials
  • Add the gateway's webhook endpoint. Without it, payments can succeed at the gateway and never mark the order paid
  • Test in the gateway's sandbox mode, end to end, before switching to live keys
  • Settings > Commission & Tax -- commission rate [10%], per-vendor overrides [on], tax [off]
  • Decide the tip commission rate. Empty means tips are commissioned at your normal rate; 0 means vendors keep tips in full
  • Settings > Payouts -- minimum withdrawal [$25], clearance period [0 days], wallet provider
  • Decide how you will actually pay vendors -- Paying Your Vendors

The clearance period ships at 0, meaning earnings are withdrawable as soon as an order completes. If you want a buffer against refunds and chargebacks, raise it now rather than after money is already owed.

4. Vendors

  • Settings > Vendors -- registration mode: open, requires approval, or closed
  • Max services per vendor [20], identity verification [off]
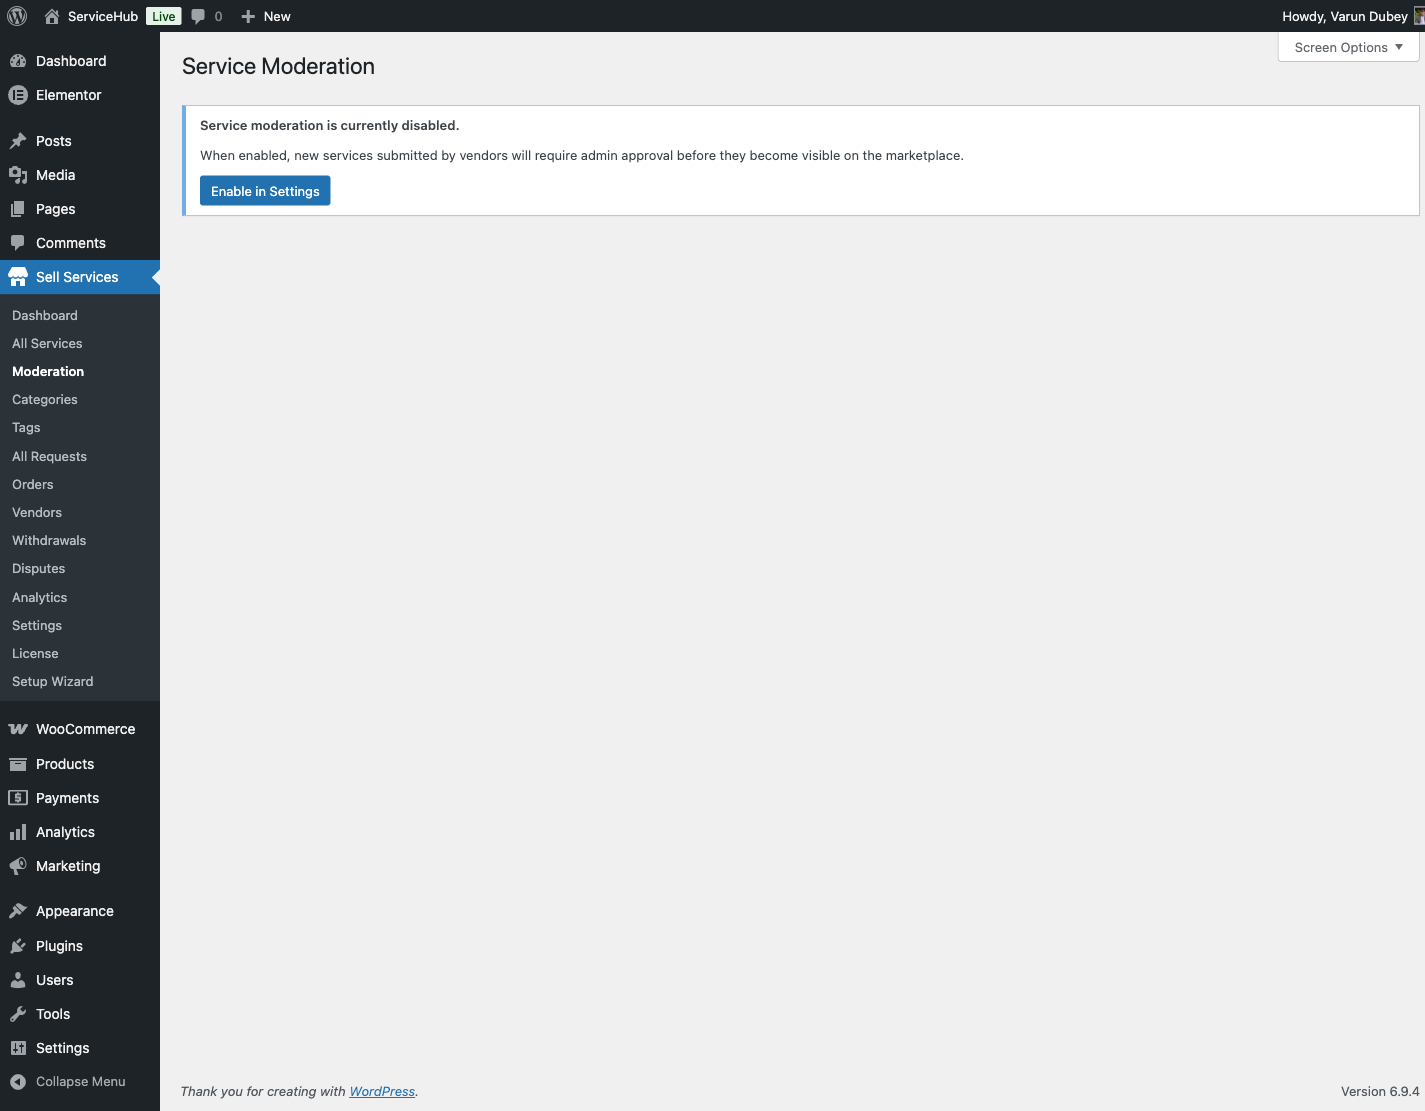
  • Service moderation [off]. Left off, new listings publish immediately. Turn it on if you want to review every service first -- Service Moderation
  • [PRO] Vendor subscription plans, if vendors will pay to sell

5. Orders and policy

  • Settings > Orders & Disputes -- auto-complete [3 days], requirements timeout [7 days], dispute window [14 days], auto-flag late orders [3 days]
  • Confirm disputes are enabled [on] and you know who will mediate them

Revision limits are not here -- vendors set those per package.

6. Emails

  • Settings > Emails -- send the deliverability test first. If it does not arrive, no notification will
  • Install an SMTP plugin if the test fails. WordPress's default mail is unreliable on most hosts
  • Review the 23 notification types [all on] and switch off any you do not want

7. Branding and display

  • Place your marketplace elements -- Shortcodes or Blocks
  • Check the catalog, a service page, and the dashboard on a phone
  • [PRO] White label -- do this last, since renaming the admin menu makes the rest of these docs stop matching your screen

8. Rehearse before launch

Do not let a customer find the first bug.

  • Create a test vendor and publish a test service
  • Order it as a different user, and pay with a real (small) live transaction
  • Submit requirements, send a message with an attachment, deliver, request a revision, then complete
  • Confirm every email arrived, for both parties
  • Check the vendor's earnings and request a withdrawal
  • Open and resolve a dispute on a second test order
  • Refund a test order and confirm the ledger reversed

wp wpss demo marketplace seeds a full marketplace for rehearsal, and wp wpss demo delete removes it without touching real content -- WP-CLI Commands.

9. Go live

  • Swap every gateway from sandbox to live keys, and re-point webhooks at the live endpoints
  • Delete demo content
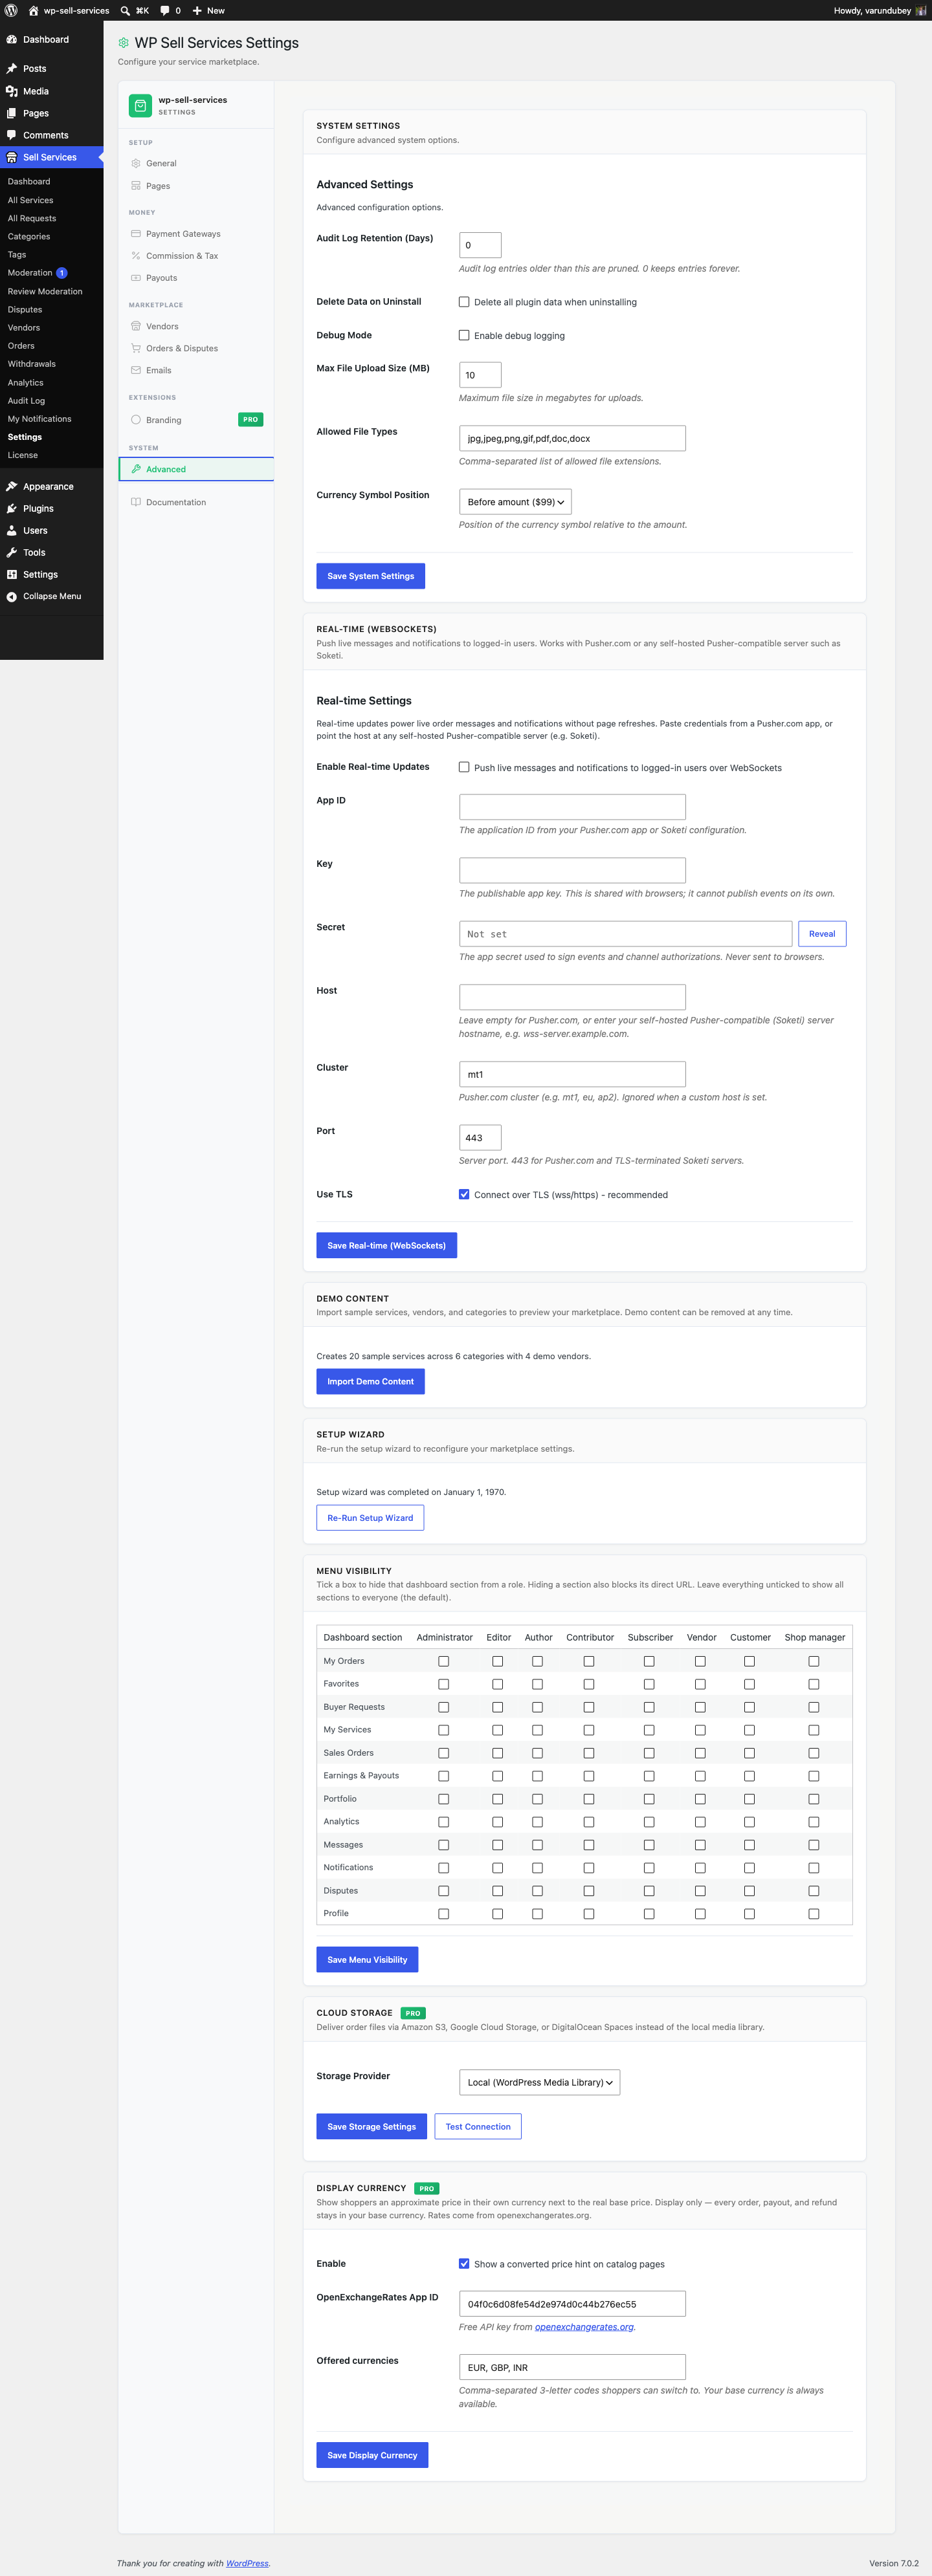
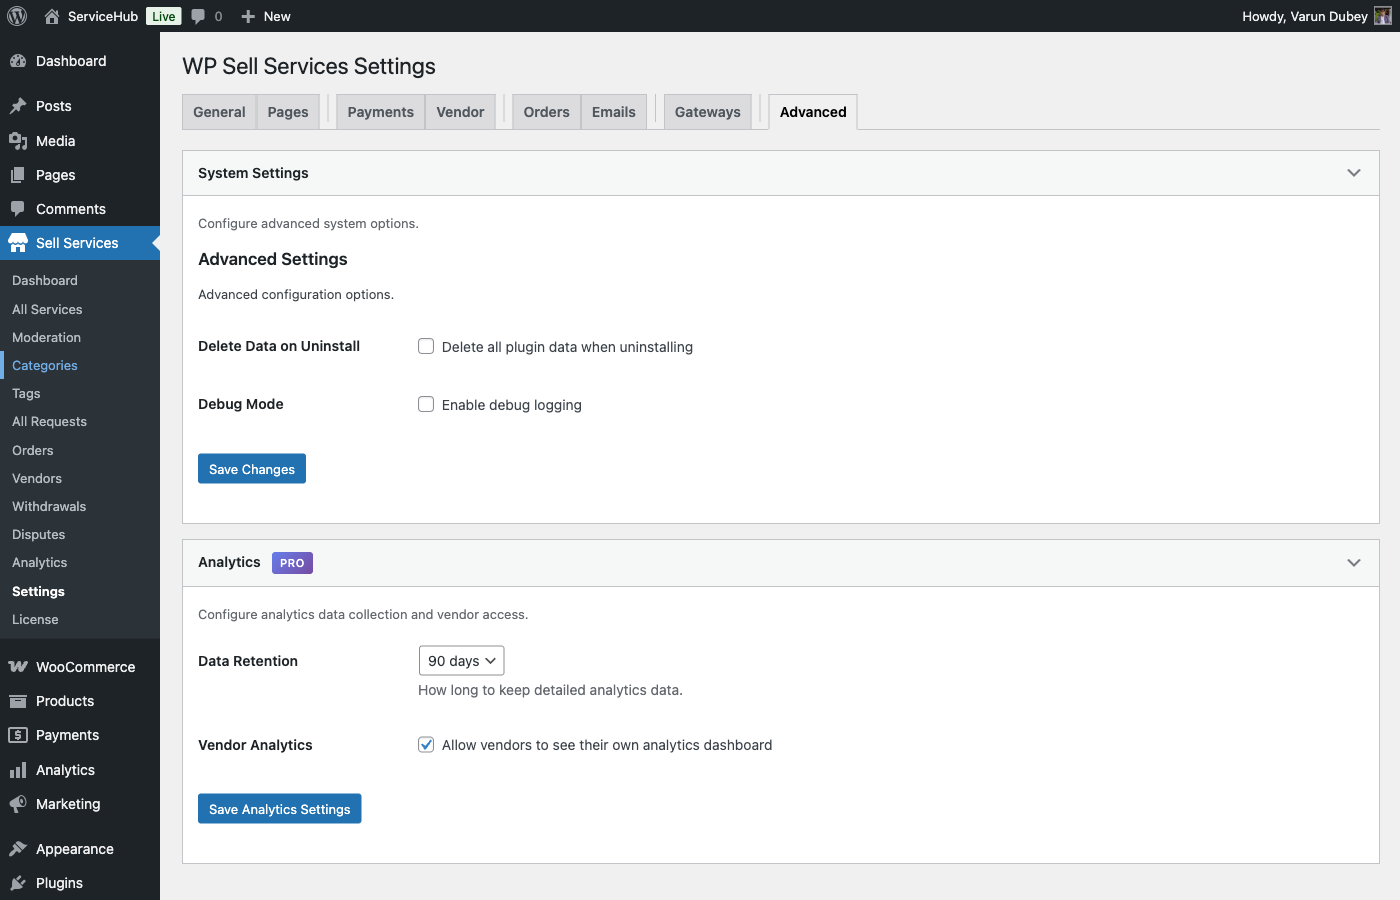
  • Turn off debug mode in Settings > Advanced
  • Place one real order yourself, then refund it
  • Confirm your backups run and include the database -- orders, earnings, and the wallet ledger all live there

After launch

  • Withdrawals need a human. Approve and pay them on a schedule your vendors can predict.
  • Disputes need answering quickly. A slow mediator loses both buyers and vendors.
  • Moderation queue, if enabled, blocks vendors from selling until you clear it.
  • Renew Pro before it expires. An expired license switches Pro features off.

Documentation Coverage

As of WP Sell Services 1.4.0 and WP Sell Services Pro 1.4.0.

This page exists so you never have to guess whether something is missing or you just cannot find it. It states what is documented, and -- more usefully -- what is not.

Both plugins' documentation lives in one place, the free plugin's docs/website/ tree, in the GitHub repository. Pro features are marked [PRO] inline rather than split into a second manual, because almost every Pro feature is an extension of a free one and splitting them meant a reader had to hold two documents open. The Pro plugin's own docs folder is retired and publishes nothing.


What is documented

Every page below exists, is listed in docs_config.json, and is checked on each run of bin/docs-audit.py.

Area Covered
Getting started Introduction, installation and requirements, quick setup, free vs Pro comparison, Pro overview, dashboard tour, license activation [PRO], launch checklist, What's New
Buying Browsing and purchasing, choosing a package, order tracking, buyer dashboard, favorites, buyer FAQ, buyer tips
Selling Service wizard, pricing and packages, add-ons, media, requirements and FAQs, editing and pausing, publishing and moderation
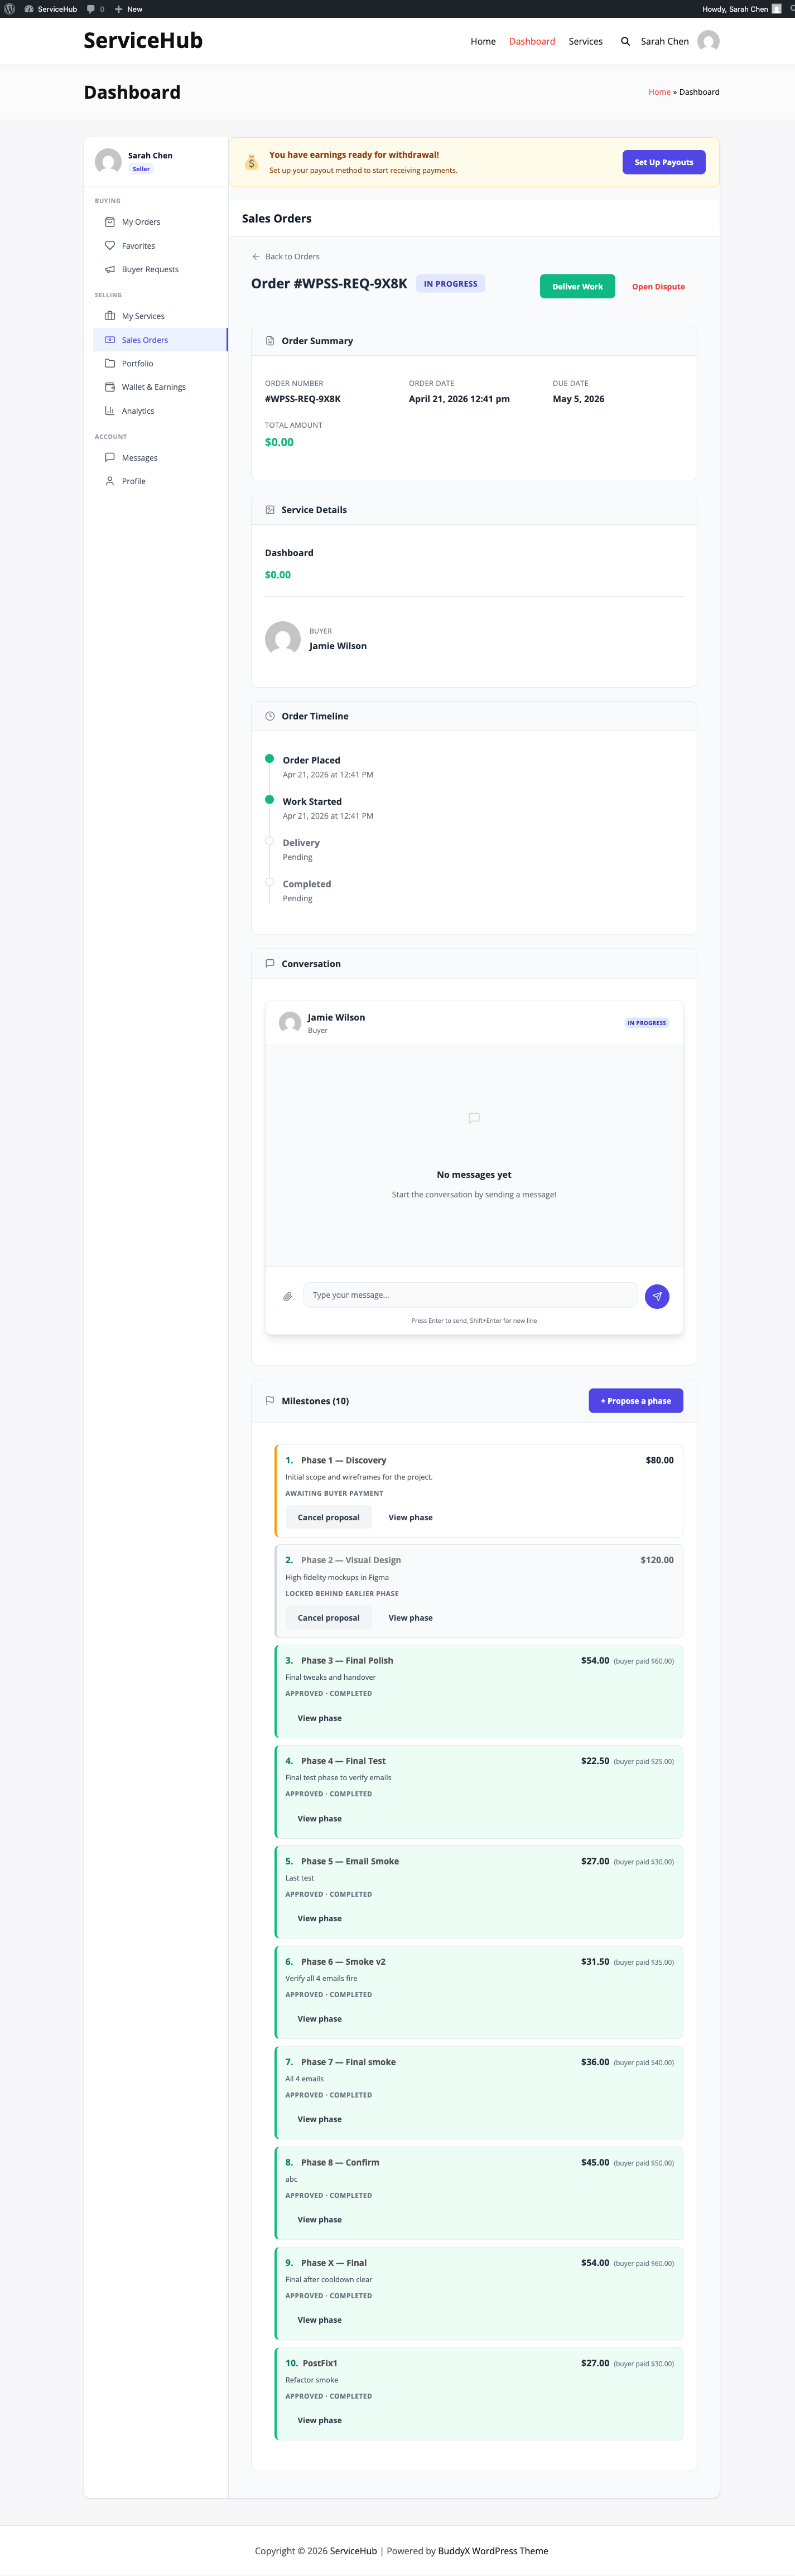
Buyer requests Posting a request, submitting proposals, managing requests, fixed vs milestone proposal contracts
Orders The 11-status lifecycle, requirements collection, messaging, deliveries and revisions, milestone contracts, paid extensions, tipping, recurring services, order settings
Payments and checkout Standalone mode, Stripe, WooCommerce (including the pay-order handoff) [PRO], alternative platforms (EDD / FluentCart / SureCart) [PRO], other gateways, Stripe Connect [PRO], currency and tax, display currency
Earnings and payouts Wallet, earnings dashboard, commission system, tiered commission [PRO], withdrawals, vendor payouts, automated payouts [PRO], the ledger and CSV export
Vendors Becoming a vendor, vendor dashboard, profile and portfolio, seller levels, vacation mode, vendor settings, vendor subscription plans [PRO]
Reviews Review system, reputation and moderation
Disputes Opening a dispute, the dispute process, admin mediation
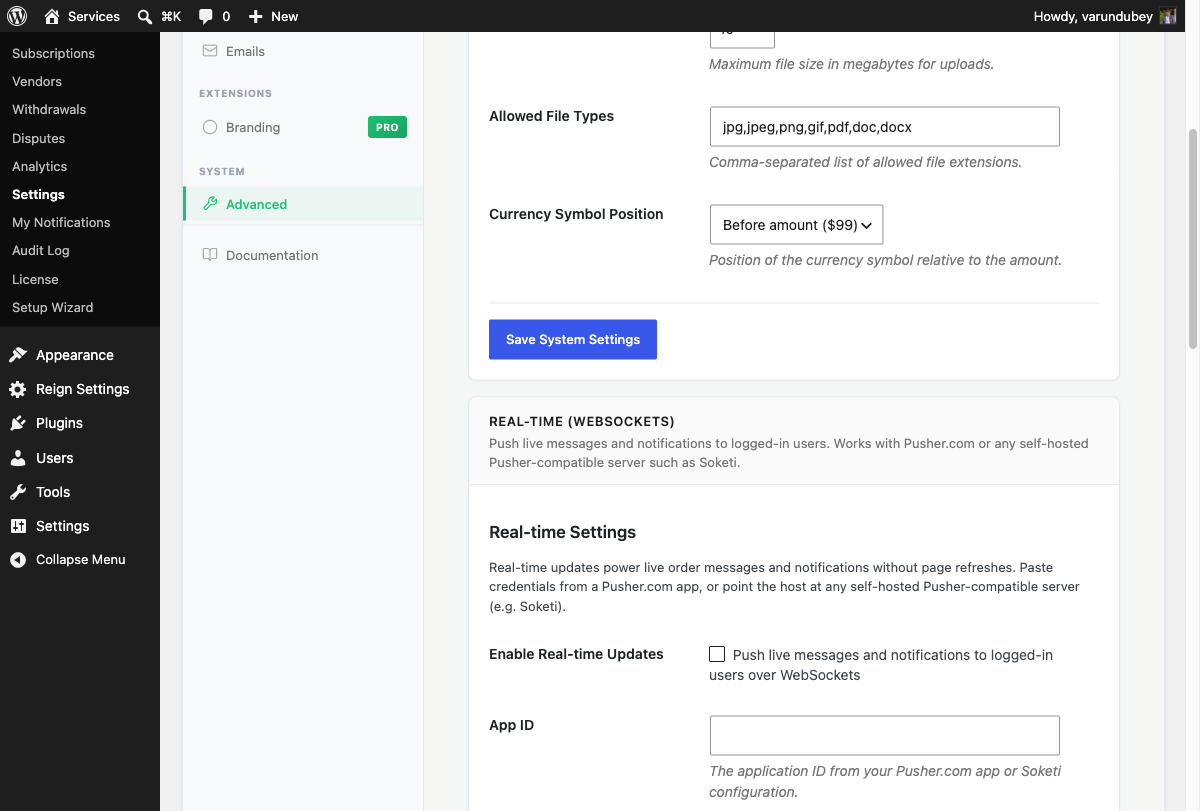
Notifications Email configuration, email types, in-app notifications, realtime (WebSocket) updates
Display and SEO Shortcodes, Gutenberg blocks, search and filters, template overrides, JSON-LD schema
Analytics Vendor analytics, admin analytics [PRO], data export [PRO]
Cloud storage [PRO] Overview and setup (S3, Google Cloud Storage, DigitalOcean Spaces)
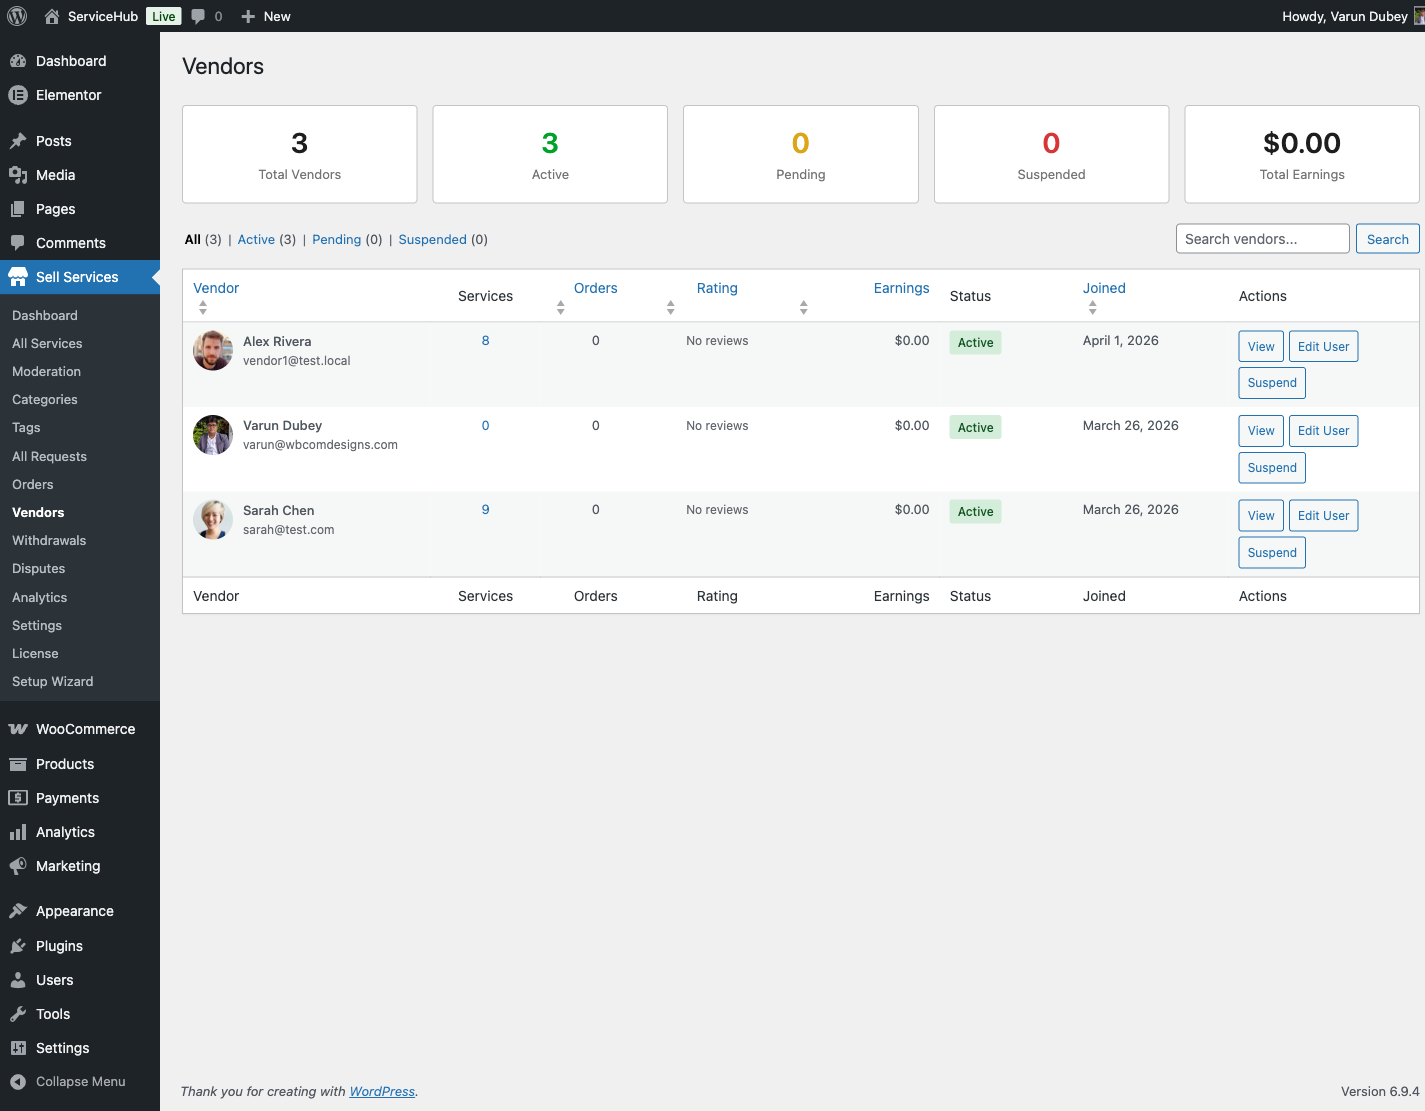
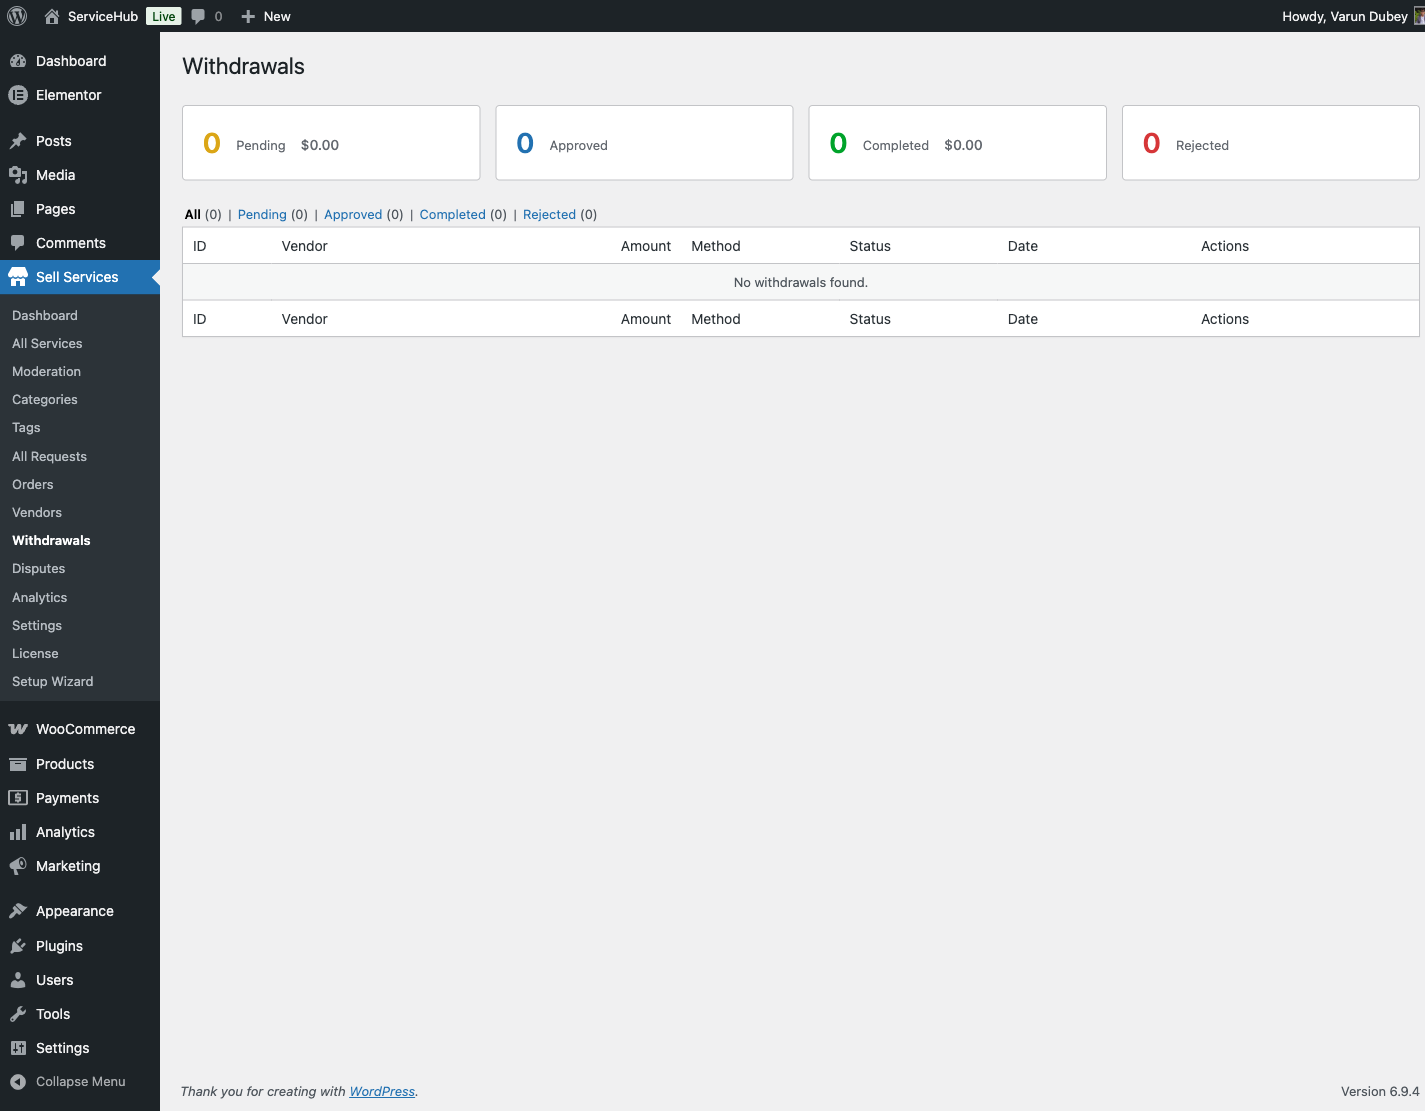
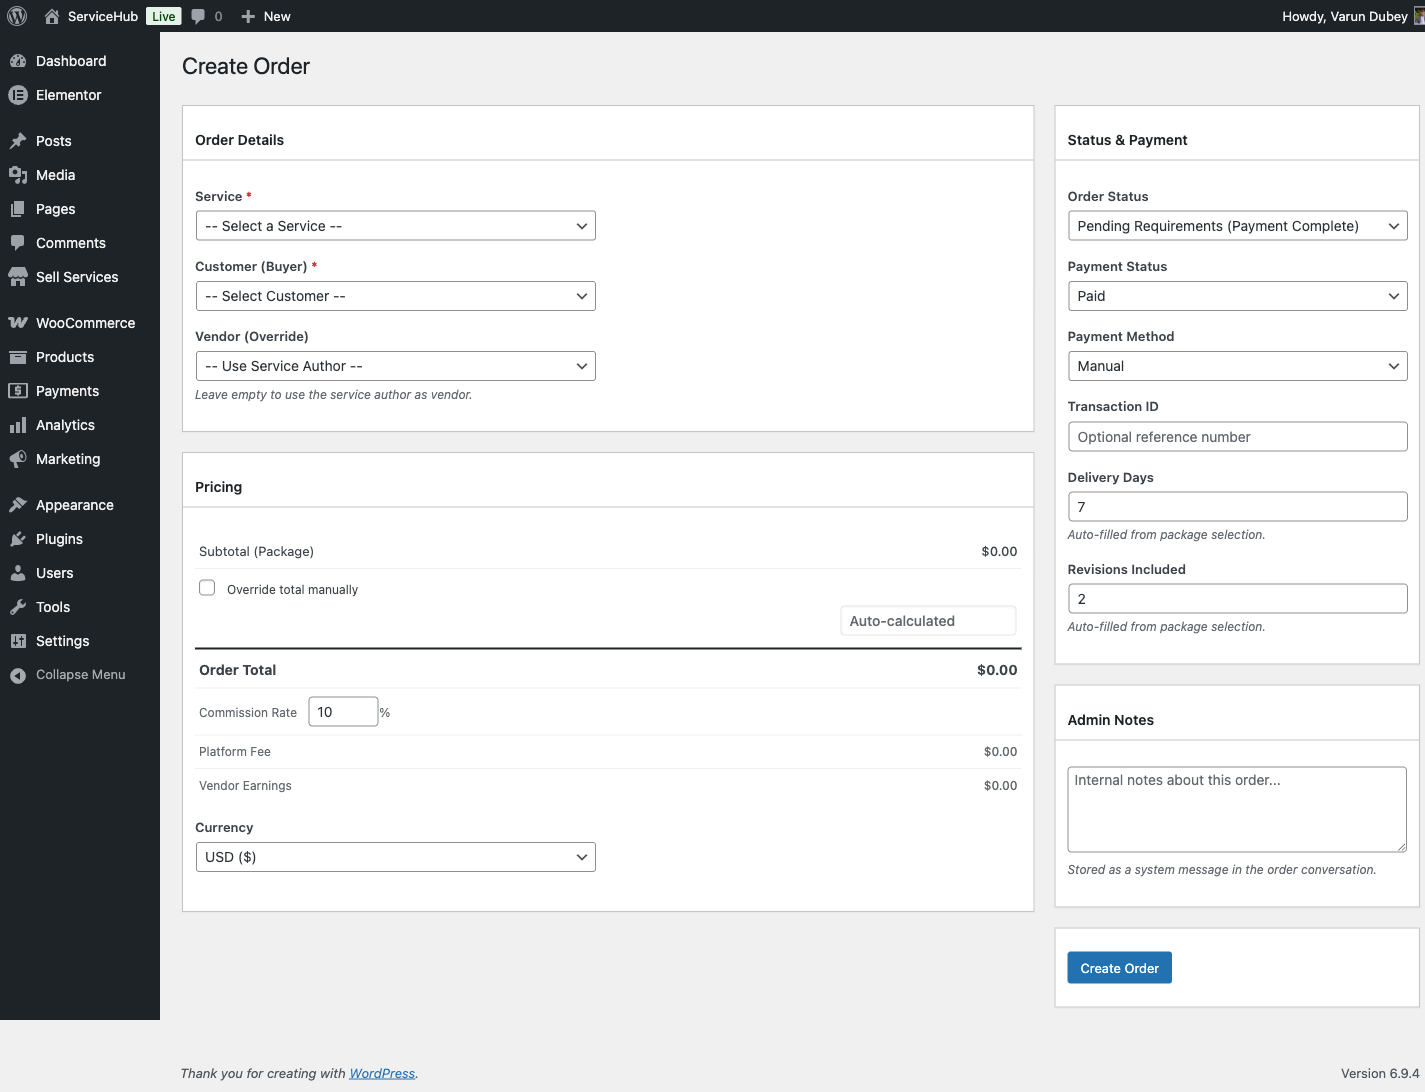
Admin tools Service moderation, vendor management, withdrawal approvals, manual orders, the guided tour
Platform settings General, Pages, Payment Gateways, Commission & Tax, Payouts, White Label [PRO], Advanced
Developer guide REST API overview, REST controller reference, hooks and filters, capabilities, database schema, template and theme integration, email customization, Action Scheduler, WP-CLI, Abilities API, Pro extension points, custom integrations

Recently closed gaps

Was missing Now at
The three money settings tabs created by the July 2026 regroup Payment Gateways, Commission & Tax, Payouts
The WooCommerce pay-order handoff, and which platforms support it WooCommerce Checkout
wpss_pay_order_url, the payment-handoff seam Hooks and Filters
Milestone failure paths, the 48-hour abandon sweep, and where lock-step is not enforced Milestone Contracts
Six live REST routes, the two-namespace split, and the real error codes REST Controllers, REST Overview

What is NOT documented

Stated plainly, because a gap you know about costs less than one you discover.

Deliberately not documented

Not covered Why
Recurring billing end to end The feature sits behind a default-off flag and is deferred. Recurring Services describes what exists; it does not walk a full subscription lifecycle, because that lifecycle is not finished. Do not plan a launch around it.
Per-jurisdiction tax The plugin has one tax rate, full stop. There is no VAT MOSS, no per-country table, no digital-services handling, so there is nothing to document. Run checkout on WooCommerce and use its tax tables if you need this.
Third-party gateway configuration We document what to paste where, not how to obtain a Stripe restricted key or a PayPal live app. Those belong to the gateway and change on their schedule, not ours.

Known gaps, not yet written

Not covered Status
A "What's New in 1.4.0" page The newest What's New page is 1.3.0. The 1.4.0 changes are in both plugins' readme.txt changelogs and in the pages they affect, but there is no single narrative page for the release yet.
A dedicated Audit Log page Sell Services > Audit Log is mentioned where it is relevant, and GET /audit-log is in the REST reference, but there is no page explaining what is recorded, retention, or how to read an entry.
The Vendors, Orders & Disputes, and Emails settings tabs These are documented by feature, not by tab: see Vendor Settings, Order Settings and Email Configuration. The Platform Settings section does not yet have a page per tab for these three, so a reader looking tab-by-tab will not find them where they expect.
Migration between e-commerce rails Switching rails is safe (past orders are never rewritten, old gateway webhooks keep working) and that is stated in the REST and WooCommerce pages, but there is no step-by-step migration guide.
Scale and performance guidance No page on running the marketplace at thousands of services, vendors or orders: no indexing notes, no caching guidance, no benchmark figures.
Multisite Neither documented nor claimed. Assume it is unsupported until it is tested.

Known product gaps that ARE documented

These are limitations of the software, not of the writing. They are called out where a reader will hit them:

  • Milestone, tip and extension payments work on Standalone and WooCommerce only. EDD, FluentCart and SureCart have no pay-order flow, so those links are a dead end there. See WooCommerce Checkout.
  • Lock-step milestone payment is a workflow rail, not a security control. It is enforced on the standalone checkout and the REST pay endpoints, but not on the WooCommerce order-pay URL. See Milestone Contracts.
  • Tips, milestone phases and paid extensions are not escrowed. They credit the vendor at payment, not at delivery. See Money Flow.
  • Stripe Connect bypasses the clearance window by paying at charge time. See Payouts Settings.

How this stays true

bin/docs-audit.py runs as a gate and fails the build on any of:

  • a page on disk that is not published, or published but missing
  • a broken image, a broken internal link, or a link that escapes the published tree
  • a hook documented in a reference table but never fired in the source
  • a Settings > X tab or Sell Services > X menu path that does not exist, across docs/website/, docs/architecture/, docs/qa/ and docs/decisions/
  • a UI label the plugin does not render

It does not, and cannot, check whether prose is true. That is what code citations and the per-release resync pass are for. If you find a page that contradicts the plugin, that is a bug worth reporting -- the last full source-to-docs resync was 2026-08-01, against 1.4.0.

Feature catalog

The canonical list of what WP Sell Services does, and which tier it is in. If a feature is not on this page, treat it as not shipping.

Version: 1.5.1 · Last verified: 2026-08-07

Free and Pro documentation both live in this folder - the Free plugin's docs/website/ is the single source of truth. There is no separate Pro docs tree.

Legend: Yes ships and is exercised · Partial ships with a stated limit · Not yet built but deliberately off.


Selling and buying

Feature Free Pro
Service listings with packages and add-ons Yes Yes
Vendor profiles, portfolios, seller levels Yes Yes
Buyer requests and vendor proposals Yes Yes
Order lifecycle with requirements, delivery, revisions Yes Yes
Order messaging Yes Yes
Reviews and ratings Yes Yes
Disputes with frontend messaging Yes Yes
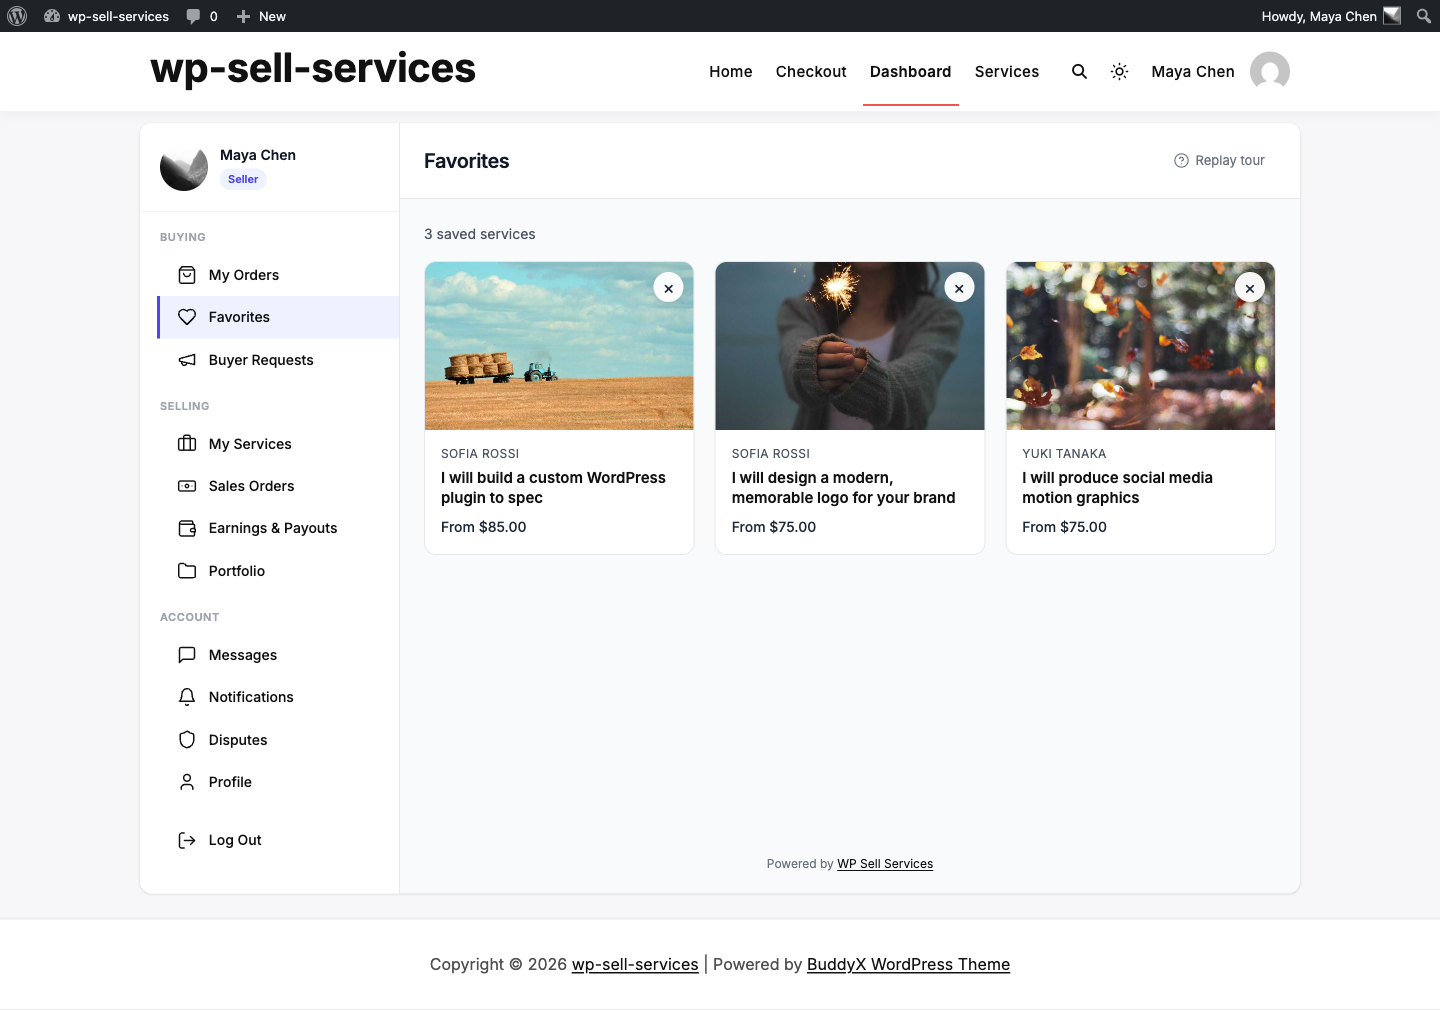
Favourites Yes Yes
Services per vendor Limited Unlimited

Money

Feature Free Pro
Standalone checkout (no other plugin needed) Yes Yes
Payment gateways Stripe, PayPal, Offline + Razorpay
Ecommerce integrations - WooCommerce, EDD, FluentCart, SureCart
Commission, per-vendor rates Yes + tiered rules
Vendor wallet and withdrawals Yes + TeraWallet, WooWallet, MyCred
Manual payouts (mark paid, CSV export) Yes Yes
Stripe Connect automated payouts - Yes
PayPal Payouts batches - Yes
Tips Yes Yes
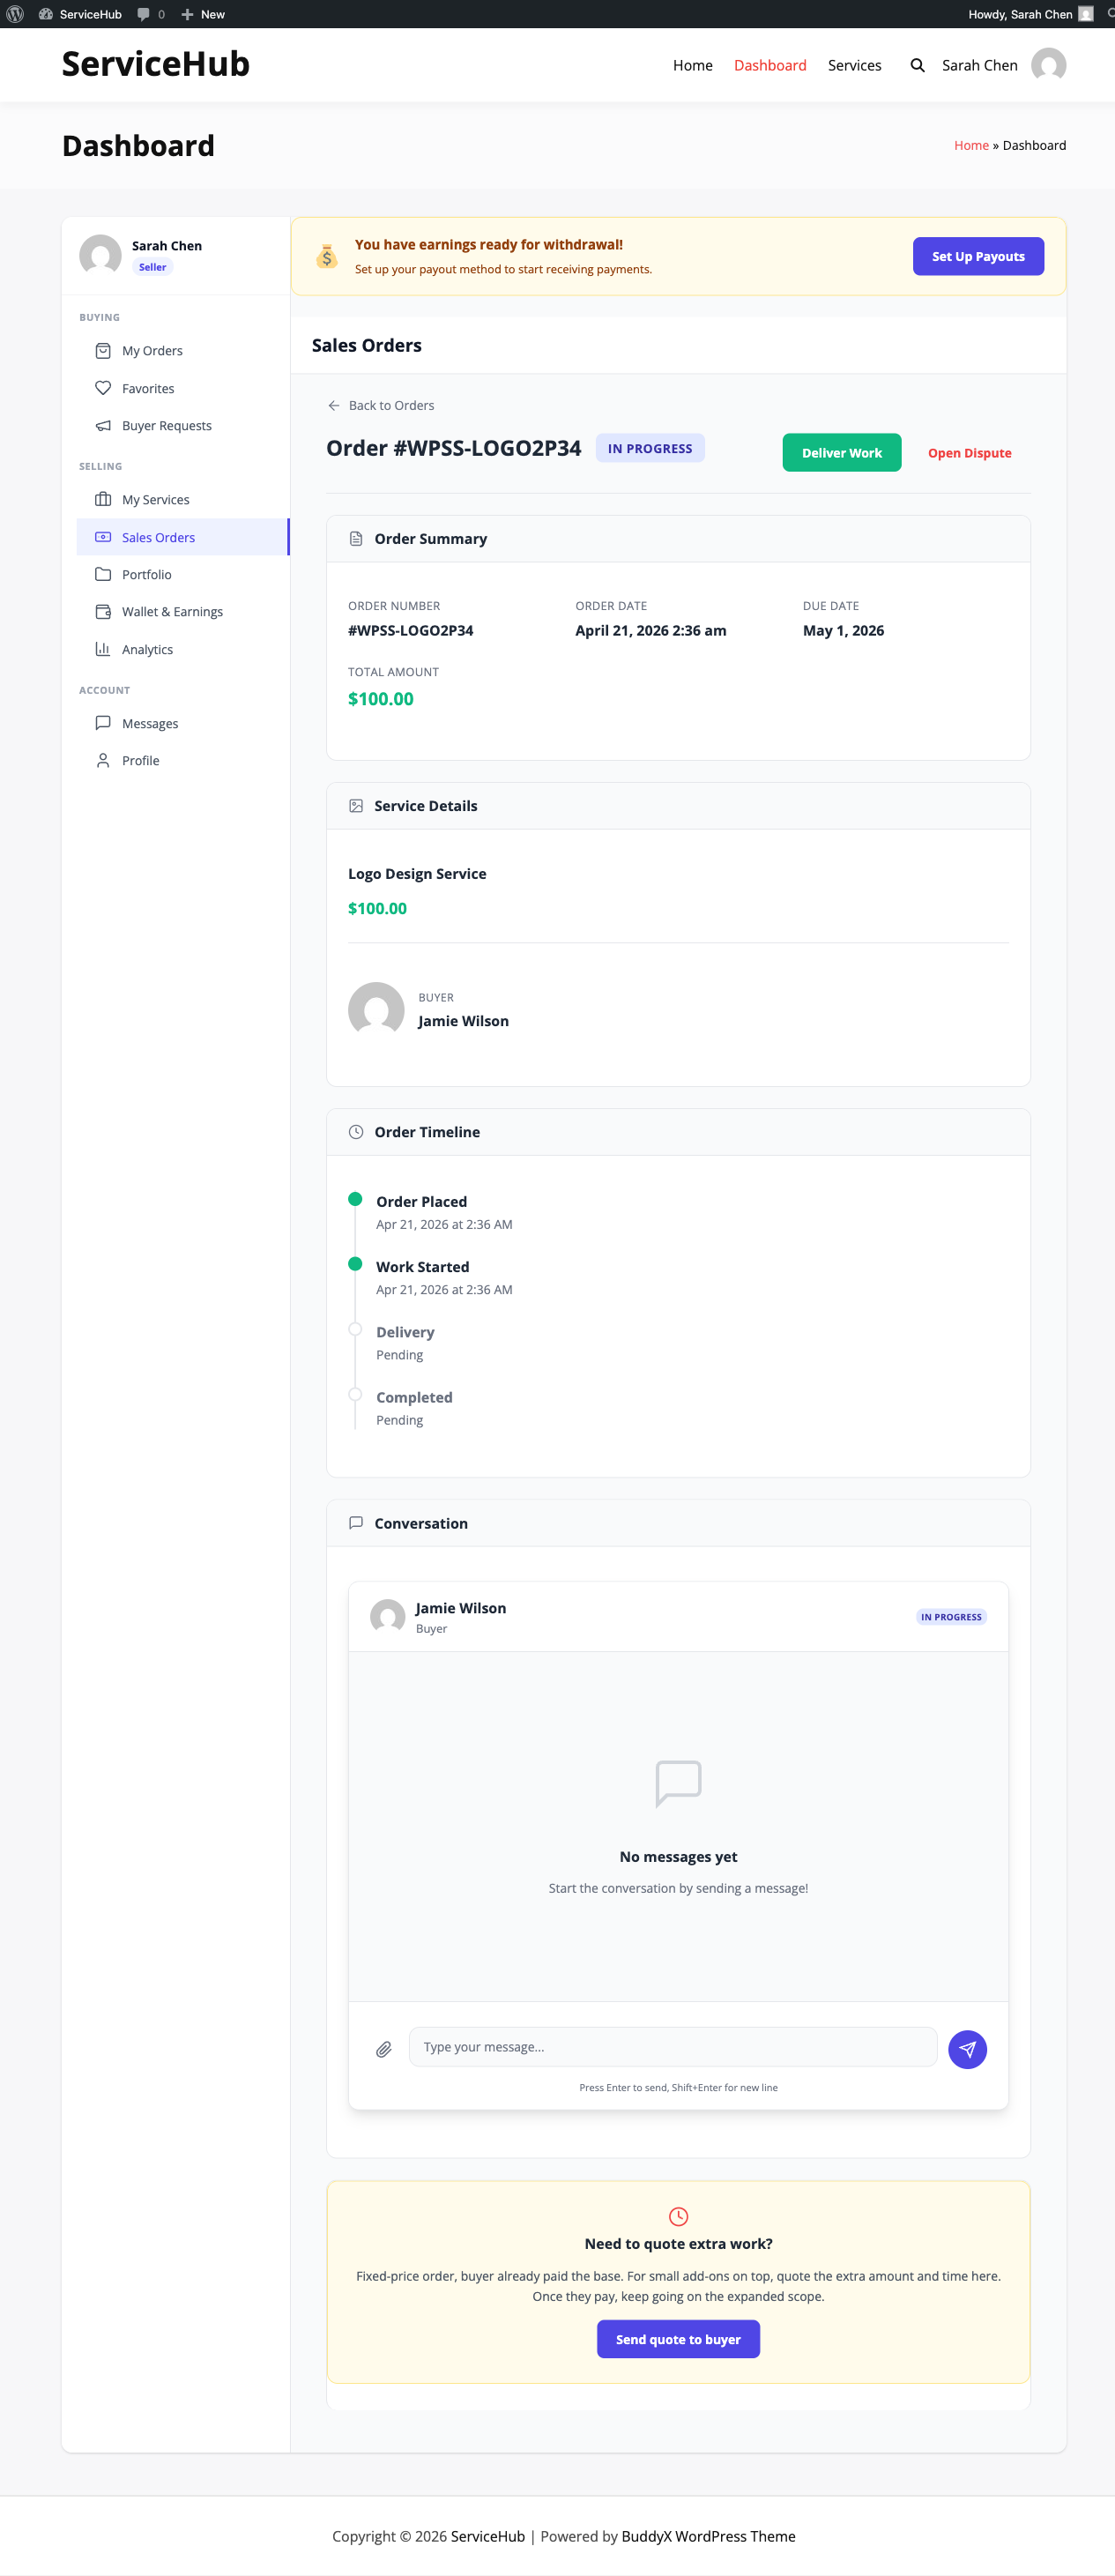
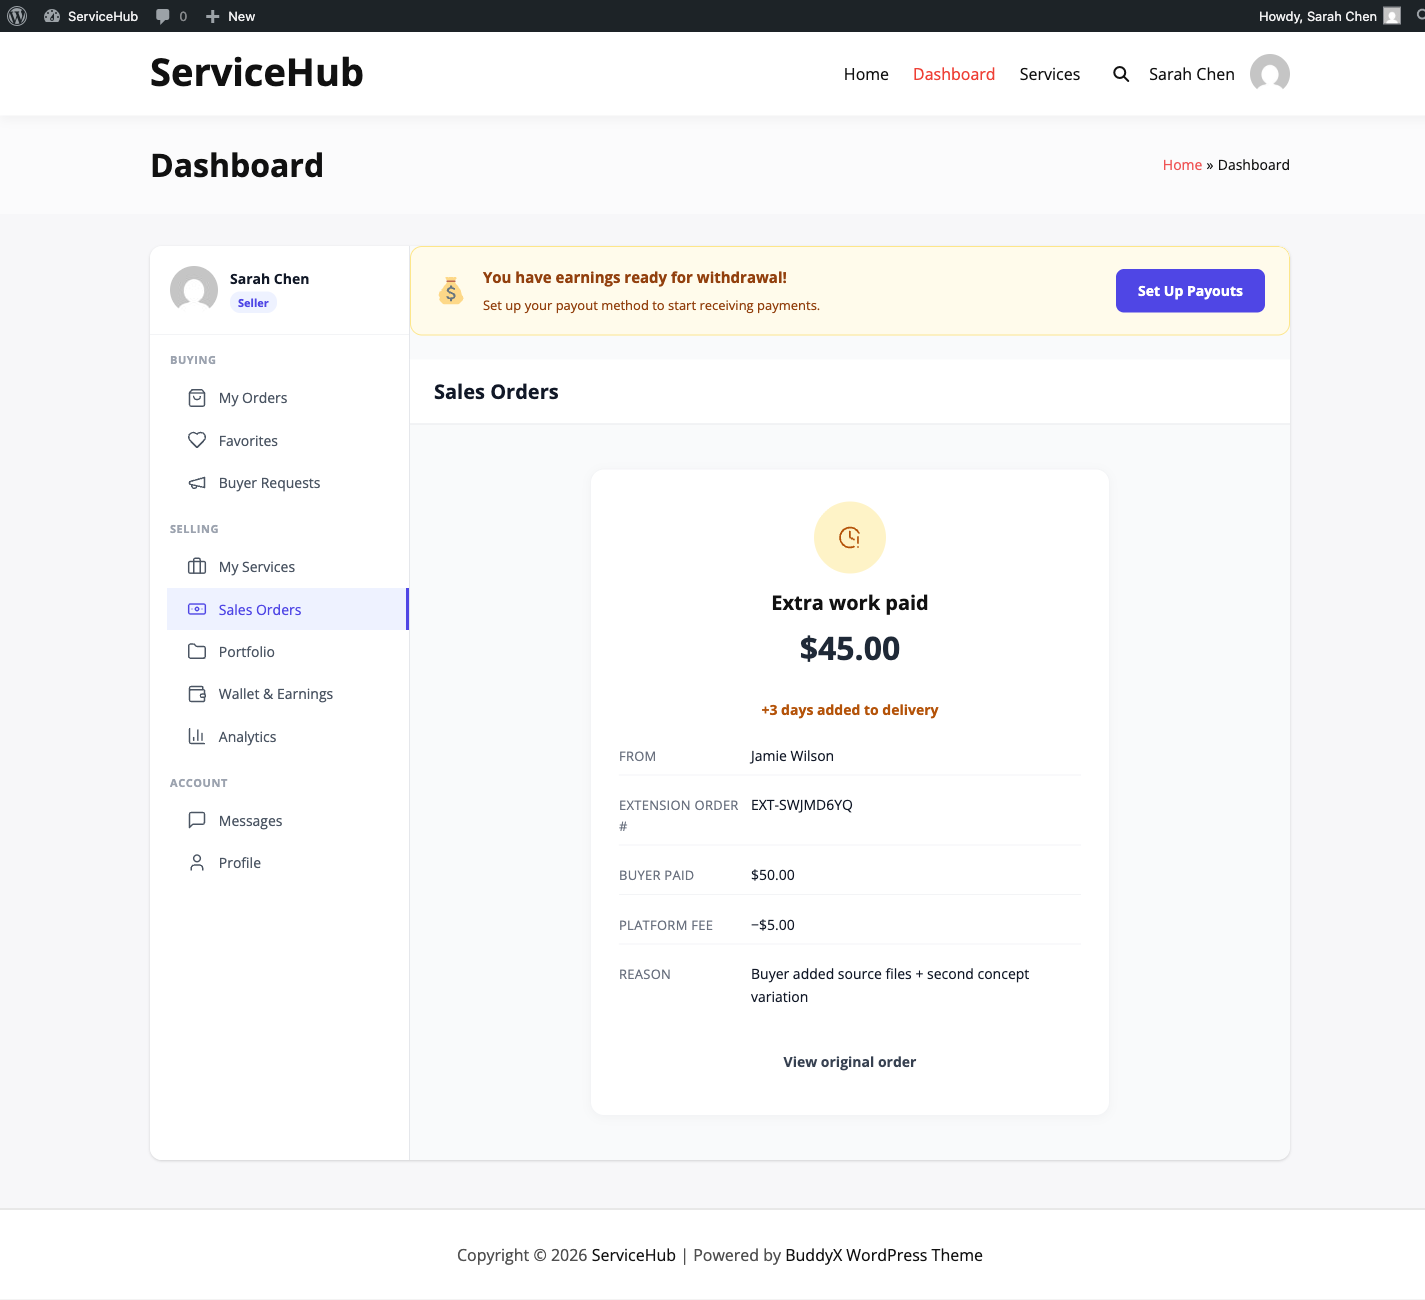
Paid extensions on catalog orders Yes Yes
Milestone contracts on buyer-request orders Yes Yes
Refunds, including partial Yes Yes
Display currency (approximate price in the shopper's currency) - Yes

Paying a single existing amount - a tip, a milestone phase, a paid extension - is supported on Standalone and WooCommerce. If your marketplace needs those, run it on one of those two.

Display currency is presentation only. The shopper's currency is detected from their timezone and shown as an approximate figure beside the real price; every order, payout and refund is still settled in your base currency, and the charge currency is stated at checkout. It is not multi-currency settlement.

Marketplace surfaces

Feature Free Pro
Frontend dashboard (buyer + vendor) Yes Yes
Role-based dashboard sections Yes Yes
Dark mode and theme integration Yes Yes
Gutenberg blocks and shortcodes Yes Yes
Email notifications Yes + white-label branding
In-app notifications Yes Yes
Realtime messaging (Pusher-protocol) Yes Yes

Operations

Feature Free Pro
Admin order, vendor, dispute, withdrawal management Yes Yes
Moderation queues Yes Yes
Analytics Basic stats Full dashboards with export
File storage Your server + S3, Google Cloud, DigitalOcean Spaces
Audit log Yes Yes
REST API Yes Yes
WP-CLI Yes Yes

Not shipping yet

Feature Status
Recurring / subscription billing for services Not yet. Present in Pro behind a default-off flag with its UI hidden in 1.3.x. Do not buy Pro for recurring billing. See Recurring Services.

How this page is maintained

Entries are added only after the feature has been exercised, not when the code lands. A row here is a promise; an owner reads it before buying.

Related: Free vs Pro · Capabilities · audit/FEATURE_AUDIT.md for the developer-side inventory.

Buyer Guide

How to Find and Purchase a Service

This guide walks you through the complete buying experience -- from discovering a service to placing your order and getting started with your vendor.

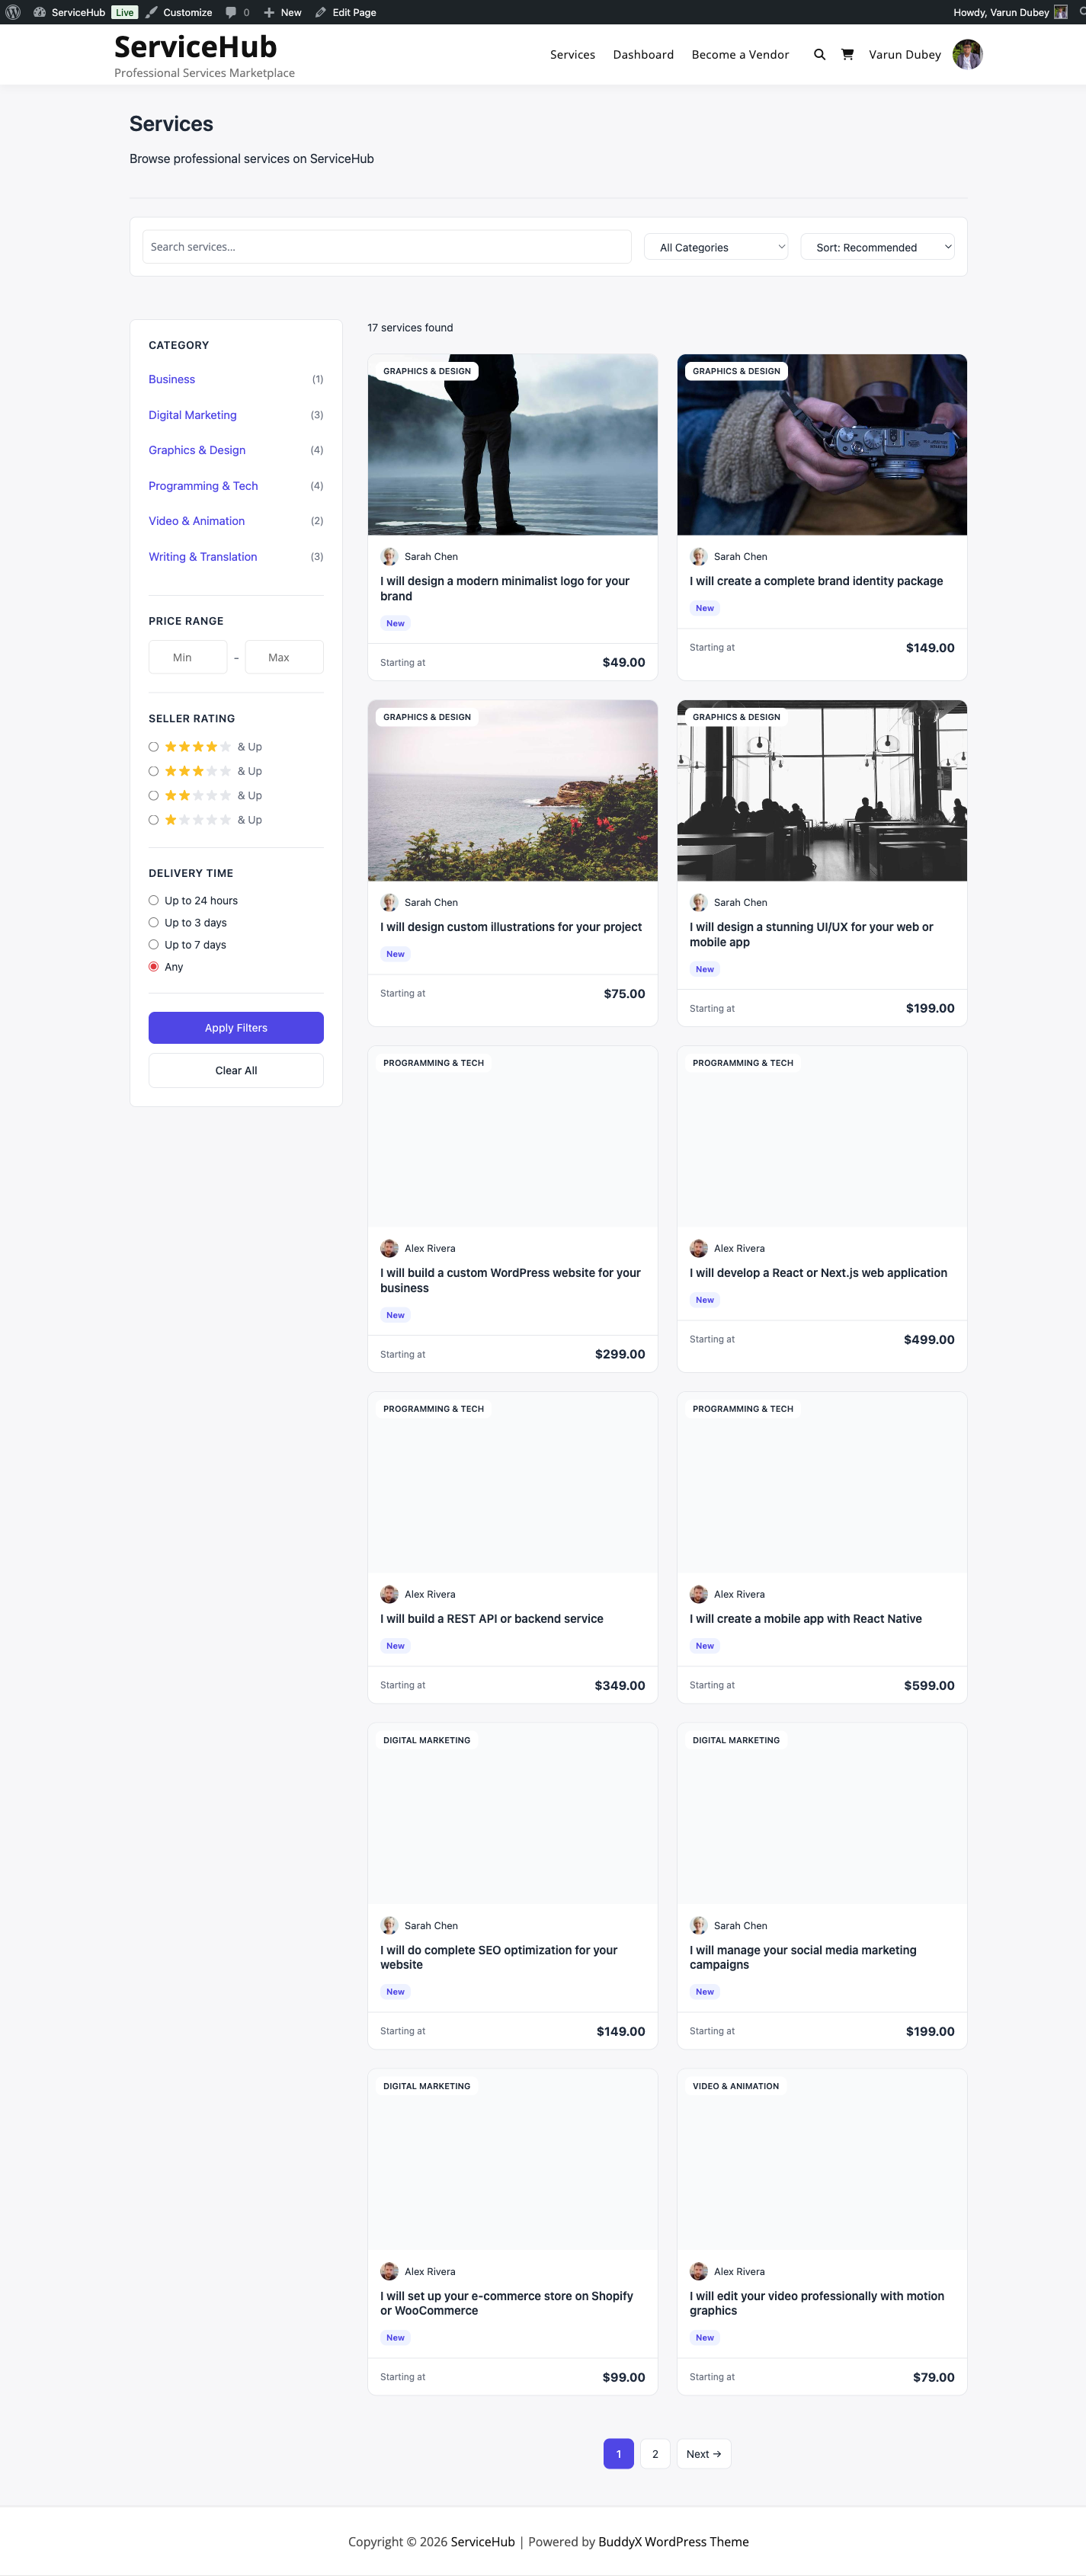
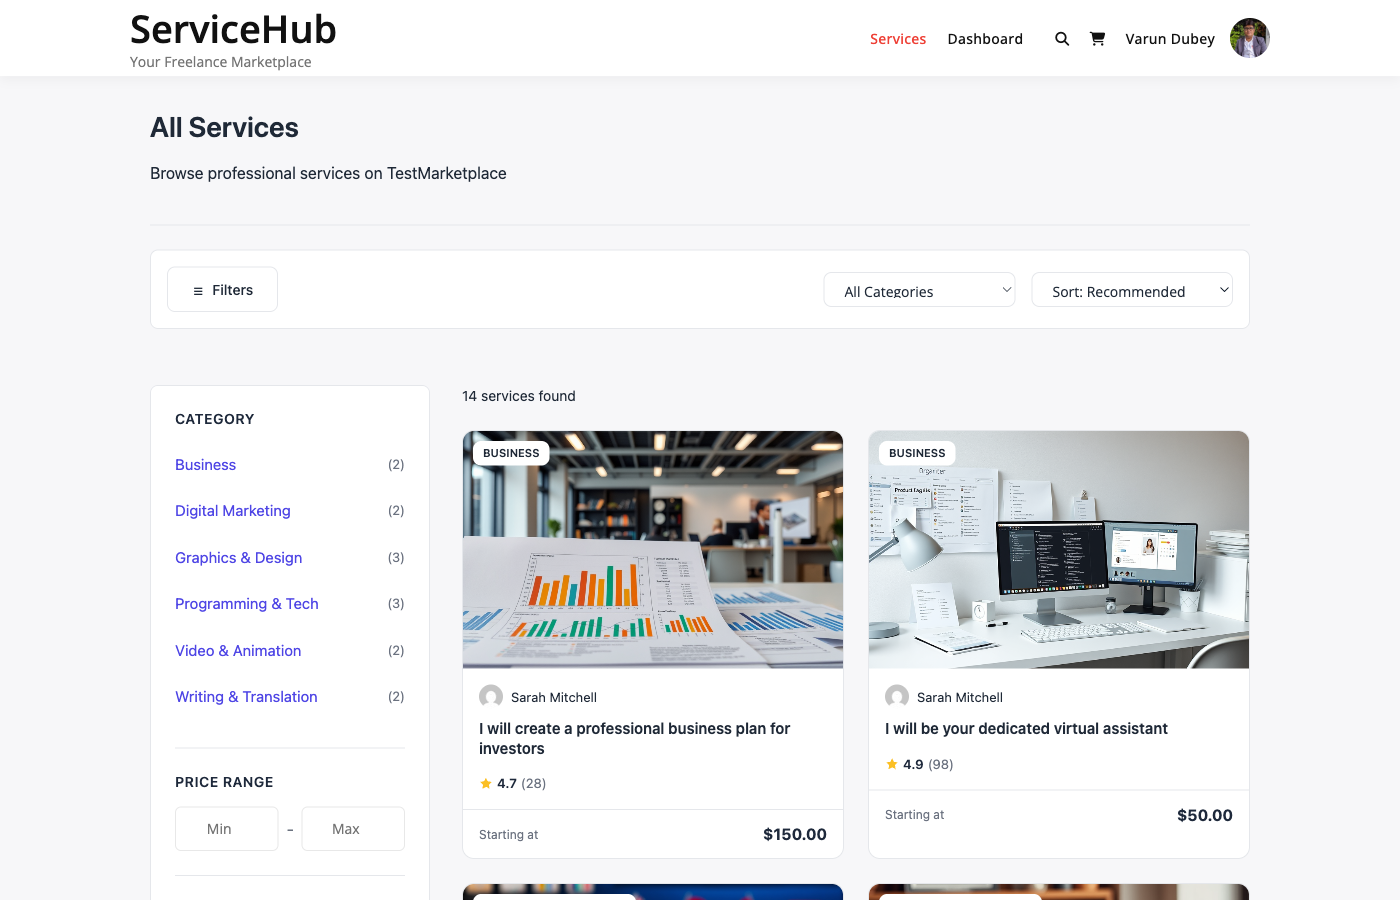
Services catalog with search and filters

Step 1: Browse the Marketplace

Visit the Services page to see all available services. You have several ways to find what you need:

Search by Keyword

Type what you are looking for into the search bar at the top of the page. The search checks service titles, descriptions, and excerpts.

Examples: "logo design," "WordPress development," "SEO audit"

Filter by Category

Use the category dropdown or click a category on the category grid to narrow results. Only categories with published services are shown.

Sort Results

Use the sort dropdown to reorder results:

Sort Option Best For
Newest Discovering fresh services
Price (low to high) Finding affordable options
Price (high to low) Finding premium services
Top Rated Finding proven vendors
Most Popular Finding best sellers

Browse Vendor Profiles

Click on any vendor name or avatar to see their full profile, including their bio, portfolio, ratings, seller level, and all their services.


Step 2: Explore a Service

Click on any service card to open its detail page. Here is what you will find:

A photo and video gallery showing examples of the vendor's work. Scroll through images to get a visual sense of quality.

Description

The vendor's detailed explanation of what they offer, their process, and what makes their service unique.

Packages

Every service offers up to 3 pricing tiers -- Basic, Standard, and Premium. Each package shows:

  • Price -- clearly displayed at the top
  • Delivery time -- how many days the vendor needs
  • Revisions included -- how many rounds of changes you get
  • Feature checklist -- specific deliverables included or excluded

Use the tabs to switch between packages and compare what each tier includes. See Choosing the Right Package for detailed guidance.

Add-ons

Some services offer optional extras you can add to any package. These appear below the package details with their own prices. Common add-ons include faster delivery, extra revisions, or additional deliverables.

FAQs

Vendors often include answers to common questions about their service. Check this section before messaging -- your question may already be answered.

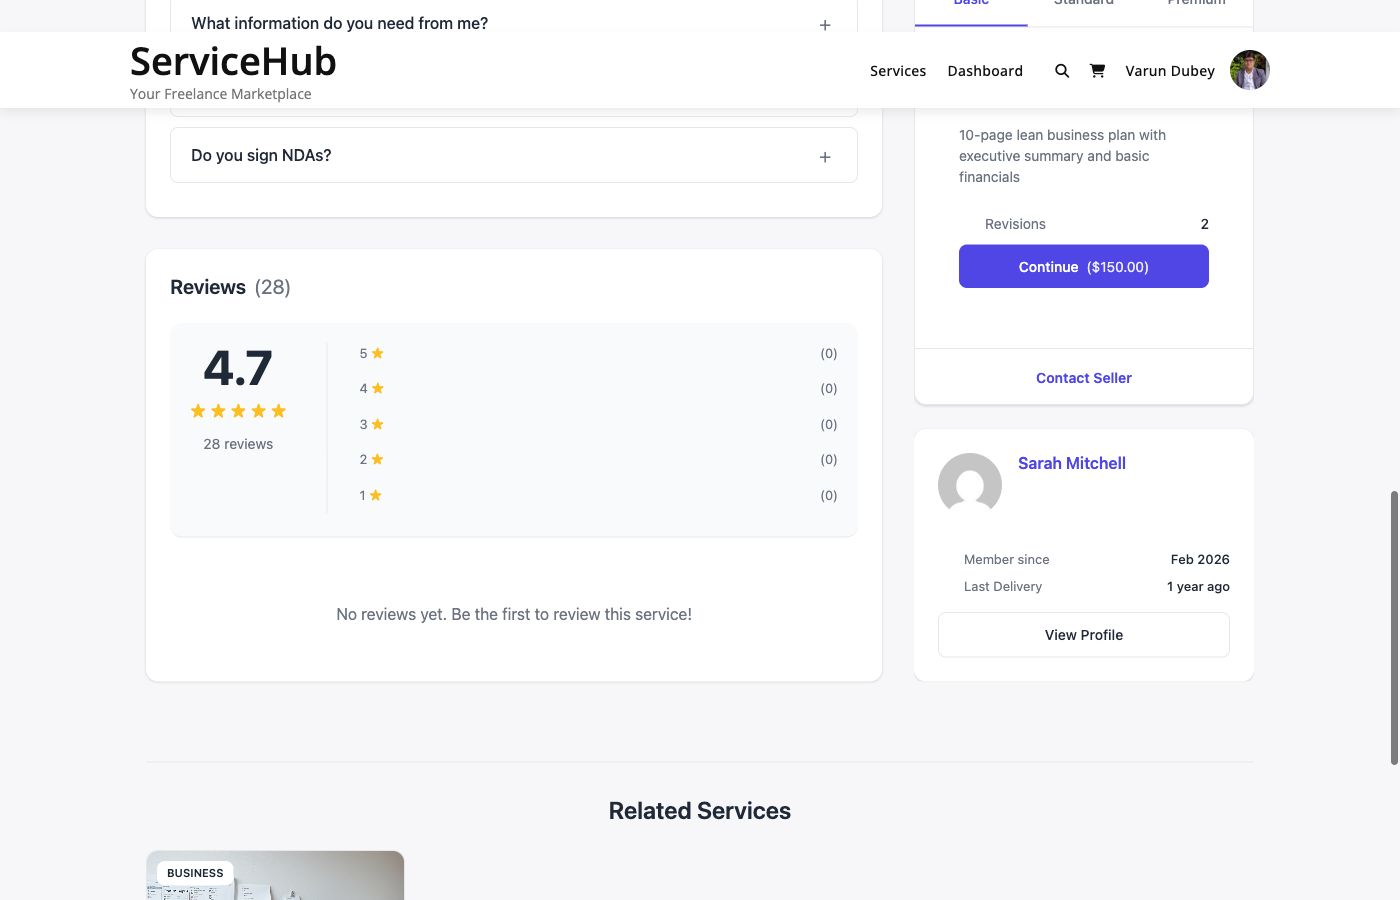
Reviews

Scroll down to see ratings and reviews from previous buyers. Each review includes a star rating, written feedback, and the buyer's name. Look for the Verified Purchase badge to confirm the reviewer actually bought the service.

Vendor Info

A sidebar card shows the vendor's profile summary -- their avatar, rating, response time, seller level, and total completed orders.


Step 3: Select a Package

Once you have found a service you want:

  1. Choose your package -- Click the tab for Basic, Standard, or Premium
  2. Review the details -- Check delivery time, revisions, and features
  3. Add any extras -- Select optional add-ons if offered
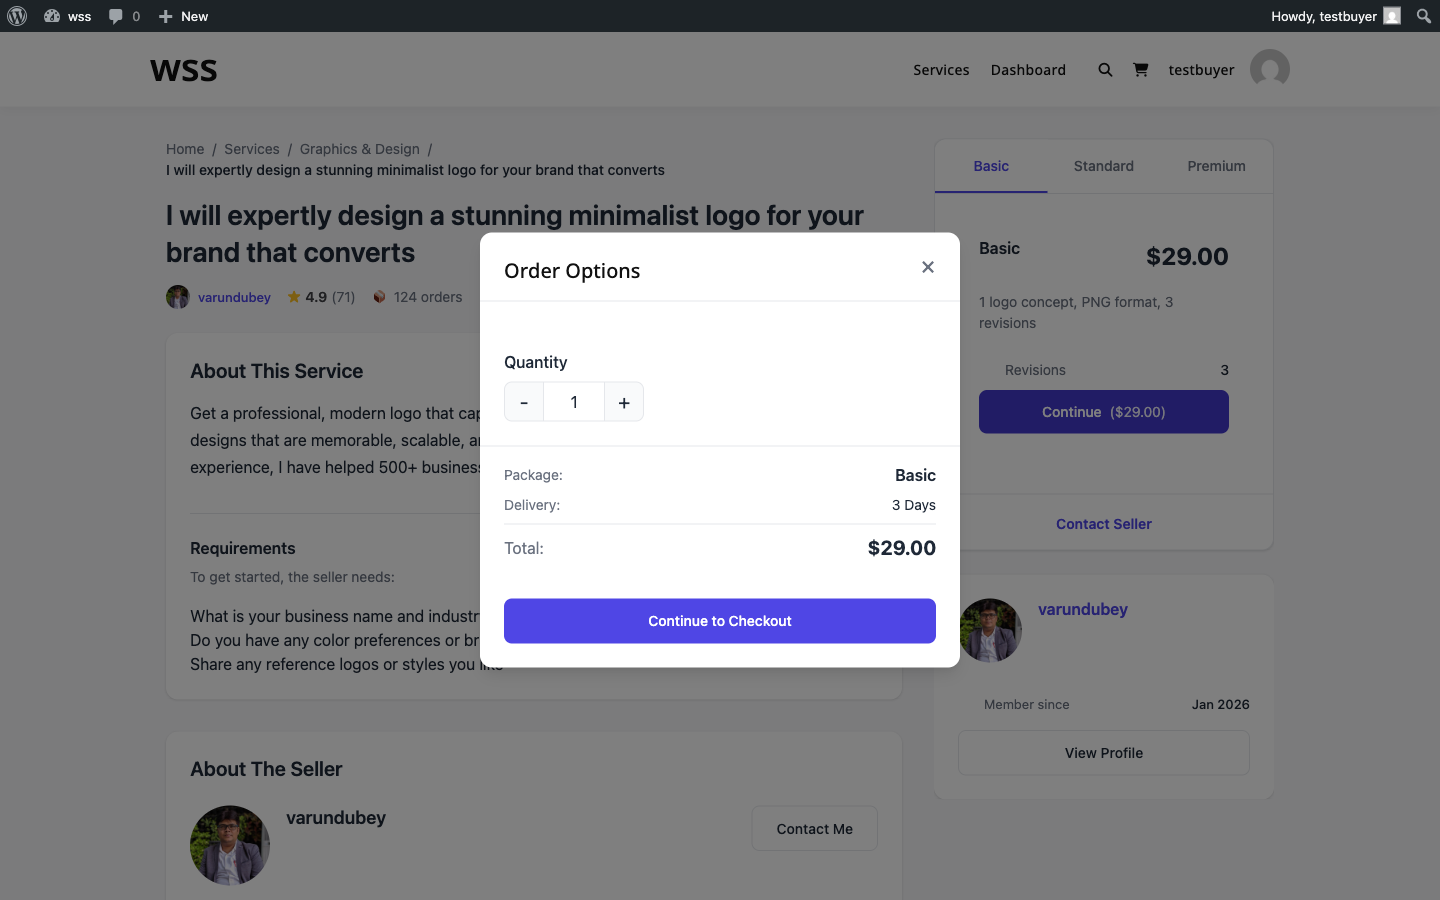
  4. Click "Continue" -- This adds the service to your cart

The button shows the total price including your selected package and any add-ons.

Tip: You can add services from multiple vendors to your cart. Each one becomes a separate order with its own delivery tracking.


Step 4: Review Your Cart

The cart page shows everything you are about to purchase:

  • Service name and selected package for each item
  • Add-ons you selected (if any)
  • Individual prices and the order total
  • Tax (if the marketplace charges it)

You can remove items from your cart or go back to add more services before proceeding.


Step 5: Complete Checkout

Click Proceed to Checkout to reach the checkout page.

Billing Details

Fill in your name and email address. The marketplace needs these to create your account (if you do not have one) and send order notifications.

Order Summary

Review your items one final time. The breakdown shows package price, add-ons, tax (if applicable), and the total amount.

Choose Payment Method

Select how you want to pay from the available gateways:

Payment Method How It Works
Stripe Pay with credit/debit card, Apple Pay, or Google Pay
PayPal Pay with your PayPal balance, linked card, or Venmo
Offline / Bank Transfer Transfer funds manually; the marketplace owner confirms receipt
Razorpay [PRO] UPI, cards, net banking, wallets (popular in India)

Place Your Order

Click Place Order to complete payment. You will see a confirmation page with your order number.


Step 6: What Happens Next

After your order is placed:

  1. You receive a confirmation email with your order number and details
  2. The vendor is notified about the new order
  3. You are asked to submit requirements -- project details the vendor needs to start working (budget, preferences, files, etc.)
  4. The vendor begins work once your requirements are submitted
  5. Track progress from your Dashboard under My Orders

If the service has requirements, submit them as soon as possible. The vendor cannot start until they have your project details. The system sends you reminders on day 1, 3, and 5 if you have not submitted yet.


Quick Tips for Buyers

  • Compare packages before choosing -- the Standard tier is often the best value
  • Read reviews to understand what previous buyers experienced
  • Check delivery time to make sure it fits your timeline
  • Submit requirements promptly so the vendor can start right away
  • Use the messaging system to clarify anything before or during the order

Choosing the Right Package

Every service on the marketplace offers up to three pricing tiers -- Basic, Standard, and Premium. This guide helps you understand the differences and pick the package that fits your needs and budget.

Package comparison on a service page

How Packages Work

Vendors structure their services into tiers so you can choose the level of service that matches your project. Think of it like ordering a coffee -- small, medium, or large -- each with progressively more included.

Tier What to Expect
Basic The essentials at the lowest price. Good for simple projects or trying a vendor for the first time.
Standard The most popular choice. Includes more deliverables, faster delivery, or extra revisions. Usually the best value for money.
Premium The full package. Everything included, often with the fastest delivery and unlimited revisions. Best for important or complex projects.

Not every service has all three tiers. Some vendors only offer Basic, or Basic and Standard. The available packages are shown as tabs on the service page.


What to Compare

When switching between package tabs, pay attention to these four things:

1. Price

The price is shown prominently at the top of each package. Consider what you get for the difference in cost. If Standard is only 50% more than Basic but includes twice as many deliverables, that is usually the better deal.

2. Delivery Time

Each package has its own delivery timeline. A Basic package might take 7 days while Premium takes 3. If you are on a tight deadline, a higher tier with faster delivery could save you from needing to request an extension later.

3. Revisions Included

This is the number of times you can ask the vendor to make changes after delivery. Packages with more revisions give you more flexibility to refine the final result.

Revisions What It Means
0 The vendor delivers once. No changes included (you can still communicate during the order).
1-2 One or two rounds of feedback and adjustments. Good for straightforward projects.
3-5 Multiple revision rounds. Better for design work or projects where preferences are subjective.
Unlimited As many revisions as you need. Ideal for brand-critical work.

4. Features Checklist

Each package lists specific deliverables. Features included in the package show a checkmark, and features not included show an X. Scan this list carefully -- the difference between tiers is often a few key features.

Example (Logo Design):

Feature Basic Standard Premium
Logo concepts 1 3 5
Revisions 1 3 Unlimited
Source files -- Included Included
Brand guidelines -- -- Included
Social media kit -- -- Included

Add-ons: Extra Options

Some services offer add-ons -- optional extras you can attach to any package. Common add-ons include:

  • Extra-fast delivery -- Get your order sooner for an additional fee
  • Additional revisions -- More rounds of changes beyond what the package includes
  • Extra deliverables -- More concepts, pages, words, or other units of work
  • Source files -- Raw/editable files (if not included in your chosen package)

Add-ons are listed below the package details. Check the ones you want before clicking "Continue" -- their price is added to the package price to form your total.


How the Total Is Calculated

Your order total is straightforward:

Package price + Add-on prices + Tax (if applicable) = Total

Example:

  • Standard package: $150
  • Extra-fast delivery add-on: $30
  • Tax (10%): $18
  • Total: $198

The total is shown on the "Continue" button and again at checkout before you confirm.


Which Package Should You Choose?

Choose Basic if:

  • You have a simple, well-defined project
  • You want to test a vendor's quality before committing to more
  • Budget is your primary concern
  • You do not need revisions or premium features

Choose Standard if:

  • You want the best balance of quality and price
  • Your project has moderate complexity
  • You want a few revision rounds for comfort
  • You are looking for the "recommended" option (most vendors optimize Standard for value)

Choose Premium if:

  • Your project is complex or high-stakes
  • You need the fastest turnaround
  • You want unlimited revisions or the most comprehensive deliverables
  • This is a brand-critical project where quality matters more than cost

Still Not Sure?

If you cannot decide between packages, try these approaches:

  1. Message the vendor -- Use the contact button on their profile to ask which package fits your project. Good vendors will give you honest advice.
  2. Read reviews -- See what packages other buyers chose and what they thought of the results.
  3. Start with Standard -- When in doubt, the middle tier is designed to be the best value for most buyers.
  4. Post a buyer request -- Describe your project and let vendors come to you with proposals. They will recommend the right scope and pricing.

Buyer Dashboard

Your dashboard is the central hub for managing everything you do on the marketplace -- tracking orders, communicating with vendors, managing buyer requests, and updating your profile.

Dashboard overview

Accessing the Dashboard

Click the Dashboard link in your site's navigation menu, or go directly to the dashboard page URL. If you are not logged in, you will be prompted to sign in first.


Dashboard Sections

The sidebar on the left shows your available sections. As a buyer, you will see:

My Orders

This is where you track every service you have purchased. Each order shows:

  • Order number -- A unique identifier (e.g., #1042)
  • Service name -- What you bought
  • Vendor -- Who is doing the work
  • Status -- Where the order is in its lifecycle (see Order Tracking)
  • Total -- How much you paid
  • Date -- When you placed the order

Filter your orders by status to quickly find what you need:

  • Active -- Orders currently in progress
  • Completed -- Finished orders
  • Cancelled -- Orders that were stopped

Click any order to open its detail page, where you can view requirements, messages, deliveries, and take actions like accepting a delivery or requesting a revision.

Buyer Requests

Post what you need and let vendors come to you. This section lets you:

  • Post a new request -- Describe your project, set a budget and deadline
  • View your active requests -- See which requests are open and receiving proposals
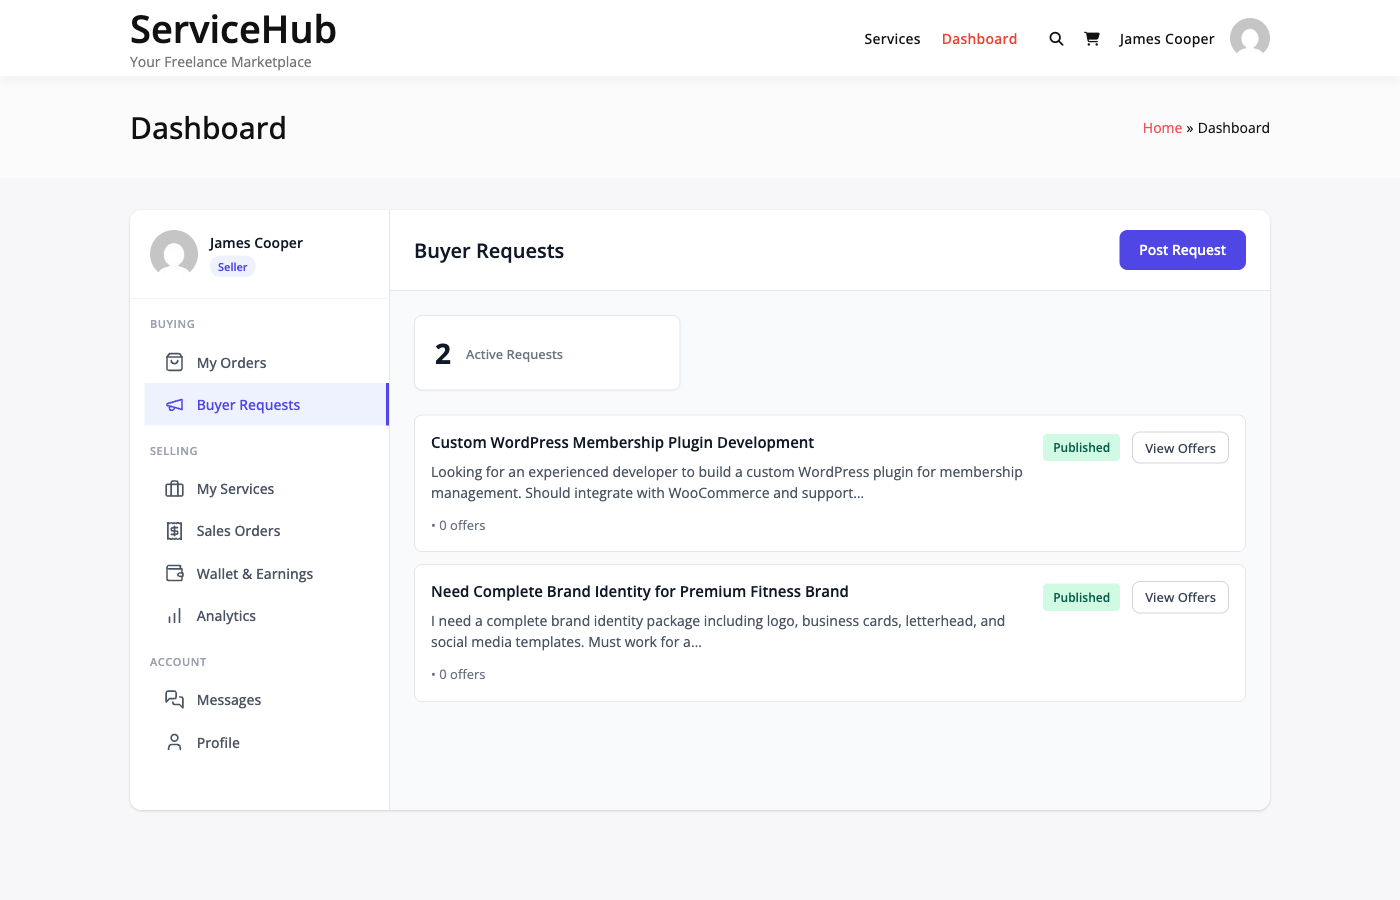
  • Review proposals -- Compare vendor proposals, see their ratings and pricing, and accept the one you like
  • Manage expired requests -- Repost or close old requests

See Posting a Buyer Request for a step-by-step guide.

Messages

All your order conversations in one place. Each order has its own conversation thread so context stays organized.

From here you can:

  • See which conversations have unread messages
  • Switch between order conversations
  • Send text messages and attach files (images, documents, archives)
  • View the full conversation history for any order

Messages are the primary way to communicate with vendors during an order. Use them to clarify requirements, ask questions, or provide feedback.

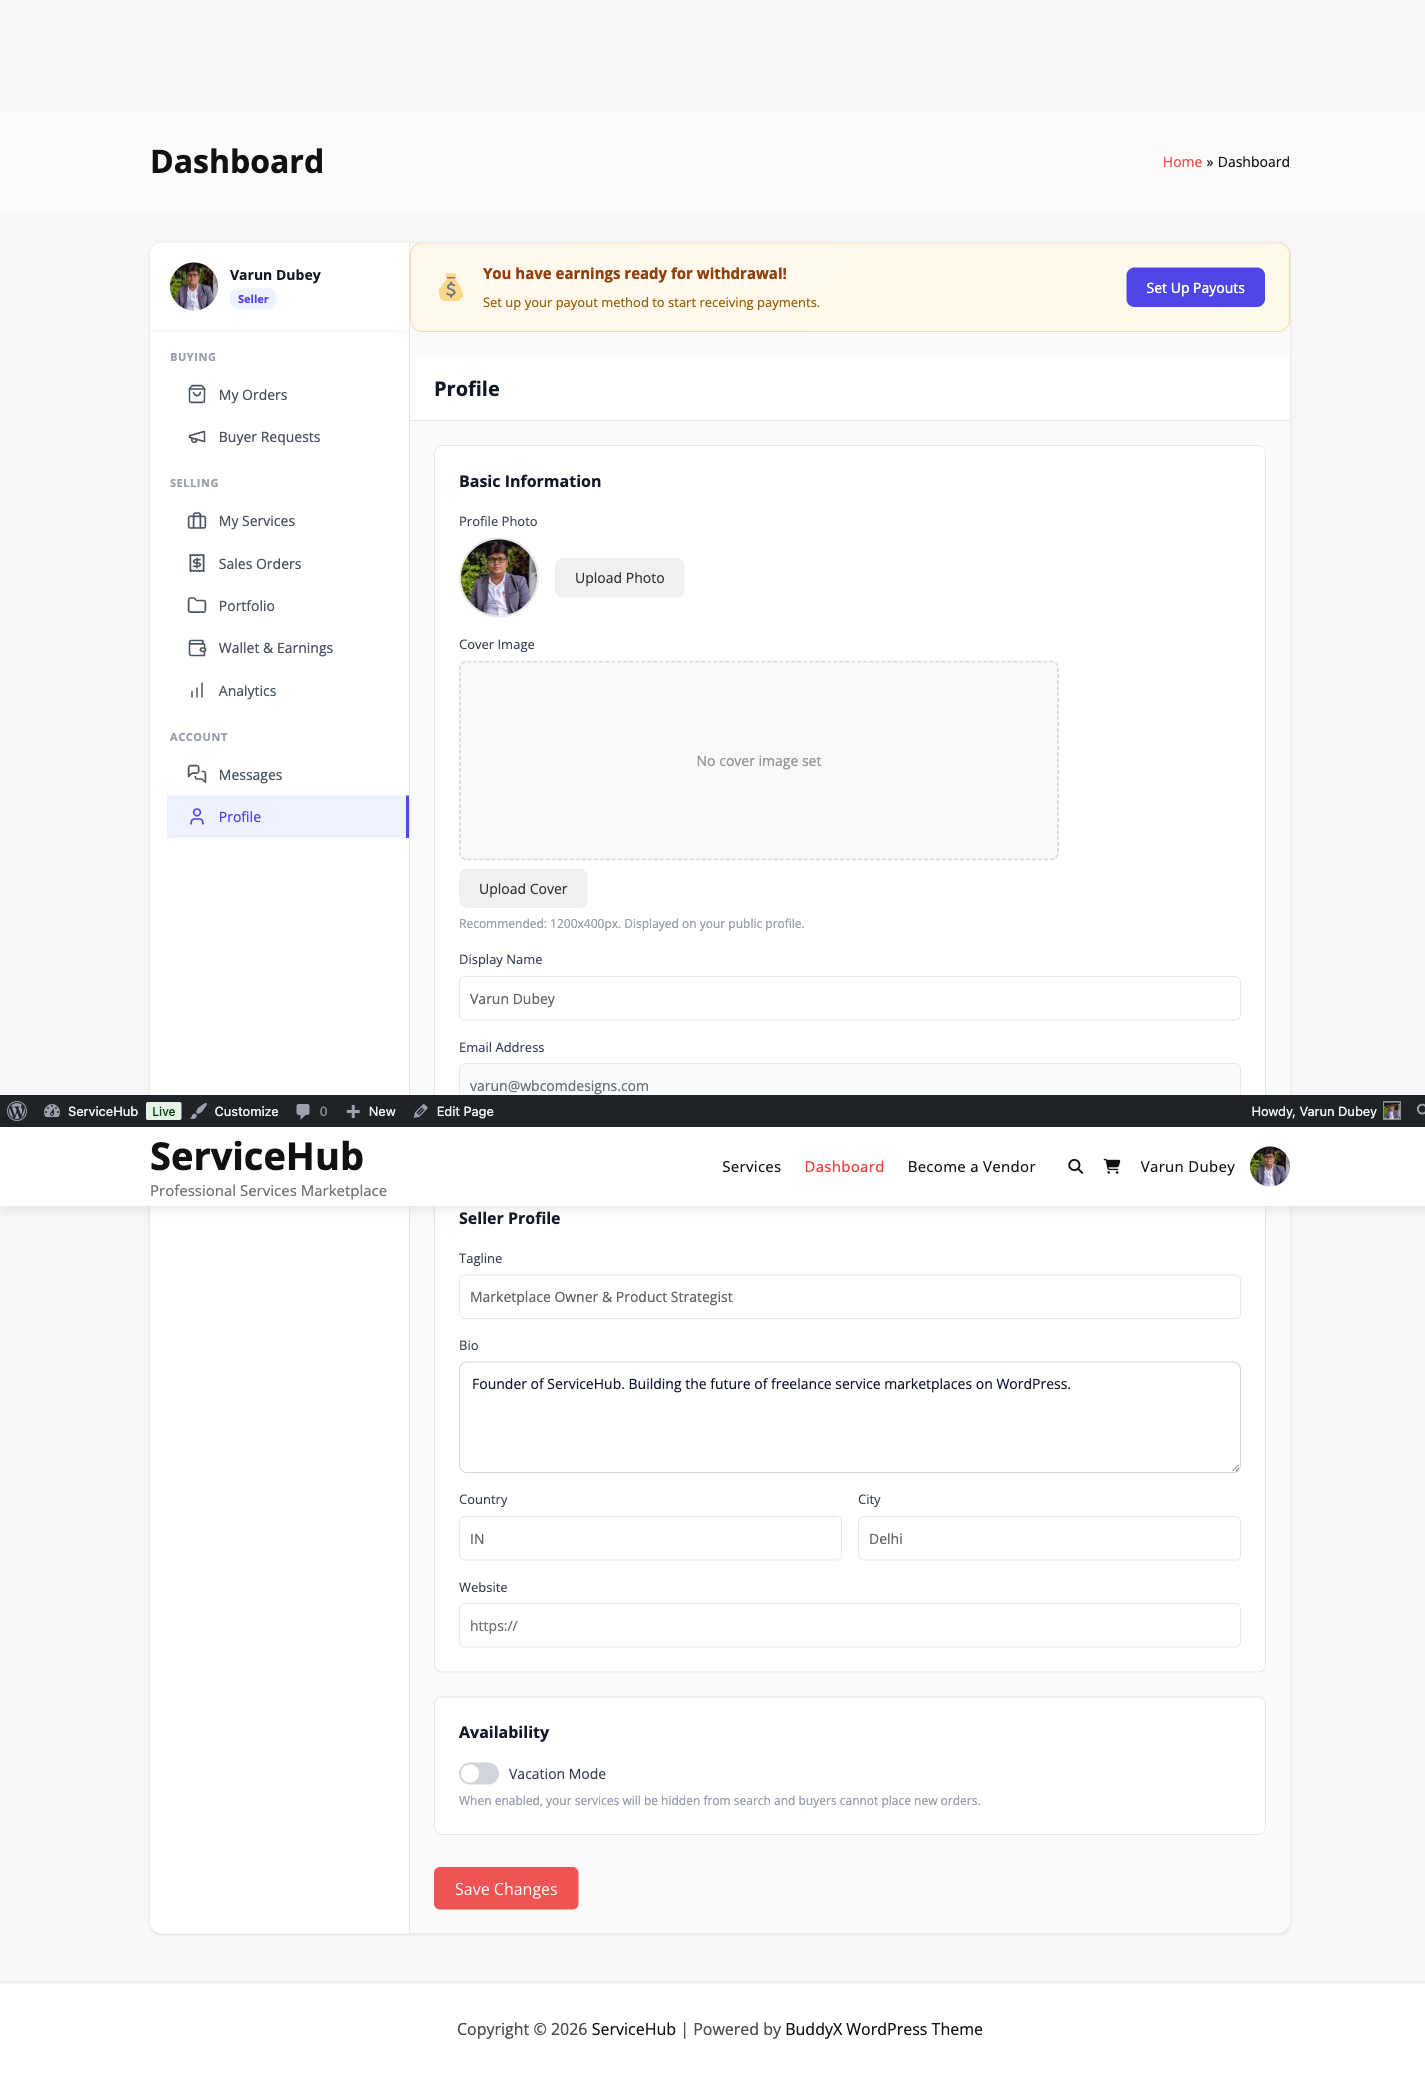
Profile

Update your account information:

  • Display name -- How vendors see you
  • Avatar -- Your profile picture
  • Bio -- A short description about yourself
  • Contact details -- Email and other info

Becoming a Vendor

If you are currently only a buyer and want to start selling services too, look for the Start Selling button in the sidebar. Clicking it registers you as a vendor (subject to the marketplace's registration mode).

Once approved, additional sections appear in your sidebar:

  • My Services -- Create and manage service listings
  • Sales Orders -- Handle incoming orders from buyers
  • Earnings -- Track revenue and request withdrawals
  • Portfolio -- Showcase your work
  • Analytics [PRO] -- Sales performance data

Your buying sections remain unchanged -- you can both buy and sell on the same account.


The dashboard sidebar groups sections logically:

Group Sections
Buying My Orders, Buyer Requests
Selling (vendors only) My Services, Sales Orders, Earnings, Portfolio
Account Messages, Profile

Your avatar and name appear at the top of the sidebar. If you are a vendor, a "Seller" badge appears next to your name along with your seller level.


Responsive Design

The dashboard adapts to your device:

  • Desktop -- Full sidebar visible alongside content
  • Tablet -- Sidebar slides in and out with a toggle
  • Mobile -- Hamburger menu for compact navigation

Each section has its own URL (e.g., /dashboard/?section=orders), so you can bookmark the ones you use most.


Quick Tips

  • Check your dashboard daily during active orders so you do not miss messages or deliveries
  • Bookmark your orders page for quick access: /dashboard/?section=orders
  • Enable email notifications so you get alerts for new messages, deliveries, and status changes even when you are not on the site
  • Submit requirements promptly after purchasing -- the vendor cannot start until you do

Order Tracking for Buyers

After you purchase a service, your order moves through a series of stages from payment to completion. This guide explains each stage, what to expect, and what actions you can take.

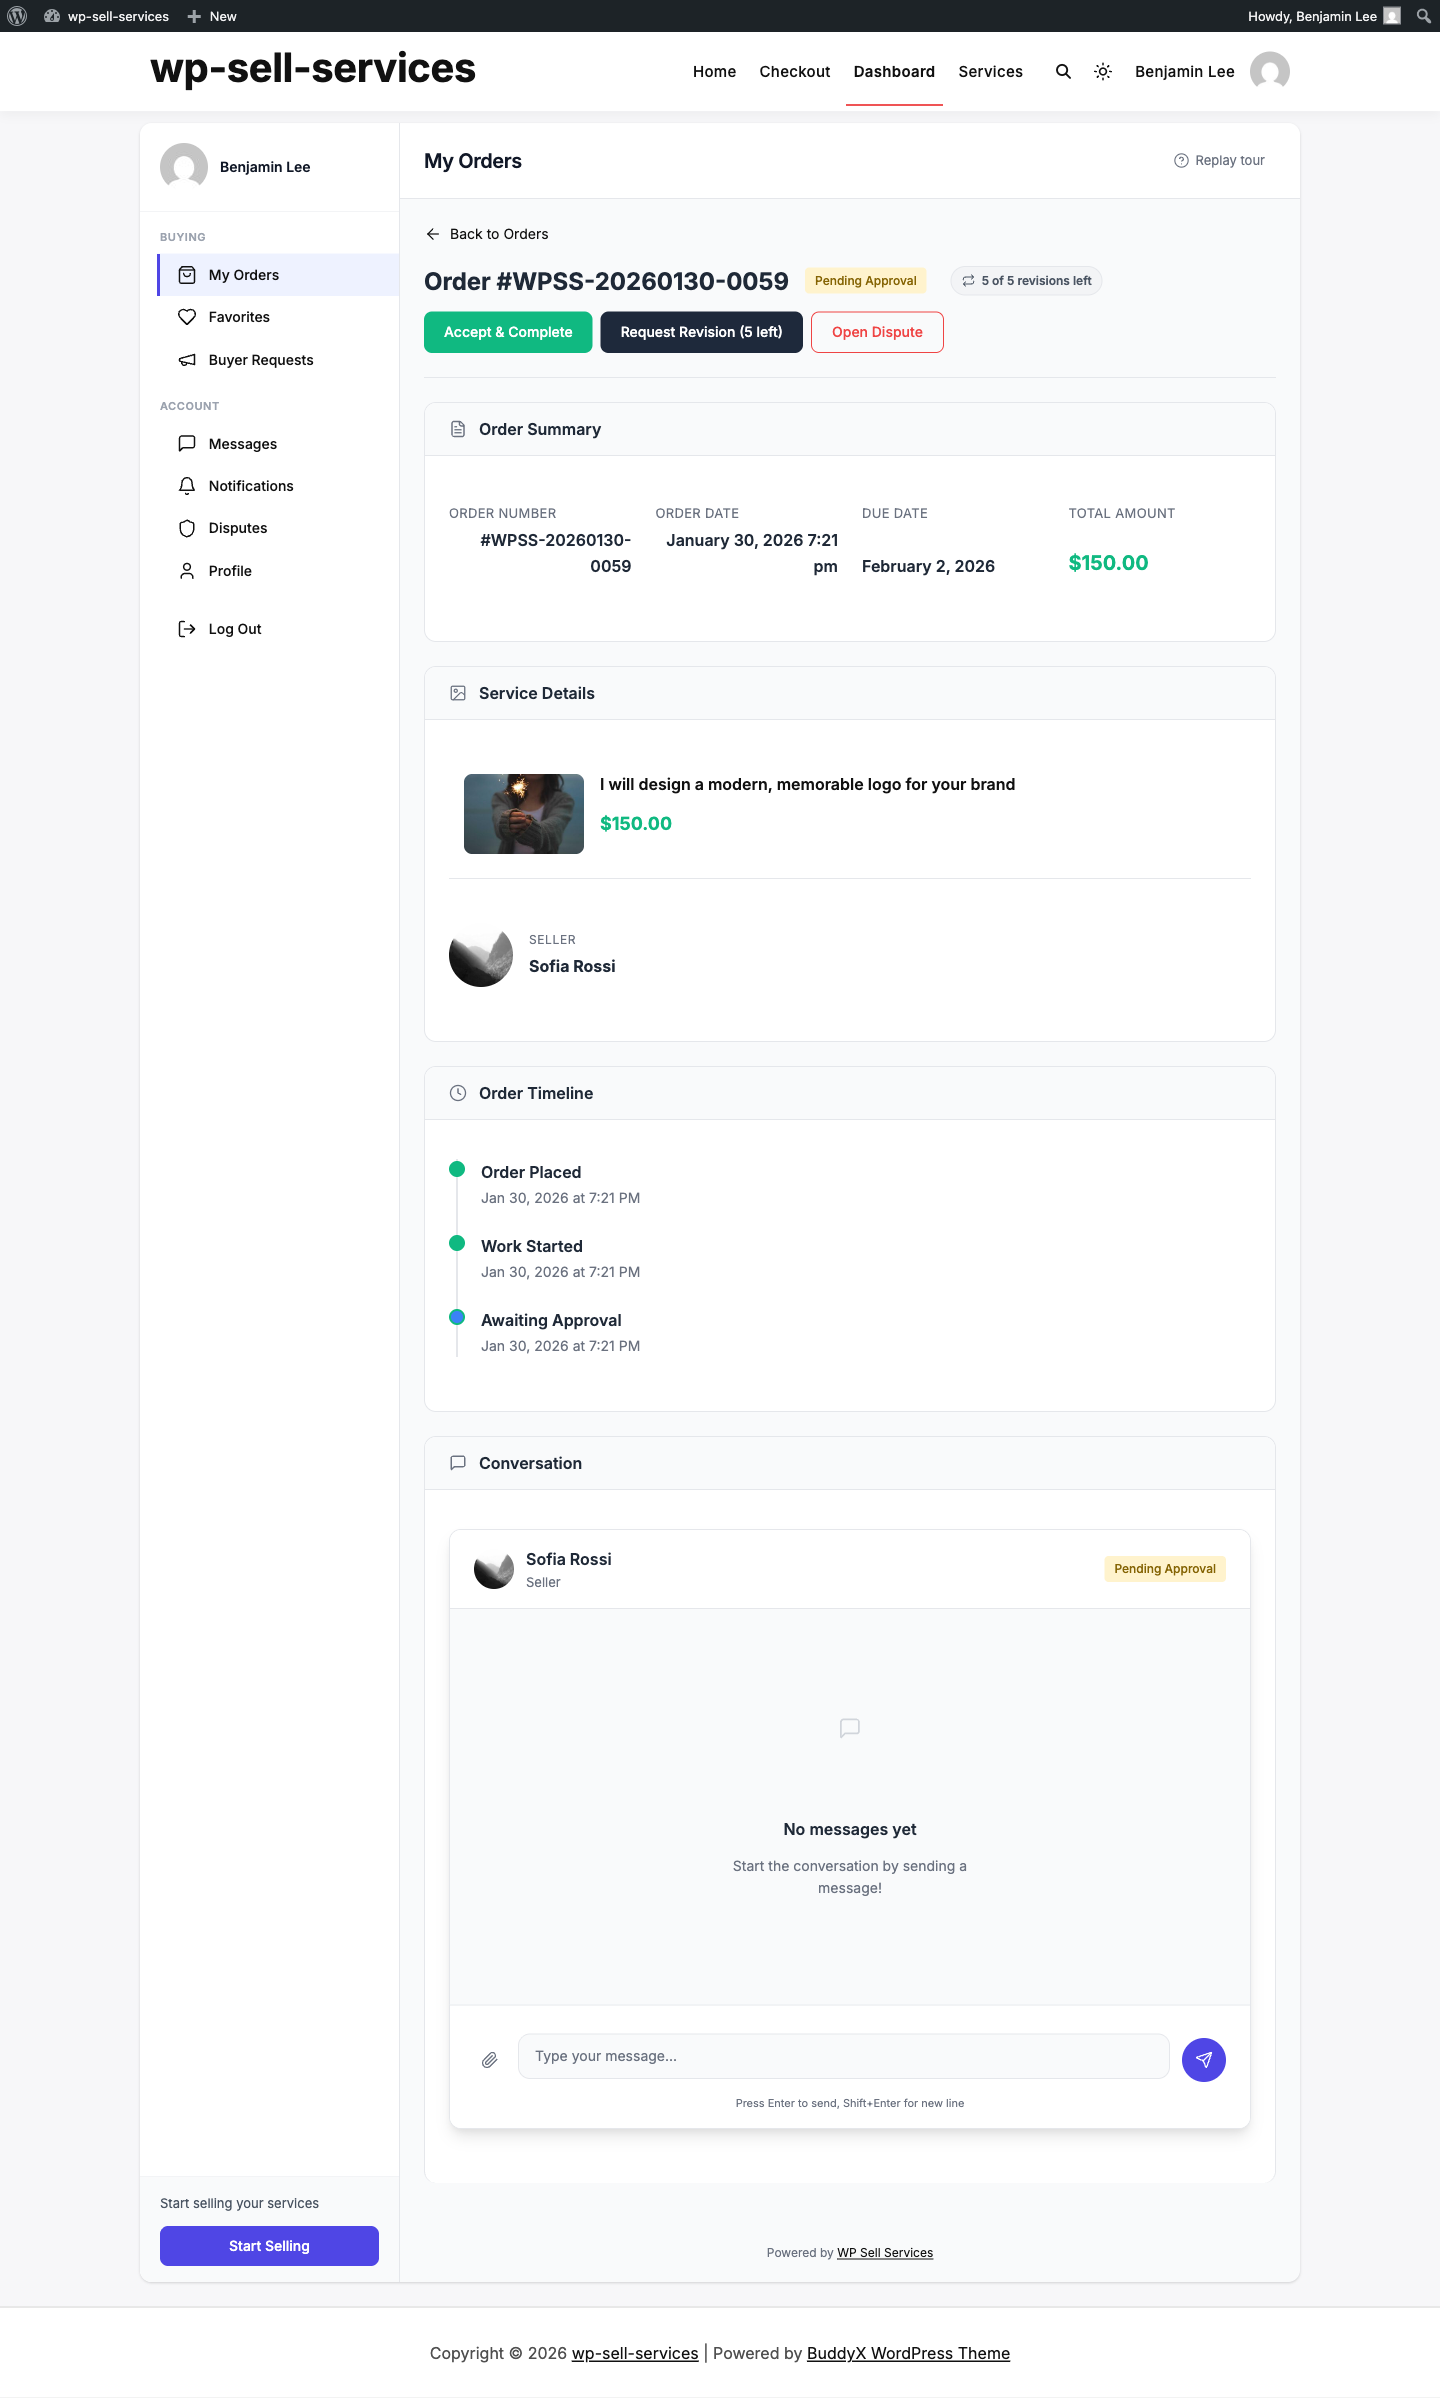
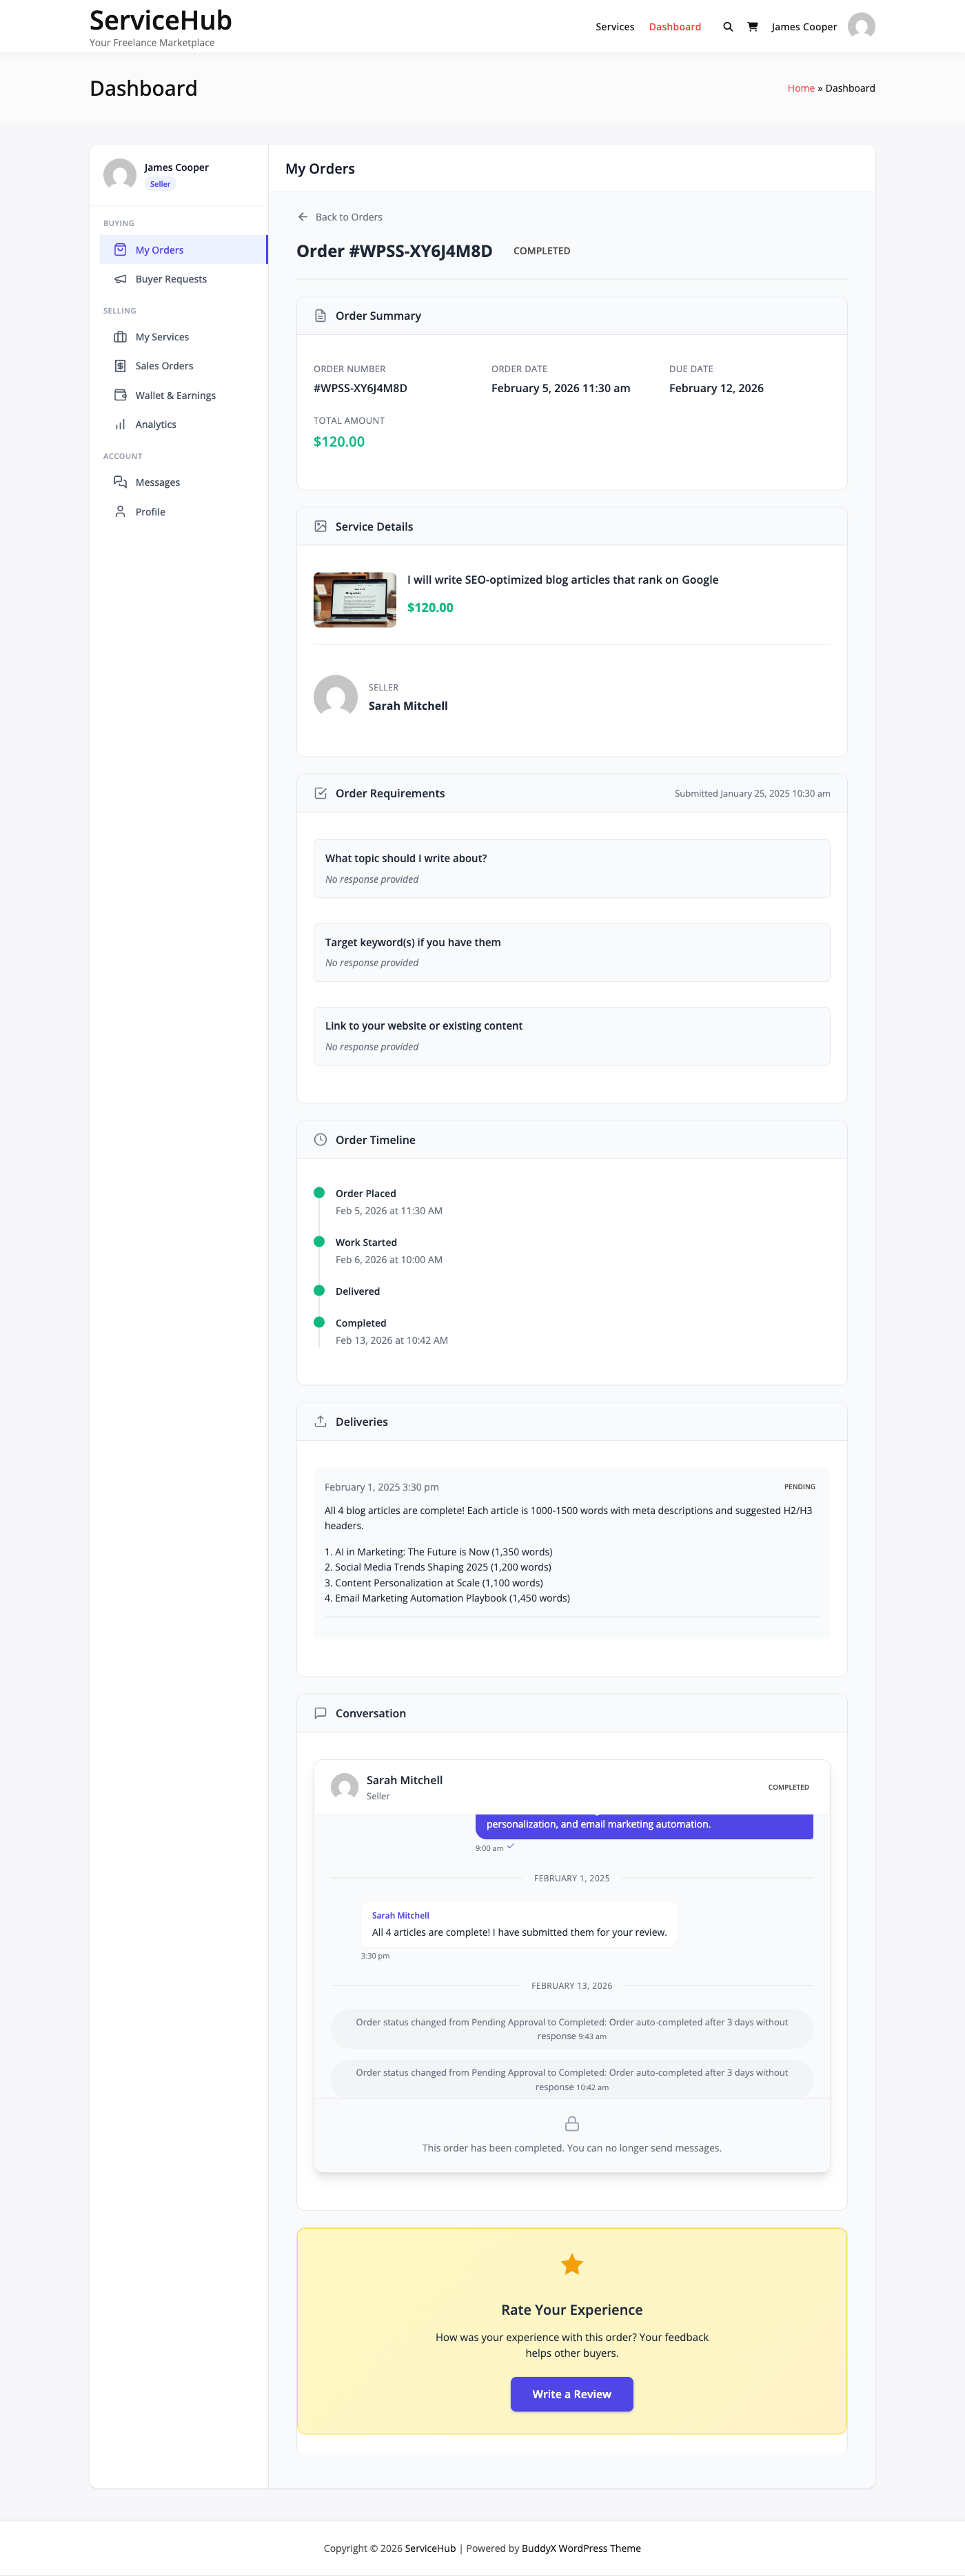
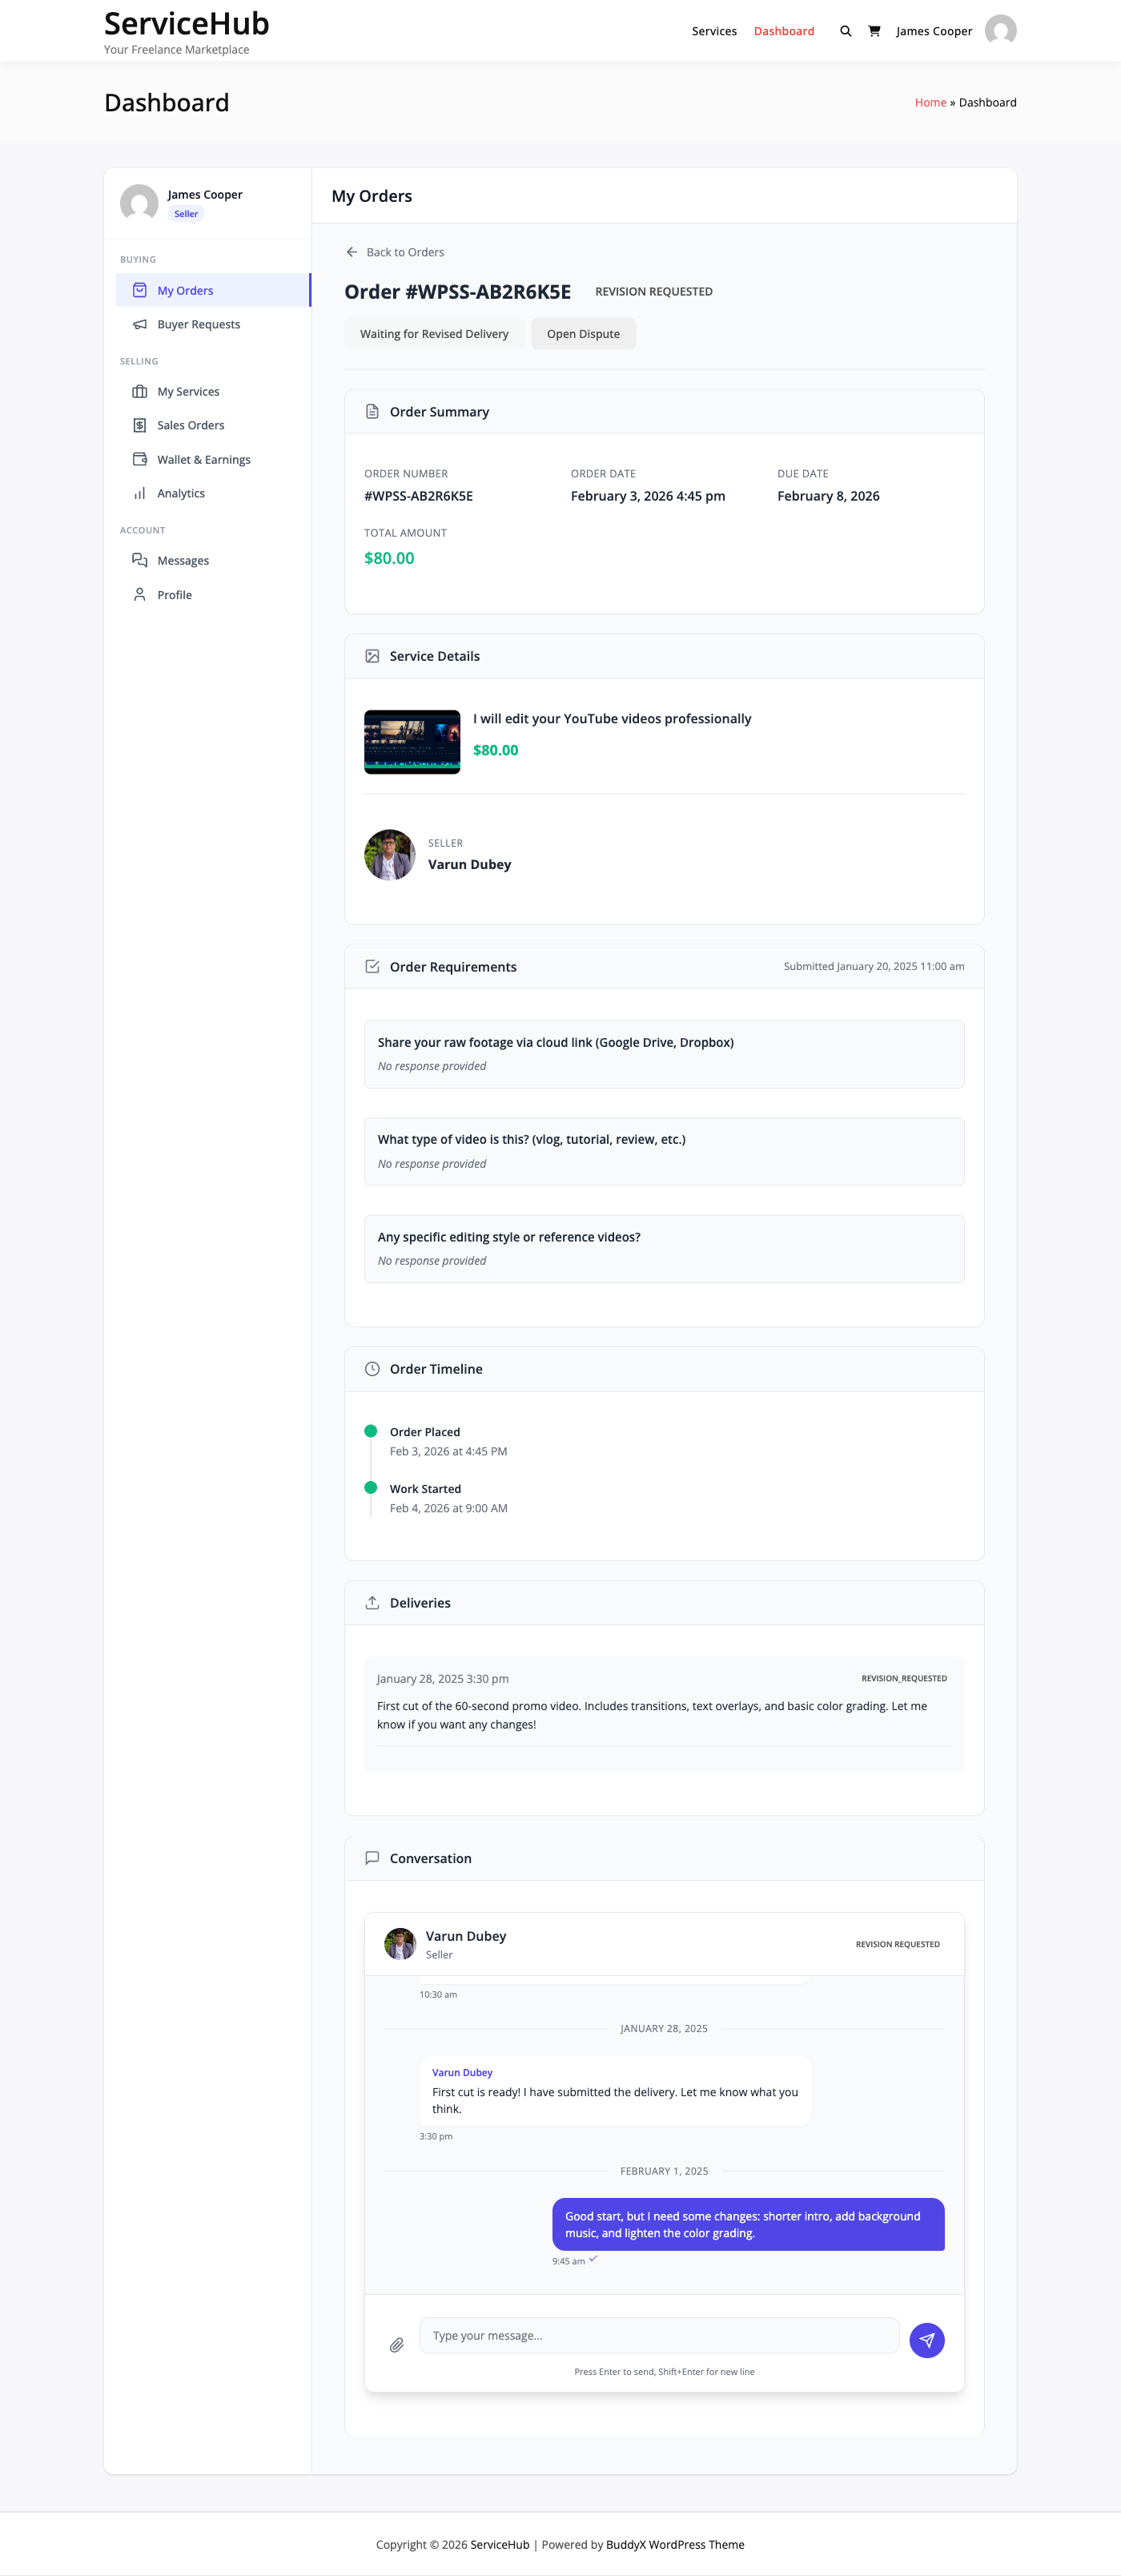
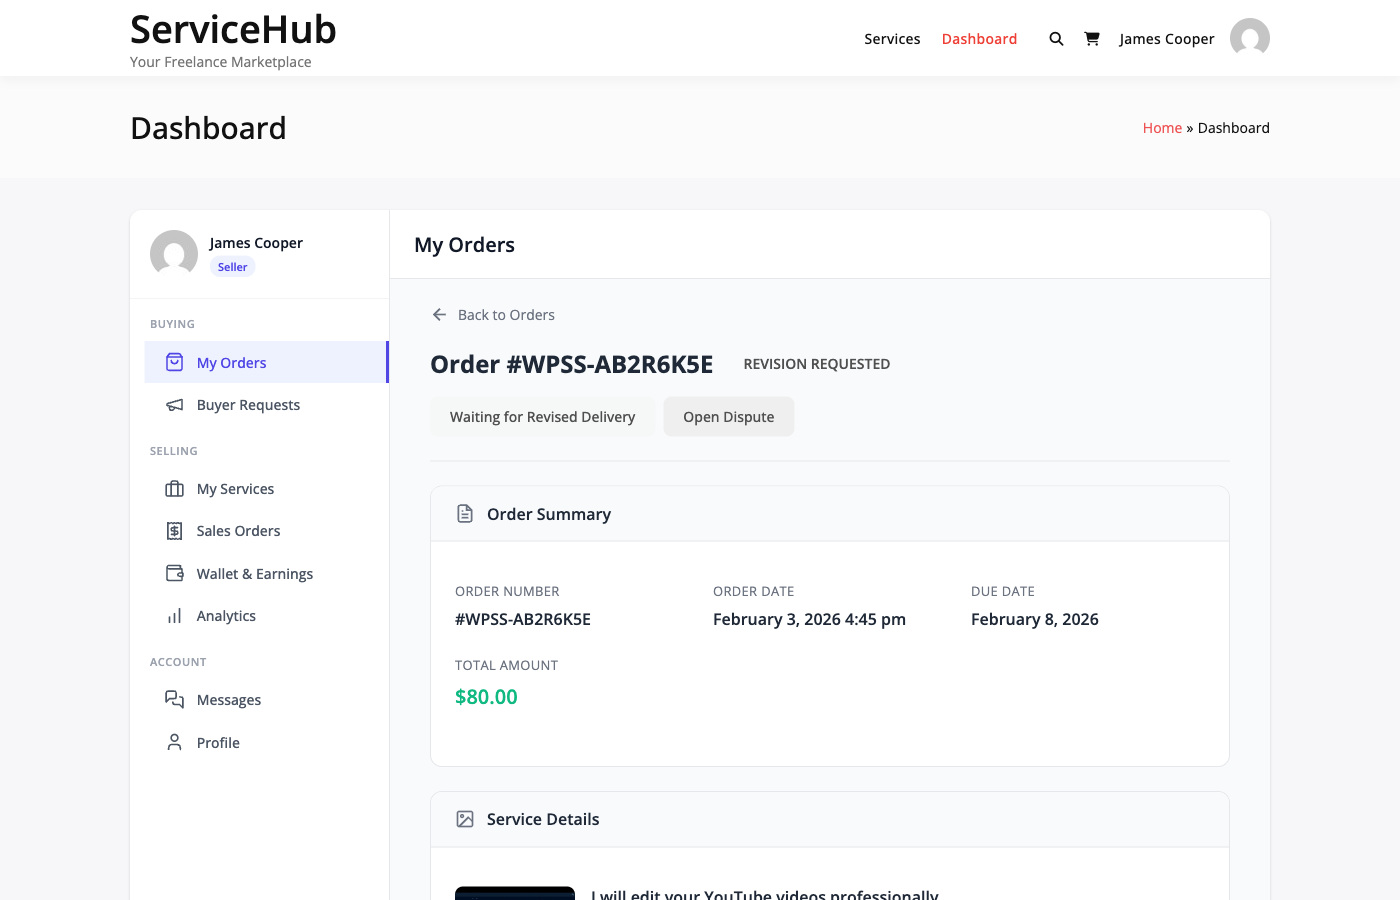
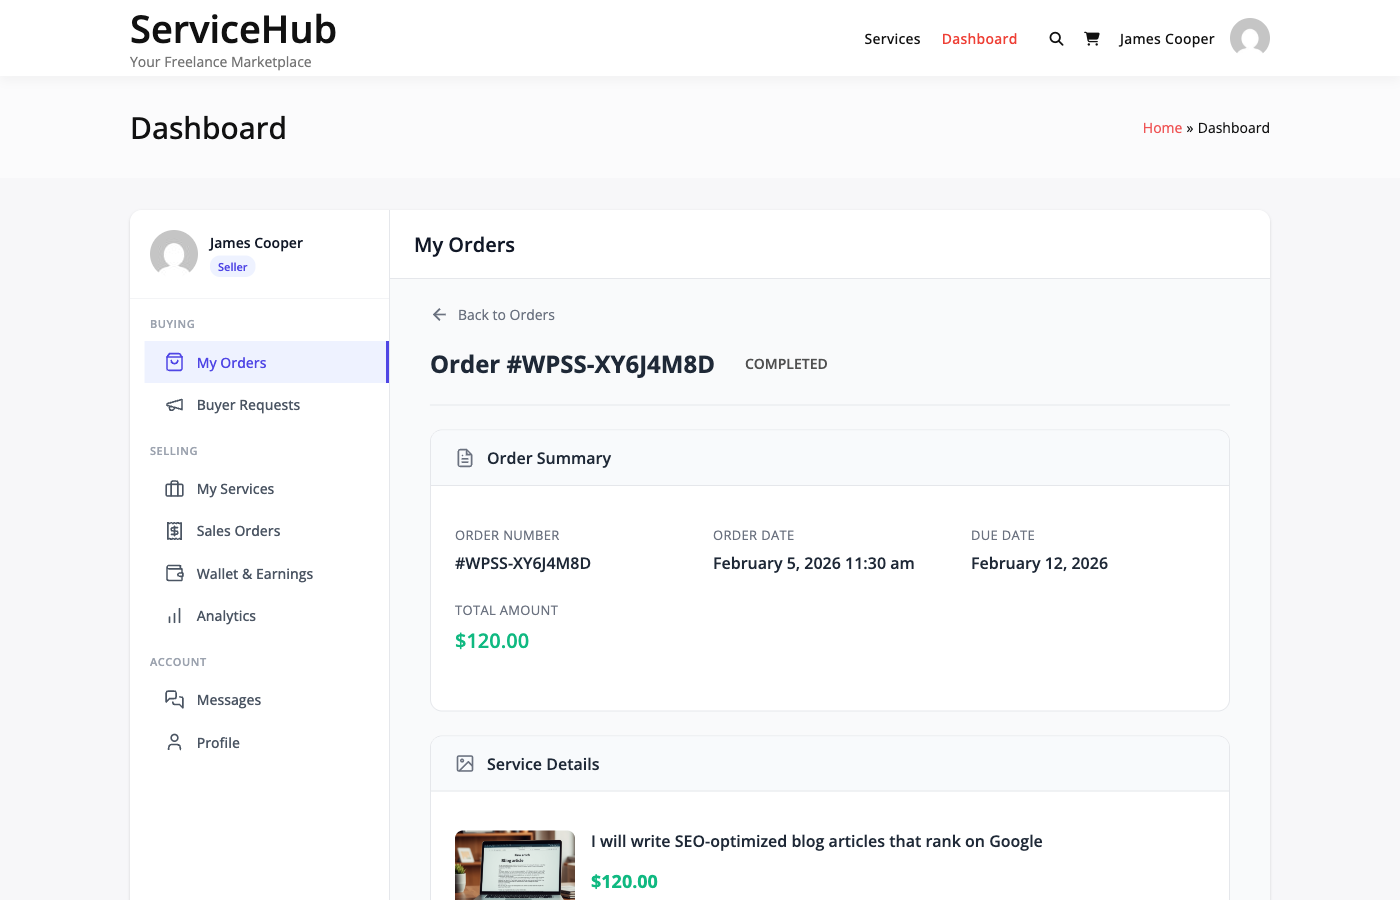
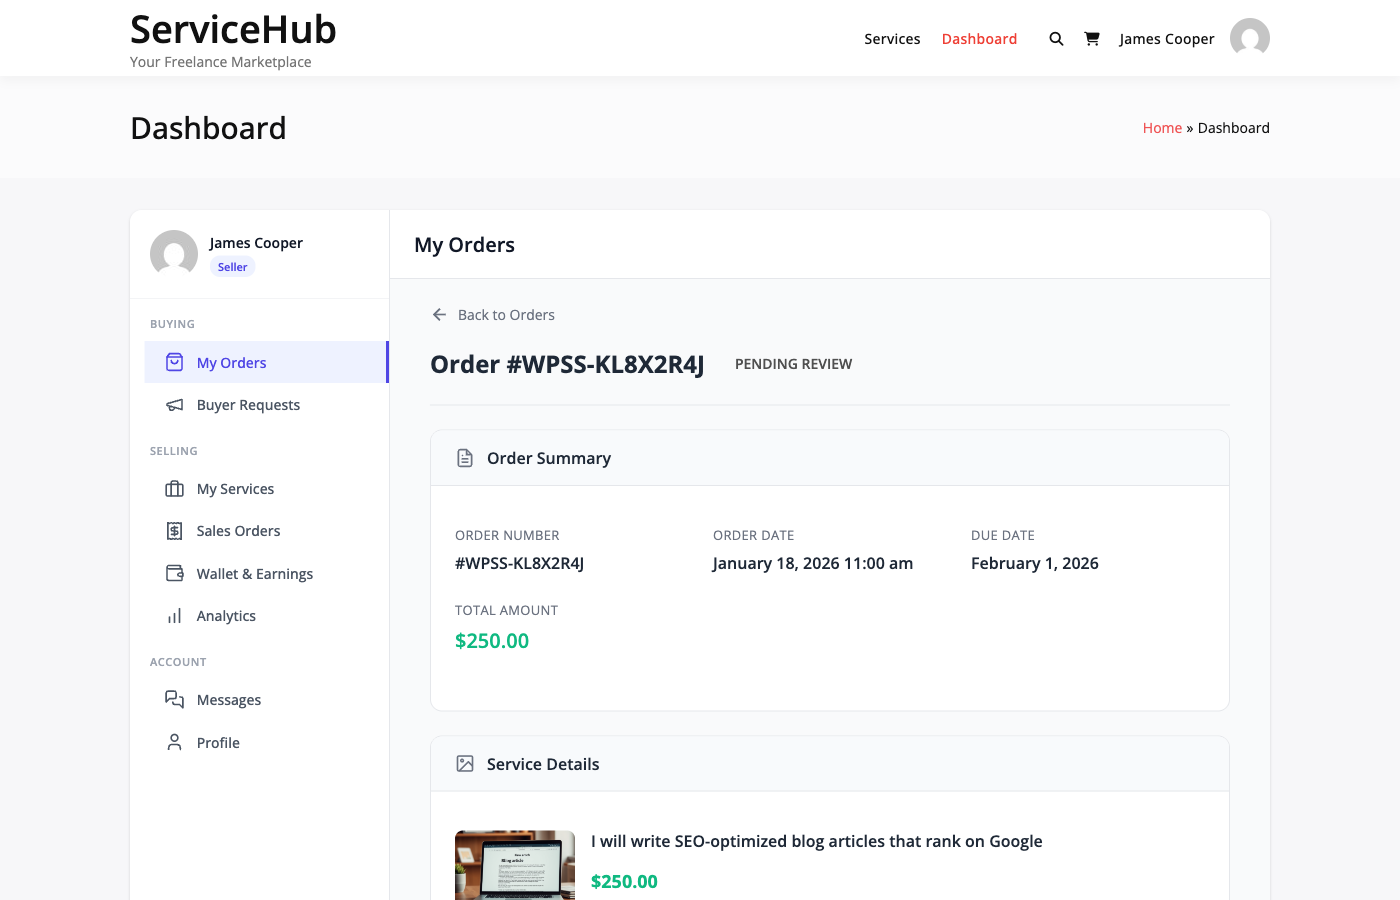
A buyer's order awaiting approval, with Accept, Request Revision and Open Dispute

Finding Your Orders

Go to your Dashboard and click My Orders in the sidebar. You will see a list of all your orders with their current status, vendor, amount, and date.

Use the status filters at the top to narrow the list:

  • Active -- Orders that need your attention or are in progress
  • Completed -- Finished orders
  • Cancelled -- Orders that were stopped

Click any order to open its detail page with the full timeline, messages, deliveries, and available actions.


Order Statuses Explained

Here is every status your order can have, what it means, and what you should do.

Pending Payment

What it means: You started checkout but payment has not been confirmed yet.

What to do: Complete payment. If you used offline/bank transfer, send the funds and wait for the marketplace admin to confirm receipt. Orders are automatically cancelled if payment is not confirmed within 24 hours.


Pending Requirements

What it means: Payment is confirmed. The vendor is waiting for your project details before starting work.

What to do: Fill out the requirements form with the information the vendor needs -- project description, preferences, reference files, and any other details they asked for.

Important: Submit requirements as soon as possible. The vendor cannot start until you do. The system sends you reminders on day 1, 3, and 5 if you have not submitted.

If you take too long (default: 7 days), the marketplace may either auto-start the order without your requirements or cancel it, depending on how the admin configured the timeout.


In Progress

What it means: The vendor is actively working on your order. A delivery deadline has been set based on the package you chose.

What to do: Wait for the vendor to deliver. You can send messages if you need to clarify something or share additional information. The vendor receives a reminder 24 hours before their deadline.


Late

What it means: The delivery deadline has passed and the vendor has not submitted their work yet.

What to do: You will receive a notification that the order is late. The vendor can still deliver, and they may request a deadline extension. If the delay is unreasonable, you can contact the vendor through the messaging system or open a dispute.


Pending Approval

What it means: The vendor has submitted their completed work for your review.

What to do: This is the most important step. Review what the vendor delivered and choose one of three options:

Action When to Use
Accept Delivery The work meets your expectations. The order is marked complete.
Request Revision The work needs changes. Provide specific feedback so the vendor knows what to fix. Only available if you have revisions remaining.
Open Dispute Something is seriously wrong -- the delivery does not match what was promised, or there is a significant quality issue.

Auto-complete: If you do not respond within the auto-complete window (default: 3 days), the order automatically completes and the vendor gets paid. Review deliveries promptly to keep control.


Revision Requested

What it means: You asked the vendor to make changes. They are working on the revision.

What to do: Wait for the vendor to submit their updated delivery. Use the messaging system if you need to clarify your revision feedback.

Revision limits: Each package includes a set number of revisions. You can see how many you have remaining on the order detail page. Once you have used all included revisions, the "Request Revision" option is no longer available.


Completed

What it means: The order is finished. You accepted the delivery (or it was auto-completed).

What to do:

  • Leave a review -- Rate the vendor and share your experience. Reviews help other buyers and help good vendors get more business.
  • Download deliverables -- Access any files the vendor sent.
  • Tip the vendor -- If you are especially happy with the work, you can send a tip as a thank-you.
  • Open a dispute (if needed) -- You have a dispute window (default: 14 days) after completion to raise issues if something goes wrong after acceptance.

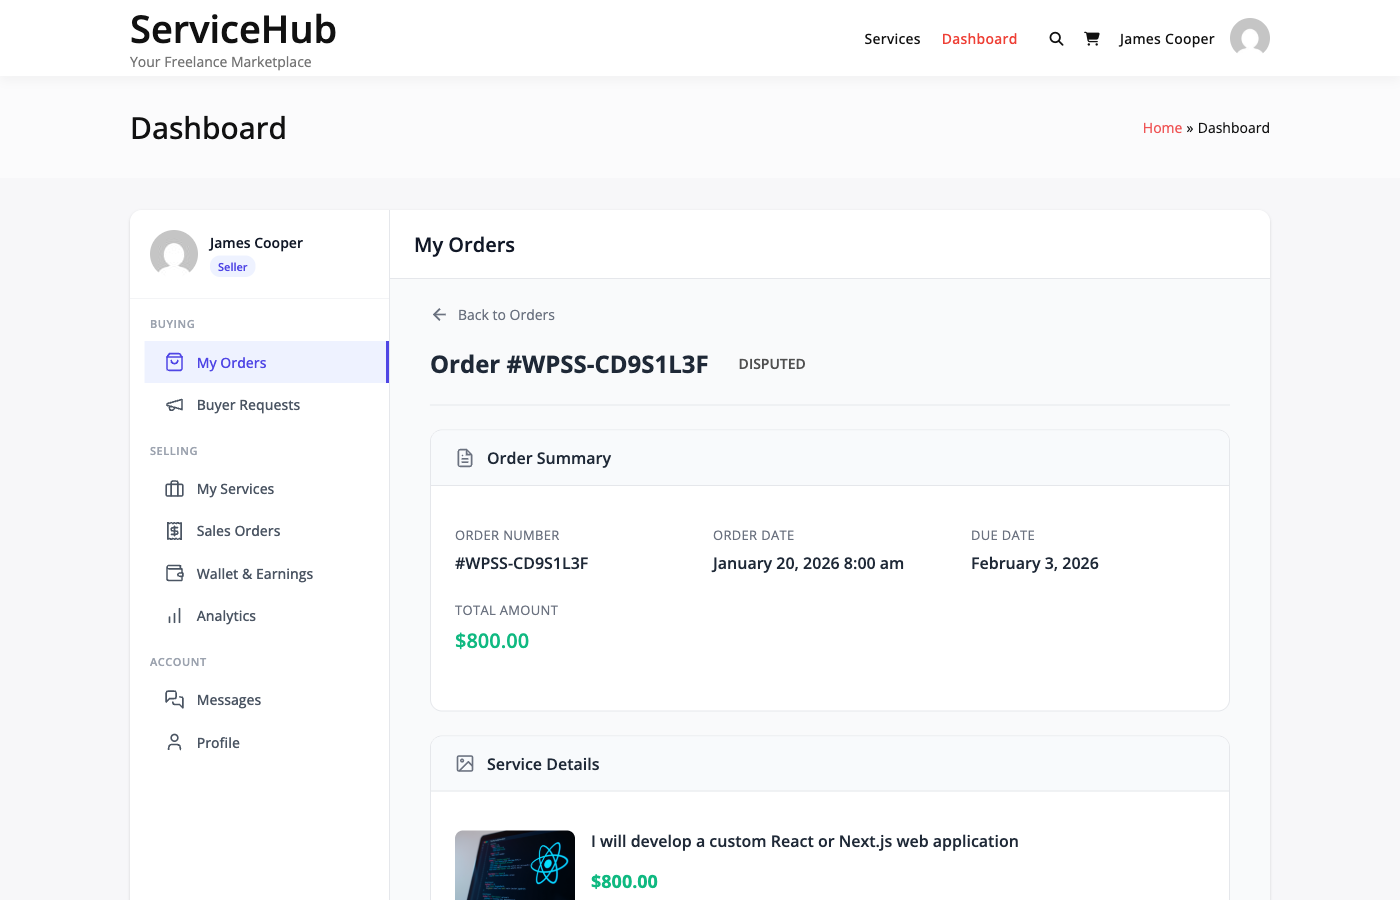
Disputed

What it means: A formal dispute has been opened. The order is paused while both parties submit evidence and the marketplace admin reviews the case.

What to do: Provide clear evidence supporting your position -- screenshots, messages, the original requirements, and the delivery. The admin will review everything and make a decision. See Opening a Dispute for details.


Cancelled

What it means: The order has been stopped. This can happen because of payment failure, requirement timeout, mutual agreement, or an admin decision.

What to do: If payment was taken, a refund is processed. Cancelled orders cannot be reopened. If you still need the service, place a new order.


On Hold

What it means: An admin has manually paused the order, usually for investigation.

What to do: Wait for the admin to resume or cancel the order. All deadlines are frozen while on hold.


Order Detail Page

When you click into an order, you see:

  • Status timeline -- Visual progress through the order stages
  • Order summary -- Service, package, add-ons, and total
  • Requirements -- What you submitted (or a prompt to submit if pending)
  • Messages -- Full conversation with the vendor
  • Deliveries -- All submissions from the vendor with download links
  • Actions -- Buttons for your available actions based on current status

Email Notifications

You receive email notifications at key moments:

Event When You Get Notified
Order confirmed After successful payment
Vendor starts work When requirements are accepted
Delivery submitted When the vendor sends their work
Revision submitted When the vendor sends updated work
Order completed When you accept or auto-complete triggers
Order cancelled If the order is stopped for any reason
Dispute update When the admin responds to your dispute

Make sure your email address is correct in your profile, and check your spam folder if notifications are not arriving.


Quick Reference: What Can I Do at Each Stage?

Status Your Actions
Pending Payment Complete payment
Pending Requirements Submit project details
In Progress Message vendor
Late Message vendor, open dispute
Pending Approval Accept, request revision, or dispute
Revision Requested Wait, message vendor
Completed Leave review, download files, tip vendor
Disputed Submit evidence
Cancelled Place new order if needed
On Hold Wait for admin

Tips for Getting Great Results

Getting the most out of your marketplace experience comes down to clear communication, realistic expectations, and knowing how to use the tools available to you. This guide covers best practices for every stage of the buying process.

Before You Order

Research the Vendor

Before committing to a purchase:

  • Read reviews -- Look for patterns in feedback, not just the overall rating. Multiple reviewers mentioning the same strength (or weakness) is a strong signal.
  • Check their portfolio -- Does their previous work match the style and quality you want?
  • Look at their seller level -- Rising Seller and Top Rated vendors have a proven track record of quality and reliability.
  • Note their response time -- Vendors who respond quickly during the inquiry phase will likely communicate well during your order.

Ask Questions First

If anything about the service is unclear, message the vendor before ordering. Good questions to ask:

  • "My project involves [details]. Which package would you recommend?"
  • "I need this delivered by [date]. Can you meet that timeline?"
  • "I have [specific requirements]. Is that something you handle?"
  • "Can you share an example of similar work you have done?"

A quick conversation upfront prevents misunderstandings later.

Choose the Right Package

Do not default to Basic to save money if your project actually needs Standard or Premium features. Underpaying for a complex project leads to disappointment on both sides. See Choosing the Right Package for detailed guidance.


Writing Great Requirements

The requirements form is your chance to give the vendor everything they need to do their best work. Clear requirements lead to better results and fewer revisions.

Be Specific

Instead of vague instructions, provide concrete details:

Vague Specific
"Make it look modern" "Clean layout, sans-serif fonts, blue and white color scheme, similar to [example URL]"
"Write something engaging" "Conversational tone, target audience is small business owners aged 30-50, include a call-to-action for email signup"
"I need a logo" "Minimalist wordmark logo for a tech startup called 'NovaPay,' colors: navy blue and teal, avoid clipart"

Include Reference Material

Whenever possible, attach:

  • Examples of work you like -- Screenshots or links showing the style you want
  • Brand assets -- Your logo, color codes, fonts, and brand guidelines
  • Content or copy -- Text, data, or other raw materials the vendor will work with
  • Technical specs -- Dimensions, file formats, platform requirements

Set Clear Expectations

State upfront:

  • Your must-have requirements (non-negotiable)
  • Your nice-to-have preferences (flexible)
  • Any hard deadlines beyond the package delivery time
  • How you plan to use the final deliverable

Submit Quickly

The vendor cannot start work until you submit requirements. Every day you delay pushes back the delivery. The system sends reminders on days 1, 3, and 5 -- do not wait for those. Submit as soon as possible after payment.


During the Order

Communicate Proactively

  • Respond to vendor messages promptly -- Delays in your responses slow down the entire order
  • Be available for questions -- The vendor may need clarification on your requirements
  • Share feedback early -- If the vendor shares progress or drafts, provide input right away rather than waiting for the final delivery

Be Respectful

Vendors are professionals. Treat them accordingly:

  • Use clear, polite language
  • Give constructive feedback (what to change and why), not just criticism
  • Respect their working hours and process
  • Remember that good communication makes both parties' experience better

Reviewing Deliveries

When the vendor submits their delivery, you have three options: accept, request revision, or dispute. Here is how to approach each:

When to Accept

Accept when the delivery meets the requirements you specified and the package description. It does not need to be perfect in every way -- it needs to match what was promised and what you asked for.

When to Request a Revision

Request a revision when:

  • Specific elements do not match your requirements
  • There are errors or inconsistencies that need fixing
  • The quality is close but needs refinement

How to write a good revision request:

  1. Be specific -- "Please change the heading font to Montserrat and increase the logo size by 20%" is better than "Make it look better"
  2. Prioritize -- If you have multiple changes, list them in order of importance
  3. Reference your original requirements -- "In my requirements, I asked for X, but the delivery shows Y"
  4. Be reasonable -- Revisions should address things within the scope of what you ordered, not add new requirements

When to Dispute

Disputes are for serious issues, not minor adjustments. Open a dispute when:

  • The delivery is completely different from what was described in the service listing
  • The vendor is unresponsive and has missed their deadline significantly
  • You suspect plagiarized or fraudulent work
  • The vendor refuses to make changes that are clearly within scope

Do not dispute for:

  • Minor style preferences that were not specified in your requirements
  • Changes that go beyond what the package includes
  • Slow responses (message the vendor or wait first)

See Opening a Dispute for the full process.


After Completion

Leave a Thoughtful Review

Reviews help other buyers make informed decisions and help good vendors get recognized. A helpful review:

  • Rates honestly -- Use the full 1-5 scale. Not everything is 5 stars, and not everything is 1 star.
  • Mentions specifics -- "The logo designs were creative, delivery was 1 day early, and the vendor was responsive to my revision request" is more useful than "Great job!"
  • Notes the package -- Mention which tier you bought so future buyers can calibrate expectations.

Tip for Exceptional Work

If a vendor went above and beyond, a tip is a great way to show appreciation. Even a small tip signals to the vendor that their extra effort was noticed and valued.

Reorder From Great Vendors

Found a vendor you love? Bookmark their profile. When you need similar work in the future, ordering from someone you trust saves time and reduces risk.


Troubleshooting Common Issues

Vendor Is Not Responding

  • Check if the vendor has vacation mode enabled (their profile will show this)
  • Send a follow-up message after 24 hours
  • If the order deadline passes with no communication, you can open a dispute

Delivery Does Not Match Expectations

  • First, check your original requirements -- did you specify what you expected?
  • If your requirements were clear and the delivery misses them, request a revision with specific feedback
  • If the vendor refuses to address valid concerns, open a dispute

Running Out of Revisions

  • If you have used all included revisions but still need changes, message the vendor -- many will accommodate reasonable requests
  • For future orders, consider a higher-tier package with more revisions
  • Some services offer an "Extra Revisions" add-on

Order Was Auto-Completed Before You Reviewed

If you did not respond to a delivery within the auto-complete window (usually 3 days), the order completes automatically. You can still leave a review and you have a dispute window (usually 14 days) if there are serious issues.


Favorites: Save Services for Later

Found a service you like but you are not ready to order? Save it to your favorites and come back when you are.

Saved services in the Favorites section, showing live prices

Saving a service

Tap the heart on any service card in the marketplace, or use the favorite button on the service page itself. The heart fills in to confirm the save. Tap again to remove it.

Saving is instant -- the page does not reload, so you keep your place in the catalog.

You need an account to save favorites. Logged-out visitors get a login prompt when they tap the heart. Once you log in, favorites are tied to your account rather than to the browser you happened to use.

Finding your favorites

Open your dashboard and go to the Favorites section. Every saved service is listed with its current price and availability, so you can compare options before committing to an order.

From the list you can:

  • Open the service page to order it
  • Remove services you are no longer considering

Why favorites beat browser bookmarks

Favorites stay attached to your account, follow you across devices, and always show the live price. A bookmark shows you a page; a favorite shows you the current state of an offer.

That matters on a marketplace, where things move:

  • Prices change. Vendors adjust their packages. Your favorites list shows today's price, not the one you saw last month.
  • Vendors go on vacation. A vendor in vacation mode shows as unavailable, instead of letting you start an order nobody will pick up.
  • Services get paused or removed. You see the real status rather than a dead link.

Using favorites well

  • Shortlist before you compare. Save three or four candidates, then open the Favorites list and compare price, delivery time, and rating side by side.
  • Save across categories when scoping a bigger project -- a designer, a copywriter, and a developer -- then decide the order of work.
  • Prune as you go. Removing what you have ruled out keeps the list a decision tool rather than a pile.
  • Re-check before ordering. Open the service page from your favorites and confirm the package and delivery time before you buy. See Choosing the Right Package.

Common questions

Do vendors know I favorited their service? No. Favorites are private to your account.

Is there a limit? No. Save as many as you like.

What happens if a service is deleted? It disappears from your list. Nothing breaks, and nothing else is affected.

Do favorites carry over if I change my email or username? Yes. They are attached to your user account, not your login details.

For developers

Favorites are stored in the _wpss_favorite_services user meta key and exposed over REST:

Method Route
GET /wpss/v1/favorites
POST /wpss/v1/favorites/{service_id}
DELETE /wpss/v1/favorites/{service_id}
GET /wpss/v1/services/{service_id}/favorited

All four require an authenticated user. See REST API Controllers.

Buyer FAQ

Quick answers to the questions buyers ask most. Defaults are noted where a marketplace owner can change them -- if a number here does not match the site you are on, the owner has adjusted it.

Ordering

Do I need an account to buy? Yes. Your order, messages, files, and deliveries all live in your account, so there is nothing to lose track of. You can register during checkout.

Which package should I pick? Compare delivery time and what is included, not just price. Most vendors offer three tiers, and add-ons let you extend a smaller package rather than jumping to a bigger one. See Choosing the Right Package.

Can I ask the vendor something before ordering? Yes -- use the contact option on their profile. For a buyer request, vendors submit proposals and you discuss the work in the order conversation once you accept one. There is no back-and-forth chat on a proposal before you accept it, so ask for everything you need in the request itself.

What happens right after I pay? If the vendor set requirements, you are asked for them first -- the vendor cannot start without them. Then the order moves to In Progress and the delivery clock starts. See Order Lifecycle.

What if I never submit the requirements? The vendor cannot begin. Marketplaces set a requirements timeout (default 7 days), after which the order either starts anyway or is cancelled, depending on how the owner configured it.

While the order is running

How do I know how it is going? Your dashboard shows every order and its status. Messages and files stay attached to the order. See Order Tracking.

What if the vendor misses the deadline? Message them first -- most delays have a simple explanation. If it stays late, the marketplace can flag it automatically (default 3 days past the deadline), and you can open a dispute.

The vendor asked for more money or more time. Is that normal? It can be, if the scope grew. A vendor can send you a paid extension (extra work for an agreed amount) or request a deadline extension. You are not obliged to accept either -- nothing changes unless you approve it. See Tipping & Extensions.

Can I cancel? You can request cancellation while an order is In Progress. The vendor accepts or declines. If they decline and you cannot resolve it between you, open a dispute. Once the work is delivered, use revisions or a dispute instead.

Delivery and revisions

The delivery is not right. What now? Request a revision and say specifically what needs changing. Vague feedback is the main cause of a second unsatisfactory round.

How many revisions do I get? It depends on the package -- vendors set revisions per package, not marketplace-wide. Your remaining count is on the order page. When they run out, the Request Revision option disappears; from there you can accept, negotiate a paid extension, or dispute.

What if I do nothing after delivery? The order auto-completes after a set window (default 3 days), which releases payment to the vendor. If something is wrong, act before that.

Can I get a refund? Refunds happen through the dispute process, not a self-service button. Open a dispute and the marketplace mediates. Refunds can be partial.

Disputes

When can I open a dispute? While an order is running, and for a period after completion -- the dispute window, default 14 days. After that the order is settled.

What happens? Both sides submit evidence: messages, files, and the delivery itself. An admin reviews and decides -- release to the vendor, refund the buyer, or split. See Dispute Process.

Does opening a dispute hurt the vendor? Opening one is not a penalty. Try messaging first: most disagreements are misunderstandings, and vendors usually prefer to fix the work.

After the order

How long do I have to leave a review? Default 30 days after completion. Reviews are public and shape the vendor's rating and seller level.

Can I edit or delete my review? You can edit your own review. Vendors can reply publicly but cannot remove it. Admins moderate only genuinely abusive content.

Should I tip? Optional, and always appreciated for work that went beyond the brief. Send it from the completed order. Note that a marketplace may take its normal commission on tips -- owners choose whether tips reach the vendor in full.

Can I re-order from the same vendor? Yes. Order again from their profile, or save them first with Favorites.

Account and privacy

Where are my files? Attached to the order, indefinitely, as long as your account exists. Download anything important to your own storage -- do not treat the order as your archive.

Can the vendor see my details? Only your display name and what you share in the order. Payment details never reach the vendor.

Do vendors know I favorited them? No. Favorites are private.

Service Creation

Creating a Service: The 6-Step Wizard

The service creation wizard walks vendors through building a professional service listing in six clear steps. It saves progress automatically, so vendors can start now and finish later.

Service Creation Wizard

How It Works

Vendors access the wizard from their Dashboard. The six steps are:

  1. Basic Info -- Title, category, and description
  2. Pricing -- Packages with prices, delivery times, and features
  3. Gallery -- Images and videos to showcase work
  4. Requirements -- Questions buyers answer before work starts
  5. Extras and FAQs -- Optional add-ons and frequently asked questions
  6. Review -- Final check before publishing

Each step can be saved as a draft at any time. A progress bar at the top shows which steps are complete.


Step 1: Basic Info

This is where vendors describe what they are offering.

Service title -- A clear, specific headline for the service. Think "I will design a professional logo for your brand" rather than "Logo design." The title should tell buyers exactly what they will get. Keep it between 10 and 80 characters.

Category -- Choose from the service categories the site owner has created (e.g., Design, Writing, Marketing). The Category dropdown lists top-level categories only.

Subcategory -- If the category you picked has subcategories, a second dropdown appears listing them. Choosing a subcategory keeps the parent category too, so your service is found under both.

If a category has no subcategories, the second dropdown stays empty and can be skipped -- it is optional.

Description -- A detailed explanation of what the vendor delivers, their process, what is included, and what is not. This is where vendors sell their expertise. Up to 5,000 characters.

Tags -- Up to 5 keywords that help buyers find the service through search (e.g., "logo, branding, graphic design, minimalist, business").


Step 2: Pricing Packages

Vendors set up their pricing using a 3-tier structure: Basic, Standard, and Premium. Only the Basic package is required -- Standard and Premium are optional.

Each package includes:

  • Package name -- Defaults to "Basic," "Standard," or "Premium" but can be customized
  • Price -- Starting from $5 minimum for the Basic package
  • Delivery time -- How many days to complete the work (1, 2, 3, 5, 7, 14, 21, or 30 days)
  • Revisions -- How many rounds of changes are included (0 to 5, or unlimited)
  • Features list -- A checklist of what is included in this package

[PRO] When the Pro plugin is active, the recurring-services feature flag is on, and recurring services are globally enabled in Sell Services > Settings > Orders & Disputes, a Recurring Billing section appears in this step. The flag is off by default in 1.3.0, so this section is normally hidden. Vendors can toggle recurring billing on and choose a frequency (Weekly, Monthly, Quarterly, or Yearly). See Recurring Services for full details.

For a deeper look at pricing strategy, see Pricing and Packages.


This is where vendors show off their work. Strong visuals make a big difference in conversions.

Main image -- Required. This is the primary image buyers see in search results and on the service page. Recommended size: 800x600 pixels.

Additional images -- Showcase more work samples. You can add up to 4 in the free version, or unlimited with [PRO].

Video embeds -- Add YouTube or Vimeo links to demo your work. 1 video in the free version, up to 3 with [PRO].

Supported image formats: JPG, PNG, GIF, and WebP. Maximum 5MB per image.

For tips on creating a great gallery, see Service Media.


Step 4: Requirements

Requirements are questions buyers answer after purchasing, before the vendor starts working. This ensures the vendor has everything they need upfront.

Each requirement has:

  • A question -- What do you need from the buyer?
  • An answer type -- Short text, long text, file upload, or dropdown choices
  • Required or optional -- Mark critical questions as required

You can add up to 5 requirements in the free version, or unlimited with [PRO].

Common examples:

  • "What is your business name?" (short text)
  • "Describe your project in detail" (long text)
  • "Upload your brand guidelines" (file upload)
  • "Choose your preferred style" (dropdown: Modern, Classic, Minimalist)

For more details, see Requirements and FAQs.


Step 5: Extras and FAQs

Service Add-ons (Extras)

Add-ons let vendors offer optional upgrades that increase order value. Buyers select these during checkout.

Types of add-ons:

  • Checkbox -- Simple yes/no (e.g., "Include source files" for $20)
  • Dropdown -- Pick one option (e.g., resolution: 720p, 1080p, 4K)
  • Text input -- Buyer types something (e.g., "Business name for the logo")
  • Quantity -- Select how many (e.g., "Extra revisions" at $10 each)

You can add up to 3 extras in the free version, or unlimited with [PRO].

For more on pricing and types, see Service Add-ons.

FAQs

Frequently Asked Questions help buyers make purchasing decisions. Vendors add common questions and answers that appear on the service page.

Great FAQs cover:

  • What is included and what is not
  • Delivery timeframes
  • Revision process
  • Refund policy

You can add up to 5 FAQs in the free version, or unlimited with [PRO].


Step 6: Review and Publish

The final step shows a summary of the service with a completion checklist. Before publishing, the wizard verifies:

  • Service title is at least 10 characters
  • A category is selected
  • Description is at least 120 characters
  • Basic package has a price and delivery time
  • A main image is uploaded

If anything is missing, the wizard highlights what needs to be fixed.

Publishing options:

  • Save Draft -- Save progress and come back later. Only the vendor and admins can see draft services.
  • Publish Service -- If your marketplace has moderation turned on, the service is submitted for admin review. If moderation is off, it goes live immediately.

Tips for Creating Great Service Listings

  1. Be specific in your title -- "I will design a modern logo with 3 concepts" beats "Logo design services"
  2. Use all available images -- Services with more visuals get more orders
  3. Price strategically -- Make your Standard package the best value so most buyers choose it
  4. Write clear requirements -- The better your intake questions, the smoother the order process
  5. Add FAQs proactively -- Answer the questions buyers would ask before they need to ask them
  6. Keep your description scannable -- Use short paragraphs and highlight key deliverables

Pricing and Packages

Every service uses a 3-tier pricing structure -- Basic, Standard, and Premium -- that lets vendors offer different levels of service at different price points. This gives buyers clear choices and helps vendors increase their average order value.

How It Works

The Basic package is always required. Standard and Premium are optional -- vendors can enable them when they are ready to offer more.

Package Purpose Required?
Basic Your entry-level offering at the lowest price Yes, always
Standard The mid-tier option -- often the most popular choice Optional
Premium The complete solution with everything included Optional

Both the free and Pro versions support 3 packages. This structure is the same for everyone.

Pricing Package Cards

What Each Package Includes

Every package has these fields:

Field What It Is
Name Defaults to "Basic," "Standard," or "Premium" -- but vendors can rename them to anything
Description A brief explanation of what is included in this tier
Price The cost for this package (minimum $5 for Basic)
Delivery time How long the vendor has to complete the work (1 to 30 days)
Revisions How many rounds of changes the buyer gets (0 to 5, or unlimited)
Features list A checklist of specific deliverables included

How Buyers See Packages

On the service page, packages are displayed side by side in a comparison view. Buyers can quickly see the differences between tiers and choose the one that fits their needs and budget.

Each package shows:

  • The price prominently displayed
  • Delivery timeline
  • Number of revisions included
  • Feature checklist with visual indicators

Buyers click "Select" on their chosen package to proceed to checkout.

Pricing Strategy Tips

Set the Right Price Ratios

A good rule of thumb:

  • Basic -- Your base price
  • Standard -- 1.5x to 2x the Basic price
  • Premium -- 2.5x to 3.5x the Basic price

Example:

  • Basic: $100
  • Standard: $150 (1.5x)
  • Premium: $300 (3x)

Make Each Tier Clearly Different

Each package should offer noticeably more value than the one below it. If the differences are too small, buyers will just pick Basic. If they are too large, the jump feels unreasonable.

Good differentiation example (Web Design):

Basic Standard Premium
Pages 5 10 20
Revisions 1 3 Unlimited
Contact form Yes Yes Yes
Blog setup -- Yes Yes
E-commerce -- -- Yes
Delivery 7 days 10 days 14 days

Common Pricing Models

Fixed deliverable -- Same type of work, different quantities:

  • Basic: 1 logo concept
  • Standard: 3 logo concepts
  • Premium: 5 logo concepts + brand guidelines

Feature tiers -- More features at each level:

  • Basic: Blog post (500 words)
  • Standard: Blog post (1,500 words) + SEO optimization
  • Premium: Blog post (3,000 words) + SEO + social media graphics

Speed-based -- Same deliverable, faster turnaround:

  • Basic: 7-day delivery
  • Standard: 3-day delivery
  • Premium: 24-hour delivery

Make Standard the Best Value

Most buyers choose the middle option. Make your Standard package the one with the best value-to-price ratio, and it will naturally become your most popular tier.

Best Practices

  • Use round numbers -- $100 converts better than $97 for services
  • List features in order of importance -- Put the most appealing items first
  • Keep descriptions concise -- Buyers skim, so make every word count
  • Include enough revisions -- Too few revisions lead to disputes; too many can be unsustainable
  • Set realistic delivery times -- Over-promising leads to late orders and bad reviews
  • Test and adjust -- Try different price points and see what converts best for your marketplace

Service Add-ons (Extras)

Add-ons let vendors offer optional upgrades that buyers can select during checkout. They are a proven way to increase order value while giving buyers flexibility to customize their order.

Service Add-ons Interface

What You Can Do with Add-ons

Add-ons are perfect for offering:

  • Rush delivery -- Pay extra for faster turnaround
  • Source files -- Get the original design files (PSD, AI, etc.)
  • Extra revisions -- Add more rounds of changes beyond what the package includes
  • Commercial license -- Use the work for commercial purposes
  • Additional pages or items -- Scale up the deliverable
  • Priority support -- Get faster responses during the project

Add-on Types

There are four types of add-ons, each suited to different situations:

Checkbox (Yes/No)

The most common type. Buyers simply check a box to add it.

Best for: Rush delivery, source files, commercial license, priority support

Example: "Include source files" -- $20 flat fee

Buyers pick one option from a list. Great when there are multiple tiers of an upgrade.

Best for: Resolution options, format choices, delivery speed tiers

Example: "Video resolution" -- 720p (free), 1080p (+$10), 4K (+$25)

Text Input

Buyers type in custom information. This can be free or carry an additional charge.

Best for: Personalization text, business names, custom inscriptions

Example: "Business name for the logo" -- no extra charge, just information gathering

Quantity (Select How Many)

Buyers choose a number, and the price multiplies accordingly.

Best for: Extra revisions, additional pages, extra hours, extra items

Example: "Additional revisions" -- $10 each, select 1-5

Limits

Free Pro
Add-ons per service 3 Unlimited [PRO]

When the free version limit is reached, the wizard lets vendors know they can upgrade to Pro for unlimited add-ons.

Pricing Options

Flat Rate

A fixed price added to the order total, regardless of which package the buyer selected.

Example: Source files = +$30, whether the buyer chose Basic or Premium.

Quantity-Based

Price multiplied by the number the buyer selects.

Example: Extra pages = $20 each. Buyer selects 3 = $60 total.

How Add-ons Appear to Buyers

After selecting a package, buyers see the available add-ons listed below. Each add-on shows:

  • The add-on name and description
  • The price (or "Free" if no charge)
  • Any impact on delivery time (e.g., rush delivery subtracts days, extra work adds days)

Selected add-ons are added to the order total at checkout. This applies regardless of whether the add-ons were created through the frontend wizard or the wp-admin service editor.

Delivery Time Impact

Add-ons can change the delivery timeline:

  • Add time -- Extra work like additional pages might add 2 days
  • Reduce time -- Rush delivery might subtract 3 days from the timeline

This is calculated automatically and shown to the buyer before checkout.

Tips for Setting Up Add-ons

  • Price add-ons at 20-40% of your base package price -- This feels like a fair upgrade without being too expensive
  • Keep it to 3-5 add-ons -- Too many options overwhelm buyers and reduce conversions
  • Lead with your most popular add-on -- Rush delivery and source files are typically the most selected
  • Use checkboxes for 90% of add-ons -- They are the simplest and convert best
  • Remove underperforming add-ons -- If an add-on rarely gets selected, replace it with something more appealing

Service Gallery and Media

Your service gallery is one of the first things buyers look at. Strong images and videos can be the difference between a click and a purchase. This guide covers what you can upload, the limits, and how to make your gallery work hard for you.

Service Gallery Upload

What You Can Upload

Media Type Free Pro
Main image 1 (required) 1 (required)
Additional images Up to 4 Unlimited [PRO]
Video embeds 1 Up to 3 [PRO]

Main Image

Every service needs a main image. This is the hero image buyers see in search results, category pages, and at the top of the service page. It is required to publish your service.

Recommendations:

  • Size: 800x600 pixels or larger
  • Format: JPG, PNG, or WebP
  • Keep it under 5MB
  • Show your best work or a clear representation of what you deliver

Gallery images let vendors showcase more of their work. Think of these as a portfolio within the service listing.

What to include:

  • Samples of completed projects
  • Before-and-after comparisons
  • Different angles or variations of your work
  • Process screenshots that show your approach

Supported formats: JPG, JPEG, PNG, GIF, WebP

Maximum file size: 5MB per image

In the free version, you can add up to 4 additional images. With [PRO], there is no limit.

Video Embeds

Videos are a powerful way to showcase work, especially for services like video editing, animation, web development, or any service that benefits from a walkthrough.

Supported platforms:

  • YouTube
  • Vimeo

Simply paste the video URL into the wizard. The video will embed automatically on your service page.

Limits:

  • Free: 1 video
  • [PRO]: Up to 3 videos

Note: Direct video file uploads (MP4, MOV, etc.) are not supported in the wizard. Use YouTube or Vimeo to host your videos and paste the link.

How your video appears to buyers

Your gallery opens on your main image, not the video. Buyers came to see the work; the video is the pitch beside it.

The video sits first in the thumbnail strip, with a play badge over it, using the thumbnail YouTube or Vimeo already generated for it. Buyers click it to watch, click any image to go back, and can switch between them as often as they like without the page reloading.

Two things worth knowing:

  • The video player is only loaded when a buyer actually clicks it. Your service page stays fast for the people who never watch it, and YouTube is not contacted on a visit that ignores the video.
  • If your video's provider does not supply a thumbnail, your main image is used for that button instead.

Nothing here needs configuring. Paste the URL and it behaves this way.

Image Quality

  • Use high-resolution images (1200 pixels wide or more looks best)
  • Show real work samples, not stock photos -- buyers can tell the difference
  • Keep a consistent style across your gallery for a professional look
  • Compress images before uploading for faster page loads (tools like TinyPNG work well)

What to Show

  • Lead with your strongest piece -- The first gallery image matters most after the main image
  • Show variety -- Different styles, projects, or use cases demonstrate versatility
  • Include context -- Show work in its real-world setting (a website design on a laptop screen, a logo on a business card)
  • Remove outdated work -- Keep your gallery current with your best and most recent projects
  • 3-5 images is the sweet spot -- enough to show range without overwhelming the page
  • Quality always beats quantity
  • Order images by relevance and quality, with the strongest pieces first

Video Tips

  • Keep videos under 3 minutes
  • Show the end result, not just the process
  • Add captions for accessibility
  • Make sure the video is set to public on YouTube/Vimeo

Requirements and FAQs

Requirements collect the information vendors need from buyers before starting work. FAQs answer common buyer questions right on the service page. Together, they smooth out the order process and reduce back-and-forth messages.

Requirements: Collecting Buyer Information

Why Requirements Matter

After a buyer places an order, the vendor needs specific information to get started. Requirements are custom questions the buyer answers before the vendor begins work. Good requirements mean fewer delays, fewer misunderstandings, and smoother orders.

How Requirements Work in the Order Flow

  1. Buyer purchases the service
  2. Order status becomes "Pending Requirements"
  3. Buyer sees a form with the vendor's questions and fills it out
  4. Once submitted, the order status moves to "In Progress"
  5. The vendor receives a notification and starts working

If the buyer does not submit requirements, the vendor cannot begin. This protects both parties by ensuring the vendor has what they need upfront.

Requirement Types

You can choose from four answer types for each question:

Type What Buyers See Best For
Short text A single-line text field Business name, website URL, email address
Long text A multi-line text area Project description, detailed preferences, content briefs
File upload A file upload button Logo files, brand guidelines, reference images, documents
Dropdown A list of predefined options Style preferences, industry type, color scheme

Setting Up Requirements

For each requirement, vendors provide:

  • The question -- Clear, specific questions get better answers. "What is your brand's primary color?" is better than "Tell me about your brand."
  • Answer type -- Choose from the four types above
  • Required or optional -- Mark truly essential information as required; keep nice-to-have questions optional
  • Dropdown options -- If using the dropdown type, provide comma-separated choices (e.g., "Modern, Classic, Minimalist, Vintage")

Limits

Free Pro
Requirements per service 5 Unlimited [PRO]

File Upload Details

When a requirement uses the file upload type, buyers can upload a wide range of file formats:

  • Images: JPG, PNG, GIF, WebP
  • Documents: PDF, DOC, DOCX, TXT, RTF, CSV
  • Spreadsheets: XLS, XLSX
  • Presentations: PPT, PPTX
  • Archives: ZIP, RAR, 7Z
  • Audio: MP3, WAV
  • Video: MP4, MOV, AVI
  • Design files: PSD, AI, EPS, SVG

Maximum file size: 50MB per file. All uploaded files are private and only accessible to the buyer, vendor, and admin.

Tips for Writing Good Requirements

  • Ask only what you need -- Too many questions reduce the chance buyers complete them
  • Be specific -- "What three colors represent your brand?" beats "Tell me about your style"
  • Give examples -- Add helpful context to your question text
  • Put the most important questions first -- If a buyer stops partway through, you still get the essentials
  • Keep optional questions at the end -- Required information first, nice-to-haves second

FAQs: Answering Common Questions

Why FAQs Matter

FAQs appear on the service page and help buyers make a decision without needing to message the vendor. They reduce the number of pre-purchase questions and increase buyer confidence.

Limits

Free Pro
FAQs per service 5 Unlimited [PRO]

What to Include in Your FAQs

Cover the questions buyers ask most often:

  • What do you need from me to start? -- Summarize your requirements
  • How many revisions are included? -- Explain per package
  • What if I need changes after delivery? -- Set expectations on post-delivery edits
  • Do you offer rush delivery? -- Point buyers to the add-on if available
  • What is your refund policy? -- Be upfront about when refunds are or are not available
  • How will we communicate? -- Explain the built-in messaging system

Tips for Great FAQs

  • Keep answers to 2-3 sentences -- Buyers scan, they do not read essays
  • Use plain language -- Write like you are talking to a friend
  • Update based on real questions -- When buyers keep asking the same thing, add it as a FAQ
  • Address objections -- If buyers hesitate for a specific reason, answer it proactively

Publishing and Moderation

After completing the service creation wizard, your service either goes live immediately or enters a review queue -- depending on how the marketplace admin has configured things. This guide explains both paths and how to manage your published services.

How Publishing Works

There are two modes, controlled by the marketplace admin:

Instant Publishing (Moderation Off)

When moderation is turned off, services go live the moment a vendor clicks "Publish Service." Buyers can find and purchase the service right away.

This is the default setting and works well for marketplaces that trust their vendors or want a faster onboarding experience.

Admin Review (Moderation On)

When moderation is turned on, submitting a service sends it to a review queue instead of publishing it immediately. Here is the flow:

  1. Vendor clicks "Publish Service" in the wizard
  2. Service status becomes "Pending Review"
  3. The admin receives an email notification
  4. The admin reviews the service and either approves or rejects it
  5. The vendor receives an email with the decision

If approved: The service goes live on the marketplace and buyers can find it.

If rejected: The service goes back to draft status. The vendor receives the admin's reason for rejection and can edit and resubmit.

Service Statuses

Your service will always be in one of these states:

Status What It Means Who Can See It
Draft Saved but not submitted -- work in progress Only the vendor and admins
Pending Review Submitted and waiting for admin approval Only the vendor and admins
Published Live on the marketplace Everyone

What Admins Look For During Review

If your marketplace uses moderation, admins typically check:

  • Is the title clear and accurate?
  • Is the description detailed enough?
  • Are the images high quality and relevant?
  • Are the prices reasonable?
  • Does the service comply with marketplace guidelines?
  • Are delivery times realistic?

What to Do If Your Service Is Rejected

Rejection is not permanent -- it is feedback. Here is how to handle it:

  1. Read the rejection reason carefully -- The admin explains what needs to change
  2. Fix everything mentioned -- Do not just address one issue if multiple were flagged
  3. Improve beyond the minimum -- Use the feedback as an opportunity to strengthen your listing
  4. Resubmit -- Open your service in the wizard and click "Publish Service" again

The service goes back into the review queue for the admin to check again.

Editing a Published Service

Vendors can update their published services at any time through the Dashboard.

What you can change:

  • Title, description, and tags
  • Pricing and packages
  • Gallery images and videos
  • Requirements and FAQs
  • Add-ons

Important: If moderation is turned on, editing a published service and republishing it sends it back through the review queue. The service is temporarily hidden from the marketplace until the admin re-approves it.

Note: Active orders are not affected by edits. Changes only apply to new orders going forward.

Managing Your Services

Saving as Draft

At any point during service creation, vendors can click "Save Draft" to save their progress without publishing. Draft services are only visible to the vendor and admins. There is no time limit on drafts.

Deleting a Service

Vendors can delete services from their Dashboard. Deleted services are moved to trash and can be restored by an admin if needed. Existing orders linked to a deleted service remain intact in the system.

Email Notifications

The following emails are sent during the publishing process:

Event Who Gets Notified
Service submitted for review Admin
Service approved Vendor
Service rejected (with reason) Vendor

These emails can be enabled or disabled by the admin under Sell Services > Settings > Emails.

Tips for Getting Approved on the First Try

  • Write a thorough description -- Explain what you deliver, your process, and what is not included
  • Upload quality images -- Use real work samples at high resolution
  • Set realistic delivery times -- Better to over-deliver than to promise too fast
  • Price fairly -- Research comparable services on your marketplace
  • Complete every field -- A fully filled-out service listing shows professionalism

Managing Your Services: Edit, Pause, and Delete

After publishing a service, you can update it, temporarily hide it, or remove it entirely. This guide covers how each action works and what to expect.

Accessing Your Services

Go to your Dashboard and click My Services in the sidebar. You will see a list of all your services with their:

  • Title and featured image
  • Status -- Published, Draft, Pending, or Suspended
  • Price range -- Starting from the lowest package price
  • Total orders and active orders
  • Average rating

Service management interface


Editing a Service

Click Edit next to any service to open the service editor. You can update:

  • Title and description
  • Category
  • Pricing packages -- Change prices, delivery times, revisions, and features
  • Add-ons -- Add, remove, or reprice extras
  • Gallery images and videos
  • Requirements and FAQs
  • Tags

What Happens After Editing

The behavior depends on whether the marketplace requires service moderation:

Moderation Setting What Happens
Moderation off Changes go live immediately
Moderation on Your service is set to "Pending" and goes back into the approval queue. It is temporarily hidden from the marketplace until an admin approves it.

Tip: If moderation is enabled, avoid making frequent small edits to a published service. Batch your changes and submit them all at once to minimize time spent waiting for re-approval.

Active Orders Are Not Affected

Editing a service does not change any orders already in progress. Existing orders keep their original package terms (price, delivery time, revisions). Only new orders use the updated details.


Pausing a Service

Pausing hides your service from the marketplace without deleting it. Buyers cannot find or purchase a paused service, but it keeps all its settings, reviews, and order history.

How to Pause

  1. Go to Dashboard > My Services
  2. Click the Pause button next to the service
  3. The status changes to Draft and the service is removed from public listings

How to Reactivate

  1. Go to Dashboard > My Services
  2. Find the paused service (status shows "Draft")
  3. Click Activate to republish it

If moderation is enabled, reactivating sends the service back through the approval queue.

When to Pause

  • Taking time off -- Use Vacation Mode instead if you want to pause all services at once
  • Updating content -- Pause while making major changes, then reactivate when ready
  • Seasonal services -- Hide services you only offer at certain times of the year
  • Too many active orders -- Temporarily stop new orders while you catch up on existing work

What Happens to Active Orders

Pausing a service does not affect orders already in progress. Existing buyers can still communicate with you, receive deliveries, and go through the normal order lifecycle. Only new purchases are prevented.


Deleting a Service

Deleting permanently removes a service from the marketplace.

Before You Delete

You cannot delete a service that has active orders. You must first:

  1. Complete or cancel all active orders
  2. Wait for any pending deliveries or disputes to resolve

How to Delete

  1. Go to Dashboard > My Services
  2. Click Delete next to the service
  3. Confirm the deletion

What Gets Removed

  • The service listing and all its content
  • Package definitions and add-ons
  • Gallery images associated with the service
  • FAQs and requirements

What Is Preserved

  • Completed order records -- All past orders, conversations, and deliveries remain in the system
  • Reviews -- Existing reviews are preserved
  • Your earnings -- All commission records stay intact

When to Delete vs Pause

Action Use When
Pause You might offer this service again in the future
Delete You will never offer this service again and want a clean slate

If you are unsure, pause instead. You can always delete later, but you cannot recover a deleted service.


Service Statuses Reference

Status Visible to Buyers Can Be Purchased How to Get Here
Published Yes Yes Approved by admin (or moderation off)
Draft No No New service not yet submitted, or paused by vendor
Pending No No Submitted for moderation, awaiting admin approval
Suspended No No Admin has paused this service (e.g., policy violation)

If Your Service Is Suspended

An admin has paused your service, usually because it violates marketplace policies or needs review. You will typically receive a notification explaining why. Contact the marketplace admin to understand what needs to change before it can be reactivated.


Tips for Managing Services

  • Keep descriptions current -- Outdated descriptions lead to mismatched expectations and revision requests
  • Adjust pricing gradually -- Large sudden price changes can confuse returning buyers
  • Monitor your reviews -- If you see recurring feedback, update your service or packages to address it
  • Use pause strategically -- Better to pause than to take orders you cannot deliver on time
  • Delete sparingly -- A service with strong reviews and order history is an asset; pause it rather than delete it

Buyer Requests & Proposals

Posting a Buyer Request

Buyer requests let you describe exactly what you need and have vendors come to you with offers. Think of it like posting a job listing -- you set the brief, and qualified sellers pitch their services.


What Are Buyer Requests?

Instead of browsing services, you flip the script. Post a description of your project, set your budget, and let vendors compete for your business. You will receive proposals with pricing, timelines, and cover letters explaining why each vendor is the right fit.

How the process works:

  1. You post a request describing your project
  2. Vendors browse open requests and submit proposals
  3. You compare proposals side by side
  4. You accept the best one -- an order is created automatically
  5. The standard order workflow begins

Post a buyer request form


How to Post a Request

Go to Dashboard > Buyer Requests and click Post New Request. Fill out the form with these details:

Title

Give your project a clear, descriptive title. Good titles attract better proposals.

  • "Logo Design for Tech Startup -- Modern and Minimalist" (good)
  • "Need help" (too vague -- vendors will skip it)

Description

Explain what you need in detail. The more specific you are, the better proposals you will get. Include deliverables, technical needs, design preferences, and anything else a vendor should know before quoting.

Category

Pick the service category that best matches your project. This helps the right vendors find your request.

Budget

You can set your budget two ways:

  • Fixed price -- A single amount (e.g., "$500")
  • Price range -- A minimum and maximum (e.g., "$300 to $500")

Price ranges tend to attract more proposals since they give vendors flexibility.

Delivery Timeline

How many days do you need the work completed? This is a guideline -- vendors can propose a different timeline in their response.

Skills Needed

List specific skills or technologies the project requires (e.g., "WordPress", "Logo Design", "React"). This helps vendors decide if they are a good fit.

Attachments

Upload reference files, mockups, design briefs, or any documents that help explain what you need.

Public buyer requests listing


After You Post

Once your request is live:

  • Vendors are notified and can browse your request
  • Proposals arrive with pricing, timelines, and cover letters
  • You get notified by email and in-app each time a new proposal comes in
  • Your request stays open for 30 days by default (admin-configurable)

Request Expiry

Requests automatically expire after 30 days if no proposal is accepted. After expiry, the request is hidden from vendors and no new proposals can be submitted. You can repost with updates if needed.


Reviewing Proposals

Go to Dashboard > Buyer Requests and click on your request to see all proposals. For each one, you will see:

  • Vendor profile and ratings
  • Proposed price and delivery timeline
  • Cover letter explaining their approach

Accepting a Proposal

When you find the right vendor, click Accept Proposal. Here is what happens:

  1. An order is created automatically
  2. All other proposals are declined
  3. Your request is marked as hired
  4. You are redirected to checkout to complete payment
  5. After payment, the vendor starts work

You can only accept one proposal per request. If you need multiple vendors, post separate requests.


Managing Your Requests

Editing

You can edit your request (title, description, budget, attachments) at any time while it is still open and no proposal has been accepted.

Closing

If you no longer need the work, click Close Request. Pending proposals are notified, and the request is removed from vendor listings.

Reopening

If your request expires or you close it early, you can repost it with updates to start receiving proposals again.


Tips for Getting Great Proposals

  • Be specific -- List exact deliverables, file formats, and must-haves
  • Set a realistic budget -- Research market rates for similar work
  • Respond quickly -- Check proposals within a day or two
  • Decline what you will not accept -- Keeps your request tidy and respects vendors' time

Common Questions

Do I pay to post a request? No. Posting requests is free. You only pay when you accept a proposal and complete checkout.

Can I accept multiple proposals? No, only one per request. Accepting one automatically declines the others. Post separate requests if you need multiple vendors.

What if I do not get any proposals? Try increasing your budget, making requirements clearer, or double-checking your category. Give it 3-5 days before reposting.

Can I message vendors before accepting? Not directly through requests, but vendors can include questions in their proposals and you can use the proposal review screen to evaluate fit.

Submitting Proposals

As a vendor, proposals are how you pitch your services to buyers who have posted requests. Browse open requests, find projects that match your skills, and submit a compelling proposal to win the work.


Finding Buyer Requests

Go to Dashboard > Buyer Requests to see all open requests from buyers. You can:

  • Browse all open requests
  • Filter by category
  • Search by keywords
  • Sort by budget or date posted

Click any request to see the full details: project description, budget, desired timeline, required skills, and any attached files.


What Goes Into a Proposal

Each proposal has three required fields and a few optional ones.

Cover Letter (Required)

This is your pitch. Explain why you are the right vendor for the job. A great cover letter:

  • Shows you understand the project
  • Highlights relevant experience
  • Outlines your approach or plan
  • Feels personalized (not copy-pasted)

Buyers can tell the difference between a thoughtful response and a generic template. Take the time to address their specific needs.

Proposed Price (Required)

Your price for completing the project. Review the buyer's stated budget and set a competitive rate that reflects the value of your work.

  • Pricing within the buyer's range gets more attention
  • Prices far below market rate raise red flags
  • If your rate is above their budget, explain why the extra value is worth it

Delivery Time (Required)

How many days you need to complete the work. Be realistic -- it is better to slightly overestimate and deliver early than to promise a tight deadline and miss it. Build in a buffer for revisions.

Attachments (Optional)

Link to portfolio samples, similar past projects, mockups, or anything that strengthens your pitch.

If you have an existing service listing that matches the request, link it. The buyer will see your service details, reviews, and ratings -- which builds trust.


One Proposal Per Request

You can only submit one proposal per request. If you want to change something after submitting, you can edit your proposal while it is still pending. If you withdraw your proposal, you can submit a new one as long as the request is still open.


Proposal Statuses

Status What It Means
Pending Submitted and waiting for the buyer's decision
Accepted Buyer chose you -- an order is created automatically
Rejected Buyer went with another vendor
Withdrawn You pulled your proposal back

Editing Your Proposal

You can update your cover letter, price, and delivery time at any time while your proposal is still pending. Once the buyer accepts or rejects it, the proposal is locked.

To edit, go to Dashboard > My Proposals, find the proposal, and make your changes.


When Your Proposal Is Accepted

When a buyer accepts your proposal:

  1. An order is created automatically with your proposed price and timeline
  2. All other proposals on that request are declined
  3. You are notified by email and in your dashboard
  4. The buyer completes payment
  5. You start work once payment is confirmed

Withdrawing a Proposal

Changed your mind? Go to Dashboard > My Proposals, find the proposal, and click Withdraw. The buyer is notified, and you can submit a fresh proposal if the request is still open.

Good reasons to withdraw: schedule changed, project scope is unclear, or you found a better opportunity.


Tips for Winning Proposals

Do:

  • Personalize every proposal to the specific request
  • Show relevant examples from your portfolio
  • Be upfront about your timeline and process
  • Proofread before submitting

Avoid:

  • Generic copy-paste responses
  • Pricing far below market rate just to win
  • Promising unrealistic timelines
  • Ignoring the project requirements

If Your Proposal Is Rejected

It happens. Common reasons include budget mismatch, timeline differences, or the buyer choosing someone they have worked with before. Focus on the next opportunity, and use any feedback to improve future proposals.


Common Questions

Can I submit proposals to multiple requests at once? Yes. There is no limit on how many active proposals you can have. Focus on quality over quantity for the best results.

Can I see what other vendors proposed? No. Proposals are private -- only the buyer sees all submissions. You can only see your own.

Do I get notified when the buyer views my proposal? Not currently. You will be notified when your proposal is accepted or rejected.

What if the buyer never responds? Give it 5-7 days. Some buyers take time to review. If there is no response, move on to other requests.

Managing Requests

Once you have posted a buyer request and proposals start coming in, this is where you evaluate vendors, accept the best offer, and manage the lifecycle of your request.


Your Requests Dashboard

Go to Dashboard > Buyer Requests to see all your buyer requests at a glance. Each request card shows:

  • Title and current status
  • Number of proposals received
  • Budget you set
  • Desired delivery timeline
  • Expiration date
  • Category

Buyer's request management

My requests with proposal count


Request Statuses

Status What It Means
Open Accepting proposals from vendors
In Review You are evaluating proposals (still accepts new ones)
Hired You accepted a proposal and an order was created
Expired The request passed its deadline without an accepted proposal
Cancelled You cancelled the request

The most common flow is: Open > In Review > Hired.


Reviewing Proposals

Click on any request to see all the proposals submitted by vendors. For each proposal, you can review:

  • The vendor's profile, rating, and past reviews
  • Their proposed price and delivery timeline
  • Their cover letter explaining their approach

Take your time comparing. The cheapest option is not always the best -- look for vendors who clearly understand your project, have relevant experience, and communicate professionally.


Accepting a Proposal

When you find the right vendor, click Accept Proposal. Here is what happens automatically:

  1. An order is created with the vendor's proposed price and timeline
  2. The accepted proposal is marked as accepted
  3. All other proposals are declined automatically
  4. Your request status changes to "Hired"
  5. The vendor is notified by email and in-app
  6. You are redirected to checkout to complete payment

After payment, the order moves to "In Progress" and the vendor begins work.


Rejecting Proposals

If a proposal is not the right fit, you can reject it individually. The vendor is notified so they can move on to other opportunities. You are not required to reject proposals -- unaccepted ones are automatically declined when you accept a different vendor.


Editing a Request

You can edit your request at any time while it is still open and no proposal has been accepted. Go to Dashboard > Buyer Requests, click Edit, make your changes, and click Update.

What you can change:

  • Title and description
  • Budget
  • Category
  • Attachments

What you cannot change:

  • Requests that already have an accepted proposal
  • Expired requests

Closing a Request

If you no longer need the work done, click Close Request on your request page. The status changes to "Cancelled", vendors with pending proposals are notified, and the request is removed from public listings.

Reasons to close:

  • Found a vendor outside the platform
  • Project cancelled or requirements changed significantly
  • Budget no longer available

Closing does not affect any orders that were already created from accepted proposals.


Request Expiration

Requests expire after 30 days by default (your site admin may configure a different period). When a request expires:

  • Status changes to "Expired"
  • No new proposals can be submitted
  • The request is hidden from vendor listings
  • Existing proposals remain visible to you for reference

If you still need the work done, you can repost the request with updated details.


From Proposal to Order

The transition from buyer request to active order is seamless. When you accept a proposal:

  • The order is created with all the details from your request and the vendor's proposal
  • Requirements from your request description are carried over
  • A conversation thread is created so you and the vendor can communicate
  • The standard order workflow takes over from there

For details on what happens next, see the Order Workflow guide.


Tips for Evaluating Proposals

  1. Vendor experience -- Check their portfolio and past reviews
  2. Proposal quality -- Do they understand your requirements?
  3. Price -- Look for value, not just the lowest number
  4. Timeline -- Is their delivery estimate realistic?
  5. Communication -- Are they responsive and professional?

Common Questions

Can I accept multiple proposals from one request? No. Only one proposal can be accepted per request. If you need multiple vendors, post separate requests.

What if no proposals come in? Try increasing your budget, improving your description, or checking that the category is correct. Give it 3-5 days before making changes.

Can I reopen an expired request? You can repost it with updated details. The original expired request remains in your history for reference.

Proposal Contracts: Fixed vs Milestone

When a vendor replies to a buyer request, they choose the contract type - Fixed or Milestone - before the buyer ever sees the proposal. This is an Upwork-style commitment: the buyer compares proposals with the contract shape locked in, accepts the one they prefer, and the order is created pre-wired for that flow.

Vendor choosing contract type on the proposal form

Why contract type matters

Two projects of the same dollar value can need very different payment rhythms:

  • A $500 job with one deliverable is a fixed contract - single price, single delivery, buyer pays upfront.
  • A $500 job split into four phases with separate reviews is a milestone contract - payment and approval happen phase by phase.

Putting the choice on the proposal lets the vendor pick the model that fits the work, and the buyer compare proposals with that shape in mind instead of renegotiating after acceptance.

The vendor journey

Picking a contract type

On the proposal form for a buyer request, the vendor picks one of two radio buttons before entering pricing:

  • Fixed price - one amount, one delivery date. This is the original proposal flow.
  • Milestone-based - break the project into named phases. A repeater appears where the vendor enters each phase's title, description, amount, and days. The total is the sum of the phases.

Milestone repeater on the proposal form

Fixed contract

A fixed proposal carries a single price and delivery estimate, exactly like the pre-1.1 flow. On acceptance, the buyer pays the full amount through checkout, the order starts in requirements collection, and delivery is handled through the standard order workflow.

Milestone contract

A milestone proposal carries a list of phases. Each phase has a title, a description of what's delivered, an amount, and a days estimate. The vendor sees a live total at the bottom of the form so the breakdown always reconciles with what the buyer will see.

A single-phase milestone plan is allowed but reads awkwardly to buyers (it looks like a fixed proposal with extra steps). For one-shot jobs, pick Fixed. For anything multi-stage, pick Milestone.

The buyer journey

Comparing proposals

On the buyer-request page, each proposal shows a small badge next to the total so you can compare shapes at a glance:

  • Fixed · $500
  • 3 phases · $600

Expanding a milestone proposal shows the full phase list with titles, amounts, and days. You see the plan - not just the total - before deciding.

Buyer comparing fixed and milestone proposals

Accepting a proposal

Fixed: clicking Accept takes you to checkout for the full amount. Once paid, the order is created in requirements collection and the vendor gets to work.

Milestone: clicking Accept creates the order immediately with all phases pre-populated in the timeline and the project marked as in-progress. You don't go through checkout for the whole project - that's $0 by design. You pay individual phases from the order page, starting with phase 1.

Paying phases in lock-step

Milestone contracts pay in lock-step: phase N only becomes payable once every earlier phase is approved (or cancelled). Phase 1 is payable immediately on order creation; phases 2 and beyond sit as "Locked - pay phase 1 first" until it clears. The rule is enforced server-side too, so you can't skip ahead by editing a URL.

Once you approve a phase, the next one unlocks. Continue until every phase is approved - at which point the project auto-completes and you get the standard order-completed email and the Rate Your Experience prompt.

See the full lock-step behaviour in the Milestone Contracts doc.

What happens at acceptance

Fixed Milestone
Parent order total Full proposal amount $0
Parent order status pending_requirements in_progress
Checkout step Required before order starts Skipped - no parent-level payment
Phases pre-created Not applicable Yes, one row per proposed phase in pending_payment
First action Buyer submits requirements Buyer pays phase 1

Changes after acceptance

Once the buyer accepts:

  • The proposal itself is locked - the vendor can't edit terms after the fact.
  • The vendor can still propose ad-hoc milestones during a milestone contract if the scope grows. Those are added to the timeline and paid individually, just like the predefined phases.
  • Extensions are not available on a milestone contract - that flow is reserved for catalog orders (#extensions-wpss)).

Tips

For vendors:

  • Pick Fixed for one-shot work, Milestone for multi-stage projects. Mismatching the contract type to the shape of the work makes it harder for the buyer to say yes.
  • On milestone proposals, lead with deliverables per phase. Buyers don't just look at the total - they look at what they get per phase.
  • Use ad-hoc milestones for real scope changes, not for restructuring phases that were already agreed. If phase 2 ends up being twice as big as you quoted, that's a conversation, not an ad-hoc.

For buyers:

  • Read the full breakdown on milestone proposals before accepting. The accept click locks the plan in.
  • Don't compare a fixed $500 proposal and a $500 milestone proposal on price alone - compare on deliverables per step.
  • Once accepted, remember the lock-step rule. If you want to keep the project moving, approve phase deliveries promptly.

Order Management

How Orders Work

Every order on your marketplace follows a clear path from purchase to completion. Here is what happens at each stage and who needs to do what.

The Order Flow at a Glance

Payment > Requirements > In Progress > Delivery > Approval > Complete

Each order moves through these stages automatically. Both buyers and vendors get email notifications at every step, so nobody is left guessing.

What Each Status Means

Pending Payment

The buyer has started checkout but payment has not gone through yet. Nothing happens on anyone's end until the payment is confirmed. If the buyer does not complete payment within 24 hours, the order is automatically cancelled.

Pending Requirements

Payment is confirmed. Now the buyer needs to fill in the project details the vendor needs before starting work. The system sends automatic reminders on day 1, day 3, and day 5 if the buyer has not submitted yet.

If you have set a requirements timeout (in Settings > Orders & Disputes), one of two things happens when time runs out:

  • Auto-start enabled -- The order moves forward without requirements, and the vendor starts work.
  • Auto-start disabled -- The order is cancelled and the buyer gets a refund.

In Progress

The vendor is actively working. A delivery deadline is set based on the service package the buyer chose. The system sends the vendor a reminder 24 hours before the deadline.

Late

The deadline has passed and the vendor has not delivered yet. Both the buyer and vendor are notified. The vendor can still submit their work, and they can also request a deadline extension.

Pending Approval

The vendor has submitted their delivery. The buyer now has three choices:

  1. Accept the delivery -- the order is complete.
  2. Request a revision -- the vendor makes changes and resubmits.
  3. Open a dispute -- if something is seriously wrong.

If the buyer does not respond within the auto-complete window (default: 3 days), the order completes automatically and the vendor gets paid.

Revision Requested

The buyer has asked for changes. The vendor receives the feedback, makes updates, and submits a new delivery. The number of revisions allowed depends on the service package settings.

Completed

The order is finished. The platform commission is calculated, the vendor's earnings are recorded, and both parties can leave reviews. The buyer has a dispute window (default: 14 days) to raise issues after completion.

Cancelled

The order has been stopped. This can happen for several reasons -- payment failure, requirement timeout, mutual agreement, or an admin decision. If payment was received, a refund is processed. Cancelled orders cannot be reopened.

Disputed

A formal dispute has been opened. The order is paused while both parties submit evidence and the admin mediates. See Opening a Dispute for details.

On Hold

An admin has manually paused the order, usually for investigation or fraud checks. All deadlines and automated workflows are frozen until the admin resumes or cancels the order.

Automatic Workflows

Your marketplace runs several background tasks to keep orders moving:

  • Late order checks run every hour, marking overdue orders as late.
  • Auto-complete runs twice daily, completing orders where the buyer has not responded to a delivery.
  • Deadline reminders go out daily, warning vendors about upcoming deadlines.
  • Requirement reminders go out daily on day 1, 3, and 5 to buyers who have not submitted project details.
  • Requirement timeout runs daily, auto-starting or cancelling orders when the waiting period expires.

Admin Order Management

Admins can view and manage all marketplace orders from Sell Services > Orders. From there you can:

  • See every order with its current status
  • Filter and search orders
  • View full order details, conversations, and deliveries
  • Manually change order status when needed

Admin orders list showing all marketplace orders

Admin order detail view with full order information

A Typical Order Timeline

Here is what a smooth order looks like:

  • Day 0 -- Buyer places order, payment confirmed, requirements submitted. Vendor starts work with a 5-day deadline.
  • Day 4 -- Vendor gets a deadline reminder (24 hours left).
  • Day 5 -- Vendor delivers the work.
  • Day 8 -- Buyer has not responded, so the order auto-completes. Commission is recorded and earnings are split.

And here is one with a revision:

  • Day 0 -- Order placed, requirements submitted, work begins.
  • Day 5 -- First delivery submitted.
  • Day 6 -- Buyer requests revision with feedback.
  • Day 8 -- Vendor submits updated delivery.
  • Day 9 -- Buyer accepts. Order complete.

Key Settings

You can adjust how orders behave at Sell Services > Settings > Orders & Disputes:

Setting Default What It Does
Auto-Complete Days 3 Days after delivery before auto-completing
Allow Disputes Enabled Whether buyers can open disputes
Dispute Window 14 days Days after completion to allow disputes
Requirements Timeout 7 days Days before taking action on missing requirements
Auto-Start on Timeout Enabled Start order vs cancel when requirements timeout

Tips for Success

For Vendors: Set realistic delivery times, communicate proactively, and deliver before your deadline whenever possible.

For Buyers: Submit your requirements promptly, review deliveries within a few days, and use the messaging system to clarify anything before opening a dispute.

For Admins: Monitor late orders regularly, respond to disputes quickly, and make sure your auto-complete and timeout settings match the pace of your marketplace.

Buyer Requirements

After a buyer places an order, the vendor often needs specific project details before they can start working. That is what requirements collection is for.

What Are Requirements?

Requirements are the questions a vendor sets up on their service so buyers can provide project details after checkout. Think of it like a brief or intake form -- the vendor defines the questions, and the buyer fills them in.

For example, a logo design vendor might ask:

  • What is your company name?
  • Upload your brand guidelines
  • What colors do you prefer?

Requirements section on the order page

How Buyers Fill Them In

After payment is confirmed, the order moves to "Pending Requirements" status and the buyer gets an email asking them to submit their details.

  1. The buyer clicks the link in the email (or navigates to the order page).
  2. They fill out the form the vendor created.
  3. They upload any requested files.
  4. They click Submit Requirements.

Once submitted, the order moves to "In Progress" and the vendor's delivery deadline starts.

Submit requirements button and form interface

Automatic Reminders

If the buyer does not submit right away, the system sends automatic email reminders:

Day What the buyer receives
Day 1 First reminder: "Please submit your requirements"
Day 3 Second reminder: "Your vendor is waiting"
Day 5 Final warning: "Submit requirements or your order may be affected"

What Vendors Can Ask For

Vendors build their requirements form when creating or editing a service. Four question types are available:

  • Text -- Short answers like a website URL, company name, or social media handle.
  • Textarea -- Longer descriptions like project overview, design preferences, or feature requirements.
  • File Upload -- Reference materials, brand logos, content documents, or design mockups. Supports images, documents, archives, media files, and design files up to 50MB per file.
  • Dropdown -- A single choice from predefined options, like preferred style or package type.

Each question can be marked as required or optional, and vendors can add helpful placeholder text and instructions.

Note: When admins create or edit services from the WordPress admin panel, additional requirement field types are available beyond these four: Number, Checkbox, Radio, Multiple File Upload, and Date. These extra types are only accessible through the admin interface, not the vendor service creation wizard.

Requirements form fields displayed on the order page

Skipping Requirements

Some services do not need upfront details from the buyer. If a vendor does not add any requirement questions to their service, the order skips straight from payment to "In Progress."

Requirement Timeout Settings

You can control what happens if a buyer never submits their requirements. Go to Settings > Orders & Disputes and adjust these:

Requirements Timeout Days -- How many days to wait before taking action. Set to 0 to disable (the order waits indefinitely).

Auto-Start on Timeout -- What happens when the timeout expires:

  • Enabled -- The order starts without requirements. The vendor begins work and can ask the buyer for details through messaging.
  • Disabled -- The order is cancelled and the buyer gets a refund.

Allow Late Requirements -- When enabled, buyers can still submit requirements even after work has already started. Useful for flexible services.

Viewing Submitted Requirements

Vendors see the submitted requirements in the order detail page under the Requirements tab. Each answer is displayed with its question, and file uploads include download links.

Completed requirements view showing all submitted information

Admins can view requirements from the order detail page in Sell Services > Orders.

Tips

For Vendors: Keep your requirements form focused -- only ask for what you truly need. Use clear questions, add helpful placeholder text, and only mark fields as required if you genuinely cannot work without them.

For Buyers: Submit your requirements as soon as possible. The vendor cannot start work without them. Be thorough -- more detail means better results and fewer revisions.

For Admins: If you notice orders getting stuck in "Pending Requirements," consider enabling a timeout. Monitor email deliverability to make sure reminder emails actually reach buyers.

Built-in Messaging

Every order includes a private conversation between the buyer and vendor. This keeps all project communication in one place and creates a clear record of everything discussed.

How It Works

When an order is placed, a conversation is created automatically. The buyer and vendor can message each other directly from the order page in their dashboard. Admins can view these conversations but cannot participate in them -- this keeps the discussion between the two parties involved.

Order messaging interface

Sending Messages

To send a message:

  1. Go to your Dashboard and open the order.
  2. Click the Messages tab.
  3. Type your message in the text area.
  4. Optionally attach files (documents, images, references).
  5. Click Send Message.

Messages can include text, file attachments, or both. You cannot send an empty message.

Order message thread between buyer and vendor

File Attachments

You can attach files to your messages for sharing reference materials, work-in-progress files, or additional project details.

Supported file types include:

  • Images (JPG, PNG, GIF, WebP)
  • Documents (PDF, Word, Excel, PowerPoint, TXT, CSV)
  • Archives (ZIP, RAR, 7Z)
  • Media (MP3, WAV, MP4, MOV, AVI, WebM)
  • Design files (PSD, AI, EPS, Sketch, Figma)

For security, SVG, HTML, CSS, and JavaScript files are not allowed.

File size limits depend on your WordPress server settings. For best results, use ZIP archives for large files.

Message Notifications

When you receive a new message:

  • An email notification is sent (if enabled in your settings).
  • An unread badge appears on your dashboard.
  • The unread count shows how many messages you have not read yet.

Messages are marked as read when you view the conversation.

When Messaging Is Available

Messaging is active throughout the order -- from the moment it is placed until it is completed. Once an order is completed or cancelled, the conversation becomes read-only. You can still view the full history, but no new messages can be sent.

If you need to communicate after an order is finished, use the dispute system for post-completion issues or reach out to the site admin.

What Appears in the Conversation

Besides your own messages, the conversation thread also shows:

  • Delivery notifications when the vendor submits work.
  • Revision requests when the buyer asks for changes.
  • Status changes as the order moves through each stage.
  • System messages for things like extension requests, deadline reminders, and auto-completion notices.

These system entries help both parties keep track of what is happening without having to check the order status separately.

Admin Access

Admins can view all order conversations from Sell Services > Orders by opening any order and clicking the Messages tab. This is useful for dispute investigation and monitoring marketplace quality.

Admins can see all messages, timestamps, and attachments, but they cannot reply directly. Admin involvement should go through the dispute resolution system or direct email contact.

Tips for Good Communication

  • Respond within 24 hours -- Timely responses build trust and keep projects moving.
  • Be clear and specific -- Provide detailed feedback and concrete examples.
  • Stay professional -- Keep all communication courteous and on-topic.
  • Use the platform -- Do not move conversations off-platform. The message history protects both parties if a dispute arises.
  • Attach files when helpful -- A screenshot or reference document can prevent misunderstandings.

Deliveries & Revisions

When a vendor finishes the work, they submit a delivery. The buyer then reviews it and either accepts the work or requests changes. Here is how the whole process works.

How Vendors Deliver Work

Once an order is in progress (or a revision has been requested), the vendor can submit their delivery:

  1. Go to Dashboard > Sales Orders and open the order.
  2. Click Submit Delivery.
  3. Upload the finished files.
  4. Write a message explaining what is included.
  5. Click Submit.

The order immediately moves to "Pending Approval" and the buyer gets an email notification.

Supported file types include: images, documents, archives, audio, video, design files, and data files. For security, SVG, HTML, CSS, and JavaScript files are not allowed -- use a ZIP archive if you need to deliver those formats.

What the Buyer Sees

When a delivery arrives, the buyer can download the files and review the work. They have three options:

Accept the Delivery

If the work meets expectations, the buyer clicks Accept Delivery. The order is marked as complete, the vendor gets paid, and both parties can leave reviews.

Order confirmation screen after accepting delivery

Request a Revision

If changes are needed, the buyer clicks Request Revision and provides specific feedback about what needs to be fixed. The order goes back to the vendor, who makes the changes and submits a new delivery.

Open a Dispute

If there is a serious problem that cannot be resolved through revisions, the buyer can open a formal dispute. See Opening a Dispute for details.

Delivery review interface where buyer can accept, revise, or dispute

Auto-Complete

If the buyer does not respond to a delivery within the auto-complete window, the order completes automatically. The default is 3 days, but admins can change this in Settings > Orders & Disputes. Setting it to 0 disables auto-completion entirely.

This protects vendors from orders that sit in limbo because a buyer never responds.

How Revisions Work

Revisions let the buyer request changes to delivered work. Each service package has its own revision limit set by the vendor (for example, Basic gets 1 revision, Premium gets unlimited).

When a buyer requests a revision:

  1. They describe what needs to change (specific feedback is required).
  2. The vendor gets notified and sees the feedback.
  3. The vendor makes the changes and submits a new delivery.
  4. Each resubmission creates a new version -- both parties can access all previous versions.

When Revisions Run Out

If all included revisions have been used, the buyer can no longer request changes through the system. At that point, their options are:

  • Accept the work as-is.
  • Negotiate an extra paid revision with the vendor.
  • Open a dispute if the work does not meet the original requirements.

The vendor can always offer additional revisions as a goodwill gesture, even after the limit is reached.

Delivery File Access

Delivery files are private and secure:

  • Only the buyer, vendor, and admin can access them.
  • Files require login to download.
  • All versions are kept -- nothing is deleted when a new delivery is submitted.

Settings That Affect Deliveries

Go to Settings > Orders & Disputes to configure:

Setting Default What It Does
Auto-Complete Days 3 Days after delivery before auto-completing if buyer does not respond. 0 to disable.

Tips

For Vendors:

  • Test all files before delivering -- make sure everything opens and works correctly.
  • Include all promised deliverables in one submission.
  • When resubmitting after a revision, clearly explain what you changed.
  • Try to deliver before your deadline.

For Buyers:

  • Review deliveries within 2-3 days to avoid auto-completion.
  • When requesting revisions, be as specific as possible about what needs to change.
  • Compare the delivery against your original requirements.
  • Accept promptly once you are satisfied.

Milestone Contracts

Milestone contracts break a custom project into paid phases. The vendor proposes the plan, the buyer approves it as a whole, then the buyer pays and approves each phase one at a time. It's the right fit for larger, scoped work where neither side wants to commit the full amount up front.

Milestone timeline on a buyer's order page

When to use a milestone contract

Milestone contracts live on buyer-request orders only - projects that started with a buyer posting a brief and a vendor responding with a custom proposal. For a fixed-price catalog service, use a Paid Extension instead. The two features are mutually exclusive - a single order will only ever show one or the other.

Milestone contracts work well when:

  • The project is large or open-ended (website build, editing a book, a phased consulting engagement).
  • The work divides cleanly into stages that each deliver something the buyer can review.
  • Both sides want progress payments rather than a lump sum upfront or everything at the end.

The vendor journey

Proposing a milestone contract at proposal time

When you reply to a buyer request, choose Milestone as the contract type on the proposal form. You'll see a repeater where you enter each phase:

  • Title - a clear name the buyer will recognise (e.g. "Homepage wireframes").
  • Description - what's delivered at the end of this phase.
  • Amount - what the buyer pays for this phase.
  • Days - how many days this phase takes.

The total of the phases is what the buyer sees as the project total. There's no separate upfront fee - the parent order's base price is $0, and all money flows through the phase payments.

Once you submit, the buyer can compare your proposal against others, expand the phase list, and review the full breakdown before accepting.

Adding ad-hoc phases later

Custom projects often grow. After the contract is under way you can still propose additional phases from the order page with the + Propose a phase button. A later addition is treated the same way as any predefined phase - the buyer pays, you deliver, the buyer approves.

Ad-hoc phases expire; contract phases do not. A phase you add mid-project is cancelled automatically if the buyer has not paid it within 48 hours. Phases that came from the original accepted proposal are exempt and wait indefinitely. See The 48-hour abandon sweep.

Delivering a phase

When the buyer pays a phase:

  1. You receive an email and in-app notification to start work.
  2. The phase moves to In progress.
  3. When you're done, hit Submit Delivery on that phase row. Attach files or notes the buyer needs.
  4. The phase moves to Awaiting approval.
  5. On approval, the money is already in your wallet - approval confirms delivery, it doesn't trigger the payout (payment happened when the buyer paid the phase).

If the buyer wants changes, they ask in the order chat and you re-submit. Revisions aren't counted against the main order's revision limit and there's no separate reject button - conversations happen in chat.

The buyer journey

Reviewing a milestone proposal

On the buyer-request page, milestone proposals are tagged with a small badge (3 phases · $500) next to the total. Expanding the proposal shows the phase list with titles, amounts, and days. You see the whole plan before accepting, so nothing is a surprise later.

Accepting a milestone contract

When you accept, the order is created with all phases pre-populated in the timeline and the project kicks off. You don't pay the base of the order - it's $0 by design. Money only moves when you pay individual phases.

The lock-step rule, and where it actually holds

The lock-step rule is the key thing to understand about milestone contracts:

Phase N only becomes payable once every earlier phase has finished - approved, declined, cancelled, or swept away unpaid.

So on a 3-phase contract, phase 1 is payable immediately. Phases 2 and 3 show a disabled "Locked - pay phase 1 first" pill. This keeps both sides in rhythm - the vendor isn't working on multiple phases in parallel with no payment history, and you aren't stacking up prepayments on phases you haven't seen yet.

Paying a phase does not unlock the next one. A paid phase is In progress, which still counts as open. Phase 2 unlocks when phase 1 is approved (or declined, or cancelled) - not when it is paid. Only one phase is ever in flight at a time, by design.

Where the rule is enforced - and where it is not

This matters if you are choosing a payment platform, and it is the part most easily mis-stated. The lock is enforced at checkout entry points on the standalone rail and on the two REST pay endpoints:

Entry point Locked phase refused?
The order page pay button (any rail) Yes - the button is disabled
POST /orders/{id}/pay, POST /milestones/{id}/pay Yes - HTTP 409 wpss_milestone_locked
Standalone checkout via ?pay_order=N Yes - shows a notice instead of the form
Standalone Stripe and Razorpay intents Yes - wpss_phase_locked
WooCommerce order-pay URL No
POST /payments/create-intent / /payments/confirm with pay_order No
PayPal's direct create-payment path No

On the WooCommerce rail the pay-order URL is generated by a resolver that checks only "is this unpaid?" - so a determined buyer who has the URL for a later phase can pay it out of order, and the payment settles normally. Treat lock-step as a workflow rail that keeps honest buyers in sequence, not a security control. If sequencing must be enforced absolutely, run on standalone.

(All ownership checks are enforced everywhere: only the buyer on the order can pay it, on every rail.)

Approving deliveries & requesting revisions

When the vendor submits a phase, you see a Review & Approve action on that row. If the delivery is right, approve it and the next phase unlocks. If you want changes, click Request revision in chat - it drops you into the order conversation with a reference to that phase so the vendor knows what you're talking about. There's no separate reject status; revisions are a conversation.

Where you actually click

A milestone contract lives in the WPSS Dashboard, not in your store's order screens. The whole run, start to finish:

# Who Where Action
1 Buyer Buyer Request Accepts a proposal whose contract type is Milestone
2 Vendor Dashboard → Sales Orders → the order Propose a phase (title, amount, days)
3 Buyer Dashboard → My Orders → the order → timeline Pay on that phase
4 Vendor Same order, same phase Works, then Submit Delivery
5 Buyer Same phase Approve - which unlocks the next phase

Repeat 2-5 per phase. Only one phase is payable at a time: the next stays Locked until the current one is approved or cancelled.

Where it is not: milestone phases never appear in WooCommerce → My Account → Orders as something to act on. That screen is a payment receipt. The work is managed in the Dashboard.


What your site needs for phase payments

Milestone contracts require the site to run Standalone WPSS payments or WooCommerce. Those are the two setups phase payment is built and tested against.

Site setup Phase Pay
Standalone WPSS payments Supported
WooCommerce Supported - a real WooCommerce order is created for the phase, so the Pay link keeps working even from an email days later

If your marketplace runs on another ecommerce platform, use Extensions for extra paid work instead, or ask the site owner about milestone support.

Site owners set this at WP Sell Services → Settings → General → Ecommerce Integration.


Project completion

When the last open phase reaches a terminal state, the whole project flips to Completed automatically. Both parties receive the standard order-completed email, a "Project complete" summary card appears at the top of the timeline showing total phases paid and total spent, and the Rate Your Experience CTA goes out to the buyer. The same completion hooks run as for any other order type - vendor stats update, seller-level progress ticks up, and the order moves to completed archives.

"Terminal" includes declined, not only approved. If the buyer declines the final phase, the project still completes. That is deliberate: with every other phase settled, a buyer refusing to fund one more phase means the engagement is over, and leaving the order open forever would strand both parties. But it does mean "Completed" on a milestone project reads as "nothing left outstanding", not necessarily "everything was delivered". Check the phase list, not just the order status.

Two ways a project does not auto-complete, worth knowing:

  • The vendor deletes the last unpaid phase. The phase is cancelled, but the completion check does not re-run, so the parent stays open until something else is approved or declined.
  • The last phase is swept by the 48-hour abandon job. Same reason.

In both cases the order can still be completed by hand from the order page.

The 48-hour abandon sweep

A daily background job cancels ad-hoc phases that have sat unpaid for more than 48 hours.

What it targets Phases in Awaiting payment, created more than 48 hours ago
What it does Sets them to Cancelled. The row is kept, not deleted
What it skips Contract phases - anything that came from the original accepted proposal. Those wait indefinitely
How often Once a day
Who is told Nobody. No email, no in-app notification, no timeline entry

This is the behaviour most likely to surprise you, so state it plainly:

  • Vendors - a phase you add mid-project is a 48-hour offer. If the buyer hasn't paid by then it disappears from their list without either of you being told. If the buyer still wants it, propose it again.
  • Buyers - if a phase you meant to pay has vanished, it most likely expired. Ask the vendor to re-propose it; nothing was charged.

Because a cancelled phase counts as finished, an abandoned phase also unlocks the phase after it.

Cancelling a milestone contract

Cancellation rules follow what's actually fair for split-phase work:

  • Paid and approved phases stand. Those payments are earned and stay with the vendor.
  • Unpaid phases are auto-cancelled when the parent is cancelled - no money has moved so there's nothing to unwind.
  • Paid but still open phases (the vendor is mid-work or the delivery is awaiting your approval) don't cancel automatically. They route through the dispute flow so both parties can agree on what's fair (full or partial refund, extra revision, or mutual agreement that the work delivered was complete).

This matches how phased contracts work in the real world - completed phases are settled, in-flight phases need to be talked through.

When something is refused

Milestone actions are guarded on the server, and the guards are strict. Most "why can't I click this?" reports are one of the rows below rather than a fault. Developers: the code column is the machine-readable code in the REST error body - branch on it, never on the message.

Proposing a phase

Refused when Code HTTP
Title is empty wpss_milestone_propose_failed 400
Amount is missing, zero, or negative rest_invalid_param / wpss_milestone_propose_failed 400
The parent order does not exist wpss_milestone_propose_failed 400
You are not the vendor on the parent order wpss_milestone_propose_failed / wpss_forbidden 400 / 403
The order is not a custom project. Milestones exist on buyer-request orders only wpss_milestone_propose_failed 400
The parent order is finished, cancelled or still awaiting payment wpss_milestone_propose_failed 400
The database write failed wpss_milestone_propose_failed 400

Paying a phase

Refused when Code HTTP
No such phase, or the id is not a milestone wpss_milestone_not_found 404
The phase is not awaiting payment (already paid, declined, cancelled) wpss_milestone_not_payable 409
An earlier phase is still open wpss_milestone_locked 409
Same, on the standalone Stripe/Razorpay path wpss_phase_locked 400
You are not the buyer on the order wpss_forbidden 403

Submitting a delivery

Refused when Code HTTP
Not a milestone row wpss_milestone_not_found 404
You are not the vendor wpss_forbidden / wpss_milestone_submit_failed 403 / 400
The phase is not paid yet, or is already complete wpss_milestone_submit_failed 400

Approving a delivery

Refused when Code HTTP
Not a milestone row wpss_milestone_not_found 404
You are not the buyer wpss_forbidden / wpss_milestone_approve_failed 403 / 400
The phase is not awaiting your approval wpss_milestone_approve_failed 400

Declining or cancelling a phase

Refused when Code HTTP
Not a milestone row wpss_milestone_not_found 404
Already paid. A paid phase cannot be declined - open a dispute instead wpss_milestone_not_declinable 409
Already paid, on the vendor's cancel action wpss_milestone_not_cancellable 409
You are neither the buyer nor the vendor wpss_forbidden 403
The underlying write failed wpss_milestone_decline_failed / wpss_milestone_cancel_failed 400

Refusals on every milestone route

Refused when Code HTTP
Not signed in rest_not_logged_in 401
Too many write requests in a short window rate_limited 429
The parent order does not exist wpss_order_not_found 404
You are not a party to the order wpss_forbidden 403

Things that fail silently, by design. Paying a phase twice does not double-credit the vendor: the crediting step recognises the existing wallet entry and does nothing. A zero-value phase, or one whose commission leaves nothing for the vendor, records no wallet entry either. None of these surface an error, because in each case the correct outcome already holds.

Differences from catalog extensions

Milestone contract Paid extension
Where it lives Buyer-request orders only Catalog (fixed-price) orders only
Who sets it up Vendor at proposal time (+ ad-hoc later) Vendor, on an already-paid order
What it charges for The whole project, split into phases Extra work on top of the already-paid scope
Payment order Lock-step (phase N must finish before N+1 unlocks) Single quote, accept or decline
Terminal state Every phase terminal - approved, declined or cancelled Quote paid or declined

Tips

For vendors:

  • Keep phases deliverable - each one should produce something the buyer can look at and sign off. Three to five phases works well for most projects.
  • Price phases independently. Don't save a "big" phase for the end - you want steady payments, not a back-loaded risk.
  • Communicate in the order chat as you work. The timeline shows state; the chat shows context.

For buyers:

  • Read the full phase breakdown on the proposal before accepting. What looks clear at proposal time is what you're committing to for the whole project.
  • Approve promptly once you're satisfied with a phase. Approval unlocks the next phase - stalling one holds the whole contract.
  • Use the chat for revision requests. It keeps a record and avoids a separate reject status.

Paid Extensions

Paid extensions are small add-ons a vendor quotes on top of an already-paid catalog order. The buyer paid for the base scope, something extra comes up mid-order, the vendor quotes a price and extra days, and the buyer accepts or declines. No revision cycle, no delivery approval on the extension itself - it's a simple mid-order add-on.

Vendor quoting a paid extension on an in-progress order

When to use a paid extension

Paid extensions live on catalog orders - orders that came through the normal service checkout (Standalone, WooCommerce, EDD, FluentCart, SureCart). These are fixed-price jobs where the buyer already paid the full amount upfront.

If the order is a custom project that started from a buyer request, use a Milestone Contract instead. Extensions and milestones are mutually exclusive - one order will only ever show one of the two CTAs, never both.

Good uses:

  • "Can you also do a square-format version for Instagram?"
  • "I need a rush turnaround - how much to shave 3 days off delivery?"
  • "The logo looks great; can you extend the package to include stationery?"

Anything that's a small extra on top of the work the buyer already paid for.

Why extensions and milestones are separate

Catalog services are fixed-price small jobs. The buyer paid the full amount at checkout. If scope creeps mid-order, the vendor quotes the extras - that's an extension. No phased payments, because the main job is already paid for.

Buyer-request orders are large custom projects. The scope was negotiated, the price was agreed in the proposal, and phased delivery makes sense - that's a milestone contract.

Both serve a real need; both would get in each other's way if shown on the same order. The plugin hides the irrelevant CTA based on the order's origin, and the backend refuses to create an extension on a buyer-request order (and vice versa) even if the UI is bypassed.

The vendor journey

Quoting an extension

  1. Open the in-progress catalog order from your dashboard.
  2. Click Quote for Extra Work (sometimes shown as "Request Extension" on older themes).
  3. Fill in:
    • Amount - what you're charging for the extra work.
    • Extra days - how many days added to the delivery deadline.
    • Reason / what's delivered - plain-English description of what the buyer gets for the money. This shows on their view.
  4. Submit the quote.

The buyer receives an email and an in-app notification with the full quote details.

What happens when the buyer pays

  • The money is charged through the same gateway that took the original order payment.
  • Your wallet is credited the net amount (platform commission is applied to the extension the same way it's applied to an order completion).
  • The parent order's delivery deadline extends by the number of days in the quote.
  • You keep working on the original order - the extension is an add-on, not a blocker.

What happens when the buyer declines

  • The extension sub-order is marked declined.
  • The parent order's deadline doesn't change.
  • You can send a revised quote immediately (different price, different days, or different scope).

Only one extension quote can be pending at a time per order. Once the buyer either accepts or declines, you're free to quote again if scope creeps further.

The buyer journey

Receiving a quote

When the vendor quotes an extension, you see a card on the order page with:

  • What the vendor is delivering for the extra money.
  • The amount.
  • How many days the deadline extends if you accept.
  • Accept & Pay and Decline buttons.

Buyer accepting or declining an extension quote

Accepting

Accept & Pay takes you to checkout for just the extension amount (not the whole order - you already paid for that). Once the payment clears:

  • The vendor is credited immediately.
  • Your order's delivery deadline pushes out by the quoted days.
  • The order status doesn't change - the main order keeps moving.

Declining

One click. The vendor is notified with whatever reason you gave. Your order's deadline doesn't change. If the vendor sends a revised quote you'll get another notification.

Extension rules at a glance

  • Vendors can quote when the order is In progress, Late, or Revision requested. Quotes can't be sent before requirements are collected or after the order is completed.
  • One pending quote per order at a time.
  • The reason must be at least 10 characters long - helps prevent "just send more money" quotes with no context.
  • Maximum extra days is 14 by default (admin may configure a different cap on your marketplace).

How this compares to milestone contracts

Paid extension Milestone contract
Where it lives Catalog orders (fixed-price) Buyer-request orders (custom projects)
What the buyer already paid Full order amount $0 - all money goes through the phases
Flow One quote · accept or decline Multi-phase · pay each in lock-step
Effect on deadline Extends by the quoted days Each phase has its own days
Revision process None on the extension itself (decline and re-quote) Chat-based revisions per phase

Tips

For vendors:

  • Quote promptly - don't sit on scope creep for days before asking.
  • Describe what's delivered, not just the price. "+$50" is confusing; "+$50 for a square variant of each deliverable" is a yes.
  • Keep extensions small. If the add-on is half the size of the original order, it's probably its own order.

For buyers:

  • Read what's delivered before accepting. The price should match the scope, not feel arbitrary.
  • If the quote feels off, decline and ask for a revised one in chat. Declines aren't hostile - they're part of the flow.

Tips & Deadline Extensions

Buyers can show appreciation with a tip after an order is completed, and vendors can request extra time if they need it. Both features help keep your marketplace flexible and fair.

Order Actions

Tipping

How Tipping Works

After an order is completed, the buyer can send a tip to the vendor as a thank-you for great work. The tip is paid like any other order and credited to the vendor's wallet.

Tips are commissioned at your normal rate by default. Marketplace owners can change this with the Tip commission rate setting under Sell Services > Settings > Commission & Tax: leave it empty to use the regular rate, or set it to 0 so vendors keep 100% of every tip.

To send a tip:

  1. Open a completed order from your dashboard.
  2. Click Send Tip.
  3. Enter the amount you would like to tip.
  4. Optionally add a short message.
  5. Confirm the payment.

The tip is credited to the vendor's wallet immediately and is available for withdrawal right away.

Tipping Rules

  • Tips are only available on completed orders.
  • One tip per order -- you cannot tip the same order twice.
  • The tip amount must be greater than zero. There is no maximum.
  • Only the buyer on the order can send a tip.
  • There is no time limit -- you can tip an old order any time after completion.

Why Tips Matter

Tips reward vendors who go above and beyond. They are a great way for buyers to encourage excellent service, and for vendors, tips provide extra income with no platform fee deducted.


Deadline Extensions

When Vendors Need More Time

Sometimes a project takes longer than expected. Instead of delivering late, vendors can request a deadline extension. The buyer decides whether to approve it.

How Extensions Work

Vendor requests an extension:

  1. Open the order from the dashboard.
  2. Click Request Extension.
  3. Enter the number of extra days needed (up to 14 by default).
  4. Provide a reason (explaining why more time is needed).
  5. Submit the request.

Buyer responds:

The buyer receives a notification and can either approve or deny the request. If the buyer does not respond within 48 hours, the request is automatically denied.

  • Approved -- The delivery deadline is extended by the requested number of days. If the order was already marked as late, it moves back to "In Progress" with the new deadline.
  • Denied -- The original deadline stays in place. The vendor should deliver as soon as possible.

Extension Rules

  • Vendors can request extensions when an order is in progress, late, or has a revision requested.
  • Only one extension request can be pending at a time. If you need more time after an approved extension, you can submit a new request.
  • The reason must be at least 10 characters long.
  • The maximum extra days is 14 by default (your admin may have configured a different limit).

Tips for Requesting Extensions

  • Ask early -- Do not wait until the deadline has already passed. Give the buyer time to respond.
  • Be honest -- Explain what happened and how much extra time you realistically need.
  • Keep it reasonable -- A 1-3 day extension is easier for buyers to accept than a 14-day one.

How Extension Approval Helps Late Orders

If an order is already marked as late and the buyer approves an extension, the late status is removed. The order goes back to "In Progress" with a new deadline, giving the vendor a clean slate to finish the work.

Order Settings

Control how orders behave on your marketplace -- from auto-completion timing to revision limits and dispute windows. All of these settings are found at Sell Services > Settings > Orders & Disputes.

Order settings tab in WP Sell Services settings panel

Auto-Complete Days

Default: 3 days

After a vendor delivers their work, the buyer has this many days to review it. If the buyer does not respond (no accept, no revision request, no dispute), the order auto-completes and the vendor gets paid.

  • Set to 1-2 days for fast-paced marketplaces with quick turnaround services.
  • Set to 5-7 days for high-value services where buyers need more review time.
  • Set to 0 to disable auto-completion entirely -- buyers must manually accept every delivery.

Allow Disputes

Default: Enabled

When enabled, buyers can open formal disputes on orders. When disabled, the dispute button is hidden and buyers must resolve issues through messaging or by contacting you directly.

Keeping disputes enabled is recommended -- it protects both buyers and vendors and gives you a structured way to mediate problems.

Dispute Window

Default: 14 days

After an order is completed, the buyer has this many days to open a dispute. Once the window closes, the order is fully finalized and cannot be disputed.

  • Set to 7 days if you want faster finalization.
  • Set to 30-60 days for high-value services where issues might surface later.
  • Set to 90 days for maximum buyer protection.

Requirements Timeout

Default: 7 days

After payment, the buyer needs to submit project requirements before work can begin. This setting controls how long to wait before taking action if the buyer never submits them.

When set to 0, the order waits indefinitely.

When set to a number of days (e.g., 7), the system takes action when the timeout expires. What action it takes depends on the next setting.

Auto-Start on Timeout

Default: Enabled

This controls what happens when the requirements timeout expires:

  • Enabled -- The order starts without requirements. The vendor begins work and can request details through messaging. This is useful for flexible services.
  • Disabled -- The order is cancelled and the buyer receives a refund. This is better for services that truly cannot begin without project details.

Allow Late Requirements

Default: Disabled

When enabled, buyers can submit their project requirements even after the order has already started (useful if auto-start on timeout moved the order forward). When disabled, requirements can only be submitted while the order is in "Pending Requirements" status.

Auto-Dispute Late Orders

Default: 3 days

When an order is overdue by this many days, the system automatically opens a dispute. This protects buyers from orders that remain undelivered well past the deadline.

  • Set to 0 to disable automatic dispute creation for late orders.
  • Set to 1-3 days for strict marketplaces.
  • Set higher for marketplaces where delays are more common or tolerated.

All Settings at a Glance

Setting Default Range What It Does
Auto-Complete Days 3 0-30 Days after delivery to auto-complete
Allow Disputes Enabled On/Off Enable the dispute system
Dispute Window 14 days 1-90 Days after completion to allow disputes
Allow Late Requirements Disabled On/Off Submit requirements after work started
Requirements Timeout 7 days 0-30 Days to wait for requirements
Auto-Start on Timeout Enabled On/Off Start order or cancel when timeout expires
Auto-Dispute Late Orders 3 days 0-30 Days overdue before auto-opening a dispute

Standard Marketplace

For most service marketplaces, the defaults work well:

  • Auto-Complete: 3 days
  • Dispute Window: 14 days
  • Requirements Timeout: 7 days, auto-start enabled

High-Value Services

For expensive, complex services like web development or consulting:

  • Auto-Complete: 7 days (more review time)
  • Dispute Window: 30-60 days
  • Requirements Timeout: 7 days, auto-start disabled (require requirements)

Quick Turnaround

For fast services like logo tweaks, quick edits, or social media graphics:

  • Auto-Complete: 1 day
  • Dispute Window: 7 days
  • Requirements Timeout: 1 day, auto-start enabled

Recurring Services & Subscriptions [PRO]

Sell services that bill on a schedule: weekly, monthly, quarterly, or yearly. Think retainers, maintenance plans, or ongoing content work.

Not switched on in 1.3.0

Recurring services are behind a default-off feature flag and their settings, wizard section, and admin page are hidden. If you have installed Pro 1.3.0 and cannot find any of the screens below, nothing is broken -- the feature is not enabled yet.

The code ships (including its REST routes and Stripe webhook handling) so the feature can be finished and turned on without a migration, but it is not supported for production use and we do not recommend selling recurring services on 1.3.0.

Developers can opt in on a staging site:

add_filter( 'wpss_pro_recurring_feature_available', '__return_true' );

Once the filter returns true, the settings appear under Sell Services > Settings > Orders & Disputes and the rest of this page applies. We will announce general availability in a release note; this banner comes down at that point.

Enable recurring billing on a service

From the frontend Service Wizard

Vendors can enable recurring billing directly from the frontend wizard at Dashboard > Create Service > Pricing step. A Recurring Billing section appears in the Pricing step when all of these are true:

  • The Pro plugin is active.
  • The wpss_pro_recurring_feature_available filter returns true (see the notice above).
  • Recurring services are globally enabled in Sell Services > Settings > Orders & Disputes.

Toggle Enable recurring billing on, then pick a billing frequency: Weekly, Monthly, Quarterly, or Yearly.

From wp-admin

  1. Edit the service and open the pricing section.
  2. Mark the package as Recurring and pick the interval.
  3. Buyers see the interval on the service page and at checkout.

Recurring billing runs on Stripe. Each cycle creates a new order for the vendor automatically, so delivery and messaging work exactly like one-off orders.

Managing subscriptions

  • Buyers see and cancel their subscriptions from their dashboard.
  • Vendors see active subscribers per service.
  • Admins get a Subscriptions page under Sell Services in wp-admin, listing every subscription with status, next renewal, and cancel controls. This menu item only registers while the feature flag is on.

Failed payments

Stripe retries per its dunning settings. The subscription pauses if retries fail; webhooks keep order status in sync.

Vendor System

Becoming a Vendor

Anyone on your marketplace can apply to become a vendor and start selling services. How the registration process works depends on which mode you have chosen as the site owner.

Three Registration Modes

You control how vendors join your marketplace from Settings > Vendors:

Open Registration

Anyone can sign up and start selling immediately. Their account is activated right away and they can create their first service within minutes. This is the best option for growing marketplaces where you want to attract as many sellers as possible.

Requires Approval

Users can submit a vendor application, but their account stays in "Pending" status until you review and approve it. This gives you quality control over who sells on your marketplace. You will receive a notification when new applications come in.

To review applications: Go to Sell Services > Vendors, filter by "Pending" status, and approve or reject each application. The applicant receives an email letting them know the outcome.

Closed Registration

The registration form is hidden from the public. Only you (the admin) can create vendor accounts manually. This is ideal for invite-only or exclusive marketplaces.

To add a vendor manually: Go to Users > Add New, create a WordPress account, and assign the vendor role.

The Registration Form

When registration is open or requires approval, users see a registration form on your "Become a Vendor" page. They fill in:

  • Display Name -- Their public vendor name.
  • Professional Tagline -- A one-line description of what they do.
  • About You -- Their background and experience.
  • Skills -- A list of their areas of expertise.
  • Terms Agreement -- They must accept your marketplace terms.

If a user already has a buyer account, they can upgrade to a vendor account from this page without creating a new account.

Vendor registration and profile editor form

What Happens After Registration

Open mode: The vendor can immediately access their dashboard, set up their profile, and create services.

Approval mode: The vendor sees a "Pending Approval" message and waits for your review. Typical review time is 1-3 business days. Once approved, they receive an email and can start selling right away.

Closed mode: The vendor is created by you, so they are active from the start.

What Vendors Can Do

Once active, vendors have access to:

Feature Description
Vendor Dashboard Their central hub for managing everything
Create Services List services with pricing, packages, and descriptions
Receive Orders Accept and fulfill buyer orders
Portfolio Showcase previous work to attract buyers
Buyer Requests Browse and respond to service requests posted by buyers
Messages Communicate with buyers about orders
Earnings Track income and request withdrawals

Tips for Getting Approved

If your marketplace requires approval, here are tips for applicants:

  • Use a professional email address.
  • Fill in every field completely -- sparse applications get rejected more often.
  • Clearly describe the services you plan to offer.
  • List relevant skills and experience.
  • Be responsive if the admin reaches out with questions.

Next Steps After Registration

  1. Set up your vendor profile -- Add your photo, bio, and portfolio.
  2. Explore the vendor dashboard -- Learn where everything is.
  3. Create your first service -- Start selling.
  4. Learn about seller levels -- Understand how to advance.

The Vendor Dashboard

The dashboard is where vendors and buyers manage everything -- orders, services, messages, earnings, and profile settings. It adapts based on your role, showing buying features to everyone and selling features to vendors.

Vendor dashboard overview

Dashboard Sections

My Orders (Buyer View)

Track the services you have purchased. You can see each order's status, the vendor, the total amount, and the date. Filter by active, completed, or cancelled to find what you need quickly.

Sales Orders (Vendor View)

This is where vendors manage incoming orders from buyers. Each entry shows the order number, buyer name, service purchased, your earnings, delivery deadline, and current status.

From here you can:

  • View order details
  • Submit a delivery
  • Message the buyer
  • Request a deadline extension

Vendor sales orders list

My Services (Vendor View)

Create and manage your service listings. You can see each service's title, status (Published, Draft, or Paused), price range, total orders, average rating, and active order count.

Available actions:

  • Create a new service using the button in the header.
  • Edit an existing service to update pricing or details.
  • Pause or activate a service to control its availability.
  • Delete a service (only if there are no active orders).

Service management interface

Buyer Requests

Browse service requests posted by buyers looking for help. Vendors can submit proposals to these requests, and buyers choose which vendor to hire. This section is available to both buyers (for posting) and vendors (for responding).

Earnings

Your financial dashboard showing:

  • Total Earnings -- Lifetime gross income.
  • Pending Earnings -- Income still in the clearance period.
  • Available for Withdrawal -- What you can withdraw right now.
  • Withdrawn Amount -- What you have already taken out.

Each completed order shows the buyer's total, the platform commission deducted, and your net earnings.

Messages

All order conversations in one place. You can see which messages are unread, switch between conversations, and send replies with file attachments. Messages are organized by order, so everything stays in context.

Profile

Edit your public vendor profile -- your display name, tagline, bio, avatar, cover image, location, website, and social links. Buyers see this information on your public profile and service pages.

How to Navigate

The dashboard uses a sidebar with grouped navigation:

  • Buying section: My Orders, Buyer Requests
  • Selling section: My Services, Sales Orders, Earnings, Portfolio
  • Account section: Messages, Profile

Your profile avatar and name appear at the top of the sidebar, along with a "Seller" badge if you are a vendor. Click any section to switch views -- the active section is highlighted.

Start Selling Button

If you are logged in but not yet a vendor, you will see a "Start Selling" button in the sidebar. Clicking it registers you as a vendor (subject to the registration mode your admin has set), and the vendor sections appear immediately.

Works on Every Device

The dashboard is fully responsive:

  • Desktop -- Full sidebar navigation with all sections visible.
  • Tablet -- Collapsible sidebar that slides in and out.
  • Mobile -- Hamburger menu for compact navigation.

Quick Tips

  • Check your dashboard daily to stay on top of new orders and messages.
  • Use the status filters in Orders and Sales to find what you need quickly.
  • Bookmark specific sections (each one has its own URL) for fast access.
  • Enable email notifications so you never miss an important update.

Vendor Profile & Portfolio

Your vendor profile is your marketplace identity. A complete, professional profile builds trust with buyers and helps you stand out. The portfolio section lets you showcase your best work.

Setting Up Your Profile

Go to Dashboard > Profile to edit your information.

Vendor profile editor

What to Fill In

  • Display Name -- Your public vendor name. This appears on your services, in search results, and on your profile page.
  • Tagline -- A one-line description of what you do (e.g., "WordPress Developer & Theme Customizer").
  • Bio -- Tell buyers about your background, experience, and what makes you great at what you do.
  • Avatar -- Your profile photo. Use a high-quality image (400x400px minimum).
  • Cover Image -- A banner image that appears at the top of your profile page.
  • Country and City -- Helps buyers find local vendors and understand your timezone.
  • Timezone -- Lets buyers know your working hours.
  • Website -- Link to your portfolio site or business website.
  • Social Links -- Add your LinkedIn, Twitter, GitHub, or other professional profiles.

Your Stats (Automatic)

These numbers appear on your profile and update automatically as you complete orders:

  • Total orders received
  • Successfully completed orders
  • Average star rating
  • Number of reviews
  • Average response time
  • On-time delivery rate
  • Verification tier (Basic, Verified, or Pro)

Intro Video

Add a YouTube or Vimeo link to your profile and buyers see your introduction right on your profile page. A 60-90 second video of you explaining what you do converts far better than text alone: buyers meet the person before they buy.

Paste the video URL in the Intro video field of your profile settings. The player embeds automatically; no upload or hosting needed.

Building Your Portfolio

Your portfolio showcases previous work to potential buyers. Think of it as your visual resume.

Adding Portfolio Items

  1. Go to Dashboard > Portfolio.

  2. Click Add Portfolio Item.

  3. Fill in the details:

    • Title -- The project name.
    • Description -- What you did and why it matters.
    • Images/Media -- Upload screenshots, photos, or samples of the work.
    • External URL -- Link to the live project (if applicable).
    • Tags -- Keywords describing the work.
    • Related Service -- Optionally link this item to one of your services.
  4. Toggle Featured to highlight your best pieces.

  5. Save the item.

Portfolio Limits

  • You can have up to 50 portfolio items (your admin may have set a different limit).
  • Up to 6 items can be marked as featured. Featured items appear first and are shown prominently on your profile.

Organizing Your Work

Drag and drop to reorder your portfolio items. Put your strongest work first -- featured items are displayed prominently on your vendor profile and in vendor cards across the marketplace.

How Buyers See Your Profile

Your profile appears in several places:

Vendor Profile Page

This is your full public page, showing your cover image, avatar, bio, location, social links, all your services, portfolio gallery, reviews, and statistics.

Public vendor profile page

Vendor profile reviews section

Service Pages

A summary of your profile appears in the sidebar of each service page -- your avatar, name, rating, response time, and a link to your full profile.

Vendor sidebar on service page

Search Results

Your avatar, name, tagline, rating, and review count appear on vendor cards in marketplace search results and listing pages.

Verification Status

Your verification tier is displayed as a badge on your profile and services:

  • Basic -- All new vendors start here.
  • Verified -- Your email or identity has been verified.
  • Pro -- Premium verification status.

Higher verification tiers help build buyer confidence. See Seller Levels for details on how to advance.

Tips for a Strong Profile

  1. Use a professional photo -- A clear, friendly headshot works best.
  2. Write a compelling bio -- Focus on your expertise and what buyers can expect.
  3. Fill in your location -- Many buyers prefer working with vendors in specific regions or timezones.
  4. Showcase 5-10 portfolio items -- Quality over quantity. Feature your very best work.
  5. Keep it updated -- Add new portfolio pieces as you complete projects. Remove outdated work.
  6. Link your professional profiles -- Active social links add credibility.

Seller Levels & Badges

WP Sell Services uses a three-tier auto-calculated level system plus one admin-only tier. As vendors complete more orders and earn better ratings, they advance through the levels and earn visible badges.

Vendor Analytics Dashboard

The Seller Levels

New Seller

Every vendor starts here. There are no requirements -- just register and you are in. You can create services, receive orders, and access the full vendor dashboard.

Rising Seller

You have proven yourself as a reliable vendor.

What You Need Minimum
Completed Orders 5
Average Rating 4.0 stars
Total Reviews 3
Response Rate 80%
On-Time Delivery Rate 80%
Days Active 30

Typical timeline: 2-4 weeks of active selling.

Top Rated

You have built a strong track record of quality and consistency.

What You Need Minimum
Completed Orders 25
Average Rating 4.7 stars
Total Reviews 10
Response Rate 90%
On-Time Delivery Rate 90%
Days Active 90

Typical timeline: 2-4 months of active selling.

Pro Seller (Admin-Granted Only)

This level cannot be earned through automatic calculation. It is granted exclusively by an admin to recognize exceptional vendors. Pro Seller status persists until the admin removes it.

How Levels Are Calculated

The system checks every vendor's stats daily and compares them against the criteria for New Seller, Rising Seller, and Top Rated. You must meet all requirements for a level to advance -- not just some of them. Pro Seller is not part of the automatic calculation -- it is assigned by an admin.

Here is what each metric measures:

  • Completed Orders -- The total number of orders you have successfully delivered.
  • Average Rating -- The average star rating across all your approved reviews.
  • Total Reviews -- How many reviews buyers have left for you.
  • Response Rate -- How consistently you reply to buyer messages.
  • On-Time Delivery Rate -- The percentage of orders you delivered before the deadline.
  • Days Active -- How many days since you registered as a vendor.

Automatic Upgrades

You do not need to apply or request a level-up. The system runs a daily check and upgrades your level automatically when you meet all the criteria for New Seller, Rising Seller, or Top Rated. You will receive an email notification when your level changes, and your badge updates across the entire marketplace. Pro Seller cannot be earned automatically -- only an admin can grant it.

What Higher Levels Get You

As you climb the levels, you unlock real benefits:

  • Visible badge -- Your seller level badge appears on your profile, your services, and in search results. Buyers see it everywhere.
  • Better search ranking -- Higher-level sellers appear more prominently in search results.
  • Increased buyer trust -- Badges signal reliability and quality, leading to higher conversion rates.
  • Lower commission rates -- With the Tiered Commission feature [PRO], admins can set lower platform fees for higher-level sellers.

Tracking Your Progress

Your current seller level and progress are displayed on your public vendor profile. For each requirement, you can see:

  • Your current value
  • The target threshold
  • Your progress percentage
  • Whether you have met it or not

This makes it easy to identify what you need to work on to reach the next level.

Staying at Your Level

Your level is recalculated daily. If your stats drop below the requirements (for example, your rating falls below the threshold), your level may be adjusted downward. The best way to maintain your level is to keep delivering quality work, responding promptly, and meeting deadlines.

Tips for Advancing

To reach Rising Seller: Focus on completing your first 5 orders with great quality. Respond to messages quickly and deliver on time. Ask satisfied buyers to leave reviews.

To reach Top Rated: Scale up while maintaining quality. Check messages multiple times a day to keep your response rate above 90%. Be meticulous about deadlines. Aim for 5-star ratings, near-instant responses, and flawless on-time delivery.

Admin Level Management

Admins can manually adjust a vendor's seller level from Sell Services > Vendors. This is also the only way to grant or remove Pro Seller status. For the auto-calculated levels (New Seller, Rising Seller, Top Rated), manual changes persist until the next daily automatic assessment.

Vacation Mode

Need a break? Vacation mode lets you temporarily stop accepting new orders while keeping your profile, services, and seller level intact.

Vacation Mode Toggle

How to Turn It On

  1. Go to Dashboard > Profile (or Settings).
  2. Toggle Vacation Mode to ON.
  3. Enter an optional vacation message for buyers.
  4. Save changes.

That is it. Your services are now paused.

What Happens When Vacation Mode Is Active

For buyers visiting your profile:

  • A vacation notice is displayed on your profile and services.
  • Order buttons are disabled -- nobody can purchase your services.
  • Your custom vacation message is shown (if you wrote one).
  • Buyers can still view your services and send you messages.

For your services:

  • They remain published and searchable, so you do not lose your SEO position or presence in search results.
  • They display an "On Vacation" indicator.
  • They stay in buyers' favorites lists.

For your existing orders:

  • Orders placed before vacation mode are not affected. You are still expected to complete them.
  • You can still deliver work, communicate with buyers, and manage active orders from your dashboard.
  • Deadlines are not automatically extended. If you need more time, request an extension from the buyer.

Your Vacation Message

Write a short, friendly message so buyers know what is going on. For example:

Thanks for visiting! I am currently on a break and not accepting new orders. I will be back soon. Feel free to message me and I will respond when I return.

Keep it brief, professional, and optionally mention when you plan to return.

Turning Vacation Mode Off

When you are ready to accept orders again:

  1. Go to Dashboard > Profile (or Settings).
  2. Toggle Vacation Mode to OFF.
  3. Save changes.

Your services become available instantly. Order buttons reappear and your vacation message is removed.

Impact on Your Account

Seller level: Vacation mode does not directly affect your seller level. Your ratings, review history, and statistics all remain the same. However, extended inactivity may indirectly impact your level if you stop completing orders and responding to messages.

Search visibility: Your services stay in search results during vacation, though some marketplace searches may filter out vendors on vacation. Your SEO position is maintained.

Important Limitations

  • Manual toggle only -- You must turn vacation mode on and off yourself. There is no scheduled start date, end date, or automatic return.
  • No deadline pausing -- Existing order deadlines keep running. Request extensions if needed.
  • No duration limit -- You can stay on vacation as long as you want, but a very long absence may reduce buyer confidence and return traffic.

Set a personal reminder on your calendar so you do not forget to turn vacation mode off when you are ready.

Alternatives to Full Vacation Mode

If you do not want to pause everything:

  • Pause individual services -- Go to Dashboard > My Services and pause specific listings while keeping others active.
  • Extend delivery times -- Edit your services to add extra delivery days temporarily.
  • Set services to draft -- Hides them from the marketplace entirely. Switch back to "Published" when you return.

Tips

Before going on vacation:

  • Finish and deliver as much active work as possible.
  • Let current buyers know about your upcoming break through order messages.
  • Request deadline extensions if you need them.
  • Write a clear vacation message.

When you return:

  • Turn off vacation mode.
  • Check your messages for any inquiries that came in while you were away.
  • Review pending orders and address any issues.
  • Update your services if delivery times need adjusting.

Vendor Settings (Admin)

These settings control how vendors join your marketplace, how many services they can create, and whether their services need your approval before going live. Find them at Sell Services > Settings > Vendors.

Vendor Settings Tab

Vendor Registration Mode

Default: Open

Choose how vendors can join your marketplace:

Mode What Happens Best For
Open Anyone can register and start selling immediately Growing marketplaces, community platforms
Requires Approval Users submit applications; you approve or reject them Curated marketplaces, quality control
Closed Only you can create vendor accounts Invite-only platforms, soft launches

How Approval Works

When set to "Requires Approval":

  1. A user submits the vendor registration form.
  2. You receive a notification.
  3. Go to Sell Services > Vendors and filter by "Pending" status.
  4. Review the application and click Approve or Reject.
  5. The applicant gets an email with the result.

Try to respond within 24-48 hours. Slow approvals can discourage quality vendors from joining.

Manual Vendor Creation (Closed Mode)

When registration is closed, you create vendor accounts manually:

  1. Go to Users > Add New and create a WordPress user account.
  2. Assign the vendor role.
  3. The user can now access vendor features immediately.

Max Services Per Vendor

Default: 20

This limits how many active services each vendor can create. Set it to 0 for unlimited.

Keeping a reasonable limit encourages vendors to focus on quality over quantity. You can always increase it for top performers.

Require Verification

Default: Disabled

When enabled, new vendors start with "Pending" status and cannot create services until you verify their identity. You review their information and manually activate their account.

This adds an extra quality gate -- vendors must be verified before they can list anything on your marketplace.

Require Service Moderation

Default: Enabled

When enabled, every new service a vendor creates goes into "Pending Review" status instead of being published immediately. You review each service and approve or reject it.

To review pending services, go to Sell Services > Moderation - the queue carries a pending count in the menu. To browse everything else, go to Sell Services > All Services and filter by status.

This is useful for maintaining marketplace quality, especially in the early days. As you build trust with your top vendors, you might consider disabling this to speed things up.

Full vendor settings panel

Registration Form Fields

The vendor registration form collects:

  • Display Name -- Their public vendor name.
  • Tagline -- A professional one-liner.
  • Bio -- Their background and experience.
  • Skills -- Areas of expertise.
  • Terms Agreement -- They must accept your marketplace terms.

Admin Vendor Management

From Sell Services > Vendors, you can manage all vendors on your marketplace:

  • View Profiles -- See complete vendor information and statistics.
  • Approve or Reject -- For pending applications.
  • Suspend -- Temporarily disable a vendor's account.
  • Delete -- Remove a vendor account entirely.
  • Set Custom Commission -- Override the global commission rate for specific vendors.

For a brand-new marketplace: Start with "Requires Approval" and "Require Service Moderation" both enabled. This lets you control quality as you build your initial vendor base. Once you have a solid group of trusted vendors, you can relax these settings.

For a growing marketplace: Switch to "Open" registration and disable service moderation to reduce friction. Use seller levels to naturally incentivize quality.

For a premium marketplace: Keep approval required but disable service moderation for Top Rated and Pro Seller vendors (the seller level system handles quality control at that point).

Vendor Subscription Plans [PRO]

Charge vendors for the right to sell on your marketplace. Create plans that gate how many services a vendor can list, how many they can feature, and what commission rate they pay.

Billing runs through hosted Stripe Checkout, so card details never touch your site.

Vendor Subscriptions on the Vendors tab

Setting up

  1. Add your Stripe keys under Sell Services > Settings > Payment Gateways.
  2. Go to Sell Services > Settings > Vendors and find the Vendor Subscriptions card.
  3. Turn the feature on, and decide whether a subscription is required to sell (see the matrix below).
  4. Create one or more plans.

What a plan holds

Field What it does
Name / slug / description What vendors see when choosing
Price and billing period Monthly or yearly
Max services Active services allowed. -1 means unlimited
Max featured Featured slots allowed
Commission override Charge members a different platform rate
Stripe Price ID The Stripe price this plan bills against
Active / sort order Whether it is offered, and where it appears

A paid plan must have a valid Stripe Price ID. A plan marked paid but missing its Price ID will not grant access. This guard is deliberate -- without it, a misconfigured paid plan would silently hand out free membership.

How billing works

  1. A vendor chooses a plan and is sent to Stripe's hosted Checkout page.
  2. The subscription is created only after payment succeeds, and its status comes from the real Stripe status -- never forced to active.
  3. Access is granted while the subscription is active or trialing, and revoked otherwise.
  4. Switching plans cancels the previous subscription, so the vendor is not double-billed.

Because the subscription is finalised from Stripe's own return and webhook, a plan is never marked active before money actually moves.

What enforcement does

Enforcement hooks service creation. Whether a vendor can publish depends on three things: whether the feature is on, whether you require a subscription, and whether they are at their plan's limit.

Feature on Subscription required Vendor subscribed At limit Result
No -- -- -- Can publish
Yes No No -- Can publish
Yes Yes No -- Blocked
Yes Either Yes (active) No Can publish
Yes Either Yes (active) Yes Blocked
Yes Either Yes (not active) -- Blocked

The practical read: with "require subscription" off, unsubscribed vendors carry on as normal and plans are an upsell. With it on, no plan means no selling.

A vendor on a 3-service plan who tries to publish a 4th is stopped in the wizard, with an explanation and a link to upgrade -- not a silent failure.

Administrators are not metered

Since 1.6.0, anyone who can manage your site bypasses these limits entirely. You are not one of your own subscribers, and an owner seeding demo content, importing a catalogue or building services on behalf of a client should not meet their own paywall.

Before this, an administrator hit the same wall as any vendor: the create-service wizard refused them with "You have reached your service limit", and the REST API answered 403, with nothing on the admin side explaining why.

The exemption applies to both the wizard and the API, and it is checked against the member being tested rather than whoever is browsing - so an administrator acting on someone else's behalf does not lift that person's limit.

If you genuinely want administrators metered too, a developer can restore that with the wpss_member_bypasses_limits filter. It is a deliberate choice rather than the accidental default it used to be.

Customer experience

Vendors manage their membership from My Subscriptions in their dashboard: current plan, status, next billing date, and plan changes.

Combining with commission

Plans work alongside commission rather than replacing it. Common models:

  • Lower commission on higher plans -- set a commission override per plan.
  • Free listings, commission only on the entry plan, flat fee on premium plans.
  • Volume tiers -- pair with Tiered Commission Rules for rates that also respond to category and seller level.

When a plan carries a commission override, it is applied to that vendor's sales in place of the otherwise-resolved rate.

Reviews & Ratings

Reviews & Ratings

Reviews are the backbone of trust on your marketplace. After a buyer completes an order, they can rate the experience and leave feedback. This helps future buyers make informed decisions and motivates vendors to deliver their best work.

How Reviews Work

  • Only buyers can leave reviews, and only on orders they have completed.
  • Each order gets one review.
  • Reviews include an overall star rating (1-5) plus optional sub-ratings.
  • Vendors can reply to reviews publicly.
  • Buyers must submit their review within the review window (default: 30 days after completion).

Review display with ratings

What Buyers Rate

Overall Rating (Required)

Every review includes a star rating from 1 to 5:

  • 5 stars -- Excellent, exceeded expectations
  • 4 stars -- Good, met expectations
  • 3 stars -- Satisfactory, acceptable
  • 2 stars -- Below expectations
  • 1 star -- Poor experience

Sub-Ratings (Optional)

Buyers can also rate three specific areas:

Category What It Measures
Communication How responsive and clear the vendor was
Quality The quality and attention to detail in the delivered work
Value Whether the service was worth the price paid

Sub-ratings are displayed for buyer information but do not change the overall rating calculation. Only the main star rating counts toward the vendor's average.

Written Review (Required)

Buyers must also write a review (minimum 10 characters). The best reviews are specific and constructive -- mentioning what went well, what could improve, and whether they would hire the vendor again.

Leaving a Review

After an order is completed, the buyer can leave a review in two ways:

  1. From the order page -- Go to Dashboard > My Orders, open the completed order, and click Leave Review.
  2. From the email reminder -- The system sends a review invitation a few days after completion. Click the link to go directly to the review form.

Once submitted, the review is published immediately (unless the admin has turned on review moderation -- see below).

Verified Purchase Badge

Every review on the marketplace comes from a real, completed order with confirmed payment. A "Verified Purchase" badge appears next to the reviewer's name, so buyers know the feedback is authentic.

Vendor Replies

Vendors can respond to any review on their services:

  1. Go to Dashboard > Reviews.
  2. Find the review.
  3. Click Reply.
  4. Write a response and submit.

Replies are public and visible to everyone. Vendors get one reply per review. A professional, gracious reply -- whether the review is positive or negative -- shows future buyers that the vendor cares about their customers.

"Mark as Helpful" Feature

Buyers browsing reviews can mark a review as helpful. The most helpful reviews surface higher in the list, making it easier for potential buyers to find the most useful feedback.

Review Moderation

By default, reviews are published immediately after submission. If you want to review them before they go live, you can turn on moderation.

Enabling Moderation

Go to Settings > General and enable Moderate Reviews. Once enabled:

  • New reviews go into "Pending" status instead of publishing immediately.
  • You review them from Sell Services > Review Moderation.
  • Click Approve to publish or Reject to hide a review.
  • The vendor is notified once an approved review goes live.

When to Use Moderation

Moderation is useful for new marketplaces where you want to ensure review quality, or if you have had problems with spam or abusive reviews. For established marketplaces with a trusted user base, auto-approval keeps the feedback loop fast.

How Ratings Are Calculated

Service rating: The average of all approved review ratings for that specific service.

Vendor rating: The average of all approved review ratings across all of the vendor's services, weighted by the number of reviews per service.

Ratings update automatically whenever a review is added, edited, or its status changes.

Where Reviews Appear

  • Service pages -- All approved reviews for that service, sorted by newest first.
  • Vendor profile -- All reviews across all of the vendor's services.
  • Search results -- Star rating and review count on each service card.
  • Vendor cards -- Average rating displayed alongside the vendor's name.

Reviews can be sorted by most recent, highest rated, lowest rated, or most helpful.

Review Impact on Sellers

Good reviews directly boost a vendor's visibility in search results and contribute to advancing through seller levels. Vendors need minimum ratings and review counts to reach Rising Seller (4.0 stars, 3 reviews) and Top Rated (4.7 stars, 10 reviews).

Consistently low ratings can reduce a vendor's search visibility and may trigger an admin review of their account.

Tips

For Buyers:

  • Leave honest, constructive feedback. Specific examples help both the vendor and future buyers.
  • Review within the time window so your experience is captured.
  • If the vendor fixed an issue, update your review to reflect the resolution.

For Vendors:

  • Reply to every review -- positive or negative. It shows you care.
  • Address negative feedback professionally. Acknowledge the issue, explain what happened, and describe how you will improve.
  • Never offer refunds in exchange for review changes or ask buyers to remove reviews.

For Admins:

  • If moderation is enabled, review pending submissions within 24 hours.
  • Do not reject reviews just because they are negative -- only reject spam, personal attacks, or policy violations.
  • Watch for sudden rating drops on vendor accounts and reach out to investigate.

Reputation & Moderation

Vendor reputation is built one review at a time. This guide explains how ratings shape a vendor's standing on your marketplace and how you can manage reviews as an admin.

The review moderation queue

How Reputation Works

A vendor's reputation is simply the average of all their approved review ratings. Every completed order that receives a review contributes equally to the overall score -- there is no special weighting for recent or older reviews.

Example:

A vendor with three services might look like this:

  • WordPress Plugin Development: 4.8 stars (20 reviews)
  • Theme Setup: 4.5 stars (10 reviews)
  • Site Migration: 4.9 stars (8 reviews)

Their overall vendor rating: 4.71 stars (across 38 reviews)

Each service also has its own individual rating, which appears on that service's page. The vendor's overall rating appears on their profile and vendor cards.

What Ratings Affect

Search Visibility

Higher-rated vendors and services appear more prominently in marketplace search results. Ratings above 4.5 stars tend to get excellent placement, while ratings below 3.5 may be shown less frequently.

Seller Levels

Ratings and review counts are key requirements for advancing through seller levels:

Level Minimum Rating Minimum Reviews
New Seller None None
Rising Seller 4.0 stars 3 reviews
Top Rated 4.7 stars 10 reviews
Pro Seller Admin-granted Admin-granted

Buyer Confidence

Buyers rely heavily on ratings when choosing a vendor. A strong rating with many reviews signals reliability, while a low rating may steer buyers elsewhere.

Sub-Ratings Are Informational Only

Buyers can optionally rate three areas -- Communication, Quality, and Value -- in addition to the overall star rating. These sub-ratings are displayed on the review for buyer information, but they do not factor into the overall vendor or service rating calculation. Only the main star rating counts.

Review Moderation

When Reviews Auto-Approve (Default)

By default, every review is published as soon as the buyer submits it. The vendor is notified immediately and ratings update in real time.

Turning On Moderation

If you want to review submissions before they go public:

  1. Go to Settings > General.
  2. Enable Moderate Reviews.
  3. Save changes.

With moderation enabled, new reviews go into "Pending" status. They are hidden from the public until you approve them.

Approving and Rejecting Reviews

Go to Sell Services > Review Moderation to manage pending reviews.

To approve: Click Approve. The review goes live instantly, the vendor is notified, and ratings are updated.

To reject: Click Reject. The review stays hidden permanently. Only reject reviews that contain spam, personal attacks, harassment, prohibited content, or content unrelated to the actual service.

You can also bulk-approve multiple reviews at once to save time.

When to Enable Moderation

  • New marketplaces where you want hands-on quality control.
  • After spam issues where you need to filter junk reviews.
  • For compliance if your industry requires content oversight.

For established marketplaces with a trusted user base, auto-approval is usually the better choice -- it keeps the feedback loop fast and reduces admin overhead.

Admin Review Management

From the Reviews page in your admin panel, you can:

  • Filter by status (Pending, Approved, Rejected), service, vendor, or rating.
  • Sort by date, rating, or service.
  • Edit a review's rating or text if needed (for example, to remove personal information or fix formatting).
  • Change status between pending, approved, and rejected.

Editing reviews should be rare and done only for clear policy reasons -- not to change the sentiment.

Reputation Recovery for Vendors

Vendors with low ratings cannot delete old reviews. The only path forward is to deliver excellent work consistently and accumulate new positive reviews over time.

Example: A vendor at 3.8 stars with 20 reviews would need roughly 30 consecutive 5-star reviews to reach a 4.5 average. That can take 3-6 months of consistent excellence.

As an admin, if you notice a vendor struggling, reach out to offer guidance. Sometimes a conversation about service quality or communication habits can turn things around.

Tips

For Admins:

  • Review pending submissions within 24 hours if moderation is enabled.
  • Be consistent in your approval criteria. Negative reviews that are factual and constructive should be approved.
  • Watch for vendors whose ratings suddenly drop -- it may signal a quality problem worth investigating.
  • Document your rejection reasons internally for consistency.

For Vendors:

  • Deliver quality work, communicate proactively, and meet deadlines. These are the foundations of a strong reputation.
  • Reply to every review professionally -- even negative ones. It shows buyers you take feedback seriously.
  • Do not ask buyers to remove negative reviews or offer incentives for positive ones.
  • Use negative feedback as a learning opportunity. If multiple reviews mention the same issue, fix it.

Disputes & Resolution

Opening a Dispute

When something goes wrong with an order and you cannot resolve it through direct communication, you can open a formal dispute. The marketplace admin will step in to mediate and find a fair resolution.

What Is a Dispute?

A dispute is a formal complaint about an order. It pauses the order, notifies the admin, and starts a structured resolution process where both the buyer and vendor can present their side.

Disputes are a last resort. Before opening one, always try to work things out directly with the other party through the order messaging system.

When to Open a Dispute

Good reasons to dispute:

  • The vendor never delivered and the deadline has passed.
  • The delivered work is significantly different from the service description.
  • The work quality is far below what was promised.
  • The vendor is unresponsive for 48+ hours despite multiple messages.
  • A serious issue cannot be resolved through revisions.

Not the right time for a dispute:

  • Minor revision requests -- use the revision system instead.
  • The vendor is slow to respond but has been communicating (give them 48 hours).
  • Subjective style preferences that were not specified in the requirements.
  • The vendor is actively working on fixes.

Before You File

Step 1: Try Direct Communication

Message the vendor through the order conversation. Clearly explain the issue, provide specific examples, and give them 24-48 hours to respond. Most problems can be solved at this stage.

Step 2: Use Revisions if Applicable

If the work was delivered but needs changes, request a revision first. Describe what needs to be fixed and give the vendor a chance to make it right.

Step 3: Gather Your Evidence

Before opening the dispute, collect everything that supports your case:

  • The original order requirements (what was agreed).
  • The delivered files (what was actually received).
  • Screenshots showing the issues.
  • Message history showing your attempts to resolve things.
  • Side-by-side comparisons of what was promised vs. delivered.

How to Open a Dispute

  1. Go to Dashboard > My Orders and open the order.
  2. Click the Open Dispute button.
  3. Select a reason from the list:
    • Not Delivered
    • Not as Described
    • Poor Quality
    • Late Delivery
    • Communication Issues
    • Other
  4. Write a detailed description of the problem. Be factual, include a timeline, and explain what you have already tried to resolve it.
  5. Add evidence -- text descriptions, links to screenshots, or uploaded files.
  6. Click Submit Dispute.

Dispute status on order

What Happens After You Submit

Immediately:

  • The order status changes to "Disputed."
  • The vendor receives a notification about the dispute.
  • The admin is alerted that a new dispute needs attention.
  • A dispute number is generated for tracking.

Over the next few days:

  • The vendor has an opportunity to respond, provide their side, and submit evidence.
  • The admin reviews everything and investigates.
  • Both parties may be asked clarifying questions.

Adding More Evidence

After the dispute is open, you can continue adding evidence as long as the dispute has not been closed. Go to the dispute page and click Add Evidence to submit additional information.

The Vendor's Response

After you open a dispute, the vendor can:

  • Provide the missing deliverables.
  • Offer a revision or correction.
  • Propose a partial refund.
  • Submit their own evidence and counter your claims.
  • Accept responsibility and agree to a refund.

If the vendor resolves the issue to your satisfaction, you can ask the admin to close the dispute.

Expected Timeline

Stage Typical Duration
Vendor response period 1-3 days
Admin review begins 1-3 business days
Resolution decided 7-14 days total

Clear-cut cases (like non-delivery) may be resolved in 1-3 days. Complex disputes can take up to 3 weeks.

Possible Outcomes

The admin will choose one of these resolutions:

  • Full Refund -- The buyer gets all their money back. The order is cancelled.
  • Partial Refund -- A percentage is refunded to the buyer, and the vendor receives the rest.
  • Complete Order (Vendor Wins) -- No refund. The vendor is paid in full.
  • Favor Buyer -- Similar to full refund, decided in the buyer's favor.
  • Mutual Agreement -- A custom solution both parties agree to.

Tips for a Strong Dispute

  • Be factual, not emotional. Stick to what happened, with dates and specifics.
  • Reference your requirements. Show exactly what was promised vs. what was delivered.
  • Include evidence. Screenshots, files, and message history make your case much stronger.
  • Show you tried to resolve it. Demonstrating good faith communication works in your favor.
  • Respond promptly to admin questions. Quick responses keep the process moving.

One Dispute Per Order

You can only open one dispute per order. If new issues come up, add them as evidence to the existing dispute rather than trying to open a second one.

The Dispute Process

Once a dispute is opened, it moves through a series of stages until the admin reaches a resolution. Here is what to expect at each step and what you can do along the way.

Dispute Stages

Every dispute follows this path:

Open > Pending Review > (Escalated) > Resolved > Closed

Not every dispute goes through escalation -- that stage is only for complex cases.

Dispute detail with messages

Stage 1: Open

The dispute has just been submitted. The other party (buyer or vendor) is notified and has a chance to respond. Both sides can add evidence, send messages, and make their case.

What you should do: Make sure all your evidence is submitted. Respond to anything the other party raises. This stage typically lasts 1-3 days.

Stage 2: Pending Review

Both parties have had their say and the admin is now reviewing everything. The dispute is queued for investigation.

What you should do: Wait for the admin to begin their review. You may be asked clarifying questions -- respond to those promptly.

Stage 3: Escalated (If Needed)

Some disputes are more complex and need extra attention. The admin may escalate a dispute when:

  • The order value is high.
  • The evidence is conflicting.
  • A policy interpretation is needed.
  • Standard resolution options do not fit the situation.

What you should do: Be patient -- thorough investigation takes time. Respond quickly if the admin asks for additional information.

Stage 4: Resolved

The admin has made a decision. The resolution is being applied -- refunds are processed, order status is updated, and both parties are notified of the outcome.

Stage 5: Closed

Everything is finalized. The dispute is closed and no further action is possible. The resolution has been implemented and the order status reflects the outcome.

Response Times

Who Action Timeframe
Other party Respond to initial dispute 48 hours
Both parties Submit all evidence Before admin review begins
Admin Begin review 1-3 business days
Admin Complete investigation 3-7 business days
Both parties Respond to admin questions 48 hours

These are typical timelines. Complex disputes may take longer.

What You Can Do at Each Stage

While the dispute is Open:

  • Add evidence (text, screenshots, links, files).
  • Send messages in the dispute thread.
  • View all evidence from both sides.
  • Respond to the other party's claims.

During Pending Review and Escalation:

  • View everything that has been submitted.
  • Respond to any questions from the admin.
  • You generally cannot add new evidence at this point.

After Resolution:

  • View the admin's decision and reasoning.
  • Confirm receipt of any refund.
  • Leave a review if you have not already.

After Closure:

  • The dispute is final. It cannot be reopened.

Communication During Disputes

Disputes have their own message thread, separate from the regular order messages. Both the buyer, vendor, and admin can see everything posted here.

Good communication practices:

  • Stay professional and factual.
  • Focus on the specific issue at hand.
  • Respond promptly when the admin asks questions.
  • Avoid aggressive language or personal attacks.

How the Order Is Updated

When the admin resolves a dispute, the order status is updated automatically:

Resolution Order Becomes
Full Refund or Favor Buyer Refunded
Partial Refund Partially Refunded
Favor Vendor or Mutual Agreement Completed

Important Things to Know

  • One dispute per order. You cannot open a second dispute on the same order, but you can add evidence to the existing one.
  • Both sides can open disputes. Either the buyer or the vendor can initiate the process.
  • No auto-resolution. An admin must make the final decision -- disputes never resolve on their own.
  • Evidence is permanent. Once evidence is added, it becomes part of the dispute record and cannot be removed.
  • Disputes can be filed at any time while the order is active, though filing sooner is always better.

What Happens After

Once a dispute is resolved and closed:

  • Any refunds are processed (the admin may need to handle this separately through the payment system).
  • The vendor's dispute history is tracked. Multiple disputes can affect a vendor's standing on the marketplace.
  • Both parties can leave reviews (if they have not already).
  • Life goes on. Learn from the experience and move forward.

Resolving Disputes (Admin Guide)

As a marketplace admin, you are the neutral mediator when buyers and vendors cannot agree. This guide walks you through how to investigate, decide, and resolve disputes fairly.

Your Role

When a dispute is opened, it lands on your desk. Your job is to:

  • Review the evidence from both sides.
  • Investigate the order history and communication.
  • Make a fair, well-reasoned decision.
  • Apply the resolution (refund, payment release, etc.).
  • Communicate the outcome clearly to both parties.

Stay impartial. Base every decision on evidence, not assumptions. Apply your marketplace policies consistently.

Disputes list

Accessing Disputes

Go to Sell Services > Disputes to see all disputes on your marketplace. The list shows each dispute's status, order reference, the parties involved, and the date it was opened.

Click any dispute to view the full details: the reason, description, all submitted evidence, the message thread, and the complete order history.

The Investigation Process

Step 1: Read the Order Details

Understand what was purchased. Check the service description, the package the buyer chose, and the price paid.

Step 2: Review the Requirements

Look at what the buyer submitted as project requirements. This is the agreed-upon scope of work.

Step 3: Examine the Deliverables

Download and review what the vendor actually delivered. Compare it against the requirements and service description.

Step 4: Read the Messages

Go through the full conversation between buyer and vendor. Look for evidence of communication attempts, revision requests, and any agreements or promises made.

Step 5: Evaluate the Evidence

Review all evidence both parties have submitted. Consider:

  • Is the evidence relevant to the claim?
  • Does the timeline add up?
  • Is the evidence consistent with other facts in the order?
  • Which party has the stronger case?

Dispute evidence view

The Five Resolution Types

When you are ready to resolve the dispute, choose one of these outcomes:

Full Refund

The buyer receives their full payment back. The vendor gets nothing.

Use when:

  • The vendor never delivered.
  • The delivered work is completely unusable.
  • The vendor seriously violated the service terms.
  • The work is so far from what was described that it has no value.

Order status becomes: Refunded

Partial Refund

The buyer gets back a portion of the payment, and the vendor keeps the rest.

Use when:

  • Some work was completed but it is incomplete.
  • The quality is below what was promised but the work is partially usable.
  • Both parties share some fault.
  • A compromise is the fairest outcome.

Order status becomes: Partially Refunded

Complete Order (Favor Vendor)

No refund is issued. The vendor receives the full payment.

Use when:

  • The vendor met all requirements.
  • The buyer's complaint is unreasonable or outside the original scope.
  • The delivered work matches the service description.
  • The evidence clearly supports the vendor.

Order status becomes: Completed

In Favor of Buyer

The buyer receives their full payment back and the resolution explicitly sides with the buyer. Similar to a full refund, but the decision is recorded as a buyer-favored outcome for vendor tracking purposes.

Use when:

  • The evidence clearly supports the buyer's claim.
  • The vendor failed to meet obligations despite clear requirements.
  • You want the resolution to count toward the vendor's dispute record as a buyer-favored decision.

Order status becomes: Refunded

Mutual Agreement

Both parties have negotiated a solution that works for them. You formalize and enforce whatever they agreed to.

Use when:

  • The buyer and vendor have already worked out a compromise.
  • A custom arrangement fits better than the standard resolution types.
  • Neither full refund nor full payment is appropriate.

Order status becomes: Completed (or Refunded, depending on the agreement)

How to Resolve a Dispute

  1. Open the dispute from Sell Services > Disputes.
  2. Complete your investigation (steps above).
  3. Choose a resolution type.
  4. Write clear resolution notes explaining your reasoning.
  5. If a refund is involved, specify the amount.
  6. Submit the resolution.

Both parties are notified of the outcome by email.

Important: For refunds, you may also need to process the actual payment refund through your payment gateway (WooCommerce, Stripe, PayPal, etc.) separately. The dispute resolution updates the order status and records, but the money transfer may require manual action depending on your setup.

Writing Good Resolution Notes

Your resolution notes should explain your reasoning so both parties understand the decision. Here is an example:

After reviewing the evidence, I am issuing a 50% partial refund.

The logo design delivered matches the service description. However, the source files promised in the Premium package were not provided, and the delivery was 3 days late. The vendor completed 2 of 3 included revisions.

Resolution: Buyer receives $50 refund (50%). Vendor receives $50 (50%). Order marked as completed.

Compare that with a poor note like "50% refund seems fair" -- which tells neither party anything useful.

Managing Dispute Status

As you work through a dispute, you can update its status:

Status When to Use
Open Just submitted, waiting for the other party to respond
Pending Review Both sides have had their say, you are investigating
Escalated Complex case requiring deeper investigation
Resolved You have made your decision
Closed Everything is finalized

Add a note each time you change the status to keep a clear paper trail.

Impact on Vendors

A vendor's dispute history is tracked. Here is how dispute volume typically plays out:

  • 1-2 disputes -- Normal. Most come from misunderstandings.
  • 3-5 disputes -- Worth monitoring. Consider reaching out to the vendor about patterns.
  • 5-10 disputes -- Formal account review recommended.
  • 10+ disputes -- Suspension should be considered.

Multiple disputes that result in buyer-favored resolutions are a strong signal that a vendor may need coaching or removal.

Tips for Fair Mediation

  • Review all evidence before deciding. Do not rush to judgment.
  • Stay neutral. No favorites, no bias.
  • Document everything. Clear resolution notes protect you and your marketplace.
  • Be consistent. Apply the same standards to every dispute.
  • Communicate clearly. Both parties should understand exactly what happened and why.
  • Respond in a timely manner. Aim to resolve disputes within 7-14 days. Letting them linger frustrates everyone.

Payments & Checkout

WooCommerce Checkout Integration [PRO]

If you already use WooCommerce, WP Sell Services Pro can plug right into it -- giving your marketplace access to WooCommerce's payment gateways, checkout, and order system.

Why Use WooCommerce Mode?

Benefit Details
100+ payment gateways Use any WooCommerce payment extension
Familiar admin experience Manage service orders alongside product orders
Extension ecosystem Compatible with WooCommerce Subscriptions, Bookings, and more
HPOS compatible Works with WooCommerce's High-Performance Order Storage
Zero product catalog bloat One hidden carrier product handles all services

How It Works: The Virtual Carrier Approach

This is one of the smartest design decisions in the plugin. Instead of creating one WooCommerce product for every service listing (which would flood your product catalog with thousands of items), the plugin uses a single virtual carrier product that acts as a bridge between your services and WooCommerce's cart/checkout system.

What the Carrier Product Is

When you activate WooCommerce mode, the plugin creates one hidden WooCommerce product called "Service Order". This product:

  • Is a Simple, Virtual product (no shipping, no inventory)
  • Has a base price of $0 (the actual price is set dynamically per cart item)
  • Is hidden from the shop catalog -- buyers never see it on your WooCommerce shop page
  • Is not searchable -- it will not appear in WooCommerce product searches
  • Redirects to the homepage if someone accesses its URL directly

Every service purchase on your marketplace flows through this single carrier product. Whether you have 10 services or 10,000, there is still only one WooCommerce product.

Why This Matters

Approach Products in WC Catalog Clutter Sync Required Performance
1 product per service (how others do it) 10,000 Massive -- services mixed with real products Constant -- every title/price change must sync Slow -- WC product queries include service products
Virtual carrier (how WPSS does it) 1 Zero -- carrier is hidden None -- service data stays in WPSS Fast -- WC only manages the carrier

This means:

  • Your WooCommerce product catalog stays clean. If you sell physical products alongside services, buyers browsing your shop only see real products.
  • No sync headaches. When a vendor updates their service title, price, or description, nothing needs to change in WooCommerce. The service data is read directly from WPSS at cart/checkout time.
  • Better performance. WooCommerce product queries, exports, and admin listings are not bloated with thousands of service products.

How Service Data Gets to WooCommerce

When a buyer clicks "Add to Cart" on a service, the plugin does not add the carrier product as-is. Instead, it attaches the service details as cart item metadata:

Cart Item
├── Product: "Service Order" (carrier)
├── Meta: wpss_service_id = 1234
├── Meta: wpss_package_id = 1 (Standard)
├── Meta: wpss_addons = [0, 2] (Extra Fast Delivery, Source Files)
└── Price: $180 (calculated from package $150 + addon $20 + addon $10)

WooCommerce's cart and checkout pages then display:

  • Product name: The actual service title (e.g., "Professional Logo Design") -- not "Service Order"
  • Product image: The service's featured image
  • Package info: The selected tier (e.g., "Standard")
  • Price: The package price plus any selected add-ons, calculated dynamically

The buyer sees a completely normal WooCommerce cart. They have no idea a carrier product is involved.


Setting It Up

  1. Install and activate WooCommerce (if you have not already)
  2. Complete the WooCommerce setup wizard
  3. Go to Sell Services > Settings > General
  4. The plugin auto-detects WooCommerce -- no manual selection needed
  5. The hidden carrier product is created automatically

That is it. Services are now purchasable through WooCommerce checkout.

Important: Do not delete the "Service Order" product from your Products list. If it disappears, just save your WP Sell Services settings again to recreate it.


Cart and Checkout Experience

When buyers add services to their cart:

  • The cart shows the service title, package name (Basic, Standard, or Premium), vendor name, and selected add-ons
  • Pricing is calculated dynamically from the service data -- not stored on the WooCommerce product
  • Buyers can purchase services from multiple vendors in a single checkout
  • Tax is calculated based on your WooCommerce tax settings
  • All WooCommerce payment gateways work as expected

After payment, the plugin splits the WooCommerce order into separate marketplace orders.


Multi-Vendor Order Splitting

This is the second key piece of the architecture. When a buyer purchases services from multiple vendors in a single WooCommerce checkout:

1 WooCommerce order → N marketplace orders (one per service/vendor)

For example, if a buyer purchases a logo design from Vendor A and a website audit from Vendor B in one checkout:

WooCommerce Order #1042 ($450)
├── WPSS Order #WPSS-1042 → Vendor A (Logo Design, $200)
│   ├── Commission: $20 (10%)
│   ├── Vendor earnings: $180
│   ├── Delivery deadline: 5 days
│   └── Own conversation, requirements, delivery tracking
│
└── WPSS Order #WPSS-1043 → Vendor B (Website Audit, $250)
    ├── Commission: $25 (10%)
    ├── Vendor earnings: $225
    ├── Delivery deadline: 7 days
    └── Own conversation, requirements, delivery tracking

Each marketplace order is completely independent:

  • Separate vendor assignment -- each vendor only sees their own order
  • Separate delivery deadline -- based on the package the buyer selected
  • Independent requirements gathering -- each vendor asks for their own project details
  • Private conversation -- buyer and vendor communicate without the other vendor seeing
  • Individual disputes -- a problem with one order does not affect the other
  • Independent commission -- per-vendor rates are supported

Commission Calculation

Commission is calculated at order creation time and recorded immediately:

  • The platform's global commission rate is applied (e.g., 10%)
  • If the vendor has a custom commission rate (set in vendor management), that overrides the global rate
  • Commission is calculated on the subtotal + add-ons (pre-tax)
  • The vendor's earnings are: total - platform fee

Paying a milestone, tip or extension

Everything above describes buying a service: the buyer fills a cart and checks out. But a marketplace also has to charge for things that appear after the first payment -- a milestone phase, a tip, a paid extension, an accepted proposal. There is no cart for those. The buyer already has an order; they need to pay one specific amount against it.

This is the pay-order path, and it is the part of WooCommerce mode most worth understanding, because it is the only place a service marketplace needs something WooCommerce does not natively have.

The seam

wpss_get_pay_order_url( $wpss_order_id )      free — src/functions.php:3375
        │
        │  default: <checkout page>?pay_order=N     (standalone understands this)
        ▼
apply_filters( 'wpss_pay_order_url', $url, $order_id )
        │
        ▼
WCPayOrderResolver::filter_pay_order_url()     Pro — Integrations/WooCommerce/
        │
        ├─ reuse the linked WC order if it still needs payment
        └─ else create a NEW pending WC order for the amount owed
                │
                ▼
        $wc_order->get_checkout_payment_url()
                │
                ▼
        /checkout/order-pay/{wc_id}/?pay_for_order=true&key=wc_order_…

Every surface that offers a "pay this" link -- the order page, the milestone list, the extension quote, the REST checkout_url field, and the emails -- calls wpss_get_pay_order_url(). None of them build the URL themselves. That is deliberate: a link built inline is correct only on standalone.

Why WooCommerce needs its own resolver

WooCommerce is cart-based. It has no notion of "pay this existing thing," so the default ?pay_order=N URL appended to a WooCommerce checkout drops the buyer on an empty cart, with no way to pay and no error message. That was the actual behaviour of every tip, milestone and extension link in WooCommerce mode before 1.4.0.

The resolver fixes it by meeting WooCommerce on its own terms: it creates a real WooCommerce order for the amount owed and hands back WooCommerce's native order-pay URL. That URL carries an order key, so it works from an email link with no cart and no session, offers every gateway the store has enabled, and produces one proper WooCommerce receipt per payment.

What the resolver actually does

  1. Bails out (returning the default URL) if WooCommerce is not loaded, the WPSS order does not exist, or it is already paid.
  2. Looks for a WooCommerce order already linked to this WPSS row. Reuses it only while it still needs payment; if it was paid, cancelled or deleted, it makes a fresh one.
  3. Creates a pending WooCommerce order for the buyer with a single fee line item -- not a product. The label is human-readable: Milestone: <title>, Tip for your seller, Additional work on your order, or Order <number>.
  4. Writes both link keys, then returns get_checkout_payment_url().

Two consequences worth planning around:

  • Asking for the URL creates the order. Rendering an order page with three unpaid phases can mint three pending WooCommerce orders. This is idempotent -- they are reused, not duplicated -- but a site owner will see pending orders in WooCommerce that nobody has paid yet. That is expected, not a bug.
  • The lock-step guard does not apply here. The resolver checks only that the row is unpaid. See Milestone Contracts.

The link is stored on both sides, because neither side can find the other without it.

Key Lives on Contains Why
wc_pay_order_id The WPSS order -- a key inside the JSON meta column of {prefix}wpss_orders. Not a column, not post meta. The WooCommerce order ID Lets the resolver reuse an existing pay order instead of minting a new one on every render
_wpss_pay_order_id WooCommerce order meta (HPOS-safe) The WPSS order ID, as a string Lets the payment-complete handler find the WPSS row when the WooCommerce order is paid

The reverse key is not optional. A sub-order (tip, milestone, extension) stores its parent order's id in platform_order_id, never a WooCommerce order id -- so the normal platform_order_id = wc_id lookup can never find one. Without _wpss_pay_order_id, a paid tip would settle into nothing.

What happens when the buyer pays

There is no custom webhook. WooCommerce's own status actions (woocommerce_order_status_processing and …_completed) resolve the linked WPSS row through _wpss_pay_order_id and call the shared mark_as_paid(), which fires wpss_order_paid. That is what credits the vendor and moves the phase to In progress.

Sub-orders are deliberately not pushed into pending_requirements when paid -- requirements belong to the parent order, not to each phase.

Refunds (1.4.0): refunding the WooCommerce order now reverses the tip, milestone or extension too. Previously only the paid handler knew how to resolve a sub-order, so a refunded or cancelled tip was silently ignored while the buyer got their money back. The refunded amount is apportioned across every linked WPSS order and written before the status change, then the vendor's share is clawed back through the single refund formula.

Platform support -- read this before promising it

The pay-order rail is WooCommerce-only. It is not a general capability of "Pro e-commerce integrations."

Platform Pay-order rail What a milestone / tip / extension pay link does
Standalone Yes (native) Opens the plugin's own checkout for that one order. Lock-step guard enforced here.
WooCommerce Yes -- WCPayOrderResolver [PRO] Opens a WooCommerce order-pay page. Works from email.
EDD No Falls back to ?pay_order=N on the EDD checkout, which EDD does not understand. Dead end.
FluentCart No Same. Dead end.
SureCart No Same. Dead end.

Exactly one implementation of the wpss_pay_order_url filter exists in the whole codebase, and it is the WooCommerce one. EDD, FluentCart and SureCart register no equivalent.

Practical consequence: if your marketplace relies on milestone contracts, tipping, or paid extensions, run it on WooCommerce or standalone. On EDD, FluentCart or SureCart the initial service purchase works, but every follow-on payment link is a dead end for the buyer. This is a known gap, not a configuration mistake -- there is nothing to switch on.


Order Status Sync

Orders stay connected between WooCommerce and your marketplace with bidirectional sync:

WooCommerce → Marketplace

WC Status WPSS Status What Happens
Processing Pending Payment Awaiting payment confirmation
Completed Pending Requirements Payment confirmed, buyer needs to submit details
Cancelled Cancelled Order stopped, refund processed
Failed Cancelled Payment failed
Refunded Cancelled Full refund processed
On Hold On Hold Order paused pending investigation

Marketplace → WooCommerce

When all marketplace sub-orders from a single WooCommerce order are cancelled or refunded, the WooCommerce order is automatically cancelled too. This prevents a scenario where the WC order shows "completed" but all linked service orders are cancelled.

The sync includes infinite-loop prevention -- a status change triggered by the sync does not re-trigger the sync in the opposite direction.


What Buyers and Vendors See

With WooCommerce active a buyer can reach something order-shaped in three places, which looks like duplication until you know what each one is for. They are not three copies of the same list - they answer different questions.

Screen Question it answers Use it to
WooCommerce → My Account → Orders What did I pay, and when? Receipts, invoices, payment history
My Account → Service Orders What is happening with my service? A bridge - see status, jump into the job
Dashboard → My Orders Manage the job Requirements, messages, delivery, revisions, approval

The rule: WooCommerce owns the money record. The Dashboard owns the work. Service Orders is the doorway between them.

Anything that progresses the job - submitting requirements, replying to the seller, approving a delivery, paying a milestone phase - happens in the Dashboard, never on the WooCommerce orders screen. A phase or tip will not appear there as something to act on.

Vendors see their dashboard with:

  • Incoming orders and delivery management
  • Earnings overview with commission breakdown
  • Withdrawal requests
  • Service listings and messaging

Vendors never interact with WooCommerce directly. Their entire experience happens through the marketplace dashboard.

Sellers: WooCommerce → My Account → Orders will look empty to you, and that is correct. That screen lists orders you placed as a customer. Your sales are in Dashboard → Sales Orders. Seeing "No orders" there is not a sign anything is broken.


Existing WooCommerce Store Compatibility

If you already sell physical products on WooCommerce, services integrate seamlessly:

  • Mixed carts work. A buyer can have both a physical product and a service in the same cart. WooCommerce handles the physical product normally, and the plugin handles the service order.
  • Shipping is not affected. The carrier product is virtual, so services never trigger shipping calculations.
  • Tax settings carry over. Your existing WooCommerce tax configuration applies to service purchases.
  • Payment gateways work as-is. No additional gateway configuration needed -- services use whatever gateways you already have enabled.

When to Choose WooCommerce vs Standalone

Choose WooCommerce if you... Choose Standalone if you...
Already run a WooCommerce store Want a lightweight setup with no extra plugins
Need a specific WooCommerce payment gateway Only need Stripe, PayPal, or bank transfer
Want to sell physical products alongside services Run a pure service marketplace
Use WooCommerce extensions (Subscriptions, etc.) Want the fastest possible checkout
Need WooCommerce reporting and analytics Prefer a simpler admin experience

Technical Reference (Developers)

For developers building custom integrations or debugging the WC integration:

Key Classes

Class Purpose
WCServiceCarrier Creates and manages the virtual carrier product
WCProductProvider Implements ProductProviderInterface for WC
WCCheckoutProvider Handles cart item data, dynamic pricing, checkout processing
WCOrderProvider Splits WC orders into WPSS orders, handles status sync, marks sub-orders paid, apportions refunds
WCPayOrderResolver The pay-order rail. Hooks wpss_pay_order_url; creates or reuses a WC order so a milestone, tip, extension or accepted proposal can be paid individually
WCOrderBridge Cross-links the two systems for humans: "WooCommerce Order #N" on the WPSS order, a "what happens next" panel on the WC thank-you page, and links between the WC and WPSS order screens (front-end and admin). Also owns the forward/reverse lookup helpers
WooCommerceAdapter Main adapter class, registers all WC hooks

Cart Item Meta Keys

Key Purpose
_wpss_service_id Links cart/order item to the service CPT
_wpss_package_id Index of the selected package (0, 1, or 2)
_wpss_addons Array of selected add-on indices
Key Stored on Purpose
wc_pay_order_id Key inside the JSON meta column of {prefix}wpss_orders The WC order minted to pay this WPSS order
_wpss_pay_order_id WooCommerce order meta The WPSS order this WC order pays

See Paying a milestone, tip or extension.

WooCommerce Hooks Used

The adapter hooks into these WooCommerce hooks:

  • woocommerce_add_cart_item_data -- Attaches service metadata to cart item
  • woocommerce_get_item_data -- Displays package name in cart
  • woocommerce_cart_item_name -- Replaces carrier title with service title
  • woocommerce_cart_item_thumbnail -- Replaces carrier image with service image
  • woocommerce_before_calculate_totals -- Sets dynamic price from package + addons
  • woocommerce_checkout_create_order_line_item -- Persists meta to order item
  • woocommerce_checkout_order_processed -- Triggers WPSS order creation
  • woocommerce_order_status_{status} -- Drives WC → WPSS status sync

Carrier Product Option

The carrier product ID is stored as wpss_wc_carrier_product_id in wp_options. If this option is missing or the product is deleted, it is recreated automatically when settings are saved.

See Building Custom Integrations for the full adapter interface documentation.


Alternative E-commerce Platforms [PRO]

WP Sell Services Pro supports several e-commerce platforms beyond WooCommerce, so you can pick the one that best fits your site.

Supported Platforms at a Glance

Platform Best For Included In
WooCommerce Full-featured stores with 100+ payment gateways Pro
Easy Digital Downloads Lightweight digital-focused marketplaces Pro
FluentCart Fast, modern single-page checkouts Pro
Standalone Pure service marketplaces, no extra plugins needed Free + Pro

Easy Digital Downloads (EDD) [PRO]

EDD is a popular choice if your site focuses on digital products and services. It is lighter than WooCommerce and great for marketplaces that do not need physical product features.

How to set it up:

  1. Install and activate Easy Digital Downloads
  2. Configure your payment gateways in Downloads > Settings
  3. Go to Sell Services > Settings > General
  4. Select Easy Digital Downloads as your e-commerce platform
  5. Click Save Changes

Once connected, services map to EDD downloads and packages become EDD price variations. Checkout and payments are handled entirely by EDD.

Payment gateways available: PayPal (built into EDD), Stripe (via EDD Stripe extension), plus other EDD gateway extensions.

FluentCart [PRO]

FluentCart is a newer, lightweight checkout plugin that focuses on speed and simplicity. It is a good fit if you want a fast, modern checkout without the overhead of a full e-commerce platform.

How to set it up:

  1. Install and activate FluentCart
  2. Configure Stripe or PayPal in FluentCart > Settings
  3. Go to Sell Services > Settings > General
  4. Select FluentCart as your e-commerce platform
  5. Click Save Changes

FluentCart provides a single-page checkout experience with Stripe and PayPal built in.

What happened to SureCart?

SureCart support was removed in 1.6.0.

Every platform on this page has to behave the same way: it owns the checkout, takes the money, and tells the marketplace an order was paid so the vendor can be credited. SureCart hosts its catalogue on its own service rather than in your WordPress site, which means it cannot act as that kind of rail without the marketplace guessing at what was bought.

It had been shipping as though it could. Rather than leave an integration in place that could take a payment without reliably starting an order, it was removed.

If you were using it, move to one of the platforms above, or to standalone mode. Orders already placed are unaffected - switching platforms never rewrites past orders.

Which Platform Should You Choose?

Here is a practical guide:

  • Already using WooCommerce? Stick with WooCommerce. You get 100+ gateways and full extension support.
  • Want the simplest setup? Use standalone mode. No extra plugins, no dependencies.
  • Selling only digital services? EDD is purpose-built for this.
  • Need the fastest checkout? FluentCart or standalone mode are your best bets.
  • Need subscription billing? Use WooCommerce with a subscriptions extension, or the recurring services feature in Pro.

Switching Between Platforms

You can change platforms at any time:

  1. Finish all active orders on your current platform first
  2. Go to Sell Services > Settings > General
  3. Select your new platform and save
  4. Reconfigure payment gateways in the new platform
  5. Test checkout thoroughly

Existing orders remain accessible -- they stay in the system they were created in. Only new orders use the new platform.

Platform Comparison

Feature WooCommerce EDD FluentCart SureCart Standalone
Payment gateways 100+ 20+ Stripe, PayPal Stripe, PayPal 4 built-in
Performance impact Medium Low Low Low Minimal
Tax automation Via extensions Basic No Yes (TaxJar) Basic
Physical products Yes No No Yes No
Setup effort Medium Medium Easy Easy Easiest

Standalone Checkout Mode

WP Sell Services includes its own built-in checkout system, so you can run a fully independent marketplace without WooCommerce or any other e-commerce plugin.

Standalone Checkout

What Is Standalone Mode?

Standalone mode means your marketplace handles everything on its own -- cart, checkout, payments, and orders. No extra plugins needed. It is the default for the free version and the fastest way to get started.

When Should You Use Standalone Mode?

Choose standalone mode if:

  • You only sell services (no physical products)
  • You want a lightweight, fast checkout experience
  • You do not need WooCommerce extensions
  • You want fewer plugins on your site

Choose WooCommerce mode if you need access to 100+ payment gateways, WooCommerce extensions like Subscriptions or Bookings, or already run a WooCommerce store.

How It Works for Buyers

  1. Buyer browses services and clicks Add to Cart
  2. Cart page shows selected services, packages, and add-ons
  3. Buyer proceeds to checkout and enters billing details
  4. Buyer picks a payment method (Stripe, PayPal, bank transfer, etc.)
  5. Buyer clicks Place Order and receives an order confirmation
  6. Vendor is notified and work begins

Buyers can purchase services from multiple vendors in a single checkout. Each service becomes its own separate order with independent delivery tracking.

Letting Buyers Create an Account at Checkout

By default a buyer must sign in before paying. On a marketplace selling to people who have never visited before, that sign-in wall is where a good number of them leave.

Turn on Sell Services > Settings > General > Account at checkout and the wall goes away: the buyer fills in the billing details they were going to fill in anyway, and their account is created from those when they pay. They are signed in immediately afterwards.

There is no guest order. After paying, a buyer has to submit requirements, message the seller, review the delivery, possibly request a revision or open a dispute -- every one of those needs an identity. An order with no owner could not be fulfilled, and could be read by any logged-out visitor. So the account is created rather than skipped.

No new fields appear at checkout. Name and email are already required billing fields, which is exactly what an account needs.

Off by default. Turning it on means anyone who completes a checkout gets a WordPress user account, which is a decision for the site owner rather than something to inherit silently.

Choosing Which Billing Fields Checkout Asks For

Sell Services > Settings > Orders & Disputes > Checkout Billing Fields

Address fields make sense when something is being shipped. For a marketplace selling design work or code, asking a buyer for a street address before they can pay is friction with nothing behind it, and every extra field costs you some buyers.

Turn off the ones you do not need. Three stay on and cannot be removed:

  • First name
  • Last name
  • Email

Those are locked because an order has to be attributable to somebody you can contact. They are also exactly what an account needs, which is why creating accounts at checkout adds no new fields to the form.

Setting Up Standalone Mode

  1. Go to Sell Services > Settings > General
  2. Under E-commerce Platform, select Standalone Mode
  3. Click Save Changes
  4. Go to Settings > Payment Gateways and enable at least one payment gateway
  5. Test the full checkout with a sample service

Available Payment Gateways

The free plugin ships with Stripe, PayPal, and Offline (bank transfer) built in. Razorpay is available with Pro.

Gateway Included In What It Supports
Stripe Free Credit/debit cards, Apple Pay, Google Pay
PayPal Free PayPal balance, cards, Venmo
Offline/Bank Transfer Free Manual payments you confirm yourself
Razorpay [PRO] Pro UPI, cards, net banking, wallets (India)

See Stripe Payments and Other Payment Gateways for setup details, including sandbox and test mode instructions for each gateway.

Test Gateway (Development Only)

When WP_DEBUG is enabled in wp-config.php, a Test Gateway option appears at checkout. It completes payments instantly with no external credentials -- useful for testing the full order lifecycle during development or QA. It is automatically hidden on production sites where WP_DEBUG is false.

See Other Payment Gateways for full details.

What the Checkout Page Includes

  • Billing details -- name, email, address
  • Order review -- services, prices, and totals
  • Payment method selector -- choose from your enabled gateways
  • Terms and conditions checkbox (optional)
  • Place Order button

Standalone vs WooCommerce: Quick Comparison

Standalone WooCommerce [PRO]
Extra plugins needed None WooCommerce required
Payment gateways 3 built-in + Razorpay [PRO] 100+ via WooCommerce extensions
Checkout speed Fastest Good
Physical products No Yes
Best for Pure service marketplaces Stores that also sell products

Switching Between Modes

You can switch at any time from Settings > General. A few things to keep in mind:

  • Finish active orders first. Existing orders stay in the system they were created in.
  • Reconfigure payment gateways after switching, since each mode uses its own gateways.
  • Test checkout thoroughly after any switch.

What Buyers and Vendors See

Vendors get a dashboard with:

  • Incoming orders and delivery management
  • Service listings and editing
  • Earnings tracking and withdrawal requests
  • Messaging with buyers

Buyers get:

  • Order history and active order tracking
  • Messaging with vendors
  • Profile and account settings

Stripe Payments

Accept credit cards, debit cards, Apple Pay, and Google Pay on your marketplace using Stripe -- the most popular online payment processor.

Stripe Gateway Settings

What You Need

  • A free Stripe account at stripe.com
  • An SSL certificate on your site (HTTPS)
  • WP Sell Services with standalone mode enabled

Setting Up Stripe

Sandbox vs Live Mode

Always start with Stripe's Test Mode before processing real payments. Test mode uses separate API keys and never charges real cards.

Test Mode Live Mode
API keys start with pk_test_ / sk_test_ pk_live_ / sk_live_
Real charges No Yes
Webhook events Test events only Real events
Dashboard URL Same dashboard, toggle "Test mode" Same dashboard

To switch: Toggle "Test mode" in your Stripe Dashboard (top right), copy the new keys, and update them in WP Sell Services settings. Remember to update the webhook endpoint secret too -- test and live webhooks have separate secrets.

Get Your API Keys

Stripe gives you two sets of keys -- test keys for trying things out, and live keys for real payments.

  1. Log in to Stripe Dashboard
  2. Toggle Test mode (top right) to start with test keys
  3. Go to Developers > API keys
  4. Copy your Publishable key and Secret key

Test keys start with pk_test_ and sk_test_. Live keys start with pk_live_ and sk_live_.

Add Keys to Your Site

  1. Go to Sell Services > Settings > Payment Gateways
  2. Click the Stripe tab
  3. Check Enable Stripe
  4. Paste your Publishable Key and Secret Key
  5. Turn on Test Mode while you are setting up
  6. Set a display title like "Credit Card" (this is what buyers see)
  7. Click Save Changes

Set Up Webhooks

Webhooks let Stripe tell your site when a payment succeeds or fails.

  1. In your Stripe Dashboard, go to Developers > Webhooks
  2. Click Add endpoint
  3. Paste your webhook URL: https://yoursite.com/wpss-payment/stripe/callback
  4. Select these events: payment_intent.succeeded, payment_intent.payment_failed, charge.refunded
  5. Click Add endpoint
  6. Copy the Signing secret that appears
  7. Paste it into Sell Services > Settings > Payment Gateways
  8. Click Save Changes

How Checkout Works with Stripe

When a buyer chooses to pay by card:

  1. Secure card fields appear right on your checkout page
  2. Stripe validates the card details in real time
  3. If 3D Secure authentication is needed, a verification popup appears
  4. Payment processes securely -- card data never touches your server
  5. Order is created instantly on success
  6. Buyer sees an order confirmation page

Testing Before Going Live

Use Stripe's test card numbers to try out checkout without charging real money:

Card Number What Happens
4242 4242 4242 4242 Payment succeeds
4000 0025 0000 3155 3D Secure verification required
4000 0000 0000 9995 Declined (insufficient funds)

Use any future expiry date and any 3-digit CVC. When everything works, switch to live keys and turn off Test Mode.

3D Secure and Strong Customer Authentication

Stripe automatically handles 3D Secure (SCA), which is required for European transactions. No extra setup from you -- buyers see a quick verification step when their bank requires it.

Supported Payment Methods

Cards: Visa, Mastercard, American Express, Discover, Diners Club, JCB

Digital wallets: Apple Pay shows automatically on Safari/iOS, and Google Pay shows on Chrome/Android. No additional configuration needed.

Supported Currencies

Stripe supports 135+ currencies. Your marketplace currency is set in Settings > General. Stripe will process payments in whatever currency you configure.

Stripe Connect for Direct Vendor Payments [PRO]

With WP Sell Services Pro, you can enable Stripe Connect so payments go directly to each vendor's Stripe account, with your platform commission deducted automatically. This means funds reach vendors faster and you avoid handling payouts manually.

Refunds

To refund an order:

  1. Go to Sell Services > Orders and open the order
  2. Click Refund
  3. Choose full or partial refund
  4. Click Process Refund

Refunds appear in the buyer's account within 5-10 business days. Stripe refunds the percentage fee but keeps the fixed fee (typically $0.30 per transaction).

Transaction Fees

Stripe charges per transaction (rates vary by country):

  • Domestic cards (US): 2.9% + $0.30
  • International cards: 3.9% + $0.30

For example, on a $100 service, Stripe keeps about $3.20 and you receive $96.80.

Security

Your site never stores or processes card data. Stripe handles all PCI compliance through their secure payment form. Card details go directly to Stripe's servers, and your site only receives a secure payment token.

Troubleshooting

Problem Solution
"Payment failed" on every attempt Check that your keys match the mode (test keys for test mode, live keys for live mode)
Webhooks not received Verify the webhook URL is exactly https://yoursite.com/wpss-payment/stripe/callback (no trailing parameters). Check your site uses HTTPS.
3D Secure popup not appearing Ensure your site is not blocking iframes. Some security plugins block the Stripe verification popup.
"No such payment_intent" error You are mixing test and live keys. Ensure both publishable and secret keys are from the same mode.
Webhook signature verification failed The webhook signing secret must match the specific endpoint. Re-copy it from Stripe Dashboard > Developers > Webhooks > your endpoint > Signing secret.
Apple Pay / Google Pay not showing These require HTTPS and domain verification in Stripe Dashboard > Settings > Payment methods.

PayPal, Razorpay, and Offline Payments

Beyond Stripe, WP Sell Services supports PayPal, Razorpay, and offline bank transfers so you can offer the payment methods your buyers prefer.

Payment gateway settings

PayPal

PayPal lets buyers pay with their PayPal balance, linked bank account, or credit/debit card -- even without a PayPal account.

Setting Up PayPal

  1. Create a PayPal Business account at paypal.com/business (if you do not have one)
  2. Go to the PayPal Developer Dashboard
  3. Create an app to get your Client ID and Secret
  4. In WordPress, go to Sell Services > Settings > Payment Gateways
  5. Check Enable PayPal and paste your credentials
  6. Click Save Changes

Sandbox (Test) Mode

PayPal provides a full sandbox environment for testing without real money.

  1. Go to PayPal Developer Dashboard
  2. Under Sandbox, click Accounts -- PayPal auto-creates a sandbox business and personal account
  3. Click Apps & Credentials and make sure Sandbox tab is selected (not Live)
  4. Create a sandbox app or use the default one
  5. Copy the Client ID and Secret from the sandbox app
  6. In WP Sell Services settings, check Sandbox Mode and paste the sandbox credentials
  7. Use the sandbox personal account email to test buyer checkout

Sandbox test credentials:

  • Login: Use the sandbox personal account from Developer Dashboard
  • Any sandbox credit card will work for testing

To go live: Switch to the Live tab in PayPal Developer Dashboard, create a live app, copy the live credentials, and uncheck Sandbox Mode in WP Sell Services.

Setting Up PayPal Webhooks

  1. In PayPal Developer Dashboard, go to Webhooks
  2. Add your endpoint: https://yoursite.com/wpss-payment/paypal/callback
  3. Select events: PAYMENT.CAPTURE.COMPLETED and PAYMENT.CAPTURE.REFUNDED
  4. Save and copy the Webhook ID to your WP Sell Services settings

How Checkout Works

Buyers see a PayPal button on your checkout page. They can:

  • Pay with their PayPal balance
  • Use a credit or debit card (no PayPal account needed)
  • Pay with Venmo (US buyers only)

PayPal's Smart Payment Buttons automatically show the most relevant options for each buyer.

PayPal Transaction Fees

Type Fee
Domestic (US) 2.9% + $0.30
International 4.4% + fixed fee (varies by country)

Razorpay [PRO]

Razorpay is the go-to payment gateway for marketplaces serving buyers in India. It supports UPI, cards, net banking, and mobile wallets.

Setting Up Razorpay

  1. Create a Razorpay account at razorpay.com
  2. Complete the KYC process (PAN, GSTIN, bank details)
  3. Get your API keys from Settings > API Keys in the Razorpay Dashboard
  4. In WordPress, go to Sell Services > Settings > Payment Gateways
  5. Check Enable Razorpay and enter your Key ID and Key Secret
  6. Click Save Changes

Test Mode

Razorpay provides test mode keys for development.

  1. In Razorpay Dashboard, go to Settings > API Keys
  2. Switch to Test Mode using the toggle
  3. Generate test API keys -- they start with rzp_test_
  4. In WP Sell Services settings, check Test Mode and paste the test credentials

Test payment methods:

  • UPI: Use success@razorpay for successful payments, failure@razorpay for failures
  • Cards: Use Razorpay's test card numbers
  • Net Banking: Any test bank option works in test mode

To go live: Generate live API keys (start with rzp_live_), complete KYC verification, and uncheck Test Mode.

Razorpay Webhooks

  1. In Razorpay Dashboard, go to Webhooks
  2. Add endpoint: https://yoursite.com/wpss-payment/razorpay/callback
  3. Select events: payment.authorized, payment.captured, payment.failed, refund.created
  4. Copy the Webhook Secret to your WP Sell Services settings

Payment Methods Available

  • UPI: Google Pay, PhonePe, Paytm, BHIM
  • Cards: Visa, Mastercard, Amex, RuPay
  • Net Banking: 50+ Indian banks
  • Wallets: Paytm, PhonePe, Mobikwik

Razorpay Transaction Fees

Method Fee
UPI Free (promotional)
Domestic cards 2%
International cards 3% + GST
Net banking Around 3-10 INR per transaction

Offline / Bank Transfer Payments

Offline payments let you accept bank transfers, checks, or any manual payment method. This is useful for high-trust relationships or regions where online payment adoption is low.

Setting Up Offline Payments

  1. Go to Sell Services > Settings > Payment Gateways
  2. Check Enable Offline Payments
  3. Set a title like "Bank Transfer" or "Pay by Check"
  4. In the Instructions field, add your payment details (bank name, account number, routing number, etc.)
  5. Click Save Changes

How It Works

  1. Buyer selects offline payment at checkout
  2. Order is created with Pending Payment status
  3. Buyer sees your payment instructions and sends money
  4. You check your bank statement and verify the payment
  5. In the order, click Confirm Payment
  6. Order moves to In Progress and the vendor is notified to begin work

When to Use Offline Payments

  • Buyers who prefer direct bank transfers
  • Phone orders or special arrangements
  • Markets where online payment is less common
  • High-value orders where buyers want wire transfers

Using Multiple Gateways at Once

You can enable as many gateways as you like. Buyers will see all enabled options at checkout and choose the one they prefer. There is no limit on how many gateways you run simultaneously.

Gateway Comparison

PayPal Razorpay [PRO] Offline
Instant payment Yes Yes No (manual confirmation)
Auto-confirmation Yes Yes No
Refunds Automatic Automatic Manual
Best for Global buyers India High-trust / manual
Transaction fees 2.9-4.4% 0-3% None

Test Gateway (Development Only)

WP Sell Services includes a built-in Test Gateway for developers. It auto-completes payments instantly -- no external accounts, API keys, or webhooks needed.

Enabling the Test Gateway

The Test Gateway only appears when WP_DEBUG is enabled in wp-config.php:

define( 'WP_DEBUG', true );

Once enabled, "Test Gateway" appears as a payment option at checkout with a "Development Mode" banner.

How It Works

  1. Buyer selects "Test Gateway" at checkout
  2. Clicks "Pay" -- no card details needed
  3. Payment is instantly marked as successful
  4. Order is created and moved to "Pending Requirements"
  5. A test transaction ID is generated (test_ prefix)

When to Use It

  • Plugin development -- test the full order lifecycle without setting up Stripe/PayPal
  • Theme development -- test checkout page styling and flow
  • QA testing -- rapid order creation for testing requirements, delivery, disputes
  • Demo sites -- showcase the marketplace without real payment credentials

Important: The Test Gateway is NOT available on production sites where WP_DEBUG is false. It cannot be enabled via settings -- only via wp-config.php.

Troubleshooting

Problem Solution
PayPal button not appearing Ensure your PayPal Client ID is correct and the app is approved. Check browser console for JavaScript errors.
PayPal webhook not received Verify webhook URL is https://yoursite.com/wpss-payment/paypal/callback. PayPal requires HTTPS for webhooks.
Razorpay "Bad Request" error Check that Key ID and Key Secret match the same mode (test or live).
Razorpay webhook failing Verify the Webhook Secret matches. Razorpay webhooks require the exact URL with no trailing slash changes.
Offline payment order stuck at "Pending" Admin must manually confirm payment in Sell Services > Orders > click "Confirm Payment".
Test Gateway not showing Enable WP_DEBUG in wp-config.php. The Test Gateway is hidden on production sites.
Gateway not appearing at checkout Go to Settings > Payment Gateways and verify the gateway is checked as "Enabled".
Currency not supported Check your gateway's supported currencies. Some gateways (Razorpay) only support certain currencies.

Currency and Tax Settings

Set your marketplace currency and configure tax collection so prices display correctly and comply with your local requirements.

Payment Settings

Setting Your Currency

Your currency applies everywhere -- service prices, order totals, vendor earnings, and withdrawal amounts.

  1. Go to Sell Services > Settings > General
  2. Select your Currency from the dropdown
  3. Click Save Changes

Supported Currencies

Currency Code Symbol
US Dollar USD $
Euro EUR E
British Pound GBP L
Canadian Dollar CAD C$
Australian Dollar AUD A$
Indian Rupee INR R
Japanese Yen JPY Y
Chinese Yuan CNY Y
Brazilian Real BRL R$
Mexican Peso MXN $

Good to know: Changing currency after you already have orders does not convert existing amounts. Only new orders will use the new currency.

Enabling Tax

If you need to collect tax on services, the plugin has a built-in tax system that works with any checkout mode.

How to Turn On Tax

  1. Go to Sell Services > Settings > Commission & Tax
  2. Scroll to the Tax Settings section
  3. Check Enable Tax
  4. Fill in the settings below
  5. Click Save Tax Settings

Tax Settings Explained

Setting What It Does
Tax Label The name buyers see (e.g., "VAT", "GST", "Sales Tax")
Tax Rate (%) The percentage applied to service prices (e.g., 20 for 20%)
Prices Include Tax Whether your displayed prices already include tax or not
Tax on Commission How tax interacts with your platform commission

Prices Include Tax vs. Exclude Tax

Prices exclude tax (common in the US): A $100 service with 7% tax charges $107 at checkout. The buyer sees the tax added separately.

Prices include tax (common in the EU): A E120 service with 20% VAT shows E120 at checkout. The tax (E20) is already baked into the displayed price, so the buyer pays what they see.

Tax on Commission

This setting controls how tax interacts with your platform fee:

  • None: No special tax treatment on commission
  • Platform: Platform collects tax on the full service amount
  • Vendor: Vendors are responsible for their own tax obligations

How Tax Looks at Checkout

Example with tax excluded (US-style):

  • Service price: $100.00
  • Sales Tax (7%): $7.00
  • Total charged: $107.00

Example with tax included (EU-style VAT):

  • Service price: E120.00 (includes 20% VAT)
  • VAT amount: E20.00
  • Total charged: E120.00 (no change at checkout)

Tax and Commission Together

Tax is calculated on the service price. Commission is also calculated on the service price (before tax). They work independently:

  • Service price: $100.00
  • Tax (7%): $7.00
  • Commission (15% of $100): $15.00
  • Vendor receives: $85.00
  • Platform receives: $15.00 commission
  • Tax collected: $7.00 (handled per your tax settings)

Tips for Getting It Right

  • Set currency before creating services. It is easier than converting later.
  • Check local tax requirements. Many regions require you to collect and remit tax on digital services.
  • Test checkout after changing tax settings to make sure prices display correctly.
  • Keep it simple. If you only serve one region, a single flat tax rate works fine.

Stripe Connect Split Payments [PRO]

Stripe Connect pays vendors their share automatically at checkout. No manual payouts, no withdrawal queue, no money sitting in your account waiting to be forwarded.

It uses Stripe Connect Express: each vendor completes a short Stripe-hosted onboarding to connect their bank account. Stripe handles their identity and compliance checks, so you never collect or store vendor bank details.

The Stripe Connect card on the Payment Gateways tab

How it works

  1. You enable Stripe Connect once, using the Stripe keys you already configured.
  2. Each vendor connects their own Stripe account from their dashboard.
  3. When a buyer pays, Stripe splits the charge: your platform fee stays with you, the remainder goes straight to the vendor's Stripe account.
  4. Stripe pays the vendor out on their own Stripe payout schedule.

Setup

No extra API keys are needed. Stripe Connect uses the same platform keys already set up for Stripe payments -- there is nothing new to paste.

  1. Enable Connect in your Stripe Dashboard if you have not already.
  2. In WordPress, go to Sell Services > Settings > Payment Gateways.
  3. Make sure the Stripe card is configured with your keys.
  4. Find the Stripe Connect card below it and tick Enable Stripe Connect.
  5. Set the Platform Fee (%) -- or leave it blank to use your normal commission rate.
  6. Click Save Connect Settings.
  7. Add the webhook endpoint shown on the settings screen to Stripe, covering payment and account events.

Platform fee vs commission

The Platform Fee (%) field is the percentage you retain from each payment before the remainder transfers to the vendor.

Leave it blank and Connect uses your ordinary commission resolution -- global rate, per-vendor override, or a tiered rule. That is usually what you want, so one number governs every rail. Set it only when Connect charges should differ deliberately from the rest of your marketplace.

See Commission System and Tiered Commission Rules.

Vendor onboarding

Once Connect is enabled, vendors see a Connect with Stripe option in their dashboard. Clicking it sends them to Stripe's hosted onboarding, where they supply their identity and bank details directly to Stripe.

You can watch progress under the Connected Vendor Accounts table on the Connect settings screen, which lists each vendor's Stripe account, status, whether charges and payouts are enabled, country, and connection date.

Status What it means
Active Fully onboarded. Charges split to this vendor.
Pending Onboarding started but not finished. Stripe is still waiting on information.
Restricted Stripe needs more information, or has limited the account. The vendor must resolve it in Stripe.
Inactive Not connected, or disconnected.

A vendor is only paid through Connect when their account is active and payouts are enabled. Until then they fall back to the standard ledger.

Vendors who do not connect

Orders still work. Nothing blocks a sale because a vendor has not onboarded. Unconnected vendors accrue earnings in the standard wallet ledger and request withdrawals manually, exactly as they would without Pro.

This means you can turn Connect on for a live marketplace without a migration window -- vendors move over as they get round to it.

Refunds

A refund reverses the vendor's earnings and your platform fee proportionally.

Crucially, the ledger only reverses when Stripe actually reclaimed the money from the connected account. If Stripe could not pull it back, the reversal becomes debt that nets against the vendor's next earnings instead. This is what stops a vendor being effectively paid twice for a refunded order.

See Paying Your Vendors for how debt netting works across every rail.

Things to know

  • Connect is per-vendor, not per-order. You cannot route one order through Connect and another manually for the same connected vendor.
  • Stripe controls payout timing to the vendor once the money is in their account. Their Stripe payout schedule applies, not yours.
  • Disconnecting a vendor stops future splits. Earnings already transferred stay with them; anything still owed remains on your ledger.
  • Test with Stripe test keys first. Connect onboarding has a full test mode with prefilled test data.

Troubleshooting

Problem Cause
Vendors see no "Connect with Stripe" option Connect is not enabled, or the Pro license is inactive.
Charges are not splitting The vendor's account is Pending or Restricted, so they are not eligible yet.
Account stuck on Pending Stripe is waiting on the vendor. They must finish onboarding in Stripe.
Refund did not reverse earnings Stripe could not reclaim the funds -- check for debt netted against future earnings.

Display Currency [PRO]

Show shoppers an approximate price in their own currency while your marketplace keeps one authoritative base currency for everything it stores and settles.

This is a display-only hint. Orders, earnings, commission, refunds, and payouts are always calculated and recorded in your base currency. Nothing about the stored price changes -- only what a visitor sees while browsing.

Display Currency settings on the Advanced tab

Why display-only

A marketplace that genuinely stored prices in many currencies would have to reconcile exchange-rate movement on every order, refund, and payout: a vendor could be paid at one rate and refunded at another, and the ledger would drift.

Keeping one base currency and treating other currencies as a browsing hint keeps the money math correct and auditable, while still meeting shoppers in their own currency. Because the base amount is the amount charged, there is no rounding drift between the price a shopper sees at checkout and the amount they pay.

Setup

  1. Sign up at openexchangerates.org and copy your App ID. The free tier is enough for a typical marketplace.
  2. Go to Sell Services > Settings > Advanced and find the Display Currency card.
  3. Tick Enable, paste your App ID, and list the currencies you want to offer.
  4. Save.

The converted hint then appears on catalog price displays automatically, through the free plugin's wpss_catalog_price_html seam. No template edits are required -- if your theme renders prices through the plugin's price helper, it picks this up for free.

What the shopper sees

  • Catalog and service pages show the converted price alongside the real base price.
  • Their choice is remembered in a wpss_display_currency cookie, so it persists across pages.
  • Checkout always shows and charges the base-currency amount.

Add a currency picker anywhere with the shortcode:

[wpss_currency_switcher]

Drop it in a header, sidebar, or the top of your services page.

Exchange rates

Rates come from openexchangerates.org and are cached for 12 hours. If a fetch fails (bad key, API down, network error), the failure is cached for only 15 minutes so a temporary outage does not leave you with stale rates for half a day, and a broken key does not hammer the API on every page load.

If rates cannot be fetched at all, the hint simply does not render -- shoppers still see correct base-currency prices. The feature degrades quietly rather than showing a wrong number.

Things to know

  • Changing the currency list or App ID flushes the rate cache immediately.
  • The hint is frontend-only. Admin screens, invoices, and exports stay in base currency.
  • This is not multi-currency pricing. Vendors set one price, in your base currency. If you need genuinely separate per-currency price points, that is not what this feature does.

Offline Payment Proof and Receipts

Some of your buyers will pay by bank transfer, cash, or another method that happens away from your site. The order sits at Pending Payment until someone confirms the money arrived, and without a way to show that it did, confirming it is a conversation over email.

This feature closes that loop: the buyer attaches proof, you review it, and approving it marks the order paid and credits the vendor.

Off by default. A marketplace taking only card payments should not show buyers an upload box it will never use.

Turning it on

  1. Go to Sell Services > Settings > Orders & Disputes.
  2. Find Offline Payment Proof.
  3. Tick Let buyers upload proof of an offline payment for an admin to verify.
  4. Save.

You also need at least one offline payment method enabled under Settings > Payment Gateways, with your bank details or instructions in it. That text is what the buyer sees after ordering, so put everything they need to pay you in it.

How it works for the buyer

  1. They order and choose the offline payment method at checkout.
  2. The order is created at Pending Payment, and your payment instructions appear on the order page.
  3. They pay you however your instructions say.
  4. They return to the order and upload their proof - a bank transfer receipt, a screenshot, a reference number.
  5. They wait for you to confirm.

The buyer can see the status of what they submitted at every point, so they are not left wondering whether you received it.

How it works for you

  1. The submission appears for review, and you are notified by email.
  2. Open it and check the proof against your bank statement.
  3. Approve it, and the order is marked paid, the vendor is credited, and the work begins - exactly as if a card had been charged.
  4. Or reject it with a reason. The buyer is told why and can submit again.

Rejecting is not an accusation. The most common reasons are an unreadable screenshot or a transfer that has not cleared yet, and giving the reason saves both of you an email.

Things worth knowing

Approving is the same action as a card payment succeeding. The vendor is credited through exactly one path in this plugin, whether the money arrived by Stripe or by bank transfer. There is no separate "offline" accounting to reconcile later.

Two admins cannot double-credit an order. If two of you open the same submission and both approve it, the vendor is credited once. The claim is locked at the database level rather than by asking you to coordinate.

A paid order gets a printable receipt. Once payment is confirmed - by any method - the buyer can open a clean, printable receipt from their order and save it as a PDF from their browser's print dialog. Nothing to configure.

Uploads follow your WordPress media rules. Size limits and allowed file types are whatever your site already permits.

When not to use it

If you only take card payments, leave this off. If you take bank transfer but handle confirmation entirely outside the site - a bookkeeper marking orders paid in the admin once a day - you can also leave it off and use Mark as Paid on the order screen instead. This feature is for when you want the buyer to be able to show you, and to see where their order stands while they wait.

Earnings & Wallet

How Commissions Work

The commission system controls how revenue is split between your platform and your vendors on every completed order.

Commission and tax settings

The Basic Idea

When a buyer pays for a service, you (the platform owner) keep a percentage as commission, and the vendor receives the rest. For example, with a 10% commission rate on a $100 order:

  • Platform keeps: $10.00 (10%)
  • Vendor earns: $90.00 (90%)

This happens automatically when an order is marked as completed. You do not need to calculate anything manually.

Setting Your Global Commission Rate

  1. Go to Sell Services > Settings > Commission & Tax
  2. Find the Commission Settings section
  3. Enter your Commission Rate (%) -- this can be anything from 0% to 50%
  4. Click Save Commission Settings

The default rate is 10%. This applies to all vendors unless you set a custom rate for specific vendors.

Per-Vendor Custom Rates

Want to reward your top performers or offer promotional rates to new vendors? You can override the global rate for individual vendors.

  1. Go to Sell Services > Vendors
  2. Click on a vendor's name
  3. Find Commission Settings
  4. Enter a custom commission rate
  5. Click Update

Use cases for custom rates:

  • Lower commission for high-performing vendors (loyalty reward)
  • Promotional rates for new vendors (to attract talent)
  • Higher rates for vendors who get extra platform support
  • Special rates for partnership agreements

When a vendor has a custom rate, it always takes priority over the global rate.

When Is Commission Calculated?

Commission is only calculated when an order reaches Completed status. Here is the typical flow:

  1. Buyer places order and pays
  2. Vendor delivers the work
  3. Buyer reviews and accepts the delivery
  4. Order status changes to Completed
  5. Commission is calculated and vendor earnings are credited

Until the order is completed, no money changes hands between the platform and vendor.

Commission on Add-ons and Tips

Add-ons: Commission applies to the full order total, including any add-ons the buyer selected.

Tips: Tips are commissioned at the same rate as regular orders by default. You can change that with the Tip commission rate field in the same settings card:

Tip commission rate Effect
(empty) Use the regular commission rate -- the default
0 Vendors keep 100% of every tip
any percentage A tip-only rate, independent of your order rate

With the default 10% rate and no tip override:

  • Order total: $100.00, tip: $10.00
  • Commission on the order (10%): $10.00
  • Commission on the tip (10%): $1.00
  • Vendor receives: $90.00 + $9.00 tip = $99.00

Set the tip rate to 0 if you want tips to reach vendors in full:

  • Vendor receives: $90.00 + $10.00 tip = $100.00

Tiered Commission Rules [PRO]

With WP Sell Services Pro, you can set up tiered commission rules that automatically adjust rates based on criteria like order volume, vendor level, or category. This lets you create more sophisticated commission structures without manually setting rates for each vendor.

What You See in Order Details

When you open any completed order in the admin panel, you will see a clear financial breakdown:

  • Order Total: Full amount the buyer paid
  • Commission Rate: Percentage applied
  • Platform Fee: Your commission in dollars
  • Vendor Earnings: Net amount the vendor receives

Vendors see a simplified view showing the order total and their earnings.

Refunds and Commission

When an order is refunded, commission reverses automatically:

Full refund: Both the platform fee and vendor earnings are reversed completely.

Partial refund: Commission reverses proportionally. For example, a 50% refund on a $100 order reverses $5 of a $10 commission.

Clearance Period

After an order is completed, vendor earnings do not become available for withdrawal immediately. There is an optional clearance period to allow time for disputes or issues. It ships at 0 days, so earnings clear as soon as the order completes. You can adjust this in Settings > Payouts.

Vendor Earnings Dashboard

The earnings dashboard gives every vendor a clear view of their income -- what they have earned, what is available to withdraw, and what is still being processed.

Vendor Earnings Dashboard

What Vendors See

When a vendor goes to Dashboard > Earnings & Payouts, they see these key numbers at a glance:

Metric What It Means
Total Earned Lifetime earnings from all completed orders (after commission)
Available Balance Money ready to withdraw right now
Pending Clearance Earnings from recent orders still in the clearance period
Withdrawn Total amount successfully paid out over time
Pending Withdrawal Amount currently in a withdrawal request awaiting admin approval

There is also a count of Completed Orders so vendors can see their overall activity.

Understanding the Numbers

Available Balance

This is the amount a vendor can actually withdraw. For earnings to appear here, three things must be true:

  1. The order is completed (buyer accepted delivery)
  2. The clearance period has passed (default: 0 days, so this is immediate unless your admin raised it)
  3. The amount is not already in a pending withdrawal request

Pending Clearance

These are earnings from completed orders that have not yet passed the clearance period. Think of it as a safety buffer -- it gives buyers time to report issues before funds are released.

For example, if an order completed on January 15 and your admin set the clearance period to 14 days, those earnings become available on January 29. At the default of 0, they are available on January 15.

Tips

Tips from buyers are tracked separately. They are:

  • Commissioned at your marketplace's normal rate unless the admin set a separate tip rate (which can be 0, giving the vendor 100%)
  • Subject to the same clearance period as other earnings -- which is 0 days by default, so normally available immediately
  • Shown as a separate line in the dashboard

Earnings History

Below the summary, vendors see a detailed transaction history showing every completed order and their earnings from it:

  • Order number and service name
  • Order total (what the buyer paid)
  • Vendor earnings (after platform commission)
  • Commission rate applied and platform fee deducted
  • Date the order was completed

Vendors can filter their history by date range and service, making it easy to track income over specific periods.

Earnings by Period

Vendors can view their earnings grouped by:

  • Daily -- last 30 days
  • Weekly -- last 12 weeks
  • Monthly -- last 12 months
  • Yearly -- all-time

Each period shows the number of orders completed, total earnings, and average per order. This helps vendors spot income trends and plan ahead.

Requesting a Withdrawal

From the earnings dashboard, vendors can click Request Withdrawal to start a payout. They will need to:

  1. Enter the amount they want to withdraw (must meet the minimum threshold)
  2. Select a payment method (bank transfer or PayPal)
  3. Provide payment details
  4. Submit the request for admin review

See Withdrawals for the full withdrawal process.

Clearance Period

The clearance period is set by the marketplace admin. It defaults to 0 days and can be raised to 90 in Settings > Payouts.

A clearance period protects both buyers and the platform by allowing time for:

  • Buyers to report quality issues after delivery
  • Disputes to be filed and resolved
  • Chargebacks to be processed

Vendor Withdrawals

When vendors are ready to get paid, they submit a withdrawal request from their dashboard. Here is how the entire process works -- from request to payment.

Withdrawal Request

How Withdrawals Work

  1. Vendor earns money -- orders are completed and earnings pass the clearance period
  2. Vendor requests withdrawal -- picks an amount and payment method
  3. Admin reviews -- approves or rejects the request
  4. Admin sends payment -- processes payment via bank transfer or PayPal
  5. Vendor gets paid -- funds arrive in their account

Minimum Withdrawal Amount

Vendors must have a minimum balance before they can request a withdrawal. The default minimum is $25, but you can change this in Settings > Payouts.

If a vendor's available balance is below the minimum, the withdrawal button is disabled and they see how much more they need to earn.

Withdrawal Methods

Vendors choose how they want to be paid when they submit a request:

Bank Transfer

  • Vendor provides: bank name, account holder, account number, routing/sort code
  • Processing time: 3-7 business days
  • Usually free for domestic transfers
  • Best for regular, larger withdrawals

PayPal

  • Vendor provides: their PayPal email address
  • Processing time: 1-3 business days
  • Best for international vendors or quick payouts

How Vendors Request a Withdrawal

From the vendor dashboard:

  1. Go to the Earnings & Payouts section
  2. Check the available balance (must meet minimum threshold)
  3. Click Request Withdrawal
  4. Enter the amount (or click Withdraw All for the full balance)
  5. Select payment method: Bank Transfer or PayPal
  6. Enter payment details
  7. Review and click Submit Request

The vendor sees a confirmation with a request ID and status. They also receive an email confirming the submission.

Withdrawal Statuses

Status What It Means
Pending Request submitted, waiting for admin review
Approved Admin approved it, payment is being processed
Completed Payment has been sent to the vendor
Rejected Request denied -- funds return to vendor's available balance

The typical flow is: Pending > Approved > Completed

If rejected, the funds go right back to the vendor's balance so they are not lost.

What Admins Do

See the full admin workflow in Withdrawal Approvals. In short:

  1. Go to Sell Services > Withdrawals
  2. Review pending requests (vendor info, amount, payment details)
  3. Approve the request
  4. Process payment externally (send the bank transfer or PayPal payment)
  5. Return to the request and click Mark as Completed

Admins can also Reject a request with a reason if something is wrong (incomplete payment details, outstanding disputes, etc.).

Withdrawal History

Vendors can see all their past withdrawal requests in Dashboard > Earnings & Payouts, including:

  • Request ID and amount
  • Payment method used
  • Current status
  • Date requested and date processed
  • Any admin notes

Clearance Period

After an order is completed, your marketplace may apply a clearance period before those earnings can be withdrawn. It ships at 0 days, so unless your admin raised it, earnings are withdrawable straight away. When it is set, it protects against:

  • Late buyer disputes
  • Chargebacks from payment processors
  • Quality issues discovered after delivery

Admins can adjust the clearance period (0-90 days) in Settings > Payouts.

Common Questions

"Why can't I withdraw?" Check that your available balance meets the minimum threshold and that you do not already have a pending withdrawal request.

"My request was rejected -- what now?" Check the rejection reason (visible in your withdrawal history), fix the issue (usually incomplete payment details), and submit a new request.

"How long until I receive payment?" After admin approval, bank transfers typically take 3-7 business days and PayPal takes 1-3 business days.

Wallet System [PRO]

WP Sell Services Pro can integrate with popular WordPress wallet plugins, giving your marketplace an internal wallet system for faster payouts and more flexible payment options.

Do You Need a Wallet?

The built-in earnings system handles everything most marketplaces need -- vendors earn from orders, wait for the clearance period, and request withdrawals. No extra plugins required.

A wallet plugin adds advanced features on top of that. Consider one if you want:

  • Buyer wallets -- let buyers pre-load funds and pay from their balance
  • Instant vendor payouts -- credits appear in vendor wallets immediately after clearance
  • Cashback and loyalty programs -- reward buyers with wallet credits
  • Partial wallet payments -- buyers pay part from wallet, part from card
  • User-to-user transfers -- let users send wallet funds to each other

If you just need vendors to earn and withdraw, the built-in system is simpler and faster.

Supported Wallet Plugins

TeraWallet

A popular free wallet plugin for WooCommerce that adds a "Wallet" payment method.

  • Buyers can top up their wallet and pay for services from their balance
  • Vendor earnings can be credited directly to their wallet
  • Supports partial payments (wallet + another method)
  • Includes a transaction history for every user

WooWallet

Another WooCommerce wallet plugin with similar functionality.

  • Wallet balance shown on the My Account page
  • Supports cashback promotions
  • Admin can credit or debit any user's wallet
  • Full transaction logs

MyCred

A points-based loyalty system that works with or without WooCommerce.

  • Points can represent money (1 point = $1) or be a separate loyalty currency
  • Supports ranks, badges, and gamification
  • Built-in reward hooks for actions like purchases and referrals
  • Good for marketplaces that want a loyalty program alongside regular payments

How Wallet Integration Works

When you connect a wallet plugin:

  1. Vendor earnings are credited to their wallet after the clearance period
  2. Vendors can use wallet funds to shop on your marketplace or withdraw
  3. Buyers can top up their wallets and pay from their balance at checkout
  4. All transactions are logged in the wallet plugin's history

The specific features depend on which wallet plugin you choose.

Built-in System vs. Wallet Plugin

Built-in Earnings System Wallet Plugin
Extra plugins needed None Yes (wallet plugin required)
Vendor payouts Withdrawal requests to bank/PayPal Wallet credits + optional withdrawal
Buyer wallets No Yes
Cashback / loyalty No Yes (plugin dependent)
Partial payments No Yes
Complexity Simple More moving parts
Best for Straightforward marketplaces Feature-rich platforms with loyalty programs

Our Recommendation

For most service marketplaces, the built-in earnings system is the right choice. It is simpler, has fewer dependencies, and covers the core need: vendors earn money and get paid.

Add a wallet plugin when you specifically need buyer wallets, loyalty programs, or instant vendor credits. Make sure the wallet plugin you choose is compatible with your e-commerce platform (most require WooCommerce).

Automated Payouts

Instead of waiting for vendors to request withdrawals manually, you can set up automatic payouts that run on a schedule -- saving time for both you and your vendors.

Scheduled auto-withdrawals are included in the free plugin. Pro adds bulk payment rails on top -- PayPal mass payouts and Stripe Connect -- but you do not need Pro to automate the withdrawal requests themselves.

Payout settings, including automatic withdrawals

How Auto-Payouts Work

Once enabled, the system checks vendor balances on a regular schedule (weekly or monthly). If a vendor's available balance meets the threshold you set, a withdrawal request is created automatically. You then review and process the payment as usual.

Here is the flow:

  1. You enable auto-withdrawals and set a threshold (e.g., $500)
  2. On the scheduled day, the system checks every vendor's balance
  3. Vendors with a balance at or above the threshold get an automatic withdrawal request
  4. Both the vendor and you receive email notifications
  5. You review and process the payment

Setting Up Auto-Payouts

  1. Go to Sell Services > Settings > Payouts
  2. Scroll to the Automatic Withdrawals section
  3. Check Enable Auto-Withdrawal
  4. Set the Threshold Amount -- the minimum balance that triggers an auto-payout (default: $500)
  5. Choose the Schedule: Weekly (every Monday), Bi-weekly (1st and 15th), or Monthly (1st of the month)
  6. Click Save Payout Settings

Threshold Amount

This is the minimum available balance a vendor must have for an auto-payout to trigger. You can set it anywhere from $100 to $10,000, in steps of $50. The default is $500.

Example:

  • Threshold: $500
  • Vendor A has $750 available -- auto-payout created for $750
  • Vendor B has $450 available -- skipped (below threshold)

Schedule Options

Schedule Runs On Example
Weekly Every Monday at 2 AM Jan 6, Jan 13, Jan 20, Jan 27
Bi-weekly 1st and 15th of each month at 2 AM Jan 1, Jan 15, Feb 1, Feb 15
Monthly 1st of each month at 2 AM Feb 1, Mar 1, Apr 1, May 1

Processing runs automatically in the background using WordPress cron.

What Vendors Need to Do

For auto-payouts to work, vendors must have their payment method set up in their profile:

  • PayPal: Their PayPal email address saved
  • Bank Transfer: Bank name, account number, and routing details saved

If a vendor has not set up a payment method, the auto-payout skips them and moves on to the next vendor.

What Happens on Payout Day

On the scheduled day, the system:

  1. Finds all vendors with a balance at or above the threshold
  2. Checks that each vendor has a payment method configured
  3. Checks that they do not already have a pending auto-withdrawal
  4. Creates withdrawal requests for eligible vendors
  5. Sends notifications to both vendors and admin

Auto-withdrawal requests are flagged with an "Auto" badge in the admin panel so you can easily distinguish them from manual requests.

Processing Auto-Payouts

Auto-payouts still need admin approval and payment processing, just like manual withdrawals:

  1. Go to Sell Services > Withdrawals
  2. You will see new auto-withdrawal requests (marked with "Auto" badge)
  3. Review the request and click Approve
  4. Send the payment via PayPal or bank transfer
  5. Return and click Mark as Completed

This keeps you in control of when money actually leaves your account while automating the request part.

Duplicate Prevention

The system prevents duplicate auto-withdrawals. If a vendor already has a pending or approved auto-withdrawal request, they will not get another one until the existing request is processed.

PayPal Mass Payouts [PRO]

With WP Sell Services Pro, you can process PayPal payouts in bulk instead of one by one. This is especially useful if you have many vendors and want to send all approved payments at once.

Disabling Auto-Payouts

To turn off automatic payouts:

  1. Go to Settings > Payouts
  2. Uncheck Enable Auto-Withdrawal
  3. Click Save Payout Settings

Existing pending requests remain in the queue and still need processing. No new auto-withdrawals will be created.

When Should You Use Auto-Payouts?

Auto-payouts are a good fit if:

  • You have many active vendors and want to reduce manual withdrawal requests
  • You want to give vendors a predictable payment schedule
  • You prefer batch processing payouts on specific days

If you have just a few vendors or prefer full manual control, you can leave auto-payouts disabled and let vendors request withdrawals on their own.

Earnings Ledger & CSV Export

[PRO] The Earnings Ledger is the vendor's source of truth for every dollar that moved through their wallet. It lives on the Wallet dashboard and mirrors, byte-for-byte, the rows the plugin writes to the wallet-transactions table. The CSV export lets vendors hand that same record to their accountant or import it into spreadsheet / accounting tools for monthly or annual reporting.

Earnings Ledger on the Wallet dashboard

Where to find it

The ledger is on the Wallet page in the vendor dashboard - the same page as the Available Balance and Total Earned cards. It sits below the summary cards as a dated list of every wallet transaction: earnings, tips, milestone phase payments, extension payments, and withdrawals.

The period selector

A dropdown above the ledger scopes the view to a time window:

  • Last 30 Days
  • This Month
  • Last Month
  • This Year
  • All Time (default)

Changing the selector re-filters the ledger AND the Export CSV button - whatever range you're viewing is what the export will contain. That way the CSV you download always matches the screen.

Ledger row types

Every row carries a type so you can tell at a glance where the money came from:

Type What it is
Earning A base order completed and the net vendor earnings hit the wallet.
Tip A buyer sent a tip after order completion. Tips carry their own commission rate (often 0%).
Extension A paid extension sub-order on a catalog order cleared. The parent order's deadline is pushed out by the quoted days.
Milestone A milestone phase on a buyer-request contract was paid. One row per phase.
Withdrawal Money left the wallet to a payout method. This is a debit; it shows as a negative amount in the CSV.
Credit / Debit Admin manually credited or debited the wallet.
Dispute Refund A dispute resolved with a refund that reversed an earlier earning.

Earning, Tip, Extension, and Milestone are all credits. Withdrawal, Debit, and Dispute Refund are debits.

Exporting to CSV

Click Export CSV next to the period selector. The browser downloads a file named like earnings-ledger-<your-username>-<period>.csv.

File structure

The file has two sections.

1. A summary block at the top, one line per value, each prefixed with # so most accounting importers skip it or treat it as a comment:

# Earnings Ledger Export
# Vendor,Jane Doe
# Period,This Month
# Generated,2026-04-21 14:32:05
# Total Credits,1240.00
# Total Debits,400.00
# Net,840.00
# Tips Received,45.00
# Total Withdrawn,400.00

2. The row table with a column header followed by every transaction in the period, oldest first:

Column What it contains
Date When the transaction was recorded (UTC, format YYYY-MM-DD HH:MM:SS).
Type Human label: Earning, Tip, Extension, Milestone, Withdrawal, Credit, Debit, Dispute Refund.
Description Free-text note. For order-based rows this includes the order ID and customer reference.
Reference A machine-readable link like order#123, withdrawal#45, tip#67. Use this to jump back to the source row.
Currency The currency the amount is in (e.g. USD).
Amount The value of the transaction. Debits are negative (e.g. -400.00 for a withdrawal). Credits are positive.
Balance After The running wallet balance immediately after this row. Makes the ledger reconcile itself - the last row's Balance After is your current balance.

Rows are ordered oldest first on purpose - accounting imports and running-balance calculations expect chronological order.

Using the export with accounting tools

The file is plain UTF-8 CSV with the standard comma delimiter and quoted fields where needed, so anything that reads CSV can consume it.

Spreadsheets (Excel, Google Sheets, Numbers)

Open the file directly. Delete the #-prefixed summary rows if you want just the data. The Amount column already carries the sign (negative for debits, positive for credits), so sum formulas work without special logic.

QuickBooks / Xero / Wave

Most accounting tools need you to map columns during import:

  • Date → transaction date
  • Description → memo / description
  • Amount → amount (the sign tells the tool whether it's a deposit or withdrawal)
  • Reference → reference / invoice number

The Type column isn't a standard accounting field - use it to map rows into the correct income or expense account (Earning / Tip / Extension / Milestone into an "Marketplace income" account, Withdrawal into a transfer, Dispute Refund into "Refunds").

Tax reporting

For annual tax reports, use the This Year period and sum the Amount column (or read the summary block's Total Credits and Total Debits). The Net figure is credits minus debits - this is the amount that changed in your wallet during the period, which is often what you need for self-employment tax calculations.

Why the ledger and the summary cards should match

The Wallet page shows Available Balance and Total Earned as summary cards. Those numbers are derived from the same ledger rows the export streams - if the card says $1,240.00 and the summary block says # Total Credits,1240.00, you're looking at the same data through two different lenses. Any disagreement between the cards and the export is a bug - please report it with a screenshot and the export file.

Admin export filters

Administrators who export ledgers for reporting have one extra option exposed via query-arg:

  • ?milestone_only=1 appended to the export URL returns only rows where Type = Milestone. Useful for auditing milestone-contract revenue separately from base-order and tip income.

Tips

  • Export monthly rather than all-time when possible. Smaller files import faster and make it easier to spot anomalies.
  • Use the Reference column to trace a specific row back to the order or withdrawal. order#123 means parent order ID 123; tip#67 is a tip sub-order ID.
  • If your accountant needs a different format, the CSV opens in any spreadsheet tool where you can re-save as XLSX or re-arrange columns before handing it over.

Tiered Commission Rules [PRO]

Replace a single flat commission rate with rules that resolve automatically: by service category, by seller level, or by sales volume. The right rate is picked at checkout without you touching anything.

Free already gives you a global rate and per-vendor overrides. Tiered rules are for when "which rate applies" is a question about the sale, not about a specific vendor you hand-picked.

Commission rules on the Commission & Tax tab

The three rule types

Type Matches on Typical use
Category The service's category Design pays 15%, Writing pays 20%
Seller level The vendor's level (New, Rising, Top Rated) Reward Top Rated sellers with 10% instead of 20%
Volume The vendor's sales volume Vendors over $10k/month drop to 12%

Creating rules

  1. Go to Sell Services > Settings > Commission & Tax.
  2. Find the Tiered Commission card.
  3. Add a rule: pick the type, what it matches, and the rate.
  4. Set a priority number.
  5. Save. Rules can be deactivated without deleting them.

How a rate is chosen

Rules are evaluated in ascending priority order -- lowest number first -- and the first rule that matches wins. Evaluation stops there; later rules are not consulted, and rates are never averaged or stacked.

The default priority is 10, so give your most specific rules a lower number.

priority 5   Seller level = Top Rated       ->  10%
priority 10  Category = Design              ->  15%
priority 20  Volume over $10,000/month      ->  12%

A Top Rated designer in the example above pays 10%, because the seller-level rule is evaluated first. If you wanted category to win for that vendor, give the category rule the lower number.

If no rule matches, resolution falls back through:

  1. A matching tiered rule (this page)
  2. The vendor's per-vendor custom rate, if set (free)
  3. The global commission rate (free)

A vendor subscription plan can also carry a commission override, applied when present -- see Vendor Subscription Plans.

Preview before you commit

The commission-rules REST endpoint exposes a preview route that resolves which rule would apply to a given vendor, category, and amount without saving anything. Use it to sanity-check a rule set, or to explain a rate inside your own UI. See REST API Controllers.

How the rate is recorded

The resolved rate computes the platform fee and vendor earnings once, at payment time, and both are stored on the order. Earnings, the vendor ledger, payouts, analytics, refunds, and the Stripe Connect application fee all read that stored figure.

This means changing a rule does not rewrite history. Orders already paid keep the rate they settled at, and a refund reverses proportionally at the original rate rather than today's.

Worked examples

  • Top Rated sellers pay 10 percent instead of 20.
  • The Design category pays 15 percent.
  • Vendors over $10k in monthly sales drop to 12 percent.
  • A specific enterprise vendor pays a flat 5 percent -- use a per-vendor rate (free), not a tiered rule. Tiered rules are for classes of sale, not individuals.

For developers

The tiered manager hooks the free plugin's wpss_commission_rate filter at priority 20 -- deliberately later than the default 10 -- so per-vendor overrides set by other code are not clobbered silently. Flat (non-percentage) fees go through wpss_commission_fee instead.

See Pro Extension Points.

Paying Your Vendors

This page is the map of how money reaches your vendors: what the platform keeps, what the vendor is owed, and every route you can use to actually pay them.

The Withdrawals screen: export what is owed, then mark each payout paid

The golden rule: you never need an integration

You can run a complete marketplace and pay every vendor without connecting any payment integration at all.

  1. Go to Sell Services > Withdrawals.
  2. Read each vendor's owed balance, or export what is owed.
  3. Pay them however you already do -- bank transfer, Wise, PayPal by hand, cash.
  4. Mark the payout Paid. The ledger records the debit and the balance clears.

Automated rails are opt-in and never required. Payout timing defaults to owner-triggered: nothing leaves your account until you decide, on every rail.

If you take one thing from this page, take that. Everything below is a convenience on top of it.

The payout rails

Rail How it works When to use it Plugin
Manual / mark-paid Read or export owed balances, pay externally, mark paid. Always available. The zero-integration default. Free
Scheduled auto-withdrawals The plugin raises withdrawal requests on a schedule when a vendor passes a threshold. You still approve and pay. You want to stop chasing withdrawal requests but keep control of payment. Free
PayPal mass payouts Batch-pay every vendor who has a PayPal payout email, in one request. You already collect with PayPal and want batch payouts. [PRO]
Stripe Connect Vendors onboard to Stripe. The platform fee is taken at charge time and the remainder settles to the vendor automatically. You want hands-off, per-transaction settlement. [PRO]

Every rail settles against the same wallet ledger, so balances stay correct no matter how you pay -- and you can mix rails across vendors.

How the split is decided

The platform fee and the vendor's earnings are calculated once, at payment time, and stored on the order. Every downstream surface -- the earnings dashboard, withdrawals, analytics, refunds, and the Stripe Connect application fee -- reads that stored figure rather than recalculating it.

That is deliberate. If each surface re-derived the split, a commission-rate change would silently rewrite the history of orders already paid. Because the number is persisted, an order settled at 10% stays settled at 10% forever.

See Commission System for how the rate is chosen, and Tiered Commission Rules [PRO] for rules that resolve by category, seller level, or volume.

Stripe Connect [PRO]

When Stripe Connect is enabled and a vendor has completed Connect onboarding, each qualifying charge computes the platform application fee from your commission rules and routes the vendor's share to their connected account.

The settlement is recorded on the order so the wallet ledger can offset it. A refund reverses the ledger only when Stripe actually reclaimed the money -- this is what prevents a vendor being paid twice for the same order.

Vendors who never connect are not blocked. Their orders work normally, earnings accrue in the standard ledger, and they request withdrawals like any other vendor.

See Stripe Connect Split Payments.

PayPal mass payouts [PRO]

Vendors set a payout email on their profile. From the payouts screen you select the owed balances and send a single PayPal Payouts batch. Each payout settles on the wallet ledger, so a vendor's owed balance is reduced exactly once.

A submitted batch can be re-synced against PayPal to reconcile its real status, so a batch that partially failed does not leave the ledger disagreeing with reality.

Refunds and debt netting

A refund reverses the vendor earnings and the platform fee proportionally, to the currency's precision. Refund half an order, and half of both the fee and the earnings come back.

If a vendor has already been paid out when the refund lands, the reversal becomes debt that nets against their next earnings. Balances never silently go wrong, and a vendor never ends up owing you money they have no way to see -- the debt is visible on their earnings dashboard and clears itself from future sales.

Choosing a setup

  • Just starting, few vendors -- manual mark-paid. Nothing to configure, nothing to break.
  • Growing, still want control -- turn on scheduled auto-withdrawals. Requests get raised for you; you approve and pay.
  • Many vendors, PayPal-based -- add PayPal mass payouts to batch the payments.
  • High volume, want it hands-off -- Stripe Connect, so each sale settles itself.

You can move between these at any time. Because every rail writes to the same ledger, switching does not orphan balances.

Analytics & Reporting

Vendor Analytics [PRO]

Vendors get their own analytics dashboard to track personal performance, earnings trends, and service statistics. Everything they need to grow their business on your marketplace.

Vendor analytics dashboard


Revenue Tracking

Vendors can see their earnings at a glance and drill down by time period:

Period Chart View
Day Today's earnings
Week Daily breakdown for the past 7 days
Month Daily breakdown for the past 30 days
Year Monthly breakdown for the past 12 months
All time Total lifetime earnings

For each period, vendors see:

  • Total revenue -- Gross sales before commission
  • Net earnings -- What they take home after commission
  • Platform fees -- Commission paid to the marketplace
  • Order count -- Number of orders in the period

Order Performance

The dashboard shows key order metrics:

  • Total orders received (all time or filtered by period)
  • Completed orders -- Successfully delivered and accepted
  • Active orders -- Currently in progress
  • Response rate -- How often the vendor responds to buyer messages
  • Active services -- Number of published service listings

Top Performing Services

Vendors see their top 5 services ranked by revenue, including:

  • Service name
  • Total views
  • Number of orders
  • Revenue generated

This helps vendors understand which services are driving their business and where to focus their efforts.


Average Order Value

The dashboard calculates the vendor's average order value across completed orders. This is a useful metric for pricing strategy -- vendors can see if their services are priced effectively.


Service Views and Conversion

Each service tracks how many times it has been viewed and how many orders it has received. The conversion rate (orders divided by views) helps vendors understand which listings are most effective at turning browsers into buyers.


Response Rate

The response rate shows what percentage of buyer messages the vendor has responded to. A high response rate builds trust and can influence the vendor's seller level ranking.


Recent Activity Feed

A timeline showing the vendor's most recent events: new orders, completed orders, reviews received, and messages. Quick access to jump into any item that needs attention.


Data Export

Vendors can export their earnings data as a CSV file for accounting and tax purposes. The export includes order dates, service names, amounts, commission rates, and net earnings.

[PRO] PDF formatted reports are also available with the Pro version.

See Data Export for details.


What Is Included in the Free Version

The free version provides basic stats: total orders, earnings totals, top services, and response rate. The full analytics dashboard with charts, trend lines, time period comparisons, and advanced metrics is a Pro feature.


Admin Analytics [PRO]

Get a bird's-eye view of your entire marketplace with the admin analytics dashboard. Track revenue, monitor vendor performance, and spot trends -- all from one screen.

Admin analytics dashboard


What You Can See

The analytics dashboard gives you a real-time overview of your marketplace health:

Revenue Overview

  • Total revenue across all completed orders
  • Revenue charts showing trends over 7 days, 30 days, 90 days, or 12 months
  • Commission earned by the platform

Order Statistics

  • Total orders and their status breakdown (pending, in progress, completed, cancelled)
  • Recent orders list with quick access to details
  • Order volume trends over time

Top Performers

  • Top services ranked by revenue, orders, or ratings
  • Top vendors ranked by rating, earnings, or order count
  • Top categories showing where the most activity is concentrated

Marketplace Counts

  • Total registered vendors
  • Total published services
  • Total orders processed
  • Active buyer count

Time Period Filters

Switch between different time ranges to analyze trends:

Period What It Shows
7 days Daily breakdown for the past week
30 days Daily breakdown for the past month
90 days Weekly trends for the past quarter
12 months Monthly trends for the past year

Dashboard Overview

The dashboard is designed for quick scanning. At the top, you see the headline numbers (total revenue, orders, vendors, services). Below that, charts visualize trends. At the bottom, tables list your top services, top vendors, and recent orders.

Everything updates as new orders are completed, so the data you see reflects the current state of your marketplace.


What Is Included in the Free Version

The free version provides basic marketplace counts: total vendors, services, orders, and revenue. The full analytics dashboard with charts, time filters, trend analysis, and detailed breakdowns is a Pro feature.


Data Export [PRO]

Export your marketplace data for accounting, reporting, and analysis. Download order histories, revenue reports, and vendor performance data in formats you can use with spreadsheets and other tools.


What You Can Export

Orders

Export your complete order history with all the details: order number, date, buyer, vendor, service, amount, commission, and status. Filter by date range, status, or vendor before exporting.

Revenue Reports

Download revenue summaries broken down by period, showing gross sales, commission earned, vendor payouts, and net platform income. Perfect for monthly accounting.

Vendor Performance

Export vendor metrics including total orders, completion rate, average rating, and earnings. Useful for identifying top performers and managing your vendor base.


Export Formats

  • CSV -- Opens in Excel, Google Sheets, or any spreadsheet tool
  • PDF -- Formatted reports ready for printing or sharing

Custom Date Ranges

Filter your export to any date range: last 7 days, last 30 days, a specific month, a custom start and end date, or all time. Only the data matching your filters is included in the download.


Current Alternatives (Free Version)

The free version does not include a built-in export feature. However, you can still get your data out:

WordPress Privacy Export

WordPress has a built-in personal data export tool at Tools > Export Personal Data. It generates a ZIP file containing a user's orders, messages, reviews, and profile data. This is useful for GDPR compliance and individual user requests.

Database Tools

If you have access to phpMyAdmin or a similar database tool through your hosting panel, you can run queries directly against the marketplace tables and export results as CSV.

Third-Party Plugins

Plugins like WP All Export Pro can export custom post types and custom tables. They require some configuration to work with WP Sell Services data, but offer powerful filtering and scheduling features.


GDPR Compliance

WP Sell Services integrates with the WordPress privacy tools. When a user requests their data (under GDPR or similar regulations), the export includes their marketplace activity: orders, messages, reviews, and profile information.

Use Tools > Export Personal Data to generate the export, or Tools > Erase Personal Data for deletion requests.


Notifications & Emails

Email Notifications

WP Sell Services emails buyers, vendors, and admins at every stage of an order. 23 notification types have their own on/off switch in Sell Services > Settings > Emails, and all 23 are on by default. A handful of operational emails (requirement reminders, seller-level promotions, proposal rejections) send automatically and are not individually switchable. Every email has both an HTML and a plain text version.

Email Notification Settings


Emails Vendors Receive

These keep your sellers informed about their business activity.

Email When It Is Sent
New Order A buyer places an order for the vendor's service
Requirements Submitted The buyer submits project requirements for an order
Revision Requested The buyer requests changes to a submitted delivery
New Message A new message arrives in an order conversation
Cancellation Requested The buyer or admin requests to cancel an order
Dispute Opened A dispute is filed on one of the vendor's orders
Withdrawal Approved The admin approves a payout withdrawal request
Withdrawal Rejected The admin declines a payout withdrawal request
Proposal Accepted A buyer accepts the vendor's proposal on a request
Vendor Contact Someone sends a message through the vendor's contact form
Level Promotion The vendor reaches a new seller level
Moderation Approved A submitted service passes admin review and goes live
Moderation Rejected A submitted service is declined during admin review
Auto-Withdrawal Processed An automatic withdrawal runs and processes a payout for the vendor
Service Pending Moderation The vendor submits a service for admin review
Moderation Response The vendor responds to moderation feedback on a submitted service

Emails Buyers Receive

These keep your customers updated on their purchases and activity.

Email When It Is Sent
Order In Progress The vendor starts working on the buyer's order
Delivery Ready The vendor submits completed work for review
Order Completed The order is marked complete (manual or automatic)
Order Cancelled An order is cancelled by any party
Proposal Submitted A vendor submits a proposal on the buyer's request
Requirements Reminder The buyer has not yet submitted requirements for their order
Cancellation Requested A cancellation request has been filed on the buyer's order

Emails Admins Receive

These alert you to actions that need your attention.

Email When It Is Sent
Withdrawal Requested A vendor requests a payout from their earnings
Dispute Opened A dispute is filed on any order in the marketplace
Dispute Escalated A dispute is escalated to admin for further investigation

Enabling and Disabling Emails

Every email type can be turned on or off individually.

  1. Go to Sell Services > Settings > Emails
  2. You will see a list of all notification types with checkboxes
  3. Uncheck any email you do not want sent
  4. Click Save Changes

When you disable an email type, no emails of that type are sent to anyone. In-app notifications are still created regardless of email settings, so users will still see alerts in their dashboard.

All email types are enabled by default when you first activate the plugin.


What Every Email Includes

Each email is professionally designed with:

  • Your marketplace name in the header
  • A clear subject line describing the event
  • The relevant details (order number, service name, vendor/buyer name, amounts)
  • A call-to-action button linking to the relevant page (e.g., "View Order")
  • Your site footer with branding

Emails are responsive and display well on both desktop and mobile email clients.


How Emails Are Delivered

Emails are sent through WordPress's built-in email system. This works with any SMTP plugin you may already have installed (WP Mail SMTP, FluentSMTP, Post SMTP, etc.).

If you are not using an SMTP plugin, emails are sent via your server's default mail function. For better deliverability and to avoid spam folders, we recommend installing an SMTP plugin and connecting it to a proper email service.


Email Templates

Every email is rendered from an HTML template file in templates/emails/. Each template is theme-overridable -- copy it to yourtheme/wp-sell-services/emails/ to customize the design.

There are also plain text variants in templates/emails/plain/ for email clients that do not support HTML.

All emails share a common header (email-header.php) and footer (email-footer.php) that you can override to match your brand.


Customizing Email Content

For developers who want to modify email content, sender details, or headers without overriding template files, see the Email Customization Guide. It covers:

  • Changing the "From" name and email address
  • Filtering email content for specific notification types
  • Customizing the email header variables and branding
  • Using plain text vs HTML variants

In-App Notifications

Every important event in your marketplace triggers an in-app notification so users never miss an update, even if they do not check their email.


In-app notifications in the dashboard

How It Works

A notification bell appears in the dashboard with an unread count badge. When something happens -- a new order, a message, a delivery, a review -- a notification is created instantly. Users click the bell to see their alerts and navigate directly to the relevant page.


What Triggers Notifications

Notifications are created for all major marketplace events:

  • New order placed
  • Order status changes (in progress, delivered, completed, cancelled)
  • New message received in an order conversation
  • Delivery submitted by vendor
  • Delivery accepted by buyer
  • Revision requested by buyer
  • Review received from a buyer
  • Dispute opened or resolved

These in-app notifications are always created, regardless of whether email notifications are enabled or disabled. They are independent systems.


Viewing Notifications

From the dashboard, click the notification bell to see your notifications list. Each notification shows:

  • An icon indicating the type of event
  • A brief message describing what happened
  • A relative timestamp (e.g., "2 minutes ago")
  • A link to the relevant order, message, or page

You can filter to see only unread notifications or browse by notification type.


Managing Notifications

Mark as Read

Click on any notification or use the "Mark as Read" link to clear it from your unread count.

Mark All as Read

Click the Mark All as Read button at the top of the notification list to clear all unread notifications at once.

Automatic Cleanup

Read notifications are automatically deleted after 90 days to keep things tidy. Unread notifications are kept until you read or dismiss them. Important notifications (disputes, order completions) are preserved longer.


The Unread Badge

The notification bell shows a number badge indicating how many unread notifications you have. This count updates as new events occur and decreases as you read or dismiss notifications.


Notifications vs. Email

In-app notifications and email notifications work independently:

Feature In-App Email
Always created Yes Only if admin enables the type
Requires login to see Yes No -- delivered to inbox
Can be marked as read Yes No
Stored in dashboard Yes No -- lives in email inbox
Links directly to relevant page Yes Yes

Disabling an email notification type does not affect in-app notifications. Users will still see the alert in their dashboard.


Push Notifications to Phones [PRO]

A member with your mobile app installed can be notified on their phone for the same events they already receive in the app. Nothing new to decide about what gets sent - push follows the notifications you already have.

Off by default, and it needs credentials before it will send anything.

Setting it up

  1. Create a Firebase project at console.firebase.google.com and generate a service account key - a JSON file Google gives you once.
  2. Go to Sell Services > Settings > Advanced.
  3. Paste the JSON into the push notification credentials field and enable it.
  4. Save.

Firebase relays to Apple's service for iOS, so one credential covers Android, iOS and web. You do not need a separate Apple key.

What to expect

  • A member's device registers itself when they sign in on the app. Nothing for them to configure.
  • A device that uninstalls the app or rotates its token is dropped automatically, so you are not paying for delivery attempts to phones that no longer exist.
  • The credential is stored masked. Re-saving settings without retyping it keeps the existing one rather than blanking it.

Before you rely on it

Push has been verified as far as the request this plugin sends. What Google does with a valid-looking request has not been tested against a real handset. Send yourself a test on a real phone before telling members the feature exists.


Tips

  • Check notifications regularly. The dashboard bell is the quickest way to stay on top of orders, messages, and reviews.
  • Use email for time-sensitive items. If you need to respond quickly (like a new order or message), make sure those email types are enabled so vendors and buyers get immediate alerts.
  • Do not ignore the unread badge. A growing badge count usually means there are actions that need your attention.

Email Configuration

Set up how your marketplace sends email notifications, test deliverability, and optionally customize branding.


Accessing Email Settings

  1. Go to Sell Services > Settings > Emails
  2. You will see toggles for each email notification type and delivery options

Email settings tab

Full email settings


Notification Toggles

Each email notification type has its own on/off switch. When you disable a notification type, no emails of that kind are sent to any user. In-app notifications are unaffected.

All toggles are enabled by default. Changes take effect immediately after saving.


What Members Can Turn Off Themselves

You control which emails the site sends. Each member controls which of those they want to receive, from Dashboard > Profile > Email Preferences.

The categories a member sees depend on what they actually do on your marketplace. A buyer is offered the five that apply to them - orders, messages, deliveries, reviews and disputes. Someone who also sells sees eight, adding the seller-side categories: sales, earnings and withdrawals, and buyer requests or proposals.

That matters more than it sounds. Before 1.6.0 every member was offered the seller list, so a buyer who unticked things they did not recognise could accidentally mute notifications about their own orders.

Two things a member cannot turn off, by design:

  • Anything about money moving - a payment taken, a refund issued, a withdrawal paid.
  • Anything about account security.

Those arrive regardless, because a marketplace that lets someone opt out of being told their money moved is not one people can trust.

Not Emailing Someone Who Is Already Reading

By default the plugin does not email a member about a new message while they are actively using the site - they are already looking at it, and the email arrives as noise a few seconds later.

There is no setting screen for this. It is on unless a developer turns it off, and the behaviour is adjustable with the wpss_skip_message_email_when_online and wpss_presence_window filters - see the Hooks & Filters reference.

Send Test Email

Use the test email feature to verify that your site can successfully send emails.

  1. Go to the Emails settings tab
  2. Click Send Test Email
  3. Check your inbox (and spam folder)

If the test email does not arrive, your server's email configuration needs attention. See the SMTP section below.


By default, WordPress sends emails through your server's built-in mail function. This works, but emails often end up in spam folders or are not delivered at all -- especially on shared hosting.

For reliable email delivery, install an SMTP plugin and connect it to a proper email service.

  • WP Mail SMTP -- The most popular option, supports all major providers
  • FluentSMTP -- Clean interface, Amazon SES support
  • Post SMTP -- Advanced features with detailed delivery logging

Why SMTP Matters

  • Emails are authenticated (SPF, DKIM) so they pass spam filters
  • Delivery tracking lets you see if emails were sent successfully
  • Works with services like Gmail, SendGrid, Mailgun, Amazon SES, and more
  • Dramatically improves the chance that buyers and vendors actually see your notifications

Once you install and configure an SMTP plugin, all WP Sell Services emails automatically route through it. No additional setup needed on the marketplace side.


WooCommerce Email Integration

If you are using WooCommerce as your e-commerce platform (Pro feature), marketplace emails can integrate with WooCommerce's email system:

  • Marketplace emails inherit your WooCommerce email template and branding
  • Configure subject lines and content at WooCommerce > Settings > Emails
  • Works with WooCommerce email customizer plugins
  • Provides a consistent look across all your store and marketplace emails

The settings page will show a notice about WooCommerce email integration when WooCommerce is active.


White-Label Email Branding [PRO]

With the Pro version, you can fully customize the email appearance to match your brand:

  • Replace the default header with your logo and brand colors
  • Customize the footer text and links
  • Set a custom "From" name and address
  • Create a consistent branded experience across all marketplace communications

Troubleshooting

Emails not arriving at all?

  • Send a test email from the settings page
  • Test WordPress email separately (try resetting a password)
  • Install an SMTP plugin -- this fixes most delivery problems
  • Check your spam/junk folder

Emails going to spam?

  • Use an SMTP plugin with proper authentication (SPF, DKIM, DMARC)
  • Send from your own domain email address (not Gmail or Yahoo)
  • Test your email score at mail-tester.com

Getting duplicate emails?

  • Check if another notification plugin is also sending emails for the same events
  • Verify each notification type is only enabled once in settings

Real-Time Updates (Live Messages & Notifications)

Real-time updates let order messages and notification badges appear instantly, without a page refresh. This feature is disabled by default and requires a WebSocket connection you configure.


How It Works

When enabled, the plugin opens a private, authenticated WebSocket channel for each logged-in user. Two events are delivered live:

  • message.created -- A new order message appears in the conversation immediately.
  • notification.created -- The notification bell badge increments and the new alert appears without reload.

When disabled, the marketplace behaves exactly as before -- messages and notifications appear on the next page load or navigation. No third-party connection is made in disabled state.


Enabling Real-Time Updates

  1. Go to Sell Services > Settings
  2. Click the Advanced tab
  3. Find the Real-time (WebSockets) card
  4. Toggle Enable to on
  5. Fill in the connection fields (see below)
  6. Save settings

Real-time settings card


Connection Options

The plugin speaks the Pusher protocol. You can connect to either a hosted service or your own server -- the settings fields are the same for both.

Option 1: Pusher.com (Hosted)

  1. Create a free account at pusher.com and create a new Channels app
  2. Copy your App ID, Key, Secret, and Cluster from the Pusher dashboard
  3. Paste them into the settings fields
  4. Leave the Host field blank -- the plugin connects to Pusher.com automatically

Option 2: Self-Hosted (Soketi or Compatible Server)

Soketi is a free, open-source, self-hostable Pusher-compatible server.

  1. Set up your Soketi instance and note the App ID, Key, and Secret you configured on it
  2. Paste those credentials into the settings fields
  3. Enter your server's hostname in the Host field (e.g., wss-server.example.com)
  4. Set the Port to match your server (default 443)
  5. Ensure Use TLS is on if your server uses HTTPS/WSS

Settings Reference

Field Default Description
Enable Off Activates the WebSocket layer
App ID -- Your Pusher / Soketi App ID
Key -- Your Pusher / Soketi Key (sent to browser)
Secret -- Your Pusher / Soketi Secret (server-only, stored masked)
Host Blank Leave blank for Pusher.com; enter hostname for self-hosted
Cluster mt1 Pusher.com cluster (ignored for self-hosted)
Port 443 WebSocket port
Use TLS On Connect over WSS (recommended)

Note on the Secret field: once saved, the secret is displayed as masked dots. Leave the field blank when saving other settings to keep the existing secret value.


Security

  • The App Secret never leaves the server and is never sent to the browser.
  • WebSocket channels are private and per-user. A buyer or vendor only receives events for their own account.
  • Order message events are only delivered to participants of that specific order (buyer, vendor, and admins).
  • Private channel subscriptions are authorized server-side via POST /wpss/v1/realtime/auth after an ownership check.

How It Behaves for Users

Buyers and vendors do not need to configure anything. When real-time is active and they are logged in:

  • New messages in an order conversation appear immediately in the thread.
  • The notification bell updates its badge count and shows the new notification without requiring a page reload.

Real-time only works for logged-in users. Guests are unaffected.


Privacy Note

When real-time is enabled, message and notification metadata transits the configured WebSocket provider.

  • Pusher.com is a third-party service with its own data processing terms. Review their privacy policy if this matters for your site's compliance.
  • Self-hosted Soketi keeps all traffic on infrastructure you control. No data leaves your servers.

Troubleshooting

Live updates are not appearing

  • Confirm the Enable toggle is on and all credentials (App ID, Key, Secret) are filled in.
  • The user must be logged in -- real-time is not active for guests.
  • Open your browser's developer console and look for WebSocket connection errors.

Pusher.com not connecting

  • Confirm the Cluster field matches the cluster shown in your Pusher app dashboard (e.g., us2, eu, mt1).
  • Confirm your Pusher app is in Channels mode (not Beams).

Self-hosted server not connecting

  • Confirm the Host field contains only the hostname (e.g., wss-server.example.com), not the full URL.
  • Confirm the Port is open and reachable over TLS from the browser.
  • Check that your Soketi instance is running and its credentials match what you entered.

Cloud Storage

Cloud Storage [PRO]

Offload delivery files from your WordPress server to a dedicated cloud storage provider for better performance, unlimited scalability, and faster downloads worldwide.


Why Use Cloud Storage?

By default, all delivery files (the work vendors upload for buyers) are stored on your WordPress server. This works fine for smaller marketplaces, but as your platform grows, file storage can become a bottleneck:

  • Disk space fills up -- Large or frequent deliveries eat into your hosting storage
  • Downloads slow down -- Your web server handles both page requests and file downloads
  • Bandwidth costs rise -- Every file download counts against your hosting plan

Cloud storage solves all of these by moving files to a specialized service designed for exactly this purpose.


What Changes With Cloud Storage

Without Cloud With Cloud Storage
Files stored on your WordPress server Files stored in a cloud bucket (S3, GCS, or DO Spaces)
Downloads served by your web server Downloads served by a global CDN
Limited by your hosting storage plan Virtually unlimited storage
Bandwidth counts against hosting Separate, affordable bandwidth

The upload experience stays the same for vendors -- they upload through the familiar WordPress interface. The plugin automatically transfers files to your cloud provider behind the scenes.


Supported Providers

Amazon S3

The industry standard for cloud storage. Proven reliability (99.999999999% durability), global datacenter coverage, and integration with Amazon CloudFront CDN for fast worldwide downloads.

Google Cloud Storage

Google's cloud storage with strong performance, multi-regional redundancy, and Google Cloud CDN integration. Particularly strong for marketplaces with significant Asia-Pacific traffic.

DigitalOcean Spaces

S3-compatible storage with simple, predictable pricing: $5/month for 250GB storage and 1TB transfer. Includes a built-in CDN. The easiest option for small to medium marketplaces.


How File Delivery Works

When cloud storage is enabled:

  1. A vendor uploads their delivery files through the order page (same as usual)
  2. The plugin transfers the files to your cloud storage bucket
  3. When the buyer downloads, the file is served from the cloud provider (with CDN acceleration)
  4. Access is controlled through secure, time-limited download links -- only the buyer with the right order can download

If your cloud storage is ever misconfigured or unreachable, the plugin falls back to local storage automatically.


Current File Storage (Without Cloud)

Until you enable cloud storage, files are stored locally:

  • Delivery files go to wp-content/uploads/wpss/deliveries/
  • Files are protected so only authorized buyers can download them
  • Storage is limited by your hosting plan

Tips for managing local storage:

  • Set reasonable file size limits in Settings > Advanced
  • Monitor your disk usage through your hosting panel
  • Consider upgrading your hosting storage if it fills up

Setting Up Cloud Storage [PRO]

Connect your marketplace to Amazon S3, Google Cloud Storage, or DigitalOcean Spaces for scalable, fast file delivery.


Cloud Storage settings on the Advanced tab

Before You Start

You will need:

  • WP Sell Services Pro active and licensed
  • An account with your chosen cloud provider
  • Access credentials (API keys or service account) from the provider

Amazon S3

Step 1: Create an S3 Bucket

  1. Sign in to the AWS Console
  2. Go to S3 and click Create Bucket
  3. Choose a bucket name (e.g., "yoursite-deliveries") and region
  4. Keep the default security settings (block public access)
  5. Click Create Bucket

Step 2: Create Access Keys

  1. Go to IAM > Users > Add User
  2. Create a user with programmatic access
  3. Attach the AmazonS3FullAccess policy (or a custom policy limited to your bucket)
  4. Save the Access Key ID and Secret Access Key

Step 3: Configure in WP Sell Services

  1. Go to Sell Services > Settings > Advanced
  2. Select Amazon S3 as the provider
  3. Enter your Access Key ID, Secret Access Key, bucket name, and region
  4. Click Test Connection to verify
  5. Save Changes

Google Cloud Storage

Step 1: Create a Storage Bucket

  1. Sign in to the Google Cloud Console
  2. Go to Cloud Storage > Buckets > Create
  3. Choose a bucket name and location
  4. Set access control to "Uniform"
  5. Click Create

Step 2: Create a Service Account

  1. Go to IAM & Admin > Service Accounts > Create Service Account
  2. Give it a name like "wpss-storage"
  3. Grant the Storage Object Admin role
  4. Create a JSON key and download it

Step 3: Configure in WP Sell Services

  1. Go to Sell Services > Settings > Advanced
  2. Select Google Cloud Storage as the provider
  3. Upload or paste your service account JSON key
  4. Enter your bucket name
  5. Click Test Connection to verify
  6. Save Changes

DigitalOcean Spaces

Step 1: Create a Space

  1. Sign in to the DigitalOcean Control Panel
  2. Go to Spaces and click Create a Space
  3. Choose a datacenter region
  4. Give it a name (e.g., "yoursite-deliveries")
  5. Click Create a Space

Step 2: Generate API Keys

  1. Go to API > Spaces Keys > Generate New Key
  2. Save the Key and Secret

Step 3: Configure in WP Sell Services

  1. Go to Sell Services > Settings > Advanced
  2. Select DigitalOcean Spaces as the provider
  3. Enter your Key, Secret, Space name, and region
  4. Click Test Connection to verify
  5. Save Changes

After Setup

Once connected, new delivery uploads are automatically sent to your cloud provider. Existing files on your server continue to work -- they are served locally until you optionally migrate them.

Test It

  1. Create a test order
  2. Upload a delivery file as a vendor
  3. Download it as the buyer
  4. Confirm the file downloads quickly from the cloud

Fallback Behavior

If your cloud storage credentials become invalid or the service is temporarily unavailable, the plugin automatically falls back to local storage. Files upload to your server instead, and you will see a warning in the admin dashboard. Fix the credentials and new uploads will resume going to the cloud.


Choosing a Provider

Factor Amazon S3 Google Cloud DigitalOcean Spaces
Pricing Pay per use Pay per use $5/month flat start
Ease of setup Moderate Moderate Simple
CDN included Extra (CloudFront) Extra (Cloud CDN) Included
Best for Large, global marketplaces Asia-Pacific focus Small to medium marketplaces
S3-compatible Yes (native) No Yes

Troubleshooting

"Connection failed" when testing? Double-check your credentials (access key, secret, bucket name, region). Make sure the bucket exists and the credentials have permission to read and write to it.

Files not uploading to cloud? Check that cloud storage is selected as the active provider in settings. Also verify your server can make outbound HTTPS connections (some hosting providers block them).

Slow downloads? Enable the CDN option for your provider. S3 uses CloudFront, GCS uses Cloud CDN, and DigitalOcean Spaces includes a CDN by default.

Marketplace Display & SEO

Shortcodes Reference

WP Sell Services registers 19 shortcodes, and WP Sell Services Pro adds one more. Together they build every part of your marketplace -- catalog, vendor directory, dashboard, buyer requests board, checkout -- with no code.

Paste a shortcode into any page or widget, publish, and it works. Every one is also available as a block; see Block Editor Elements.

The plugin auto-creates the most important pages during setup, so you may already have most of these in place. See Pages Setup.

Quick reference

Shortcode What it renders
[wpss_services] Services catalog grid
[wpss_featured_services] Featured services only
[wpss_service_search] Search form with category dropdown
[wpss_service_categories] Category grid
[wpss_vendors] Vendor directory grid
[wpss_top_vendors] Highest-rated vendors
[wpss_vendor_profile] One vendor's full profile
[wpss_buyer_requests] Open buyer requests board
[wpss_post_request] Form to submit a buyer request
[wpss_dashboard] Unified buyer/vendor dashboard
[wpss_my_orders] The user's order list
[wpss_order_details] One order's detail view
[wpss_service_wizard] Service creation wizard
[wpss_login] Login form
[wpss_register] Registration form
[wpss_vendor_registration] Become-a-vendor form
[wpss_cart] Shopping cart
[wpss_checkout] Standalone checkout
[wpss_account] Standalone account page
[wpss_currency_switcher] [PRO] Shopper currency picker

Marketplace pages

[wpss_services] -- Services catalog

A grid of published services with thumbnails, prices, ratings, and vendor info. The main browsing page of your marketplace.

Attribute Default Notes
category (empty) Limit to a category
tag (empty) Limit to a tag
vendor (empty) Limit to one vendor
limit 12 Services shown
columns 4 Grid columns
orderby date date, title, price, rating, sales
order DESC ASC or DESC
featured (empty) true to show featured only
[wpss_services category="design" limit="8" columns="4" orderby="rating"]

Identical to [wpss_services] with featured forced on, so it accepts all the same attributes. Use it for homepage spotlights and Editor's Picks.

[wpss_featured_services limit="4" columns="4"]

A search form with a keyword field and category dropdown. Put it on your homepage or above your services grid.

Attribute Default
placeholder Search services...
show_categories true
button_text Search
action the service archive URL
[wpss_service_search placeholder="What do you need?" button_text="Find a pro"]

[wpss_service_categories] -- Category grid

Your categories as a visual grid with counts.

Attribute Default Notes
parent 0 Parent term id; 0 for top level
show_count true Show the service count
columns 4 Grid columns
hide_empty true Hide categories with no services
limit 12 Categories shown

[wpss_buyer_requests] -- Buyer requests board

Open buyer requests so vendors can browse projects and submit proposals. Also works as a compact sidebar listing -- just lower the limit.

Attribute Default
limit 10
category (empty)
budget_min (empty)
budget_max (empty)
[wpss_buyer_requests limit="5" budget_min="500"]

[wpss_post_request] -- Post a request form

The form buyers use to submit a new request. Requires the user to be logged in. No attributes.

Vendor elements

[wpss_vendors] -- Vendor directory

A grid of vendor profiles with names, avatars, ratings, and review counts.

Attribute Default Notes
limit 12 Vendors shown
columns 4 Grid columns
orderby rating rating, date, name, sales
order DESC ASC or DESC

[wpss_top_vendors] -- Top vendors

[wpss_vendors] with orderby="rating" and order="DESC" forced. Accepts limit and columns.

[wpss_top_vendors limit="6" columns="3"]

[wpss_vendor_profile] -- Vendor profile

One vendor's full profile page.

Attribute Default
id the vendor_id query var

On a dedicated profile page the id comes from the URL, so you can usually omit it. If no id is found, the shortcode renders "Vendor not found."

User pages

[wpss_dashboard] -- Unified dashboard

The single most important element. One page that adapts to the visitor's role:

  • Buyers see orders, requests, messages, favorites, and profile settings
  • Vendors see services, sales orders, earnings, analytics, messages, and portfolio
  • Dual-role users see both

One page, one shortcode, serves everyone. No attributes.

[wpss_my_orders] -- Order list

Attribute Default Notes
type customer customer (bought) or vendor (sold)
status (empty) Filter to one status
limit 20 Orders per page
[wpss_my_orders type="vendor" status="in_progress"]

[wpss_order_details] -- Order detail

The full details of one order. The order id comes from the URL. Only the buyer, the vendor, or an admin on that order can view it. No attributes.

[wpss_service_wizard] -- Service creation wizard

The multi-step form vendors use to create a service.

Attribute Default Notes
id 0 Pass a service id to edit instead of create

Accounts and checkout

[wpss_login] -- Login form

Attribute Default
redirect (empty)

Shows an "already logged in" message to authenticated users.

[wpss_register] -- Registration form

Username, email, and password. Requires WordPress registration to be enabled in Settings > General ("Anyone can register") -- otherwise the form cannot create accounts. No attributes.

[wpss_vendor_registration] -- Become a vendor

The vendor-specific registration form. Different from [wpss_register] -- use this on your "Become a Vendor" page. What it does depends on your registration mode (open, requires approval, or closed); see Vendor Settings. No attributes.

[wpss_cart] -- Shopping cart

Selected services, packages, and add-ons with a total, before checkout. Buyers can remove items or continue. No attributes.

[wpss_checkout] -- Standalone checkout

Billing details, order review, payment method, and Place Order. This is the checkout for standalone mode -- not used when WooCommerce or another e-commerce platform handles checkout. No attributes.

[wpss_account] -- My account

Account management for standalone mode: profile, saved addresses, settings. Separate from the vendor dashboard. No attributes.

Pro

[wpss_currency_switcher] [PRO]

A currency picker for shoppers. The selection is a display-only hint -- every order and payout stays in your base currency. See Display Currency. No attributes.

Where to use what

Goal Recommended elements
Main browsing page [wpss_services] + [wpss_service_search]
Homepage [wpss_featured_services] + [wpss_service_categories] + [wpss_top_vendors]
User account area [wpss_dashboard]
Vendor recruitment page [wpss_vendor_registration]
Buyer request marketplace [wpss_buyer_requests] + [wpss_post_request]
Vendor directory page [wpss_vendors]
Sidebar [wpss_service_search], [wpss_top_vendors], [wpss_buyer_requests limit="5"]

Tips

  • Start with the auto-created pages. Setup creates the essentials; customise from there.
  • Combine elements on one page -- search bar, then categories, then the grid.
  • All of these work in widgets, so sidebars and footers are fair game.
  • Prefer blocks if you use the block editor -- same features, visual controls. See Block Editor Elements.

Block Editor Elements

WP Sell Services includes 6 drag-and-drop blocks for the WordPress block editor. Build your marketplace pages visually -- no shortcode syntax needed.


Available Blocks

All blocks appear under the WP Sell Services category in the block inserter. Click the + button in the editor, search for any block by name, and drop it onto your page.


Service Grid

Display a grid of services with visual controls for layout, filtering, and sorting.

What you can configure:

  • Services per page (3 to 24, default 9)
  • Grid columns (2 to 5, default 3)
  • Filter by category, or show featured only
  • Sort by date, title, menu order, or random
  • Show or hide pagination, rating, price, and seller

Best for: Service showcase pages, category-specific displays, homepage service sections.

To filter by tag or by a specific vendor, use the [wpss_services] shortcode instead -- the block exposes category only.


Add a search form with keyword input and category dropdown.

What you can configure:

  • Placeholder text
  • Show or hide category filter
  • Button text
  • Custom results page URL

Best for: Homepage hero sections, top of service directory pages, sidebar widgets.


Service Categories

Show your service categories in a visual grid with icons and service counts.

What you can configure:

  • Grid columns
  • Show or hide service count
  • Filter by parent category
  • Hide empty categories
  • Maximum categories to display

Best for: Homepage category sections, browse-by-category pages, landing pages.


Highlight services you have marked as featured in a grid layout.

What you can configure:

  • Number of featured services
  • Grid columns
  • Category filter
  • Sort order

Best for: Homepage spotlights, promotional sections, editor's picks.


Seller Card

Display a vendor's profile information -- name, avatar, rating, and bio.

What you can configure:

  • Select a specific vendor by ID
  • Or auto-detect from the page context (URL parameter)

Best for: Vendor spotlight pages, team profiles, featured vendor sections.


Buyer Requests

Show active buyer requests with filtering options.

What you can configure:

  • Number of requests to display
  • Category filter
  • Budget range filters

Best for: Buyer request marketplace pages, vendor opportunity sections, project listing pages.


How to Add a Block

  1. Edit any page or post in the WordPress block editor
  2. Click the + button to open the block inserter
  3. Search for "WP Sell Services" or the specific block name (e.g., "Service Grid")
  4. Click the block to insert it
  5. Use the sidebar panel to configure settings
  6. Preview your page to see the result

Blocks vs Page Elements

Blocks and the page elements described in the shortcodes reference produce the same output. The difference is how you add them:

  • Blocks give you a visual editing experience with a settings panel in the sidebar. Great for content editors and non-technical users.
  • Page element tags are faster to type for experienced users and work in widgets, the classic editor, and template files.

You can mix both on the same site -- use blocks on some pages and tags on others.


Troubleshooting

Block not appearing in the inserter? Make sure the plugin is active and you are using the block editor (not the Classic Editor plugin). Try clearing your browser cache and refreshing the page.

Block shows nothing on the frontend? Check that matching content exists (published services, registered vendors, etc.) and that all block settings are filled in. Clear your site cache.

Block settings not saving? Update to the latest plugin version, disable other plugins temporarily to check for conflicts, and check the browser console for JavaScript errors.


Attribute reference (for developers)

Block names and their attributes, as registered. Useful when inserting blocks programmatically, building patterns, or setting defaults in theme.json.

wpss/service-grid

Attribute Type Default Range / values
columns number 3 2-5
perPage number 9 3-24
category number 0 term id, 0 = all
orderBy string date date, title, menu_order, rand
order string DESC ASC, DESC
featured boolean false
showPagination boolean true
showRating boolean true
showPrice boolean true
showSeller boolean true
Attribute Type Default Values
placeholder string (empty)
buttonText string (empty)
showCategoryFilter boolean true
style string default default, hero, minimal

wpss/service-categories

Attribute Type Default Range / values
layout string grid grid, list
columns number 4 2-6
maxItems number 8 2-20
orderBy string name
order string ASC ASC, DESC
showCount boolean true
showIcon boolean true
showImage boolean false
hideEmpty boolean true
parentOnly boolean false

wpss/featured-services

Attribute Type Default Range / values
layout string carousel carousel, grid
columns number 4 2-5
limit number 8 2-16
title string (empty)
autoplay boolean true carousel only
interval number 5000 2000-10000, step 500
showDots boolean true carousel only
showArrows boolean true carousel only
showRating boolean true
showPrice boolean true

wpss/seller-card

Attribute Type Default Values
userId number 0 0 = current user
layout string vertical vertical, horizontal
showBio boolean true
showStats boolean true
showRating boolean true
showServices boolean true
showButton boolean true

wpss/buyer-requests

Attribute Type Default Range / values
perPage number 10 3-20
category number 0 term id, 0 = all
orderBy string date date, title
order string DESC ASC, DESC
layout string list
showPagination boolean true
showBudget boolean true
showDeadline boolean true
showOffers boolean true

All six blocks render server-side, so the front end always reflects current data rather than what was saved into the post content.

Search and Filtering

WP Sell Services includes built-in search and filtering so your visitors can quickly find the right service. No extra plugins or configuration needed.

Services grid view

Full catalog with filters


The search bar lets visitors type keywords to find services by title or description. It can be placed on any page and includes an optional category dropdown for more targeted results.

What it searches:

  • Service titles
  • Service descriptions
  • Service excerpts

You can customize the placeholder text, button label, and whether the category dropdown appears.


Category Filtering

Visitors can filter services by category using the dropdown in the search bar or by clicking a category on the category grid. Only categories that contain published services are shown.

Category archives have their own pages, so when a visitor selects "Logo Design," they land on a dedicated page showing only logo design services.


Sort Options

On the services catalog page, visitors can sort results by:

Sort Option What It Does
Newest Most recently published services first
Price (low to high) Starting from the most affordable
Price (high to low) Starting from the premium options
Top Rated Highest average rating first
Most Popular Most sales first

Pagination

When there are more services than fit on one page, pagination appears automatically. Visitors can click through pages of results, and the current search and filter selections are preserved as they navigate.


The search bar works well in several locations:

  • Homepage -- As a prominent hero search so visitors can start browsing immediately
  • Services catalog page -- At the top, above the service grid
  • Sidebar -- A compact search in your sidebar widget area
  • Header or navigation -- Some themes support widget areas in the header

To add search to a sidebar widget area, go to Appearance > Widgets, add a Custom HTML or Shortcode widget, and place the search element there.


Tips

  • Put search front and center. The easier it is to find services, the more likely visitors are to browse and buy.
  • Keep categories organized. Well-structured categories make filtering more useful. Avoid too many top-level categories -- use subcategories for specificity.
  • Combine search with category grids. A homepage with a search bar followed by a category grid gives visitors two ways to start browsing.

Troubleshooting

Search returns no results? Make sure services are published (not drafts) and that the search term matches words in the title or description. Clear your site cache if results seem stale.

Category dropdown is empty? Categories only appear if they contain at least one published service. Create categories under Services > Categories and assign them to your services.

Results page looks wrong? The search form submits to your services archive page by default. If you changed your permalink structure, go to Settings > Permalinks and click Save to refresh.

Template Overrides

Change how service cards, vendor profiles, dashboards, and order screens look -- through your theme, without touching plugin files.

The plugin ships 98 templates: 47 frontend templates plus 51 email templates. Any of them can be overridden, and most of them also expose hooks so you can add markup without overriding at all.

Read this first: prefer a hook. An override is a copy that stops receiving updates. Every fix, accessibility change, and new feature in that template is now yours to merge by hand. If a hook can do the job, use the hook -- the full hook list is on this page.

How overriding works

Copy a template from the plugin into a wp-sell-services/ folder in your theme, keeping the same filename and subfolder path. Your copy wins.

Lookup order:

  1. Child theme's wp-sell-services/
  2. Parent theme's wp-sell-services/
  3. The plugin's templates/ (fallback)
wp-content/plugins/wp-sell-services/templates/content-service-card.php
                    |
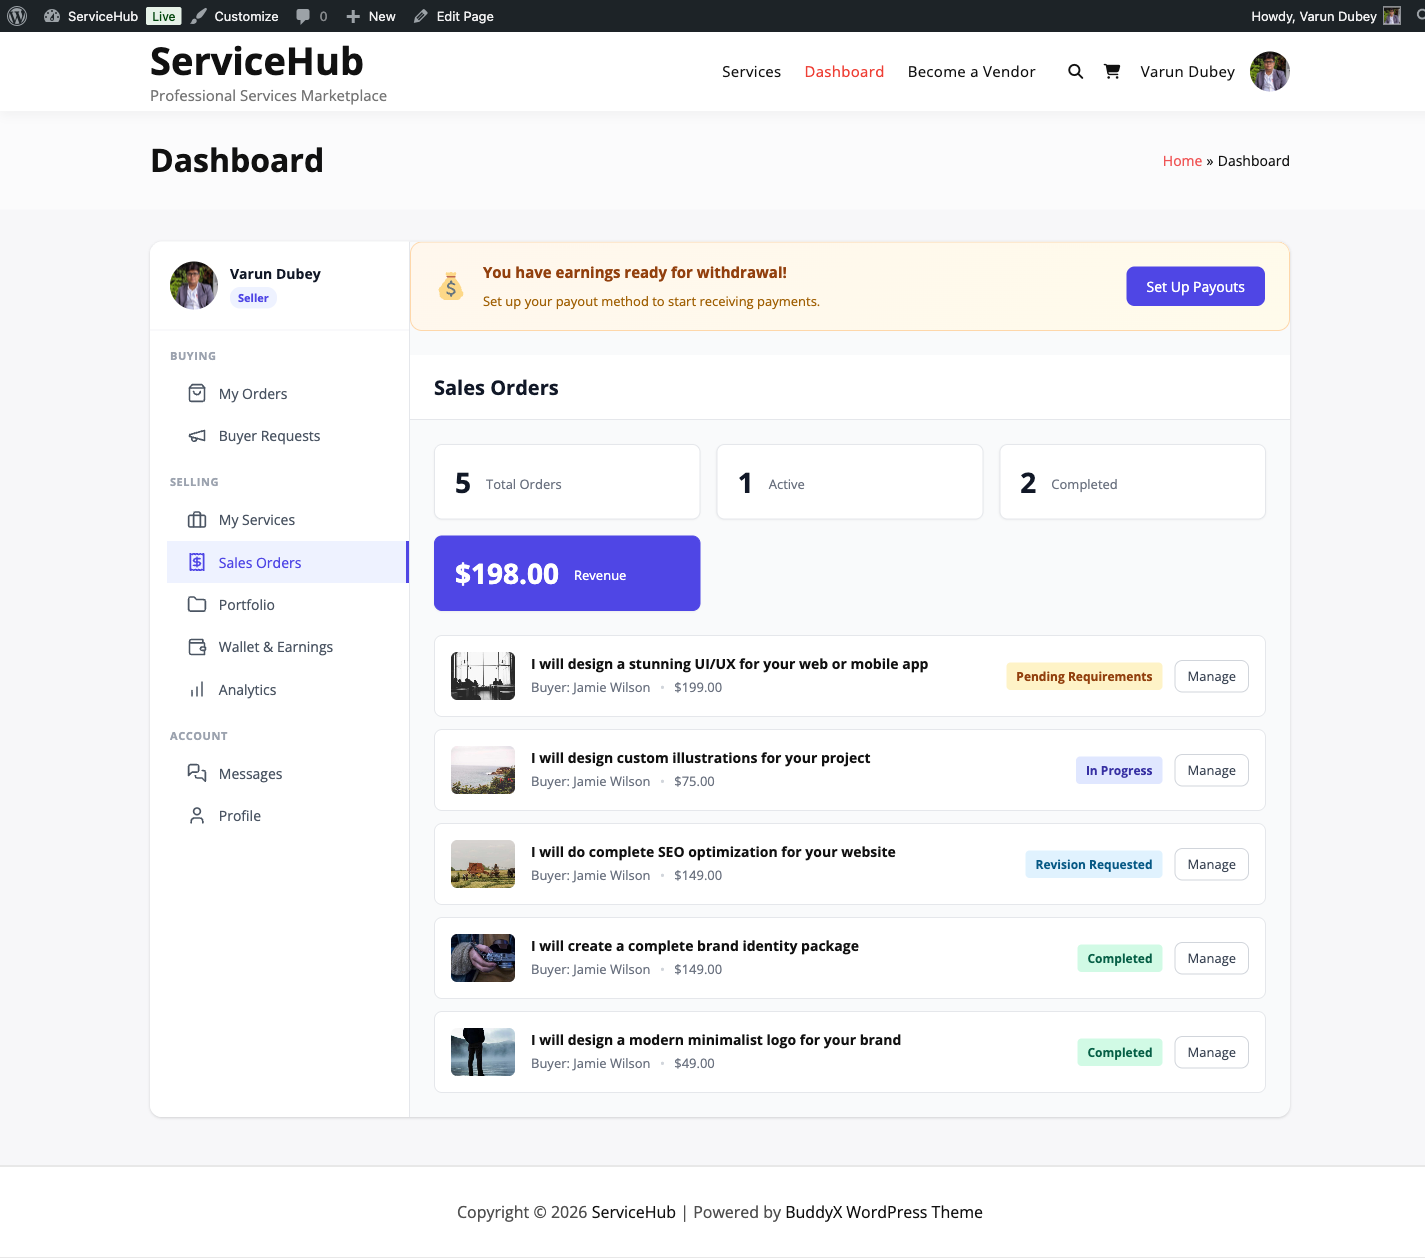
                    v
wp-content/themes/your-child-theme/wp-sell-services/content-service-card.php

Subfolders are preserved: templates/order/order-view.php becomes your-theme/wp-sell-services/order/order-view.php.

Steps

  1. Create wp-sell-services/ in your child theme.
  2. Copy the whole template across, keeping its path.
  3. Edit your copy.
  4. Clear every cache (object, page, CDN, browser) and test at desktop and 390px.

Overridable templates

Catalog and single pages

Template Controls
archive-service.php The services catalog page
archive-request.php The buyer requests board
single-service.php A service detail page
single-request.php A buyer request detail page
content-service-card.php A service card in any grid
content-request-card.php A request card in any list
content-no-services.php Empty state for the catalog
content-no-requests.php Empty state for the requests board
wpss-fullwidth-template.php The full-width page wrapper

Service page parts

Template Controls
partials/service-gallery.php Image and video gallery
partials/service-packages.php The Basic/Standard/Premium tabs
partials/service-faqs.php FAQ accordion
partials/service-reviews.php Review list and summary
partials/vendor-card.php Vendor summary card
partials/vendor-portfolio.php Portfolio grid
partials/notifications-list.php Notification list markup
partials/billing-fields.php Billing form fields
partials/billing-summary.php Billing recap at checkout

Vendor

Template Controls
vendor/profile.php The public vendor profile

Orders

Template Controls
order/order-view.php The order detail screen
order/order-confirmation.php Post-checkout confirmation
order/conversation.php Order messaging thread
order/order-requirements.php Requirements screen
order/requirements-form.php The requirements form itself
order/milestone-view.php A milestone phase
order/extension-view.php A paid extension
order/tip-view.php A tip receipt

Dashboard

Each section of the unified dashboard is its own template under dashboard/sections/:

orders.php · sales.php · services.php · create.php · requests.php · create-request.php · edit-request.php · favorites.php · earnings.php · messages.php · notifications.php · disputes.php · portfolio.php · profile.php

Other

Template Controls
cart/cart.php Shopping cart
disputes/dispute-view.php Dispute detail screen
myaccount/vendor-dashboard.php Legacy account-area vendor dashboard
myaccount/vendor-services.php Legacy account-area service list
myaccount/service-orders.php Legacy account-area order list
myaccount/notifications.php Legacy account-area notifications

The myaccount/ templates serve the standalone account area. Most sites use the unified dashboard instead -- check which one your pages actually render before overriding.

Emails

51 templates under emails/. They override the same way, but see Email Customization first -- most changes are better made through the email filters than by copying a template.

Template hooks

137 action hooks across 41 templates. Almost every template opens and closes with a before/after pair and exposes named slots in between, so you can inject markup without copying anything.

// Add a trust badge under every service card.
add_action( 'wpss_after_service_card', function ( $service_id ) {
    if ( get_post_meta( $service_id, '_my_verified', true ) ) {
        echo '<span class="my-badge">Verified</span>';
    }
} );

Catalog

Hook Args
wpss_before_service_archive / wpss_after_service_archive --
wpss_service_archive_header, wpss_service_archive_sidebar --
wpss_before_service_loop / wpss_after_service_loop --
wpss_before_request_archive / wpss_after_request_archive --
wpss_request_archive_header, wpss_request_archive_sidebar --
wpss_before_request_loop / wpss_after_request_loop --
wpss_no_services_content, wpss_no_requests_content --

Cards

Hook Args
wpss_before_service_card / wpss_after_service_card $service_id
wpss_service_card_header, wpss_service_card_meta, wpss_service_card_footer $service_id
wpss_service_card_image_overlay $service_id
wpss_before_request_card / wpss_after_request_card $request_id
wpss_request_card_header, wpss_request_card_meta, wpss_request_card_footer $request_id
wpss_before_vendor_card / wpss_after_vendor_card $vendor_id
wpss_vendor_card_meta $vendor_id

Single service

Hook Args
wpss_before_single_service / wpss_after_single_service $service
wpss_single_service_header, _gallery, _content, _faqs, _reviews, _sidebar, _portfolio, _related $service
wpss_single_service_meta $service_id
wpss_before_service_gallery / wpss_after_service_gallery $service_id
wpss_before_service_packages / wpss_after_service_packages $service_id
wpss_before_package_tab / wpss_after_package_tab $service_id, $index, $package
wpss_package_features $service_id, $index, $package
wpss_before_service_faqs / wpss_after_service_faqs $service_id
wpss_before_service_reviews / wpss_after_service_reviews $service_id
wpss_after_single_review $review

Single request

Hook Args
wpss_before_single_request / wpss_after_single_request $request_id
wpss_single_request_header, _content, _proposals, _sidebar $request_id

Vendor profile

Hook Args
wpss_before_vendor_profile / wpss_after_vendor_profile $vendor_id
wpss_vendor_profile_header, _bio, _services, _reviews, _stats, _sidebar $vendor_id
wpss_before_vendor_portfolio / wpss_after_vendor_portfolio $vendor_id

wpss_vendor_profile_sidebar is where Pro renders its analytics teaser -- a useful precedent if you are adding your own panel.

Orders

Hook Args
wpss_before_order_view / wpss_after_order_view $order
wpss_order_view_header, _actions, _details, _sidebar $order
wpss_before_order_confirmation / wpss_after_order_confirmation $order
wpss_order_confirmation_details $order
wpss_before_conversation / wpss_after_conversation $order
wpss_conversation_header, wpss_conversation_form $order
wpss_after_message $message, $order
wpss_before_requirements_form / wpss_after_requirements_form $order
wpss_requirements_form_fields $order
wpss_before_requirements_form_component / wpss_after_requirements_form_component $order_id, $order
wpss_before_milestone_view / wpss_after_milestone_view $current_order
wpss_before_extension_view / wpss_after_extension_view $current_order
wpss_before_tip_view / wpss_after_tip_view $current_order

Dashboard

Every section fires the same pair, with the section slug as the first argument:

Hook Args
wpss_dashboard_section_before $section, $user_id
wpss_dashboard_section_after $section, $user_id

Slugs: orders, sales, services, create, requests, create_request, edit_request, favorites, earnings, messages, notifications, disputes, portfolio, profile.

add_action( 'wpss_dashboard_section_before', function ( $section, $user_id ) {
    if ( 'earnings' === $section ) {
        echo '<div class="notice">Payouts run on Fridays.</div>';
    }
}, 10, 2 );

Section-specific slots:

Hook Args
wpss_earnings_summary, wpss_earnings_ledger_actions $user_id
wpss_payout_methods $user_id, $payout_method
wpss_orders_filters $user_id
wpss_services_list_actions $user_id
wpss_profile_form_fields $user_id

Two sections pass a different second argument -- profile passes $user (a WP_User) and portfolio passes get_userdata( $user_id ). If your callback expects an id everywhere, guard for it.

Disputes

Hook Args
wpss_before_dispute_view / wpss_after_dispute_view $dispute, $order
wpss_dispute_view_header, _evidence, _resolution $dispute, $order

Template filters

Change values without touching markup at all.

Filter Default Purpose
wpss_archive_service_columns 3 Catalog grid columns
wpss_archive_request_columns 2 Requests grid columns
wpss_services_per_page 12 Catalog page size
wpss_requests_per_page 10 Requests page size
wpss_reviews_per_page 10 Reviews shown per service
wpss_service_card_classes ['wpss-service-card'] CSS classes on a card
wpss_request_card_classes ['wpss-request-card'] CSS classes on a request card
wpss_service_card_thumbnail_size medium_large Card image size
wpss_gallery_image_size large Gallery image size
wpss_package_price_html -- Rendered package price markup
wpss_package_button_text -- Package CTA label
wpss_order_status_label -- Human status label
wpss_order_actions -- Buttons on the order screen
wpss_tip_quick_amounts [5, 10, 20, 50] Tip preset buttons
wpss_allow_late_requirements_submission false Accept requirements after the timeout
wpss_requirements_form_args -- Requirements form config
wpss_vendor_profile_fields [] Extra profile fields
wpss_single_service_layout default Layout variant
wpss_single_request_layout default Layout variant
wpss_no_services_message -- Empty-state copy
wpss_no_requests_message -- Empty-state copy
wpss_get_template -- Swap a resolved template path
wpss_get_template_part -- Swap a resolved template part
wpss_template_args -- Modify the args passed into a template

wpss_get_template is the surgical option when you want a different file for one case only, without a blanket override:

add_filter( 'wpss_get_template', function ( $template, $name ) {
    if ( 'content-service-card.php' === $name && is_tax( 'wpss_service_category', 'premium' ) ) {
        return get_stylesheet_directory() . '/wpss-premium-card.php';
    }
    return $template;
}, 10, 2 );

Guidance

  • Always use a child theme. Overrides in a parent theme are lost when it updates.
  • Copy the whole file. Partial templates fatal; the loader includes the file as-is.
  • Re-check after plugin updates. If a default template changed, diff it against your copy and merge. Overrides are the main cause of "broken after update".
  • Do not strip functionality. Keep nonces, form fields, and data attributes; restyle around them.
  • Test at 390px, and in dark mode if your theme supports it.

Troubleshooting

Problem Cause
Override ignored Path must be exactly your-theme/wp-sell-services/{same/path}.php, case-sensitive
Still ignored Object or page cache; flush both
Fatal after copying Partial copy, or a missing variable the template expects
Broken after an update Default template changed structurally -- diff and merge
Theme styles clash Add CSS in the child theme rather than editing the template

SEO Features

WP Sell Services automatically adds structured data and SEO enhancements to your marketplace so your services can appear as rich results in Google. No setup or configuration required -- it works out of the box.


What This Does for You

When someone searches Google for services like yours, structured data helps your listings stand out with extra information right in the search results:

  • Star ratings displayed below your listing
  • Pricing information visible before anyone clicks
  • Vendor name and business details shown
  • Breadcrumb navigation that helps Google understand your site structure

This means better visibility, higher click-through rates, and more qualified traffic to your marketplace.


What Gets Added Automatically

Service Listings

Every published service page gets structured data that tells Google:

  • Service name and description
  • Starting price and currency
  • Average rating and number of reviews
  • Vendor/provider information
  • Service category
  • Delivery timeframe
  • Availability status

Google may use this information to display your services as rich results with star ratings and prices directly in search.

Vendor Profiles

Vendor profile pages include structured data with:

  • Vendor name and bio
  • Profile photo
  • Job title or tagline
  • Average rating and review count

Category Pages

Category archive pages include structured data that lists the services within them, helping Google understand the relationship between your categories and service listings.

Service and category pages include breadcrumb data (e.g., Home > Services > Graphic Design > Logo Design) that can appear in Google search results as a navigational path.

Your Marketplace

The homepage includes organization data with your site name, URL, description, and logo -- helping Google identify your marketplace as a business entity.


Social Sharing

When someone shares a service page on Facebook, Twitter, or other platforms, the plugin automatically adds Open Graph and Twitter Card tags so the shared link shows:

  • Service title and description
  • Featured image
  • Price information
  • Your site name

This only applies if you are not already using a dedicated SEO plugin (like Yoast or Rank Math), which handles social tags on their own.


Works With Your SEO Plugin

If you use Yoast SEO, Rank Math, or All in One SEO, WP Sell Services plays nicely with them:

  • The plugin automatically detects your SEO plugin
  • Meta descriptions and social tags are deferred to your SEO plugin
  • Structured data from WP Sell Services still applies (unless your SEO plugin provides its own)
  • Service pages appear in your SEO plugin's sitemap

You do not need to configure anything special -- the integration is automatic.


XML Sitemap

All published, active services are automatically included in the WordPress XML sitemap. This helps search engines discover and index your service listings. Paused or unpublished services are excluded.


How to Verify It Is Working

You can confirm structured data is in place using free tools:

  1. Google Rich Results Test -- Go to search.google.com/test/rich-results, paste a service page URL, and check for detected schemas
  2. Schema.org Validator -- Go to validator.schema.org, paste a service URL, and review the detected data

Both tools will show you exactly what Google sees for each page.


No Setup Needed

This is one of those features that just works. The plugin handles all the structured data, social sharing tags, and sitemap entries automatically. Focus on creating great services and building your marketplace -- the SEO foundations are already in place.

Admin Tools & Moderation

Service Moderation

Keep your marketplace quality high by reviewing vendor services before they go live. When moderation is enabled, every new service submission needs your approval.

Service Moderation Queue

Turning On Moderation

  1. Go to Sell Services > Settings > Vendors
  2. Check Require Service Moderation
  3. Click Save Changes

When moderation is on: New services are submitted as "Pending" and stay hidden until you approve them. Vendors are notified when their service is approved or rejected.

When moderation is off: Services go live immediately when a vendor publishes them. No review step needed.

The Moderation Workflow

Here is what happens from submission to publication:

  1. Vendor submits a service -- clicks "Publish" on their new listing
  2. Service enters the queue -- status is set to "Pending" and it is hidden from buyers
  3. You review it -- check the title, description, pricing, and images
  4. You approve or reject -- approved services go live; rejected ones return to draft
  5. Vendor gets notified -- they receive an email with the outcome

If you reject a service, the vendor can edit it and resubmit. The resubmitted service goes back into your moderation queue.

Reviewing Pending Services

Go to Sell Services > Moderation to see all services waiting for your review. The moderation menu shows a badge with the pending count so you never miss new submissions.

What You See in the Queue

Each service in the queue shows:

  • Thumbnail -- the service image
  • Service title -- click to preview the full listing
  • Vendor name -- who submitted it
  • Category -- what type of service
  • Price -- starting price (basic package)
  • Submitted date -- when it was submitted
  • Approve / Reject buttons -- take action right from the list

You can filter the queue by status: Pending, Approved, or Rejected.

What to Look For

When reviewing a service, check for:

  • Clear, honest title -- no misleading claims or ALL CAPS
  • Detailed description -- explains what the buyer gets, how it works, and expected turnaround
  • Reasonable pricing -- packages make sense for the scope of work
  • Quality images -- relevant portfolio samples, not stock photos or stolen work
  • Policy compliance -- no prohibited services or copyright violations

Approving a Service

Click Approve next to the service. The service immediately:

  • Becomes visible on your marketplace
  • Appears in search results and the vendor's profile
  • Can start receiving orders

The vendor gets an email confirming their service is live, with a link to view it.

Bulk approval: Check multiple services and select Approve from the bulk actions dropdown to approve several at once.

Rejecting a Service

Click Reject and enter a clear reason explaining what needs to change. Be specific so the vendor knows exactly what to fix.

Good rejection feedback: "Your description is too brief. Please add details about what you will deliver, your typical process, and expected turnaround time. Also, please upload at least 2 portfolio samples showing your actual work."

Unhelpful rejection feedback: "Needs improvement."

When rejected:

  • The service returns to draft status
  • The vendor sees the rejection reason in their dashboard
  • The vendor can edit and resubmit
  • Resubmissions enter the moderation queue again

Common Rejection Reasons

  • Thin description -- needs more detail about deliverables and process
  • Irrelevant images -- portfolio samples do not match the service offered
  • Stolen or stock images -- portfolio must be original work
  • Unrealistic pricing -- price does not match the scope of work promised
  • Prohibited service -- violates marketplace policies
  • Duplicate listing -- vendor already has a similar service

What Vendors See

Pending service: Yellow "Pending Review" badge with a message that the service is awaiting approval.

Rejected service: Red "Rejected" badge with the rejection reason displayed and an "Edit Service" button.

Approved service: Green "Live" badge with order statistics and full editing capabilities.

Who Bypasses Moderation?

Admins and shop managers always bypass the moderation queue. Services they create publish immediately.

Notifications

When moderation is enabled, email notifications go out automatically:

  • To admins: When a new service is submitted or resubmitted
  • To vendors: When their service is approved or rejected

Configure which emails are active in Settings > Emails.

Managing Vendors

The vendor management page gives you a bird's-eye view of everyone selling on your marketplace -- their activity, earnings, ratings, and account status.

Vendor Management

Where to Find It

Go to Sell Services > Vendors in your WordPress admin. You will see a dashboard with key stats at the top and a searchable list of all vendors below.

Dashboard Stats

At the top of the page, four cards summarize your vendor base:

Card What It Shows
Total Vendors Everyone who has signed up as a vendor
Active Vendors currently able to sell and receive orders
Pending Vendors waiting for your approval (if approval is required)
Suspended Vendors whose accounts are temporarily restricted

You also see the average vendor rating and total vendor earnings across your marketplace.

The Vendor List

The main table shows every vendor with these details:

  • Name and email -- click a name to view their full profile
  • Services -- number of published service listings
  • Orders -- total orders completed
  • Earnings -- lifetime earnings on the platform
  • Rating -- average customer rating
  • Level -- seller level badge (based on activity and performance)
  • Status -- active, pending, or suspended
  • Joined -- registration date

You can sort by name, rating, orders, earnings, or join date. Use the search box to find vendors by name or email.

Filtering by Status

Click the tabs above the table to filter:

  • All -- every vendor
  • Active -- currently operating
  • Pending -- awaiting approval
  • Suspended -- temporarily restricted

Vendor Approval

If you want to screen vendors before they can sell, enable vendor verification:

  1. Go to Sell Services > Settings > Vendors
  2. Check Require Verification
  3. Click Save Changes

When enabled: New vendors start with "Pending" status and cannot create services until you approve them.

When disabled: New vendors are active immediately after registration.

Approving a Vendor

  1. Go to Sell Services > Vendors
  2. Click the Pending tab
  3. Click the vendor's name to review their profile
  4. Click Approve to activate their account

The vendor receives a notification that they can now start selling.

Custom Commission Per Vendor

By default, all vendors share the same global commission rate. But you can override it for any individual vendor:

  1. Click a vendor's name to open their profile
  2. Find the Commission Settings section
  3. Enter a custom commission rate
  4. Click Update

This is useful for rewarding top performers with lower commission, offering promotional rates, or setting up partnership agreements.

Suspending a Vendor

If a vendor violates your policies or you need to temporarily restrict their account:

  1. Click the vendor's name
  2. Change their status to Suspended

Suspended vendors cannot receive new orders, but their existing active orders continue to completion. You can reactivate them at any time by setting their status back to Active.

Vendor Verification Tiers

Vendors can have one of three verification tiers:

Tier Meaning
Basic Default tier for all new vendors
Verified Identity or business verified by admin
Pro Top-tier vendors with proven track records

These tiers appear as badges on vendor profiles, helping buyers identify trusted sellers.

Vendor Detail View

Click any vendor's name to see their complete profile, including:

  • Bio, location, and contact information
  • All published services
  • Order history and performance metrics
  • Earnings and withdrawal history
  • Review scores and buyer feedback

Processing Withdrawals

When vendors request payouts, their requests land in your withdrawal queue. Here is how to review, approve, and complete them.

Withdrawal Approvals

Where to Find Withdrawal Requests

Go to Sell Services > Withdrawals in your WordPress admin. You will see summary cards at the top and a list of all withdrawal requests below.

Summary Cards

Card What It Shows
Pending Requests waiting for your review, with total amount
Approved Requests you have approved but not yet marked complete
Completed Successfully paid out, with total amount
Rejected Requests you denied

The Withdrawal Queue

Each request in the list shows:

  • Vendor name and email -- who is requesting the payout
  • Amount -- how much they want to withdraw
  • Method -- bank transfer or PayPal, plus their account details
  • Status -- pending, approved, completed, or rejected
  • Date -- when the request was submitted (and processed date, if applicable)
  • Action buttons -- approve, reject, or mark complete depending on current status

Filtering

Click the status tabs above the table to view only pending, approved, completed, or rejected requests. This makes it easy to focus on what needs your attention.

The Approval Workflow

Step 1: Review the Request

Click Approve on a pending withdrawal. A confirmation popup shows the vendor name, amount, and payment method. You can add an optional admin note.

Before approving, verify:

  • The vendor has sufficient available balance
  • Payment details look complete and correct
  • There are no unresolved disputes on recent orders

Step 2: Approve

Click Confirm in the popup. The request status changes to Approved and the vendor receives a notification.

Step 3: Send Payment

Process the payment outside of WordPress -- send the bank transfer or PayPal payment using the vendor's account details shown in the request.

Step 4: Mark as Completed

After you have sent the payment, return to the withdrawal request and click Mark Completed. Add a note with the transaction reference (e.g., PayPal transaction ID or bank transfer reference). The vendor receives a completion notification.

Rejecting a Withdrawal

Click Reject on any pending or approved request. Enter a reason explaining why (e.g., "Payment details are incomplete -- please update your bank account number and resubmit").

When rejected:

  • The funds return to the vendor's available balance (nothing is lost)
  • The vendor receives a notification with your reason
  • The vendor can fix the issue and submit a new request

Bulk Processing

For marketplaces with many vendors, the typical weekly workflow looks like this:

  1. Filter by Pending to see all new requests
  2. Review and Approve each valid request
  3. Process all approved payments in one batch (via PayPal or bank)
  4. Return and Mark Completed for each one, noting the transaction reference

Auto-Withdrawal Requests

If you have automated payouts enabled, system-generated withdrawal requests appear in the same queue with an "Auto" badge. Process them the same way as manual requests.

Admin Notes

Use the admin notes field to keep a record of:

  • Payment transaction IDs or reference numbers
  • Special circumstances or exceptions
  • Rejection reasons (visible to the vendor)
  • Internal notes for your team

Best Practices

  • Process withdrawals promptly -- aim for 1-3 business days after submission
  • Always add transaction references when marking complete -- this protects both you and the vendor
  • Check for disputes before approving -- if a vendor has active disputes, consider waiting until they are resolved
  • Keep rejection reasons clear -- tell the vendor exactly what to fix so they can resubmit successfully
  • Review withdrawal history for patterns -- unusually frequent or large requests may warrant a closer look

Withdrawal Limits

Minimum withdrawal amount: Default is $25 (configurable in Settings > Payouts)

Clearance period: Earnings must pass the clearance period before they become available for withdrawal. It ships at 0 days (earnings clear immediately); raise it in Settings > Payouts if you want a refund buffer

Vendors cannot request more than their available balance, and they cannot have multiple pending requests at the same time.

Creating Orders Manually

Sometimes orders happen outside the normal checkout flow -- a phone call, a special arrangement, or a migration from another system. The manual order tool lets you create orders directly from the admin panel.

Create Manual Order

When to Use Manual Orders

  • Phone orders -- a buyer calls and wants to place an order
  • Offline payments -- you received a bank transfer or cash payment
  • Special pricing -- a negotiated deal that does not fit standard packages
  • Data migration -- importing orders from a previous system
  • VIP arrangements -- custom terms for specific buyers

Manual orders work exactly like regular orders once created. Vendors and buyers can track them, message each other, and complete delivery through the normal workflow.

How to Create a Manual Order

Go to Sell Services > Orders and click Create Order. The form walks you through each step:

1. Pick the Service and Package

Select a published service from the dropdown. It shows the service title, vendor name, and starting price. After selecting a service, choose a package (Basic, Standard, or Premium). The price, delivery time, and revisions auto-fill from the package details.

If the service has add-ons, they appear automatically. Check the ones you want to include -- prices update in real time.

2. Select Buyer and Vendor

Buyer (required): Choose any registered user as the buyer.

Vendor (optional): Defaults to the service author. You can override this to assign the order to a different vendor if needed. The buyer and vendor cannot be the same person.

3. Review and Adjust Pricing

The pricing summary shows:

  • Subtotal -- base package price
  • Add-ons total -- sum of selected add-ons
  • Order total -- subtotal plus add-ons
  • Commission -- platform fee based on your commission rate
  • Vendor earnings -- what the vendor receives after commission

Need custom pricing? Check "Override total manually" to enter a specific amount. You can also adjust the commission rate for this particular order.

4. Set Status and Payment Details

Order status options:

Status When to Use
Pending Payment Payment has not been received yet
Pending Requirements Payment received, waiting for buyer to submit requirements
In Progress Skip requirements, vendor starts right away
Delivered Order with delivery already submitted
Completed Historical order that is already finished

If you select "Pending Requirements" but the service has no requirements, the order automatically moves to "In Progress" instead.

Payment details:

  • Payment status: Pending, Paid, Failed, or Refunded
  • Payment method: Manual (default), Bank Transfer, Cash, or Other
  • Transaction ID: Optional reference number from the external payment

Delivery settings:

  • Delivery days: auto-filled from the package, but you can adjust
  • Revisions included: auto-filled from the package, adjustable

5. Add Admin Notes

Add any internal notes about the order. These are only visible to admins, not to buyers or vendors. Good for recording context like "Phone order from client on April 1" or "Custom pricing approved by management."

6. Submit

Click Create Order. The system generates an order number, creates the order record, and sets up the conversation thread between buyer and vendor.

After creation, you see:

  • The order number and a link to view it
  • A Submit Requirements button (if the service has requirements and the order is in "Pending Requirements" status)
  • A Create Another Order button to start a new one

What Happens After Creation

The order follows the same workflow as any checkout-created order:

  • If status is Pending Requirements, the buyer (or you) fills in requirements, then the vendor starts work
  • If status is In Progress, the vendor is notified and the delivery deadline starts
  • If status is Completed, no further action is needed

Things to Keep in Mind

  • Manual orders are created one at a time (no bulk creation)
  • You cannot edit an order after creation from this page -- use the order detail page for changes
  • Buyer notifications are not sent automatically for manual orders -- let the buyer know directly if needed
  • If the calculated total is zero or negative, it defaults to $10.00 as a minimum

Guided Admin Tour

A built-in onboarding walkthrough runs the first time a new admin opens the WP Sell Services dashboard. It introduces the sidebar, the at-a-glance stats cards, and each of the main sub-screens - Services, Vendors, Orders, and Settings - so a first-time operator knows where everything lives without reading docs first.

The welcome tour shown on a user's first dashboard visit

When The Tour Starts

The tour auto-opens the first time a logged-in admin lands on Sell Services > Dashboard. It will not re-open on subsequent visits.

  • Completion is persisted per-user in the wpss_tour_completed user meta
  • Clicking "Skip" counts as completion - the tour won't nag you again
  • Each admin sees the tour once on their own account; a second admin on the same site still gets their own first-time walkthrough

The Eight Steps

  1. Welcome -- points at the "Sell Services" sidebar item
  2. Marketplace at a glance -- highlights the order/revenue stats cards
  3. Quick actions -- the shortcut panel for common admin tasks
  4. Services -- where vendor services live
  5. Vendors -- all vendor accounts and the registration flow
  6. Orders -- the 11-status order lifecycle
  7. Settings -- commission, payouts, tax, notifications
  8. You're all set -- sign-off with a pointer to the "Replay guide" button

Each step carries a short explainer, a Lucide icon, and Back / Next / Skip controls.

Replaying The Tour

After the first run, the Dashboard header shows a Replay guide button next to the page title. Click it any time to walk through again - you don't need to reset any user meta.

Letting Pro Or Custom Code Add Steps

The tour content is filterable. A Pro plugin or custom integration can append its own steps by hooking wpss_tour_steps:

add_filter( 'wpss_tour_steps', function ( array $steps ): array {
    $steps[] = array(
        'id'       => 'my-addon',
        'title'    => __( 'My Add-on', 'my-addon' ),
        'text'     => __( 'Configure the add-on here.', 'my-addon' ),
        'attachTo' => array(
            'element' => '#adminmenu a[href="admin.php?page=my-addon"]',
            'on'      => 'right',
        ),
        'buttons'  => array(
            array(
                'text'    => __( 'Back', 'my-addon' ),
                'action'  => 'back',
                'classes' => 'shepherd-button-secondary',
            ),
            array(
                'text'    => __( 'Next', 'my-addon' ),
                'action'  => 'next',
                'classes' => 'shepherd-button-primary',
            ),
        ),
    );
    return $steps;
} );

Two notes:

  1. action is a plain string -- the controller translates next / back / cancel / complete to the correct Shepherd callback.
  2. If your attachTo.element selector doesn't match anything, the step still renders (centered) instead of aborting the tour. Safer for themes that restructure menu markup.

Resetting Completion For A User

If you need to force the tour to re-open automatically (for example, during a training session) delete the user's meta:

wp user meta delete <user_id> wpss_tour_completed

Or via SQL:

DELETE FROM wp_usermeta WHERE user_id = 1 AND meta_key = 'wpss_tour_completed';

The next time that user opens the dashboard the full walkthrough runs again.

Technical Notes

The tour is implemented with Shepherd.js v11 and Lucide for icons, both bundled locally (no CDN calls). The controller lives at assets/js/wpss-tour.js; step authoring is in src/Frontend/Tour.php (get_admin_tour_steps()). Completion is persisted through the REST endpoint POST /wpss/v1/tour/complete.

Platform Settings

General Settings

Configure the basics of your marketplace -- your platform name, currency, and which e-commerce system powers your checkout.


Platform Name

Give your marketplace a custom name that appears throughout the platform: in emails, page headers, notifications, and payment receipts.

  1. Go to Sell Services > Settings > General
  2. Enter your marketplace name in the Platform Name field
  3. Click Save Changes

Default: Your WordPress site name is used if no custom name is set.

Examples: "Creative Hub Marketplace", "Expert Services Network", "DesignPro Market"

General settings tab

Full general settings


Currency

Choose the currency for all transactions on your marketplace. This affects how prices are displayed on services, how orders are totaled, and how vendor earnings are calculated.

Supported Currencies

Currency Symbol Code
US Dollar $ USD
Euro EUR EUR
British Pound GBP GBP
Canadian Dollar C$ CAD
Australian Dollar A$ AUD
Indian Rupee INR INR
Japanese Yen JPY JPY
Chinese Yuan CNY CNY
Brazilian Real R$ BRL
Mexican Peso MXN MXN

Setting Your Currency

  1. Go to General Settings
  2. Select your currency from the dropdown
  3. Click Save Changes

Default: USD (US Dollar)

Your entire marketplace operates in one currency. All service prices, order totals, and vendor earnings use the same currency. Payment gateways handle any conversion on their end if a buyer pays from a different region.

Tip: Set your currency during initial setup. Changing it later can create confusion since existing service prices stay at their original numbers.

[PRO] Multi-currency support is available in the Pro version -- automatic currency detection by buyer location, live exchange rates, and localized price displays.


E-Commerce Platform

Choose which system handles your marketplace checkout and payments.

Available Options

Platform Availability
Standalone (built-in checkout) Free -- no extra plugins needed
WooCommerce [PRO]
Easy Digital Downloads [PRO]
FluentCart [PRO]
SureCart [PRO]

The default setting automatically detects which platform is available and uses it. For most sites, this is the best choice.

  • If only the free plugin is active, it uses the built-in Standalone checkout
  • If Pro is active and WooCommerce (or another supported platform) is installed, it uses that platform

Standalone Mode (Free)

The free version includes a complete built-in checkout system with Stripe, PayPal, and Offline payment support. No WooCommerce or any other e-commerce plugin is required. This is the simplest setup -- perfect if you want a clean, lightweight marketplace.

WooCommerce and Other Platforms [PRO]

The Pro version lets you plug into WooCommerce, Easy Digital Downloads, FluentCart, or SureCart. This is useful if you already have an online store and want your marketplace orders to flow through the same checkout and payment system.

Switching Platforms

You can change platforms at any time under Settings > General. Keep in mind:

  • Existing orders stay with the original platform
  • New orders use the new platform
  • Payment gateway settings may need reconfiguration
  • Test the checkout flow on a staging site before switching on a live marketplace

Troubleshooting

Platform name not updating everywhere? Clear all caches (site, theme, hosting, CDN) after saving. Some email templates may cache the old name.

Currency symbol not displaying? Check that your database uses UTF-8 encoding and your theme supports special characters.

E-commerce platform not detected? Make sure the platform plugin (e.g., WooCommerce) is installed and activated. Refresh the WP Sell Services settings page after activating it.

Pages Setup

WP Sell Services needs a few dedicated pages to run your marketplace. The good news: you can create them all in one click, or set them up manually if you prefer.


The Pages the Installer Creates

Activating the plugin creates six pages and maps each one in Sell Services > Settings > Pages. You do not have to create any of them by hand.

Page Slug What It Does Required
Services services The main browsing page where visitors find and explore services Yes
Dashboard dashboard The unified account area for buyers and vendors Yes
Become a Vendor become-vendor The registration page for users who want to sell Yes
Service Checkout service-checkout The checkout page for standalone mode purchases Yes
Vendors vendors A directory of every approved seller, sorted by rating No
Service Cart service-cart Where buyers review selected services before checkout No

"Required" means the marketplace cannot run without the page mapped, so a missing one raises a setup notice. The other two are created for you as well; they are marked optional only because you can unmap or delete them and the rest of the marketplace still works.

Why the cart and checkout slugs are prefixed. They are service-cart and service-checkout rather than cart and checkout because WooCommerce and most other stores already own those slugs. Before the slugs were made explicit, WordPress would find cart taken and append a number, so sites ended up on /cart-2/ and worse while the intended slug was never used.

Pages settings tab


The fastest way to get started:

  1. Go to Sell Services > Settings > Pages
  2. Click Auto-Create All Pages
  3. Done -- the plugin creates and assigns all six pages automatically

The pages are published immediately with the correct content, SEO-friendly URLs, and everything wired up and ready to go.


Manual Page Setup

Prefer to create pages yourself? Here is how.

Services Page

  1. Go to Pages > Add New
  2. Give it a title like "Services" or "Browse Services"
  3. Add the Services Grid block (or the services page element)
  4. Publish the page
  5. Go to Sell Services > Settings > Pages and select this page in the Services dropdown
  6. Save Changes

Tip: For a richer catalog page, combine the search bar, category grid, and service grid on the same page.

Dashboard Page

  1. Create a new page titled "Dashboard"
  2. Add the Dashboard block (or the dashboard page element)
  3. Publish and assign it in Settings > Pages

The dashboard automatically shows different content based on who is logged in:

  • Buyers see their orders, requests, messages, favorites, and profile settings
  • Vendors see their services, sales, earnings, analytics, messages, and portfolio
  • Users with both roles see everything

Logged-in buyers who are not yet vendors will see a "Become a Vendor" button in their dashboard.

Become a Vendor Page

  1. Create a new page titled "Become a Vendor" or "Start Selling"
  2. Add the Vendor Registration block (or the vendor registration page element)
  3. Add some persuasive content above the form -- explain why someone should sell on your marketplace, highlight benefits like no listing fees and flexible pricing
  4. Publish and assign it in Settings > Pages

Service Checkout Page

  1. Create a new page titled "Checkout"
  2. Add the Service Checkout block (or the checkout page element)
  3. Publish and assign it in Settings > Pages

This page handles the standalone checkout flow -- billing details, order review, payment method selection, and order placement.

Vendors Page

  1. Create a new page titled "Vendors"
  2. Add the [wpss_vendors] shortcode (or the vendor directory block)
  3. Publish and assign it in Settings > Pages

This is the public directory of approved sellers, sorted by rating. It gives buyers a way in through the person rather than the service, which matters on a marketplace where people come back to a seller they already trust.

Service Cart Page

  1. Create a new page titled "Service Cart"
  2. Add the [wpss_cart] shortcode (or the cart block)
  3. Publish and assign it in Settings > Pages

Give it the service-cart slug rather than cart if you run WooCommerce or any other store alongside, so the two carts do not fight over the same URL.


Extra Pages You Can Build

The cart and the vendor directory are created for you, so there is nothing to add for either. These are the surfaces you might compose yourself on top of the six, using a block or shortcode on any page you like:

Page What to Add
Featured Services A curated showcase of your best services
Top Vendors Your highest-rated sellers
Buyer Requests The request board with a "Post a Request" form

See Shortcodes Reference for the full list, including [wpss_vendors] if you want a second vendor directory somewhere other than the Vendors page.


Changing Assigned Pages

Already have pages you want to use instead?

  1. Go to Sell Services > Settings > Pages
  2. Each setting shows a dropdown of all your published pages
  3. Select the page you want for each function
  4. Make sure the page contains the correct block or page element
  5. Save Changes

You can also create individual pages one at a time using the Create Page button next to each dropdown.


Page Template Tips

For the best results:

  • Use a Full Width template for the Services catalog and Dashboard pages
  • The Dashboard does not need any extra content -- the page element generates the full interface
  • For the Become a Vendor page, add marketing content (benefits, testimonials, earnings potential) above the registration form
  • Add your marketplace pages to your site's navigation menu so visitors can find them easily

Troubleshooting

Page shows raw text instead of the marketplace content? Make sure the plugin is active, the page is published (not a draft), and clear all caches.

Dashboard shows wrong content for a user? The dashboard adapts to user roles. Buyers see buyer sections, vendors see vendor sections. Verify the user's role at Users > All Users. For new vendors, check if admin approval is required.

Pages return 404 errors? Go to Settings > Permalinks and click Save Changes to refresh your URL structure. Also verify the page is published and not trashed.

"Permission denied" when accessing dashboard? The dashboard requires users to be logged in. For vendor sections, the user must have an approved vendor account.

Payment Gateways Settings

Sell Services > Settings > Payment Gateways Direct link: wp-admin/admin.php?page=wpss-settings#payments

This tab is where you decide how buyers actually hand over money on the standalone checkout. Each gateway is its own card, with its own enable switch and its own Save button.

Settings pages are hash-routed. All tabs render on one screen and the #payments fragment scrolls to this one. There is no ?tab= parameter -- admin.php?page=wpss-settings&tab=payments will land you on General.


Before you configure anything: which rail is active?

These gateways power the standalone checkout only.

If WooCommerce, Easy Digital Downloads, FluentCart or SureCart is active, that platform owns checkout and payment end to end. Buyers pay through its gateways and never see these. Configuring Stripe here on a WooCommerce site changes nothing, and the screen will not warn you -- there is no "WooCommerce owns payments" banner on this tab.

Check which rail is live on Settings > General, in the E-Commerce Integration section: it prints Currently Active: under the platform selector. That line, not this tab, is the source of truth.

Switching rails never rewrites past orders. An order paid through Stripe keeps its Stripe record and its refunds keep working, even after you move the marketplace to WooCommerce.


How the cards behave

  • A gateway that is disabled starts collapsed, with a grey Disabled badge. Click the header to open it.
  • Each card is an independent form. Saving Stripe does not save PayPal. Press the Save button inside the card you edited.
  • Secret fields are masked. Leaving a secret field blank keeps the saved value -- it does not erase it. To rotate a key, paste the new one.
  • After saving you stay on this tab; a toast confirms.

Stripe

Card payments, and the gateway most marketplaces start with.

Field Type Default Notes
Enable Stripe Checkbox Off
Test Mode Checkbox Off Uses Stripe's test environment
Test Secret Key Password -- Starts sk_test_
Test Publishable Key Text -- Starts pk_test_
Live Secret Key Password -- Starts sk_live_
Live Publishable Key Text -- Starts pk_live_
Webhook Secret Password -- Signing secret used to verify incoming events
Pass Gateway Fees to Buyer Checkbox Off On: the fee is added to the buyer's total. Off: it comes out of vendor earnings
Gateway Fee (%) Number, 0-10 2.9 Stripe's percentage. Only used to compute the fee, never read back from Stripe
Gateway Fee (Fixed) Number, 0-5 0.30 Per-transaction fixed fee, in your currency

The card includes a three-step Stripe Setup Guide covering API keys, the webhook endpoint to register (/wpss-payment/stripe/callback/, listening for payment_intent.succeeded, payment_intent.payment_failed and charge.refunded), and the minimum permissions for a restricted key.

Fee fields are for display and splitting, not billing. Stripe charges what Stripe charges. These two numbers only tell the plugin how to show and allocate that cost. If your Stripe pricing differs from the US default, set them to your real rate, or the vendor's earnings line will be slightly wrong.


PayPal

Field Type Default Notes
Enable PayPal Checkbox Off
Sandbox Mode Checkbox Off
Sandbox Client ID / Client Secret Text / Password -- From your PayPal sandbox app
Live Client ID / Client Secret Text / Password -- From your PayPal live app
Webhook ID Text -- Used to verify webhook signatures
Pass Gateway Fees to Buyer Checkbox Off Same behaviour as Stripe
Gateway Fee (%) Number, 0-10 2.9
Gateway Fee (Fixed) Number, 0-5 0.30

Offline Payment

Bank transfer, cash, cheque, invoice -- anything settled outside the site. This is enabled on a fresh install so a new marketplace can take an order on day one with no gateway account. (Upgrades are never re-enabled.)

Field Type Default Notes
Enable Offline Payment Checkbox On for new installs
Title Text "Manual / Offline Payment" What the buyer sees at checkout
Description Textarea "Pay via bank transfer, cash, or other offline methods..." Short line under the title
Payment Instructions Rich text Seeded placeholder Shown after the order is placed. This is where your bank details go
Auto-Cancel (Hours) Number, 0-720 0 Cancels unpaid orders after N hours. 0 disables

Payment Instructions supports placeholders: {order_number}, {order_id}, {total}, {currency}. Use them so the buyer can quote a reference on the transfer.

Offline has no webhook and no automatic confirmation. Nothing tells the site the money arrived -- you mark the order paid yourself from the Orders screen. Set Auto-Cancel so unpaid offline orders do not sit open forever; 48 or 72 hours suits most marketplaces.


Test Gateway

A pass-through gateway for development. It only appears when WP_DEBUG is true, so it cannot be left on by accident in production.


Razorpay [PRO]

Cards, UPI, netbanking and wallets, primarily for India.

Field Type Default
Enable Razorpay Checkbox Off
Test Mode Checkbox Off
Test Key ID / Key Secret Text / Password --
Live Key ID / Key Secret Text / Password --
Webhook Secret Password --
Theme Color Text (hex) #3399cc
Pass Gateway Fees to Buyer Checkbox Off
Gateway Fee (%) Number, 0-10 2.0
Gateway Fee (Fixed) Number, 0-50 0

Stripe Connect [PRO]

Splits each payment at charge time: the platform's cut stays, the rest transfers straight to the vendor's own Stripe account.

Field Type Default Notes
Enable Stripe Connect Checkbox Off
Platform Fee (%) Number, 0-100, step 0.1 20.0 Leave blank to fall back to the general commission rate

The card also lists vendors' connected accounts and their onboarding status.

Connect pays the vendor at charge, which bypasses the clearance window entirely. If you rely on a hold period as your refund buffer, understand that Connect does not honour it. See Stripe Connect.

Unlike the core gateway cards, Connect saves over AJAX -- the button on the card is the one to press.


What is not on this tab


Commission & Tax Settings

Sell Services > Settings > Commission & Tax Direct link: wp-admin/admin.php?page=wpss-settings#commission

Two things live here: what the platform keeps from every sale, and whether tax is added at the standalone checkout. They are separate cards with separate Save buttons.

Settings are hash-routed. #commission scrolls to this tab; there is no ?tab= parameter.


Commission Settings

Field Type Default What it does
Commission Rate (%) Number, 0-50, step 0.1 10 The platform's cut of each order
Per-Vendor Rates Checkbox On Allows a per-vendor rate to override the default
Tip Commission Rate (%) Number, 0-50, step 0.1 empty The cut taken from tips

Commission Rate

The percentage the platform keeps. On a 20% rate and a $100 order, the platform keeps $20 and the vendor earns $80.

Commission is calculated on the subtotal plus add-ons, before tax, and is recorded on the order when it is created -- so a rate change never retroactively alters an existing order. Change the rate whenever you like; only new orders see it.

Per-Vendor Rates

Leave this on unless you have a reason not to. With it enabled you can set a different rate on an individual vendor's profile (Sell Services > Vendors), which is how most marketplaces reward high performers or run an introductory deal. Turn it off and every vendor pays the global rate, and per-vendor values are ignored.

Pro adds a third layer above both -- see Commission Rules below.

Tip Commission Rate

Tips are optional extra payments from a buyer to a vendor after good work, and you get to decide whether the platform takes a cut of them.

  • Leave it empty -- tips use the main commission rate. A vendor nets the same proportion as on any order.
  • Set it to 0 -- vendors keep 100% of every tip.
  • Set a number -- that rate applies to tips only.

0 is the common choice: a tip is a gesture between two people, and taking a cut of it tends to read badly to both.

Tips credit the vendor immediately. The commission is taken at the moment the buyer pays the tip, not when anything completes. See Money Flow.


Commission Rules [PRO]

Pro adds a rules engine above the flat rate. Define rules that match on service category, seller level or sales volume, each with its own rate and priority.

Rules are evaluated in priority order and the first match wins -- they do not stack. Order them so the most specific rule sits highest, or a broad rule will shadow everything under it.

The rules table saves over AJAX, not with the tab's Save button. Use its own Add / Save controls.

See Tiered Commission.


Tax Settings

Field Type Default What it does
Enable Tax Checkbox Off Adds tax to standalone orders
Tax Label Text Tax What buyers see -- VAT, GST, Sales Tax
Tax Rate (%) Number, 0-50, step 0.01 0 Applied to all services
Prices Include Tax Checkbox Off Whether listed prices already contain tax

These settings apply to the standalone checkout only

If WooCommerce, EDD, FluentCart or SureCart runs your checkout, that platform calculates tax using its own tax configuration, and everything in this card is ignored. On WooCommerce, configure tax under WooCommerce > Settings > Tax.

Prices Include Tax

  • Off (default) -- listed prices are pre-tax and tax is added at checkout. A $100 service at 20% shows a $120 total.
  • On -- listed prices already contain tax, and the checkout shows how much of the price is tax. A $100 service at 20% stays $100, of which $16.67 is tax.

Inclusive pricing is the norm in the UK and EU; exclusive is the norm in the US.

One rate, all services

The plugin applies a single rate to everything. There is no per-category rate, no per-country rate, and no VAT MOSS / digital-services handling. If you owe different rates in different jurisdictions, run checkout on WooCommerce and use its tax tables, or a dedicated tax plugin.


Payouts Settings

Sell Services > Settings > Payouts Direct link: wp-admin/admin.php?page=wpss-settings#payouts

This tab controls how vendors get their money out: when earnings become withdrawable, the minimum they can request, and whether high earners are paid automatically.

It configures the rules. The actual batch work -- approving, exporting, marking paid -- happens on Sell Services > Withdrawals, which this tab links to.

Settings are hash-routed. #payouts scrolls to this tab; there is no ?tab= parameter.


Withdrawal Settings

Field Type Default What it does
Wallet Provider Select Internal Wallet Which wallet holds vendor balances
Minimum Withdrawal Number, 0-1000 25 on a fresh install The floor for a withdrawal request
Clearance Period (Days) Number, 0-90 0 How long earnings are held before they can be withdrawn

Wallet Provider

Where vendor balances live. The built-in Internal Wallet needs nothing else installed. Pro adds TeraWallet, WooWallet and MyCred, and each appears in this list only while its plugin is active.

Pick this once, at setup. Switching provider later does not migrate balances.

Minimum Withdrawal

Vendors must reach this balance before they can request a payout. It exists to stop a stream of $3 transfers, each of which costs you a bank fee and a minute of admin.

$25-$100 suits most marketplaces. Set it too high and vendors feel their money is trapped; too low and your payout run becomes tedious.

Clearance Period (Days)

The single most consequential field on this tab. It is how many days completed earnings are held before a vendor may withdraw them.

Default is 0 -- pay out as soon as an order completes. That is a deliberate choice, not an oversight. Plenty of marketplaces pay immediately, and whether to sit on a vendor's money is your business policy, not the plugin's.

Set 7, 14 or 30 if you want a refund buffer:

Value Meaning
0 No hold. Money is withdrawable as soon as it is earned
7 Weekly hold
14 Fortnightly hold
30 Monthly hold

What a hold buys you. If a refund arrives inside the window, the money is still unpaid and nothing has to be clawed back.

What happens with no hold. You do not eat the loss -- the ledger records it honestly. A refund on money the vendor has already withdrawn drives that vendor's balance negative, and their future earnings pay it down automatically. The balance is deliberately not clamped at zero. Clearance avoids that conversation; the ledger survives it either way. Both are correct.

Two exceptions worth knowing:

  • Tips, milestone phases and paid extensions credit at payment, not at completion, so the clearance clock starts from the payment.
  • Stripe Connect bypasses clearance entirely. Connect splits at charge time and pays the vendor's Stripe account directly, so no hold applies to a Connect payment regardless of what you set here.

Automatic Withdrawals

Field Type Default What it does
Enable Auto-Withdrawal Checkbox Off Creates withdrawal requests automatically
Auto-Withdrawal Threshold Number, 100-10000, step 50 500 Balance above which a vendor is picked up
Auto-Withdrawal Schedule Select Monthly Weekly (Mondays) / Bi-weekly (1st and 15th) / Monthly (1st)

With this on, any vendor whose available balance clears the threshold on the scheduled day has a withdrawal request created for them -- they do not have to ask. Available balance means the ledger balance minus pending withdrawals minus anything still in clearance.

This creates the request; it does not move the money. You still complete each payout on the Withdrawals screen. That separation is on purpose: exporting or queuing a payout must never claim money has been sent when it has not.

Saving this card reschedules the background job immediately.


PayPal Payouts [PRO]

Bulk-pay vendors through PayPal's Payouts API.

Field Type Default What it does
Show PayPal Payout Option to Vendors Checkbox Off Adds PayPal as a payout method vendors can select, so they can save a PayPal email
Enable PayPal Payouts Checkbox Off Enables batch sending
PayPal Client ID / Client Secret Text / Password -- From the PayPal Developer Dashboard
Sandbox Mode Checkbox Off Test without moving real money
Minimum Payout Amount Number -- Vendors below this are excluded from a batch

The card also holds Create Batch Payout (pick vendors, send) and Recent Payout Batches.

Vendors must save a PayPal email on their profile first. Until they do, the vendor table here shows an empty state -- turn on Show PayPal Payout Option to Vendors so they have somewhere to enter it.

This card saves over AJAX with its own Save Payout Settings button.

This is not the PayPal gateway on the Payment Gateways tab. That one takes money from buyers; this one sends money to vendors. They use separate credentials and either can run without the other.


You can pay every vendor with no integration at all

This matters more than any option above: a site with no gateway and no Connect and no PayPal Payouts still has a complete payout flow.

On Sell Services > Withdrawals you can filter the queue, export it to CSV with the bank and PayPal bulk-upload columns your bank expects, pay however you actually pay, and then Mark paid. That single step writes the ledger debit, and marking twice debits once.

Exporting never changes a status. Export and mark-paid are two deliberate acts, because an export that auto-marked would lie the moment a bank transfer bounced.

Stripe Connect and PayPal Payouts are conveniences on top of that. They are never prerequisites.


White Label Branding [PRO]

Make the marketplace yours. White Label replaces WP Sell Services branding with your own across the admin, the vendor dashboard, and transactional emails.

White Label settings on the Branding tab

Setup

  1. Go to Sell Services > Settings > Branding.
  2. Tick Enable -- nothing changes until you do.
  3. Fill in the fields below and save.

Branding applies immediately. There are no template edits and no CSS to write.

What you can brand

Setting What it changes Default
Brand name The admin menu label, and the name shown in emails and the dashboard header (empty -- uses the plugin name)
Logo Shown in the vendor dashboard header and email headers. Recommended 240 x 60 px (empty)
Primary colour Accent colour across admin, dashboard, and email headers #7f54b3
Email footer text Small-print line at the bottom of every transactional email (empty)
Email from name The sender name on every transactional email (empty -- uses your site name)
Hide branding Removes the "powered by" attribution Off

Brand name renames the admin menu

Setting a brand name changes the Sell Services entry in your WordPress sidebar to whatever you choose. Worth knowing before you follow any other page in these docs: once branded, "Sell Services > Settings" becomes "Your Brand > Settings" on your site.

Email from name

This changes the sender name on transactional emails, not the sending address. The address still comes from WordPress or your SMTP plugin. If you want mail to come from support@yourbrand.com, configure that in your SMTP plugin -- White Label does not control it.

See Email Configuration.

What it does not change

Be clear with clients about the boundary:

  • The plugin's entry on the Plugins screen. WordPress shows the real plugin name, author, and description there. A site administrator can always see what is installed.
  • Your theme. White Label brands the plugin's own screens. Site-wide colours, fonts, and layout remain your theme's job.
  • The WordPress admin itself. Only the plugin's menu label and its own screens are affected.

For agencies

White Label plus an agency license is built for client builds: ship a marketplace under the client's brand, with nothing to relabel at handover.

A practical order of operations:

  1. Build and test with branding off, so the docs and screenshots you are following match what you see.
  2. Turn branding on near the end, once the marketplace works.
  3. Set the brand name last -- after it changes, the admin navigation in these docs will no longer match your screen.

For developers

Branding is applied through filters, so you can extend or override it:

Filter / action Purpose
wpss_admin_menu_label The admin menu label
wpss_email_from_name Sender name on transactional emails
wpss_email_header_vars Logo and colours in email headers
wpss_show_powered_by Whether the attribution renders
wpss_dashboard_header Inject markup into the branded dashboard header

Settings are stored in the wpss_white_label option. See Hooks and Filters.

Advanced Settings

Configure data management, debugging, and learn about the automated background tasks that keep your marketplace running smoothly.

Advanced Settings Tab


Delete Data on Uninstall

By default, uninstalling the plugin keeps all your marketplace data intact. If you enable this option, uninstalling will permanently delete everything: services, orders, vendor profiles, reviews, conversations, earnings history, and all plugin settings.

When to Enable This

  • You are testing the plugin temporarily and want a clean removal
  • You are shutting down the marketplace and moving to a different solution
  • Compliance requires complete data removal

When to Keep It Disabled

  • You might reinstall the plugin later
  • You need to preserve transaction records
  • You want a safety net in case of accidental uninstall

What Stays After Deletion

Even with this option enabled, some things are not removed:

  • WordPress user accounts (buyers and vendors remain as WP users)
  • Uploaded media files (images, documents in your media library)
  • Payment records held by your payment processor (Stripe, PayPal, etc.)

Important: This is irreversible. Always export your data and create a database backup before uninstalling with this option enabled.


Debug Mode

Enable detailed logging when you need to troubleshoot issues. When active, the plugin records information about orders, payments, emails, file uploads, and background tasks to your WordPress debug log.

  1. Go to Sell Services > Settings > Advanced
  2. Check Enable Debug Mode
  3. Save Changes

What gets logged:

  • Order creation and status changes
  • Payment processing and commission calculations
  • Email delivery attempts (success and failure)
  • File upload operations
  • Background task execution
  • Errors and warnings

Where to view logs:

  • Free version: Check the WordPress debug log at wp-content/debug.log
  • Go to Sell Services > Audit Log for a filterable record of admin and marketplace actions

Tip: Enable debug mode only when troubleshooting. Disable it in normal operation to keep your logs clean and avoid any (minor) overhead.


Max Upload Size

Set the maximum file size for uploads (delivery files, attachments, requirement files). The default is 10MB. This is capped by your server's PHP settings -- if your server allows only 25MB uploads, that will be the actual limit regardless of what you set here.


Allowed File Types

Control which file types vendors and buyers can upload. By default, common formats are allowed: JPG, JPEG, PNG, GIF, PDF, DOC, and DOCX.

Add or remove file extensions to match your marketplace needs.


Currency Symbol Position

Choose where the currency symbol appears relative to the amount. Options include:

  • Left -- $100 (default)
  • Right -- 100$
  • Left with space -- $ 100
  • Right with space -- 100 $

Configure this at Sell Services > Settings > General.


Hide dashboard sections from specific roles. The Menu Visibility card is a grid: dashboard sections down the side, every role on your site across the top. Tick a box to hide that section from that role.

Leave everything unticked -- the default -- and every role sees every section.

Sections you can hide: My Orders, Favorites, Buyer Requests, My Services, Sales Orders, Earnings & Payouts, Portfolio, Analytics, Messages, Notifications, Disputes, Profile.

Hiding a section also blocks its direct URL. This is access control, not just menu cosmetics -- a user who bookmarks a hidden section is refused, so you can use it to genuinely take a capability away from a role rather than merely hiding the link.

A section is hidden for a user when any of their roles hides it. Someone with two roles gets the union of both restrictions, not the more permissive of the two.

Typical uses:

  • Hide the whole selling side (My Services, Sales Orders, Earnings & Payouts, Portfolio) from a buyer-only role.
  • Hide Analytics from vendors while keeping it for administrators.
  • Hide Disputes from everyone while you decide on a mediation policy.

For developers, the same gate is exposed as the wpss_can_access_dashboard_section filter -- see Hooks and Filters.

Demo Content

Import Demo Content

Quickly populate your marketplace with sample services, vendors, and categories for testing or demonstration purposes. Go to Settings > Advanced and click Import Demo Content.

Delete Demo Content

When you are done testing, click Delete Demo Content to remove all sample data without affecting your real marketplace content.


Automated Background Tasks

WP Sell Services runs three scheduled tasks automatically to keep your marketplace in good shape.

Auto-Complete Orders

Runs every hour. If a buyer does not accept or request revisions on a delivered order within the configured time limit (default: 3 days), the order is automatically marked as complete and payment is released to the vendor.

Configure the auto-complete delay at Settings > Orders & Disputes.

Expire Old Buyer Requests

Runs once daily. Buyer requests that have passed their expiration deadline are automatically marked as expired and hidden from vendor listings.

Update Vendor Statistics

Runs twice daily. Recalculates vendor performance metrics including overall rating, total earnings, completion rate, response time, and service counts. This keeps vendor profiles and rankings accurate without impacting real-time performance.

If Background Tasks Are Not Running

WordPress scheduled tasks rely on site traffic to trigger. On low-traffic sites, tasks may run late. If you notice orders not auto-completing or vendor stats being outdated, set up a real server cron job through your hosting control panel to ping your site every 15 minutes.

Additional Background Tasks [PRO]

  • Auto-Withdrawals -- Automatically processes vendor payouts when earnings reach a threshold
  • Cloud Storage Sync -- Keeps local and cloud storage in sync, cleans up orphaned files

Troubleshooting

Background tasks not running? Install the free WP Crontrol plugin to check if scheduled tasks are registered. If your site has low traffic, set up a real server cron job.

Debug log not showing anything? Make sure WordPress debugging is also enabled in your wp-config.php file, and that the wp-content directory is writable.

Data still present after uninstall? The "Delete Data on Uninstall" option must be enabled before you uninstall. Also, use the proper WordPress uninstall process (Plugins page) rather than deleting files via FTP.

Developer Guide

REST API Overview

WP Sell Services provides a comprehensive REST API for building custom integrations, mobile apps, and external applications. The API follows WordPress REST API standards with 23 dedicated controllers plus generic endpoints.

Overview

Base URL: /wp-json/wpss/v1/

Controllers: 21 specialized controllers handling services, orders, vendors, reviews, conversations, disputes, buyer requests, proposals, notifications, portfolio, earnings, extension requests, milestones, tipping, seller levels, moderation, favorites, media, cart, authentication, and realtime channel authorization.

Authentication Methods:

  • Cookie authentication (browser-based)
  • Application Passwords (WordPress 5.6+)
  • JWT tokens [PRO] (via third-party plugin)

Response Format: JSON with standard WordPress REST API structure

Pagination: Standard WordPress pagination with page and per_page parameters

Authentication

Used for same-origin requests from logged-in WordPress users.

Requirements:

  • User must be logged into WordPress
  • Requests must include X-WP-Nonce header

Example:

const nonce = wpApiSettings.nonce; // From wp_localize_script

fetch('/wp-json/wpss/v1/services', {
    credentials: 'same-origin',
    headers: {
        'X-WP-Nonce': nonce
    }
})
.then(response => response.json())
.then(data => console.log(data));

Application Passwords

Recommended for external applications and integrations (WordPress 5.6+).

Setup:

  1. Navigate to Users → Profile
  2. Scroll to Application Passwords section
  3. Enter application name (e.g., "Mobile App")
  4. Click Add New Application Password
  5. Copy the generated password (shown once)

Example:

curl -X GET \
  https://yoursite.com/wp-json/wpss/v1/services \
  -u "username:xxxx xxxx xxxx xxxx"
const auth = btoa('username:xxxx xxxx xxxx xxxx');

fetch('/wp-json/wpss/v1/services', {
    headers: {
        'Authorization': `Basic ${auth}`
    }
});

App sign-in and sessions

POST /auth/login is the entry point for a mobile or desktop client. It takes the member's account password and returns a token to use as Basic auth.

{
  "token": "base64(user_login:app_password)",
  "user":  { "id": 42, "name": "Sofia Rossi", "...": "..." },
  "expires": "2026-11-16T20:13:40+00:00"
}

expires is real and enforced. Before 1.6.0 it was always null and the server enforced nothing, so a stolen token worked forever. A token now dies 30 days after it was last used or 90 days after it was issued, whichever comes first - a daily user is never interrupted, and an abandoned token is gone in a month. Both limits are filterable via wpss_app_token_lifetime.

Treat expires as advisory and the 401 as authoritative: on 401 wpss_token_expired, discard the token and sign in again.

A token cannot mint another token. POST /auth/login refuses a request whose password is an app token rather than the account password, with 401 wpss_token_cannot_mint. Without that, whoever stole one token had an unlimited supply and revoking the original changed nothing.

Signing in still works with a dead token attached. WordPress answers 401 for the whole request when an application password fails, so a client that attaches its stored token to every request would be unable to reach the login route to replace it. /auth/login, /auth/register and /auth/forgot-password are therefore reachable with an expired token in the header - they take their credentials from the body and grant nothing on their own. Every other route still refuses it.

Listing and revoking sessions:

GET    /wpss/v1/auth/sessions           # uuid, device, created, last_used, expires, is_current
DELETE /wpss/v1/auth/sessions/{uuid}    # revoke one device

is_current marks the session making the call, so a client can avoid offering to sign itself out. A uuid is resolved against the current member, so it cannot be used to sign anybody else out.

Note this is /auth/sessions, not /auth/devices. The latter exists and manages push notification tokens - revoking one of those must not sign anyone out.

Only sign-ins this plugin issued are expired or listed. An application password a member created by hand in their WordPress profile belongs to whatever script they built with it and is left alone.

Payload conventions

Four shapes are the same everywhere in this API. They were not always, and the inconsistencies were the most-reported problem from client developers: each one becomes an adapter in the client that never goes away.

Dates are ISO-8601 with an offset

Every timestamp, on every endpoint, in every nested object:

"created_at": "2026-08-17T07:36:09+00:00"

Never a bare 2026-08-17 07:36:09. A MySQL datetime carries no timezone, so a client has to guess - and until 1.6.0 roughly half the API guessed differently from the other half. If you find one, it is a bug; report it with the route.

Dates inside free-form blobs - a notification's data object, whose shape the producing feature owns - are normalised on the way out for keys that name a date. Everything else is passed through exactly as stored.

A person is always the same object

"vendor": { "id": 42, "name": "Sofia Rossi", "avatar": "https://...", "deleted": false }

Wherever the API describes a member - vendor, customer, author, initiated_by, other_user, sender, reviewer - it is this object. Write one renderer and use it everywhere.

deleted matters more than it looks. Orders and conversations outlive the people in them, so a client needs to tell "this member's account is gone" from "no member acted". A sender of { "id": 0, "name": "System" } is the system speaking, not a deleted user.

Some endpoints also carry flat legacy keys beside the object - vendor_id, vendor_name, vendor_avatar and the customer_* equivalents on order detail. Those are a compatibility surface for clients that predate the object. Prefer the object in new code; the flat keys will be retired on a stated version, never silently.

A service card is always the same object

GET /services and GET /favorites return the same keys for a service: id, title, slug, description, excerpt, status, link, vendor, pricing, delivery, images, categories, tags, rating, created_at, updated_at.

/favorites additionally carries the flat thumbnail, price, price_minor and currency it has always returned. One exception is deliberate and documented: on /favorites, rating is a float where the canonical shape is { average, count }. Changing the type of an existing field is a breaking change, so it waits for a contract bump.

Money carries minor units

Every money value ships alongside an integer in the currency's minor unit, so a client never does float arithmetic on a price:

"pricing": { "base_price": 79.99, "base_price_minor": 7999, "currency": "USD" }

Trimming a response

Server-rendered HTML is included on a few endpoints for the plugin's own progressive-enhancement surfaces - messages[].html, reviews[].review_html, created_human and friends. A native client does not want them.

Use WordPress core's _fields:

GET /wpss/v1/reviews?_fields=id,rating,review,created_at

Measured on a real install, that takes /reviews from 8547 bytes to 1825 (79% smaller) and /conversations/{id}/messages from 26867 to 6829 (75%). The HTML keys stay in the payload by default because removing a field is a breaking change, but no client has to receive them.

_fields only works over HTTP. It is applied in rest_post_dispatch, which rest_do_request() does not run - so testing it through wp eval shows no reduction and looks broken.

The contract version

GET /settings returns a contract_version. It is bumped when a field changes shape or meaning, never when a value changes, because clients refuse a contract newer than the one they understand - a spurious bump bricks every build already shipped.

Adding a key is not a bump. Changing a date's format is not a bump. Changing rating from a number to an object would be.

Checking the conventions yourself

They are enforced by a committed command rather than by review:

wp wpss api:shapes            # every GET route
wp wpss api:shapes --verbose  # also names the routes it could not reach

It walks the whole route table, fills parameterised routes from real rows, and fails on a MySQL date or an actor missing deleted. If you add an endpoint, run it.

Error codes

Branch on code, never on the message - messages are translated and will not match in another locale.

Status codes

Status Meaning What a client should do
401 Not authenticated Refresh the token / prompt sign-in, then retry
403 Authenticated, not permitted Do not retry with the same credentials - show the reason
404 No such route or record Stop; the path or id is wrong
405 Wrong method on a real route Fix the verb; the Allow header lists what is accepted
409 Conflict / illegal state Refresh state and re-decide
501 Feature disabled on this site Hide the feature; do not retry

Permission codes

A 403 always carries one of these, so the reason is machine-readable:

Code Meaning
rest_not_logged_in Not signed in (this one is 401)
wpss_not_vendor Signed in, but the account is not a vendor
wpss_vendor_pending Vendor account exists but is awaiting approval
wpss_not_owner Signed in, but this order / service / file / conversation belongs to someone else
wpss_not_admin Requires an administrator
wpss_cannot_create Lacks the capability to create this resource
wpss_service_limit_reached Permitted, but the account is at its service limit - offer to remove one

wpss_not_vendor and wpss_not_owner used to be a single generic rest_forbidden, so a client could not tell "you need a vendor account" from "that is not your order" without reading English.

One caveat worth knowing

WordPress validates required parameters before it runs the permission callback. A request that omits a required argument therefore returns 400 rest_missing_callback_param even when unauthenticated - so do not treat 400 as an authentication signal. A well-formed anonymous request always returns 401.

Generic Endpoints

These endpoints are registered directly in API.php (not controllers).

GET /categories

Get service categories with hierarchy.

Parameters:

  • parent (int) - Parent category ID (default: 0)
  • hide_empty (bool) - Hide empty categories (default: true)

Response:

[
  {
    "id": 12,
    "name": "Web Development",
    "slug": "web-development",
    "description": "Website and web application development",
    "count": 145,
    "parent": 0,
    "icon": "dashicons-code",
    "image": "https://example.com/cat-image.jpg"
  }
]

GET /tags

Get service tags.

Parameters:

  • search (string) - Search term

Response:

[
  {
    "id": 34,
    "name": "WordPress",
    "slug": "wordpress",
    "count": 89
  }
]

GET /settings

Get public marketplace settings.

Response:

{
  "currency": "USD",
  "currency_symbol": "$",
  "currency_position": "before",
  "decimal_places": 2,
  "min_order_amount": 5.00,
  "max_order_amount": 10000.00,
  "vendor_registration": true,
  "service_moderation": false,
  "review_moderation": false,
  "max_file_size": 10485760,
  "allowed_file_types": ["jpg", "jpeg", "png", "pdf", "zip"],
  "pages": {
    "services": 123,
    "vendors": null,
    "dashboard": 125,
    "checkout": 126,
    "cart": 128,
    "become_vendor": 129,
    "terms": null
  },
  "page_urls": {
    "services": "https://yoursite.com/services/",
    "vendors": null,
    "dashboard": "https://yoursite.com/dashboard/",
    "checkout": "https://yoursite.com/service-checkout/",
    "cart": "https://yoursite.com/service-cart/",
    "become_vendor": "https://yoursite.com/become-a-vendor/",
    "terms": null
  },
  "realtime": {
    "enabled": false,
    "key": "",
    "host": "",
    "cluster": "mt1",
    "port": 443,
    "use_tls": true,
    "auth_endpoint": "https://yoursite.com/wp-json/wpss/v1/realtime/auth"
  }
}

Which pages exist, and which are optional

pages gives the post ID, page_urls the absolute URL, for the same keys. Both are always present with the same key set, so a client can read either without checking for missing keys.

A value is either a published page or null - never 0. null means the site has no such page: it was never mapped, or the page it pointed at has since been unpublished or deleted. Hide the entry rather than linking to it; a 0 was never a post ID a client could open.

The installer creates these automatically:

Key Created on install
services Yes
dashboard Yes
checkout Yes
cart Yes
become_vendor Yes

These are optional and stay null until the site owner maps them in WP Sell Services > Settings:

Key Notes
terms Mapped to the site's existing terms page - the plugin deliberately does not create a second one.
vendors Only set when the owner publishes a vendor-directory page. page_urls.vendors may still resolve when the directory is served from an archive rather than a page.

On a WooCommerce or EDD install, checkout and cart resolve to that rail's pages, not the standalone ones - so a client always deep-links to the checkout the buyer will actually use.

The realtime key carries the non-sensitive client config for the realtime (WebSocket) layer - see Realtime controller. The app secret is never included.

GET /me

Get current user info and capabilities.

Authentication Required: Yes

Response:

{
  "id": 45,
  "email": "john@example.com",
  "display_name": "John Doe",
  "avatar": "https://example.com/avatar.jpg",
  "is_vendor": true,
  "is_admin": false,
  "capabilities": {
    "can_create_services": true,
    "can_manage_orders": false
  },
  "vendor_status": "approved",
  "rating": 4.8,
  "review_count": 156
}

GET /dashboard

Get dashboard statistics for current user.

Authentication Required: Yes

Response:

{
  "user_id": 45,
  "is_vendor": true,
  "as_customer": {
    "total_orders": 12,
    "active_orders": 3,
    "completed_orders": 9
  },
  "as_vendor": {
    "services_count": 8,
    "total_orders": 234,
    "pending_orders": 5,
    "active_orders": 12,
    "completed_orders": 217,
    "total_earnings": 45620.00,
    "rating": 4.8,
    "review_count": 156
  }
}

POST /batch

Execute multiple API requests in single HTTP call (mobile efficiency).

Authentication Required: Yes

Maximum Requests: 25 (filtered via wpss_batch_max_requests)

Request Body:

{
  "requests": [
    {
      "method": "GET",
      "path": "/wpss/v1/services?per_page=5"
    },
    {
      "method": "GET",
      "path": "/wpss/v1/vendors?per_page=5"
    },
    {
      "method": "POST",
      "path": "/wpss/v1/favorites",
      "body": {
        "service_id": 123
      }
    }
  ]
}

Notes:

  • All sub-requests must be within /wpss/v1/ namespace
  • Authentication inherited from parent request
  • Each sub-request processed independently
  • Failed requests don't stop batch processing

Global search across services and vendors.

Parameters:

  • q (string, required) - Search query
  • type (string) - Search type: all, services, vendors (default: all)

Error Handling

Standard Error Format

All errors follow WordPress REST API error format:

{
  "code": "invalid_request",
  "message": "Missing required parameter: service_id",
  "data": {
    "status": 400,
    "params": {
      "service_id": "required"
    }
  }
}

Error codes

The plugin returns 78 distinct error codes. Branch on code, never on message -- messages are translated and will not match on a non-English site.

Codes are grouped by the status they return. Anything not listed here comes from WordPress core (rest_no_route, rest_cookie_invalid_nonce, and friends).

The codes you will actually branch on

If you implement nothing else, implement these. They are the ones a real client hits, and several were undocumented before 1.4.0.

Status Code Means What to do
401 rest_not_logged_in No usable session or credentials Refresh the token / re-auth, then retry once
403 wpss_forbidden Logged in, but not a party to this object (not the buyer, not the vendor) Do not retry. Surface it
403 wpss_not_vendor Logged in, but the account is not a vendor Offer the "become a vendor" flow
403 wpss_pro_license_required A Pro endpoint on a site with no active license Hide the feature; do not retry
400 wpss_category_required Publishing a service with no category, on a site that requires one Fix the payload
404 wpss_milestone_not_found No such milestone, or the id is not a milestone sub-order Re-fetch the order
409 wpss_milestone_not_payable The phase is not in pending_payment Re-fetch; someone already paid or cancelled it
409 wpss_milestone_locked An earlier phase is still open Show the "pay the previous phase first" hint
409 wpss_milestone_not_declinable The phase is not awaiting approval Re-fetch
409 wpss_milestone_not_cancellable The phase has moved past the cancellable window Re-fetch
409 wpss_order_not_payable The order is not awaiting payment Re-fetch

On 401 vs 403 (changed in 1.4.0): the plugin now answers these two correctly. Routes that used a bare boolean permission callback made WordPress report rest_forbidden to an anonymous caller -- so a client whose rule is "401 means refresh the token and retry" read an expired token as a permanent denial and never recovered. /me and /dashboard, the first two routes a cold-starting app calls, both did this. Anonymous is now always 401 rest_not_logged_in; a logged-in caller who lacks the right is 403, and the vendor case has one code, wpss_not_vendor, instead of several spellings.

There is no error code for "a cart plugin owns payments." When WooCommerce, EDD, FluentCart or SureCart is enabled, the /payments/* routes are simply not registered, so the answer is WordPress core's 404 rest_no_route. Detect the rail from GET /settings rather than probing a payment route and interpreting the 404.

401 -- not authenticated

rest_not_logged_in · invalid_credentials

403 -- authenticated but not allowed

rest_forbidden (admin-only action) · wpss_forbidden · wpss_not_vendor · not_vendor (legacy spelling, still emitted by some vendor routes) · wpss_pro_license_required · wpss_realtime_forbidden · disputes_disabled · registration_disabled

404 -- not found

rest_order_not_found · wpss_order_not_found · rest_vendor_not_found · rest_review_not_found · request_not_found · proposal_not_found · dispute_not_found · conversation_not_found · addon_not_found · invalid_service · invalid_package · rest_file_not_found · rest_not_vendor · not_found

409 -- conflicting state

wpss_order_not_payable -- the order is not awaiting payment wpss_milestone_not_payable -- the phase is not awaiting payment wpss_milestone_not_declinable -- the phase is past the point where it can be declined wpss_milestone_not_cancellable -- the phase is past the point where it can be cancelled wpss_milestone_locked -- an earlier phase is still open

These are the ones worth handling explicitly: they mean "your request was valid, but the object has moved on." Re-fetch the order rather than retrying.

wpss_milestone_locked is narrower than it sounds. A phase unlocks when every earlier phase has reached completed or cancelled -- and cancelled covers a buyer declining it, a vendor deleting it while unpaid, and the 48-hour abandon sweep. Paying an earlier phase does not unlock the next one: a paid phase is in_progress, which still blocks. See Milestone Contracts.

There is also a second, differently-spelled code for the same condition: wpss_phase_locked, returned by CheckoutIntentService on the Stripe and Razorpay standalone paths. Branch on both.

429 -- rate limited

rate_limit_exceeded · rate_limited

Both ship in free (login and registration are rate limited). Back off and retry; do not loop.

500 / 501 -- server side

order_failed · create_failed · update_failed · delete_failed · upload_failed · addon_create_failed · rest_review_failed · rest_message_failed · rest_conversation_failed · rest_deliverable_failed · rest_vacation_update_failed · wpss_profile_update_failed · conversation_unavailable · user_lookup_failed · no_provider · app_passwords_unavailable · checkout_unavailable (501)

no_provider and checkout_unavailable mean the marketplace is misconfigured (no e-commerce adapter or gateway available), not that the request was wrong.

400 -- bad request or rejected business rule

Most codes fall here. The ones you are most likely to handle:

Code Means
rest_validation_failed Generic parameter validation failure
rest_invalid_rating Rating outside 1-5
rest_invalid_message, message_empty Empty message body
rest_already_reviewed, rest_already_replied, rest_already_voted Duplicate action
rest_review_window_expired Past the review window (default 30 days)
rest_order_not_completed Reviewing an order that is not complete
rest_action_failed The order status transition is not allowed from here
rest_amount_mismatch Paid amount does not match the order total
own_service Buying your own service
service_paused Vendor paused the service or is on vacation
empty_cart, not_found Cart empty, or item key not in cart
insufficient_balance, below_minimum, pending_exists Withdrawal rejected
invalid_amount Amount must be greater than zero
rest_registration_closed, rest_already_vendor, rest_pending_application Vendor registration rejected
username_exists, email_exists, weak_password, incorrect_password Account problems
invalid_gateway, unsupported_gateway Gateway not enabled, or does not support REST confirmation
stripe_error, stripe_confirm_error, paypal_error, paypal_confirm_error Gateway declined or errored
file_too_large, invalid_type, no_file Upload rejected

rest_action_failed is the one that most often looks like a bug and is not: it means the transition you asked for is not legal from the order's current status. Check the status first -- see Order Lifecycle.

Pagination

Pagination Parameters

All list endpoints support pagination:

Parameters:

  • page (int) - Current page number (default: 1)
  • per_page (int) - Items per page (default: 10, max: 100)

Pagination Headers

Responses include pagination headers:

X-WP-Total: 50
X-WP-TotalPages: 5
Link: <url?page=2>; rel="next", <url?page=5>; rel="last"

Pagination Response Body

{
  "items": [...],
  "total": 50,
  "pages": 5,
  "current_page": 1,
  "per_page": 10
}

CORS Support

CORS headers are automatically added for requests to /wp-json/wpss/ namespace.

Allowed Origins: Configurable via wpss_api_cors_origins filter (default: site home URL)

Allowed Methods: GET, POST, PUT, PATCH, DELETE, OPTIONS

Allowed Headers: Authorization, Content-Type, X-WP-Nonce

Example Filter:

add_filter( 'wpss_api_cors_origins', function( $origins ) {
    $origins[] = 'https://mobile-app.example.com';
    return $origins;
} );

Rate Limiting [PRO]

API rate limiting protects against abuse.

Limits:

  • Authenticated users: 300 requests/hour
  • Application passwords: 1000 requests/hour
  • Administrators: Unlimited

Rate Limit Headers:

X-RateLimit-Limit: 300
X-RateLimit-Remaining: 245
X-RateLimit-Reset: 1706785200

Extending the API

Adding Custom Endpoints

Register custom controllers via wpss_api_controllers filter:

add_filter( 'wpss_api_controllers', function( $controllers ) {
    $controllers[] = new My_Custom_Controller();
    return $controllers;
} );

See Custom Integrations for detailed examples.


API Version: v1 Documented against: WP Sell Services 1.4.0 (free) + WP Sell Services Pro 1.4.0 WordPress Version: Requires WordPress 6.4+ with REST API enabled

The API has changed since 1.0.0 -- routes were added, accept/reject order actions were removed in 1.4.0, and /payments/* became conditional on the active e-commerce rail. Treat this page as describing 1.4.0, not "1.0.0 and everything after".

REST API Controllers Reference

WP Sell Services registers 23 REST controllers plus a set of generic utility routes. WP Sell Services Pro adds 10 more. Everything lives under one namespace:

/wp-json/wpss/v1/

Every route below is generated from the 1.4.0 source. Path parameters are shown as WordPress route regex ((?P<id>[\d]+)) so you can match them exactly.

For authentication, pagination, error shapes, and the generic endpoints, see REST API Overview.

POST/PUT/PATCH means the route is registered as EDITABLE, so WordPress accepts all three verbs on it.

Two namespaces -- and only one of them is the API

There are two namespaces, and the split is not the one the names suggest.

Namespace What is on it
wpss/v1 Everything. All 23 free controllers and all 10 Pro controllers. Pro extends the API; it does not run a parallel one.
wpss-pro/v1 Exactly four cart-adapter routes, and only while the matching cart plugin is active.

The four wpss-pro/v1 routes are:

Method Route Present when
POST /wpss-pro/v1/surecart/sync-products SureCart is active
GET /wpss-pro/v1/surecart/orders SureCart is active
GET /wpss-pro/v1/fluentcart/products FluentCart is active
GET /wpss-pro/v1/fluentcart/orders FluentCart is active

Build every client against wpss/v1. Prefixing a Pro endpoint with wpss-pro/v1 returns rest_no_route on every single one.

Route presence is conditional

Two things change which routes exist on a given site, so enumerate rather than assume:

  • The active e-commerce rail. /payments/* -- in free and Pro -- registers only when wpss_uses_standalone_payments() is true, i.e. no cart plugin has claimed payments. Activate WooCommerce, EDD, FluentCart or SureCart and those routes stop registering entirely; a call to them answers 404 rest_no_route from WordPress core. That is by design: when a cart plugin is enabled it owns all payment, and the plugin does not offer a second way in.
  • Pro + a valid license. The 10 Pro controllers register on wpss_loaded.

To see the truth for a site, read the index: GET /wp-json/wpss/v1.

Free controllers

Generic utility routes

Registered by the API bootstrap rather than a dedicated controller.

Method Route Purpose
GET / Namespace index -- the WordPress-generated route list for wpss/v1. The authoritative answer to "what exists on this site".
GET /categories Service categories
GET /tags Service tags
GET /settings Public marketplace settings
GET /me Current user summary
GET /dashboard Dashboard payload for the current user
GET /search Cross-entity search
POST /batch Batch several reads into one request
POST /tour/complete Mark the guided onboarding tour finished for the current user. Called by the bundled tour; persists per-user so the tour does not replay.

Services

Method Route
GET, POST /services
GET /services/grid
GET, POST/PUT/PATCH, DELETE /services/(?P<id>[\d]+)
GET /services/(?P<id>[\d]+)/packages
GET /services/(?P<id>[\d]+)/faqs
GET /services/(?P<id>[\d]+)/reviews
GET, POST /services/(?P<id>[\d]+)/addons
POST/PUT/PATCH, DELETE /services/(?P<id>[\d]+)/addons/(?P<addon_id>[\d]+)

/services/grid returns the lighter payload used by the catalog grid. Prefer it over /services when you only need cards.

Orders

Method Route
GET /orders
GET, POST/PUT/PATCH /orders/(?P<id>[\d]+)
GET, POST /orders/(?P<id>[\d]+)/messages
GET, POST /orders/(?P<id>[\d]+)/deliverables
POST /orders/(?P<id>[\d]+)/(?P<action>…)
GET, POST /orders/(?P<id>[\d]+)/requirements
POST /orders/(?P<id>[\d]+)/requirements/skip
DELETE /orders/(?P<id>[\d]+)/requirements/files/(?P<file_id>[\d]+)
GET /orders/(?P<id>[\d]+)/sub-orders
GET /orders/(?P<id>[\d]+)/timeline
POST /orders/(?P<id>[\d]+)/pay

Order transitions all go through one action route rather than a verb per transition. (?P<action>…) accepts exactly:

start | deliver | complete | revision | cancel | dispute
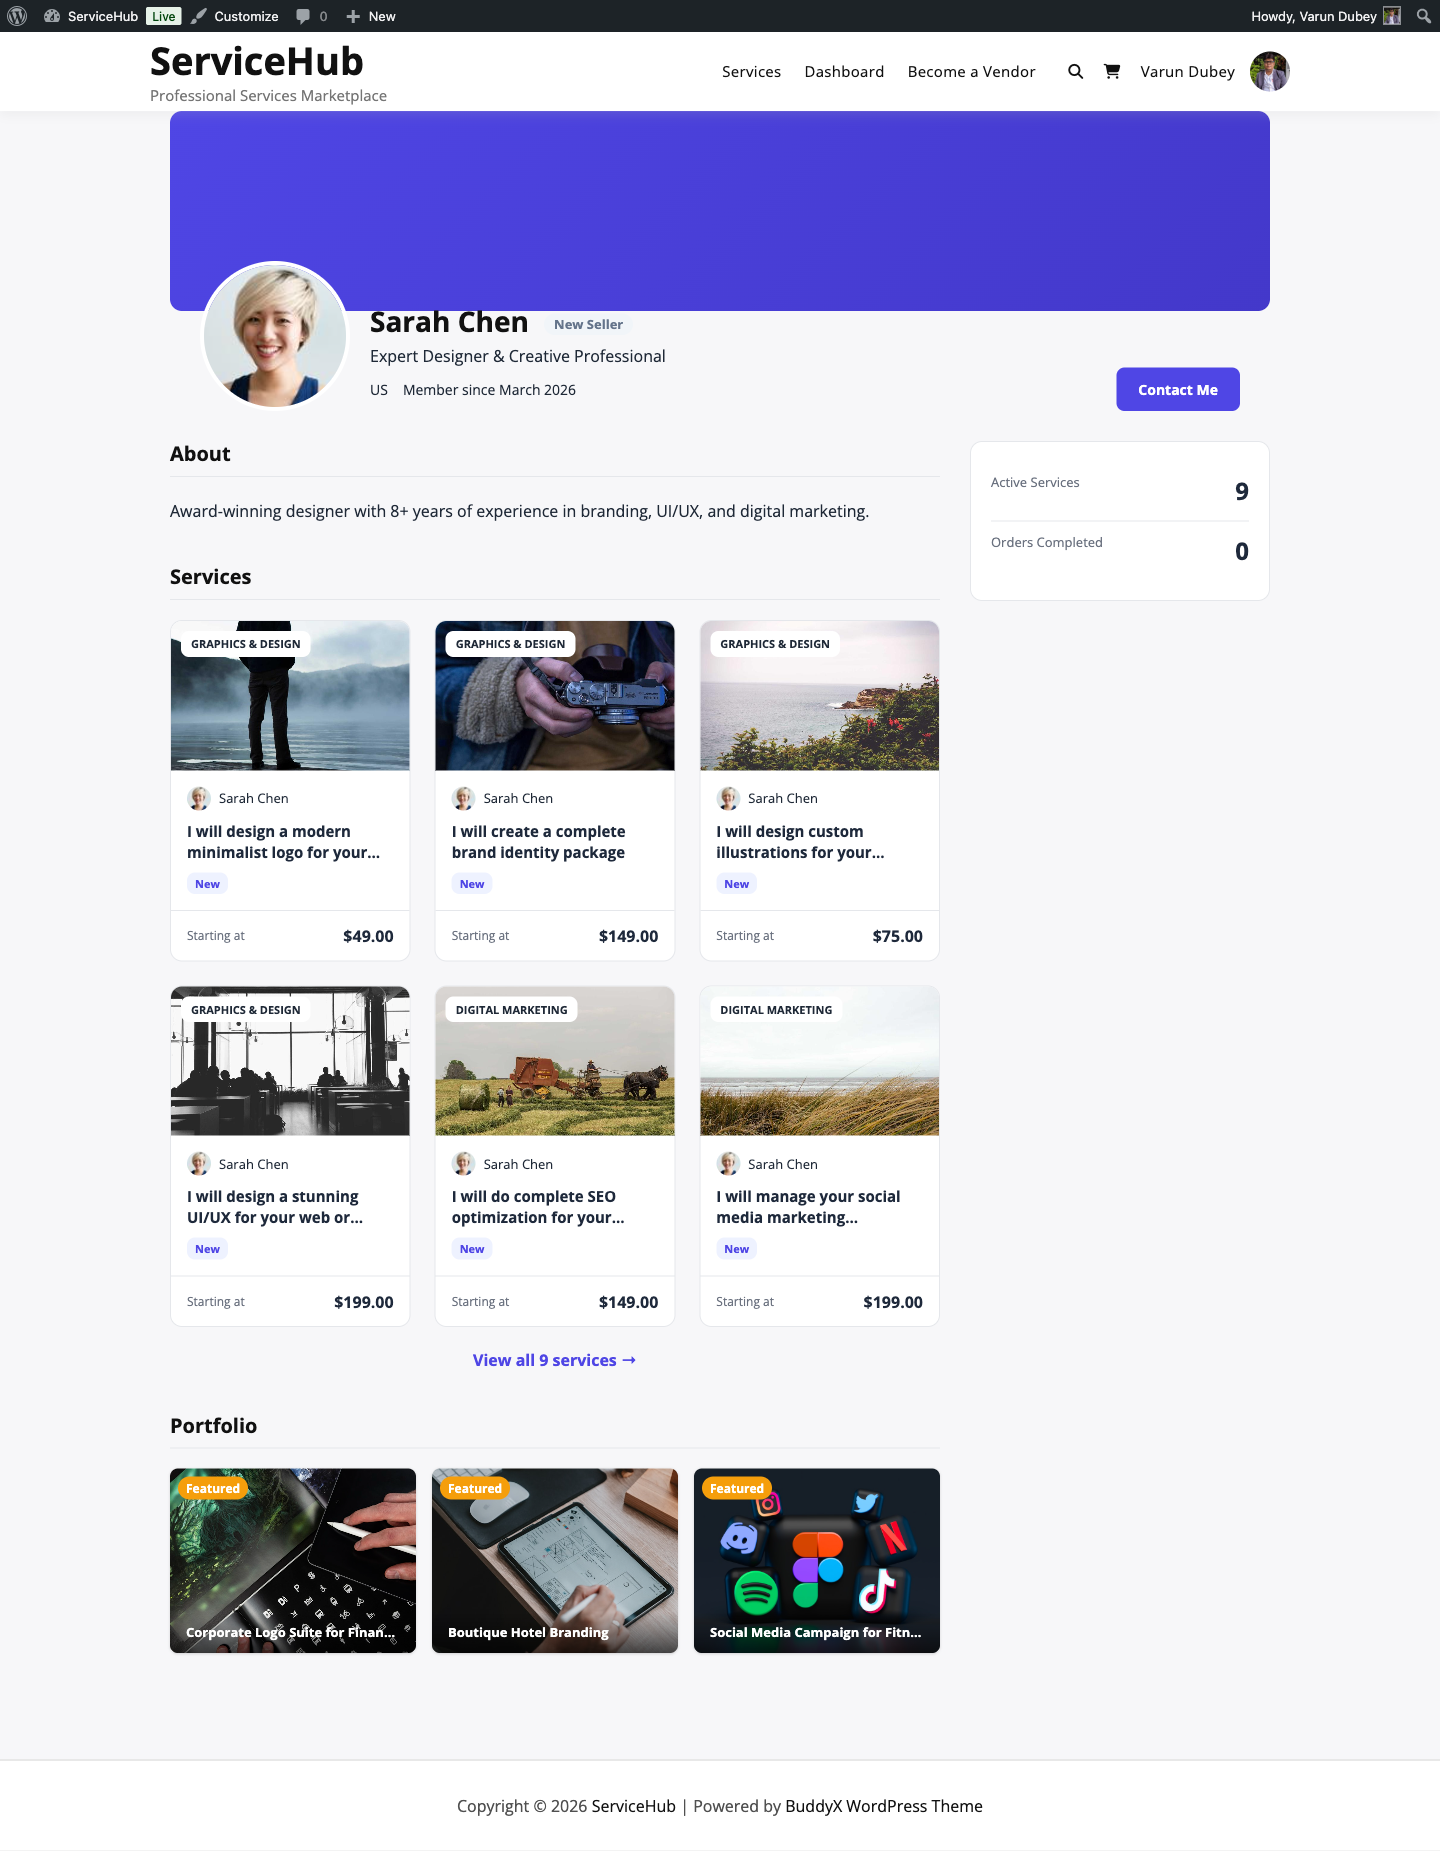
hold | resume | accept-cancellation | reject-cancellation

Changed in 1.4.0: accept and reject were removed. They had no handler behind them and returned a misleading success on some paths, so a client built against them was never actually transitioning anything. There is no replacement -- an order is accepted by being paid. deliver now routes through DeliveryService rather than writing the status directly, so a delivery made over REST produces the same records and notifications as one made in the dashboard.

curl -X POST https://yoursite.com/wp-json/wpss/v1/orders/42/deliver \
  -H "X-WP-Nonce: $NONCE"

/sub-orders lists the milestone, tip, and extension sub-orders attached to a parent order -- see Sub-Order Pattern.

GET /orders/{id}/timeline (new in 1.4.0) returns the merged, chronological event history for one order -- status transitions, deliveries, revisions, milestone and extension events, and payment events -- as a single list. It is what an order-detail screen renders instead of stitching four endpoints together.

Paying an order or a phase

POST /orders/{id}/pay and POST /milestones/{id}/pay do not take money. They resolve where the buyer must go to pay, and enforce the milestone lock-step guard while doing so.

POST /orders/{id}/pay -- 200:

{
  "success": true,
  "order_id": 42,
  "checkout_url": "https://yoursite.com/checkout/order-pay/1042/?key=wc_order_…",
  "platform": "milestone"
}

platform is the sub-order type when the row is one (milestone, tip, extension) and an empty string for a normal order.

POST /milestones/{id}/pay -- 200:

{
  "success": true,
  "milestone_id": 57,
  "checkout_url": "https://yoursite.com/checkout/order-pay/1043/?key=wc_order_…"
}

Errors on both:

Status Code When
404 wpss_order_not_found / wpss_milestone_not_found No such row, or the row is not a milestone
409 wpss_order_not_payable / wpss_milestone_not_payable The row is not in pending_payment
409 wpss_milestone_locked An earlier phase is still open

checkout_url is a BROWSER url, not an API endpoint

This is the single most common way to get this wrong. checkout_url is a page for a human, resolved through the wpss_pay_order_url filter by whatever e-commerce rail is active. Do not fetch it, do not parse it, do not reconstruct it. A native client must open it in a webview (or the system browser) and watch for the return URL.

On the WooCommerce rail it is a WooCommerce order-pay page (/checkout/order-pay/{wc_id}/?key=…), rendered by WooCommerce with whatever gateways the store has enabled. There is no JSON behind it.

Side effect on Woo: generating this URL creates a real WooCommerce order. Pro's WCPayOrderResolver creates (or reuses) an unpaid WC order for the amount owed so the link survives an email with no cart session. It is idempotent -- the WC order id is stored on the WPSS row as wc_pay_order_id and reused while the order still needs payment -- but calling /pay speculatively on a site with Woo active still puts a pending order in the store. Call it when the buyer is actually about to pay.

On the standalone rail it is …/checkout/?pay_order={id} and nothing is created.

EDD, FluentCart and SureCart have no pay-order rail at all. They do not hook the filter, so checkout_url falls back to the standalone ?pay_order=N URL, which those checkouts do not understand -- the buyer lands on an empty cart. See WooCommerce Checkout for the support matrix.

Milestones

Method Route
GET, POST /orders/(?P<order_id>[\d]+)/milestones
GET, DELETE /milestones/(?P<id>[\d]+)
POST /milestones/(?P<id>[\d]+)/pay
POST /milestones/(?P<id>[\d]+)/submit
POST /milestones/(?P<id>[\d]+)/approve
POST /milestones/(?P<id>[\d]+)/decline

The terminal actions are approve and decline (not "reject") -- the same vocabulary as the milestone hooks.

Extensions and tips

Method Route
GET, POST /orders/(?P<order_id>[\d]+)/extensions
POST /orders/(?P<order_id>[\d]+)/extension
POST /extensions/(?P<id>[\d]+)/decline
GET, POST /orders/(?P<order_id>[\d]+)/tip
GET /vendors/(?P<vendor_id>[\d]+)/tips
GET /vendors/(?P<vendor_id>[\d]+)/tips/total

Vendors

Method Route
GET /vendors
GET /vendors/(?P<id>[\d]+)
GET, POST/PUT/PATCH /vendors/me
POST/PUT/PATCH /vendors/me/vacation
GET /vendors/(?P<id>[\d]+)/services
GET /vendors/(?P<id>[\d]+)/reviews
GET /vendors/(?P<id>[\d]+)/stats
POST /vendors/register

Seller levels

Method Route
GET /seller-levels
GET /seller-levels/(?P<level>[a-z_]+)
GET /vendors/me/level
GET /vendors/(?P<vendor_id>[\d]+)/level

Portfolio

Method Route
GET /vendors/(?P<vendor_id>[\d]+)/portfolio
GET, POST /portfolio
GET, POST/PUT/PATCH, DELETE /portfolio/(?P<id>[\d]+)
POST /portfolio/(?P<id>[\d]+)/featured
POST /portfolio/reorder

Reviews

Method Route
GET, POST /reviews
GET, POST/PUT/PATCH, DELETE /reviews/(?P<id>[\d]+)
POST /orders/(?P<order_id>[\d]+)/review
POST /reviews/(?P<id>[\d]+)/reply
POST /reviews/(?P<id>[\d]+)/helpful
GET /services/(?P<service_id>[\d]+)/reviews/summary
GET /vendors/(?P<vendor_id>[\d]+)/reviews/summary

Buyer requests and proposals

Method Route
GET, POST /buyer-requests
GET /buyer-requests/mine
GET, POST/PUT/PATCH, DELETE /buyer-requests/(?P<id>[\d]+)
GET, POST /buyer-requests/(?P<id>[\d]+)/proposals
POST /buyer-requests/(?P<id>[\d]+)/proposals/(?P<proposal_id>[\d]+)/accept
POST /buyer-requests/(?P<id>[\d]+)/proposals/(?P<proposal_id>[\d]+)/reject
GET, POST /proposals
GET, POST/PUT/PATCH /proposals/(?P<id>[\d]+)
POST /proposals/(?P<id>[\d]+)/withdraw
GET /proposals/stats

Conversations

Method Route
GET /conversations
GET /conversations/(?P<id>[\d]+)
GET, POST /conversations/(?P<id>[\d]+)/messages
POST /conversations/(?P<id>[\d]+)/read
GET /conversations/unread-count
GET /orders/(?P<order_id>[\d]+)/conversation
POST /orders/(?P<order_id>[\d]+)/conversation/messages

Disputes

Method Route
GET /disputes
GET /disputes/(?P<id>[\d]+)
GET, POST /orders/(?P<order_id>[\d]+)/dispute
POST /disputes/(?P<id>[\d]+)/respond
GET, POST /disputes/(?P<id>[\d]+)/evidence
GET /disputes/(?P<id>[\d]+)/timeline
POST /disputes/(?P<id>[\d]+)/escalate
POST /disputes/(?P<id>[\d]+)/cancel
POST /disputes/(?P<id>[\d]+)/resolve
POST /disputes/(?P<id>[\d]+)/assign
GET /disputes/options

resolve and assign require dispute-management capability. See Admin Mediation.

Earnings and withdrawals

Method Route
GET /earnings/summary
GET /earnings/history
GET /wallet/transactions
GET, POST /withdrawals
POST/PUT/PATCH /withdrawals/(?P<id>[\d]+)
GET /withdrawals/methods

Payments (free) -- standalone rail only

Method Route
GET /payments/methods
POST /payments/create-intent
POST /payments/confirm

These are the standalone checkout payment routes shipped in free. Pro replaces them with a wider, gateway-specific set -- see Payments (Pro).

These routes do not exist on every site. As of 1.4.0 the whole controller is skipped unless wpss_uses_standalone_payments() is true (src/API/PaymentController.php). With WooCommerce, EDD, FluentCart or SureCart enabled, that rail owns all payment and these routes are never registered -- a client calling them gets 404 rest_no_route. Do not treat that as an error to retry: check GET /wpss/v1 (or GET /settings) and send the buyer to the rail's own checkout instead.

Switching rails never rewrites past orders -- an order paid through a gateway keeps its record, and that gateway's webhooks keep working.

Cart

Method Route
GET /cart
POST /cart/add
DELETE /cart/(?P<item_key>[a-z0-9]+)
POST /cart/checkout

Cart items are addressed by item_key, not by service id -- one service can appear more than once with different packages and add-ons.

Authentication

Authentication ships in the free plugin, not Pro.

Method Route
POST /auth/login
POST /auth/register
POST /auth/logout
GET /auth/me
POST /auth/forgot-password
POST /auth/change-password
GET, POST /auth/devices
DELETE /auth/devices/(?P<device_id>[a-zA-Z0-9_-]+)

/auth/devices registers a device for push notifications -- what a mobile client calls after login.

Favorites, media, notifications, moderation, audit log

Method Route
GET /favorites
POST, DELETE /favorites/(?P<service_id>[\d]+)
GET /services/(?P<service_id>[\d]+)/favorited
GET, POST /media
GET, DELETE /media/(?P<id>[\d]+)
GET /notifications
GET /notifications/unread-count
POST /notifications/(?P<id>[\d]+)/read
POST /notifications/read-all
DELETE /notifications/(?P<id>[\d]+)
GET /moderation/pending
GET /moderation/count
GET /moderation/(?P<service_id>[\d]+)
POST /moderation/(?P<service_id>[\d]+)/approve
POST /moderation/(?P<service_id>[\d]+)/reject
GET /audit-log

Realtime

Method Route
POST /realtime/auth

Private-channel authorization for the realtime (WebSocket) layer. The plugin speaks the Pusher protocol, so this works with Pusher.com or any self-hosted Pusher-compatible server (e.g. Soketi). Client connection settings (key, host, cluster, port, TLS) are exposed under the realtime key of GET /settings; the app secret never leaves the server.

POST /realtime/auth

Authorize a private-channel subscription per the Pusher auth contract. Called automatically by the bundled wpss-realtime.js client (with the X-WP-Nonce header); external clients can call it with any supported authentication method.

Authentication Required: Yes (logged-in user)

Parameters:

  • socket_id (string, required) - Pusher socket ID of the connecting client (format 123.456)
  • channel_name (string, required) - Private channel to subscribe to

Allowed channels:

  • private-wpss-user-{ID} - Only the user themself
  • private-wpss-order-{ID} - The order's customer, its vendor, or administrators

Response (200):

{
  "auth": "app_key:hmac_sha256_signature"
}

Errors:

  • 401 rest_not_logged_in - Not authenticated
  • 403 wpss_realtime_forbidden - Channel not owned by the current user (any channel outside the two shapes above is also refused)
  • 404 wpss_realtime_disabled - Realtime is not enabled/configured on this site

Example:

curl -X POST \
  https://yoursite.com/wp-json/wpss/v1/realtime/auth \
  -u "username:xxxx xxxx xxxx xxxx" \
  -d "socket_id=1234.5678" \
  -d "channel_name=private-wpss-user-45"

Events published by the plugin:

  • notification.created on private-wpss-user-{ID} - payload { id, type }
  • message.created on private-wpss-order-{ID} and the recipient's private-wpss-user-{ID} - payload { order_id, sender_id, message_id, excerpt }

Pro controllers [PRO]

Available only when WP Sell Services Pro is active with a valid license.

Payments (Pro)

Method Route
GET /payments/methods
POST /payments/stripe/create-intent
POST /payments/stripe/confirm
POST /payments/paypal/create-order
POST /payments/paypal/capture
POST /payments/razorpay/create-order
POST /payments/razorpay/verify
POST /payments/offline/submit
GET /payments/(?P<order_id>[\d]+)/status

Wallet

Method Route
GET /wallet/balance
GET /wallet/transactions
POST /wallet/withdraw
GET /wallet/withdrawals
GET /wallet/providers

Stripe Connect

Method Route
POST /stripe-connect/onboard
GET /stripe-connect/status
POST /stripe-connect/disconnect
GET /stripe-connect/accounts
GET /stripe-connect/accounts/(?P<vendor_id>[\d]+)
GET, POST/PUT/PATCH /stripe-connect/settings

PayPal mass payouts

Method Route
GET, POST /paypal-payouts/batches
GET /paypal-payouts/batches/(?P<id>[\d]+)
POST /paypal-payouts/batches/(?P<id>[\d]+)/sync
GET /paypal-payouts/pending
GET, POST/PUT/PATCH /paypal-payouts/profile

/pending is what an owner exports to pay vendors manually; sync reconciles a submitted batch back against the wallet ledger.

Commission rules

Method Route
GET, POST /commission-rules
GET /commission-rules/preview
GET, POST/PUT/PATCH, DELETE /commission-rules/(?P<id>[\d]+)

preview resolves which rule would apply to a given vendor/category/amount without persisting anything -- use it to explain a rate in your own UI.

Vendor subscription plans

Method Route
GET, POST /subscription-plans
GET, POST/PUT/PATCH, DELETE /subscription-plans/(?P<id>[\d]+)
GET /subscription-plans/my-subscription
POST, DELETE /subscription-plans/subscribe

Recurring services

Method Route
GET, POST /recurring-services
GET /recurring-services/(?P<id>[\d]+)
GET /recurring-services/my-subscriptions
GET /recurring-services/vendor-subscriptions
POST /recurring-services/(?P<id>[\d]+)/cancel
POST /recurring-services/(?P<id>[\d]+)/pause
POST /recurring-services/(?P<id>[\d]+)/resume

Recurring services sit behind a default-off feature flag in 1.3.0. The routes register, but the feature's UI is hidden until you opt in -- see Recurring Services.

Analytics

Method Route Scope
GET /analytics/overview Marketplace-wide -- admin only
GET /analytics/revenue Marketplace-wide -- admin only
GET /analytics/vendor/overview The calling vendor
GET /analytics/vendor/revenue The calling vendor
GET /analytics/vendor/orders The calling vendor
GET /analytics/vendor/services The calling vendor
POST /analytics/export Queue a data export

The two un-prefixed routes (/analytics/overview, /analytics/revenue) are the platform-owner numbers and were previously undocumented; the /vendor/* ones are scoped to whoever is calling. /analytics/export is POST, not GET -- it starts an export rather than returning one.

/analytics/revenue takes period, one of 7days | 30days (default) | 90days | 12months.

Both admin routes register even on an unlicensed site, deliberately: an unlicensed call answers 403 wpss_pro_license_required rather than 404 rest_no_route, so a client can tell "you need a license" apart from "this build does not have that endpoint". Anonymous callers get 401 rest_not_logged_in; a logged-in non-admin gets 403.

Cloud storage

Method Route
POST /storage/upload
GET /storage/(?P<file_id>[\d]+)/url
DELETE /storage/(?P<file_id>[\d]+)
GET /storage/providers

/storage/{file_id}/url returns a time-limited signed URL. Do not cache it past its expiry.

White label

Method Route
GET, POST/PUT/PATCH /white-label

Returns the active branding (name, logo, colors) so a headless or mobile client can render the same identity as the site.

Hooks and Filters Reference

WP Sell Services and WP Sell Services Pro fire 454 actions and filters between them.

This page covers the behavioural surface -- services, orders, delivery, money, disputes, REST, and the Pro seams -- each with its parameters and the source file that fires it.

Template hooks are on their own page. The ~110 wpss_before_* / wpss_after_* markup slots, the dashboard section hooks, and the display filters are documented next to the templates that fire them, in Template Overrides. Use that page when you want to inject markup rather than change behaviour.

Between the two, 377 of the 454 hooks are documented. The rest are internal and may change without notice -- if you need one, open a support request and we will promote it rather than have you bind to a moving target.

Verify before you ship. Hook names and signatures on this page are checked against the 1.3.0 source. Some names in pre-1.3.0 documentation were never fired at all -- if a callback of yours has silently stopped running, search this page for the hook name before assuming a regression.

Using Hooks

// Actions execute code at specific points
add_action( 'wpss_order_status_changed', 'my_func', 10, 3 );
function my_func( $order_id, $new_status, $old_status ) {
    // Your code here
}

// Filters modify data before it is used
add_filter( 'wpss_review_window_days', fn( $days ) => 14 );

Plugin Lifecycle Actions

Hook Parameters File
wpss_loaded Plugin $plugin Plugin.php:261
wpss_adapter_initialized EcommerceAdapterInterface $adapter IntegrationManager.php:124
wpss_register_field_types FieldManager $manager FieldManager.php:59

wpss_loaded is the primary extension hook. All Pro features register here:

add_action( 'wpss_loaded', function( $plugin ) {
    // Plugin is ready - register extensions
}, 10, 1 );

Service Actions

Hook Parameters File
wpss_service_created int $post_id, array $data ServiceManager.php:144
wpss_service_updated int $service_id, array $data ServiceManager.php:225

Service Filters

Filter Parameters File
wpss_pre_create_service array $data ServiceManager.php
wpss_pre_update_service array $data, int $service_id ServiceManager.php
wpss_before_service_deleted int $service_id ServiceManager.php:259
wpss_service_meta_saved int $post_id, WP_Post $post ServiceMetabox.php:1052
wpss_rest_service_created int $service_id, WP_REST_Request $request ServicesController.php:321
wpss_rest_service_updated int $service_id, WP_REST_Request $request ServicesController.php:386
wpss_rest_service_deleted int $service_id, bool $force ServicesController.php:431

Moderation Actions

Hook Parameters File
wpss_service_approved int $service_id, string $notes ModerationService.php:181
wpss_service_rejected int $service_id, string $reason ModerationService.php:233
wpss_service_pending_moderation int $service_id ModerationService.php:273

Order Actions

Hook Parameters File
wpss_order_status_changed int $order_id, string $new_status, string $old_status OrderService.php:196
wpss_order_status_{status} int $order_id, string $old_status OrderService.php:197
wpss_order_created int $order_id, string $status ManualOrderPage.php:716

Order Filters

Filter Parameters File
wpss_pre_create_order array $order_data StandaloneOrderProvider.php
wpss_pre_order_status_change bool $allow, int $order_id, string $new_status, string $old_status OrderService.php
wpss_order_started int $order_id OrdersController.php:747
wpss_order_completed int $order_id, object $order OrderWorkflowManager.php:685
wpss_order_cancelled int $order_id, int $user_id, string $reason OrderService.php:427
wpss_order_disputed int $order_id, int $opened_by, string $reason OrdersController.php:670
wpss_order_message_created int $message_id, int $order_id, int $user_id OrdersController.php:406
wpss_order_requirements_submitted int $order_id, array $requirements OrdersController.php:839
wpss_after_status_change_notification int $order_id, string $new_status, string $old_status OrderWorkflowManager.php:638
wpss_send_requirements_reminder_email int $order_id, int $reminder_num, string $message OrderWorkflowManager.php:338
wpss_requirements_timeout int $order_id, bool $auto_start OrderWorkflowManager.php:472

Removed in 1.4.0: wpss_order_accepted, wpss_order_rejected, wpss_order_delivered. The first two went when the dead accept / reject order verbs were removed -- they never had a real transition behind them. wpss_order_delivered went when deliver was routed through DeliveryService, which already fires its own, better-shaped hooks.

Rebind as follows:

Was Use instead
wpss_order_accepted wpss_order_paid, or wpss_order_status_changed -- an order is accepted by being paid
wpss_order_rejected wpss_order_cancelled
wpss_order_delivered wpss_delivery_submitted ($delivery_id, $order_id) or wpss_delivery_accepted ($order_id)

All three are gone from the source, so a callback still bound to them runs never -- silently. Grep your integrations.

Delivery Actions

Delivery Filters

Filter Parameters File
wpss_pre_submit_delivery array $delivery_data, int $order_id DeliveryService.php
Hook Parameters File
wpss_delivery_submitted int $delivery_id, int $order_id DeliveryService.php:127
wpss_delivery_accepted int $order_id DeliveryService.php:168
wpss_revision_requested int $order_id, string $reason DeliveryService.php:234
wpss_requirements_submitted int $order_id, array $field_data, array $attachments RequirementsService.php:461
wpss_cancellation_requested int $order_id, int $user_id, string $reason, string $note OrderService.php:598
wpss_order_auto_refunded int $order_id, object $order, mixed $refund_result OrderWorkflowManager.php:861
wpss_new_order_message int $order_id, int $sender_id, string $content ConversationService.php:337

Payment and Gateway Actions

These hooks fire during payment processing, gateway interactions, and checkout flow.

Standalone Adapter

Hook Parameters File
wpss_standalone_adapter_init StandaloneAdapter $adapter StandaloneAdapter.php:155
wpss_standalone_checkout_processed int $order_id, array $order_data StandaloneCheckoutProvider.php:133
wpss_standalone_order_complete object $order StandaloneOrderProvider.php:688
wpss_order_paid int $order_id, string $transaction_id StandaloneOrderProvider.php:391
wpss_order_status_pending_requirements int $order_id, string $old_status StandaloneOrderProvider.php:383
wpss_payment_callback string $gateway_id StandaloneAdapter.php:232

Offline Gateway

Hook Parameters File
wpss_offline_multi_orders_created array $order_ids, int $customer_id OfflineGateway.php:387
wpss_offline_order_created int $order_id, object $order OfflineGateway.php:484
wpss_offline_order_paid int $order_id, string $transaction_id OfflineGateway.php:561

Stripe Gateway

Hook Parameters File
wpss_stripe_webhook_received string $event_type, object $data, string $payload StripeGateway.php:313
wpss_stripe_refund_processed string $payment_intent_id, object $charge StripeGateway.php:1023

PayPal Gateway

Hook Parameters File
wpss_paypal_refund_processed string $url, array $resource PayPalGateway.php:1094

Payment REST API

Hook Parameters File
wpss_rest_offline_order_created int $order_id, object $order, string $gateway_id PaymentController.php:440

Payment Filters

Filter Parameters File
wpss_stripe_payment_intent_args array $params, int $order_id, int $vendor_id StripeGateway.php:181
wpss_rest_create_payment_intent null, object $gateway, float $amount, string $currency, int $service_id, int $package_id, object $pay_order PaymentController.php:254
wpss_rest_confirm_payment null, object $gateway, string $payment_id, int $service_id, int $package_id, object $pay_order PaymentController.php:303
wpss_checkout_tax_rate float $tax_rate, int $vendor_id, int $service_id StandaloneCheckoutProvider.php:401

wpss_stripe_payment_intent_args lets you modify Stripe PaymentIntent parameters before creation:

add_filter( 'wpss_stripe_payment_intent_args', function( $params, $order_id, $vendor_id ) {
    $params['metadata']['custom_field'] = 'value';
    return $params;
}, 10, 3 );

wpss_checkout_tax_rate lets you apply different tax rates per vendor or service:

add_filter( 'wpss_checkout_tax_rate', function( $rate, $vendor_id, $service_id ) {
    // Apply 15% tax for services in a specific category
    if ( has_term( 'consulting', 'wpss_service_category', $service_id ) ) {
        return 15.0;
    }
    return $rate;
}, 10, 3 );

Data Cascade Actions

These hooks fire when services, requests, or users are deleted and related data is cleaned up. Use them for custom cleanup logic.

Hook Parameters File
wpss_before_cascade_delete_service int $service_id DataCascadeHandler.php:101
wpss_after_cascade_delete_service int $service_id DataCascadeHandler.php:139
wpss_before_cascade_delete_request int $request_id DataCascadeHandler.php:155
wpss_after_cascade_delete_request int $request_id DataCascadeHandler.php:166
wpss_before_cascade_delete_user int $user_id DataCascadeHandler.php:182
wpss_after_cascade_delete_user int $user_id DataCascadeHandler.php:226
// Clean up custom data when a service is deleted
add_action( 'wpss_before_cascade_delete_service', function( $service_id ) {
    global $wpdb;
    $wpdb->delete( $wpdb->prefix . 'my_custom_table', [ 'service_id' => $service_id ] );
} );

Vendor Actions

Vendor Filters

Filter Parameters File
wpss_pre_vendor_register array $profile_data, int $user_id VendorService.php
wpss_vendor_profile_allowed_fields array $allowed_fields VendorService.php
Hook Parameters File
wpss_vendor_registered int $user_id, array $profile_data VendorService.php:131
wpss_vendor_profile_updated int $user_id, array $filtered_data VendorService.php:250
wpss_vendor_vacation_mode_changed int $user_id, bool $enabled, string $message VendorService.php:299
wpss_vendor_tier_changed int $user_id, string $tier VendorService.php:340
wpss_vendor_level_promoted int $user_id, string $new_level, string $current_level OrderWorkflowManager.php:539
wpss_vendor_level_updated int $user_id, string $level SellerLevelService.php:299
wpss_vendor_status_updated int $vendor_id, string $status VendorsPage.php:1583
wpss_vendor_commission_updated int $vendor_id, float $rate VendorsPage.php:1884
wpss_vendor_contacted int $vendor_id, int $user_id, int $service_id, string $message, array $attachments AjaxHandlers.php:2052
wpss_vendor_access_granted int $user_id VendorService.php:356
wpss_vendor_access_revoked int $user_id VendorService.php:401

Financial Actions

Financial Filters

Filter Parameters File
wpss_commission_base_amount float $base_amount, int $order_id, int $vendor_id CommissionService.php
Hook Parameters File
wpss_commission_recorded int $order_id, array $commission, int $vendor_id CommissionService.php:116
wpss_withdrawal_requested int $withdrawal_id, int $vendor_id, float $amount EarningsService.php:344
wpss_withdrawal_processed int $withdrawal_id, string $status, object $withdrawal EarningsService.php:489
wpss_auto_withdrawal_created int $withdrawal_id, int $vendor_id, float $amount EarningsService.php:866
wpss_tip_order_created int $tip_order_id, int $parent_order_id, int $customer_id, float $amount TippingService.php:280
wpss_tip_sent int $tip_txn_id, int $parent_order_id, int $vendor_id, int $customer_id, float $vendor_earnings, string $vendor_notes TippingService.php:482

wpss_tip_order_created fires when the tip checkout is started; wpss_tip_sent fires only once the tip is actually paid and credited. The first argument of wpss_tip_sent is the wallet transaction id, not the tip order id, and the amount passed is the vendor's net earnings after commission -- not the gross tip. Tips are excluded from commission by default, so the two usually match.

Dispute Actions

Dispute Filters

Filter Parameters File
wpss_pre_open_dispute array $dispute_data, int $order_id DisputeService.php
Hook Parameters File
wpss_dispute_opened int $dispute_id, int $order_id, int $opened_by, array $data DisputeService.php:132
wpss_dispute_evidence_added int $dispute_id, int $user_id DisputeService.php:248
wpss_dispute_status_changed int $dispute_id, string $status, string $old_status DisputeService.php:334
wpss_dispute_resolved int $dispute_id, string $resolution, object $dispute, float $refund_amount DisputeService.php:400
wpss_dispute_response_submitted int $message_id, int $dispute_id, int $user_id DisputeWorkflowManager.php:193
wpss_dispute_escalated int $dispute_id, string $reason, int $escalated_by DisputeWorkflowManager.php:321
wpss_dispute_cancelled int $dispute_id, int $user_id, string $reason DisputeWorkflowManager.php:463

Review, Request, and Proposal Actions

Review Filters

Filter Parameters File
wpss_pre_create_review array $review_data, int $order_id ReviewService.php
Hook Parameters File
wpss_review_created int $review_id, int $order_id ReviewService.php:120
wpss_review_reply_created int $review_id ReviewsController.php:542
wpss_buyer_request_created int $post_id, array $data BuyerRequestService.php:112
wpss_buyer_request_updated int $request_id, array $data BuyerRequestService.php:164
wpss_buyer_request_status_changed int $request_id, string $status, string $old_status BuyerRequestService.php:425
wpss_request_converted_to_order int $order_id, int $request_id, int $proposal_id, object $request, object $proposal BuyerRequestService.php:704
wpss_proposal_submitted int $proposal_id, int $request_id, int $vendor_id, array $proposal_data ProposalService.php:136
wpss_proposal_updated int $proposal_id, array $update_data ProposalService.php:229
wpss_proposal_accepted int $proposal_id, object $proposal, object $request ProposalService.php:283
wpss_proposal_rejected int $proposal_id, object $proposal, string $reason ProposalService.php:331
wpss_proposal_withdrawn int $proposal_id, object $proposal ProposalService.php:373
wpss_proposal_deleted int $proposal_id, object $proposal ProposalService.php:665
wpss_proposal_status_updated int $proposal_id, string $status ProposalService.php:418
wpss_buyer_request_deleted int $request_id BuyerRequestService.php:897
wpss_buyer_request_meta_saved int $post_id, WP_Post $post BuyerRequestMetabox.php:341

Milestone and Extension Actions

A milestone is a sub-order of the parent order, so every hook passes both ids: $milestone_id is the sub-order, $order_id is the parent. See Sub-Order Pattern.

Hook Parameters File
wpss_milestone_proposed int $milestone_id, int $order_id, int $vendor_id MilestoneService.php:262
wpss_milestone_paid int $milestone_id, int $order_id, int $vendor_id, int $customer_id, float $vendor_earnings MilestoneService.php:411
wpss_milestone_submitted int $milestone_id, int $order_id, int $vendor_id, int $customer_id MilestoneService.php:483
wpss_milestone_approved int $milestone_id, int $order_id, int $vendor_id, int $customer_id MilestoneService.php:536
wpss_milestone_declined int $milestone_id, int $order_id, int $customer_id MilestoneService.php:591
wpss_extension_request_created int $request_id, int $order_id, array $data (requested_by, extra_days, reason) ExtensionRequestService.php:249
wpss_extension_request_approved int $request_id, object $request ExtensionRequestService.php:371
wpss_extension_request_rejected int $request_id, object $request ExtensionRequestService.php:455

Renamed in 1.3.0. The milestone lifecycle uses proposed and declined, not created and rejected -- see Milestone terminology. wpss_milestone_created, wpss_milestone_rejected, wpss_extension_requested and wpss_extension_approved were listed in earlier docs but are not fired by the plugin. Callbacks bound to those names never run. Note also that wpss_milestone_approved passes $vendor_id as its third argument, not an amount -- if you need the money, read it from the sub-order or hook wpss_milestone_paid.

Admin and Settings Actions

These hooks fire in the WordPress admin area for order management, service meta, and settings pages.

Hook Parameters File
wpss_admin_order_actions object $order, string $status OrderMetabox.php:831
wpss_admin_requirements_submitted int $order_id, array $field_data OrderMetabox.php:1097
wpss_gateway_cards Settings $settings Settings.php:1341

Admin Filters

Filter Parameters File
wpss_service_meta_fields array $fields, int $post_id ServiceMetabox.php:155
wpss_pro_upgrade_url string $url (default https://wpsellservices.com/) UpgradePage.php, ServiceWizard.php:961
wpss_docs_url string $url (default https://wpsellservices.com/docs/) UpgradePage.php:349

wpss_pro_upgrade_url (added 1.3.0) controls where every "Upgrade to Pro" call-to-action points - the admin upgrade screen and the in-wizard prompts. Point it at your own landing page or an in-site URL:

add_filter( 'wpss_pro_upgrade_url', function( $url ) {
    return home_url( '/go-pro/' );
} );

Dashboard Menu Visibility Filters

Added in 1.3.0. Role-based menu visibility lets you show or hide dashboard sections per user role. Gate a section programmatically with:

Filter Parameters File
wpss_can_access_dashboard_section bool $can_access, string $section, int $user_id MenuVisibility.php
// Hide the "Earnings" section from a custom role
add_filter( 'wpss_can_access_dashboard_section', function( $can, $section, $user_id ) {
    if ( 'earnings' === $section && user_can( $user_id, 'my_limited_role' ) ) {
        return false;
    }
    return $can;
}, 10, 3 );

Currency Display Filters

Filter Parameters File
wpss_catalog_price_html string $html, float $amount, string $context functions.php:111

wpss_catalog_price_html (added 1.3.0) is the single seam for catalog price display. Base currency is authoritative for all stored amounts; this filter is where an add-on (such as the Pro display-currency hint) injects a converted, visitor-facing price without changing the stored value.

// Add custom fields to the service meta box in wp-admin
add_filter( 'wpss_service_meta_fields', function( $fields, $post_id ) {
    $fields['custom_field'] = [
        'label' => 'Custom Field',
        'type'  => 'text',
        'value' => get_post_meta( $post_id, '_wpss_custom_field', true ),
    ];
    return $fields;
}, 10, 2 );

Service Wizard Actions

Hook Parameters File
wpss_service_wizard_saved int $service_id, array $sanitized_data ServiceWizard.php:1603
wpss_wizard_pricing_after WP_Post|null $service ServiceWizard.php
wpss_wizard_save_service_meta int $service_id, array $data ServiceWizard.php

Service Wizard Filters

Filter Parameters File
wpss_vendor_can_create_service bool $can_create, int $user_id ServiceWizard.php:288
wpss_services_per_page int $per_page (default 12) ServiceArchiveView.php:525
wpss_wizard_service_data array $data, int $service_id ServiceWizard.php
wpss_wizard_sanitize_service_data array $sanitized, array $raw ServiceWizard.php
// Prevent unverified vendors from creating services
add_filter( 'wpss_vendor_can_create_service', function( $allowed, $user_id ) {
    if ( ! get_user_meta( $user_id, '_wpss_identity_verified', true ) ) {
        return false;
    }
    return $allowed;
}, 10, 2 );

Wizard Extension Surface (Add-on Integration - 1.2.0)

These four hooks form the contract that lets add-ons (such as Pro's recurring billing) inject fields into the frontend Create/Edit Service wizard without patching core files.

wpss_wizard_service_data - seed extra keys into the wizard's edit-form data model so they pre-fill when a vendor edits an existing service:

add_filter( 'wpss_wizard_service_data', function( $data, $service_id ) {
    $data['my_billing_cycle'] = get_post_meta( $service_id, '_wpss_billing_cycle', true ) ?: 'one_time';
    return $data;
}, 10, 2 );

wpss_wizard_pricing_after - render extra fields after the Pricing step. Markup runs inside the wizard's Alpine.js scope; bind inputs with x-model="data.your_key":

add_action( 'wpss_wizard_pricing_after', function( $service ) {
    ?>
    <div class="wpss-field-group">
        <label><?php esc_html_e( 'Billing cycle', 'my-addon' ); ?></label>
        <select x-model="data.my_billing_cycle">
            <option value="one_time"><?php esc_html_e( 'One-time', 'my-addon' ); ?></option>
            <option value="monthly"><?php esc_html_e( 'Monthly', 'my-addon' ); ?></option>
        </select>
    </div>
    <?php
} );

wpss_wizard_sanitize_service_data - sanitize your injected keys from the untrusted client JSON payload before save:

add_filter( 'wpss_wizard_sanitize_service_data', function( $sanitized, $raw ) {
    $allowed = [ 'one_time', 'monthly', 'yearly' ];
    $sanitized['my_billing_cycle'] = in_array( $raw['my_billing_cycle'] ?? '', $allowed, true )
        ? $raw['my_billing_cycle']
        : 'one_time';
    return $sanitized;
}, 10, 2 );

wpss_wizard_save_service_meta - persist your custom meta. Fires on both save-draft and publish (unlike wpss_service_wizard_saved, which fires on publish only):

add_action( 'wpss_wizard_save_service_meta', function( $service_id, $data ) {
    if ( isset( $data['my_billing_cycle'] ) ) {
        update_post_meta( $service_id, '_wpss_billing_cycle', $data['my_billing_cycle'] );
    }
}, 10, 2 );

Dashboard Actions

Hook Parameters File
wpss_dashboard_section_before_content string $section, int $user_id UnifiedDashboard.php:529

Dashboard Filters

Filter Parameters File
wpss_dashboard_default_section string $section, int $user_id UnifiedDashboard.php
// Add a notice at the top of the earnings dashboard section
add_action( 'wpss_dashboard_section_before_content', function( $section, $user_id ) {
    if ( 'earnings' === $section ) {
        echo '<div class="wpss-notice">Minimum withdrawal is $50.</div>';
    }
}, 10, 2 );

wpss_dashboard_default_section - the landing section when no section is in the URL. Defaults to sales for active vendors and orders for buyers:

// Always land on the messages section regardless of role
add_filter( 'wpss_dashboard_default_section', function( $section, $user_id ) {
    return 'messages';
}, 10, 2 );

Cart and Checkout Filters

Filter Parameters File
wpss_add_service_to_cart bool $added, array $cart_item, object $adapter AjaxHandlers.php:2524
wpss_pay_order_url string $url, int $order_id functions.php:3391

wpss_pay_order_url -- the payment-handoff seam

This is the one seam for "send the buyer somewhere they can pay THIS order." Every tip, milestone phase, paid extension and accepted proposal resolves its pay link through it -- on the order page, in the dashboard, in the REST checkout_url field, and in the emails the plugin sends.

Never rebuild that URL inline. Code that does is correct on the standalone rail and broken on every other one.

// The helper. Call this; do not re-author it.
$url = wpss_get_pay_order_url( $order_id );   // src/functions.php:3375

Default (unfiltered): <checkout page>?pay_order={id}. The standalone checkout understands that query arg and renders the single order.

Why it needs a filter at all: a cart-based rail has no concept of "pay this existing order." Appending ?pay_order=N to a WooCommerce checkout URL lands the buyer on an empty cart with no way to pay and no error message -- which is exactly what every tip, milestone and extension link did in Woo mode before 1.4.0.

Who hooks it:

Rail Hooks it? What the buyer gets
Standalone n/a (the default) ?pay_order=N on the plugin's own checkout
WooCommerce Yes -- WCPayOrderResolver (Pro) A native WC order-pay URL
EDD No The unfiltered default -> empty cart
FluentCart No The unfiltered default -> empty cart
SureCart No The unfiltered default -> empty cart

Two things to know before you hook it:

  1. It is called speculatively. Rendering the order page asks for a pay URL for every unpaid phase, and MilestoneService::propose() asks for one when the phase is created. A resolver that has side effects (Woo's creates a WC order) will have them at render time, not at click time -- so make yours idempotent, as WCPayOrderResolver is.
  2. It is not a security gate. The milestone lock-step guard lives on the checkout side, not here. Returning a URL for a locked phase is possible and the plugin's own Woo resolver does it.
// Point a custom rail at its own pay page.
add_filter( 'wpss_pay_order_url', function ( string $url, int $order_id ): string {
    $order = wpss_get_order( $order_id );
    if ( ! $order || 'paid' === ( $order->payment_status ?? '' ) ) {
        return $url;
    }
    return my_gateway_build_pay_page( $order_id, (float) $order->total );
}, 10, 2 );

See WooCommerce Checkout for the full WC implementation and the platform-support matrix.

Email Filters

These filters let you customize outgoing email content without modifying templates.

Filter Parameters File
wpss_email_from_name string $from_name EmailService.php:1118
wpss_email_header_vars array $template_vars, string $type EmailService.php:1102
wpss_vendor_pending_email_content string $content, object $user, string $platform_name NotificationService.php:1160
wpss_vendor_approved_email_content string $content, object $user, string $platform_name NotificationService.php:1293
wpss_vendor_rejected_email_content string $content, object $user, string $platform_name NotificationService.php:1361
// Change the "From" name on all marketplace emails
add_filter( 'wpss_email_from_name', function( $name ) {
    return 'DesignHub Marketplace';
} );

// Customize the vendor approval email content
add_filter( 'wpss_vendor_approved_email_content', function( $content, $user, $platform ) {
    $content .= '<p>Welcome aboard! Here are some tips to get started...</p>';
    return $content;
}, 10, 3 );

Other Actions

Other Filters

Filter Parameters File
wpss_pre_send_message array $message_data, int $conversation_id ConversationService.php
wpss_validate_add_to_cart bool $valid, int $service_id, int $package_id, int $user_id CartController.php
wpss_cart_item_data array $cart_item, int $service_id, int $package_id CartController.php
wpss_email_subject string $subject, string $type, string $to EmailService.php
wpss_search_query_args array $query_args, string $query SearchService.php
wpss_template_args array $args, string $template_name functions.php
Hook Parameters File
wpss_message_sent object $message, object $conversation ConversationService.php:223
wpss_notification_created int $notification_id, int $user_id, string $type, array $data NotificationService.php:80
wpss_portfolio_item_created int $item_id, int $vendor_id, array $data PortfolioService.php:194
wpss_portfolio_item_updated int $item_id, array $data PortfolioService.php:289
wpss_portfolio_item_deleted int $item_id, object $item PortfolioService.php:339
wpss_addon_created int $addon_id, int $service_id, array $addon_data ServiceAddonService.php:143
wpss_addon_updated int $addon_id, array $update_data ServiceAddonService.php:229
wpss_addon_deleted int $addon_id, object $addon ServiceAddonService.php:353
wpss_settings_tab_{tab} (none) Settings.php:985
wpss_advanced_settings_sections (none) Settings.php:1317

Filters

Provider Registration

Filter File Default
wpss_ecommerce_adapters IntegrationManager.php:67 Standalone only (Pro adds WooCommerce, EDD, FluentCart, SureCart)
wpss_payment_gateways Plugin.php:813 Test gateway (debug)
wpss_wallet_providers [PRO] Plugin.php:825 Empty
wpss_storage_providers [PRO] Plugin.php:837 Empty
wpss_email_providers [PRO] Plugin.php:849 Empty
wpss_analytics_widgets [PRO] Plugin.php:861 Empty

Service Wizard Limits

Filter File Free Default
wpss_service_max_packages ServiceWizard.php:116 3
wpss_service_max_gallery ServiceWizard.php:126 4
wpss_service_max_videos ServiceWizard.php:136 1
wpss_service_max_extras ServiceWizard.php:146 3
wpss_service_max_faq ServiceWizard.php:156 5
wpss_service_max_requirements ServiceWizard.php:166 5
wpss_service_wizard_features ServiceWizard.php:175 All false

Data Filters

Filter Parameters File
wpss_format_price $formatted, $price, $currency functions.php:68
wpss_currency $currency functions.php:91
wpss_platform_name $platform_name functions.php:117
wpss_is_vendor $is_vendor, $user_id functions.php:331
wpss_order_number_prefix $prefix (default 'WPSS-') functions.php:385
wpss_dispute_number_prefix $prefix (default 'DSP-') functions.php:397
wpss_currency_symbols $symbols functions.php:490
wpss_currency_format $format, $symbol, $currency functions.php:517
wpss_currencies $currencies functions.php:564
wpss_order_statuses $statuses functions.php:620
wpss_max_upload_size $upload_max functions.php:834
wpss_allow_late_requirements_submission $allow_late functions.php:888
wpss_wallet_manager null functions.php:1029

Currency System Filters (1.2.1)

As of 1.2.1, currencies are driven by a single canonical registry (code → name, symbol, decimals). Every currency surface - price formatting, the settings dropdown, manual orders, decimal handling - reads from it, so overriding one filter updates all of them consistently.

Filter Parameters File
wpss_currency_registry array<string, array{name:string, symbol:string, decimals:int}> $registry functions.php:793
wpss_currency_decimals int $decimals, string $currency functions.php:101
wpss_zero_decimal_currencies string[] $codes functions.php:130
wpss_settings_currencies array $currencies Settings.php:3052
wpss_manual_order_currencies array $currencies ManualOrderPage.php:814

wpss_currency_registry is the preferred, single-place override - add, remove, or adjust a currency (name / symbol / decimals) and every currency surface updates. Prefer it over the older per-surface currency filters (wpss_currency_symbols, wpss_currency_format, wpss_currencies):

// Register a custom currency and change USD's symbol
add_filter( 'wpss_currency_registry', function( $registry ) {
    $registry['XCD'] = [
        'name'     => 'East Caribbean Dollar',
        'symbol'   => 'EC$',
        'decimals' => 2,
    ];
    $registry['USD']['symbol'] = 'US$';
    return $registry;
} );

wpss_currency_decimals overrides the decimal places for a specific currency at format time (for example, to render USD without minor units):

add_filter( 'wpss_currency_decimals', function( $decimals, $currency ) {
    return 'USD' === $currency ? 0 : $decimals;
}, 10, 2 );

wpss_zero_decimal_currencies returns the codes rendered without minor units. It is derived from the registry (decimals === 0); filter it only when you need to force a currency into or out of zero-decimal formatting independently of its registry entry.

wpss_settings_currencies and wpss_manual_order_currencies narrow (or extend) the currency choices offered in the admin settings dropdown and the manual-order screen respectively - useful for restricting a store to a subset of the registry:

// Only allow USD and EUR to be selected in settings
add_filter( 'wpss_settings_currencies', function( $currencies ) {
    return array_intersect_key( $currencies, array_flip( [ 'USD', 'EUR' ] ) );
} );

Template Filters

Filter Parameters File
wpss_get_template_part $template, $slug, $name functions.php:165
wpss_get_template $template, $template_name, $args functions.php:211
wpss_locate_template $template, $template_name, $template_path TemplateLoader.php:318
wpss_dashboard_section_template $template_path, $section UnifiedDashboard.php:418

URL and Taxonomy Filters

Filter Parameters File
wpss_vendor_slug $slug (default 'provider') Plugin.php, functions.php
wpss_service_order_slug $slug (default 'service-order') Plugin.php, functions.php
wpss_checkout_slug $slug (default 'service-checkout') StandaloneAdapter.php
wpss_service_slug $slug (default 'service') ServicePostType.php:184
wpss_buyer_request_slug $slug (default 'buyer-request') BuyerRequestPostType.php:112
wpss_service_post_type_args $args ServicePostType.php:106
wpss_service_tag_args $args ServicePostType.php:168
wpss_service_category_taxonomy_args $args ServiceCategoryTaxonomy.php:118
wpss_service_tag_taxonomy_args $args ServiceTagTaxonomy.php:103
wpss_buyer_request_post_type_args $args BuyerRequestPostType.php:96

Order, Commission, and API Filters

Filter Parameters File
wpss_order_status_transitions $transitions, $from, $to OrderService.php:290
wpss_commission_rate $rate, $order, $vendor_id, $service_id CommissionService.php:163
wpss_proposal_order_revisions $revisions, $proposal, $request BuyerRequestService.php:628
wpss_max_order_quantity $max SingleServiceView.php:743
wpss_api_controllers $controllers API.php:76
wpss_api_public_settings $settings API.php:346
wpss_batch_max_requests $max (default 25) API.php:571
wpss_api_cors_origins $origins API.php:641
wpss_settings_tabs $tabs Settings.php:161
wpss_blocks $blocks BlocksManager.php:93
wpss_rate_limits $limits, $action RateLimiter.php:243

Miscellaneous Filters

Filter Parameters File
wpss_realtime_settings array $settings RealtimeService.php
wpss_review_window_days $days ReviewService.php:420
wpss_auto_approve_reviews $auto_approve (default true) ReviewsController.php:350
wpss_vendor_registration_open $open (default true) VendorsController.php:380
wpss_auto_approve_vendors $auto_approve (default true) VendorsController.php:390
wpss_delivery_allowed_file_types $types DeliveryService.php:374
wpss_requirements_allowed_file_types $types RequirementsService.php:411
wpss_withdrawal_methods $methods EarningsService.php:575
wpss_search_results $results, $query, $args SearchService.php:121
wpss_search_suggestions $suggestions, $query SearchService.php:498
wpss_related_services_args $args, $service SingleServiceView.php:647
wpss_cart_checkout $result, $cart, $user_id, $payment_method CartController.php:378
wpss_seller_levels $levels SellerLevelsController.php:284
wpss_rest_service_data $data, $service, $request ServicesController.php:608
wpss_rest_order_data $data, $order, $request OrdersController.php
wpss_rest_review_data $data, $review, $request ReviewsController.php
wpss_rest_vendor_data $data, $vendor, $request VendorsController.php
wpss_can_access_dashboard_section $allowed, $section, $user_id UnifiedDashboard.php:173
wpss_dashboard_sections $sections, $user_id, $is_vendor UnifiedDashboard.php:243
wpss_dashboard_section_titles $titles UnifiedDashboard.php:371

wpss_realtime_settings - filter the resolved real-time/WebSocket connection settings before they are used. The $settings array includes: enabled, app_id, key, secret, host, cluster, port, use_tls. The secret field is server-only; it is never sent to the browser:

add_filter( 'wpss_realtime_settings', function( $settings ) {
    // Force a specific cluster at runtime
    $settings['cluster'] = 'eu';
    return $settings;
} );

Full-width Plugin Pages Filters

Filter Parameters File
wpss_use_fullwidth_template bool $use src/Frontend/TemplateLoader.php:246 (and :332)
wpss_fullwidth_page_keys string[] $page_keys src/Frontend/TemplateLoader.php:292

wpss_use_fullwidth_template - return false to keep the active theme's normal page template (with sidebar) on the plugin's pages instead of the sidebar-free full-width layout:

add_filter( 'wpss_use_fullwidth_template', '__return_false' );

wpss_fullwidth_page_keys - control which mapped plugin pages render full-width. Default: ['dashboard', 'cart', 'checkout', 'become_vendor']:

// Remove the cart page from full-width treatment
add_filter( 'wpss_fullwidth_page_keys', function( $keys ) {
    return array_diff( $keys, [ 'cart' ] );
} );

SEO and Email Filters

Filter Parameters File
wpss_service_schema $schema, $service_id SchemaMarkup.php:183
wpss_service_list_schema $schema SchemaMarkup.php:221
wpss_category_schema $schema, $term SchemaMarkup.php:280
wpss_person_schema $schema, $user_id SchemaMarkup.php:328
wpss_vendor_page_schema $schema, $user_id SchemaMarkup.php:375
wpss_organization_schema $schema SchemaMarkup.php:406
wpss_open_graph_data $data, $service_id SEO.php:257
wpss_sitemap_post_types $post_types SEO.php:321
wpss_breadcrumbs $breadcrumbs, $service_id SEO.php:387
wpss_notification_email_content $content, $subject, $user_id, $data NotificationService.php:1195
wpss_vendor_welcome_email_content $content, $user, $platform_name NotificationService.php:994
wpss_admin_vendor_notification_content $content, $user NotificationService.php:1049

Pro Plugin Actions [PRO]

These hooks are fired exclusively by the Pro plugin and require an active Pro license.

WooCommerce Integration Actions

Unlike the EDD, FluentCart, and SureCart adapters, the WooCommerce adapter does not fire its own namespaced lifecycle hooks. It reuses the core order hooks instead, so code written against wpss_order_created / wpss_order_status_changed works identically whether the sale came through WooCommerce or standalone checkout.

Hook Parameters File
wpss_order_created int $order_id, string $status WCOrderProvider.php
wpss_order_status_changed int $order_id, string $new_status, string $old_status WCOrderProvider.php
wpss_max_order_quantity int $max, int $service_id WCCheckoutProvider.php

Earlier documentation listed wpss_woocommerce_adapter_init, wpss_service_synced_to_wc_product, wpss_after_checkout_process and wpss_service_to_wc_status_map. None of these are fired -- use the core order hooks above. To react to product sync, hook wpss_service_updated.

EDD Integration Actions

Hook Parameters File
wpss_edd_adapter_init EDDAdapter $adapter EDDAdapter.php:163
wpss_edd_service_purchased ServiceItem $item, int $order_id EDDOrderProvider.php:355
wpss_edd_services_processed int $order_id, ServiceItem[] $items EDDOrderProvider.php:370
wpss_edd_order_record_created int $record_id, ServiceItem $item, int $order_id EDDOrderProvider.php:595
wpss_edd_service_meta_saved int $product_id EDDProductProvider.php:232
wpss_edd_service_checkout_processed int $order_id, int $download_id, array $service_data, int $index EDDCheckoutProvider.php:222

FluentCart Integration Actions

Hook Parameters File
wpss_fluentcart_adapter_init FluentCartAdapter $adapter FluentCartAdapter.php:157
wpss_fluentcart_order_created int $order_id, int $external_order_id, array $order_data FluentCartOrderProvider.php:93
wpss_fluentcart_order_detail object $order FluentCartAccountProvider.php:384

wpss_fluentcart_product_created was removed in 1.6.1. FluentCart is a payment rail, not a catalogue: the plugin no longer creates FluentCart products, so there is no creation event to fire. A service is linked to an existing FluentCart product instead.

SureCart integration removed in 1.6.1. Its four namespaced hooks (wpss_surecart_adapter_init, wpss_surecart_order_created, wpss_surecart_product_created, wpss_surecart_order_detail) no longer exist. SureCart keeps products and prices as objects in its own cloud and settles through webhooks, so it cannot act as a payment rail the way WooCommerce, EDD and FluentCart do -- charging an arbitrary amount would mean creating a remote price object per order.

Wallet Actions

Hook Parameters File
wpss_wallet_credited int $user_id, float $amount, string $description, string $provider_id WalletManager.php:253
wpss_wallet_debited int $user_id, float $amount, string $description, string $provider_id WalletManager.php:292
wpss_vendor_payout_processed int $order_id, int $vendor_id, float $amount WalletManager.php:391
wpss_terawallet_recharged int $transaction_id, float $amount TeraWalletProvider.php:203
wpss_mycred_balance_changed int $user_id, float $amount, string $reference MyCredProvider.php:253

Razorpay Actions

Hook Parameters File
wpss_razorpay_refund_processed string $payment_id, array $refund RazorpayGateway.php:876

Stripe Connect Actions

Hook Parameters File
wpss_pro_connect_payout_paid string $payout_id, string $account_id, float $amount, string $currency ConnectWebhookHandler.php:185
wpss_pro_connect_payout_failed string $payout_id, string $account_id, string $failure_code, string $failure_message ConnectWebhookHandler.php:226
wpss_pro_connect_transfer_created string $transfer_id, string $account_id, float $amount, string $currency ConnectWebhookHandler.php:267

Recurring Services Actions

Hook Parameters File
wpss_recurring_renewal_order_created int $new_order_id, int $subscription_id, object $subscription RecurringOrderFactory.php:119
wpss_recurring_payment_failed int $subscription_id, object $subscription RecurringWebhookHandler.php:191
wpss_recurring_subscription_cancelled int $subscription_id, object $subscription RecurringWebhookHandler.php:229

Analytics Actions

Hook Parameters File
wpss_analytics_init AnalyticsManager $manager AnalyticsManager.php:93

Gateway Settings Actions

Hook Parameters File
wpss_gateway_settings_{$gateway_id} (none) Pro.php:1057

Pro Plugin Filters [PRO]

EDD Filters

Filter Parameters File
wpss_edd_cart_item_data $cart_item_data, $product_id, $variation_id EDDCheckoutProvider.php:56
wpss_edd_validate_add_to_cart $valid, $product_id, $quantity EDDCheckoutProvider.php:97
wpss_edd_thankyou_redirect $redirect, $order_id EDDCheckoutProvider.php:249
wpss_edd_can_access_vendor_dashboard $can_access, $user_id EDDAccountProvider.php:516

WooCommerce Filters

Filter Parameters File

Paying for a single order (sub-orders)

Tips, milestone phases and extension quotes are sub-orders: a real WPSS order of their own, created against a parent order, that the buyer pays separately. They are the one deliberate exception to the one-rail catalog rule

  • the catalog checkout belongs entirely to the active platform, but a sub-order has no cart and cannot go through it.

wpss_get_pay_order_url( int $order_id ): string

The single source for "pay THIS order." Every surface that links a buyer to a payment - dashboard timeline, order view, emails, notifications - must call it. Never build a ?pay_order= link by hand; it is correct only on one rail.

$url = wpss_get_pay_order_url( $order_id );

wpss_pay_order_url (filter)

apply_filters( 'wpss_pay_order_url', string $url, int $order_id );

A cart-based rail replaces the URL entirely. Pro's WooCommerce implementation (WCPayOrderResolver) creates - or reuses - a real WooCommerce order for the sub-order and returns its native order-pay URL, so the link works from an email days later with no cart session.

Supported rails

ecommerce_platform Sub-order Pay How
standalone Supported ?pay_order=N on the WPSS checkout page
woocommerce Supported Real WC order + native order-pay URL (Pro)

These are the two rails the sub-order payment path is built and tested against.

A platform that has not implemented wpss_pay_order_url inherits the standalone URL, which is not the checkout that rail owns - so implement the filter for any new platform the way WCPayOrderResolver does. Do not solve it by re-enabling WPSS gateways alongside the platform's own, which would break the one-rail contract.

Why wpss_get_checkout_base_url() is not the answer

It returns the active rail's checkout - WooCommerce's under Woo. Sending a buyer there for a sub-order lands them on an empty cart, because a sub-order was never added to one. That is the trap the filter above exists to avoid, and the reason browser Pay never reaches StandaloneCheckoutProvider::render_pay_order_checkout() on a cart rail.

Mobile Session and Selling Limits (1.6.0)

Token lifetime

Filter Parameters File
wpss_app_token_lifetime array{idle:int, absolute:int} $lifetime functions/misc.php
wpss_token_recovery_routes array<int,string> $routes API/AppTokenGuard.php

App tokens expire 30 days after last use or 90 days after issue, whichever comes first. Returning 0 for either key disables that limit; disabling both restores the pre-1.6.0 behaviour of tokens that never expire, which is what that release was filed to end.

// A 7-day idle window for a high-security marketplace.
add_filter( 'wpss_app_token_lifetime', function ( array $lifetime ): array {
    $lifetime['idle'] = 7 * DAY_IN_SECONDS;
    return $lifetime;
} );

wpss_token_recovery_routes lists the routes reachable with an expired token in the Authorization header - by default /auth/login, /auth/register and /auth/forgot-password.

Do not add a route that reads the current user. WordPress 401s the whole request on a failed application password, so without this carve-out an app that attaches its stored token to every request could never reach the login route to replace it. These three take their credentials from the request body and grant nothing on their own, which is what makes them safe to open.

Selling limits

Filter Parameters File
wpss_member_bypasses_limits bool $bypasses, int $user_id functions/vendors.php
wpss_vendor_can_create_service bool $can_create, int $vendor_id two gates, see below

Administrators bypass vendor selling limits by default, so a site owner seeding demo content or building services for a client does not meet their own paywall.

// Meter administrators too.
add_filter( 'wpss_member_bypasses_limits', '__return_false' );

wpss_vendor_can_create_service has TWO gates on it, and this catches people out: this plugin enforces a per-profile maximum at priority 10, and Pro's plan enforcer runs at priority 20. If you are testing whether a member may create a service, run the filter - calling either class directly can return true while the filter answers false.

Presence and Messaging (1.6.0)

Filter Parameters File
wpss_skip_message_email_when_online bool $skip, int $recipient_id, bool $enabled functions/notifications.php
wpss_presence_window int $seconds functions/notifications.php
wpss_messages_per_page int $per_page templates/dashboard/sections/messages.php

There is no settings screen for the presence behaviour - it is on by default and adjusted here.

Filter Parameters File
wpss_video_thumbnail_cache_ttl int $ttl, string $video_url functions/services.php
wpss_gallery_image_size string $size, int $service_id partials/service-gallery.php
wpss_sticky_top_offset int $offset Frontend/Frontend.php

A video thumb uses the embed provider's own poster frame, fetched through oEmbed and cached for a week. That call is an HTTP request to the provider, so if you shorten the TTL, shorten it deliberately - an uncached lookup puts a third-party round trip in front of every visitor.

Use wpss_sticky_top_offset when a theme has its own sticky header that the plugin's measurement cannot see.

Categories (1.6.0)

Filter Parameters File
wpss_category_terms_limit int $limit functions/services.php

Category choosers cap at 200 terms. The helper wpss_group_category_terms() turns a flat term list into parents each carrying their children, and is what every single-dropdown chooser in the plugin uses - reuse it rather than grouping by hand, or the two will drift as they did before 1.6.0.

Orphans - a child whose parent is missing because hide_empty dropped it - are promoted to top level rather than discarded, so a category with services in it always stays reachable.

Custom Integrations Guide

Extend WP Sell Services with custom e-commerce platforms, payment gateways, REST API controllers, and more. This guide documents the actual interfaces and extension patterns available in the plugin source code.

Extension Architecture

WP Sell Services provides six contract interfaces in src/Integrations/Contracts/ and several filter-based registration points. The free version ships with standalone checkout, Stripe, and PayPal. The Pro version adds WooCommerce, EDD, FluentCart, SureCart, and Razorpay.

Extension Type Interface/Filter Free Pro
E-commerce Platform EcommerceAdapterInterface Standalone (built-in) WooCommerce, EDD, FluentCart, SureCart [PRO]
Payment Gateway PaymentGatewayInterface Stripe, PayPal, Offline Razorpay [PRO]
Storage Provider wpss_storage_providers Local uploads S3, GCS, DigitalOcean Spaces [PRO]
Email Provider wpss_email_providers WordPress mail SendGrid, Mailgun, SES
REST API Controller wpss_api_controllers 23 controllers Additional endpoints
Analytics Widget wpss_analytics_widgets Basic stats Revenue, conversion, vendor analytics [PRO]

E-Commerce Adapters

EcommerceAdapterInterface

Located at src/Integrations/Contracts/EcommerceAdapterInterface.php. All e-commerce integrations must implement this interface, which delegates to four specialized providers.

interface EcommerceAdapterInterface {
    public function get_id(): string;
    public function get_name(): string;
    public function is_active(): bool;
    public function init(): void;
    public function supports_feature( string $feature ): bool;
    public function get_order_provider(): OrderProviderInterface;
    public function get_product_provider(): ProductProviderInterface;
    public function get_checkout_provider(): CheckoutProviderInterface;
    public function get_account_provider(): AccountProviderInterface;
}

Provider Interfaces

OrderProviderInterface (src/Integrations/Contracts/OrderProviderInterface.php) -- Handles order data retrieval: get_order(), get_order_item(), get_customer_orders(), get_vendor_orders(), has_service_items(), get_service_items(), update_item_meta(), get_item_meta(), get_customer_data(), handle_order_complete().

ProductProviderInterface (src/Integrations/Contracts/ProductProviderInterface.php) -- Handles service-to-product mapping: is_service_product(), get_service(), get_service_vendors(), get_requirements(), get_delivery_time(), set_service_type(), add_service_type_option(), save_service_meta(), sync_with_service().

CheckoutProviderInterface (src/Integrations/Contracts/CheckoutProviderInterface.php) -- Handles cart and checkout: add_cart_item_data(), validate_add_to_cart(), get_checkout_url(), cart_has_services(), get_cart_services(), process_checkout(), get_thankyou_redirect(), filter_quantity_max().

AccountProviderInterface (src/Integrations/Contracts/AccountProviderInterface.php) -- Handles user account integration: add_menu_items(), register_endpoints(), get_account_url(), get_orders_url(), get_vendor_dashboard_url(), render_orders_endpoint(), render_services_endpoint(), render_notifications_endpoint(), can_access_vendor_dashboard(), get_login_url(), get_register_url().

Creating a Custom Adapter

<?php
namespace MyPlugin;

use WPSellServices\Integrations\Contracts\EcommerceAdapterInterface;

class CustomPlatformAdapter implements EcommerceAdapterInterface {
    public function get_id(): string { return 'custom_platform'; }
    public function get_name(): string { return 'Custom Platform'; }
    public function is_active(): bool { return class_exists( 'CustomPlatform' ); }
    public function init(): void { /* Register platform hooks */ }
    public function supports_feature( string $feature ): bool {
        return in_array( $feature, [ 'checkout', 'orders' ], true );
    }
    public function get_order_provider(): OrderProviderInterface { return new CustomOrderProvider(); }
    public function get_product_provider(): ProductProviderInterface { return new CustomProductProvider(); }
    public function get_checkout_provider(): CheckoutProviderInterface { return new CustomCheckoutProvider(); }
    public function get_account_provider(): AccountProviderInterface { return new CustomAccountProvider(); }
}

// Register via filter
add_filter( 'wpss_ecommerce_adapters', function( $adapters ) {
    $adapters['custom_platform'] = new \MyPlugin\CustomPlatformAdapter();
    return $adapters;
} );

Adapter Selection Logic

The IntegrationManager (src/Integrations/IntegrationManager.php) selects the active adapter:

  1. Reads ecommerce_platform from wpss_general settings
  2. If set to a specific adapter ID and that adapter's is_active() is true, uses it
  3. If set to 'auto' (default), iterates all registered adapters and uses the first active one
  4. After selection, calls $adapter->init() and fires wpss_adapter_initialized

Payment Gateways

PaymentGatewayInterface

Located at src/Integrations/Contracts/PaymentGatewayInterface.php. Used for standalone payment processing without an e-commerce platform.

interface PaymentGatewayInterface {
    public function get_id(): string;
    public function get_name(): string;
    public function get_description(): string;
    public function is_enabled(): bool;
    public function supports_currency( string $currency ): bool;
    public function init(): void;
    public function create_payment( float $amount, string $currency, array $metadata = [] ): array;
    public function process_payment( string $payment_id ): array;
    public function process_refund( string $transaction_id, ?float $amount = null, string $reason = '' ): array;
    public function handle_webhook( array $payload ): array;
    public function get_settings_fields(): array;
    public function render_payment_form( float $amount, string $currency, int $order_id ): string;
}

Creating a Custom Gateway

The plugin includes a reference implementation at src/Integrations/Gateways/TestGateway.php (debug-only, auto-completes payments). Register your gateway via the wpss_payment_gateways filter (Plugin.php:813):

add_filter( 'wpss_payment_gateways', function( $gateways ) {
    $gateways['custom_pay'] = new \MyPlugin\CustomGateway();
    return $gateways;
} );

Key methods to implement:

  • create_payment() should return ['success' => true, 'id' => '...', 'client_secret' => '...']
  • process_payment() should return ['success' => true, 'transaction_id' => '...', 'status' => 'completed']
  • process_refund() should return ['success' => true, 'refund_id' => '...', 'status' => 'completed']
  • get_settings_fields() returns an array of field definitions (type, label)
  • render_payment_form() returns HTML for the payment form

The CheckoutIntent seam (gateway-agnostic)

Added in 1.3.0. Every purchase - pay an existing order, buy a multi-item cart, or buy a single service + add-ons - resolves to a single value object, CheckoutIntent, before any gateway is involved. This is the seam that lets Stripe, PayPal, Razorpay (Pro), and your custom gateway all charge the same way, and it guarantees the amount is server-computed, never trusted from the client.

The flow is always resolve → charge → settle:

use WPSellServices\Checkout\CheckoutIntentService;

$service = new CheckoutIntentService();

// 1. RESOLVE — the server computes the authoritative amount + currency from the
//    request. Returns a CheckoutIntent, or a WP_Error if the request is invalid.
$intent = $service->resolve( $request, $buyer_id );   // $request: service_id/package_id, or cart, or order_id
if ( is_wp_error( $intent ) ) {
    return $intent;
}

// $intent->amount / ->currency are authoritative — charge THIS, never a client value.

// 2. CHARGE — run your gateway with $intent->amount and $intent->currency.

// 3. SETTLE — record the completed charge; the plugin creates/links the order,
//    delivery deadline, commission split, and ledger entries.
$result = $service->settle( $intent, 'custom_pay', $transaction_id, $charged_amount, $charged_currency );

CheckoutIntent is built through three factories that mirror the three purchase kinds - CheckoutIntent::order(), ::cart(), ::single() - but you normally get one back from resolve() rather than constructing it yourself. Base currency stays authoritative throughout; the charged_currency you pass to settle() records what the gateway actually took.

REST API Controllers

Custom controllers extend RestController (src/API/RestController.php) which provides:

  • check_permissions( $request ) -- Verifies user is logged in (returns 401 if not)
  • check_admin_permissions( $request ) -- Verifies manage_options capability (returns 403 if not)
  • user_owns_resource( $resource_id, $resource_type ) -- Checks ownership for 'service' or 'order'
  • paginated_response( $items, $total, $page, $per_page ) -- Returns paginated response with X-WP-Total and X-WP-TotalPages headers
<?php
namespace MyPlugin;
use WPSellServices\API\RestController;

class CustomController extends RestController {
    protected $rest_base = 'custom';

    public function register_routes() {
        register_rest_route( $this->namespace, '/' . $this->rest_base, [
            [
                'methods'             => \WP_REST_Server::READABLE,
                'callback'            => [ $this, 'get_items' ],
                'permission_callback' => [ $this, 'check_permissions' ],
            ],
        ] );
    }

    public function get_items( \WP_REST_Request $request ): \WP_REST_Response {
        $items = []; // Your data retrieval logic
        return $this->paginated_response( $items, 0, 1, 10 );
    }
}

// Register the controller (filter at API.php:76)
add_filter( 'wpss_api_controllers', function( $controllers ) {
    $controllers[] = new \MyPlugin\CustomController();
    return $controllers;
} );

Provider Registration Filters [PRO]

// Storage providers (Plugin.php:837)
add_filter( 'wpss_storage_providers', function( $providers ) {
    $providers['custom_storage'] = new \MyPlugin\CustomStorageProvider();
    return $providers;
} );

// Email providers (Plugin.php:849)
add_filter( 'wpss_email_providers', function( $providers ) {
    $providers['custom_email'] = new \MyPlugin\CustomEmailProvider();
    return $providers;
} );

// Wallet providers (Plugin.php:825)
add_filter( 'wpss_wallet_providers', function( $providers ) {
    $providers['custom_wallet'] = new \MyPlugin\CustomWalletProvider();
    return $providers;
} );

// Analytics widgets (Plugin.php:861)
add_filter( 'wpss_analytics_widgets', function( $widgets ) {
    $widgets['custom_metric'] = new \MyPlugin\CustomAnalyticsWidget();
    return $widgets;
} );

Settings Tabs

Add custom tabs to admin settings using wpss_settings_tabs filter (Settings.php:161) and the dynamic wpss_settings_tab_{tab} action (Settings.php:985):

add_filter( 'wpss_settings_tabs', function( $tabs ) {
    $tabs['my_integration'] = 'My Integration';
    return $tabs;
} );

add_action( 'wpss_settings_tab_my_integration', function() {
    echo '<div class="wpss-settings-section"><h2>My Settings</h2>';
    // Your settings form here
    echo '</div>';
} );

Custom Field Types

Register custom field types for service requirements via the wpss_register_field_types action (FieldManager.php:59). Default types: Text, Textarea, Select, MultiSelect, Radio, Checkbox, FileUpload, Date, Number.

add_action( 'wpss_register_field_types', function( $manager ) {
    $manager->register( new \MyPlugin\ColorPickerField() );
} );

Gutenberg Blocks

Register custom blocks via wpss_blocks filter (BlocksManager.php:93):

add_filter( 'wpss_blocks', function( $blocks ) {
    $blocks[] = [
        'name' => 'wpss/custom-block',
        'args' => [ 'title' => 'Custom Block', 'category' => 'wpss', 'render_callback' => 'render_my_block' ],
    ];
    return $blocks;
} );

How Pro Extends Free

The Pro plugin hooks into wpss_loaded to register all extensions:

What Pro Changes Filter Free Default Pro Value
Gallery images wpss_service_max_gallery 4 -1 (unlimited)
Service extras wpss_service_max_extras 3 -1 (unlimited)
FAQ items wpss_service_max_faq 5 -1 (unlimited)
Video URLs wpss_service_max_videos 1 3
Requirements wpss_service_max_requirements 5 -1 (unlimited)
Wizard features wpss_service_wizard_features All false AI titles, templates

Vendor Capabilities

The wpss_vendor role includes: wpss_vendor, wpss_manage_services, wpss_manage_orders, wpss_view_analytics, wpss_respond_to_requests, read, upload_files, edit_posts.

Theme Integration Guide

Customize WP Sell Services appearance to match your WordPress theme through template overrides, CSS customization, and template hooks.

Template Override System

The plugin uses TemplateLoader (src/Frontend/TemplateLoader.php) to load templates with theme override support. When a template is requested, the loader checks locations in this order:

  1. Child theme: wp-content/themes/child-theme/wp-sell-services/{template}.php
  2. Parent theme: wp-content/themes/parent-theme/wp-sell-services/{template}.php
  3. Plugin default: wp-content/plugins/wp-sell-services/templates/{template}.php

Setting Up Overrides

  1. Create wp-sell-services/ directory in your theme
  2. Copy the template you want to customize from wp-sell-services/templates/
  3. Edit the copied file in your theme directory
  4. Clear page cache and refresh

Only copy templates you need to change. Uncopied templates continue using plugin defaults.

Available Templates

Top-Level Templates

Template Purpose
single-service.php Single service page
archive-service.php Service archive/listing page
single-request.php Single buyer request page
archive-request.php Buyer request archive page
content-service-card.php Service card in grids and listings
content-request-card.php Buyer request card in listings
content-no-services.php Empty state when no services found
content-no-requests.php Empty state when no requests found

Partial Templates (templates/partials/)

Template Purpose
partials/service-gallery.php Image gallery on single service page
partials/service-packages.php Pricing packages (Basic/Standard/Premium)
partials/service-reviews.php Reviews section on single service page
partials/service-faqs.php FAQ accordion on single service page
partials/vendor-card.php Vendor info card on service page sidebar
partials/vendor-portfolio.php Public vendor portfolio lightbox and grid

Order Templates (templates/order/)

Template Purpose
order/order-view.php Order details page
order/order-requirements.php Requirements submission page
order/order-confirmation.php Order confirmation/thank you page
order/requirements-form.php Requirements form template
order/conversation.php Order messaging/conversation view

Order URLs route as: /service-order/{id}/ (view), /service-order/{id}/requirements/, /service-order/{id}/delivery/, /service-order/{id}/review/.

Dashboard Templates (templates/dashboard/sections/)

Template Purpose
dashboard/sections/orders.php Orders section
dashboard/sections/sales.php Sales section (vendor)
dashboard/sections/services.php Services management
dashboard/sections/earnings.php Earnings section
dashboard/sections/messages.php Messages section
dashboard/sections/profile.php Profile editing
dashboard/sections/requests.php Buyer requests
dashboard/sections/create.php Service creation
dashboard/sections/create-request.php Buyer request creation
dashboard/sections/edit-request.php Edit an existing buyer request

WooCommerce Account Templates (templates/myaccount/)

Template Purpose
myaccount/service-orders.php Service orders in WooCommerce My Account
myaccount/vendor-dashboard.php Vendor dashboard in My Account
myaccount/vendor-services.php Vendor services list
myaccount/service-disputes.php Disputes tab
myaccount/notifications.php Notifications tab

Cart Templates (templates/cart/)

Template Purpose
cart/cart.php Shopping cart page for standalone checkout mode

Other Templates

  • Vendor: vendor/profile.php -- Public vendor profile page (served at /provider/{username}/ by default, customizable via the wpss_vendor_slug filter)
  • Disputes: disputes/dispute-view.php -- Dispute details view

Email Templates (templates/emails/)

All email templates are theme-overridable at yourtheme/wp-sell-services/emails/.

26 HTML templates:

Template Purpose
emails/new-order.php New order notification
emails/order-in-progress.php Vendor started work
emails/delivery-ready.php Delivery submitted for review
emails/order-completed.php Order completed
emails/order-cancelled.php Order cancelled
emails/requirements-submitted.php Buyer submitted requirements
emails/requirements-reminder.php Reminder to submit requirements
emails/revision-requested.php Buyer requested revision
emails/cancellation-requested.php Cancellation request filed
emails/new-message.php New order message
emails/dispute-opened.php Dispute opened
emails/dispute-escalated.php Dispute escalated to admin
emails/seller-level-promotion.php Vendor promoted to new seller level
emails/moderation-pending.php Service submitted for moderation
emails/moderation-approved.php Service approved
emails/moderation-rejected.php Service rejected
emails/moderation-response.php Vendor responded to moderation feedback
emails/vendor-contact.php Vendor contact form submission
emails/withdrawal-requested.php Vendor requested withdrawal
emails/withdrawal-approved.php Withdrawal approved
emails/withdrawal-rejected.php Withdrawal rejected
emails/withdrawal-auto.php Automatic withdrawal processed
emails/generic.php Generic notification template
emails/test-email.php Test email (from settings)
emails/email-header.php Shared email header with logo and branding
emails/email-footer.php Shared email footer

10 plain text variants at emails/plain/:

Template Purpose
emails/plain/new-order.php Plain text new order
emails/plain/order-in-progress.php Plain text order started
emails/plain/order-completed.php Plain text order completed
emails/plain/order-cancelled.php Plain text order cancelled
emails/plain/delivery-ready.php Plain text delivery submitted
emails/plain/requirements-submitted.php Plain text requirements submitted
emails/plain/requirements-reminder.php Plain text requirements reminder
emails/plain/revision-requested.php Plain text revision requested
emails/plain/new-message.php Plain text new message
emails/plain/dispute-opened.php Plain text dispute opened

See Email Customization for how to override email content, headers, footers, and sender details using filters.

Template Functions

// Load a template part (like WP get_template_part but with plugin fallback)
wpss_get_template_part( 'content', 'service-card' );
// Searches: theme/wp-sell-services/content-service-card.php then plugin/templates/

// With arguments
wpss_get_template_part( 'partials/vendor-card', '', [ 'vendor_id' => 42 ] );

// Load a specific template file
wpss_get_template( 'order/order-view.php', [ 'order' => $order ] );

Template Filters

// Redirect template loading without copying files
add_filter( 'wpss_locate_template', function( $template, $template_name, $template_path ) {
    if ( 'single-service.php' === $template_name ) {
        return '/path/to/my/custom-single-service.php';
    }
    return $template;
}, 10, 3 );

// Override a dashboard section template
add_filter( 'wpss_dashboard_section_template', function( $template_path, $section ) {
    if ( 'earnings' === $section ) {
        return get_stylesheet_directory() . '/my-earnings-template.php';
    }
    return $template_path;
}, 10, 2 );

Single Service Page Hooks

The SingleServiceView class (src/Frontend/SingleServiceView.php) renders each section via action hooks. You can add, remove, or reorder sections without overriding the entire template.

Default Hook Registration

Hook Callback Priority
wpss_single_service_header render_breadcrumb 5
wpss_single_service_header render_title 10
wpss_single_service_header render_meta 15
wpss_single_service_gallery render_gallery 10
wpss_single_service_content render_description 10
wpss_single_service_content render_about_vendor 20
wpss_single_service_faqs render_faqs 10
wpss_single_service_reviews render_reviews 10
wpss_single_service_sidebar render_packages 10
wpss_single_service_sidebar render_vendor_card 20
wpss_single_service_related render_related_services 10
wpss_after_single_service render_order_modal 10
wpss_after_single_service render_contact_modal 20

Customizing Sections

// Add content after service title (priority 12 = after title at 10, before meta at 15)
add_action( 'wpss_single_service_header', function( $service ) {
    if ( get_post_meta( $service->id, '_wpss_featured', true ) ) {
        echo '<span class="wpss-featured-badge">Featured</span>';
    }
}, 12 );

// Remove FAQ section
remove_action( 'wpss_single_service_faqs', [ wpss()->get_single_service_view(), 'render_faqs' ], 10 );

// Show vendor card before packages (move from priority 20 to 5)
$view = wpss()->get_single_service_view();
remove_action( 'wpss_single_service_sidebar', [ $view, 'render_vendor_card' ], 20 );
add_action( 'wpss_single_service_sidebar', [ $view, 'render_vendor_card' ], 5 );

Dashboard Customization

// Control section access
add_filter( 'wpss_can_access_dashboard_section', function( $allowed, $section, $user_id ) {
    if ( 'earnings' === $section ) {
        return (bool) get_user_meta( $user_id, '_wpss_vendor_verified', true );
    }
    return $allowed;
}, 10, 3 );

// Add custom dashboard sections
add_filter( 'wpss_dashboard_sections', function( $sections, $user_id, $is_vendor ) {
    if ( $is_vendor ) {
        $sections['analytics'] = [ 'label' => 'Analytics', 'icon' => 'chart' ];
    }
    return $sections;
}, 10, 3 );

// Rename section titles
add_filter( 'wpss_dashboard_section_titles', function( $titles ) {
    $titles['orders'] = 'My Purchases';
    $titles['sales']  = 'My Sales';
    return $titles;
} );

Full-width Plugin Pages

Since 1.2.0, the plugin's app-like pages - Dashboard, Cart, Checkout, and Become a Vendor - render full-width without a theme sidebar. This prevents marketplace UI from appearing next to widgets such as Recent Posts.

How it works per theme

The plugin detects the active theme and uses its native mechanism rather than hiding the sidebar with CSS:

Theme Method
Reign Sets Reign's native per-page layout meta (reign_wbcom_metabox_data), the same mechanism Reign uses for FluentCart. Reign's page wrappers and subheader remain intact.
BuddyX / BuddyX Pro Uses the theme's bundled "Page No Sidebar" template (page-templates/full-width-container.php).
Any other theme Falls back to templates/wpss-fullwidth-template.php, which calls get_header() / get_footer() and emits a contained full-width wrapper.

If a site owner has already set a specific Page Template on a plugin page in the editor, that choice wins and the plugin does not override it.

Customizing the fallback template

Copy templates/wpss-fullwidth-template.php into your theme to override the fallback wrapper:

yourtheme/wp-sell-services/wpss-fullwidth-template.php

Opting out and controlling scope

Turn off full-width handling entirely - the active theme's normal sidebar layout will be used on all plugin pages:

add_filter( 'wpss_use_fullwidth_template', '__return_false' );

Control which plugin pages receive the full-width treatment (default: dashboard, cart, checkout, become_vendor):

// Remove the dashboard from full-width treatment
add_filter( 'wpss_fullwidth_page_keys', function( $keys ) {
    return array_diff( $keys, [ 'dashboard' ] );
} );

See also wpss_use_fullwidth_template and wpss_fullwidth_page_keys in the hooks reference.

CSS Classes Reference

The plugin uses wpss- prefixed CSS classes. Verified classes from SingleServiceView.php:

.wpss-breadcrumb / .wpss-breadcrumb-list / .wpss-breadcrumb-item / .wpss-breadcrumb-current
.wpss-service-title / .wpss-service-meta / .wpss-meta-item
.wpss-meta-vendor / .wpss-meta-rating / .wpss-meta-orders / .wpss-meta-queue
.wpss-vendor-mini-avatar / .wpss-vendor-name / .wpss-verified-badge
.wpss-rating-link / .wpss-rating-value / .wpss-rating-count
.wpss-star / .wpss-star.filled

Enqueued Stylesheets

Handle File Purpose
wpss-design-system assets/css/design-system.css CSS custom properties and tokens
wpss-frontend assets/css/frontend.css Base frontend styles
wpss-single-service assets/css/single-service.css Single service page
wpss-unified-dashboard assets/css/unified-dashboard.css Dashboard styles

Overriding Styles

// Enqueue a custom stylesheet after plugin styles
add_action( 'wp_enqueue_scripts', function() {
    wp_enqueue_style( 'mytheme-wpss', get_stylesheet_directory_uri() . '/css/wpss-custom.css', [ 'wpss-frontend' ], '1.0.0' );
}, 20 );

// Or dequeue plugin styles entirely
add_action( 'wp_enqueue_scripts', function() {
    wp_dequeue_style( 'wpss-frontend' );
    wp_deregister_style( 'wpss-frontend' );
}, 100 );

Dark Mode and Design Tokens

Added in 1.3.0. Every plugin surface is built on CSS custom-property tokens in design-system.css, and the plugin follows the active theme's dark mode rather than the OS preference. This means WP Sell Services goes dark exactly when the theme does, and never darkens on top of a light theme.

How dark mode is triggered

The plugin's dark tokens activate when any of these signals is present on the root element - the same signals BuddyX, BuddyX Pro, and Reign 8.x already set from their own dark-mode toggle:

:root[data-theme="dark"],
:root[data-bx-mode="dark"],
.wpss-dark .wpss-app { /* dark token overrides */ }

If your theme has a dark toggle, set data-bx-mode="dark" (or data-theme="dark") on <html> and the plugin follows automatically - no per-component CSS required. There is deliberately no prefers-color-scheme rule, so the plugin never fights a light theme on a dark OS.

Token model

Components consume semantic and scale tokens, never raw hex. In dark mode the whole system flips in one place:

Token group Light Dark Used for
--wpss-surface #ffffff #1f2937 Card / panel backgrounds
--wpss-text / --wpss-text-muted dark light Body + muted copy
--wpss-gray-* ramp light ramp inverted ramp Raw text + hairlines (ink end resolves light, paper end dark)
--wpss-primary #4f46e5 #4f46e5 Button/badge fills (stays dark enough for white text)
--wpss-primary-accent #4f46e5 #a5b4fc Primary as text/links/icons (lightens on dark)
--wpss-secondary-accent #1e293b #e2e8f0 Emphasis text (prices)
--wpss-block-surface var(--wpss-surface) flips Gutenberg block card backgrounds

Two rules matter when extending the UI:

  1. Use --wpss-primary-accent / --wpss-secondary-accent for text, --wpss-primary / --wpss-secondary for fills. The accent tokens lighten in dark mode so links stay readable on dark surfaces; the fill tokens stay dark so white button text keeps its contrast.
  2. Never hard-code hex for text or surfaces - reach for the tokens above so your addition flips with the rest of the plugin. Lucide icons inherit currentColor, so they follow the text token automatically.

Overriding tokens per theme

Redefine any token under your theme's dark selector to match your palette exactly:

html[data-bx-mode="dark"] {
    --wpss-surface: #12141a;      /* match your theme's card colour */
    --wpss-primary-accent: #93c5fd;
}

JavaScript Integration

Handle File Dependencies
alpinejs assets/js/vendor/alpine.min.js None (defer)
wpss-frontend assets/js/frontend.js alpinejs
wpss-single-service assets/js/single-service.js jquery, wpss-frontend
wpss-unified-dashboard assets/js/unified-dashboard.js jquery

JavaScript Data Objects

wpss: ajaxUrl, restUrl, nonce

wpssData: ajaxUrl, apiUrl, nonce, orderNonce, restNonce, pollingInterval (10000ms), currencyFormat, i18n

wpssService (single service page only): serviceId, ajaxUrl, nonce, checkoutUrl, cartUrl, i18n

// Add custom scripts after plugin JS
add_action( 'wp_enqueue_scripts', function() {
    wp_enqueue_script( 'mytheme-wpss-js', get_stylesheet_directory_uri() . '/js/wpss-custom.js', [ 'wpss-frontend' ], '1.0.0', true );
}, 20 );

URL Structure

Pattern Template Filter
/provider/{username}/ vendor/profile.php wpss_vendor_slug
/service-order/{id}/ order/order-view.php wpss_service_order_slug
/service-order/{id}/{action}/ order/order-{action}.php wpss_service_order_slug
/service/ (CPT slug) archive-service.php wpss_service_slug
/buyer-request/ (CPT slug) archive-request.php wpss_buyer_request_slug
/service-checkout/{id}/ Checkout shortcode wpss_checkout_slug

All URL slugs are filterable to avoid conflicts with other plugins. After changing slugs, flush rewrite rules by visiting Settings > Permalinks and clicking Save.

Email Customization Guide

Customize every aspect of WP Sell Services emails -- from sender details and branding to the content of individual notification types. This guide covers template overrides, content filters, and header/footer customization.

Email Architecture

Every email sent by the plugin flows through EmailService (src/Services/EmailService.php), which:

  1. Loads the HTML template from templates/emails/{type}.php
  2. Wraps it with the shared header (email-header.php) and footer (email-footer.php)
  3. Applies content filters
  4. Sends via wp_mail() (which uses your configured SMTP plugin if installed)

Template Overrides

All email templates are theme-overridable. Copy the template to your theme to customize the HTML structure and design.

Override Path

Plugin default:  wp-sell-services/templates/emails/{template}.php
Theme override:  yourtheme/wp-sell-services/emails/{template}.php
Child theme:     yourchildtheme/wp-sell-services/emails/{template}.php

Child theme overrides take priority over parent theme, which takes priority over plugin defaults.

Available Templates

26 HTML templates in templates/emails/:

Template Notification Type
new-order.php New order placed
order-in-progress.php Vendor started work
delivery-ready.php Delivery submitted for review
order-completed.php Order completed
order-cancelled.php Order cancelled
requirements-submitted.php Buyer submitted project requirements
requirements-reminder.php Reminder to submit requirements
revision-requested.php Buyer requested changes
cancellation-requested.php Cancellation request filed
new-message.php New message in order conversation
dispute-opened.php Dispute opened
dispute-escalated.php Dispute escalated to admin
seller-level-promotion.php Vendor reached new seller level
moderation-pending.php Service submitted for review
moderation-approved.php Service approved by admin
moderation-rejected.php Service rejected by admin
moderation-response.php Vendor responded to moderation feedback
vendor-contact.php Message via vendor contact form
withdrawal-requested.php Vendor requested payout
withdrawal-approved.php Payout approved
withdrawal-rejected.php Payout rejected
withdrawal-auto.php Automatic withdrawal processed
generic.php Generic notification (fallback)
test-email.php Test email from settings
email-header.php Shared header with logo and branding
email-footer.php Shared footer with links

10 plain text templates in templates/emails/plain/:

Plain text versions are used by email clients that do not support HTML. They follow the same naming convention and override path.

Example: Customizing the Order Completed Email

# 1. Create the override directory in your theme
mkdir -p yourtheme/wp-sell-services/emails/

# 2. Copy the template
cp wp-sell-services/templates/emails/order-completed.php yourtheme/wp-sell-services/emails/

# 3. Edit the copy in your theme

The shared header and footer wrap every email. Override them to change the logo, colors, or branding across all notifications at once.

Overriding the Header

Copy templates/emails/email-header.php to yourtheme/wp-sell-services/emails/email-header.php and customize:

  • Logo image and link
  • Background color and accent colors
  • Header layout and spacing

Copy templates/emails/email-footer.php to yourtheme/wp-sell-services/emails/email-footer.php and customize:

  • Footer text and links
  • Social media links
  • Legal/compliance text
  • Unsubscribe link (if applicable)

Header Variables Filter

Modify the variables available in the email header template:

add_filter( 'wpss_email_header_vars', function( $vars, $type ) {
    // Add a custom banner for order-related emails
    if ( str_starts_with( $type, 'order' ) ) {
        $vars['banner_text'] = 'Order Update';
    }
    return $vars;
}, 10, 2 );

Content Filters

Modify email content programmatically without overriding template files. These filters are useful for adding dynamic content, custom messages, or conditional sections.

General Email Filters

Filter Parameters Purpose
wpss_email_subject string $subject, string $type, string $to Change the email subject line
wpss_email_from_name string $from_name Change the sender display name
wpss_email_data array $email Modify the entire email data array before sending
wpss_notification_email_content string $content, string $subject, int $user_id, array $data Modify any notification email content

Vendor-Specific Email Filters

Filter Parameters Purpose
wpss_vendor_welcome_email_content string $content, object $user, string $platform_name Customize the welcome email for new vendors
wpss_vendor_pending_email_content string $content, object $user, string $platform_name Customize the "application pending" email
wpss_vendor_approved_email_content string $content, object $user, string $platform_name Customize the vendor approval email
wpss_vendor_rejected_email_content string $content, object $user, string $platform_name Customize the vendor rejection email
wpss_admin_vendor_notification_content string $content, object $user Customize the admin notification when a new vendor registers

Common Customization Examples

Change the Sender Name

add_filter( 'wpss_email_from_name', function( $name ) {
    return 'DesignHub Marketplace';
} );

Change Subject Lines

add_filter( 'wpss_email_subject', function( $subject, $type, $to ) {
    if ( 'new_order' === $type ) {
        return 'You have a new project on DesignHub!';
    }
    return $subject;
}, 10, 3 );

Add Onboarding Content to Vendor Welcome Email

add_filter( 'wpss_vendor_welcome_email_content', function( $content, $user, $platform ) {
    $content .= '<h3>Getting Started</h3>';
    $content .= '<ul>';
    $content .= '<li>Complete your profile with a photo and bio</li>';
    $content .= '<li>Create your first service listing</li>';
    $content .= '<li>Set up your payment method for withdrawals</li>';
    $content .= '</ul>';
    return $content;
}, 10, 3 );
add_filter( 'wpss_notification_email_content', function( $content, $subject, $user_id, $data ) {
    $content .= '<p style="color:#999;font-size:12px;">Need help? Contact us at support@example.com</p>';
    return $content;
}, 10, 4 );

Customize the Vendor Rejection Email

add_filter( 'wpss_vendor_rejected_email_content', function( $content, $user, $platform ) {
    // Replace the default content entirely
    $content  = '<p>Hi ' . esc_html( $user->display_name ) . ',</p>';
    $content .= '<p>Your application to sell on ' . esc_html( $platform ) . ' was not approved at this time.</p>';
    $content .= '<p>Common reasons include incomplete profile information or services that do not match our marketplace categories.</p>';
    $content .= '<p>You are welcome to reapply after updating your profile.</p>';
    return $content;
}, 10, 3 );

Email Trigger Hooks

Emails are sent in response to specific action hooks. If you need to run custom logic alongside an email (or conditionally suppress an email), hook into the same action:

Email Type Triggered By
New Order wpss_order_status_changed (to pending_requirements)
Delivery Ready wpss_delivery_submitted
Order Completed wpss_order_completed
Dispute Opened wpss_dispute_opened
Vendor Registered wpss_vendor_registered
Withdrawal Requested wpss_withdrawal_requested
Level Promotion wpss_vendor_level_promoted
Requirements Reminder wpss_send_requirements_reminder_email

WooCommerce Email Integration [PRO]

When using WooCommerce as the e-commerce platform, marketplace emails can optionally integrate with WooCommerce's email system:

  • Emails inherit your WooCommerce email template and branding
  • Configure subject lines at WooCommerce > Settings > Emails
  • Works with WooCommerce email customizer plugins
  • Provides a consistent look across store and marketplace emails

Testing Emails

  1. Go to Sell Services > Settings > Emails
  2. Click Send Test Email
  3. Check your inbox (and spam folder)

The test email uses emails/test-email.php and shows your current header/footer branding. Use it to verify that your template overrides and SMTP configuration are working correctly.


Action Scheduler Integration

Since version 1.1.0 every recurring job in WP Sell Services runs on Action Scheduler instead of WP-Cron. This gives operators a real queue with durable retry, admin-visible run history (Tools > Scheduled Actions), and proper task isolation - no more dispute cron blocking page loads on a cron-starved site.

What Runs On Action Scheduler

All free-plugin jobs use the wpss group; Pro uses wpss-pro. The group convention lets the deactivator sweep everything in a single call.

Hook Interval Purpose
wpss_check_late_orders 1 hour Flags orders past their delivery deadline
wpss_process_cancellation_timeouts 1 hour Auto-cancels orders stuck in cancellation grace
wpss_process_offline_auto_cancel 1 hour Cancels offline-gateway orders that never paid
wpss_auto_complete_orders 12 hours Auto-completes delivered orders past the review window
wpss_update_vendor_stats 12 hours Refreshes cached vendor metrics
wpss_send_deadline_reminders Daily Emails vendors about upcoming delivery deadlines
wpss_send_requirements_reminders Daily Nudges buyers to submit order requirements
wpss_check_requirements_timeout Daily Handles orders where the buyer never submitted requirements
wpss_cleanup_expired_requests Daily Removes expired buyer requests
wpss_cron_daily Daily Dispute workflow deadline check
wpss_audit_log_cleanup Daily Prunes the audit log per retention setting
wpss_cleanup_abandoned_tips Daily Clears unpaid tip sub-orders past the abandon window
wpss_cleanup_abandoned_extensions Daily Same contract for extension sub-orders
wpss_cleanup_abandoned_milestones Daily Same contract for non-contract milestones
wpss_cleanup_review_votes Daily Expires guest "marked review helpful" idempotency rows from wp_options
wpss_recalculate_seller_levels Weekly Seller level progression recalculation
wpss_process_auto_withdrawals Admin-selected (weekly / biweekly / monthly) Auto-payout run if enabled in Settings

The Scheduler Facade

Every scheduling call in the plugin routes through WPSellServices\Services\Scheduler. You should use it too - it's easier to stub in tests, enforces the wpss group by default, and handles the "data store not ready" race that Action Scheduler has on early plugins_loaded.

use WPSellServices\Services\Scheduler;

// Schedule a recurring job. Idempotent — if an action with this hook
// is already pending, the call is a no-op.
Scheduler::schedule_recurring( 'my_hook', HOUR_IN_SECONDS );

// Schedule a one-off at a specific timestamp. Also idempotent on
// (hook + args + group).
Scheduler::schedule_single( 'my_hook', time() + 300, array( 'order_id' => 42 ) );

// Cancel everything matching a hook, any args.
Scheduler::unschedule_all( 'my_hook' );

// Cancel every action in the `wpss` group (used by the deactivator).
Scheduler::unschedule_all_for_group( Scheduler::GROUP_FREE );

// Check whether something is pending.
if ( Scheduler::has_pending( 'my_hook' ) ) {
    // ...
}

Calling Before AS Is Ready

Action Scheduler's data store comes up on the action_scheduler_init action (fired during init). Calling as_schedule_*() before that logs a warning ("was called before the Action Scheduler data store was initialized").

Scheduler handles this with is_ready() and on_ready():

// Defer the call until AS is up. Safe to use from plugins_loaded
// or any earlier hook — if AS is already ready, it runs immediately.
Scheduler::on_ready( function () {
    Scheduler::schedule_recurring( 'my_hook', HOUR_IN_SECONDS );
} );

All of Scheduler's public methods already auto-defer via on_ready internally - on_ready() itself is only needed when you want to wrap a larger block of work.

Upgrade Path From Pre-1.1.0

Sites upgrading from 1.1.0 will have WP-Cron entries for the legacy hook names. On first load after the upgrade, Plugin::clear_legacy_wpcron_hooks() runs once and scrubs the WP-Cron entries for:

wpss_check_late_orders
wpss_auto_complete_orders
wpss_send_deadline_reminders
wpss_send_requirements_reminders
wpss_check_requirements_timeout
wpss_recalculate_seller_levels
wpss_process_cancellation_timeouts
wpss_process_offline_auto_cancel
wpss_cleanup_expired_requests
wpss_update_vendor_stats
wpss_process_auto_withdrawals
wpss_cron_daily
wpss_audit_log_cleanup

Then Activator::schedule_cron_events() re-runs, registering everything against Action Scheduler. The sweep is keyed on version change so it fires exactly once per site.

Adding A New Recurring Job

  1. Author the handler in your service class:

    add_action( 'my_addon_nightly_cleanup', array( $this, 'nightly_cleanup' ) );
    
  2. Schedule it once - either on activation, or from a Scheduler::on_ready() call during bootstrap:

    use WPSellServices\Services\Scheduler;
    
    Scheduler::on_ready( function () {
        Scheduler::schedule_recurring( 'my_addon_nightly_cleanup', DAY_IN_SECONDS );
    } );
    
  3. If you're writing a Pro extension, pass Scheduler::GROUP_PRO as the group so it gets swept with the rest of Pro on deactivation.

Monitoring

Scheduled Actions admin screen lives at Tools > Scheduled Actions. Filter by the wpss group to see every free-plugin job, its next run, last run, status, and log. Failed actions show their exception message inline - useful when debugging a flaky third-party API.

Why File-Load Require

wp-sell-services.php requires action-scheduler.php at file-load time (not from a plugins_loaded hook). Action Scheduler's own internals bootstrap on plugins_loaded:1 - registering the every_minute interval used by its queue runner. If the require runs later, AS's queue runner can't re-schedule itself and WordPress logs:

Cron reschedule event error for hook: action_scheduler_run_queue,
Error code: invalid_schedule

The file-load require is the recommended pattern documented in the Action Scheduler wiki and is safe - plugin headers run before any hook fires.

Testing

The plugin ships PHPStan stubs for Action Scheduler's function family in tests/stubs/action-scheduler-stubs.php. That way static analysis passes without needing AS itself in the composer dev-requires tree; at runtime the real library is already loaded.

# phpstan.neon
parameters:
    scanFiles:
        - tests/stubs/action-scheduler-stubs.php

In PHPUnit tests, you can safely call Scheduler::has_pending() etc. - if AS isn't loaded in the test bootstrap, the facade falls through to false/0 rather than a fatal.

WP-CLI Commands

WP Sell Services ships a wpss command namespace for site operators and developers. Run wp wpss to list everything, or add --help to any command for its full options.

wp wpss demo         Manage demo services
wp wpss preflight    Run release-readiness preflight checks
wp wpss scale        Seed, benchmark and teardown a production-shape dataset
wp wpss service      Manage services (alias of `demo` -- same subcommands)
wp wpss test:flow    Run end-to-end data flow tests
wp wpss validate     Validate models and schema

All commands respect the current site in multisite (--url=).

Demo content

wp wpss demo and wp wpss service are the same command registered under two names, so every subcommand below works with either prefix.

wp wpss demo create --count=20 --featured=5   # seed 20 services, 5 featured
wp wpss demo marketplace                      # seed a FULL demo marketplace
wp wpss demo list                             # list services with stats
wp wpss demo stats                            # marketplace statistics summary
wp wpss demo regenerate-meta                  # rebuild computed service meta
wp wpss demo delete --yes                     # remove all demo/test content

create and marketplace are not the same thing. create seeds service listings only. marketplace builds a working marketplace: multiple vendors with profiles and portfolios, buyers, orders across the whole lifecycle, reviews, buyer requests with proposals, and conversations. Use marketplace for staging sites, theme testing, and client demos; use create when you just need catalog volume.

Demo content is flagged internally, so demo delete never touches real customer data. delete prompts for confirmation -- pass --yes in scripts.

Health checks

wp wpss preflight    # verify database tables, settings defaults, page mappings
wp wpss validate     # validate marketplace data integrity

Run preflight after installation, after a migration, and before a release. Every check prints PASS or FAIL with the reason.

Testing and gap detection

wp wpss test:flow      # end-to-end data flow tests

Earlier documentation listed wp wpss test run, test tables, test gaps, test seed and test clean. No bare wpss test command is registered -- those examples fail with "not a registered subcommand". The only command in this group is test:flow. For seeding and cleanup use wp wpss demo, and for release checks wp wpss preflight.

test:flow walks a complete order lifecycle through the data layer and reports where a flow breaks. It is the fastest way to confirm a fresh install actually works end to end.

API payload contract

wp wpss api:shapes                        # audit every GET route
wp wpss api:shapes --verbose              # also list routes it could not reach
wp wpss api:shapes --route=conversations  # narrow to one area
wp wpss api:shapes --user=diego           # audit as a vendor, not an admin

Walks every registered GET route in both namespaces, fills parameterised routes from real rows in the database, and inspects each response for the two conventions a client depends on: dates are ISO-8601 with an offset, and any object describing a person carries deleted. Exits non-zero on a breach, so it can gate a build.

Run it after adding or changing an endpoint. It exists because the same class of inconsistency was reported three times, and twice the fix was verified against a hand-picked sample of endpoints and reported as if it covered the API.

Read the "Not audited" count as part of the result. Those are routes with no matching row on the current dataset, or not readable as the chosen user -- an unaudited route is exactly where the last gaps hid, so the command names them rather than passing over them silently. Seeding the missing data, or re-running with --user, shrinks the list.

Scale benchmarking

For verifying the marketplace holds up at production shape -- 10k vendors with orders and wallet transactions.

wp wpss scale seed                    # seed a production-shape dataset
wp wpss scale bench                   # time every hot-path query vs its budget
wp wpss scale bench --seed --teardown # seed, bench, teardown in one shot (CI gate)
wp wpss scale teardown --yes          # remove all benchmark data

Every seeded row carries a sentinel (a description / vendor_notes prefix plus a high user-id offset), so teardown removes exactly what seed created and never touches real marketplace data.

bench measures each hot-path query against a per-query budget, so it fails loudly when a change makes a list view unusable at scale, rather than leaving you to discover it on a customer's site.

Pro Extension Points [PRO]

WP Sell Services Pro extends the free plugin only through documented hooks and services -- it never modifies free source. This page covers the Pro-specific seams. For the base marketplace hooks (services, orders, delivery, disputes, REST), see Hooks and Filters.

How Pro relates to Free

  • Pro boots after Free (later priority on plugins_loaded) and requires Free to be active.
  • Pro consumes Free's services and seams rather than calling WordPress APIs directly. Money helpers, the ledger debit-type list, and the display-price seam (wpss_catalog_price_html) all live in Free; Pro builds on them, so there is one settlement source of truth.
  • E-commerce integrations (WooCommerce, EDD, SureCart, FluentCart) are a payment rail only -- they move money. They never supply the marketplace's amounts, currency, or delivery deadline. Those are WP Sell Services-internal and set by the order provider.

That last point matters when you write an integration. If you source a price or a due date from the cart plugin, you will disagree with the ledger the moment someone edits a package or a refund lands.

Commission

Filter Parameters Purpose
wpss_commission_rate float $rate, object $order, int $vendor_id, int $service_id Adjust the commission percentage before the split is computed.
wpss_commission_fee float $fee, object $order, float $base, float $rate Override the final platform fee amount for an order.

Use wpss_commission_rate for percentage logic and wpss_commission_fee when a percentage cannot express what you need -- a flat fee, or an absolute per-plan override.

// Flat $5 platform fee, regardless of order value.
add_filter( 'wpss_commission_fee', function ( $fee, $order, $base, $rate ) {
    return min( 5.00, $base );
}, 10, 4 );

The split is computed once via CommissionService and persisted on the order; every rail and payout reads the stored value. Return a value from these filters and it becomes the number of record -- do not try to adjust the fee later in the flow.

See Tiered Commission Rules.

Analytics

Hook Parameters Purpose
wpss_analytics_init AnalyticsManager $manager Fires when the analytics subsystem boots.
wpss_analytics_widgets array $widgets Register additional analytics widgets.

Wallet

Hook Parameters
wpss_wallet_providers array $providers
wpss_wallet_credited int $user_id, float $amount, string $description, string $provider_id
wpss_wallet_debited int $user_id, float $amount, string $description, string $provider_id
wpss_vendor_payout_processed int $order_id, int $vendor_id, float $amount

Register wpss_wallet_providers to add your own wallet backend alongside the built-in Internal Wallet, TeraWallet, WooWallet, and MyCred providers.

Storage

Hook Parameters
wpss_storage_providers array $providers

Add an S3-compatible or bespoke storage backend next to S3, Google Cloud Storage, and DigitalOcean Spaces.

Payment gateways

Hook Parameters
wpss_payment_gateways array $gateways
wpss_render_secret_field (gateway settings rendering)

E-commerce adapter hooks

Each integration exposes lifecycle hooks so you can react to rail-specific events without coupling to the rail.

EDD

Hook Fires when
wpss_edd_adapter_init The EDD adapter boots.
wpss_edd_service_purchased An EDD purchase of a service completes.
wpss_edd_services_processed All services in an EDD order have been processed.
wpss_edd_order_record_created The marketplace order is created from an EDD order.
wpss_edd_service_meta_saved Service meta is saved on the EDD product.
wpss_edd_service_checkout_processed An EDD checkout line has been turned into an order.

FluentCart exposes parallel hooks (wpss_fluentcart_adapter_init, wpss_fluentcart_order_created, and so on).

SureCart was removed in 1.6.1 and fires nothing.

WooCommerce is the exception. The WooCommerce adapter does not fire its own namespaced lifecycle hooks -- it reuses the core wpss_order_created and wpss_order_status_changed hooks instead. Code written against those works identically whether the sale came through WooCommerce or standalone checkout.

Use adapter hooks to observe or annotate, never to source marketplace amounts. The order provider owns price, currency, and delivery deadline.

Payouts and Stripe Connect

Hook Parameters
wpss_pro_connect_payout_paid string $payout_id, string $account_id, float $amount, string $currency
wpss_pro_connect_payout_failed string $payout_id, string $account_id, string $failure_code, string $failure_message
wpss_pro_connect_transfer_created string $transfer_id, string $account_id, float $amount, string $currency

Stripe Connect settlement is recorded on the order so the wallet ledger can offset it; a refund reverses the ledger only when Stripe actually reclaimed the money. Build payout tooling against the wallet ledger and the persisted commission split, not against re-derived amounts.

Recurring services (feature-gated)

Recurring services sit behind a default-off feature flag in 1.3.0 while the feature is finished. Opt in on a development site with:

add_filter( 'wpss_pro_recurring_feature_available', '__return_true' );

While the flag is off, all recurring-service UI, settings, and the admin Subscriptions page stay hidden, so the feature never appears before it ships. Its REST routes register either way. See Recurring Services.

Database Schema

WP Sell Services stores marketplace data in 17 custom tables, and Pro adds 8 more. Services and buyer requests are custom post types; everything else lives in these tables.

All names are shown without the site's table prefix. Use $wpdb->prefix in code.

Read before you query. Money columns are authoritative and are written once at settlement. Do not recompute a fee or an earnings figure from a rate -- read the stored value. See Money Flow.

Where things live

Entity Stored as
Service wpss_service post type + wpss_service_packages / wpss_service_addons
Buyer request wpss_request post type
Order wpss_orders (custom table, not a post type)
Everything else Custom tables below

Because orders are not posts, WP_Query will not find them. Go through the order service or query the table directly.

Core tables

wpss_orders

The centre of the data model. One row per order and per sub-order.

Column Type Notes
id bigint PK
order_number varchar(50) Unique, human-facing (WPSS-…)
customer_id, vendor_id, service_id bigint Indexed
package_id, addons bigint / longtext Selected package and add-on JSON
platform varchar(50) Which rail created it, and the sub-order type discriminator
platform_order_id bigint For a sub-order, the parent order id
platform_item_id bigint Line item on the external rail
subtotal, addons_total, total decimal(11,3) Buyer-facing amounts
currency varchar(10) Base currency at time of sale
commission_rate decimal(5,2) Rate resolved at settlement
platform_fee decimal(11,3) What the platform kept
vendor_earnings decimal(11,3) What the vendor is owed
refunded_amount decimal(11,3) Running total refunded
connect_transfer_id varchar(255) Stripe Connect transfer, when used
status varchar(50) Indexed. See Order Lifecycle
delivery_deadline, original_deadline datetime Second changes when an extension is approved
payment_method, payment_status, transaction_id, paid_at Payment record
revisions_included, revisions_used int Copied from the package at purchase
billing_address, meta longtext JSON
created_at, updated_at, started_at, completed_at datetime

Sub-orders. Tips, paid extensions, and milestone phases are rows in this same table, linked to the parent through platform_order_id. A query that forgets to filter on platform will count a tip as an order and double-count revenue. See Sub-Order Pattern.

commission_rate, platform_fee, and vendor_earnings are persisted, not derived. Changing your commission rate does not alter orders already settled -- that is deliberate, and re-deriving them in a report will disagree with the ledger.

wpss_vendor_profiles

One row per vendor, keyed uniquely on user_id.

Identity: display_name, tagline, bio, avatar_id, cover_image_id, country, city, timezone, website, intro_video_url, social_links.

Status: status, verification_tier, verified_at.

Availability: is_available, vacation_mode, vacation_message, vacation_return_date.

Denormalised counters - total_orders, completed_orders, total_earnings, net_earnings, total_commission, avg_rating, total_reviews, response_time_hours, on_time_delivery_rate. These are maintained by the plugin and drive seller levels. Treat them as read-only; writing them directly puts them out of step with the rows they summarise.

custom_commission_rate is the free per-vendor commission override. NULL means "use the global rate".

wpss_wallet_transactions

The append-only earnings ledger. Every credit and debit, whatever the rail.

Column Notes
user_id, type, amount type is indexed; credits and debits share the table
balance_after Running balance snapshot at write time
currency, description, status
reference_type, reference_id Indexed pair pointing at the order, withdrawal, or payout that caused the row

A vendor's balance is the ledger, not a column. Derive it here rather than from vendor_profiles.total_earnings, which is a display counter.

wpss_withdrawals

vendor_id, amount, method, details (JSON), status, is_auto, admin_note, processed_at, processed_by, created_at.

is_auto distinguishes scheduled auto-withdrawals from vendor-initiated ones -- that is what the "Auto" badge in the admin list reads.

Orders and fulfilment

Table Purpose Key columns
wpss_service_packages Package tiers per service service_id, name, price, delivery_days, revisions, features, sort_order
wpss_service_addons Add-ons and extras service_id, title, field_type, price, price_type, min_quantity, max_quantity, is_required, options, delivery_days_extra, applies_to
wpss_order_requirements Buyer's answers order_id, field_data, attachments, submitted_at
wpss_deliveries Delivery submissions order_id, vendor_id, message, attachments, version, status, response_message, responded_at
wpss_extension_requests Paid extensions order_id, requested_by, extra_days, amount, pay_order_id, status, original_due_date, new_due_date

wpss_deliveries.version increments per revision round, so the delivery history is preserved rather than overwritten. extension_requests.pay_order_id points at the sub-order in wpss_orders that carries the payment.

Messaging and notifications

Table Purpose Key columns
wpss_conversations One thread per order order_id, service_id, participants, message_count, unread_counts, is_closed, last_message_at
wpss_messages Messages in a thread conversation_id, sender_id, type, content, attachments, metadata, read_by, is_edited
wpss_notifications In-app notifications user_id, type, title, message, data, action_url, is_read, read_at, is_email_sent

participants, unread_counts, and read_by are JSON. Unread state is per-participant, so do not treat is_read on a message as global.

Reviews, disputes, portfolio, proposals

Table Purpose Key columns
wpss_reviews Ratings and replies order_id, reviewer_id, reviewee_id, rating, communication_rating, quality_rating, delivery_rating, vendor_reply, status, is_public, helpful_count
wpss_disputes Dispute records dispute_number, order_id, initiated_by, respondent_id, reason, evidence, status, response_deadline, resolution, refund_amount, resolved_by, assigned_admin
wpss_dispute_messages Dispute thread dispute_id, sender_id, sender_role, message, attachments
wpss_proposals Bids on buyer requests request_id, vendor_id, cover_letter, proposed_price, proposed_days, contract_type, milestones, status, order_id
wpss_portfolio_items Vendor portfolio vendor_id, service_id, title, media, external_url, tags, is_featured, sort_order
wpss_audit_log Admin action trail actor_id, actor_role, event_type, object_type, object_id, action, from_value, to_value, is_forced, context

proposals.contract_type selects fixed-price or phased; when phased, the milestones JSON is what becomes milestone sub-orders on acceptance. proposals.order_id is populated once accepted.

Pro tables

Created by Pro's schema manager. They persist when Pro is deactivated or its license lapses, so nothing is lost on reactivation.

Table Purpose Key columns
wpss_pro_commission_rules Tiered commission rule_type, rate, rate_type, conditions, priority, is_active
wpss_pro_connect_accounts Stripe Connect vendor_id, stripe_account_id, status, payouts_enabled, charges_enabled, country, default_currency, onboarding_completed
wpss_pro_paypal_payout_batches Mass payout batches batch_id, payout_batch_id, status, total_amount, total_items, initiated_by
wpss_pro_paypal_payout_items Payouts in a batch batch_id, vendor_id, paypal_email, amount, payout_item_id, transaction_id, status, error_message
wpss_pro_subscription_plans Vendor plans name, slug, price, billing_period, max_services, max_featured, commission_override, stripe_price_id, is_active
wpss_pro_vendor_subscriptions Who is on a plan vendor_id, plan_id, stripe_subscription_id, status, current_period_start, current_period_end, cancelled_at
wpss_pro_recurring_subscriptions Recurring services customer_id, vendor_id, service_id, original_order_id, stripe_subscription_id, billing_interval, amount, status, next_billing_date

commission_rules.priority is ascending -- lowest number is evaluated first and the first match wins. See Tiered Commission.

Querying safely

  • Filter sub-orders. Any revenue or order-count query over wpss_orders must account for platform / platform_order_id, or tips and milestone phases inflate the numbers.
  • Use the stored split. platform_fee and vendor_earnings are the record. Never recompute from commission_rate.
  • Balance comes from the ledger. Sum wpss_wallet_transactions; the profile counters are for display.
  • Prepare everything. These are direct $wpdb tables with no WP_Query layer -- use $wpdb->prepare() on every interpolated value.
  • Do not ALTER these tables. Schema is managed by the plugin's installer and migrations will overwrite you. Use meta JSON columns or your own table.
  • Test at scale. wp wpss scale seed builds a production-shape dataset and wp wpss scale bench times hot-path queries against a budget. See WP-CLI Commands.

Uninstall

Tables are kept on plugin deletion unless the site owner enables Delete data on uninstall in Sell Services > Settings > Advanced.

Capabilities & Roles

WP Sell Services adds one role and eight capabilities. Everything the plugin gates -- admin screens, REST routes, abilities -- goes through them, so this is the page to read before building a custom role or restricting an area.

The vendor role

wpss_vendor is registered on activation. Users get it when they become a vendor, and it is additive: a subscriber who becomes a vendor keeps reading and gains selling.

It carries read, upload_files, edit_posts, plus five plugin capabilities.

The capabilities

Capability Grants
wpss_vendor Marker capability -- "this user is a vendor". Gates the selling side of the dashboard
wpss_manage_services Create and edit own services; also gates vendor-side earnings reads
wpss_manage_orders Act on orders (accept, deliver, complete). Gates the admin Orders screen
wpss_view_analytics Analytics dashboards
wpss_respond_to_requests Submit proposals on buyer requests
wpss_manage_vendors Approve, suspend, and edit vendors (admin)
wpss_manage_disputes Mediate and resolve disputes (admin)
wpss_manage_settings Read and write plugin settings (admin)

The first five are vendor-facing; the last three are administrative and are not granted to vendors.

Who gets what

Verified on a stock install:

Role Capabilities
administrator All eight
wpss_vendor wpss_vendor, wpss_manage_services, wpss_manage_orders, wpss_view_analytics, wpss_respond_to_requests
shop_manager (WooCommerce) The same five as wpss_vendor
author The same five as wpss_vendor
editor, contributor, subscriber None

Activation grants vendor capabilities to author and shop_manager.

This is deliberate -- a WooCommerce store manager can run the marketplace without a second account -- but the author case surprises people. Every existing WordPress author on the site becomes a vendor the moment the plugin activates, appearing in the vendor directory and able to publish services, regardless of your vendor-registration setting.

On a blog with contributors who are not sellers, that is probably not what you want. Strip it after activation:

add_action( 'admin_init', function () {
    $role = get_role( 'author' );
    if ( ! $role || ! $role->has_cap( 'wpss_vendor' ) ) {
        return;
    }
    foreach ( array( 'wpss_vendor', 'wpss_manage_services', 'wpss_manage_orders',
                     'wpss_view_analytics', 'wpss_respond_to_requests' ) as $cap ) {
        $role->remove_cap( $cap );
    }
} );

Note that vendor registration mode does not gate this. Closing registration stops new sign-ups; it does not revoke capabilities an existing role was granted at activation.

What each capability gates

Surface Capability
Admin: Orders screen wpss_manage_orders
Admin: Disputes screen wpss_manage_disputes
Admin: Settings screen wpss_manage_settings
Admin: Vendors screen wpss_manage_vendors
Admin: top-level menu edit_posts (deliberately low -- vendors reach their own screens)
REST: create/update service wpss_manage_services
REST: analytics wpss_view_analytics
Ability: wpss/create-service wpss_manage_services
Ability: wpss/view-earnings, wpss/request-withdrawal wpss_manage_services
Ability: wpss/submit-proposal wpss_respond_to_requests
Ability: analytics / subscriptions / Connect [PRO] manage_options (plus wpss_view_analytics for analytics)

A quirk worth knowing: vendor earnings reads are gated on wpss_manage_services, not on a dedicated earnings capability. If you strip wpss_manage_services from a role to stop it publishing services, you also remove its access to earnings and withdrawals. Add a role that keeps wpss_manage_services but restricts publishing another way if you need that split.

Checking capabilities in code

Use current_user_can() as normal:

if ( current_user_can( 'wpss_manage_disputes' ) ) {
    // Show mediation UI.
}

To ask "is this user a vendor?", prefer the plugin helper over checking the role name directly -- it is filterable, so sites that grant vendor status another way still work:

if ( wpss_is_vendor( $user_id ) ) {
    // ...
}

// Override the answer, e.g. treat a membership level as vendor status.
add_filter( 'wpss_is_vendor', function ( $is_vendor, $user_id ) {
    return $is_vendor || my_plugin_has_seller_membership( $user_id );
}, 10, 2 );

Customising

Grant a capability to another role

add_action( 'init', function () {
    $role = get_role( 'editor' );
    if ( $role && ! $role->has_cap( 'wpss_manage_disputes' ) ) {
        $role->add_cap( 'wpss_manage_disputes' );
    }
} );

Role capabilities are stored in the database, so this only needs to run once -- but guarding with has_cap() keeps it idempotent and cheap.

Remove one

add_action( 'init', function () {
    $role = get_role( 'shop_manager' );
    if ( $role ) {
        $role->remove_cap( 'wpss_manage_services' );
    }
} );

Build a moderator role

A reviewer who mediates and moderates but cannot sell or change settings:

add_action( 'init', function () {
    if ( get_role( 'marketplace_moderator' ) ) {
        return;
    }
    add_role( 'marketplace_moderator', 'Marketplace Moderator', array(
        'read'                 => true,
        'upload_files'         => true,
        'wpss_manage_orders'   => true,
        'wpss_manage_disputes' => true,
        'wpss_manage_vendors'  => true,
    ) );
} );

Deliberately no wpss_manage_settings (cannot change commission or gateways) and no wpss_vendor (does not appear in the vendor directory).

Gotchas

  • Roles persist. add_role() and add_cap() write to the database. Removing your code does not remove the role -- clean up on your own deactivation hook.
  • Multisite super admins pass current_user_can() for everything, so an admin-only screen is visible network-wide by design.
  • Verify after a migration. wp wpss preflight checks that the expected capabilities exist; a role editor plugin can strip them without warning.

Abilities API

WP Sell Services registers 12 abilities through the WordPress Abilities API, and Pro adds 3 more. They give AI agents, MCP clients, and any Abilities-aware tool a described, permission-checked way to work with your marketplace -- browse services, place and manage orders, message, review, and read earnings -- without that client needing to learn the REST surface.

Every ability is registered with an input schema, an output schema, an execute callback, and its own permission check.

They are a facade over the REST API, not a second implementation. Each execute callback builds a WP_REST_Request against the plugin's own wpss/v1 routes and dispatches it internally. That has three consequences worth knowing:

  • Behaviour cannot drift between an ability and its REST route -- there is one code path.
  • The route's own permission callback still runs, on top of the ability's. An ability whose permission check passes can still be refused by the endpoint.
  • Any filter you have added to a REST route applies to the ability too, for free.

Requirements

The Abilities API is part of WordPress 6.9 and later. WP Sell Services supports WordPress 6.4+, so on 6.4-6.8 the registrar detects that wp_register_ability() is absent and registers nothing. No error, no notice: the marketplace works exactly as before, and the abilities simply are not there.

To check on a given site:

wp eval 'var_dump( function_exists( "wp_register_ability" ) );'
wp eval 'print_r( array_keys( wp_get_abilities() ) );'

The category

All abilities live under one category:

Slug Label
wpss-marketplace Service Marketplace

Registered on wp_abilities_api_categories_init; the abilities themselves on wp_abilities_api_init.

Free abilities

All are exposed to REST (show_in_rest) and none are marked destructive.

Ability Permission Read-only Input
wpss/browse-services Public Yes search, category, min_price, max_price, sort_by, page, per_page
wpss/view-service Public Yes id
wpss/create-service wpss_manage_services No title, description, category, packages[]
wpss/manage-orders Logged in No action, order_id, status, page, per_page
wpss/send-message Logged in No order_id, message
wpss/view-earnings wpss_manage_services Yes period
wpss/request-withdrawal wpss_manage_services No amount, method
wpss/post-buyer-request Logged in No title, description, budget, category, deadline
wpss/submit-proposal wpss_respond_to_requests No request_id, price, delivery_days, cover_letter
wpss/leave-review Logged in No order_id, rating, comment
wpss/view-notifications Logged in Yes unread_only, page, per_page
wpss/manage-favorites Logged in No action, service_id

wpss/browse-services and wpss/view-service are the only two with a permission callback that returns true unconditionally -- they expose the same public catalog a visitor can already see. Everything else requires at least a logged-in user.

wpss/manage-orders and wpss/manage-favorites take an action enum rather than splitting into one ability per verb, which keeps the surface small for clients enumerating what they can do.

Pro abilities [PRO]

Registered only when Pro is active with a valid license -- an expired license means Pro loads nothing, so these disappear along with the rest of Pro.

Ability Permission Read-only Input
wpss/analytics-overview manage_options or wpss_view_analytics Yes period, metrics[]
wpss/manage-vendor-subscriptions manage_options Yes action, plan_id, vendor_id
wpss/configure-stripe-connect manage_options Yes action

Consuming them

REST

Abilities are discoverable and runnable under the core namespace:

/wp-json/wp-abilities/v1/abilities
/wp-json/wp-abilities/v1/abilities/wpss/browse-services

Note this is wp-abilities/v1, WordPress's namespace -- not the plugin's wpss/v1. The two are separate surfaces over the same services.

A client sees only the abilities whose permission callback passes for the authenticated user, so an anonymous request lists the two public ones and a vendor's token lists considerably more.

JavaScript

Use @wordpress/abilities rather than hand-rolling fetches, so permission filtering and schema validation come for free:

import { store as abilitiesStore } from '@wordpress/abilities';

Choosing abilities or REST

They are complementary, not alternatives:

  • Abilities are self-describing. A client can enumerate what exists, read the input schema, and call it without prior knowledge of your API. That is what makes them useful to an AI agent.
  • REST is finer-grained and complete. Every route in REST API Controllers is available; abilities cover the twelve highest-value marketplace actions.

Build a normal integration on REST. Reach for abilities when the caller is an agent, an MCP server, or anything that has to discover capability at runtime.

Adding your own

Register on the same hook and reuse the existing category so your ability appears alongside the marketplace's:

add_action( 'wp_abilities_api_init', function () {
    if ( ! function_exists( 'wp_register_ability' ) ) {
        return; // WordPress < 6.9.
    }

    wp_register_ability( 'my-plugin/export-orders', array(
        'label'               => __( 'Export Orders', 'my-plugin' ),
        'description'         => __( 'Export marketplace orders as CSV for a date range.', 'my-plugin' ),
        'category'            => 'wpss-marketplace',
        'input_schema'        => array(
            'type'       => 'object',
            'properties' => array(
                'from' => array( 'type' => 'string', 'format' => 'date' ),
                'to'   => array( 'type' => 'string', 'format' => 'date' ),
            ),
        ),
        'output_schema'       => array( 'type' => 'object' ),
        'execute_callback'    => 'my_plugin_export_orders',
        'permission_callback' => static function (): bool {
            return current_user_can( 'wpss_manage_orders' );
        },
        'meta'                => array(
            'annotations' => array(
                'readonly'    => true,
                'destructive' => false,
            ),
            'show_in_rest' => true,
        ),
    ) );
} );

Two things to get right:

  • Gate on a real capability. Your permission callback is the only thing standing between an agent and the action. Reuse the plugin's capabilities -- see Capabilities & Roles.
  • Annotate honestly. readonly and destructive are how a client decides whether to confirm with a human first. Marking a write as read-only invites an agent to call it unattended.

Troubleshooting

Symptom Cause
No wpss/* abilities at all WordPress below 6.9, so registration self-skips
Pro abilities missing Pro inactive or its license invalid
Ability listed but a client cannot call it Either the ability's permission callback, or the underlying REST route's, returned false for that user
Yours does not appear Registered on the wrong hook, or show_in_rest not set
Changes not reflected Object cache -- flush and retry

REST error codes

How to branch on WP Sell Services REST failures from a client.

Clients should branch on the HTTP status first and use the code only to choose the message or the recovery step. The status tells you what kind of failure it is; the code tells you which one.

Asserted by wp wpss rest:contract, which runs the table below against a live site as anonymous, buyer, vendor and admin. Run it before shipping a client release.

Status meanings

Status Meaning What the client should do
401 Not authenticated, or the token expired Refresh the token and retry once. Never log the user out on a single 401.
403 Authenticated, but not allowed Stop. Retrying will not help. Show why, using the code.
404 No such route, or no such resource Stop. Do not cache "gone" for a feature flag - check the code first.
409 Conflict with current state Refetch the resource and reconcile before retrying.
501 Feature disabled on this site Hide the feature. Do not retry.

The single most important rule: a 401 and a 403 must never be interchangeable. A client that treats 403 as "refresh and retry" loops forever; one that treats 401 as "permission denied" logs people out when a token simply expired.

Codes

Authentication

Code Status Meaning
rest_not_logged_in 401 No authenticated user. Every protected route answers this when anonymous.

Authorisation

Code Status Meaning
wpss_not_admin 403 Logged in, but lacks manage_options. Moderation, audit log, analytics, and the Pro admin endpoints.
wpss_not_vendor 403 Logged in, but not a vendor. Vendor-only creates and earnings surfaces.
wpss_not_owner 403 Logged in, but does not own this specific resource - and is not an admin. Orders, reviews, portfolio items, disputes, media.

These three are deliberately distinct. wpss_not_owner is about one resource; wpss_not_admin and wpss_not_vendor are about the caller. Before 1.6.0 the admin case also answered wpss_not_owner, so a client could not tell "this isn't yours" from "you need admin" without reading the English message.

Resources

Code Status Meaning
rest_no_route 404 Unknown path. Also returned by WordPress core for a known path with an unsupported method - see the note below.
wpss_order_not_found 404 The order does not exist, or is not visible to this caller.

State

Code Status Meaning
wpss_order_not_payable 409 The order is not in a payable state. Refetch it before retrying.
wpss_milestone_locked 409 An earlier milestone phase is not approved yet. Phases pay in lock-step.
wpss_report_already_resolved 400 The report has already been actioned by someone else.
wpss_realtime_disabled 501 Realtime is switched off on this site. Hide the feature.
wpss_missing_service_requirement 403 Checkout blocked: a required service requirement was not supplied (FluentCart rail).

Known deviation: wrong HTTP method

A known path called with an unsupported method returns 404 rest_no_route, not 405.

This is WordPress core's behaviour, not ours - DELETE /wp/v2/posts answers the same. We match core deliberately rather than special-casing our namespace, so the client can apply one rule to every WordPress API it talks to. If a client needs to distinguish "wrong method" from "wrong path", check the route against the schema before dispatching.

Verifying

wp wpss rest:contract              # full table, one line per check
wp wpss rest:contract --porcelain  # failure count only, for CI

Exits non-zero on the first violated expectation. Add a row to RestContractCommand::expectations() whenever a new permission gate ships.

FAQ & Troubleshooting

FAQ and Troubleshooting

Answers to the most common questions about WP Sell Services, plus solutions for issues you might run into.


Frequently Asked Questions

Do I need WooCommerce to use this plugin?

No. WP Sell Services works completely standalone with its own built-in checkout, Stripe, PayPal, and Offline payment support. You do not need WooCommerce or any other e-commerce plugin. The Pro version optionally adds WooCommerce, EDD, FluentCart, and SureCart as alternative checkout platforms if you want them.

How do I change the commission rate?

Go to Sell Services > Settings > Commission & Tax and set a platform-wide percentage (0-50%, default 10%). Per-vendor rates are also included free -- open a vendor under Sell Services > Vendors and give them their own rate, which overrides the global one. Pro adds tiered rules on top: rates that resolve automatically by category, seller level, or sales volume.

Can vendors set their own prices?

Yes. Each service has its own pricing packages (Basic, Standard, Premium), and vendors set the prices for each tier. You control the commission the platform takes, but vendors decide what they charge.

What happens if a vendor does not deliver on time?

Late orders are flagged in the system. Buyers can open a dispute, request a cancellation, or wait for the vendor to deliver. The dispute system lets both parties present their case, and an admin can step in to mediate and resolve the issue (including issuing refunds).

Is the marketplace mobile-friendly?

Yes. All frontend pages -- service listings, dashboards, order management, messaging -- are fully responsive and work on phones and tablets. The plugin also includes a full REST API, making it ready for native mobile app development.

Can I white-label the plugin?

[PRO] Yes, with the Pro version. You can rebrand the entire marketplace: custom platform name, logo, colors, and email branding. The "WP Sell Services" name does not appear anywhere your users can see it.

How do vendors get paid?

Vendors accumulate earnings as their orders are completed. They can request a withdrawal from their dashboard, and the admin approves and processes the payout. [PRO] With Pro, you can also set up automatic payouts via PayPal or Stripe Connect so vendors get paid without manual intervention.

Can buyers request custom work?

Yes. The Buyer Requests feature lets buyers post detailed project descriptions with budgets and timelines. Vendors browse these requests and submit proposals. When a buyer accepts a proposal, an order is created automatically.

What payment gateways are supported?

The free version includes Stripe, PayPal, and Offline (manual) payment gateways, all built into the standalone checkout. [PRO] The Pro version adds Razorpay and integrates with payment gateways from WooCommerce, EDD, FluentCart, and SureCart.

Can I run multiple marketplaces on a multisite network?

Yes. WP Sell Services works on WordPress multisite. Each site in the network runs its own independent marketplace.


Common Issues and Fixes

Services not showing up

  1. Flush permalinks -- Go to Settings > Permalinks and click Save Changes
  2. Check service status -- Services must be published, not draft or pending
  3. Clear cache -- Clear your site cache and browser cache
  4. Assign categories -- Services need at least one category assigned

Vendor registration not working

  1. Enable WordPress registration -- Go to Settings > General and check "Anyone can register"
  2. Enable vendor registration -- Go to Sell Services > Settings > Vendors and enable it
  3. Check approval mode -- If admin approval is required, approve pending vendors at Sell Services > Vendors > Pending

Pages showing 404 errors

Go to Settings > Permalinks and click Save Changes. This refreshes URL routing. Also verify the page is published and assigned in Sell Services > Settings > Pages.

Orders not appearing in vendor dashboard

  • Verify the order exists and has the correct vendor assigned
  • Check that the order status is valid
  • Look for errors in your WordPress debug log

Emails not arriving

  1. Test WordPress email -- Try resetting a password to see if any WordPress emails work
  2. Install an SMTP plugin -- WP Mail SMTP or FluentSMTP dramatically improves deliverability
  3. Check spam folder -- WordPress emails frequently land in spam without SMTP
  4. Verify notification settings -- Make sure the email type is enabled in Settings > Emails

Buyer requests not expiring automatically

Request expiration runs on WordPress cron, which requires site traffic to trigger. On low-traffic sites:

  1. Install the free WP Crontrol plugin to check scheduled tasks
  2. Set up a real server cron job to ping your site every 15 minutes

Delivery files not uploading

  1. Check file size limits -- The default max is 50MB. Increase in Settings > Advanced if needed
  2. Check allowed file types -- Make sure the file extension is permitted
  3. Check server limits -- Your hosting may have lower PHP upload limits than the plugin setting
  4. Verify disk space -- Make sure your server has available storage

Slow performance

  1. Install a caching plugin -- WP Super Cache, W3 Total Cache, or LiteSpeed Cache
  2. Use an object cache -- Redis or Memcached if your hosting supports it
  3. Optimize your database -- Regularly clean transients and optimize tables
  4. Consider a search plugin -- For large marketplaces, Relevanssi or ElasticSearch improves search speed

Getting Help

Enable debug mode for troubleshooting: Go to Sell Services > Settings > Advanced and enable Debug Mode. Check wp-content/debug.log for detailed error messages.

Have your details ready when contacting support:

  • WordPress version and PHP version
  • WP Sell Services version
  • Active theme name
  • List of active plugins
  • Error messages from the debug log
  • Steps to reproduce the issue

Support channels:

  • Free version -- WordPress.org support forum
  • Pro version -- Priority email support

Something unclear? Open a support ticket → · Refund policy

Buy WP Sell Services