Advertiser Portal Overview
PRO feature. Requires the WB Ad Manager Pro add-on on top of the free plugin.
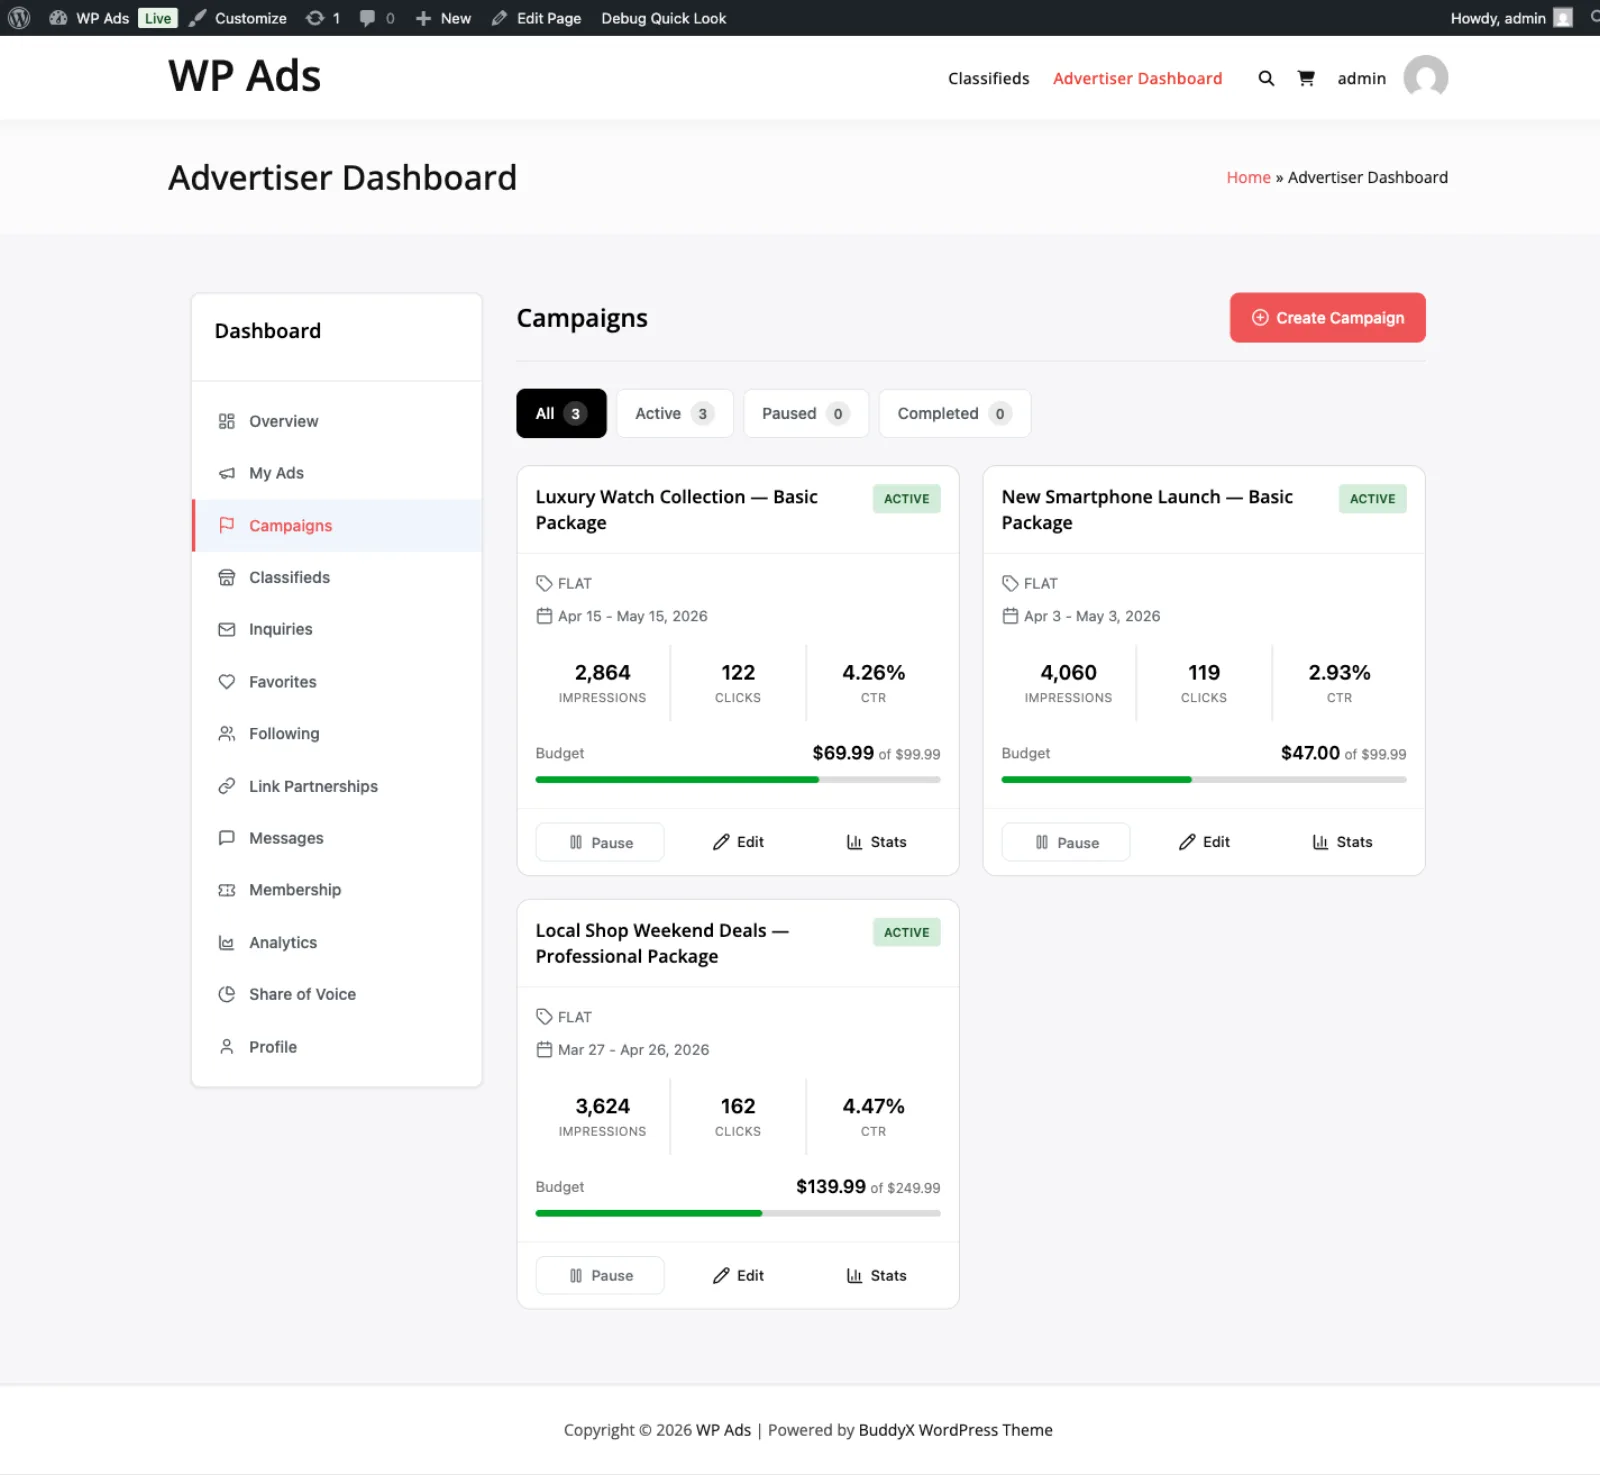
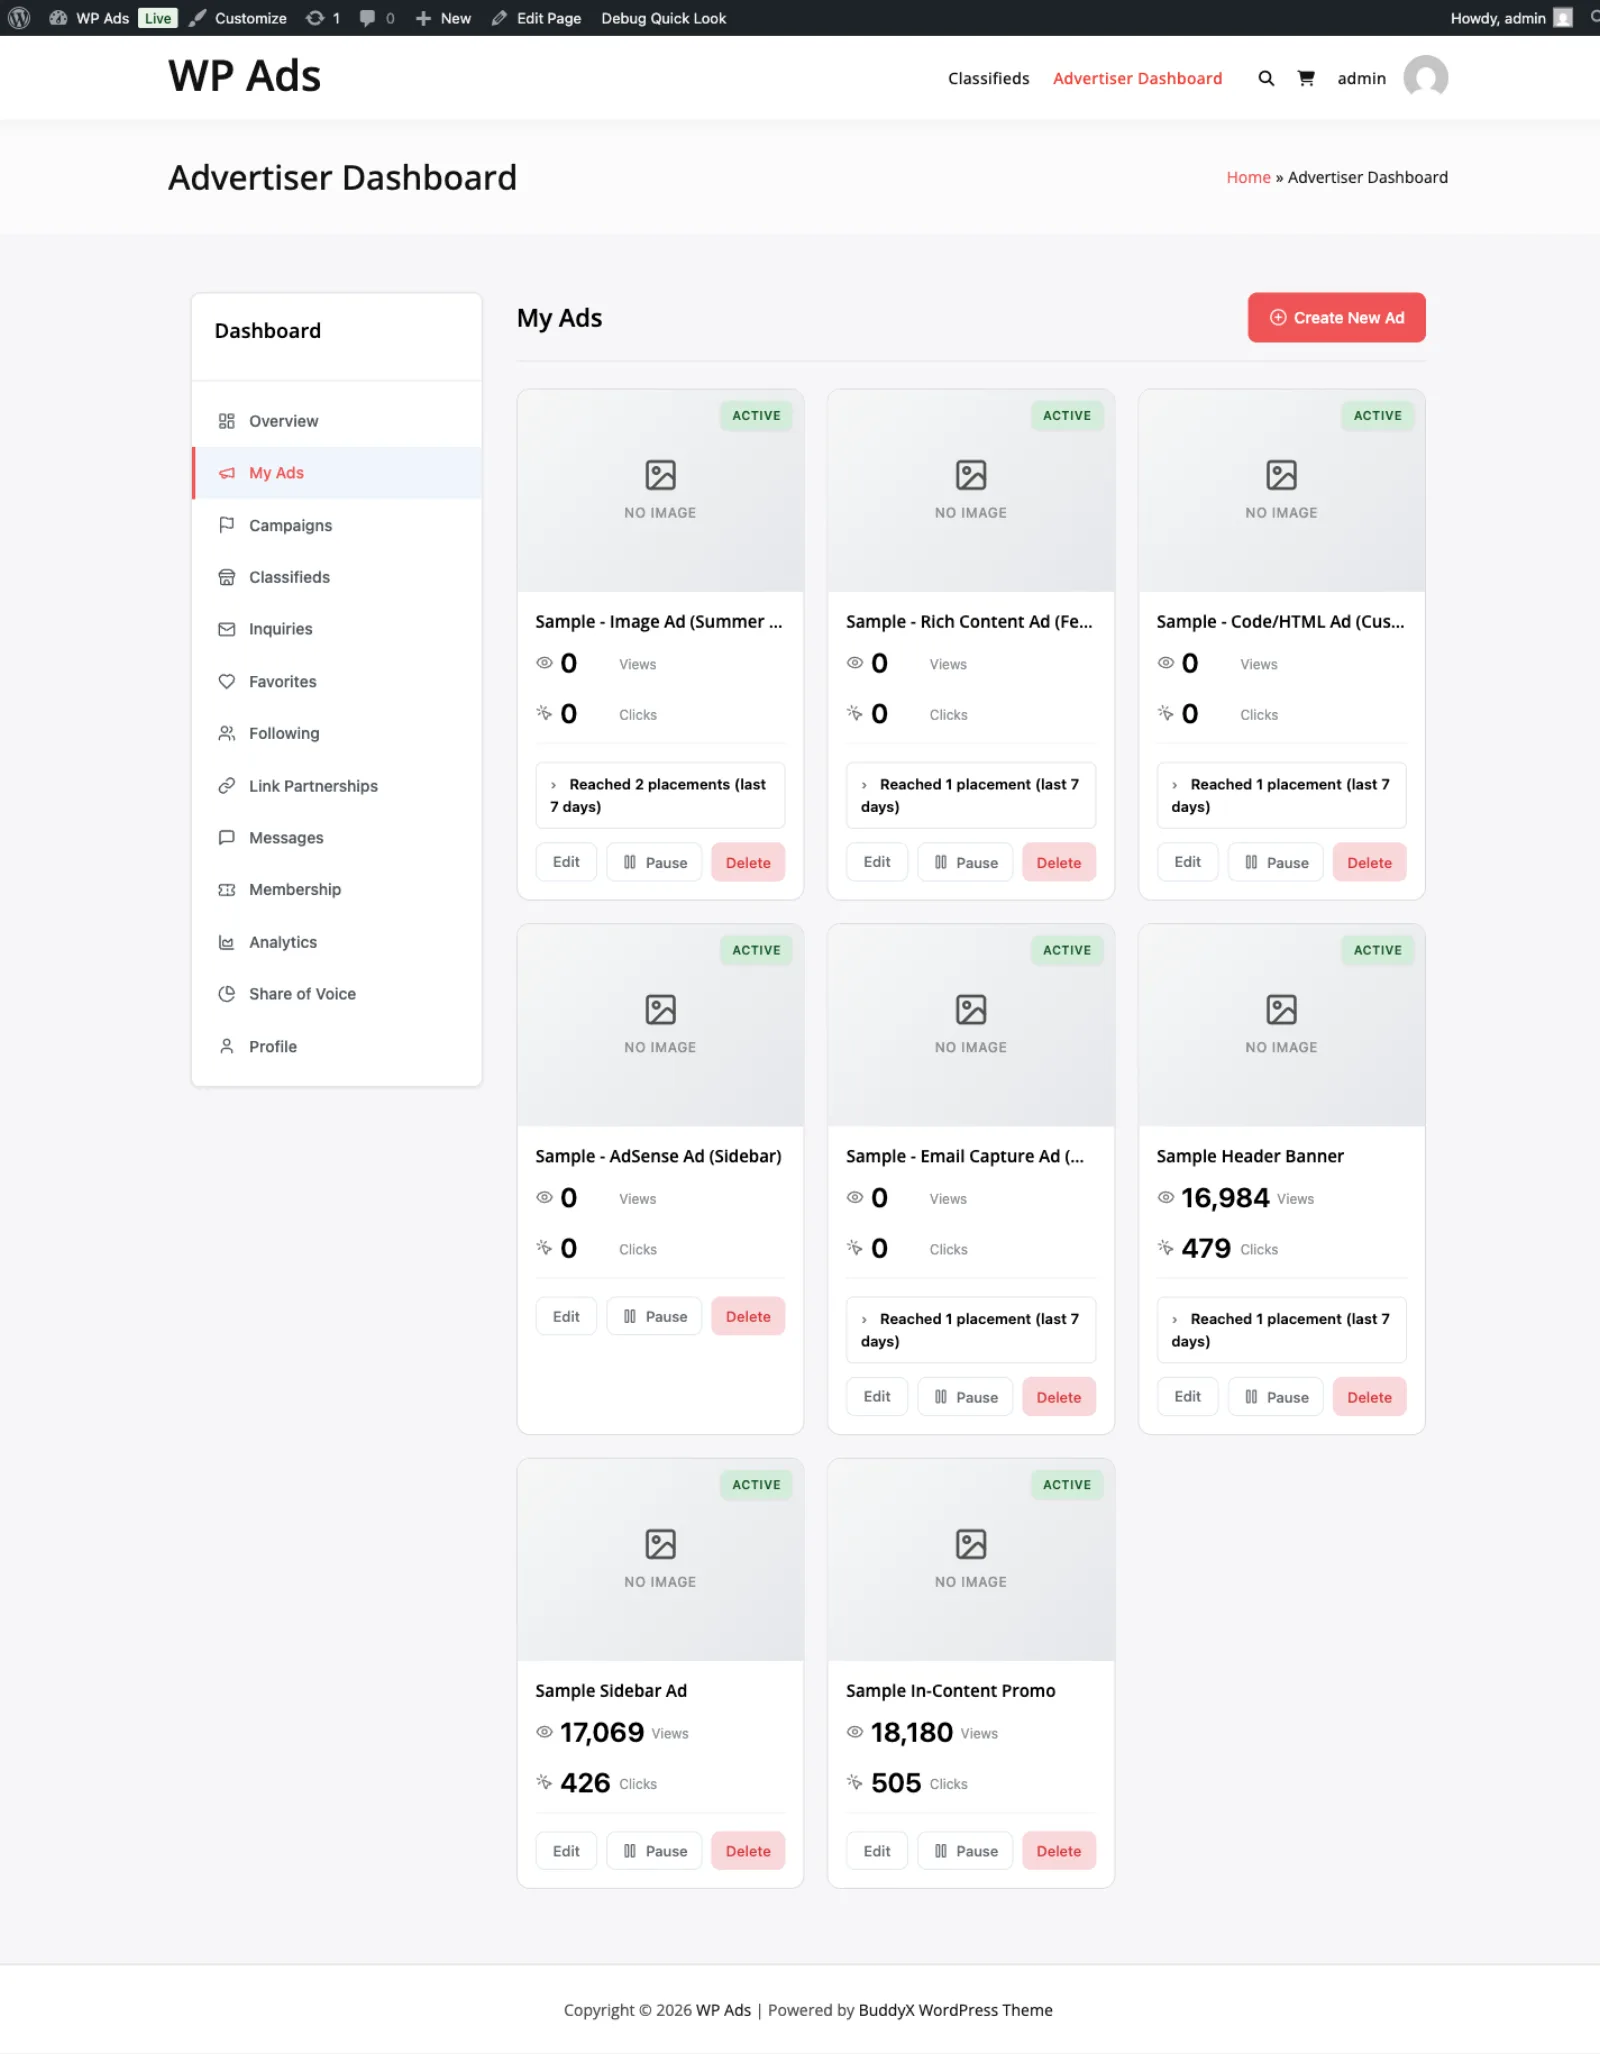
The Advertiser Portal is a frontend page where each advertiser manages their own ads, classifieds, wallet, campaigns, analytics, and profile. Advertisers never need WordPress admin access.
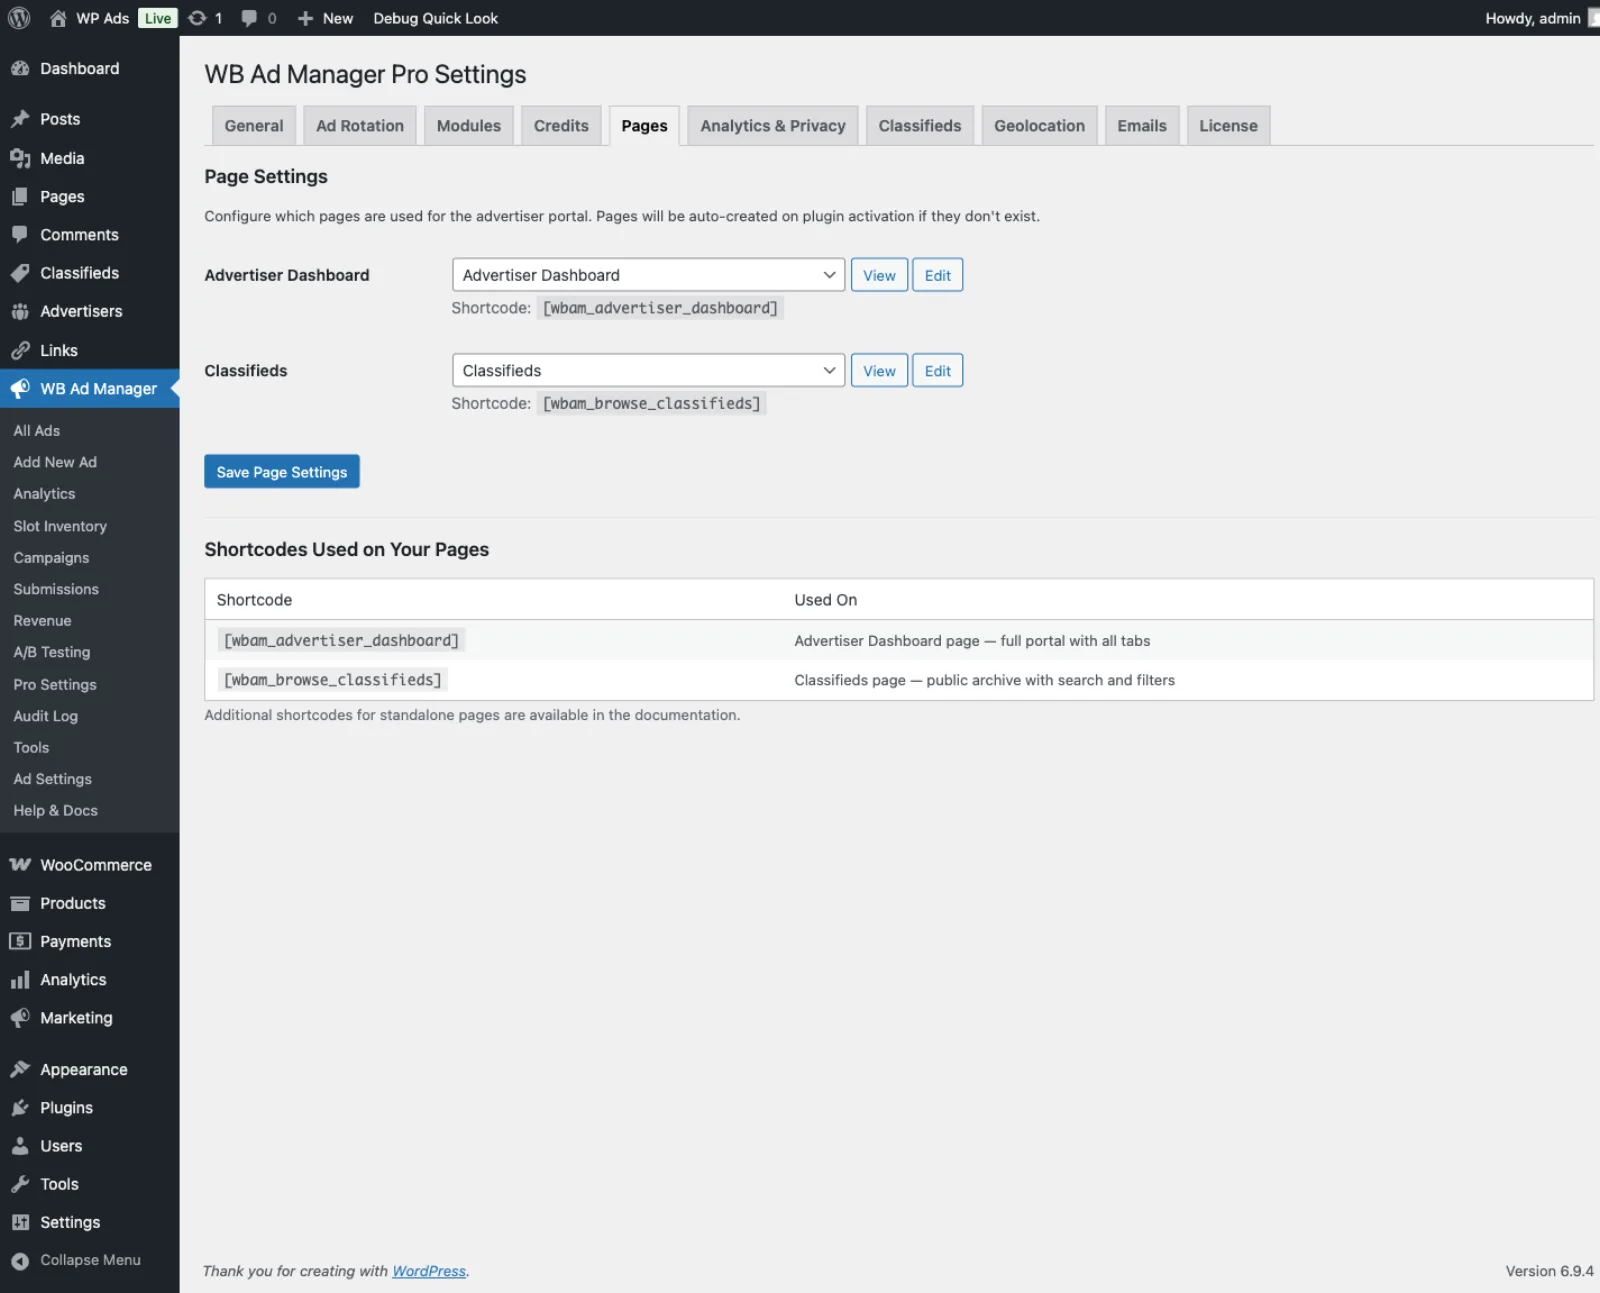
The portal is embedded on any page using a single shortcode:
[wbam_advertiser_dashboard]
How the Portal Works
When a logged-in user visits the dashboard page, the plugin checks whether they have an advertiser account. If auto-registration is enabled in settings, an account is created automatically. Otherwise, users register via the dashboard page and wait for admin approval.
The dashboard header displays the advertiser's current wallet balance and an Add Funds button that links to the Wallet tab. A tab bar along the top lets advertisers switch between sections.
Advertiser Registration and Approval Workflow
Registration
Advertisers can register in two ways:
- Self-registration - User logs in and visits the dashboard page. If Auto-approve advertisers is enabled, their account is activated immediately. If not, it enters
pending status.
- Admin-created - An admin goes to WB Ad Manager Pro → Advertisers → Add New, links the account to an existing WordPress user, and sets the initial status manually.
Account Statuses
| Status |
What It Means |
pending |
Account awaiting approval. The advertiser can log in and view the portal but sees a notice that approval is pending. They can still create ads. |
active |
Full access to all portal features and ad serving. |
suspended |
Account frozen. Advertiser cannot access the portal. All their ads are paused. Wallet balance is preserved. |
banned |
Permanently blocked. Similar to suspended but indicates a policy violation. |
Approval Flow
- New advertiser registers - status set to
pending
- Admin sees the account in WB Ad Manager Pro → Advertisers
- Admin clicks the advertiser name and changes status to Active
- Advertiser receives an approval email (if email notifications are enabled)
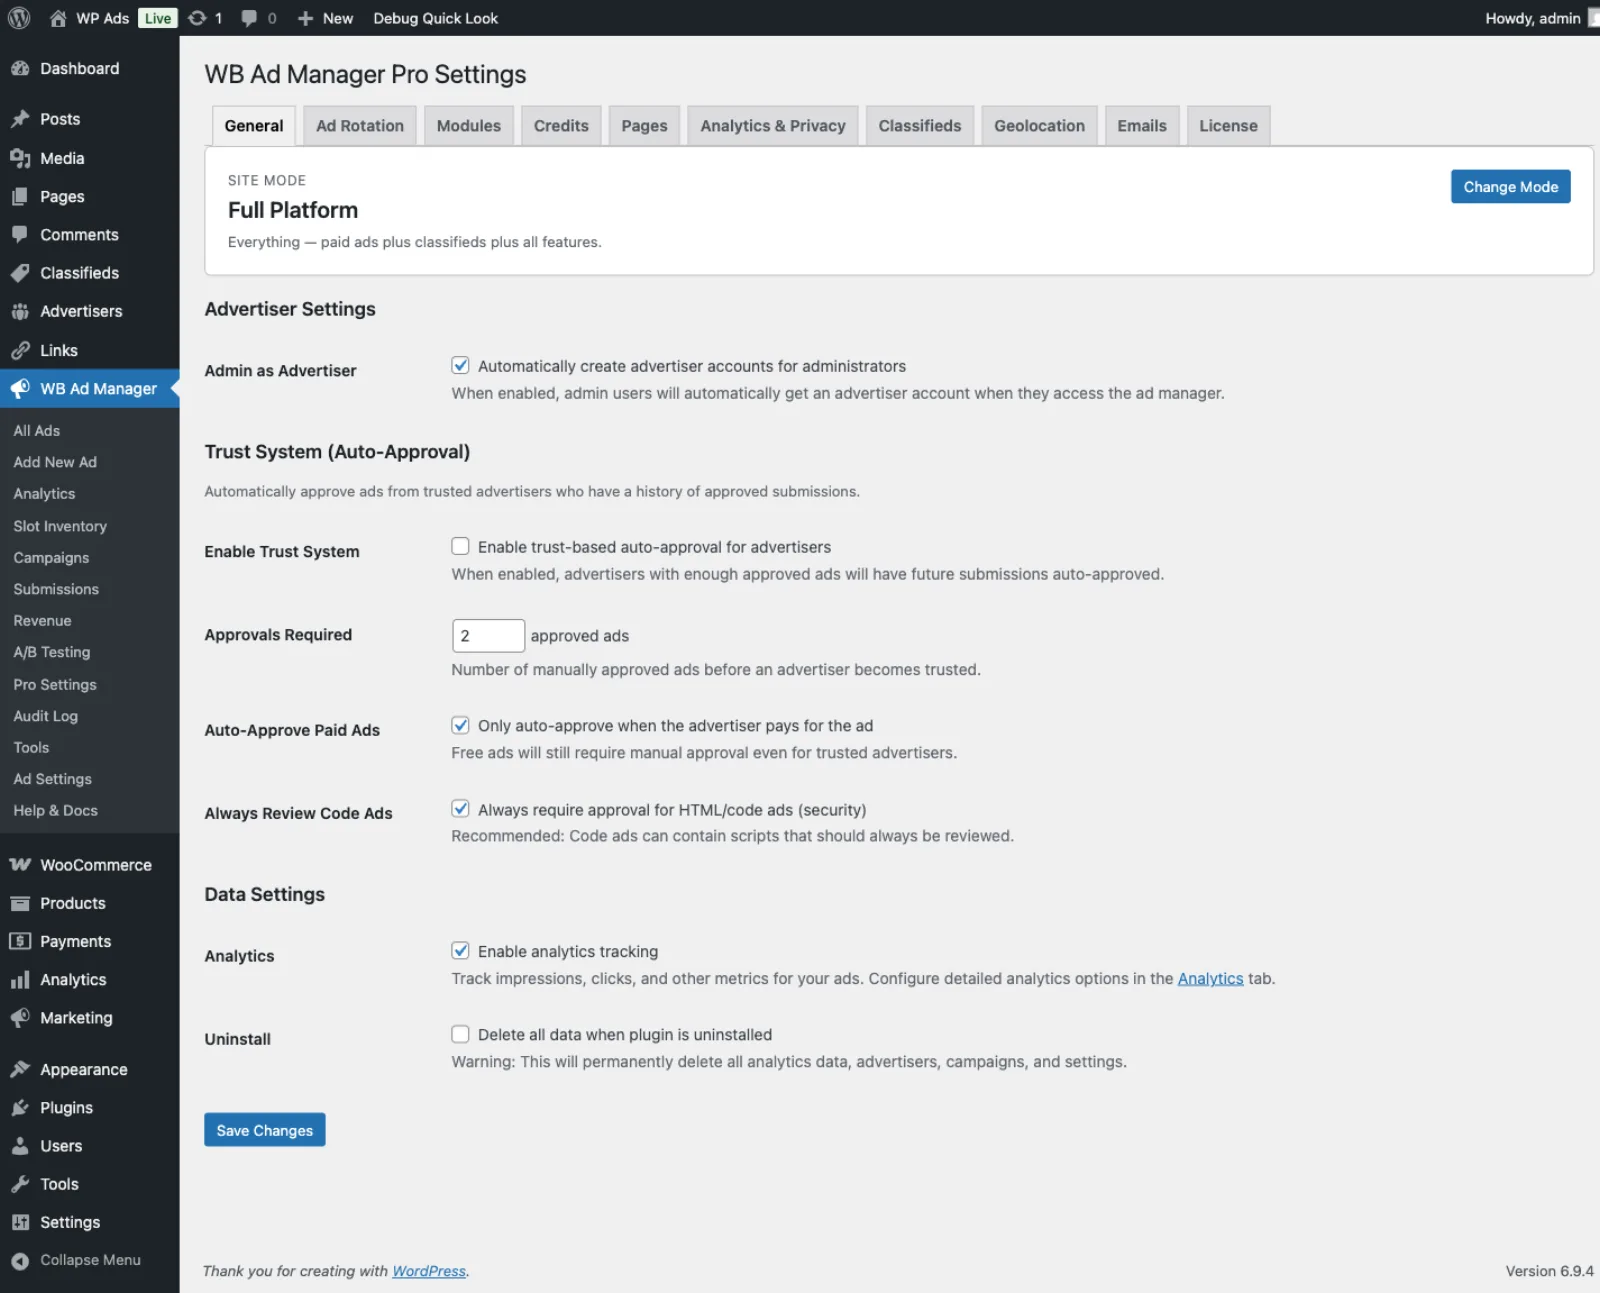
To enable auto-approval (skip manual review): go to WB Ad Manager Pro → Settings → General and enable Auto-approve advertisers.
Portal Tabs
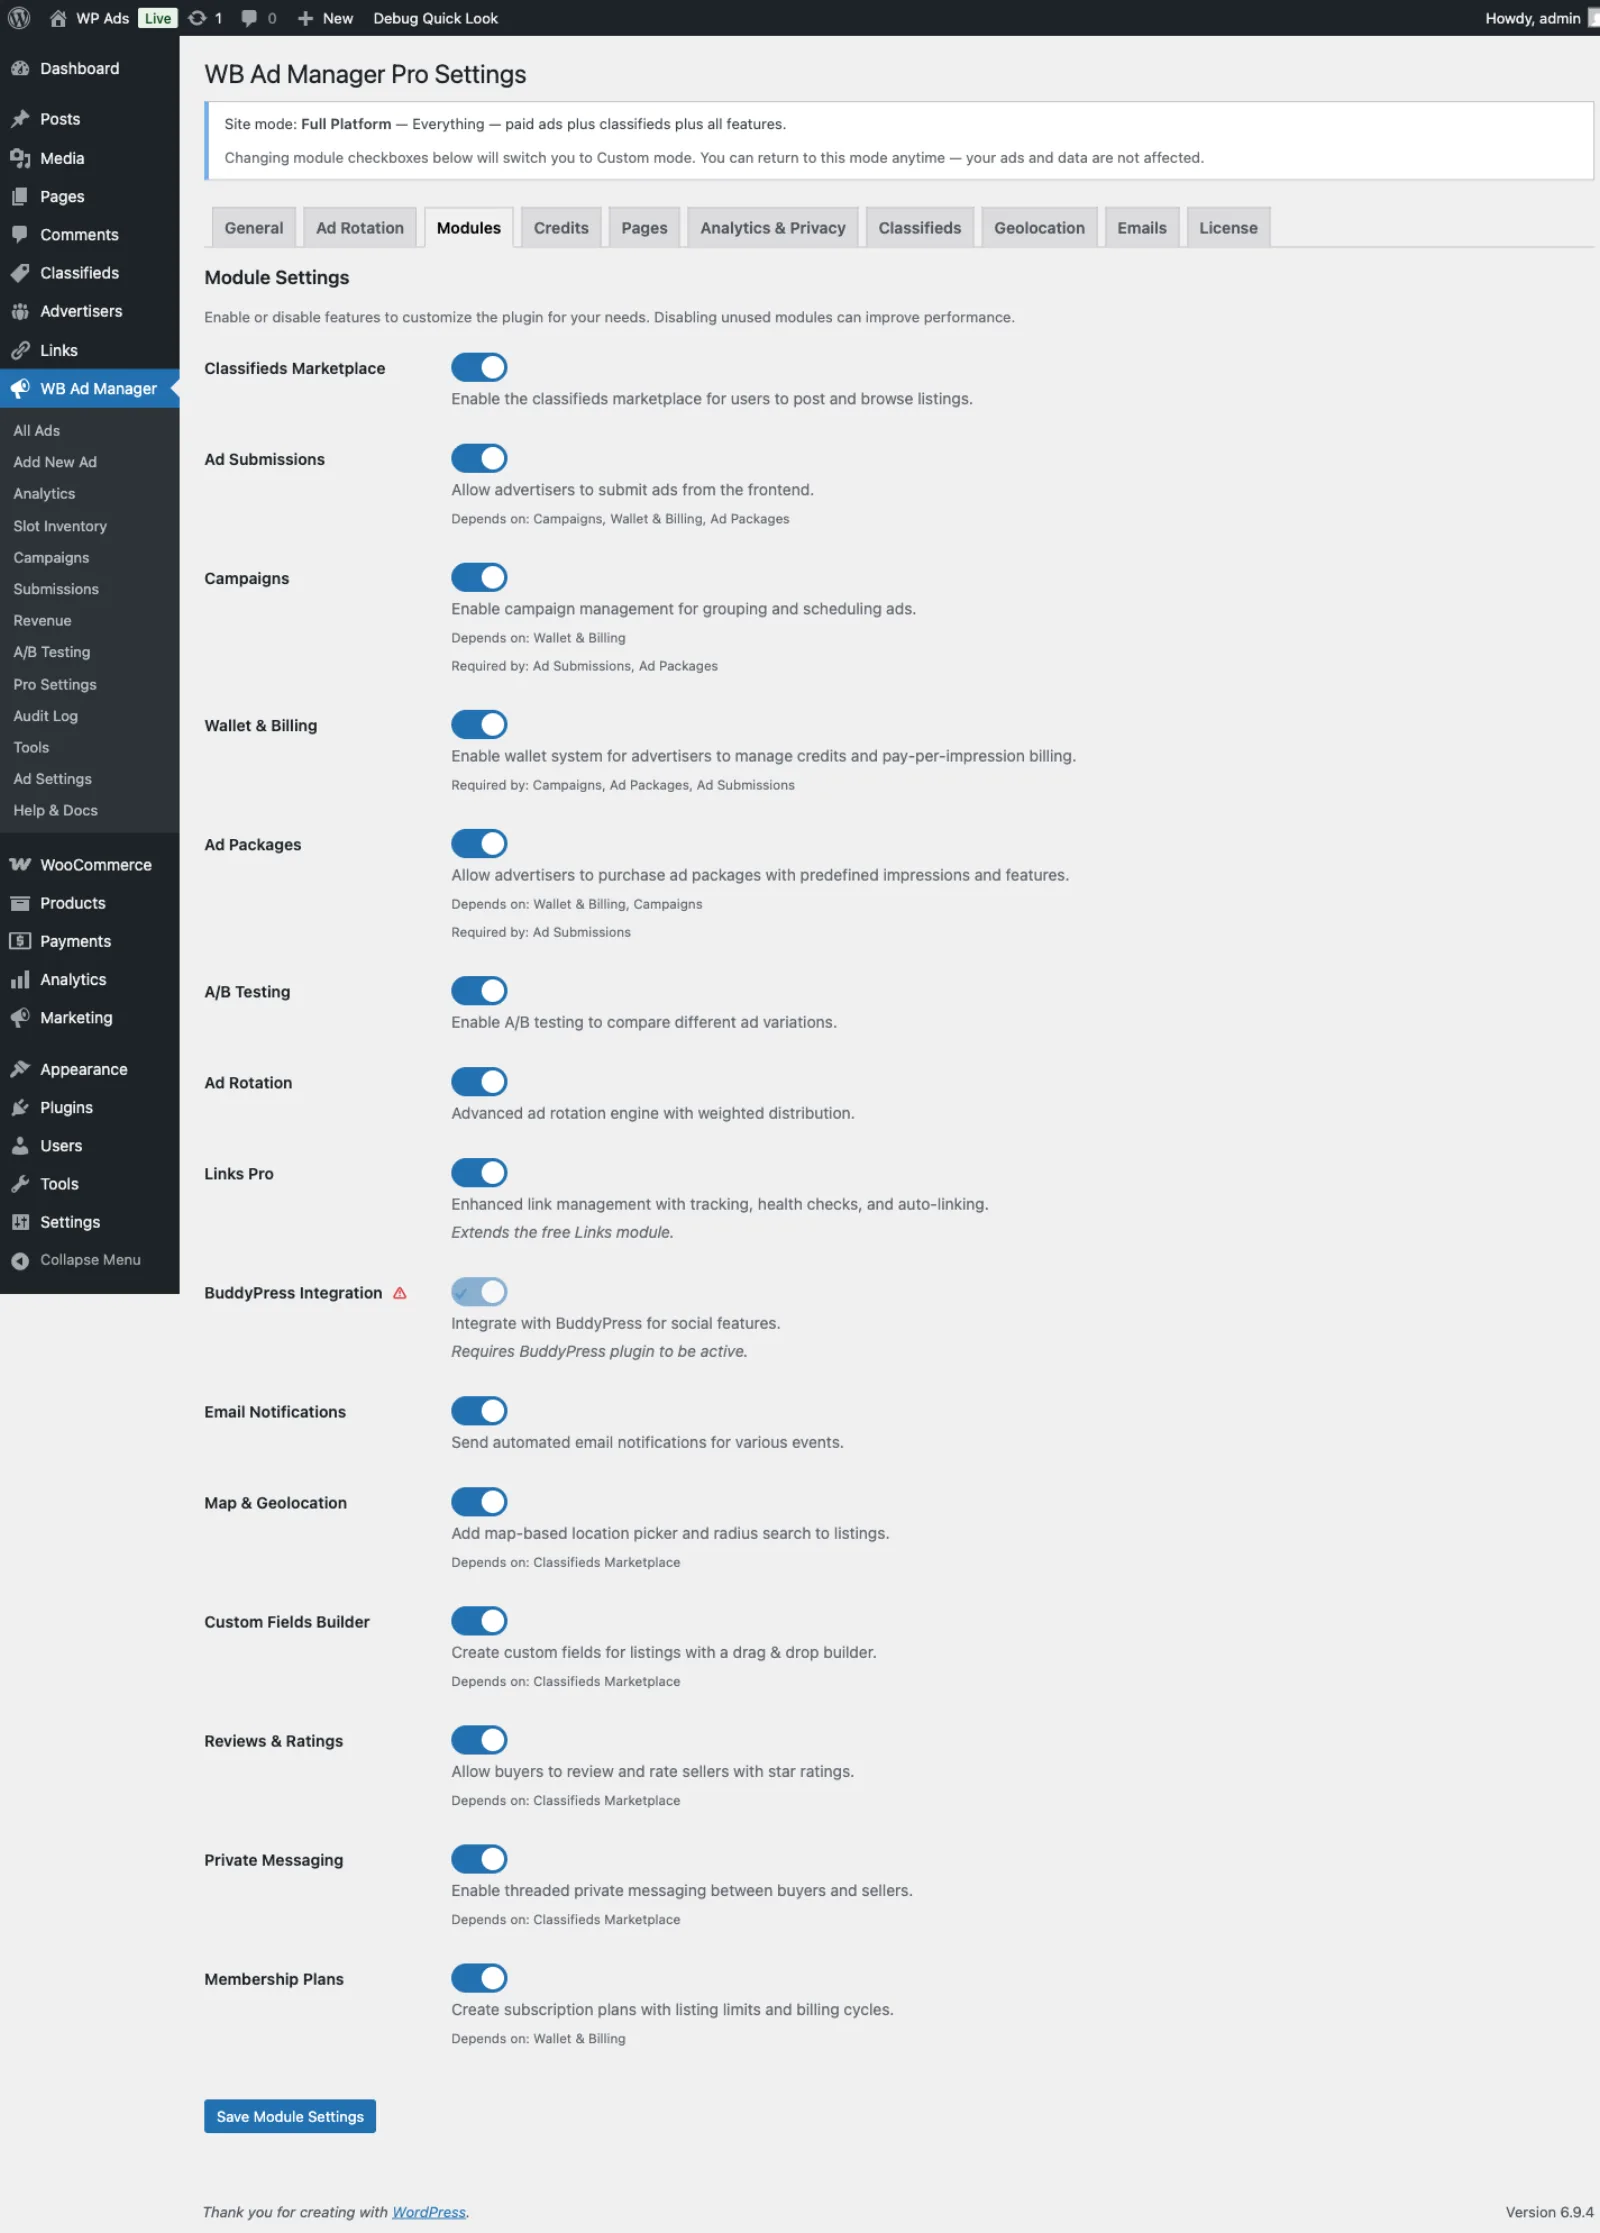
The dashboard has 12 tabs. Tabs are only visible when their corresponding module is enabled.
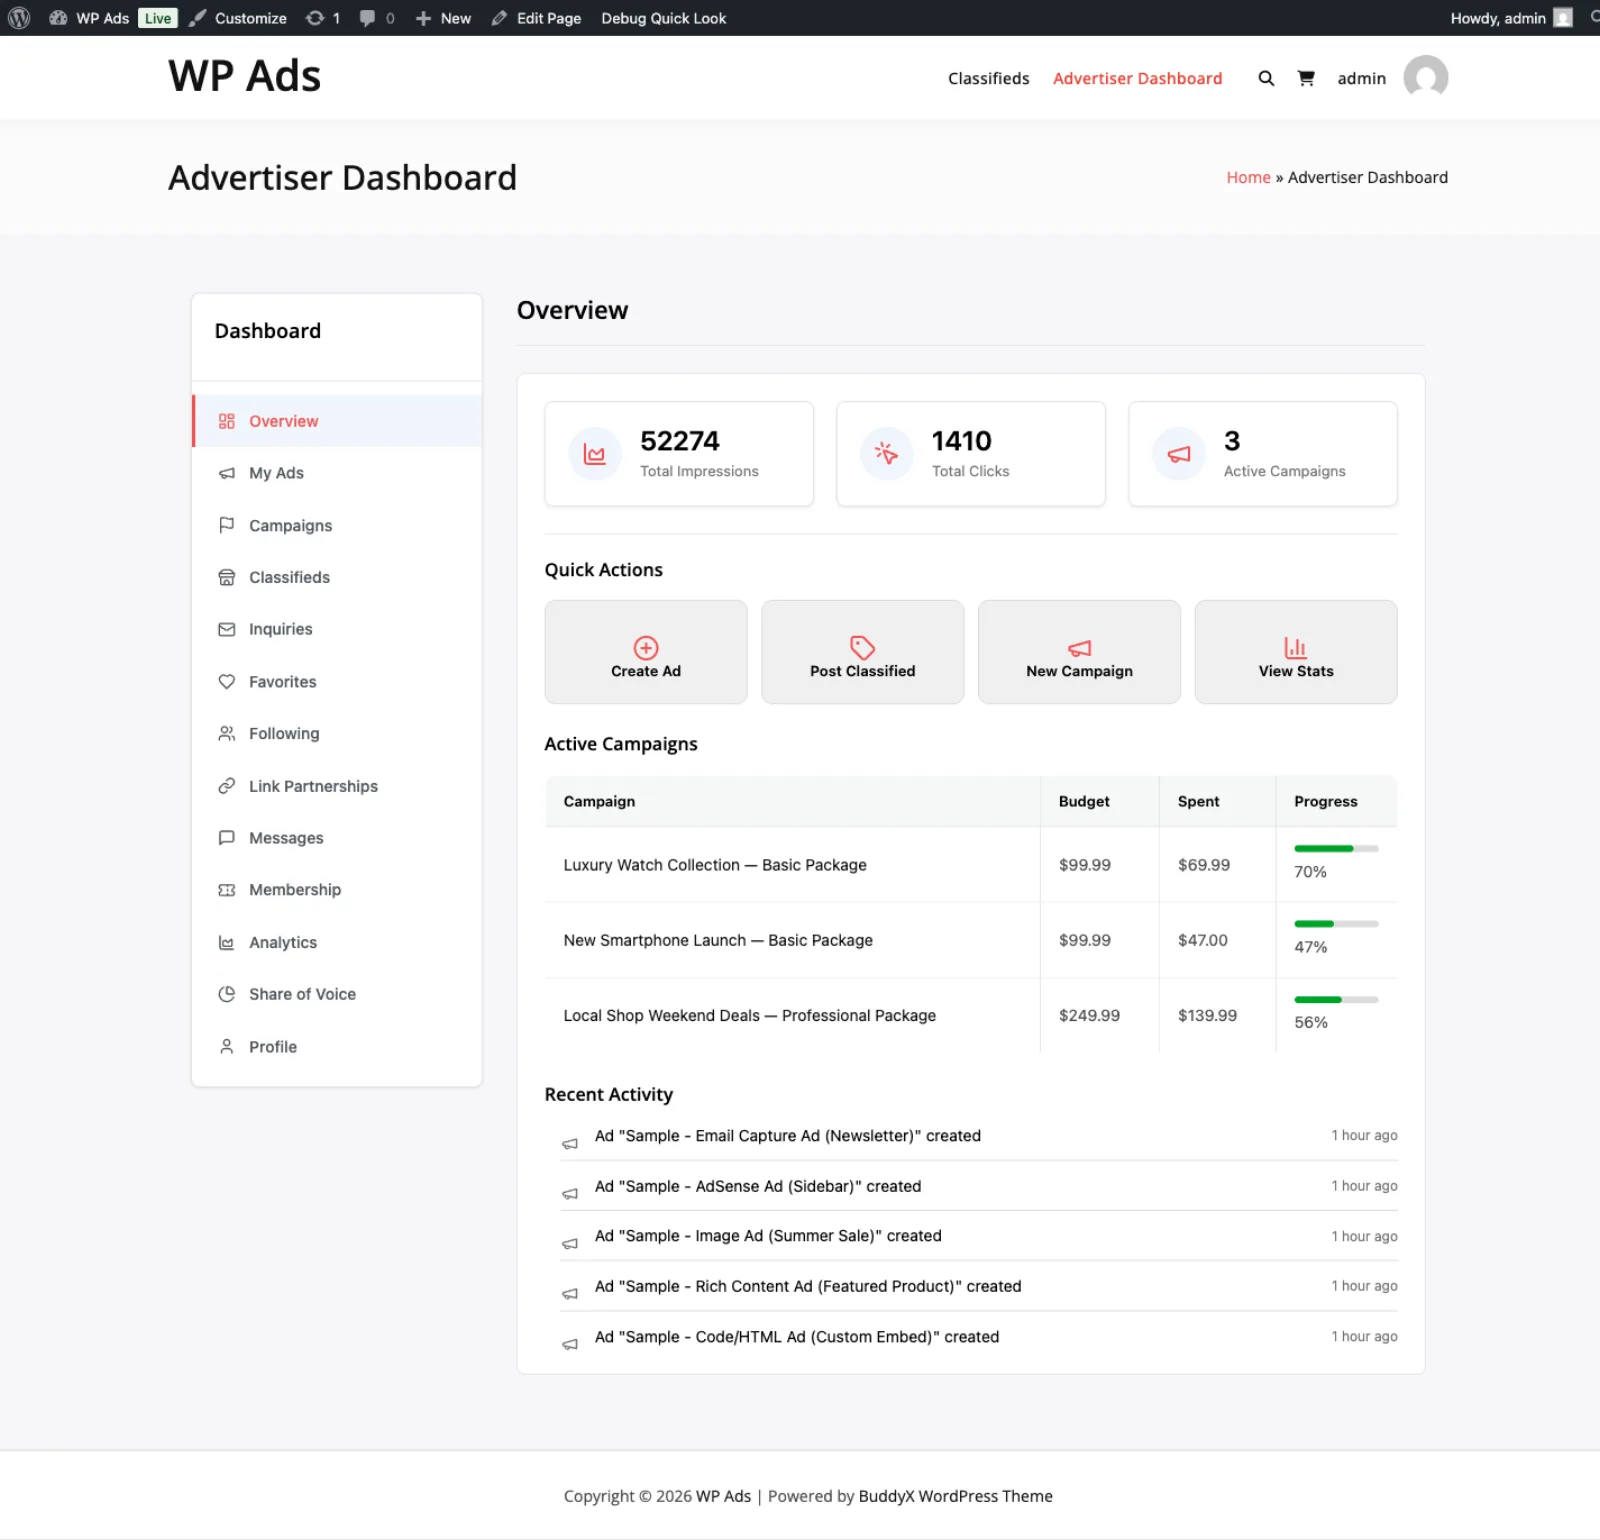
Overview
Shows a summary of the advertiser's performance: total impressions, clicks, active campaign count, total wallet spend, and a recent activity feed. Stats pull from the Analytics and Campaigns modules when those modules are enabled.
Ads
Lists all ad submissions created by the advertiser. Each row shows the ad title, status, associated campaign, and impression/click counts. The Create New Ad button opens the ad submission form. Ads can be edited or deleted from this tab.
Campaigns
Lists all campaigns with status, budget, spend, and date range. The Create Campaign button opens the campaign builder. From here advertisers can pause, resume, or cancel active campaigns. Requires the Campaigns module.
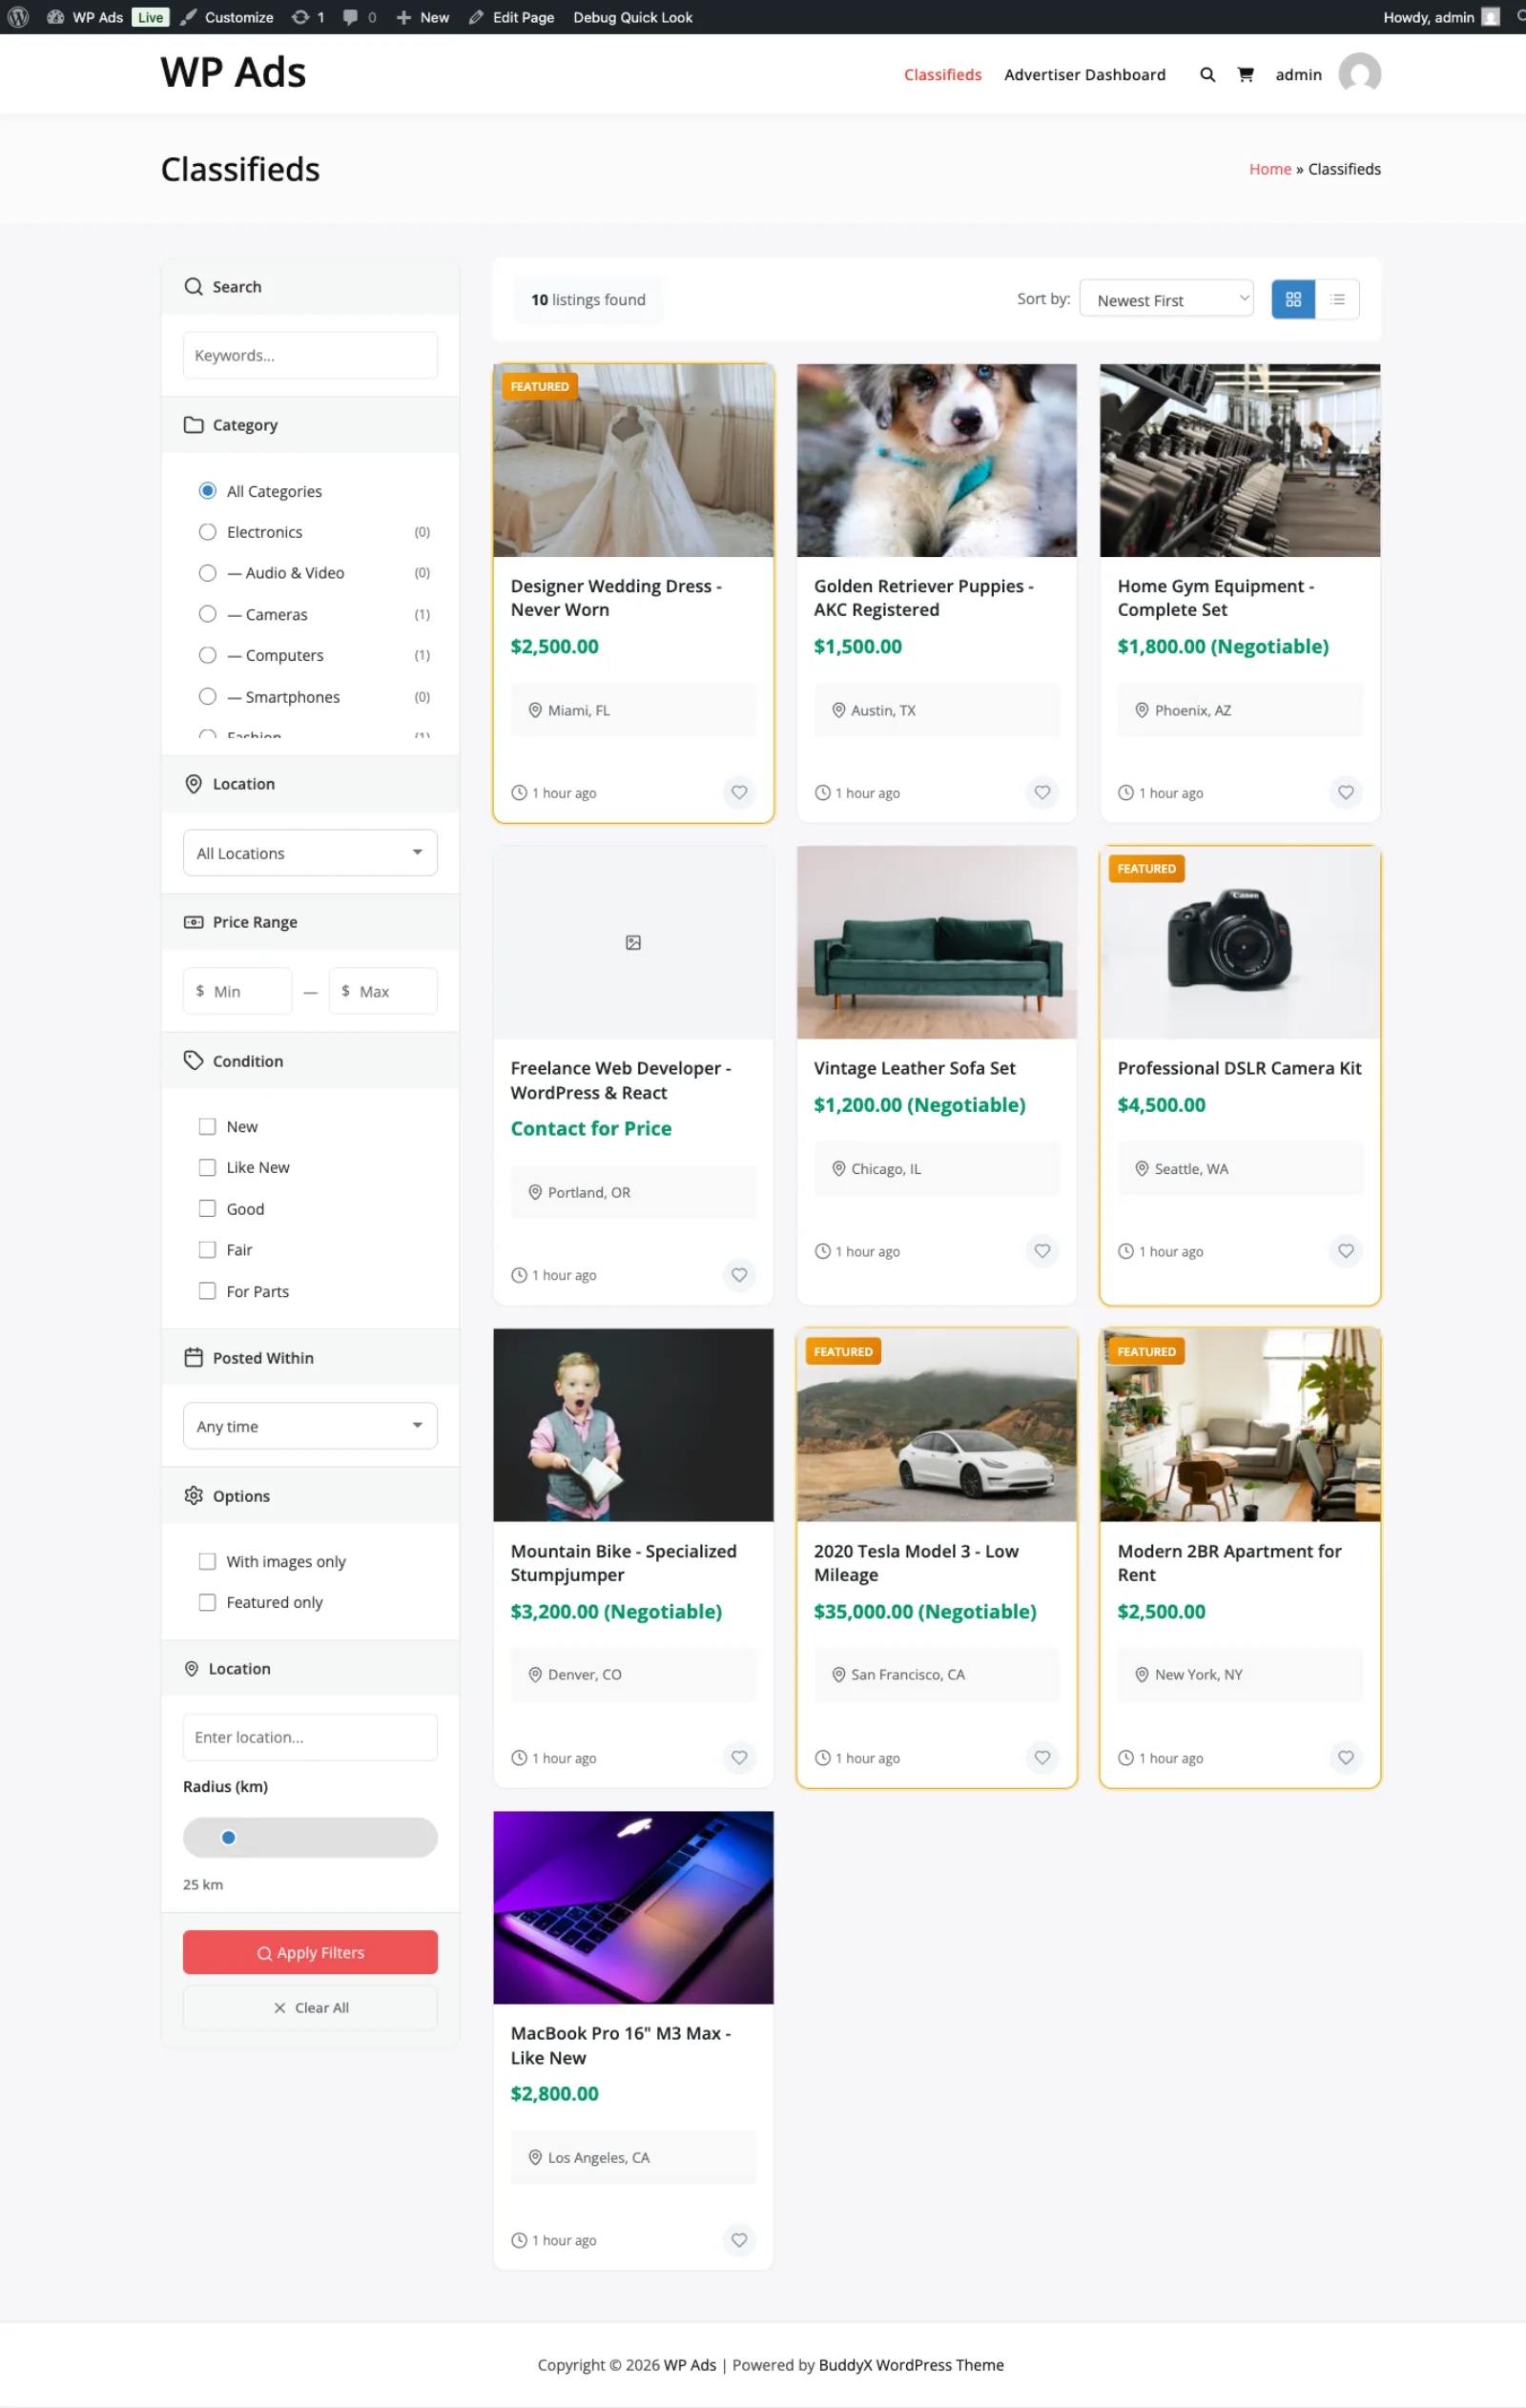
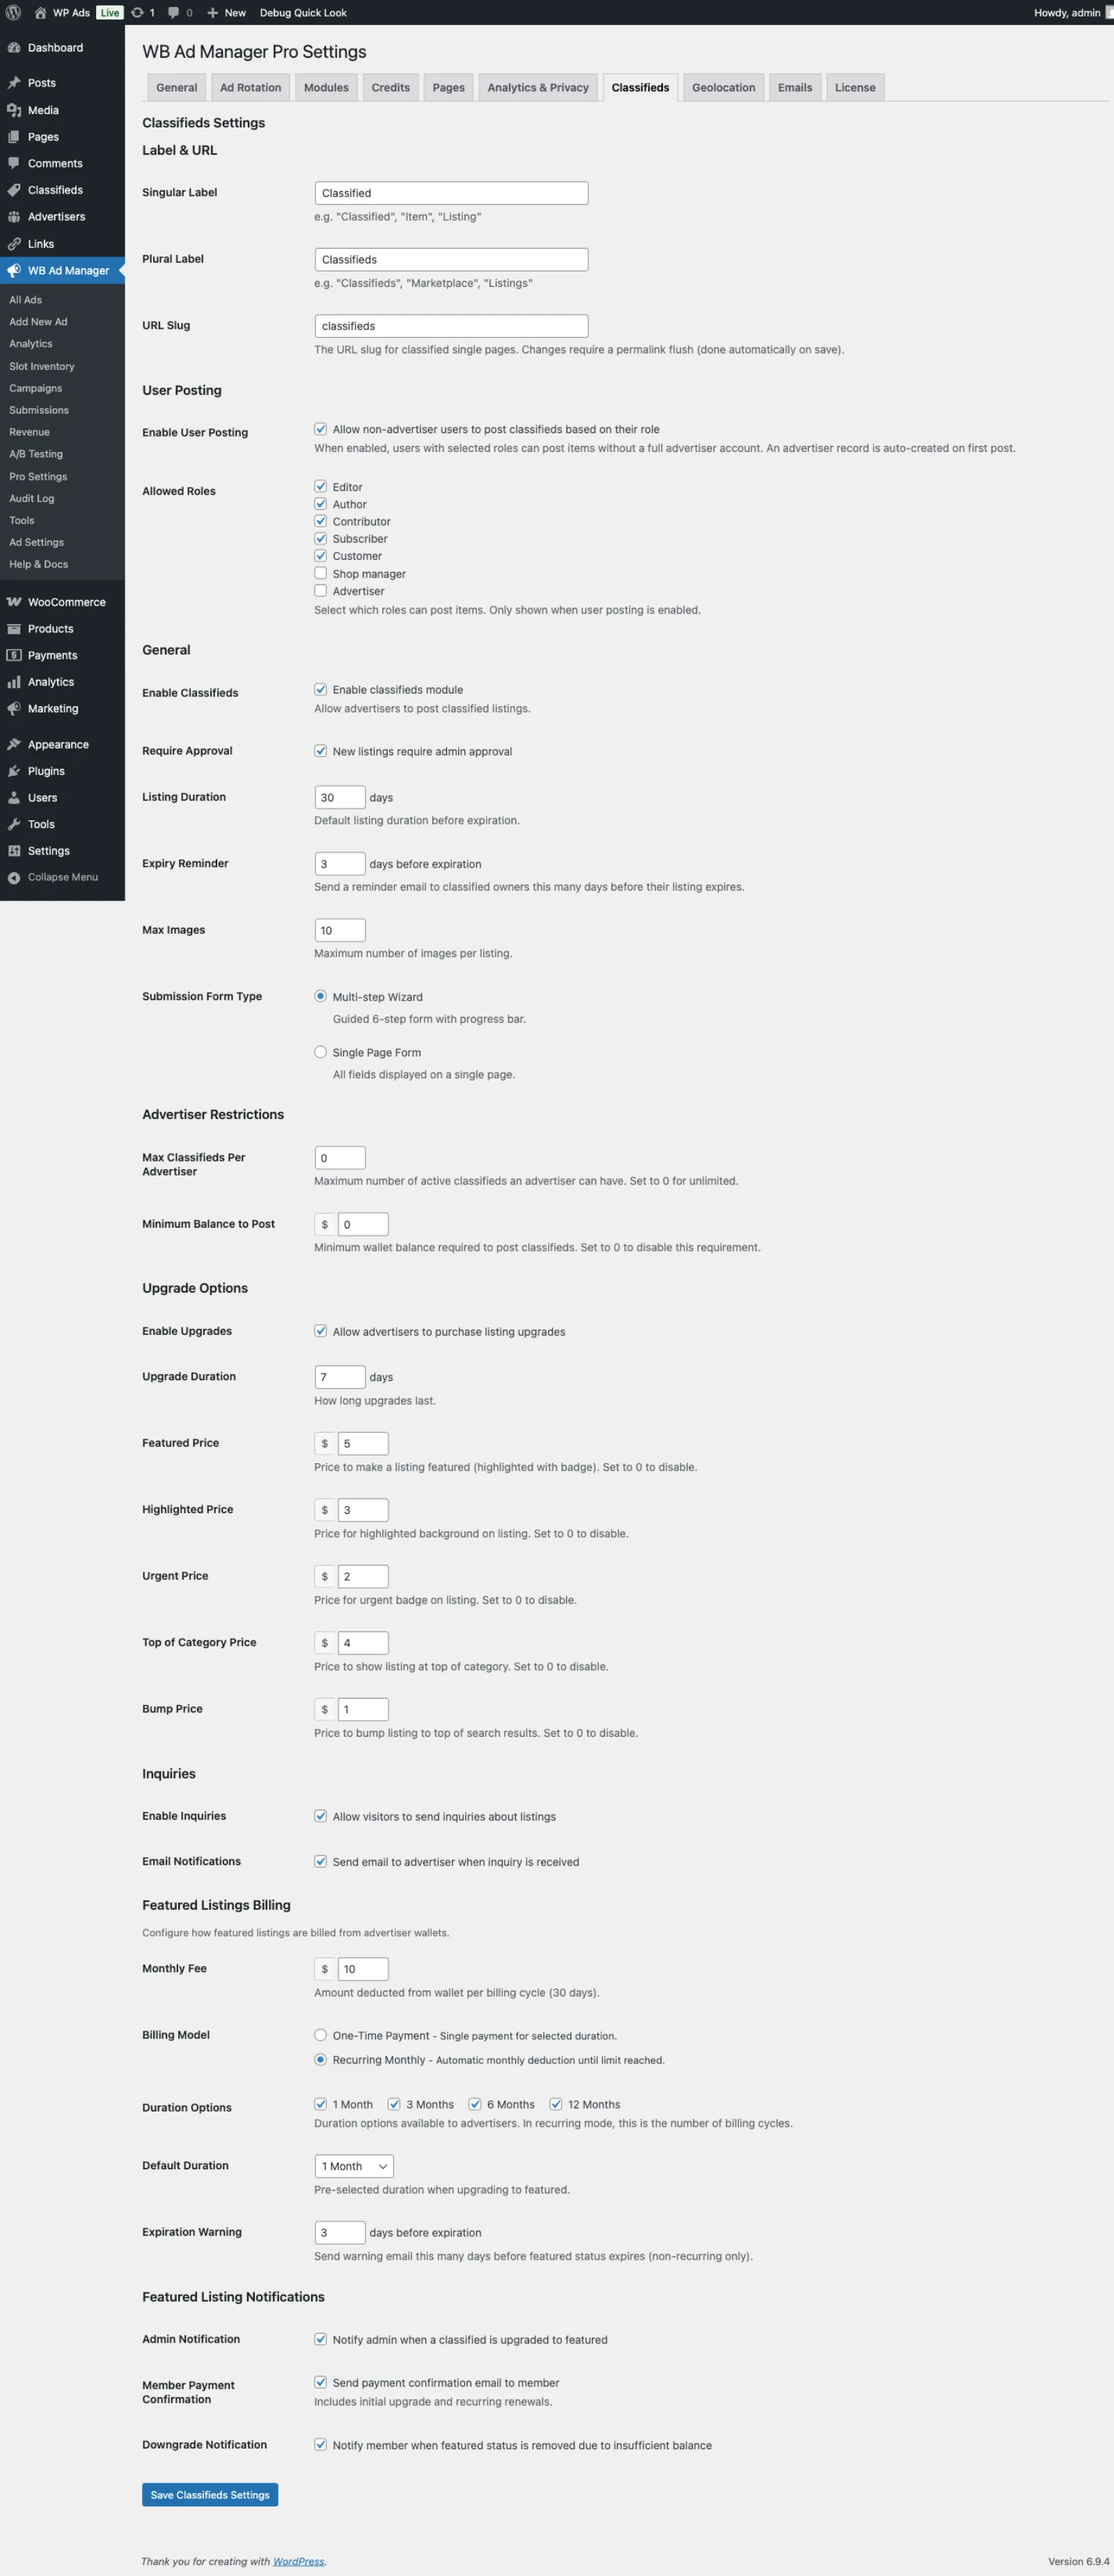
Classifieds
Lists all classified listings submitted by the advertiser. Each row shows the listing title, status, listing type (standard/featured/premium), view count, and inquiry count. The Submit Listing button links to the submit form page. From here advertisers can renew, edit, or delete their listings. Requires the Classifieds module.
Inquiries
Shows all buyer inquiries received across the advertiser's classified listings. Each inquiry shows the sender name, email, the listing it relates to, the message, and the current status (unread, read, replied, archived). Advertisers can update the status of each inquiry. Requires the Classifieds module.
Favorites
Displays all classified listings the advertiser has saved as favorites. Listings can be removed from favorites here. Requires the Classifieds module.
Following
Shows all sellers the advertiser is following, with their most recent listings. Advertisers can unfollow sellers from this tab. Requires the Classifieds module.
Links
Displays link partnership requests submitted by site visitors through the [wbam_partnership_inquiry] form. Requires the Links module.
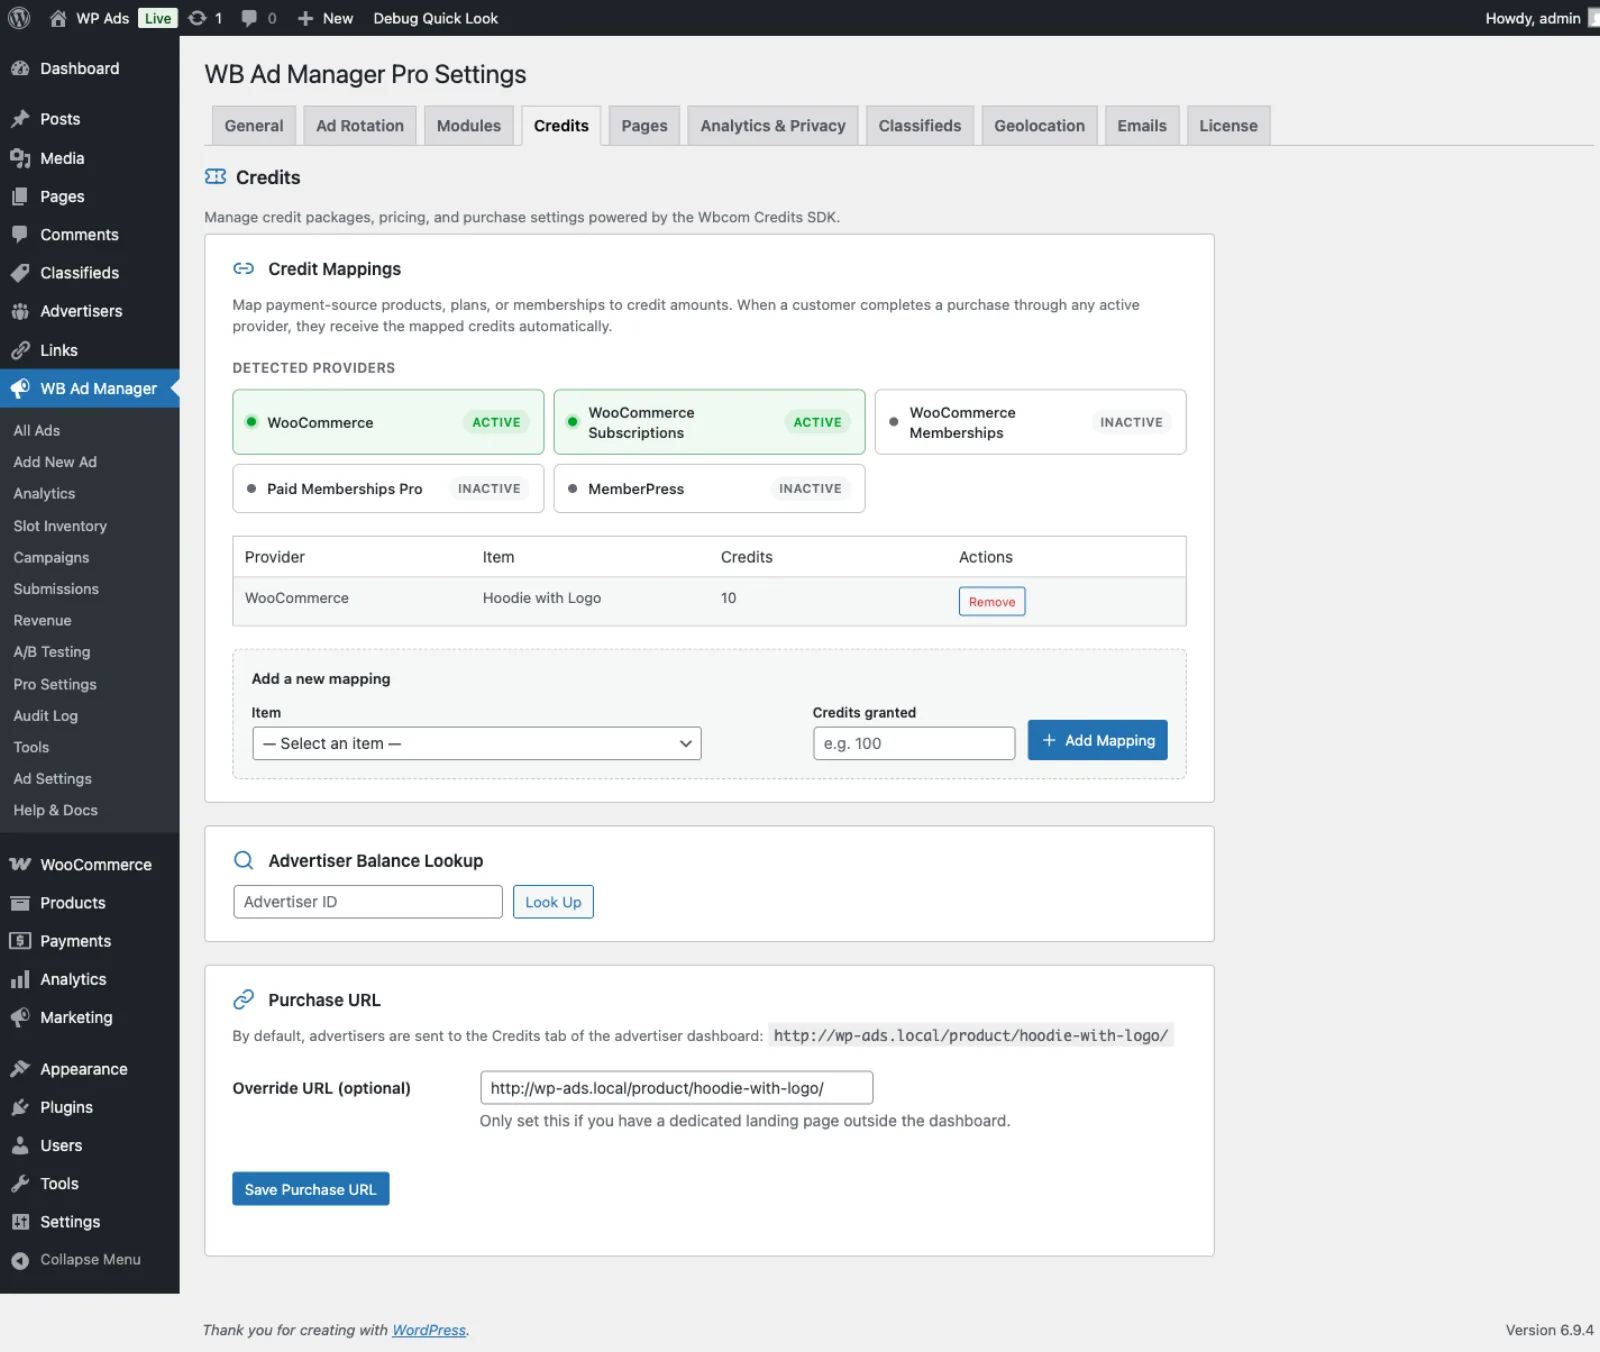
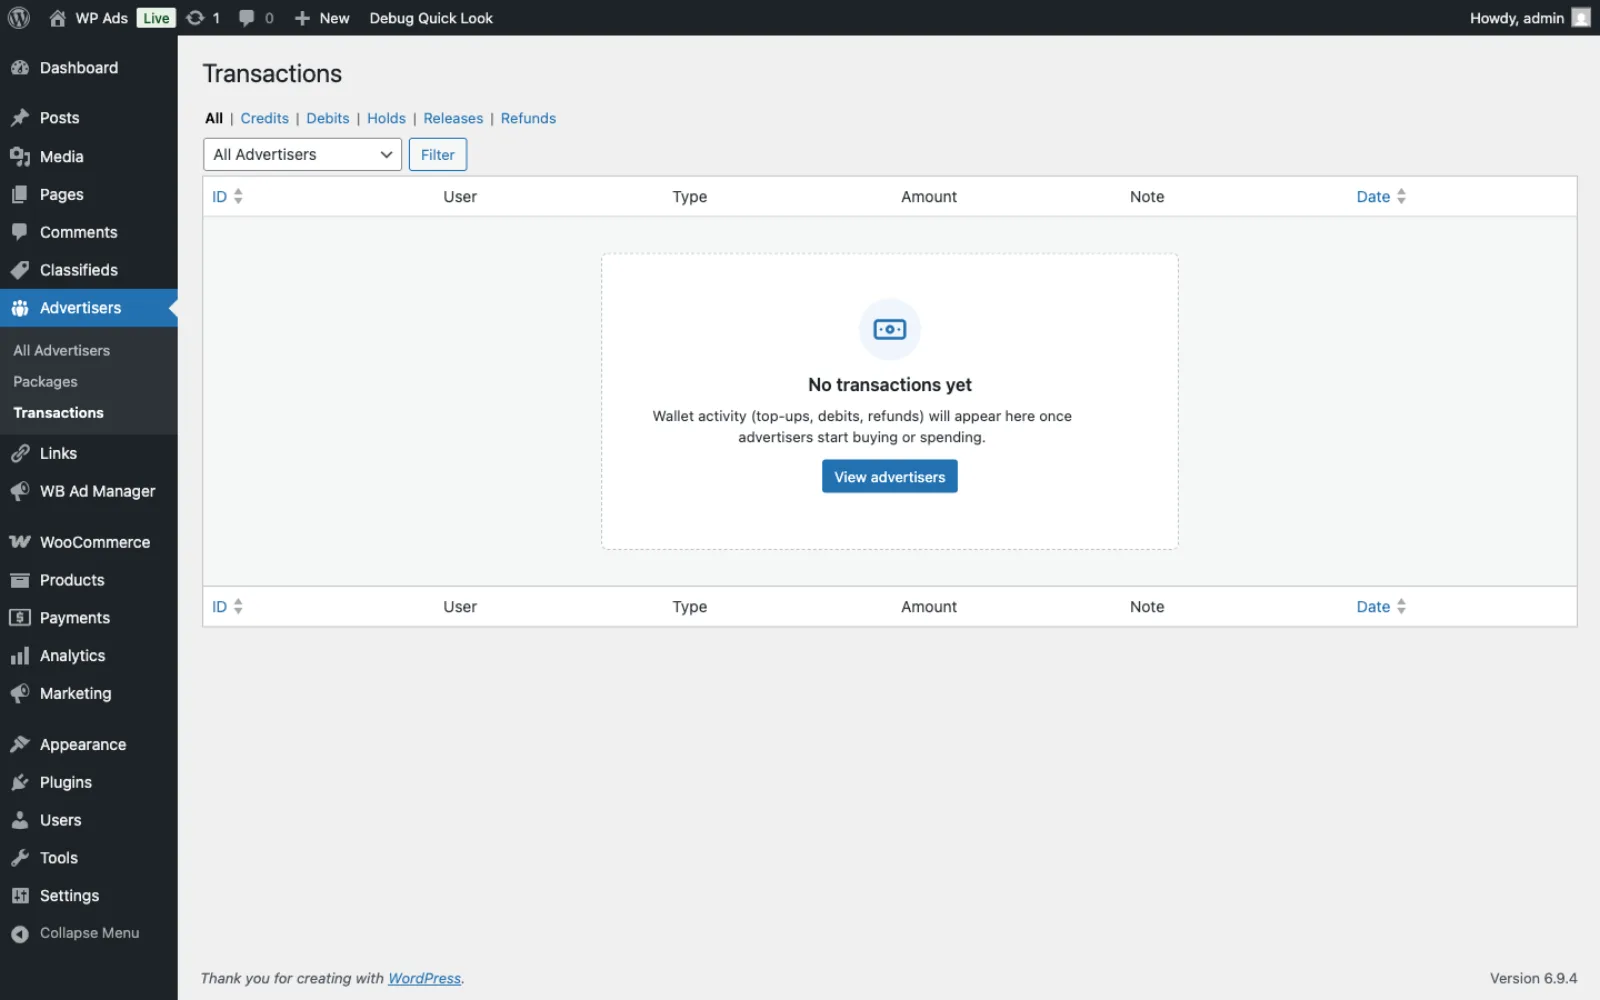
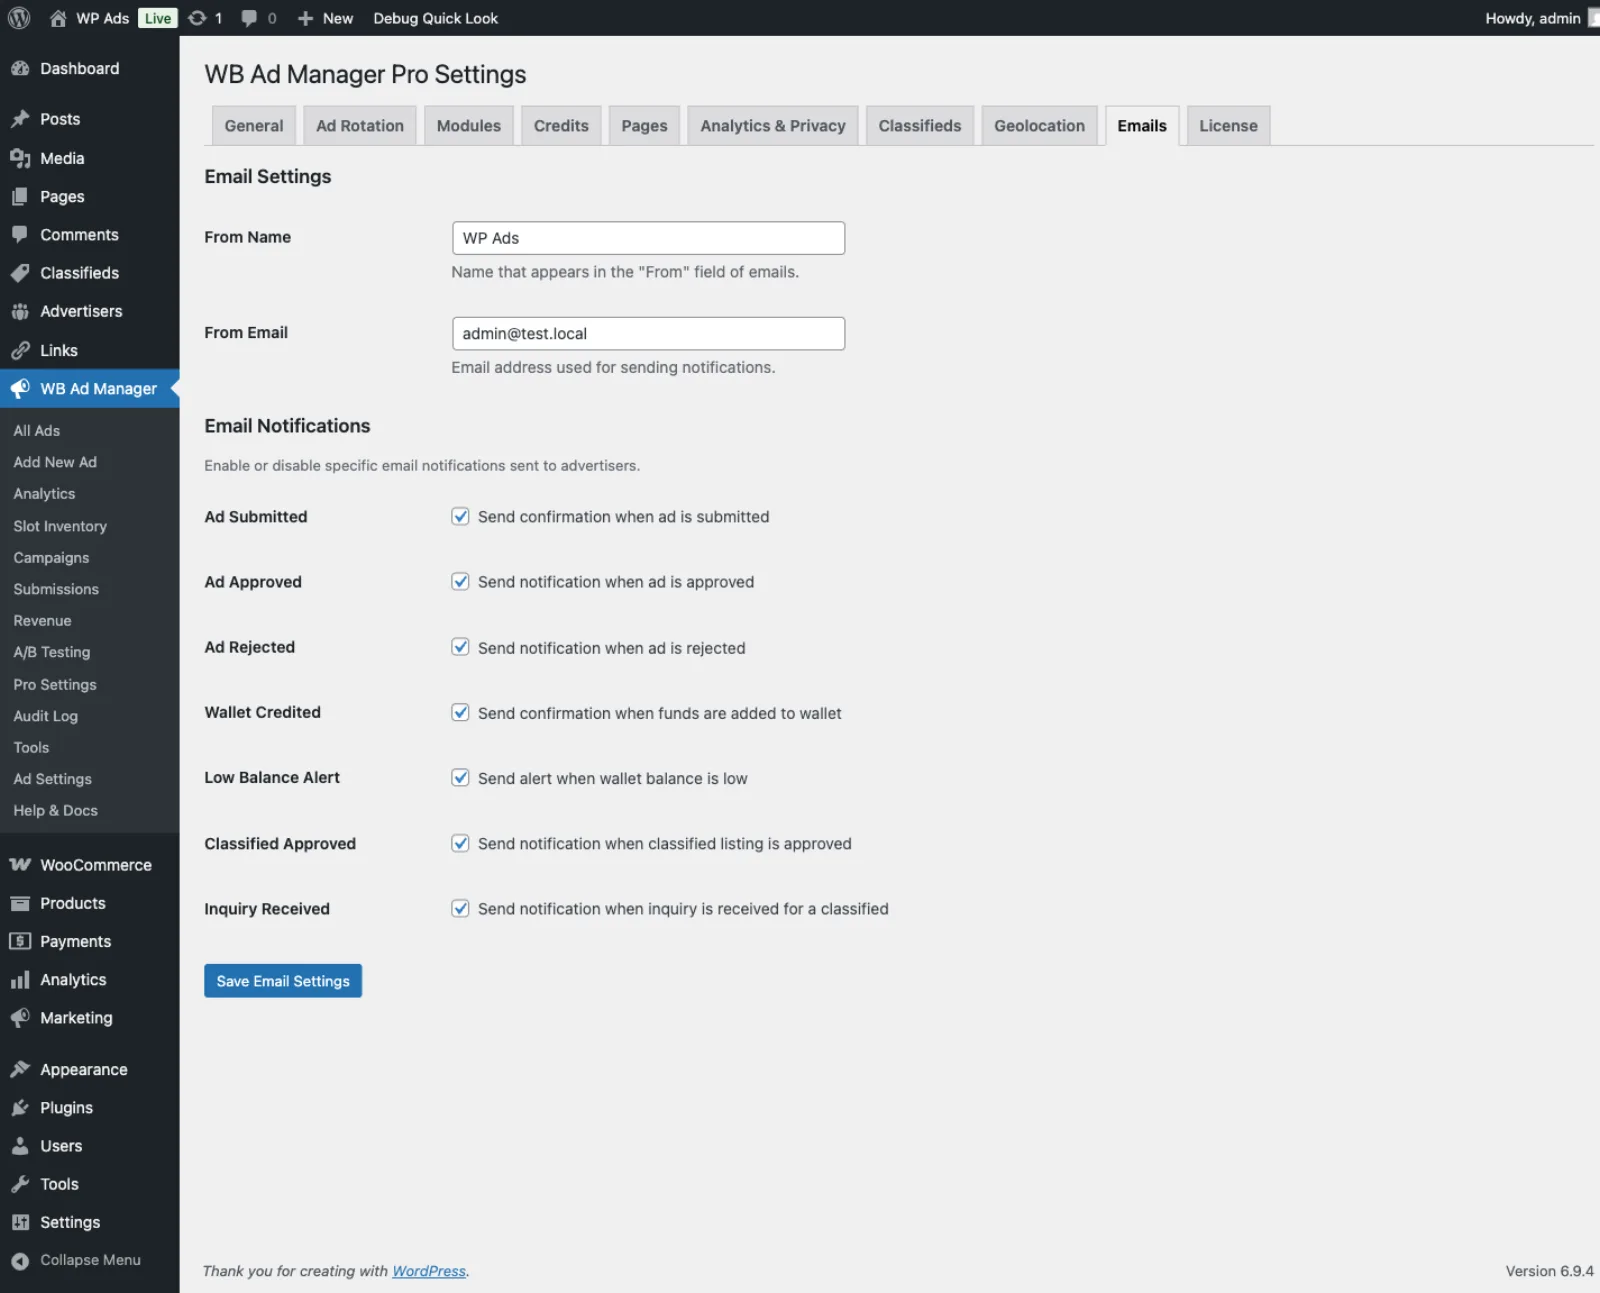
Wallet
Shows the current balance, full transaction history, and a form to add funds. Payment methods available depend on which gateways are configured in settings (Stripe, PayPal, Razorpay, WooCommerce, or Manual/Bank Transfer). Requires the Wallet module.
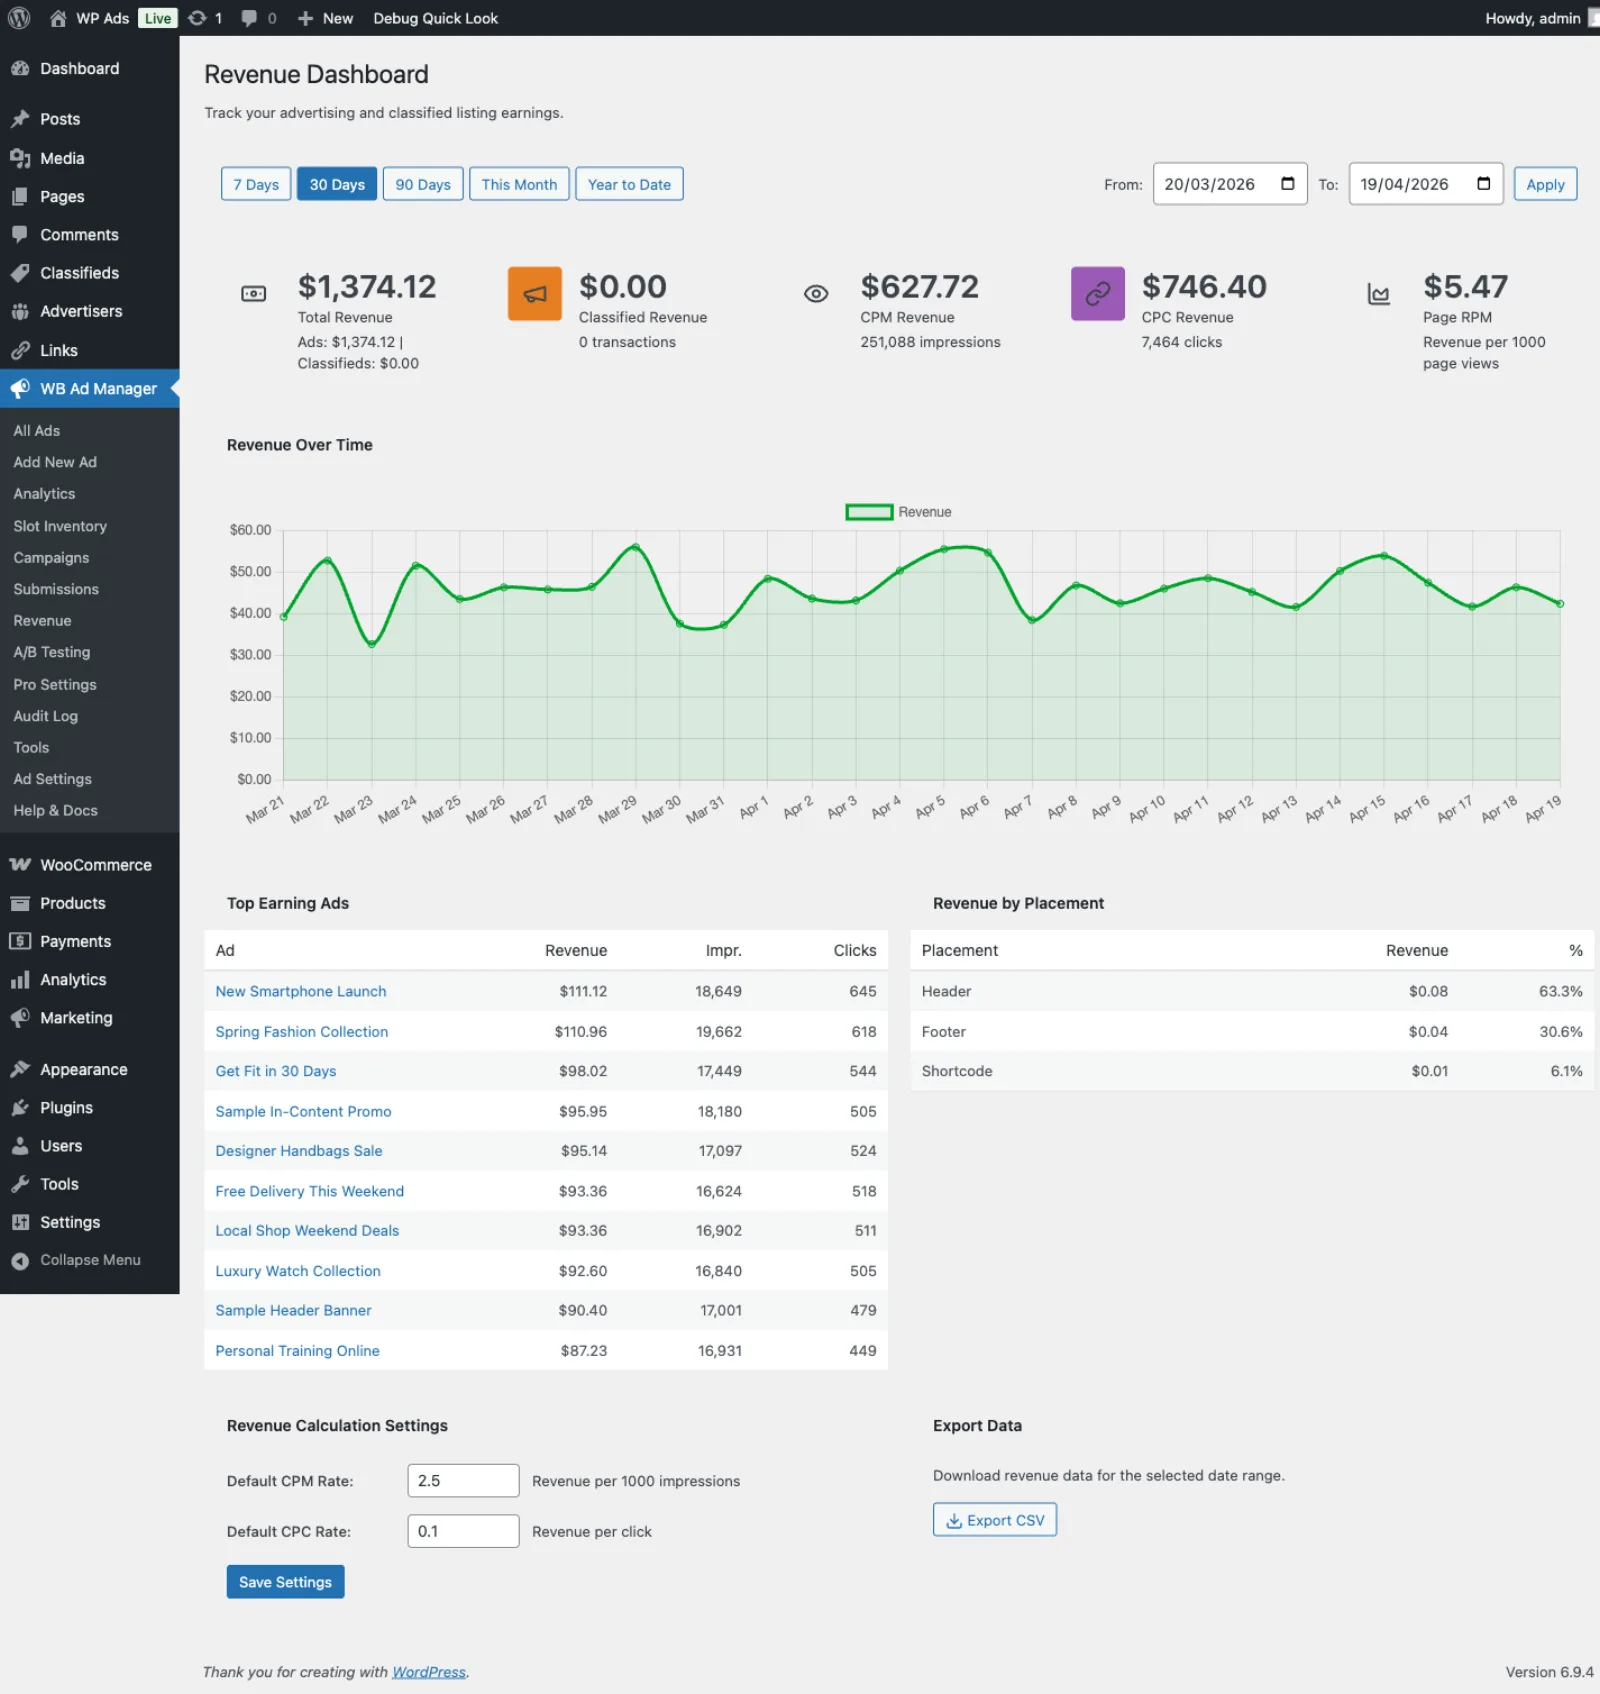
Analytics
Shows impression and click charts for the advertiser's ads over a selected date range. Data is broken down by ad, placement, and date. Requires the Analytics module.
Profile
Allows the advertiser to update their company name, contact name, phone, website, address, and email notification preferences. Changes save immediately and are reflected in seller profile pages.
Share of Voice
Shows what percentage of total ad impressions the advertiser's ads received versus other advertisers in the same placements. Useful for understanding competitive position in the ad rotation. Requires the Rotation module.
Seller Profile Pages
Each active advertiser gets a public seller profile page at:
/seller/{slug}/
The slug is derived from the company name. If no company name is set, the WordPress display name is used.
The seller profile page shows:
- Advertiser's company name and contact info
- BuddyPress xProfile fields (if the BuddyPress module is enabled and field mapping is configured)
- All active classified listings from that seller
- A "Follow" button for logged-in visitors
WP Admin User Profile Integration
When viewing or editing a WordPress user in Users → All Users → Edit User, admins see an Advertiser Account section added to the bottom of the profile page. This section shows:
- Advertiser status (active/pending/suspended)
- Current wallet balance
- Company name, phone, website, address
- A direct link to the advertiser's portal record
Admins can update these fields directly from the WordPress user profile screen. Changes are saved to the wbam_advertisers table. This is useful for quick edits without navigating to the separate Advertisers admin screen.
Admin Management
Navigate to WB Ad Manager Pro → Advertisers to manage all advertiser accounts.
From the list table you can:
- Filter by status (active, pending, suspended)
- See wallet balance, ad count, and registration date at a glance
- Click an advertiser name to open their edit screen
From the advertiser edit screen you can:
- Change account status
- Add or deduct wallet credits manually
- Add a note to manual transactions
- View the advertiser's ads, campaigns, and classifieds
- Review recent account activity
Adding Manual Wallet Credits
- Go to WB Ad Manager Pro → Advertisers
- Click the advertiser name
- Go to the Wallet tab
- Click Add Credit
- Enter the amount and an internal note
- Click Add
The credit appears in the wallet immediately and is logged in the transaction history.
Shortcodes Reference
| Shortcode |
Description |
[wbam_advertiser_dashboard] |
Full tabbed advertiser portal |
[wbam_my_ads] |
Standalone ad list widget |
[wbam_advertiser_stats] |
Stats summary widget |
[wbam_advertiser_wallet] |
Standalone wallet widget |
[wbam_seller_profile] |
Seller profile display for current user |
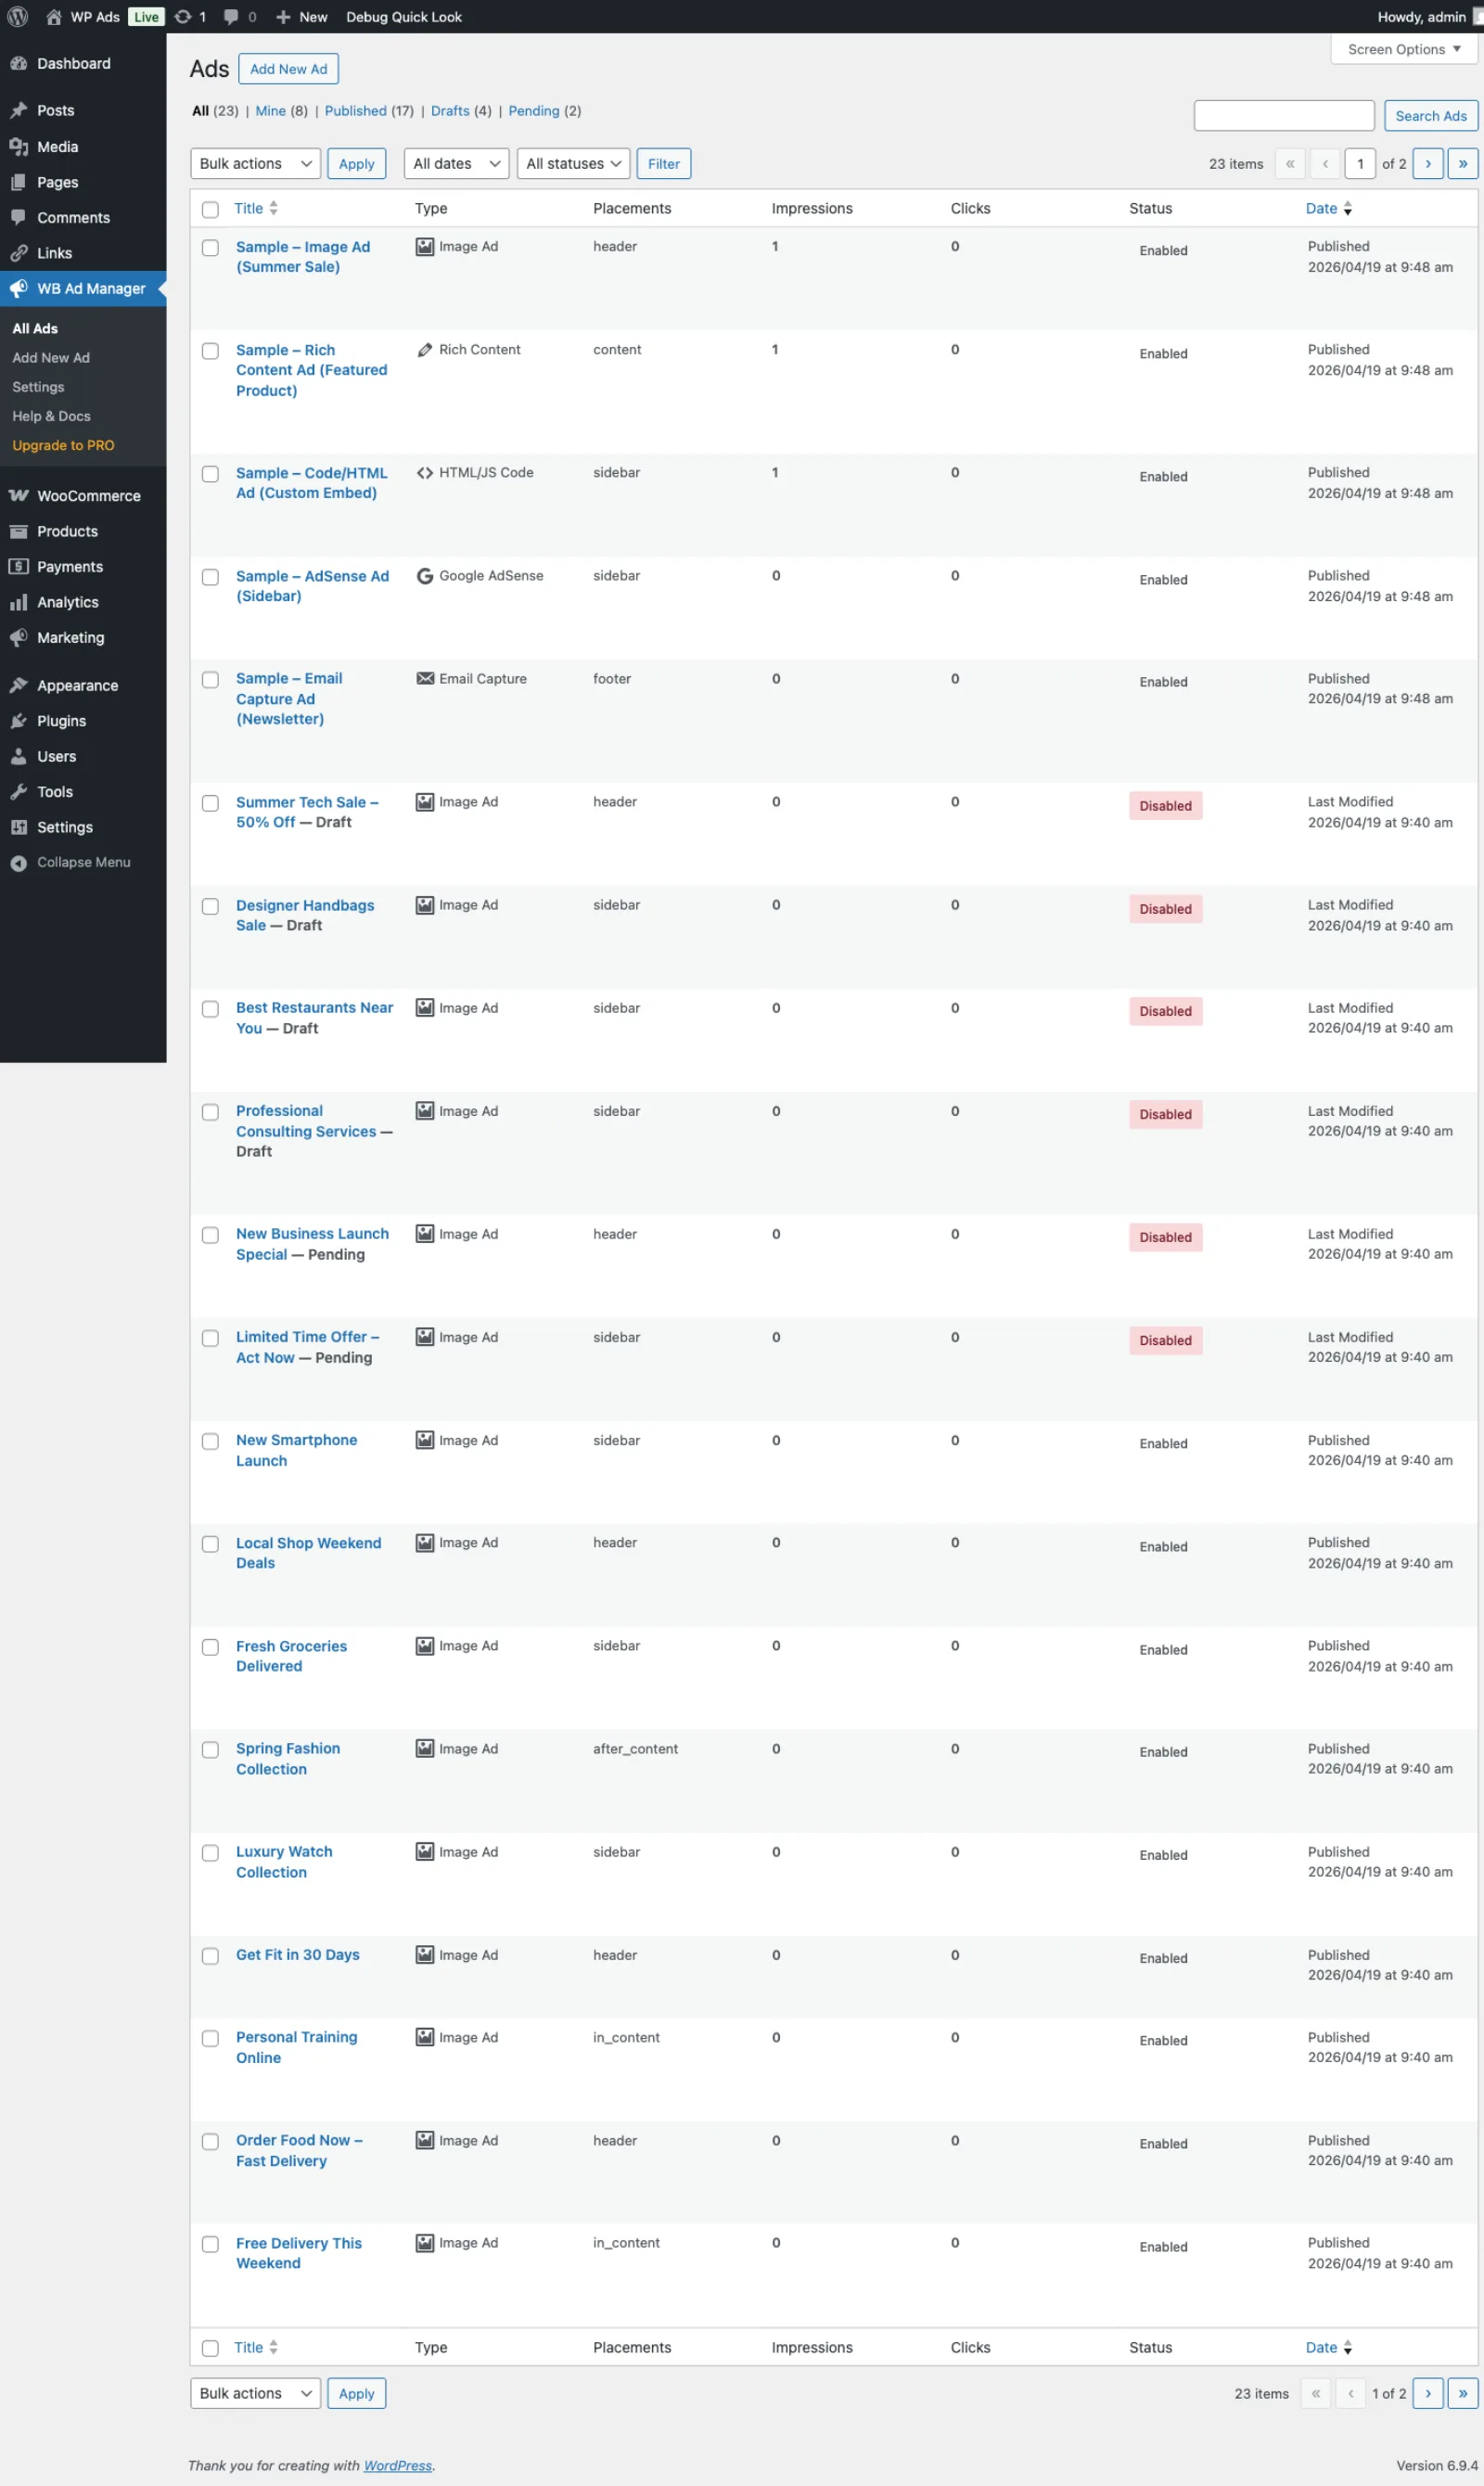 The ads list showing all your ads with status, placements, and performance metrics
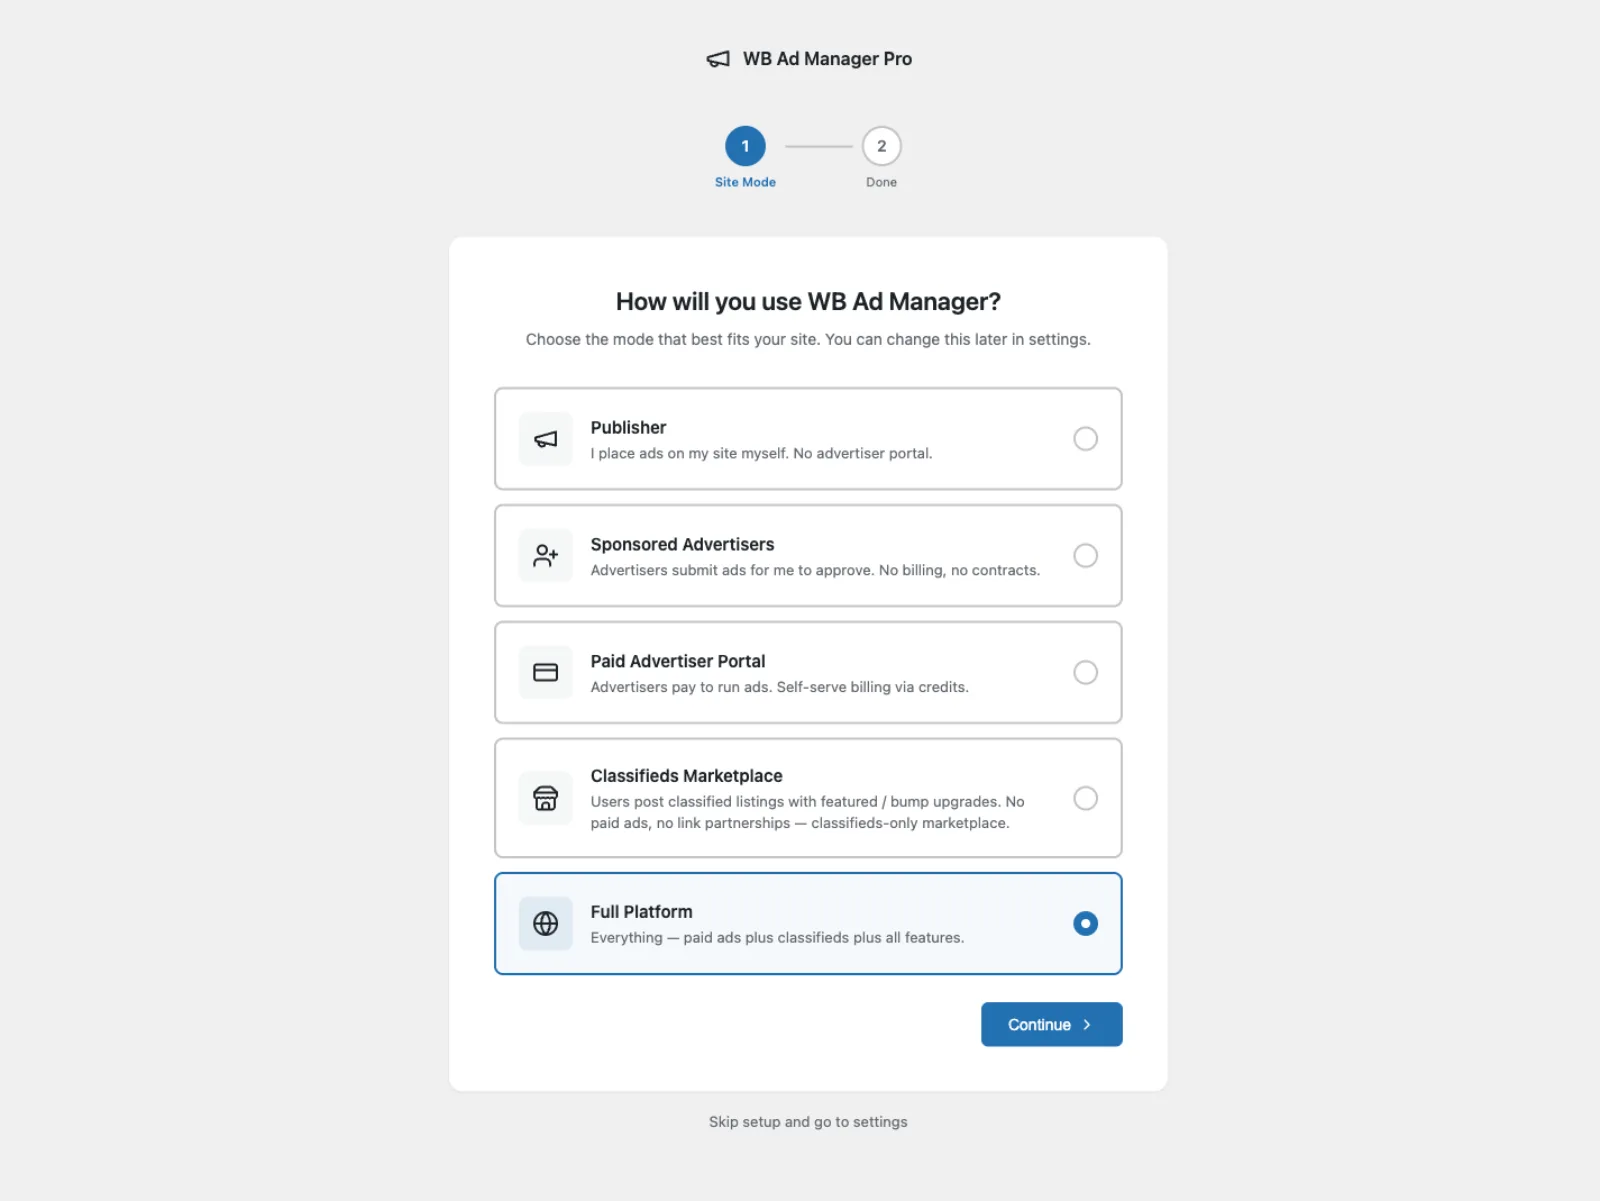


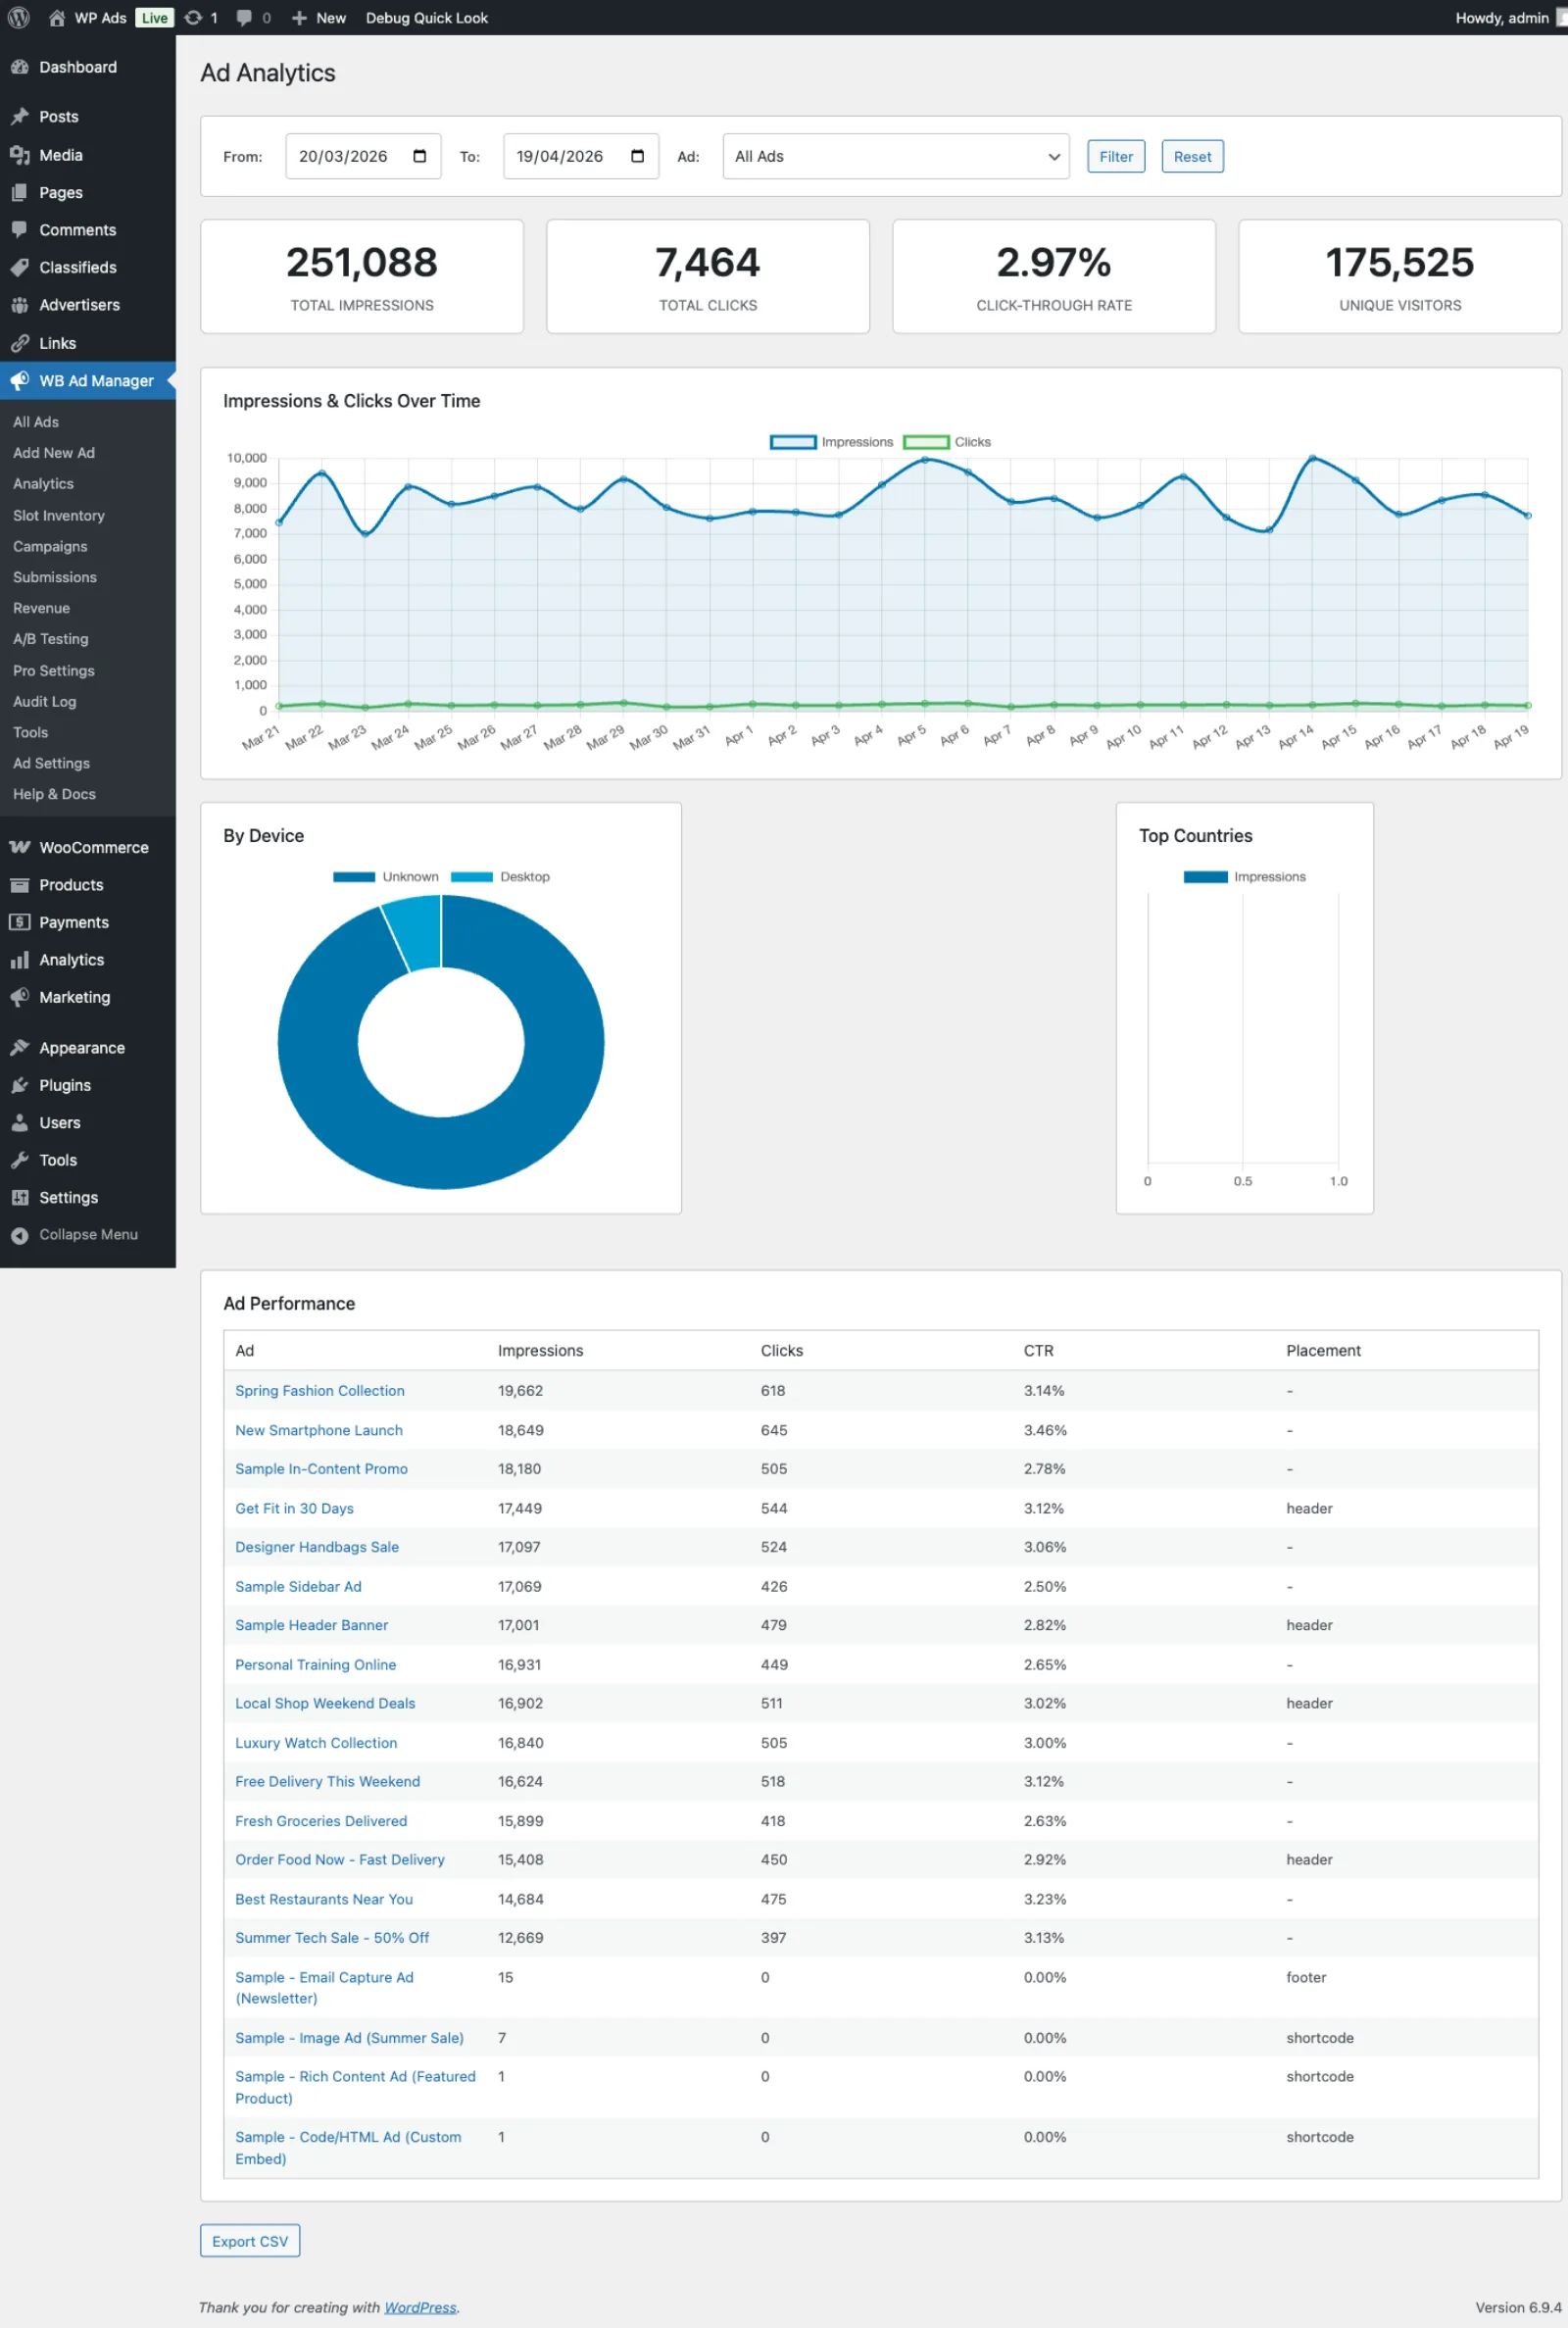 The ads list showing impressions, clicks, and status columns per ad
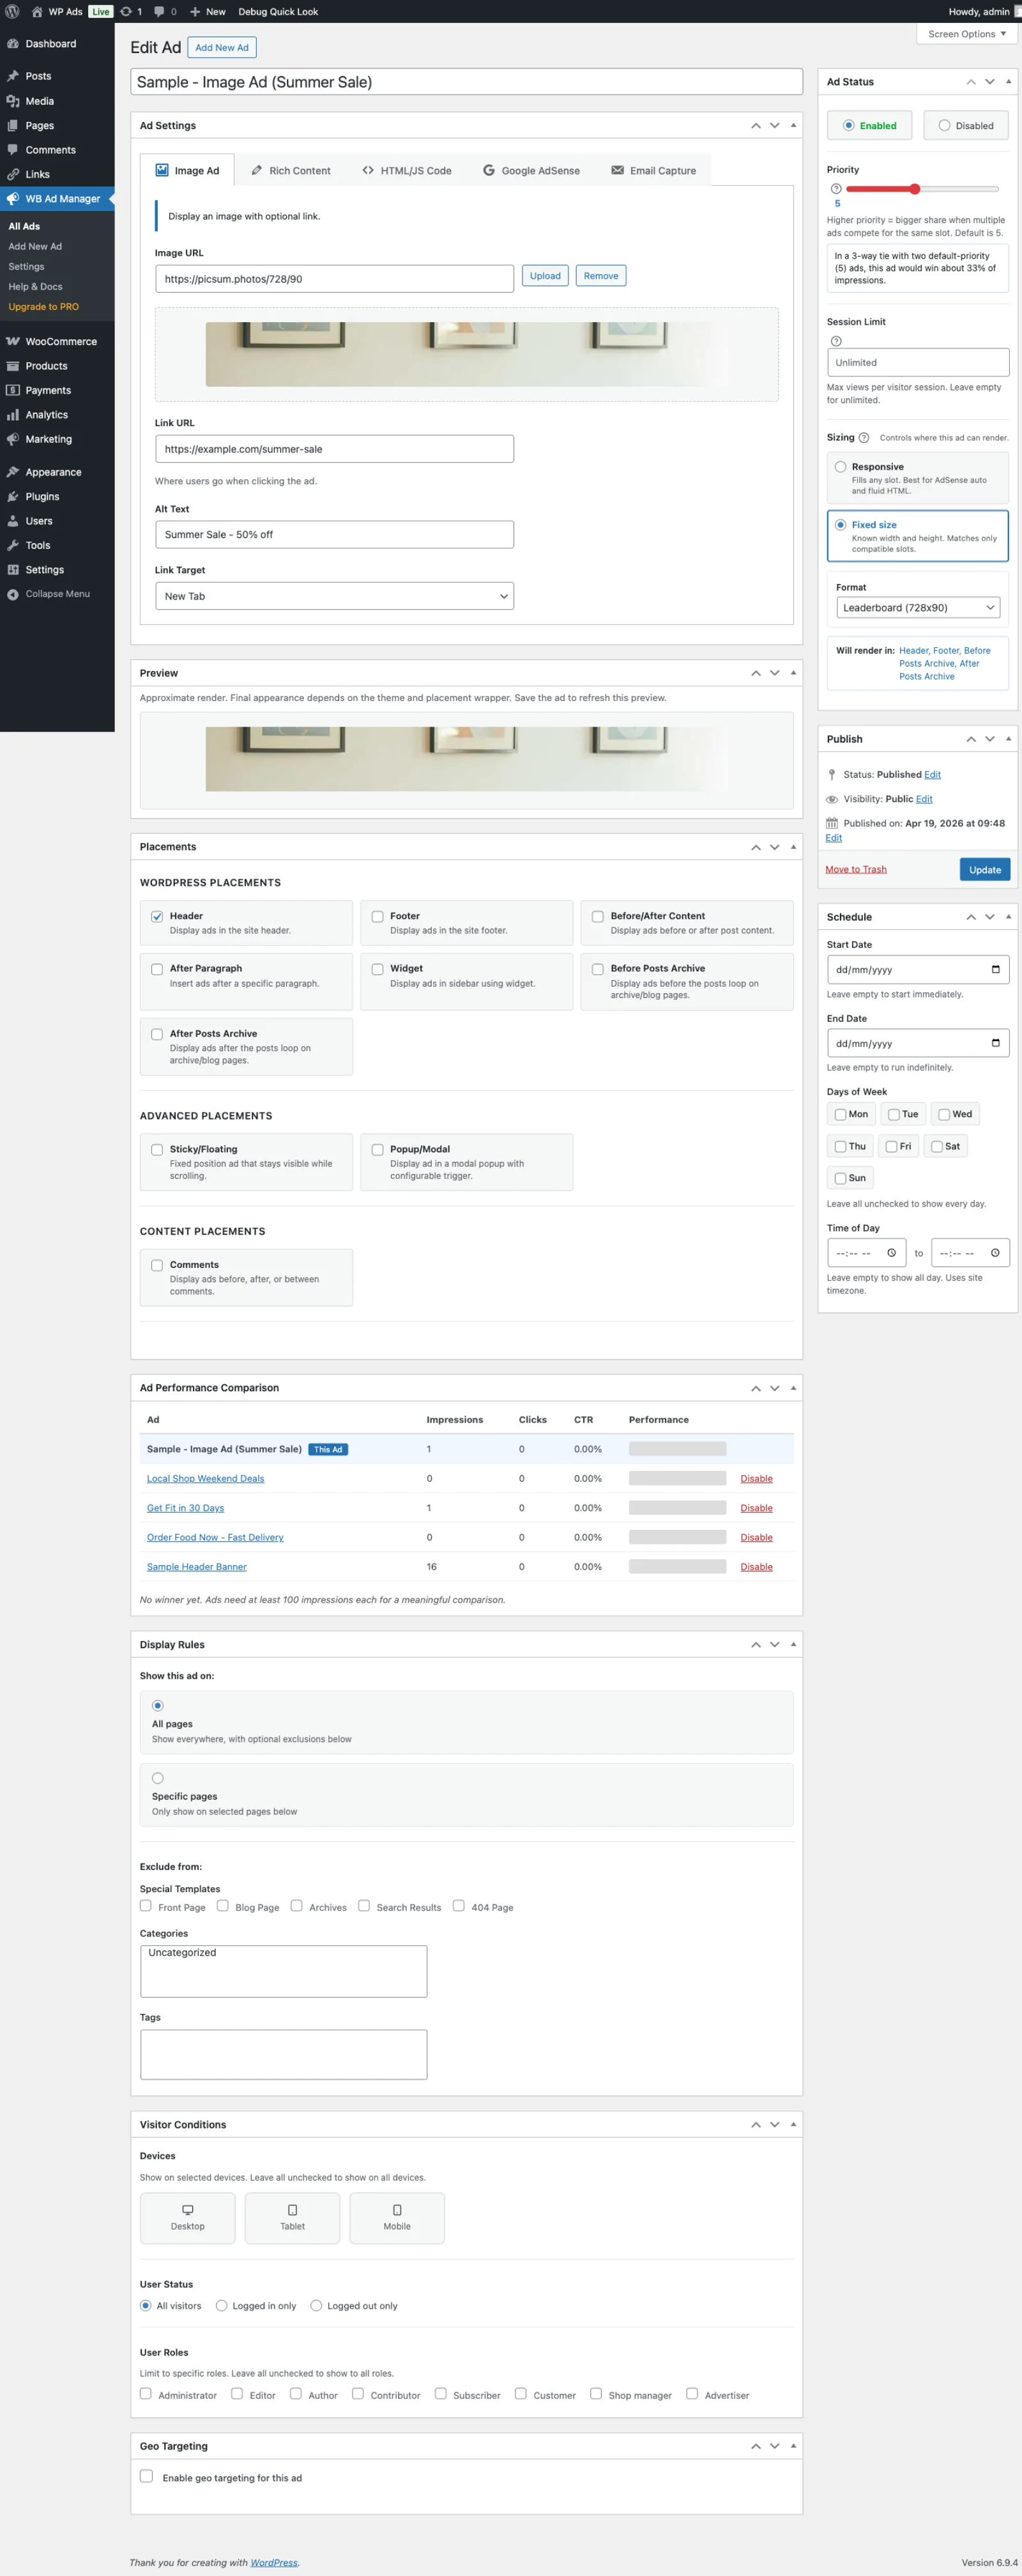 The Image Ad editor showing image upload, destination URL, and alt text fields
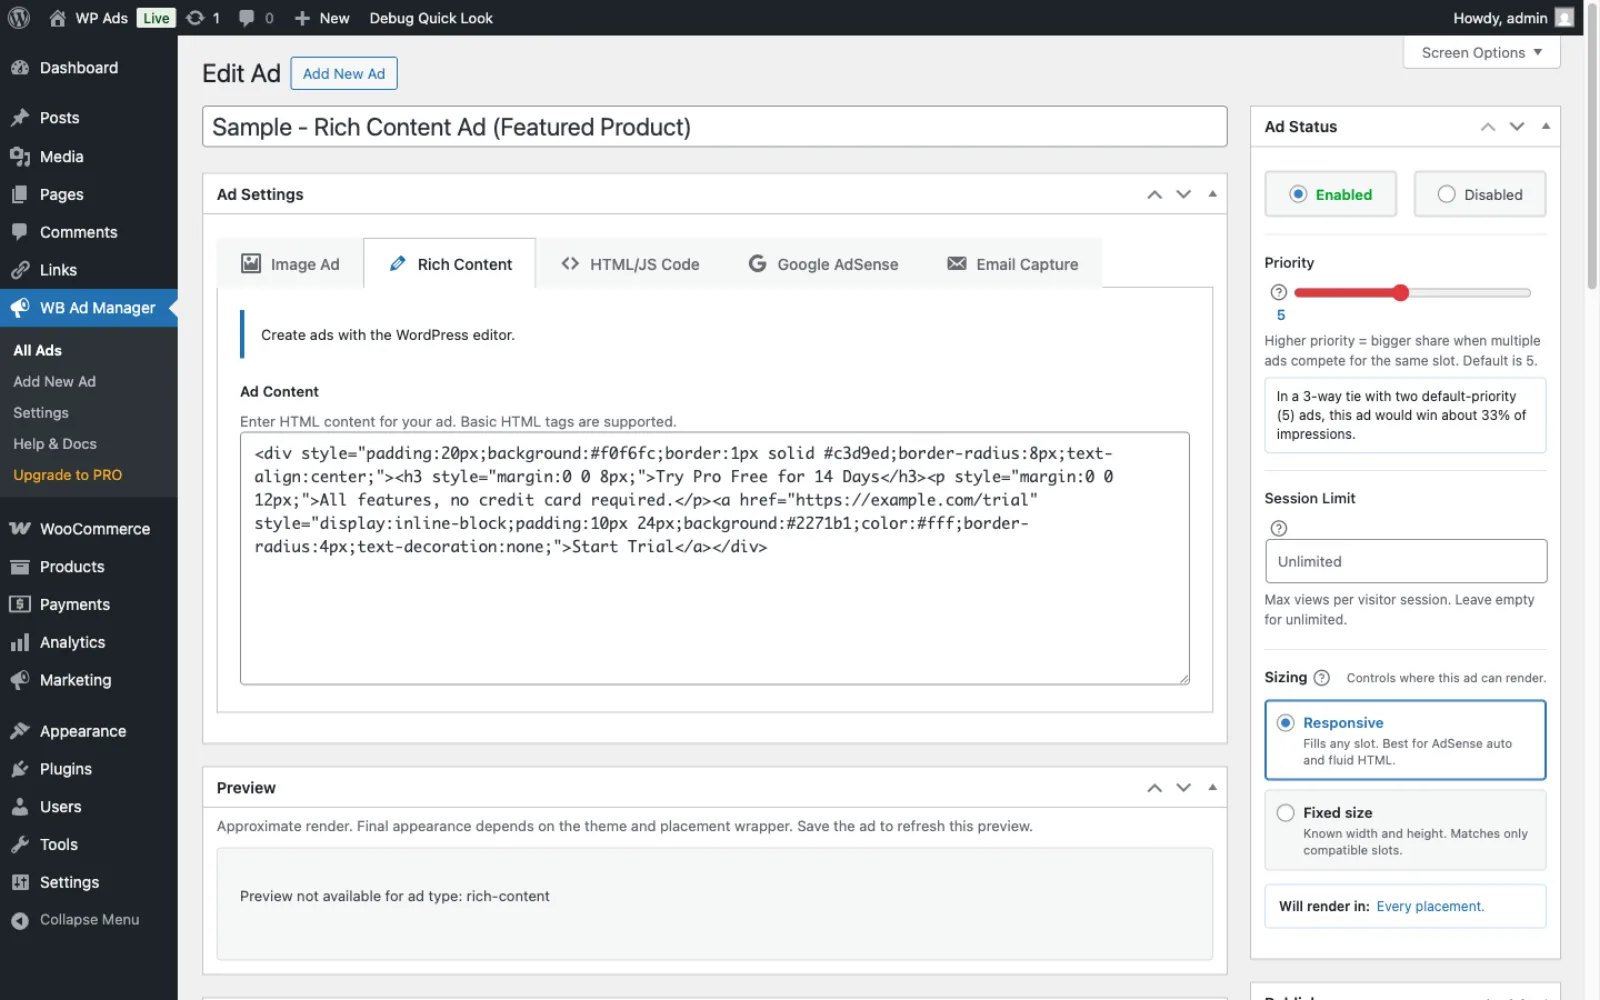
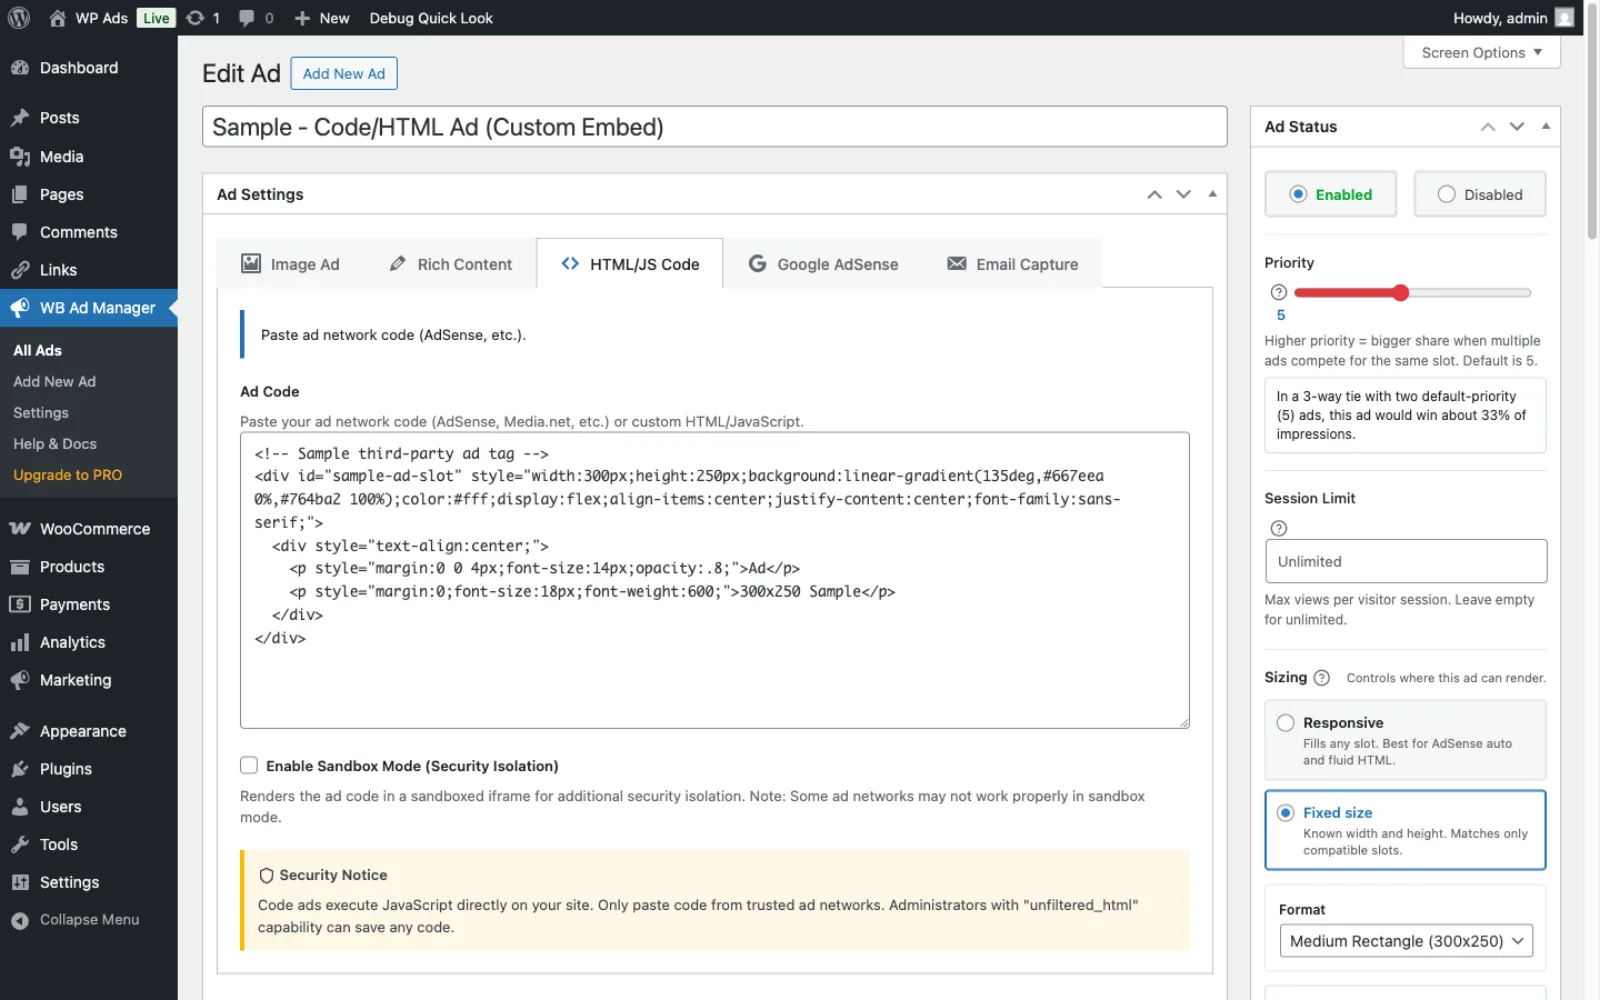 The Code Ad editor showing the syntax-highlighted code input area
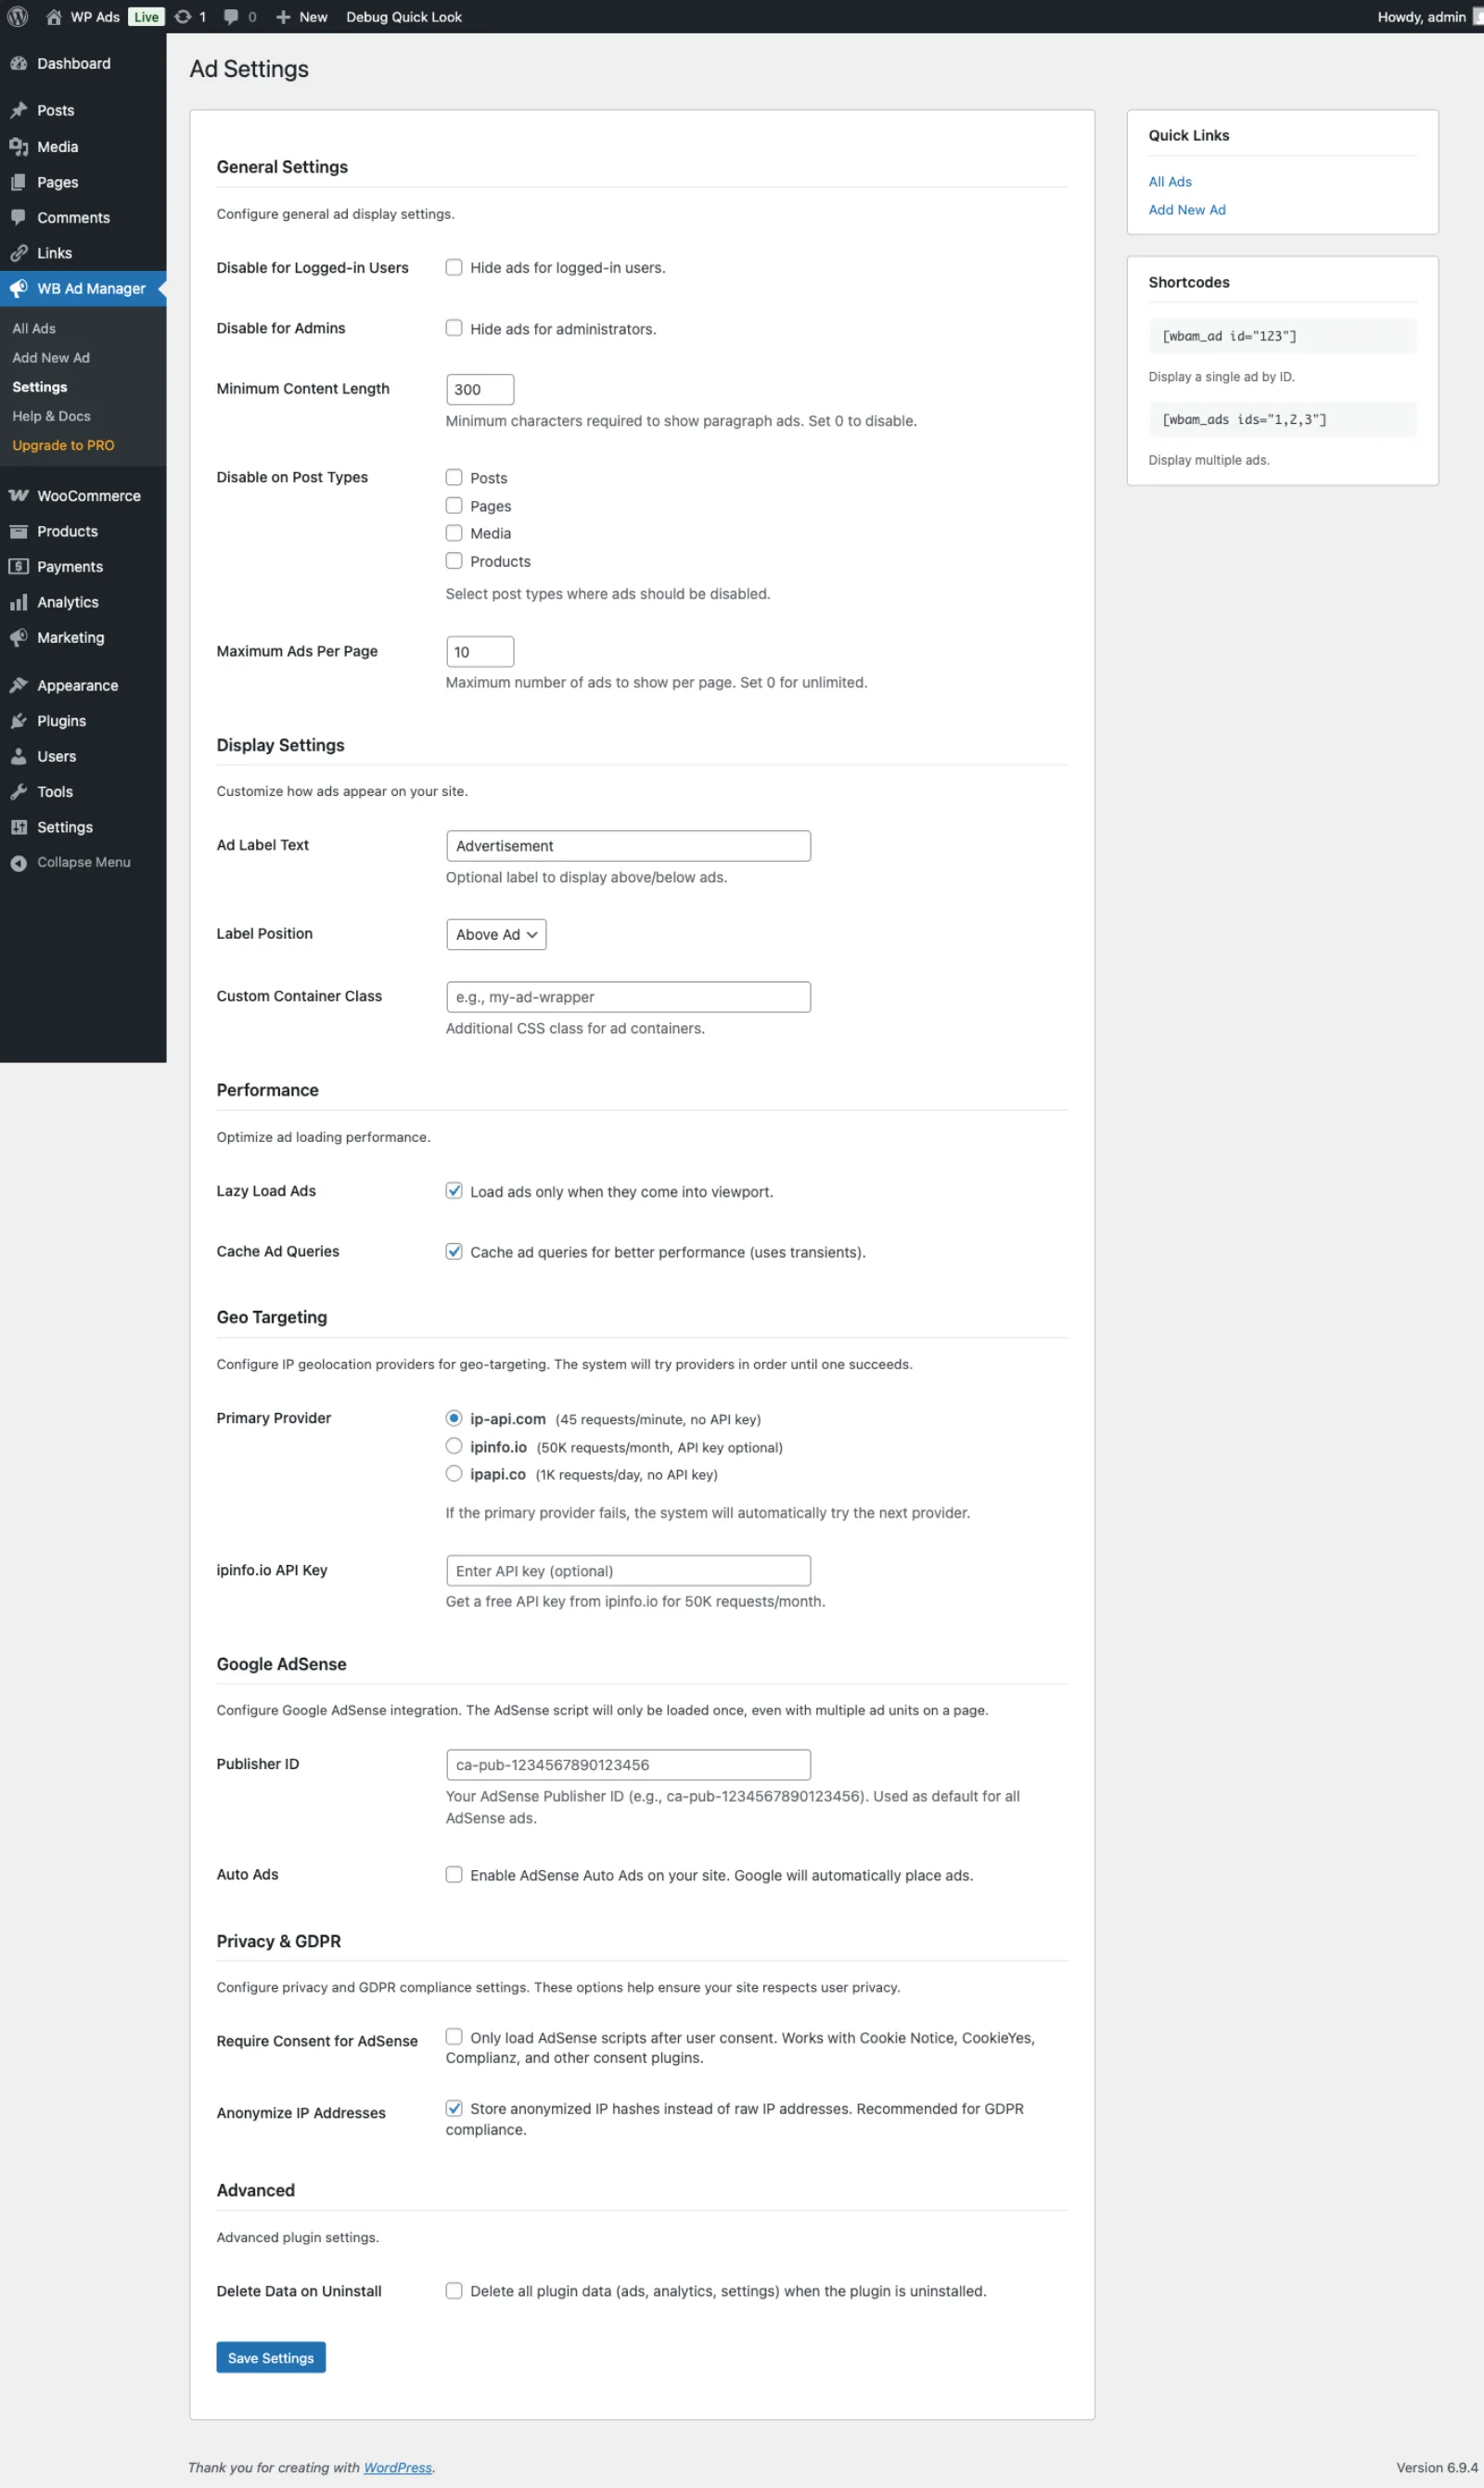 The settings page with General, Display, Performance, Geo Targeting, AdSense, Privacy, and Advanced sections
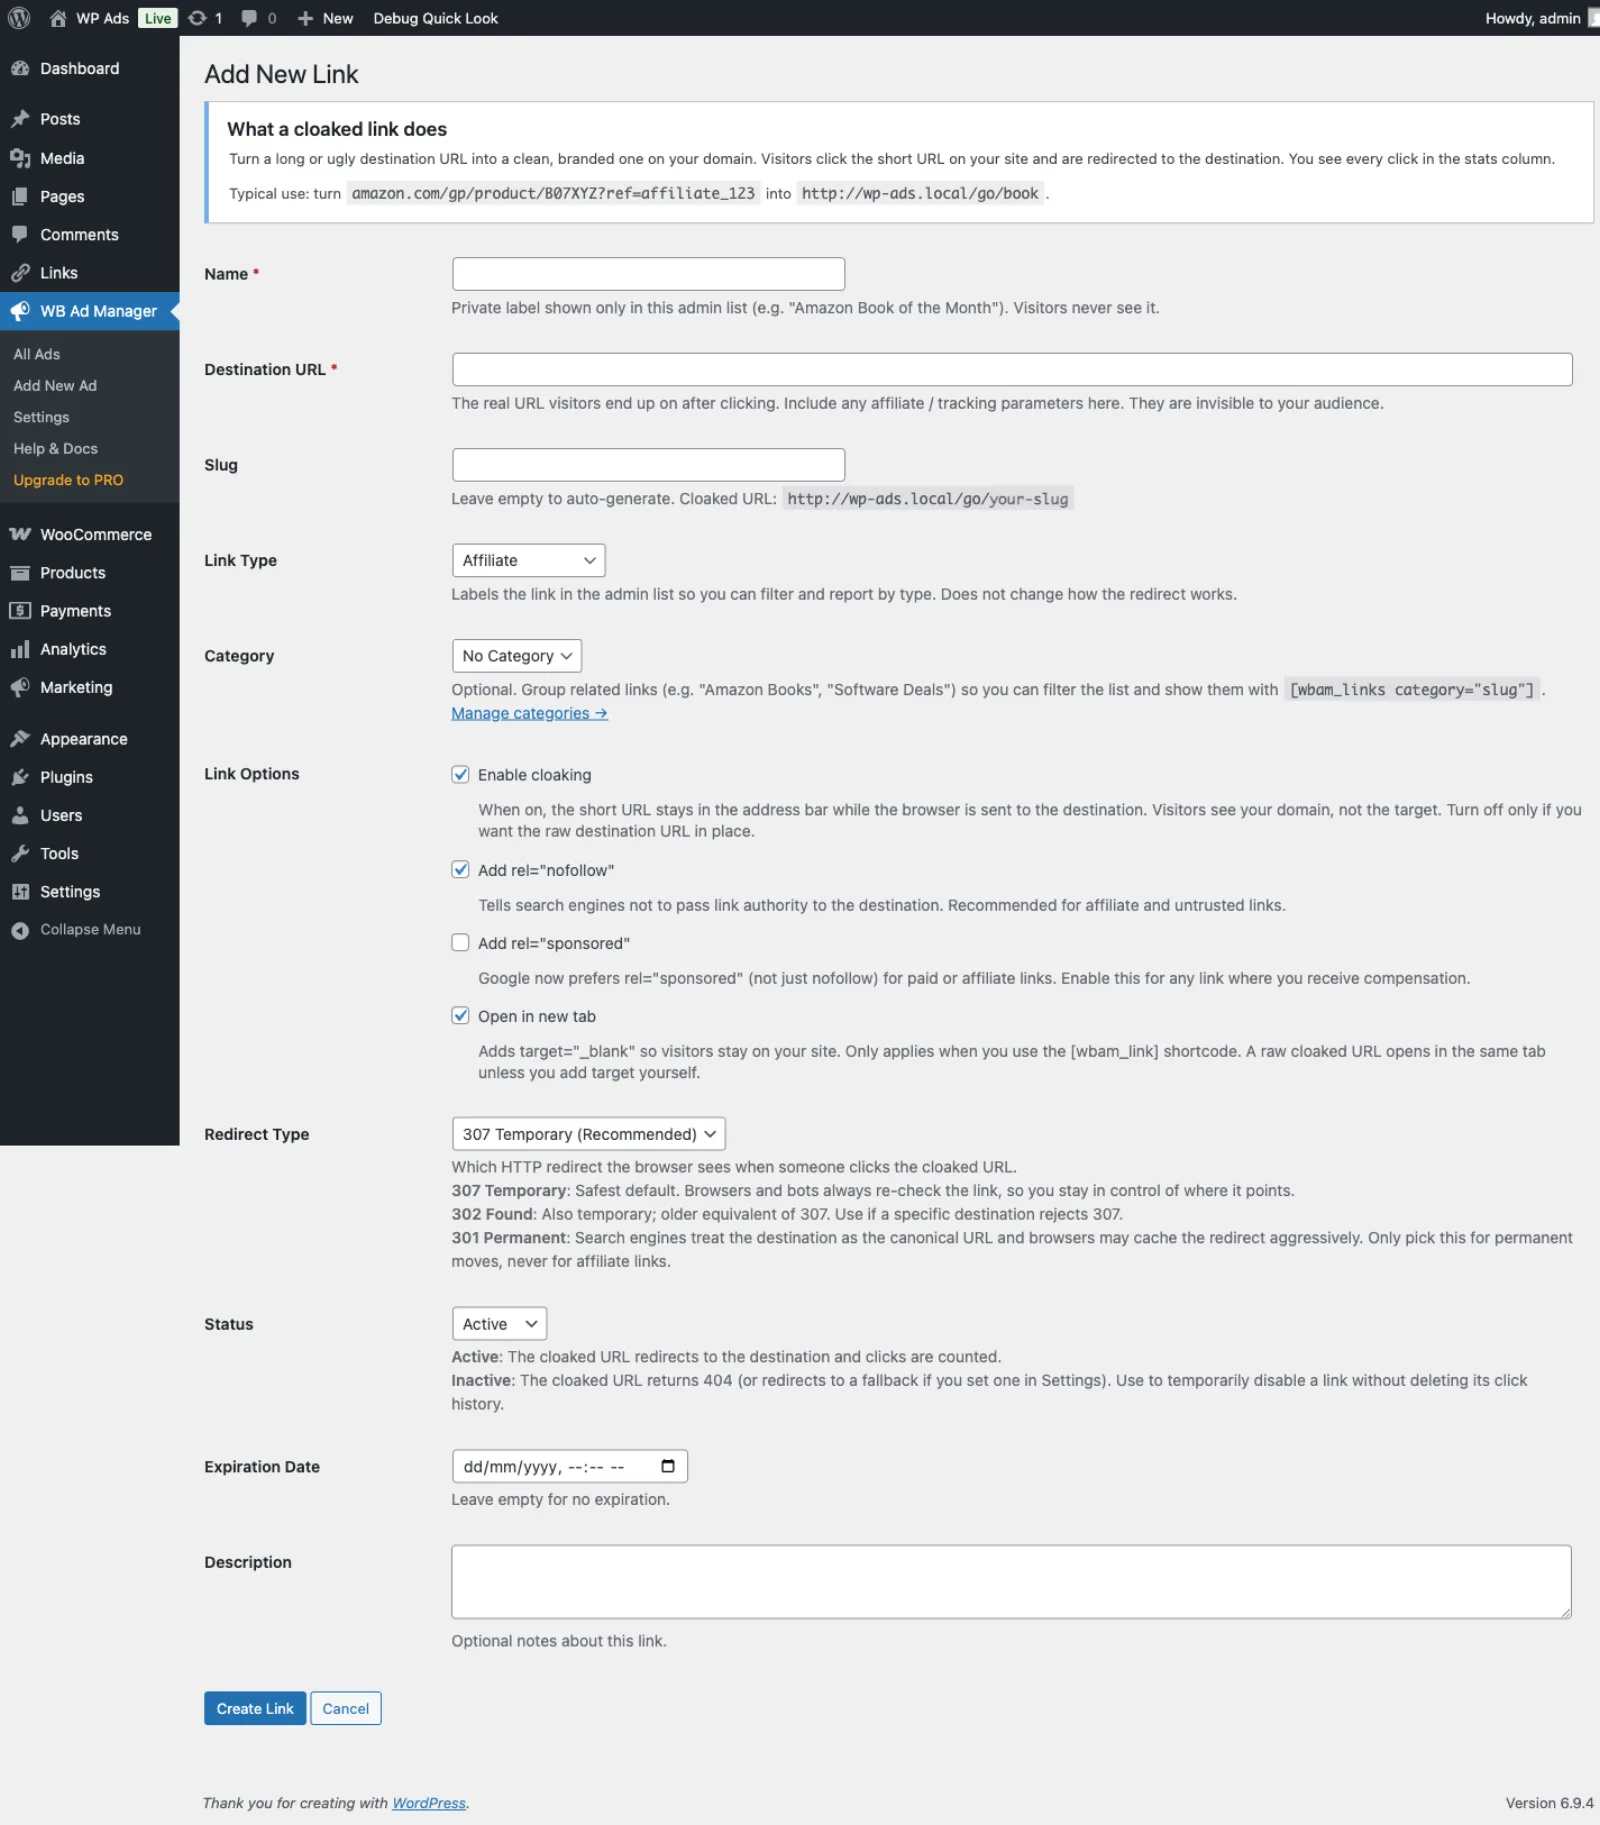 The Add New Link form showing URL configuration, cloaking options, and SEO attributes
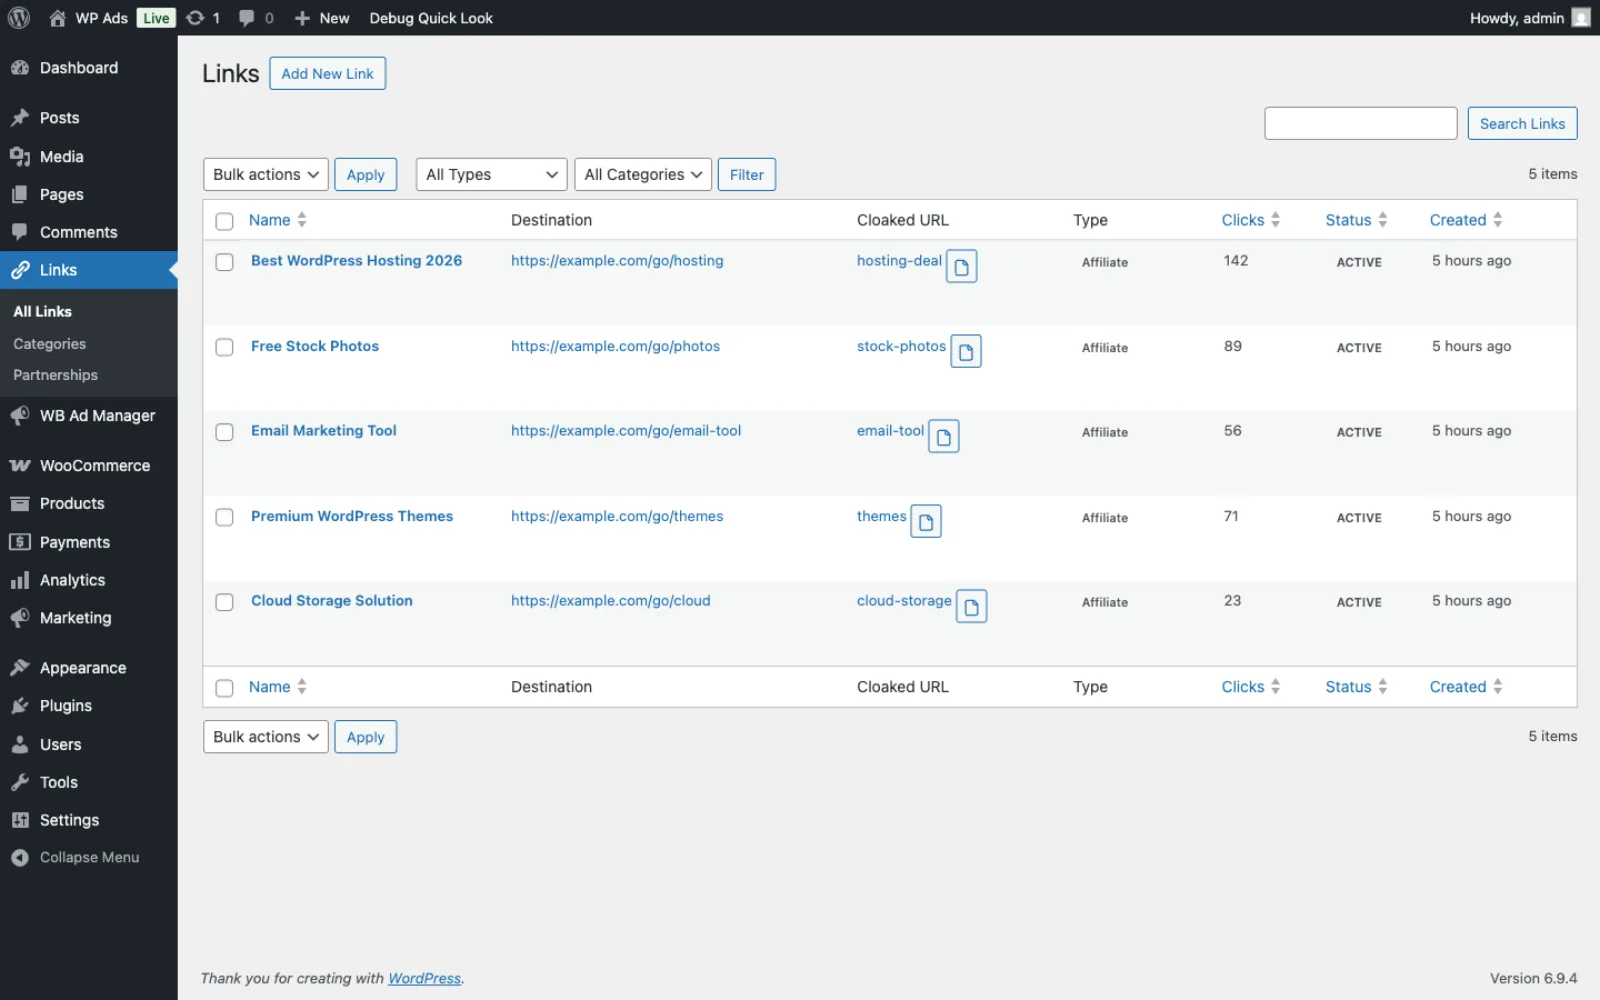 The Partnership Inquiries page with status filters, search, and inquiry management