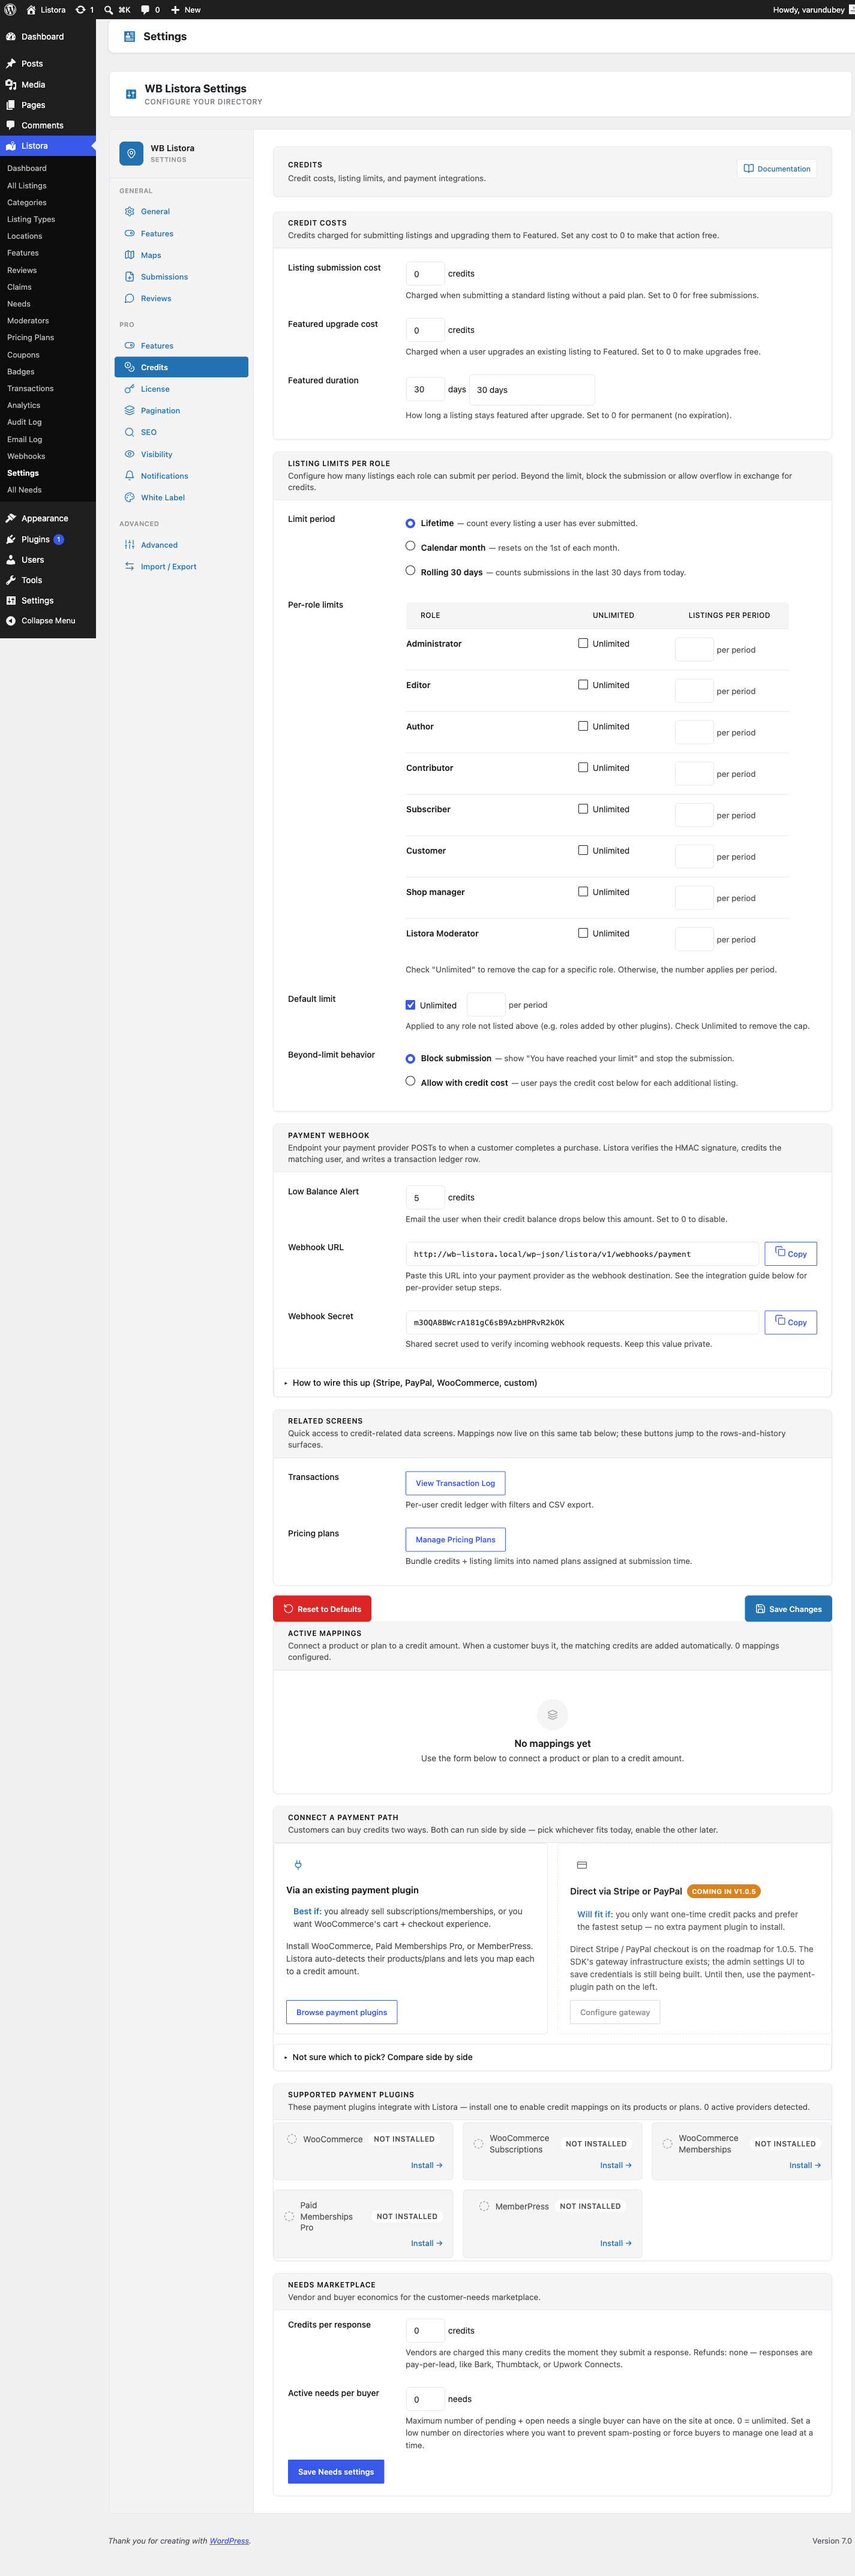
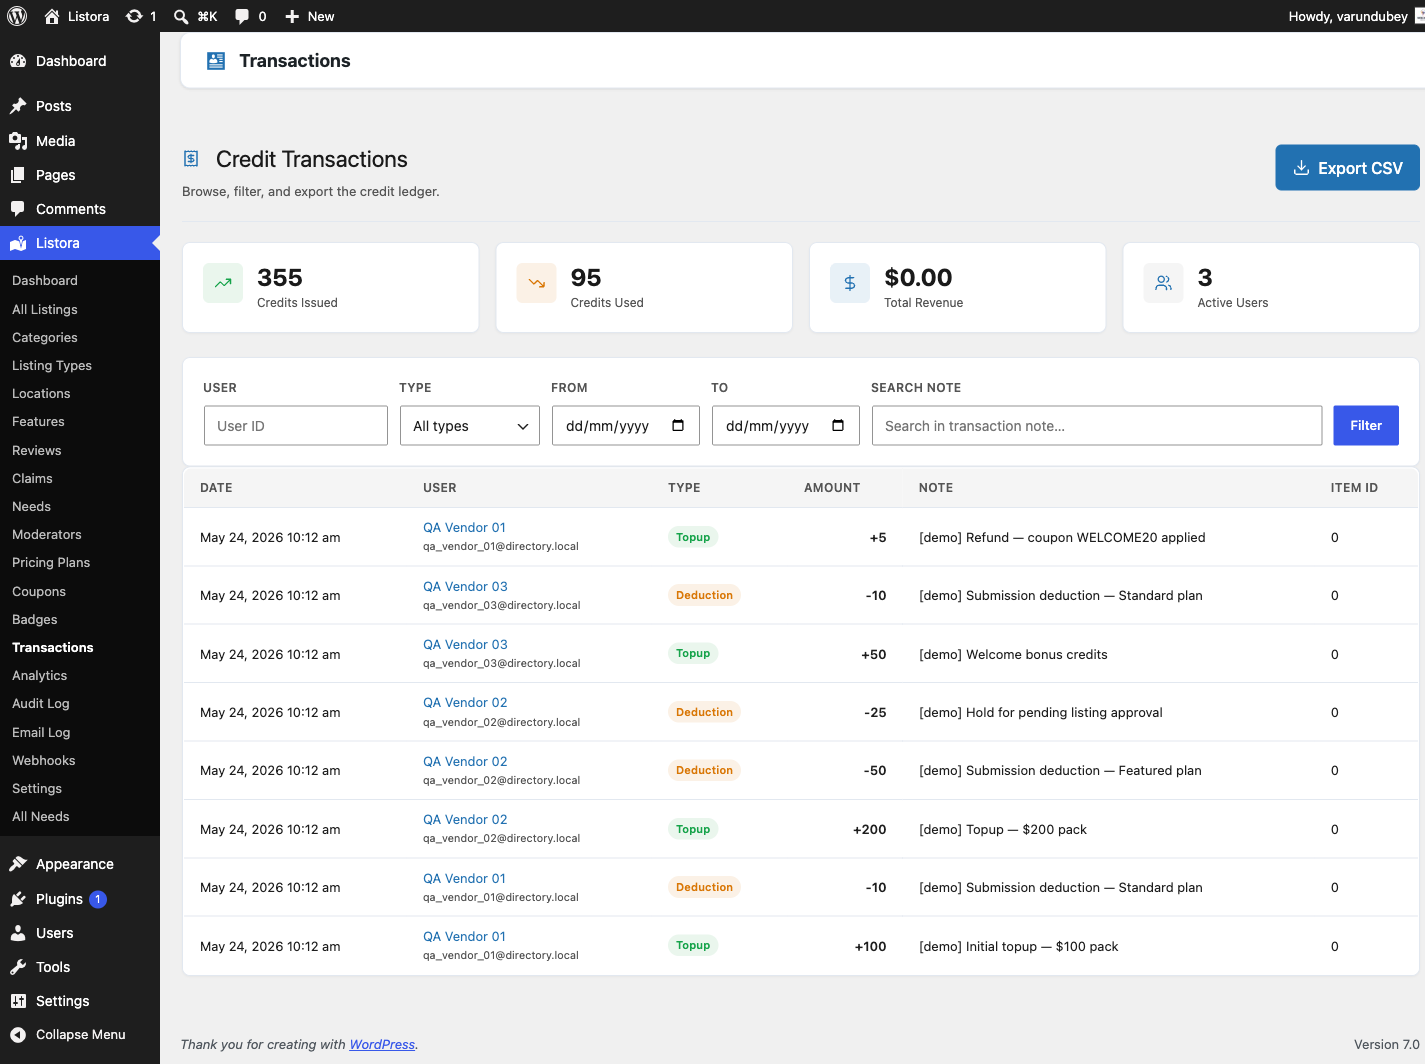
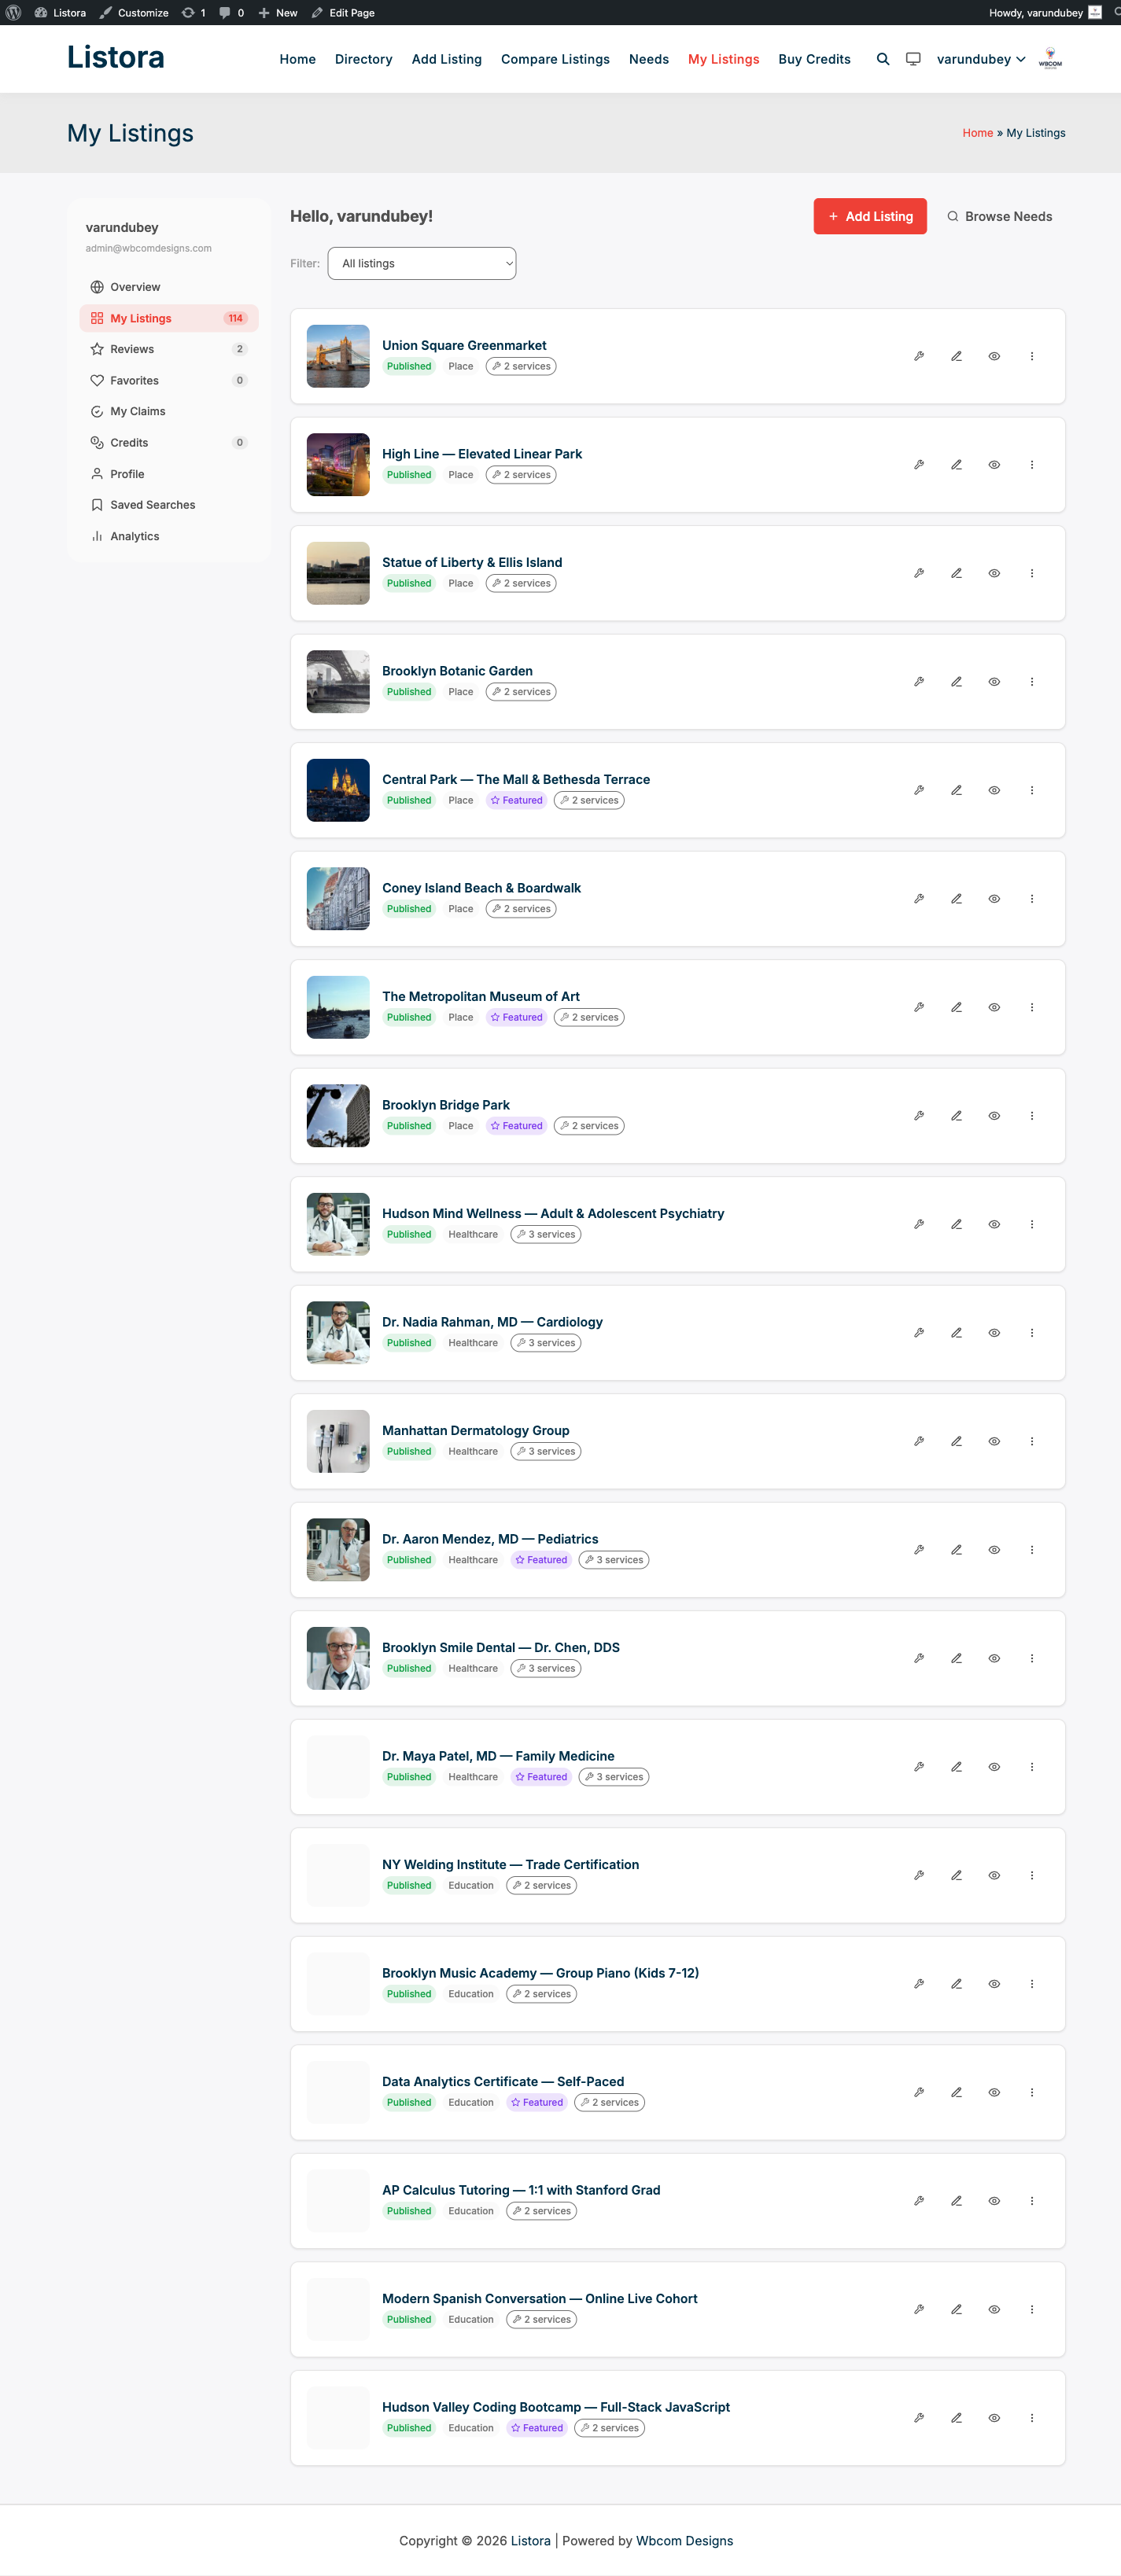
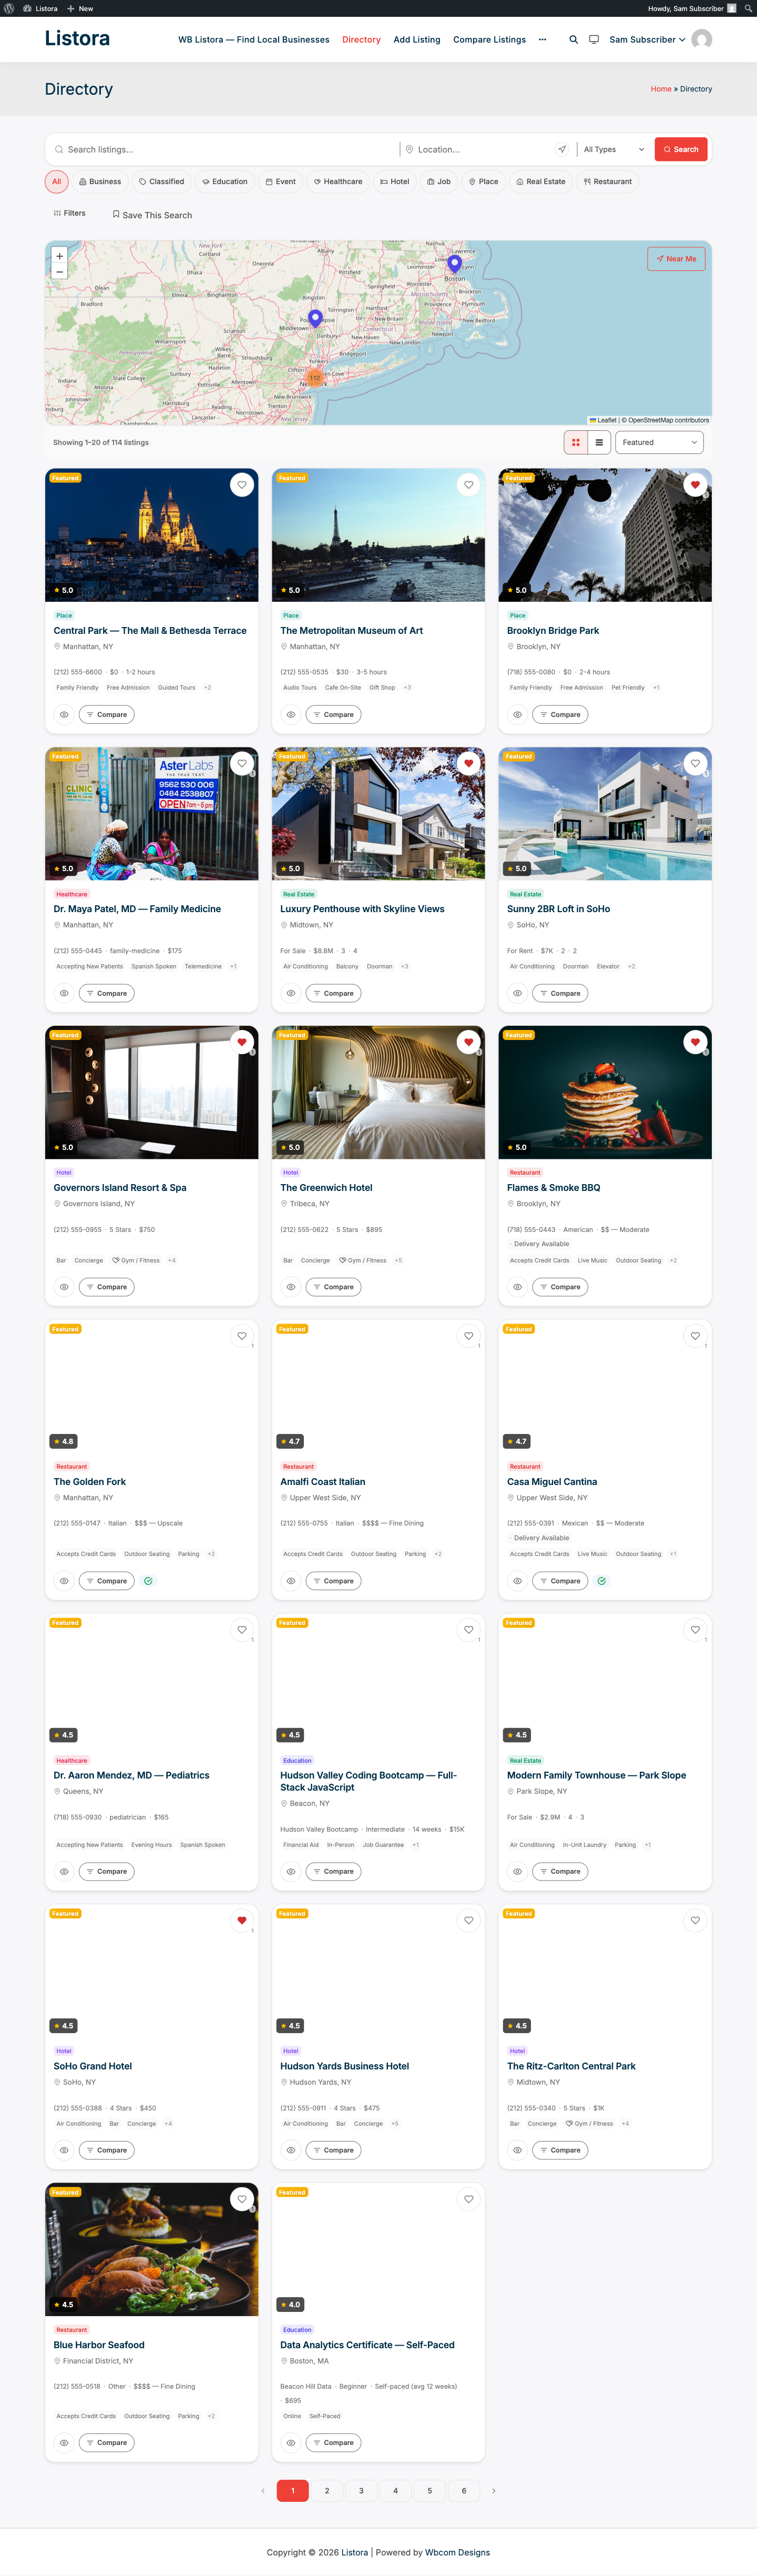
Wbcom Designs Listora Docs
Back to product Buy Now

Overview

WB Listora Documentation

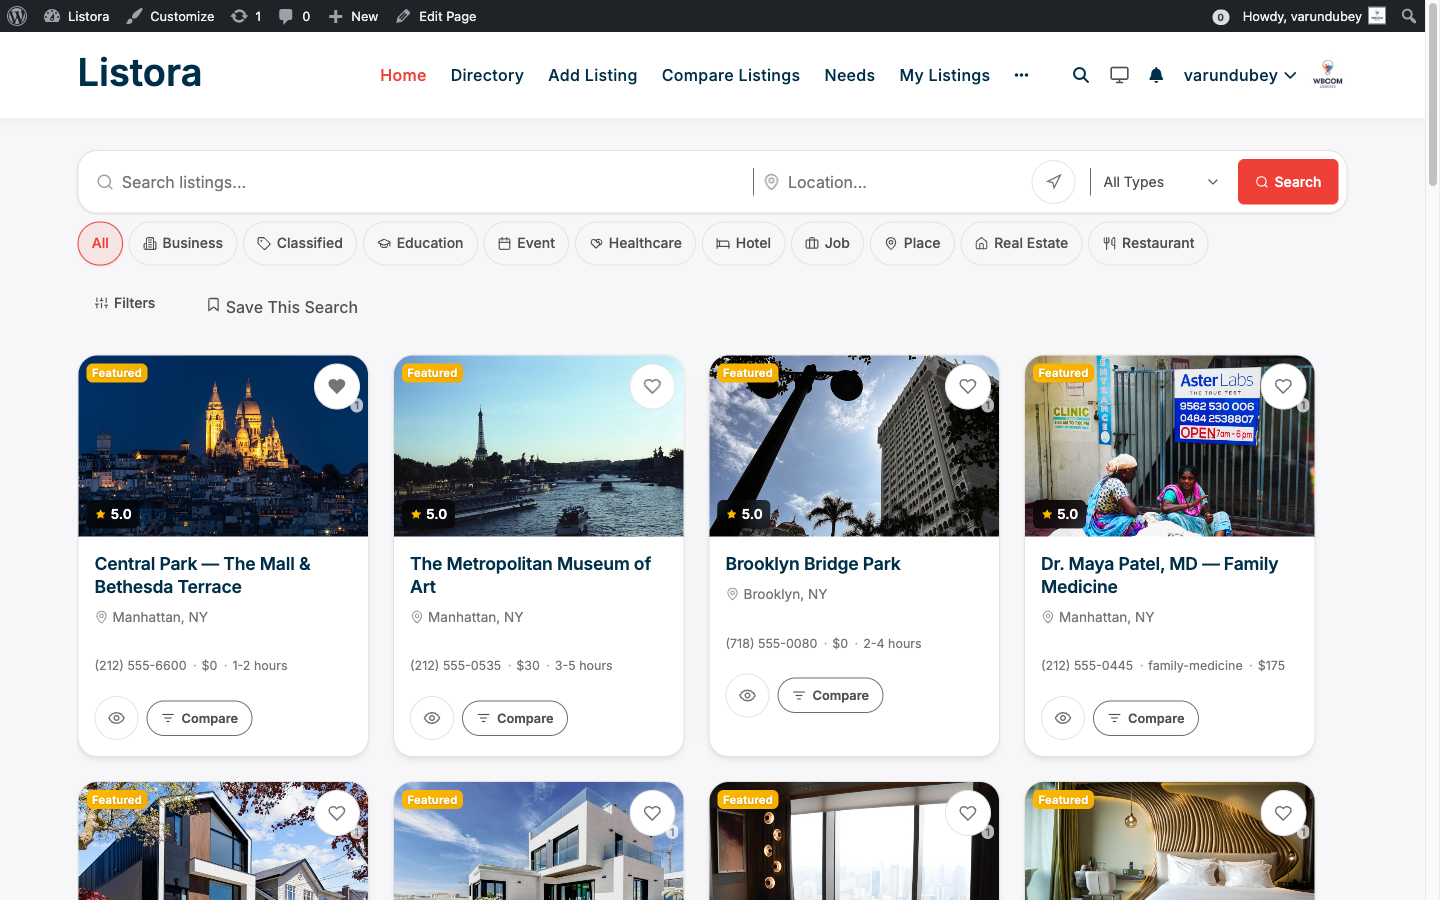
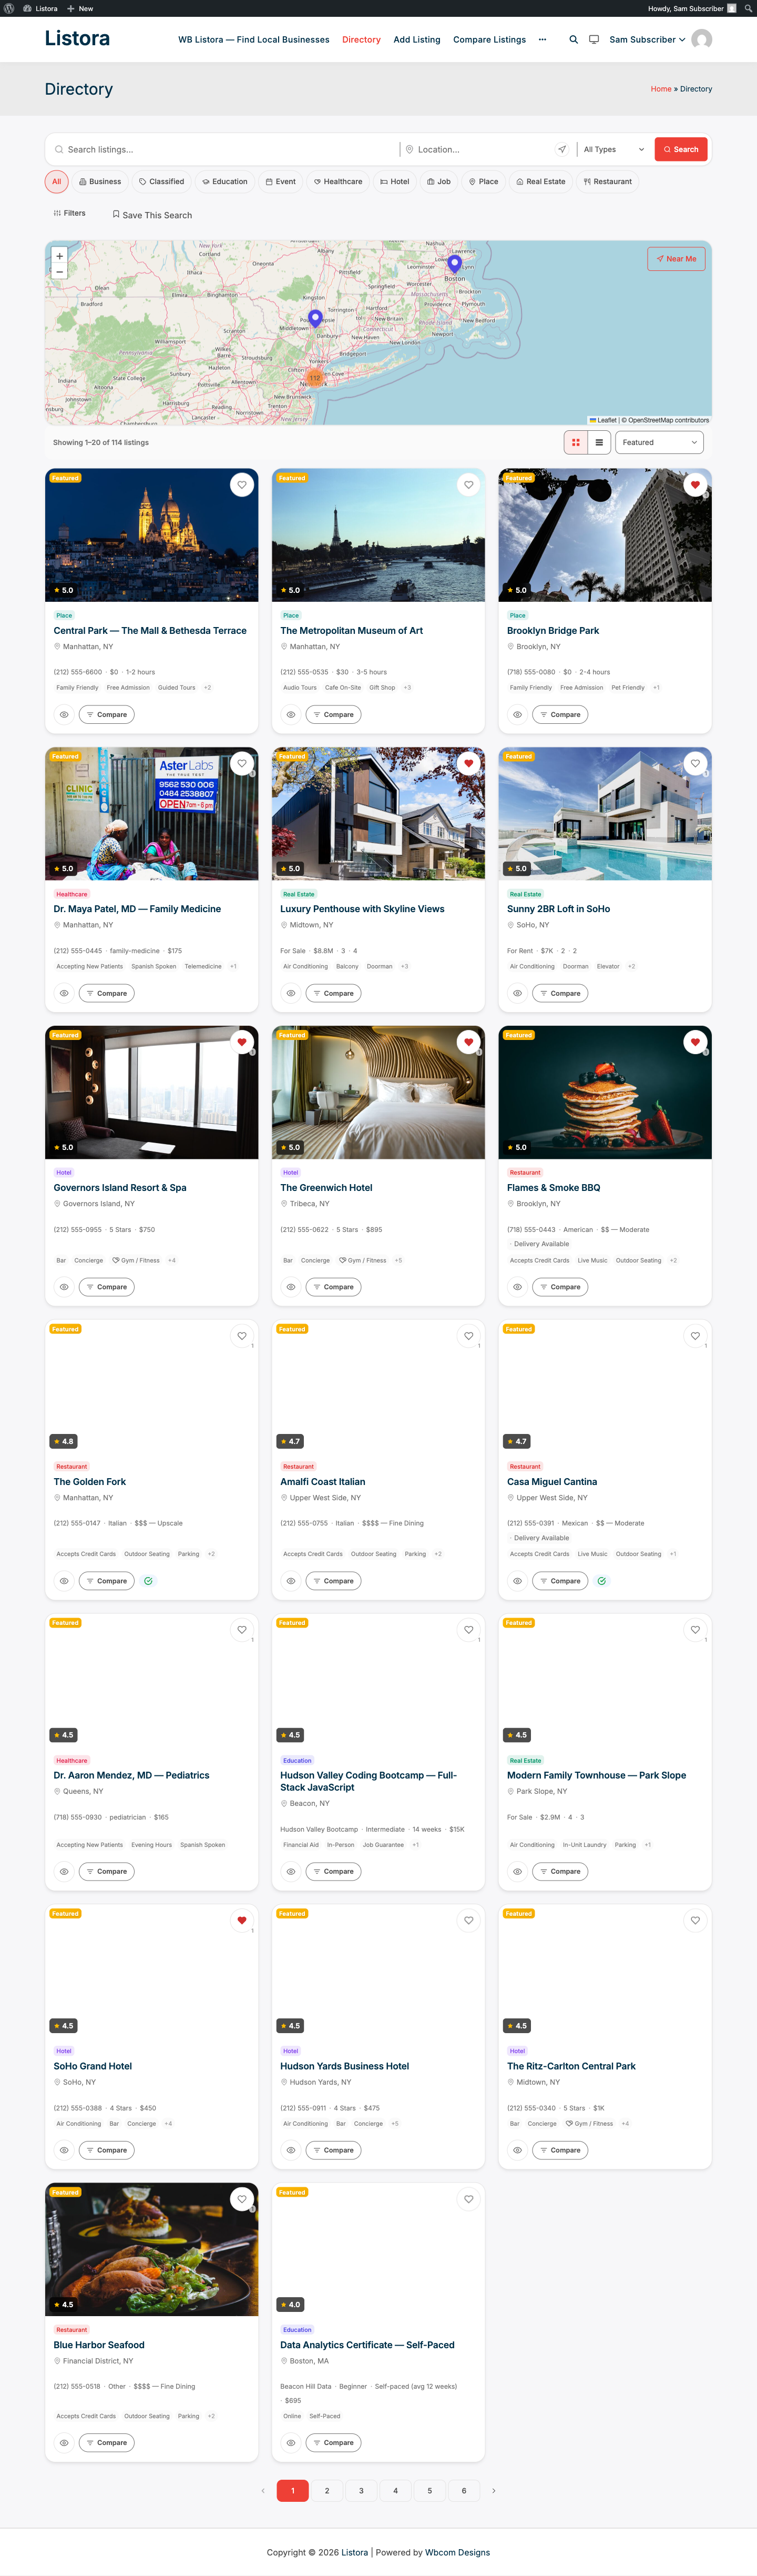
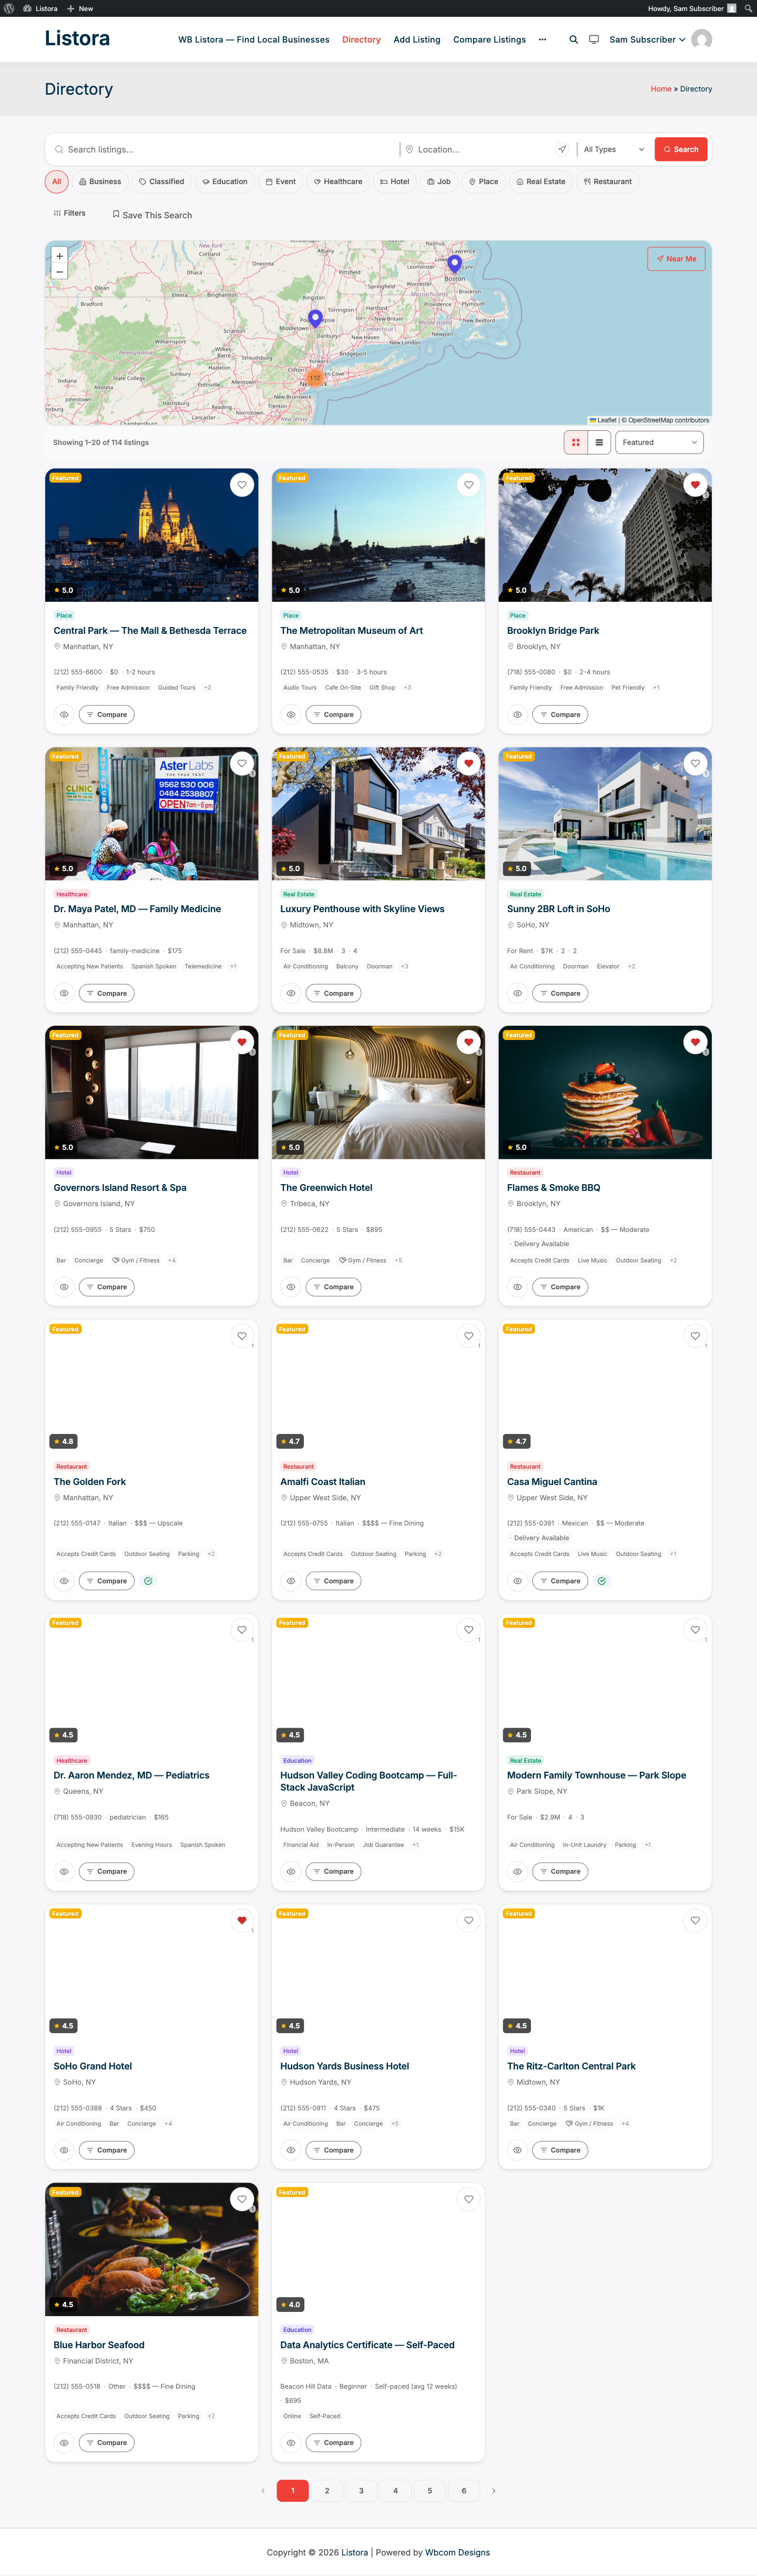
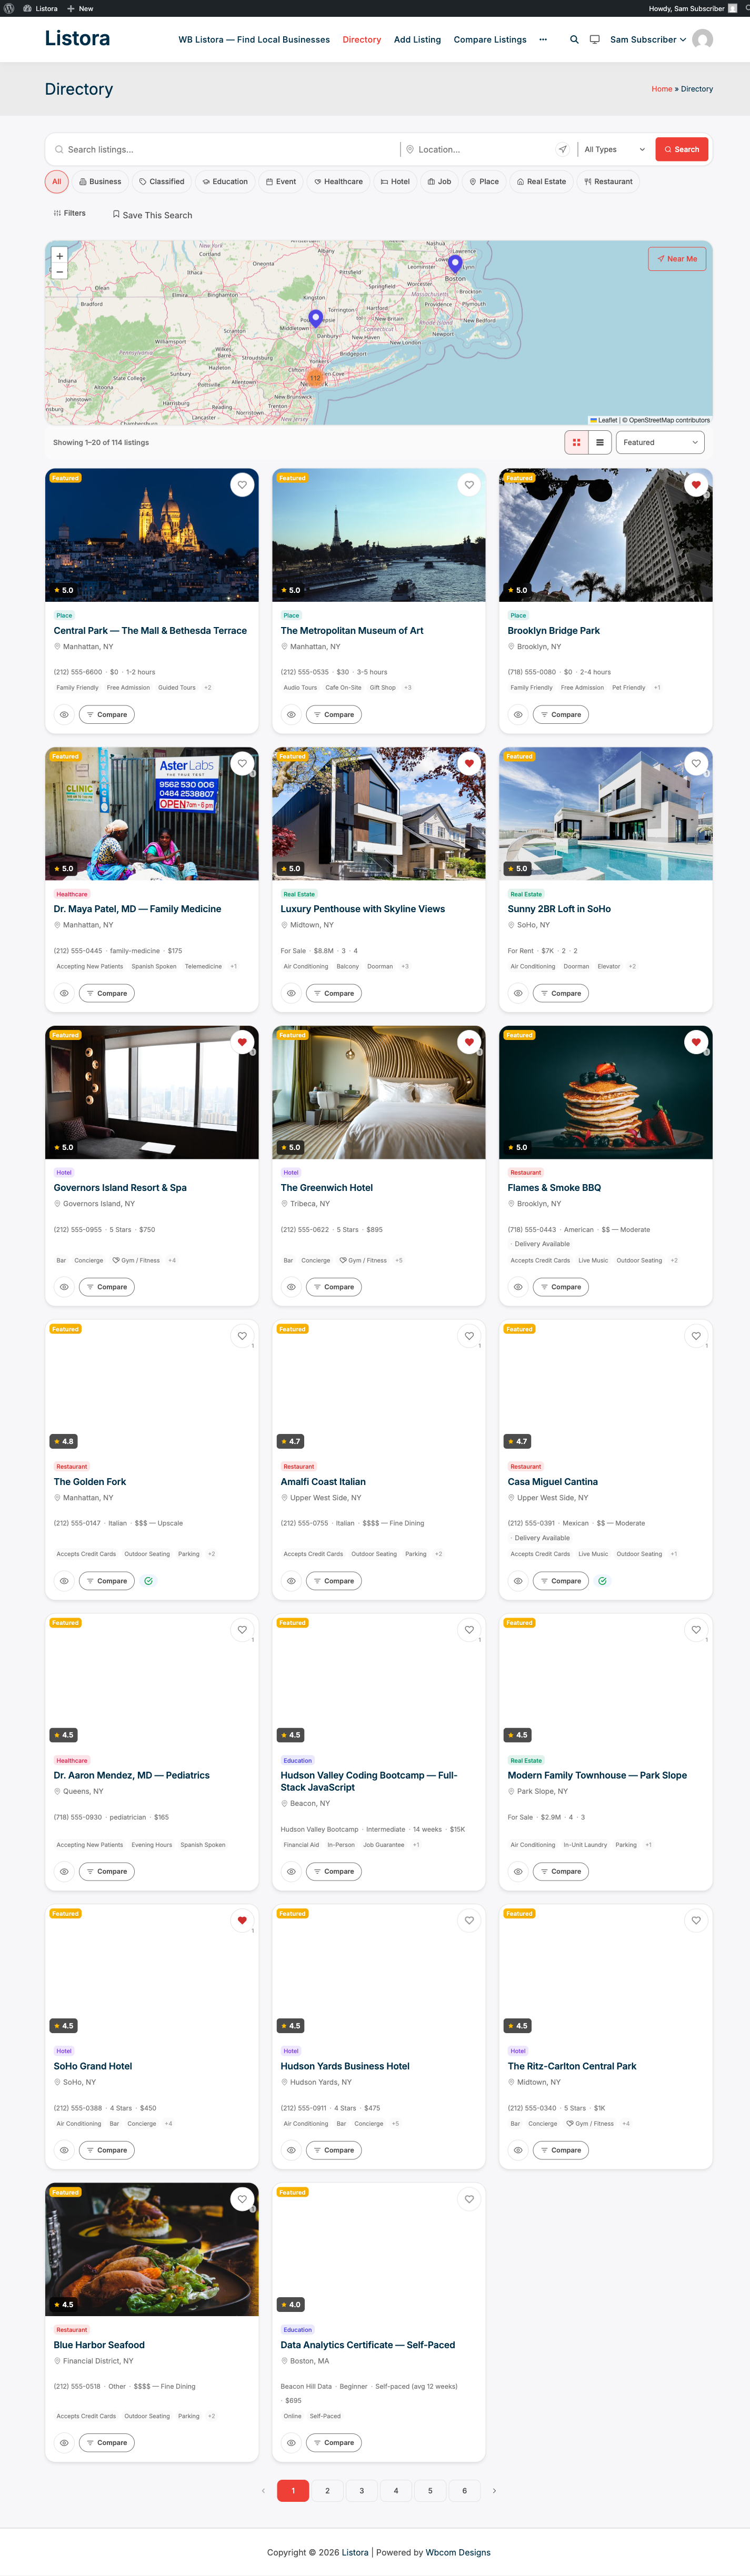
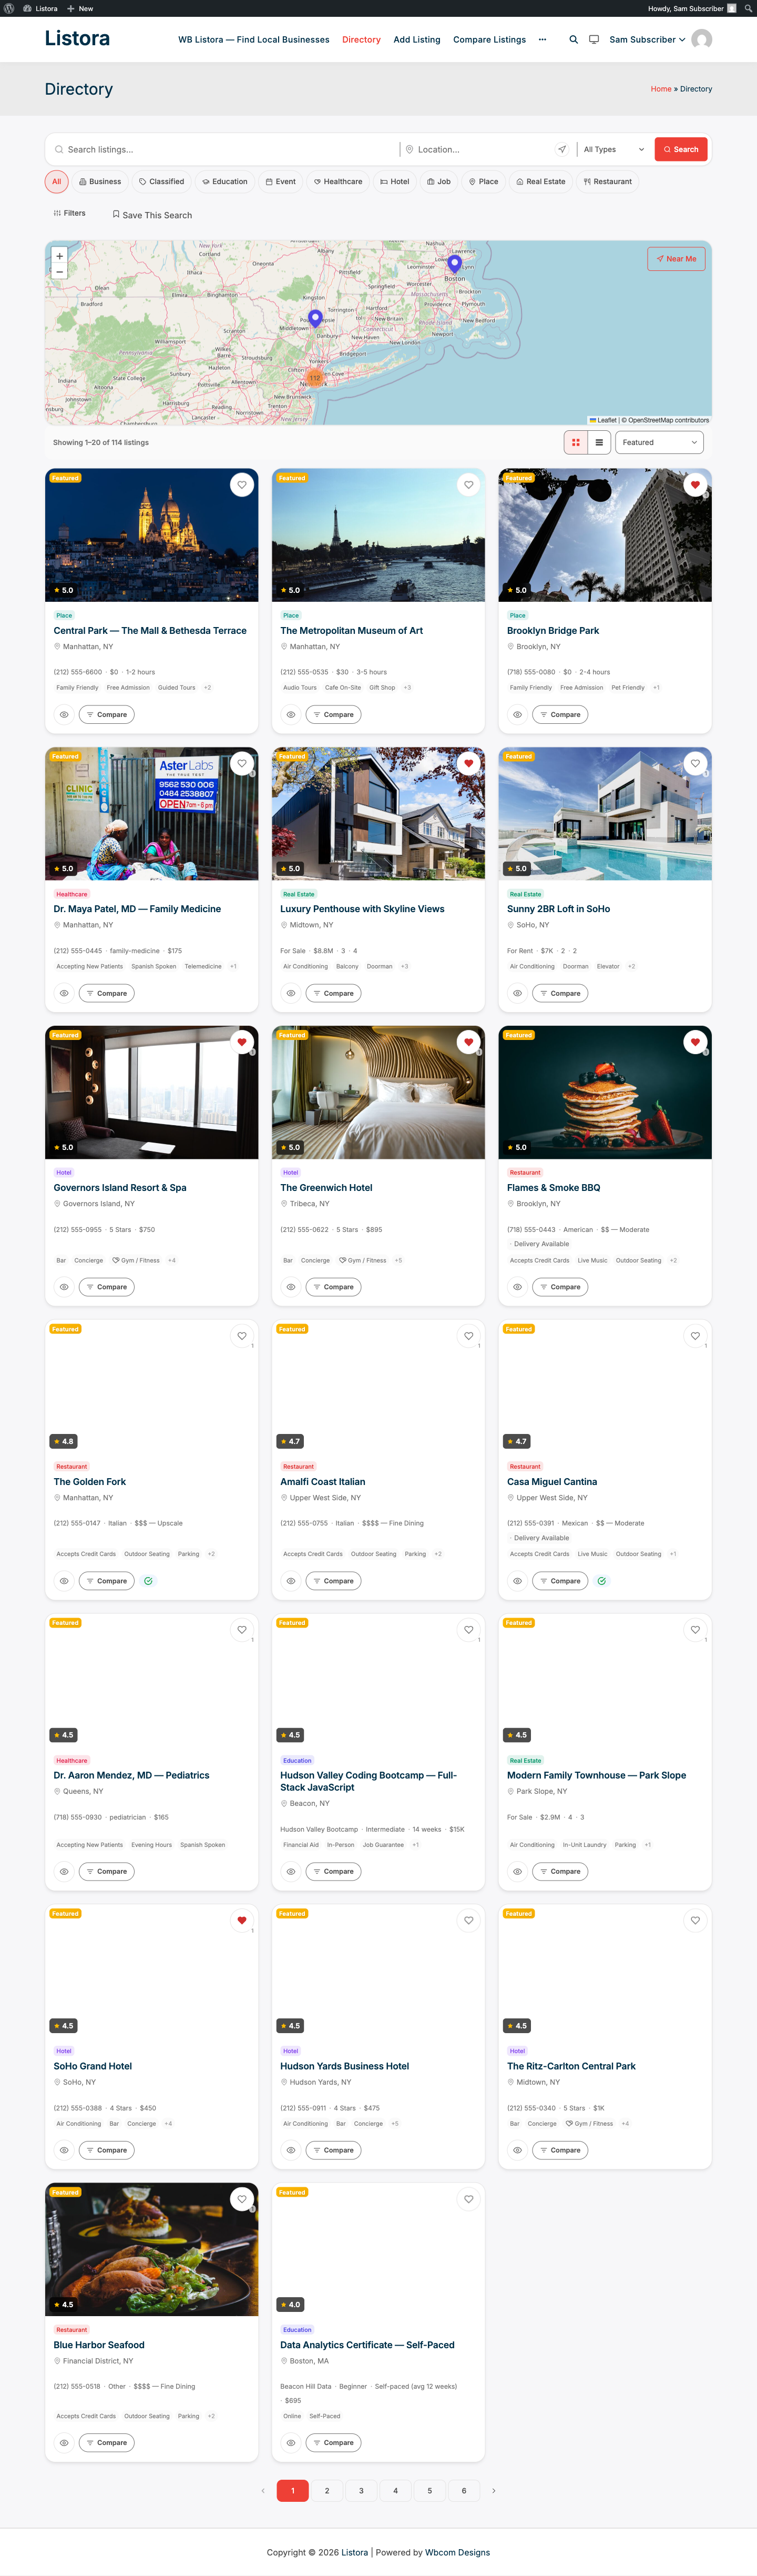
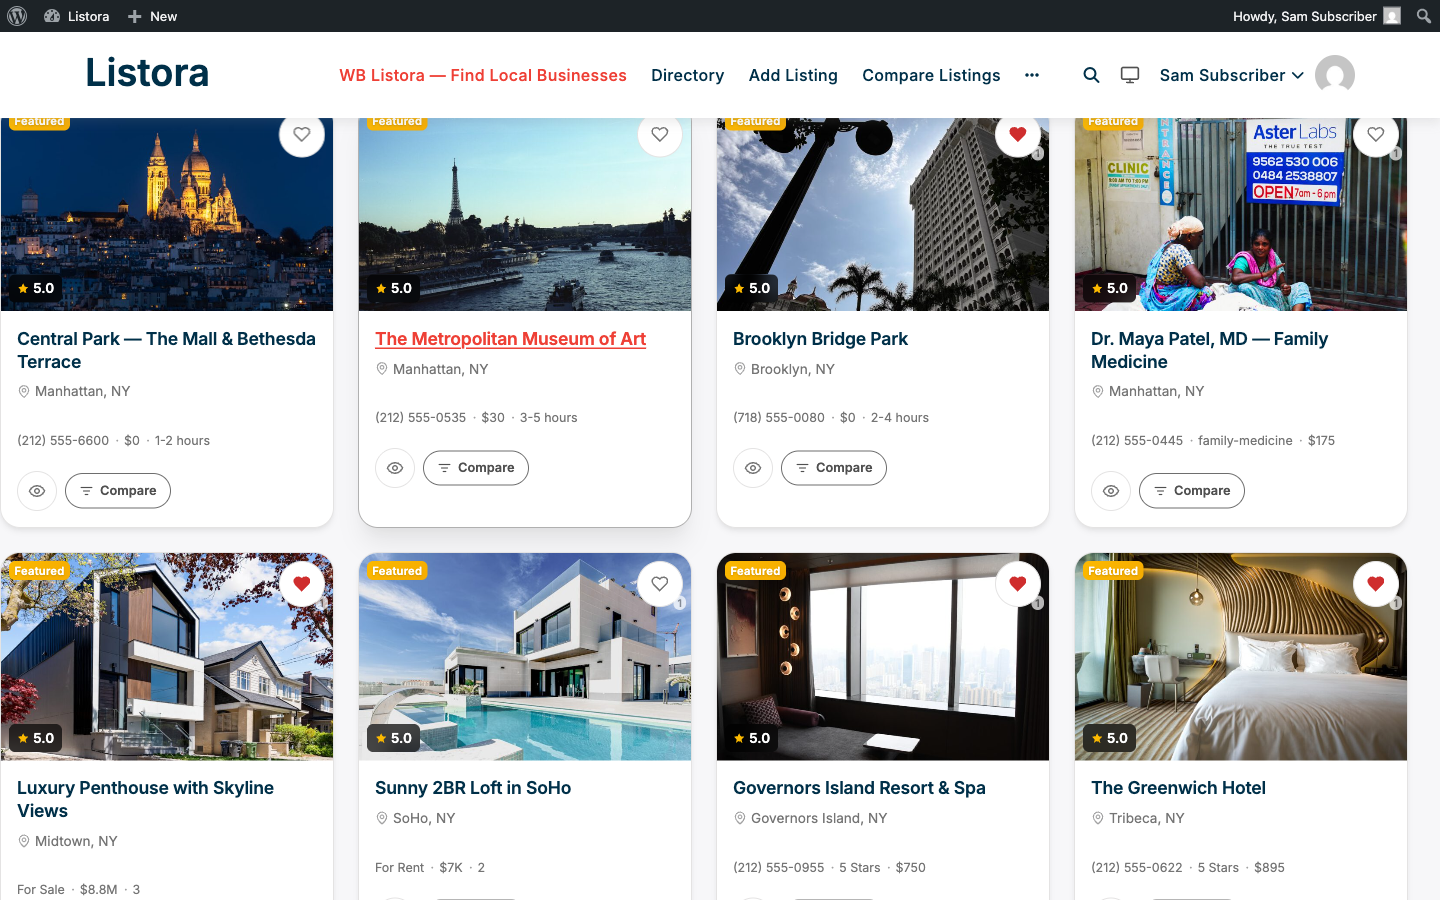
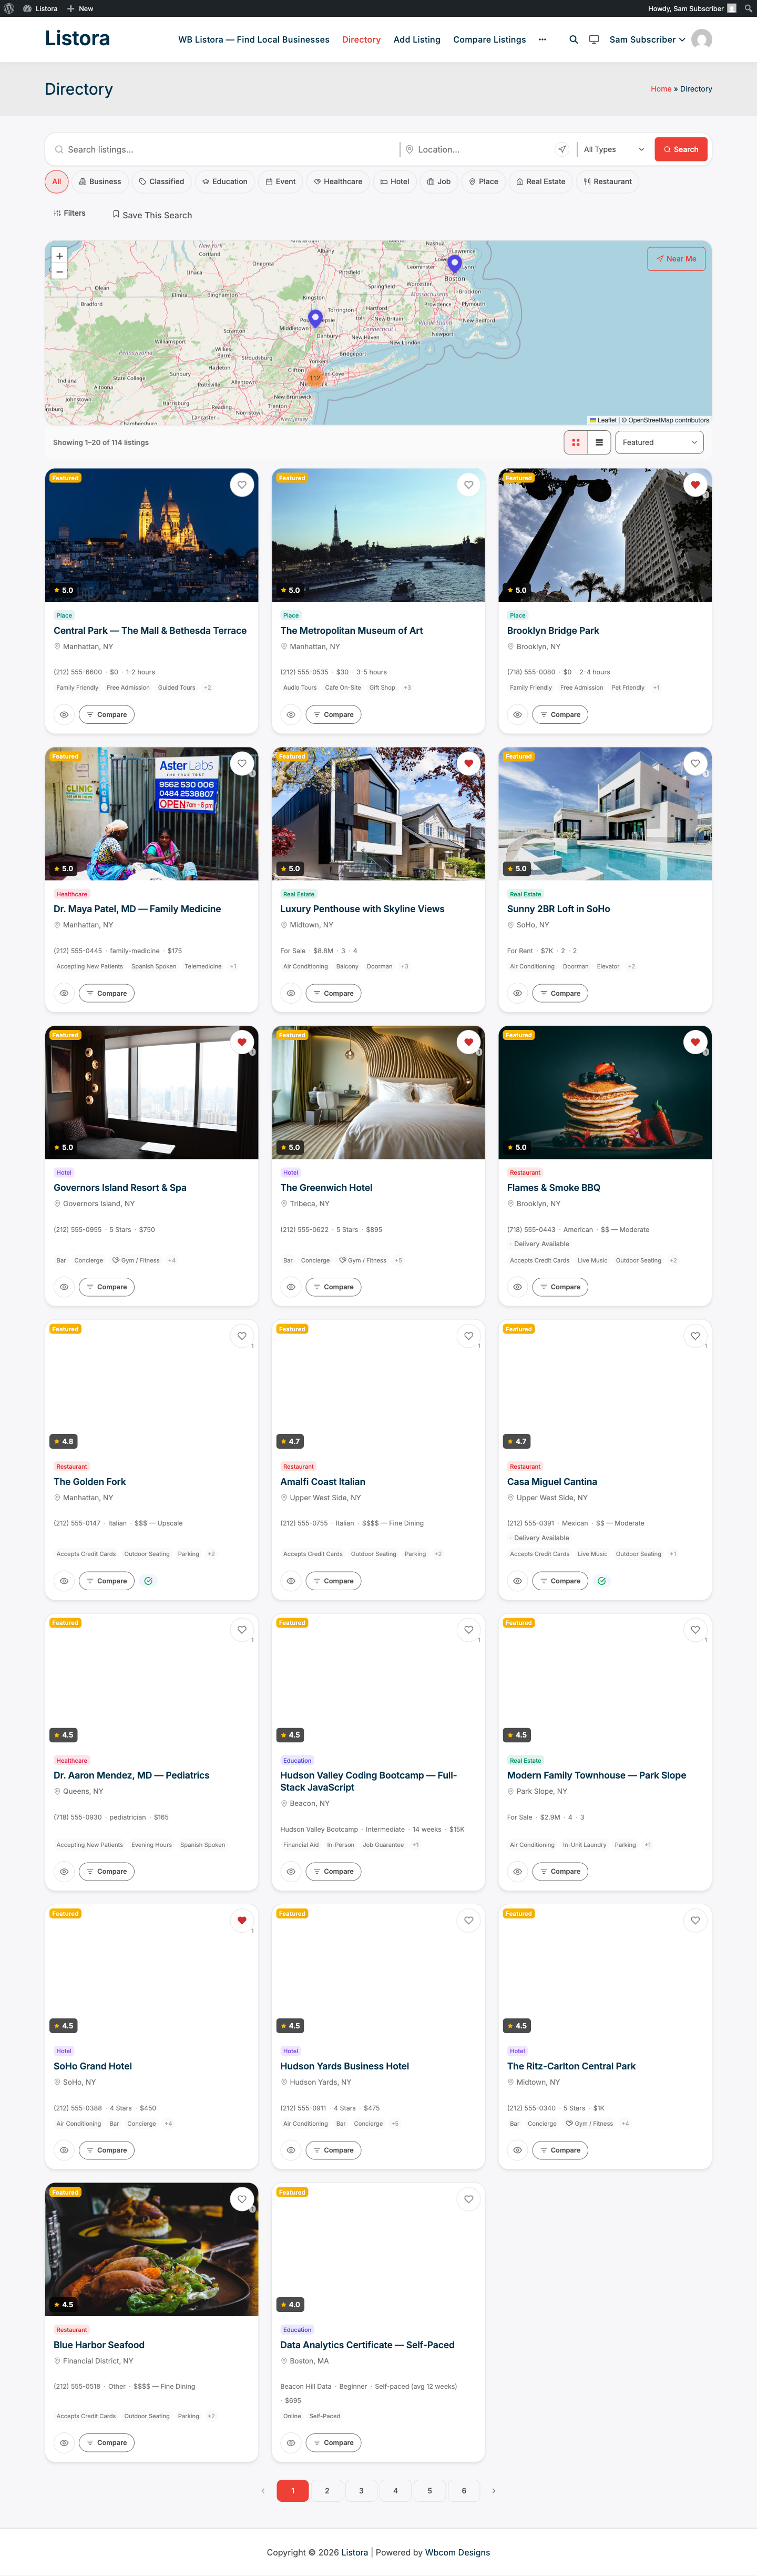
WB Listora - directory site homepage on the modernized 1.0.5 UI

WB Listora is a complete WordPress directory plugin. Build any type of listing directory - business, restaurant, hotel, real estate, jobs, events, and more - using native Gutenberg blocks and the WordPress Interactivity API.

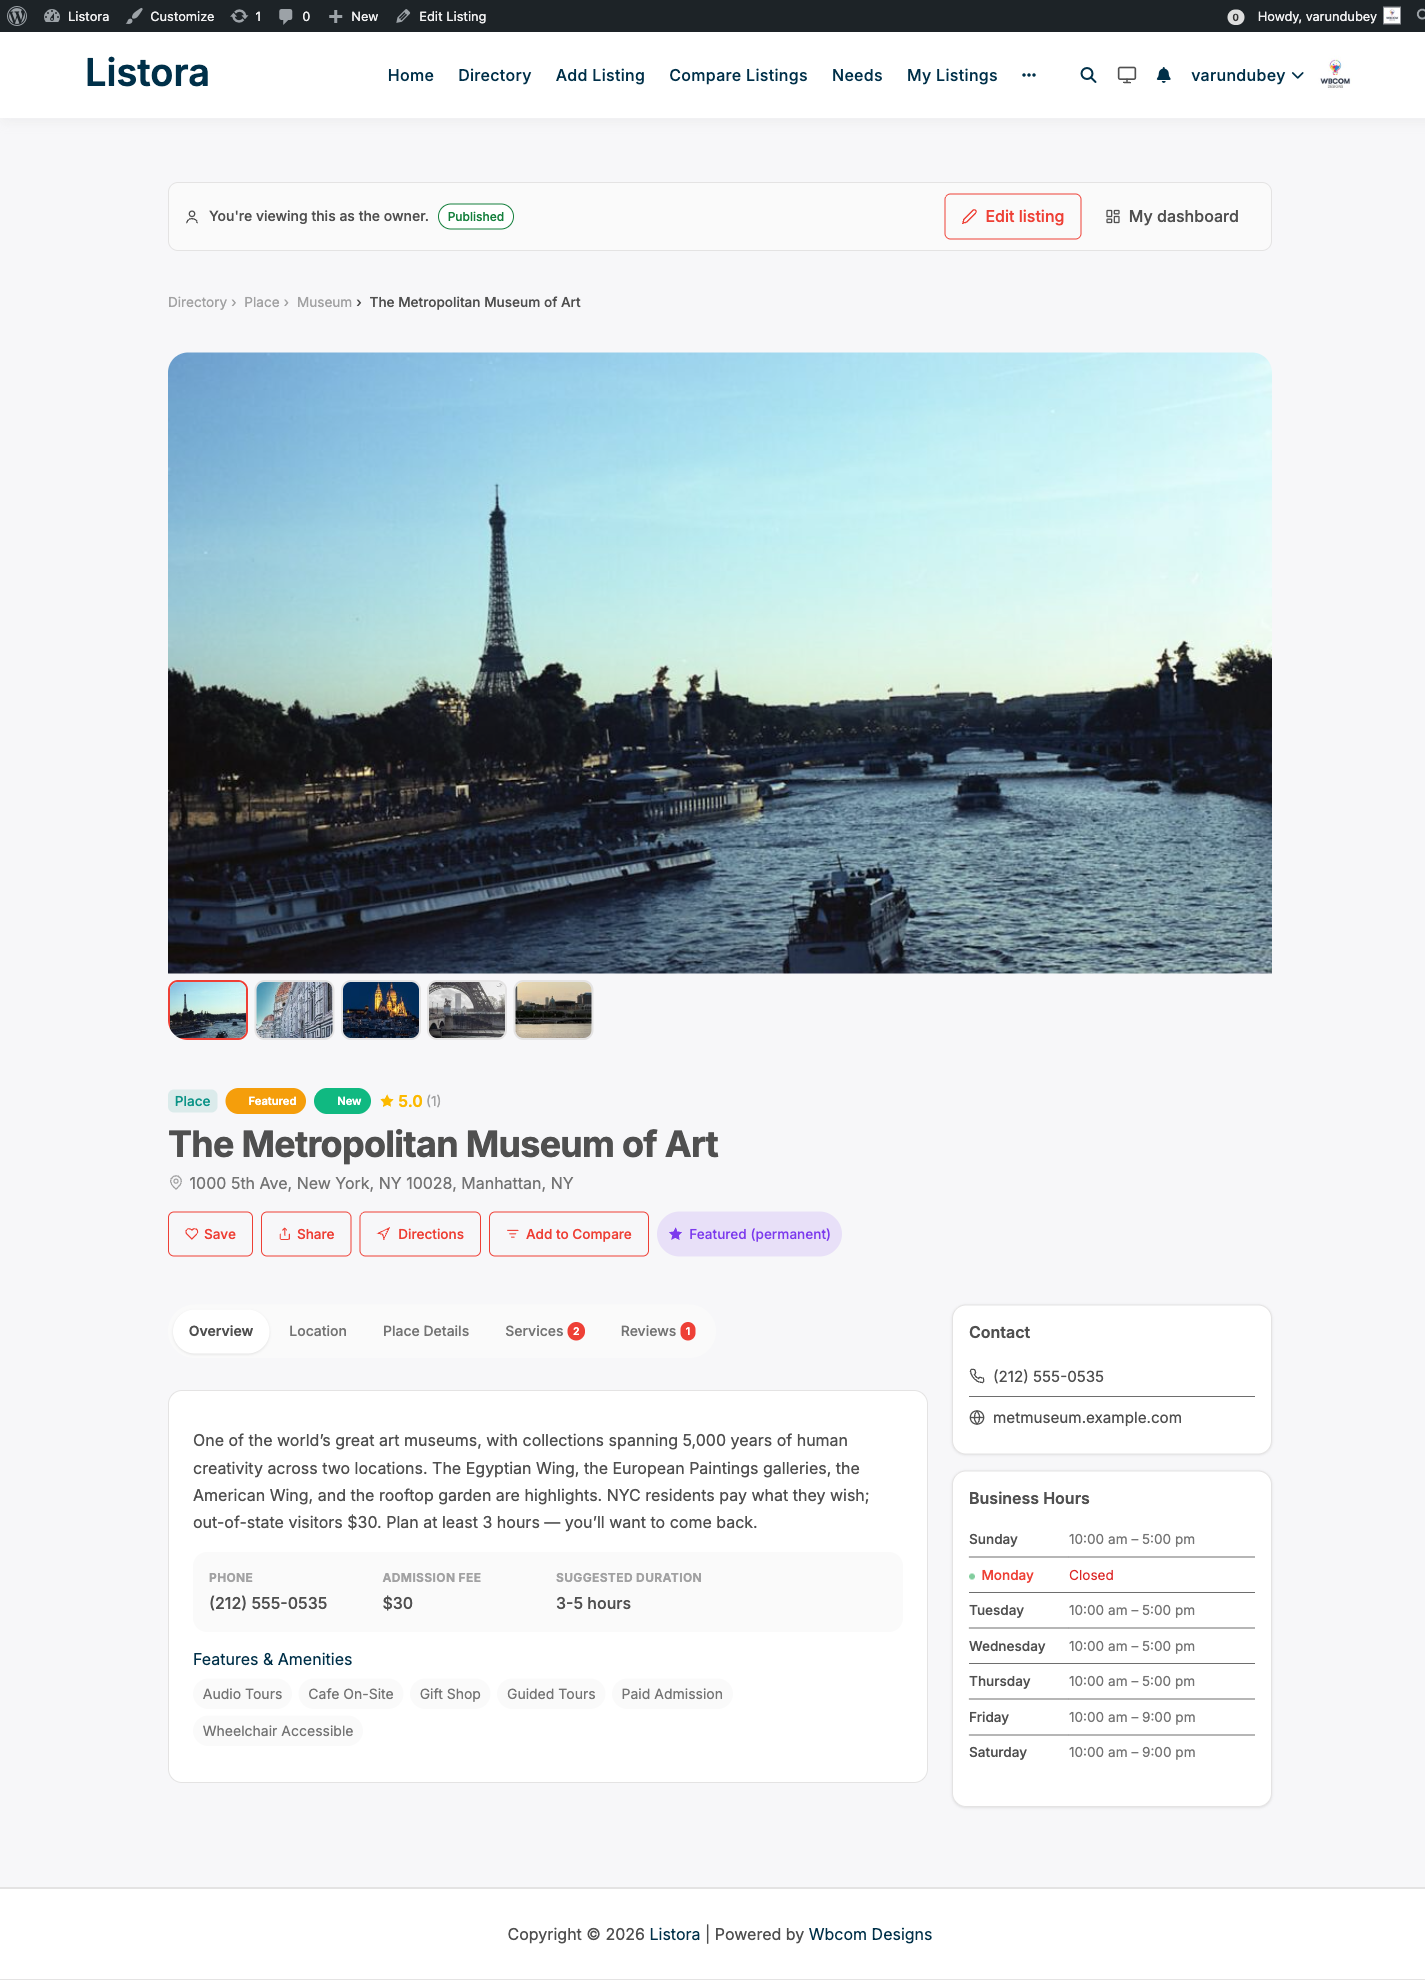
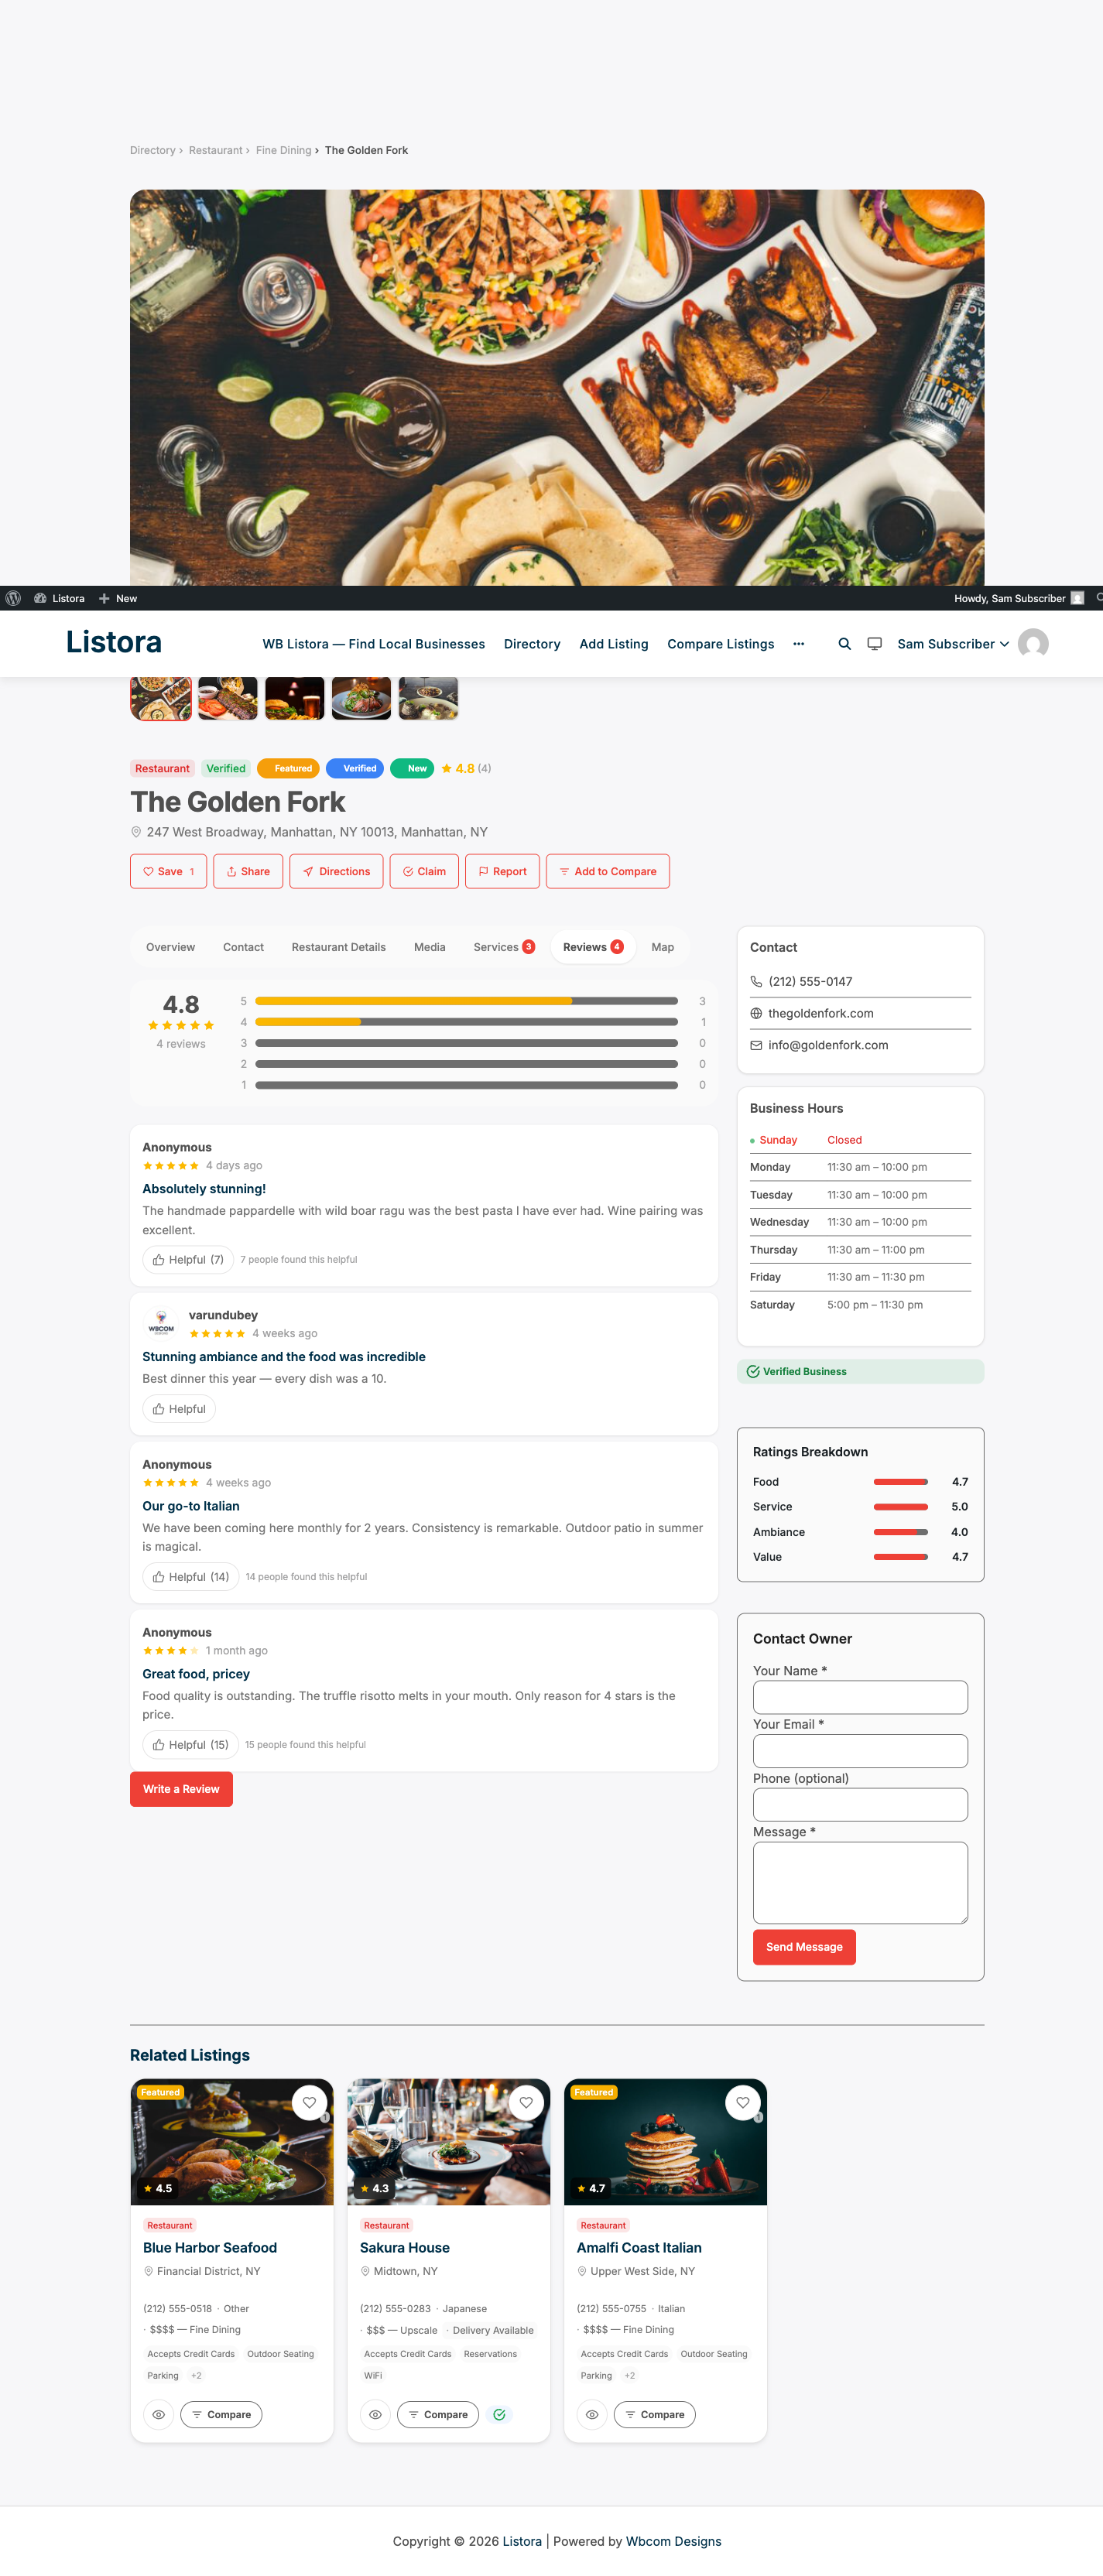
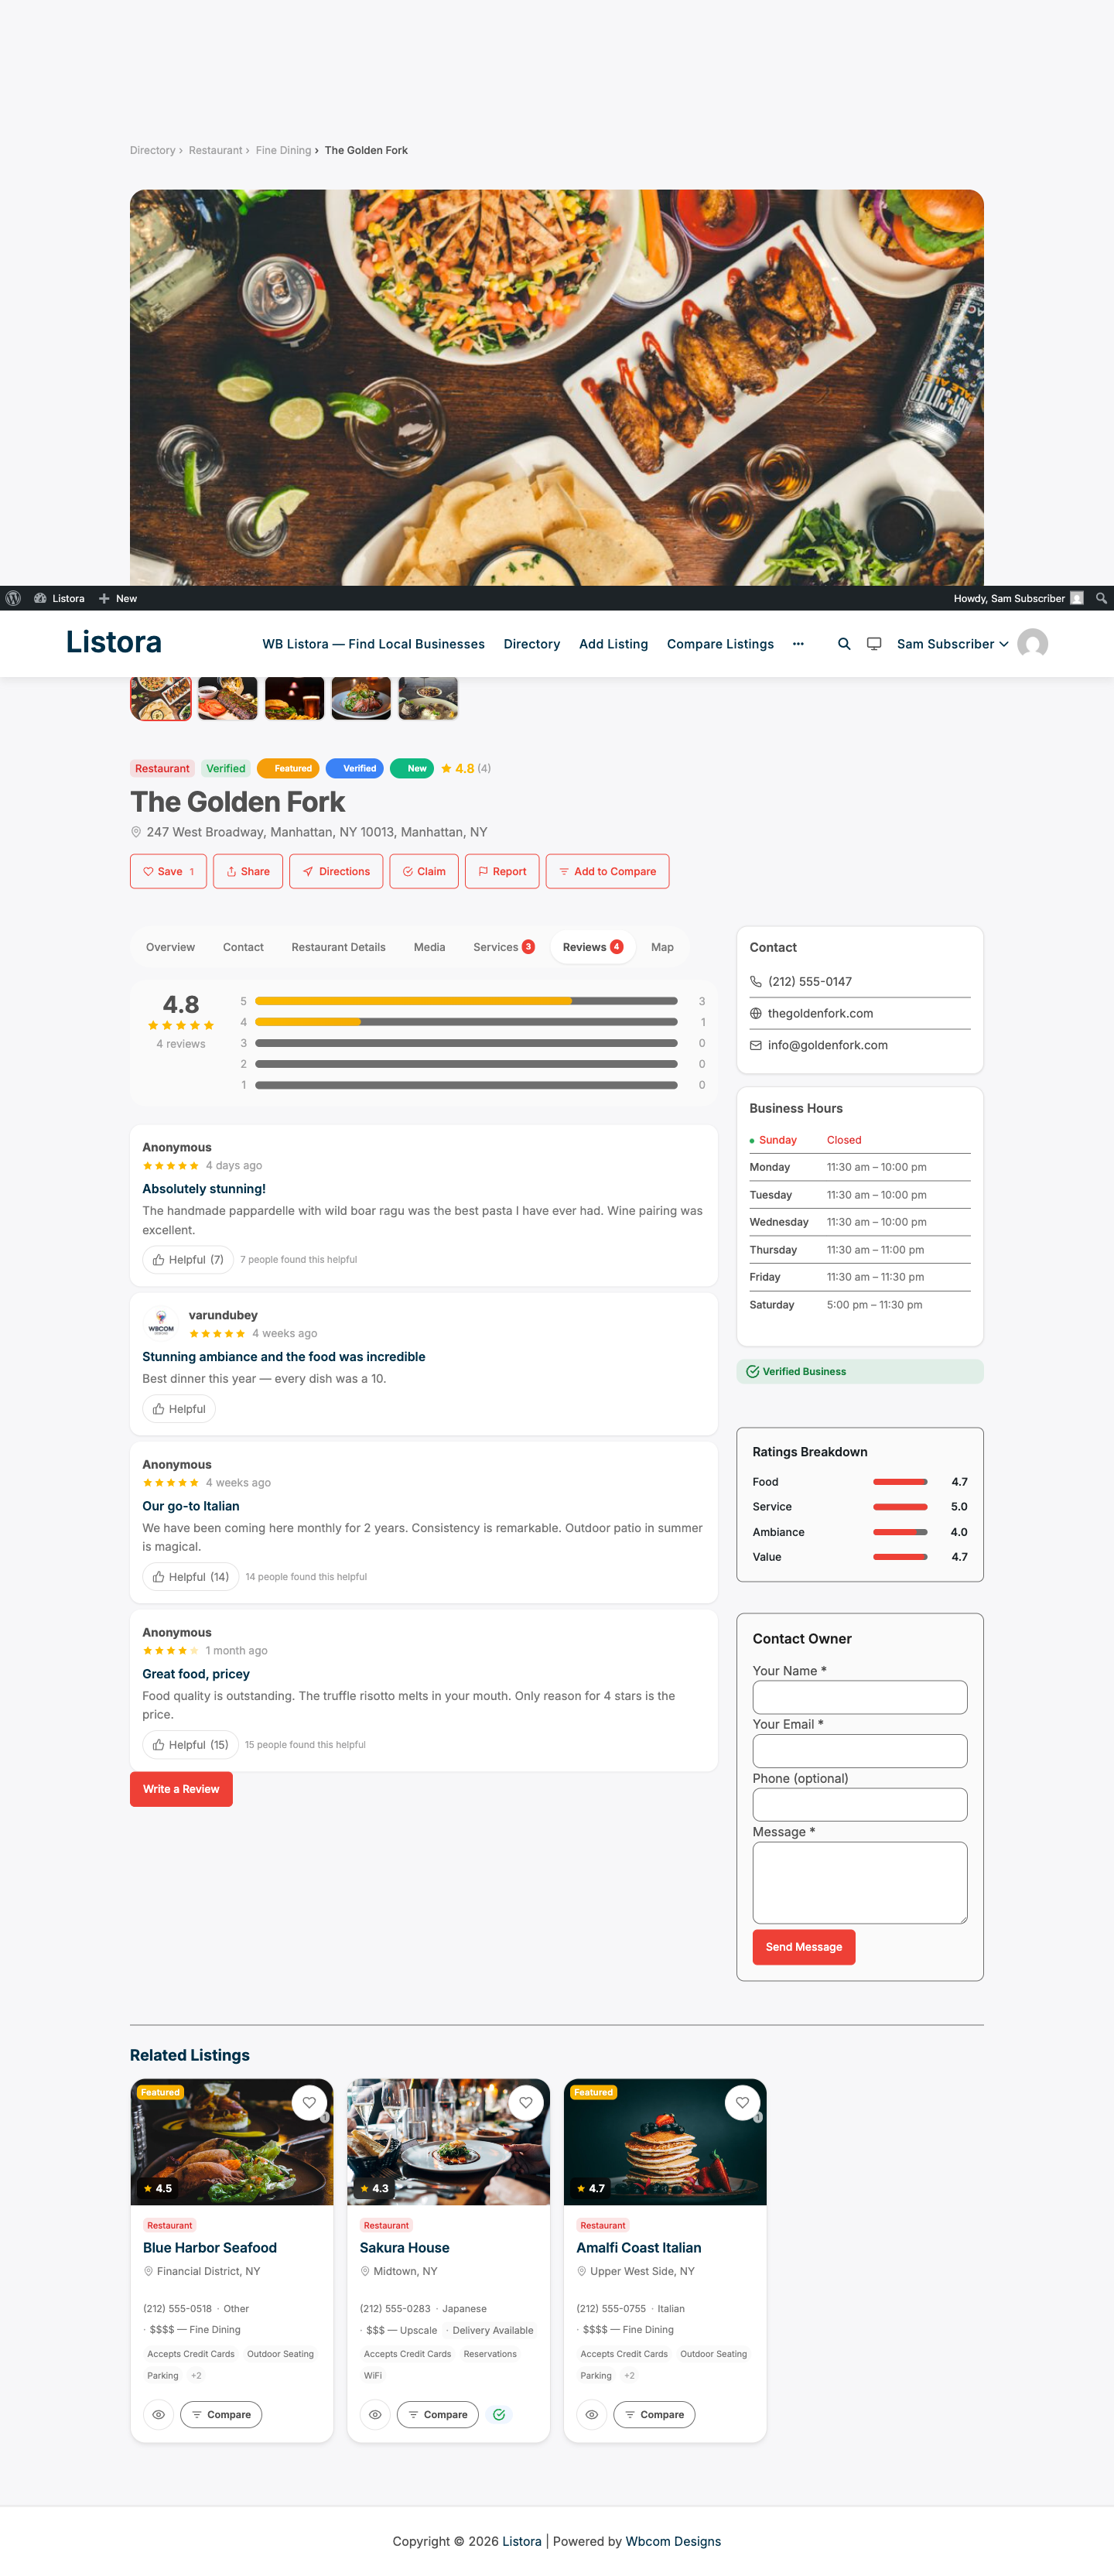
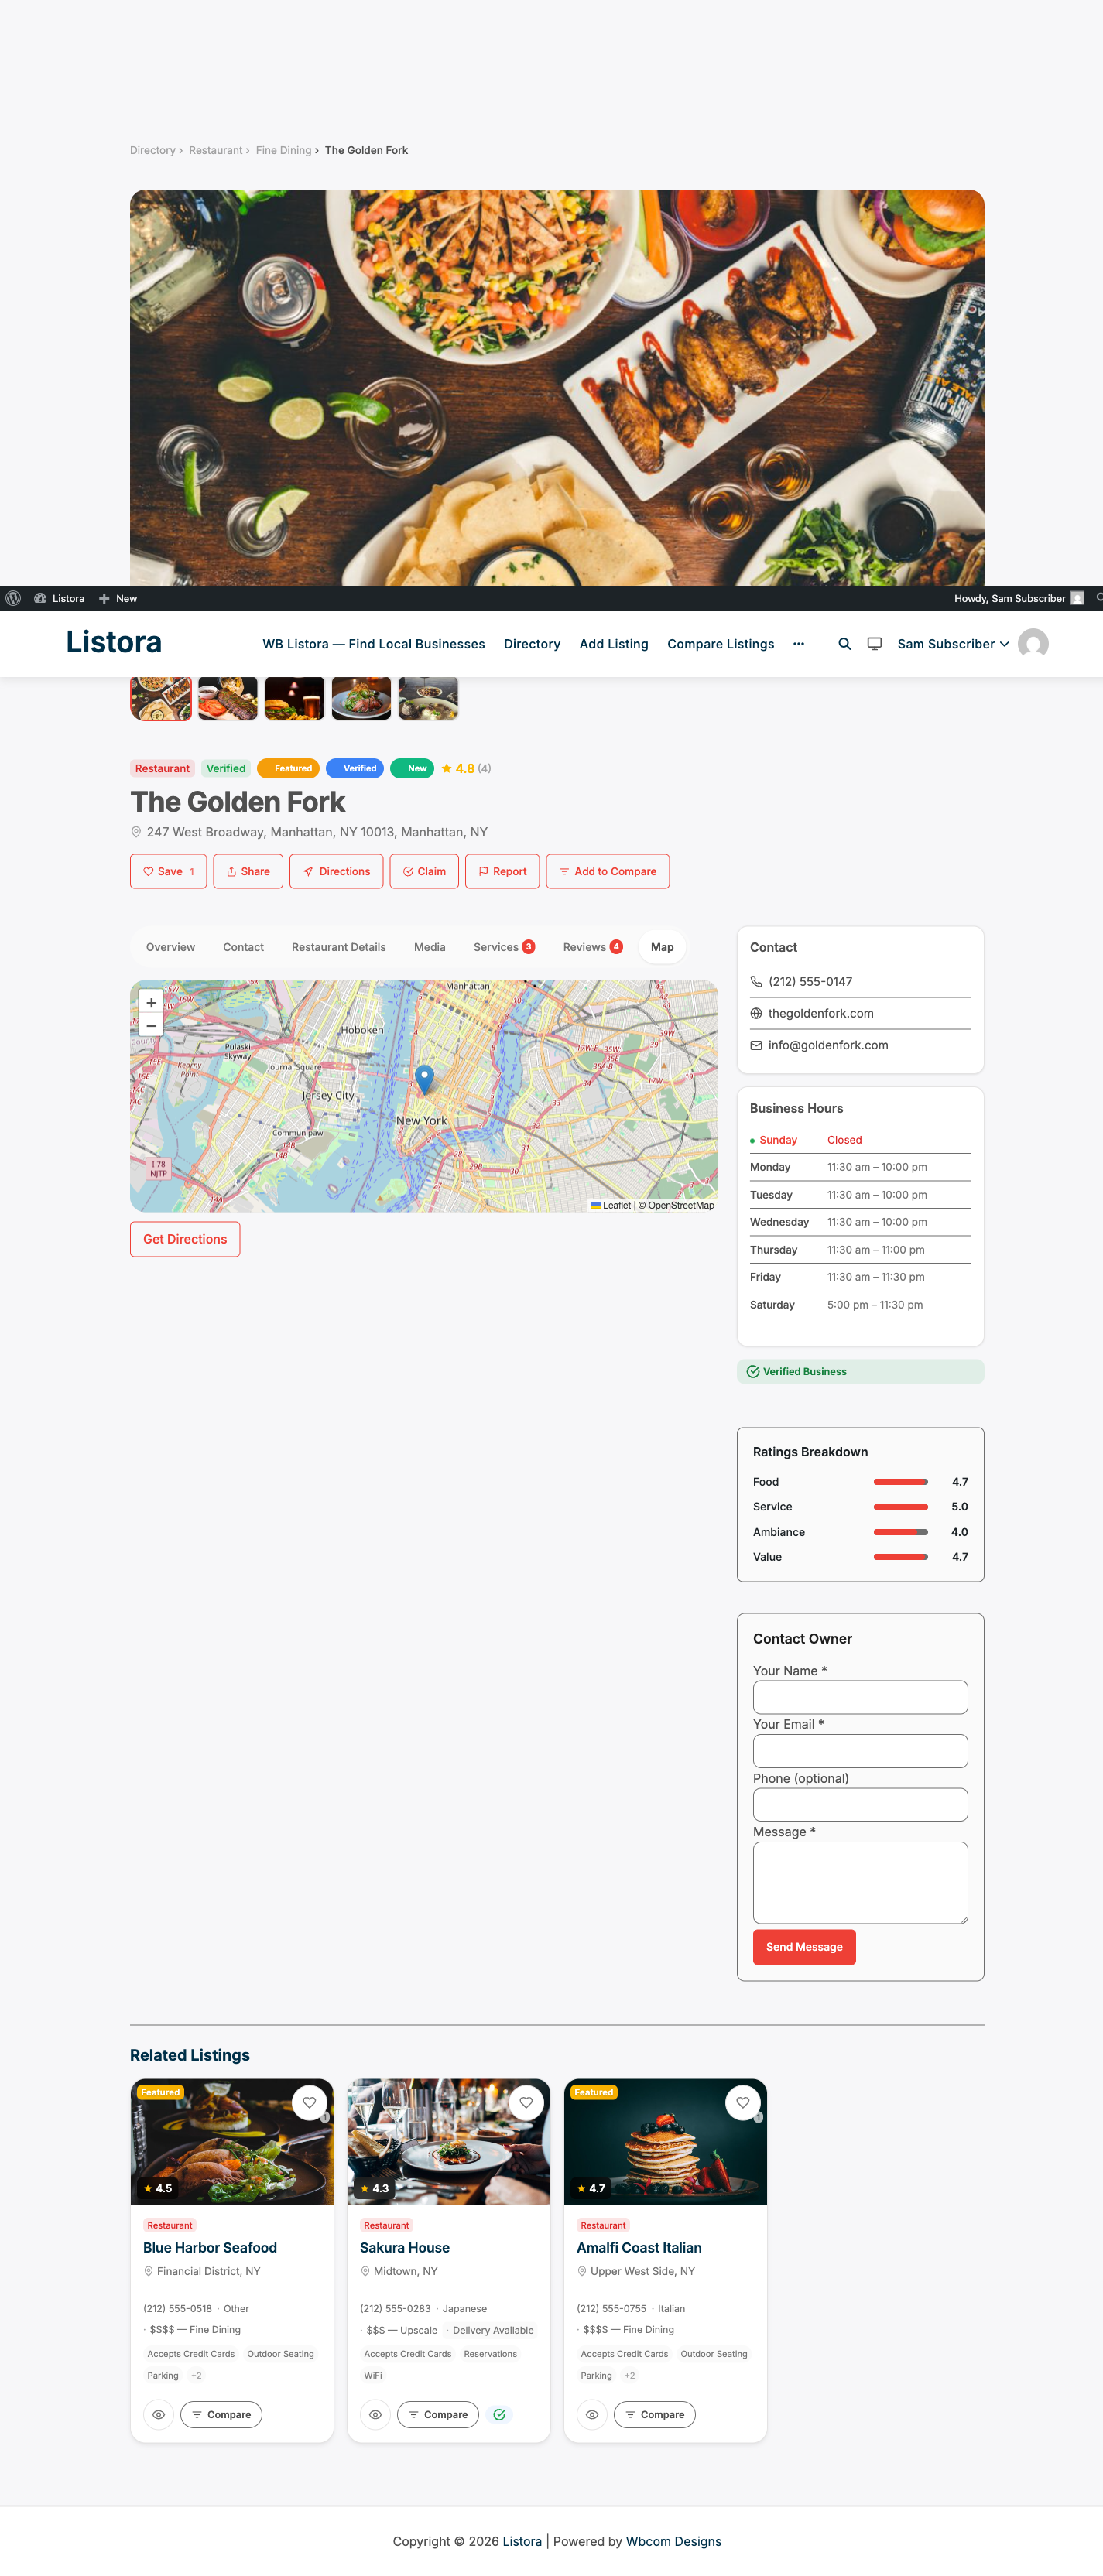
Single listing page

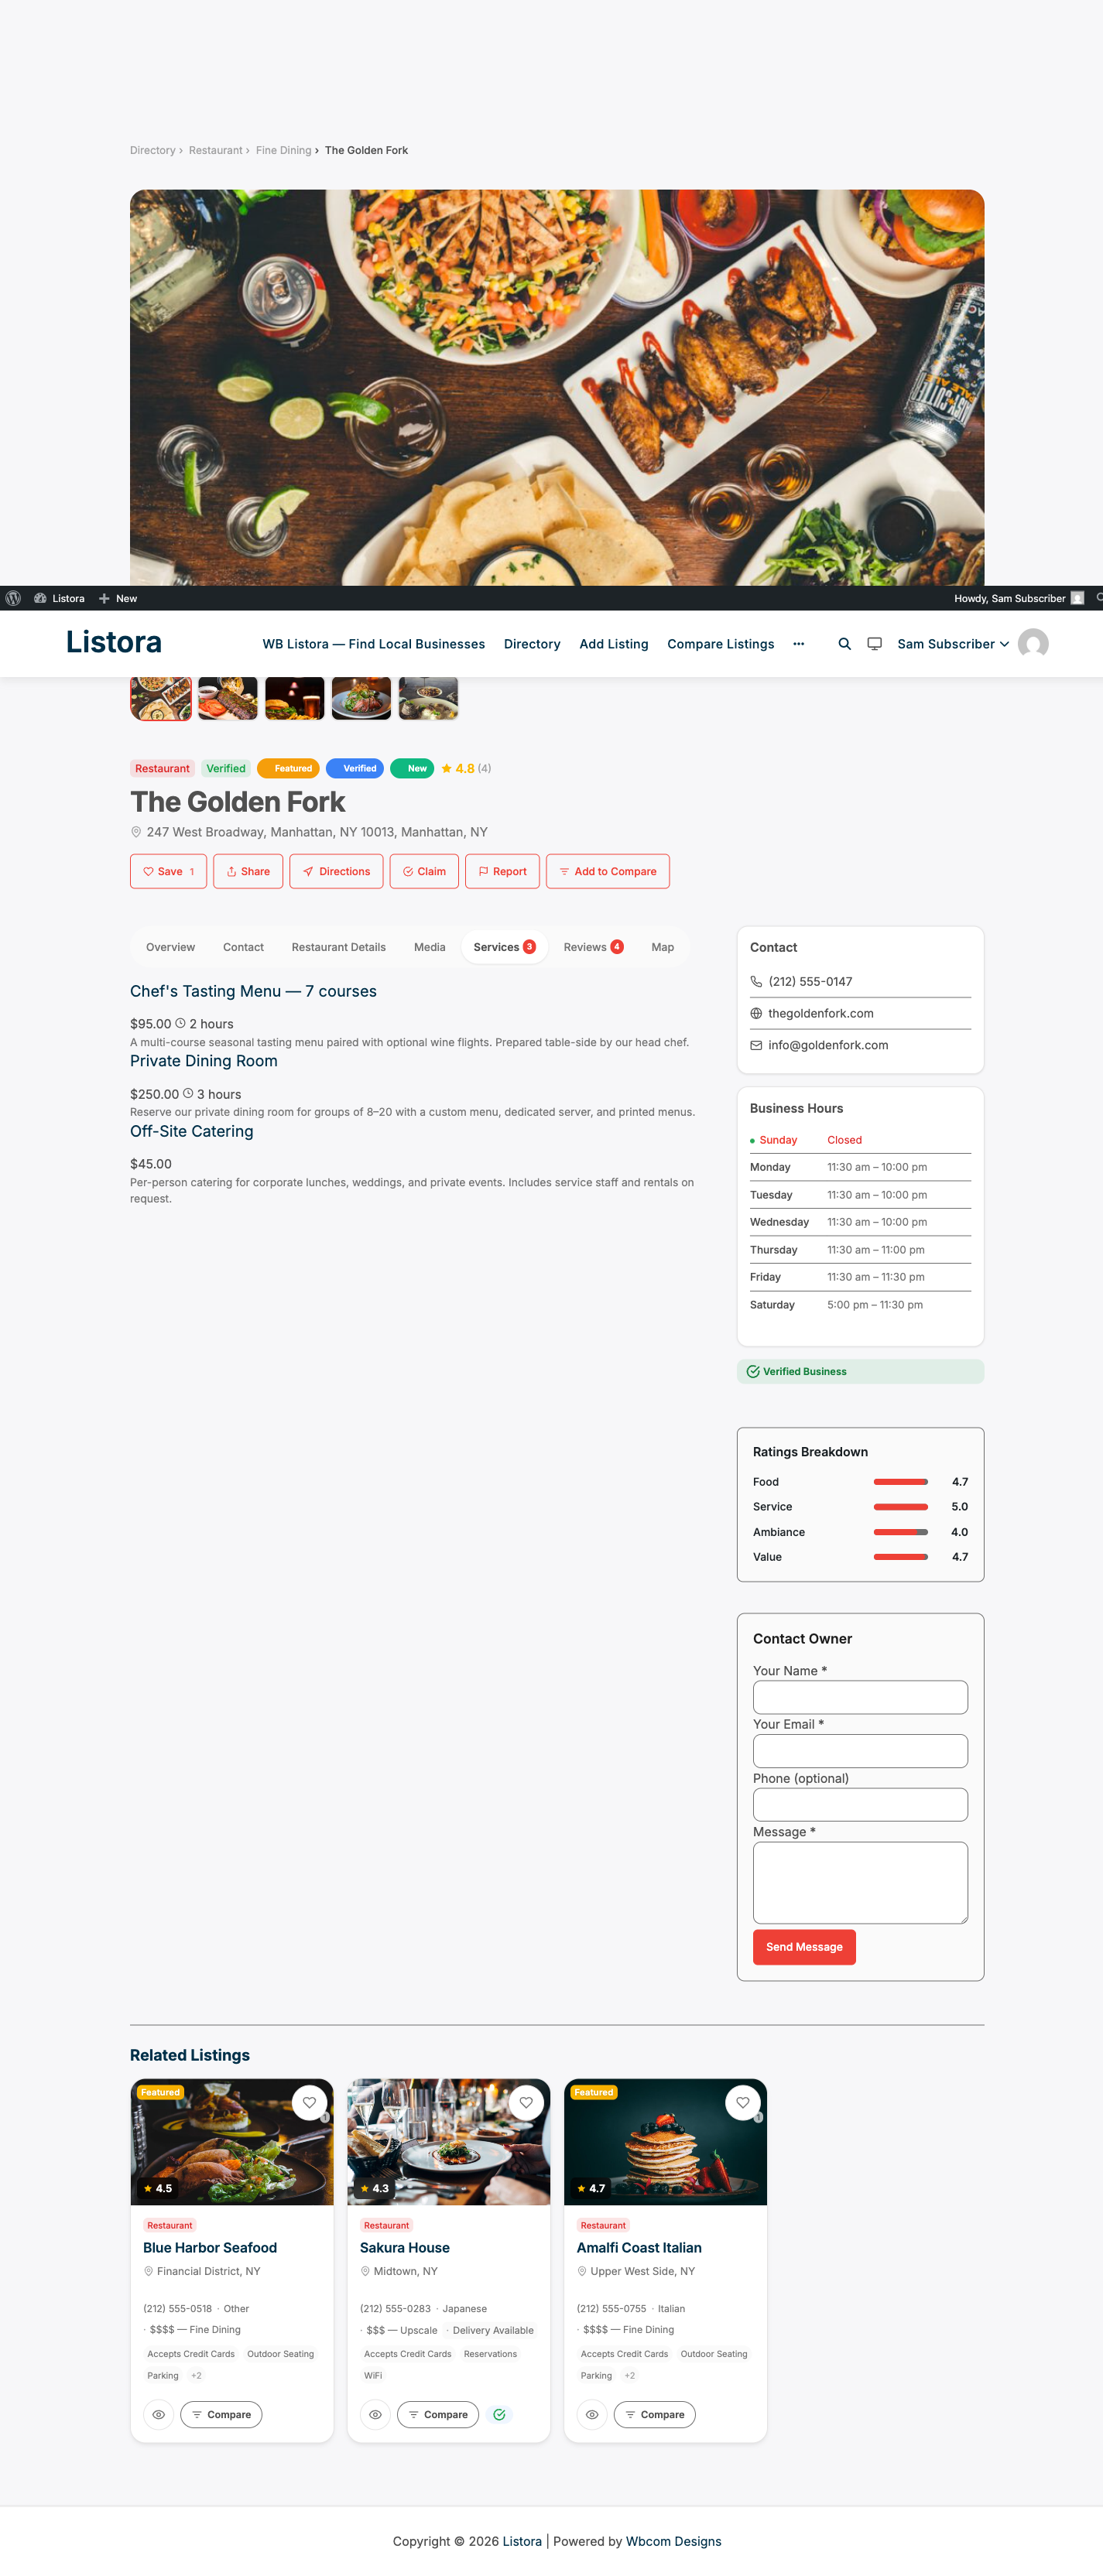
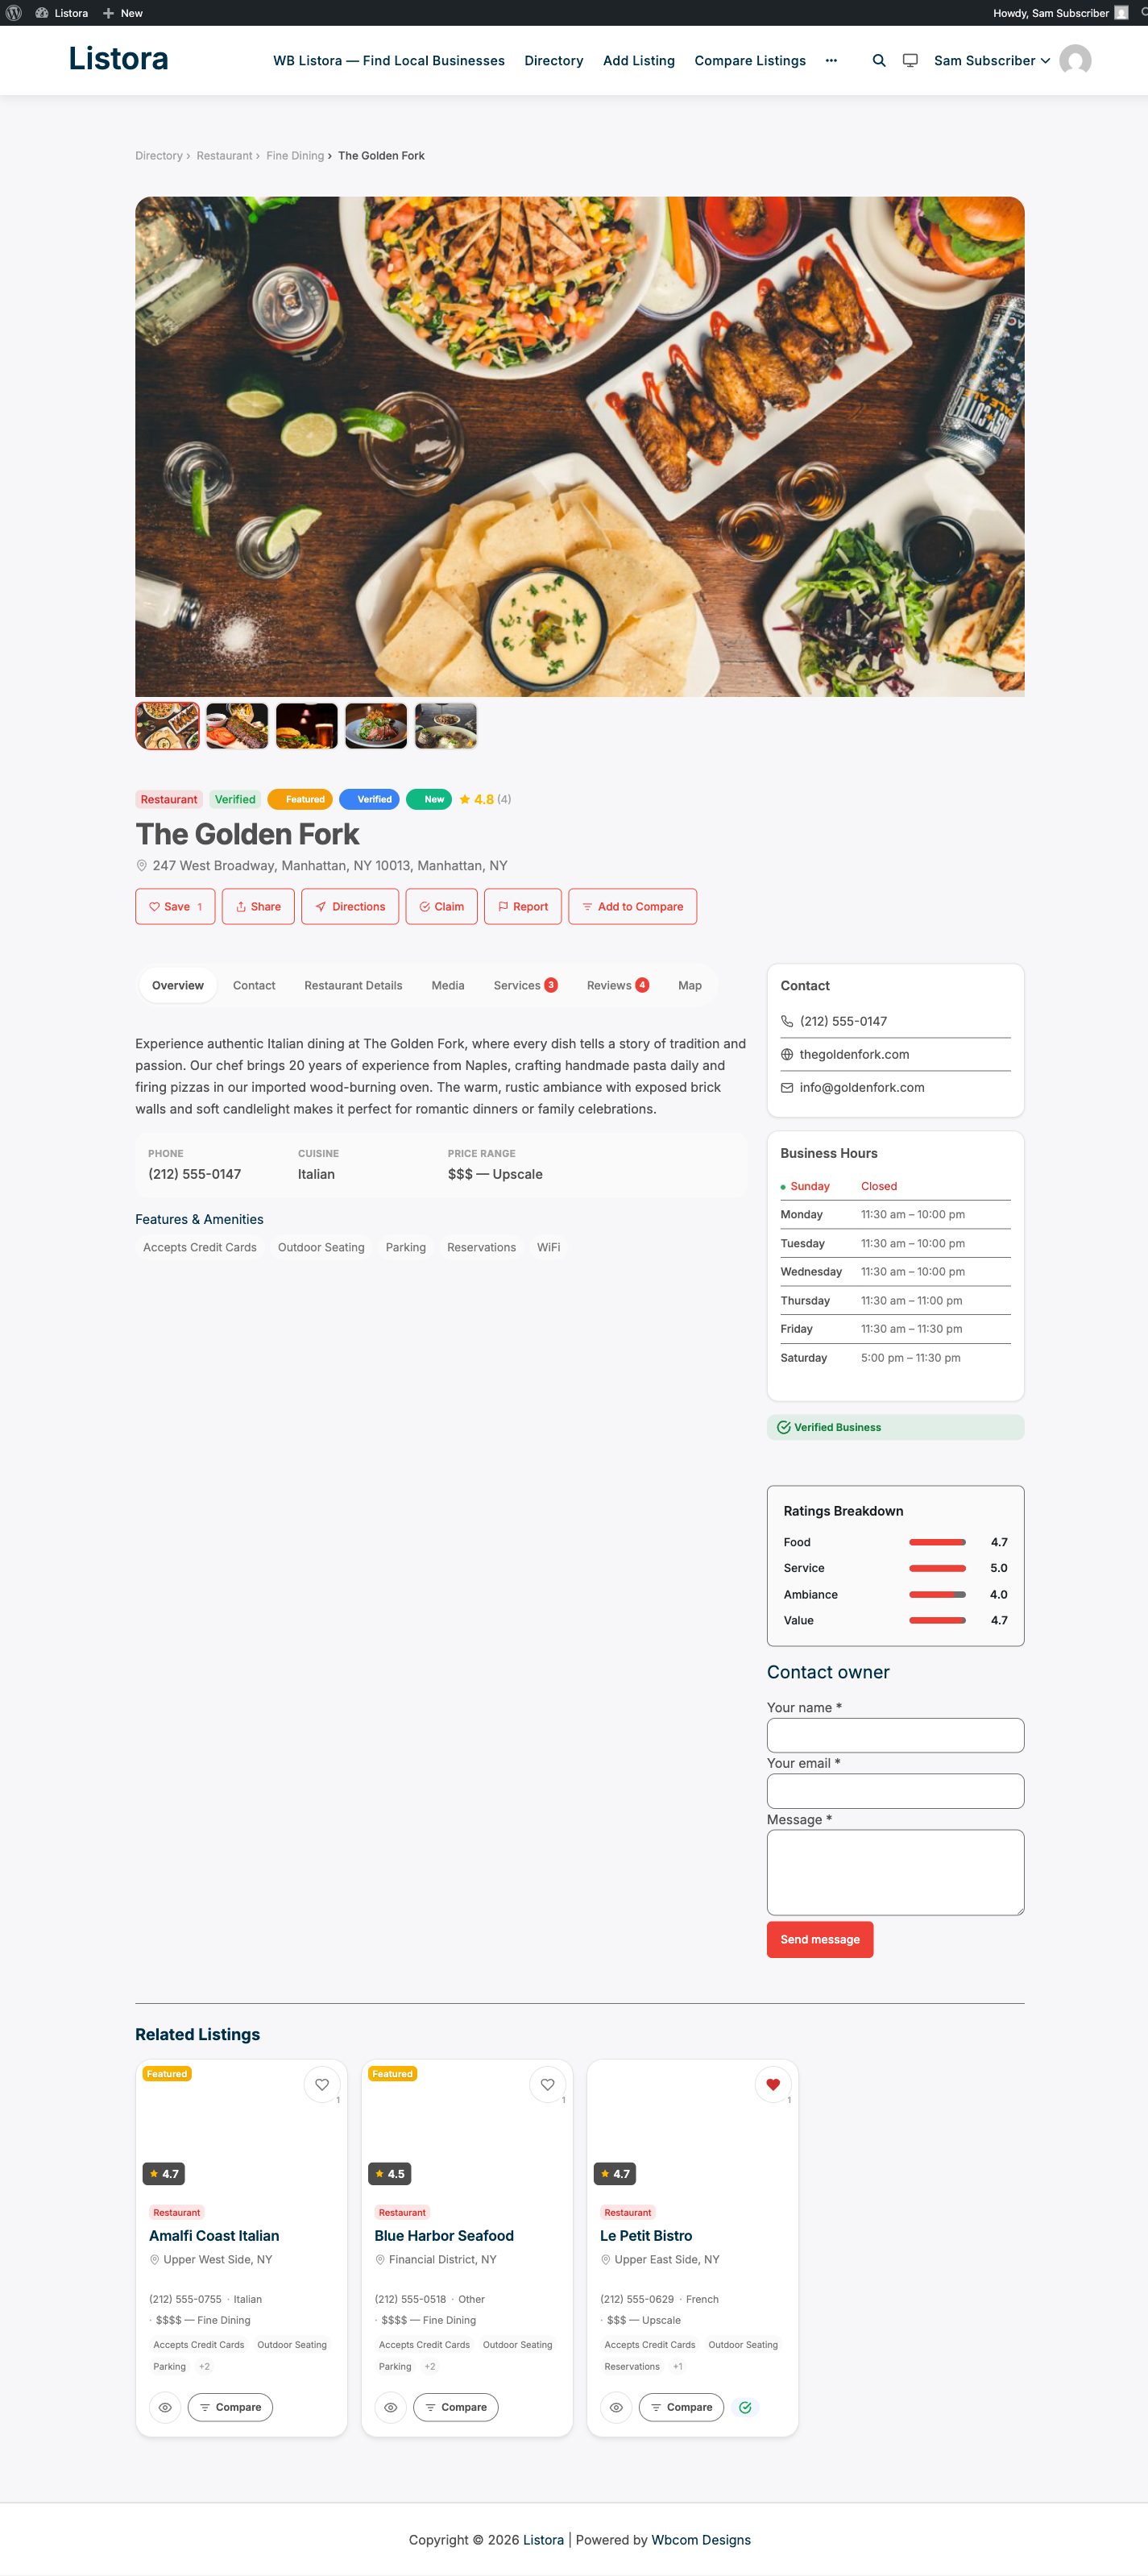
Each listing renders with a uniform tabbed layout: Overview, Location (with embedded map), Place Details, Services, and Reviews. Empty tabs are suppressed automatically. The gallery, ratings, save / share / directions actions, and a sidebar with contact info + business hours sit alongside.

Single listing detail page with merged Location + Map tab and uniform tab cards

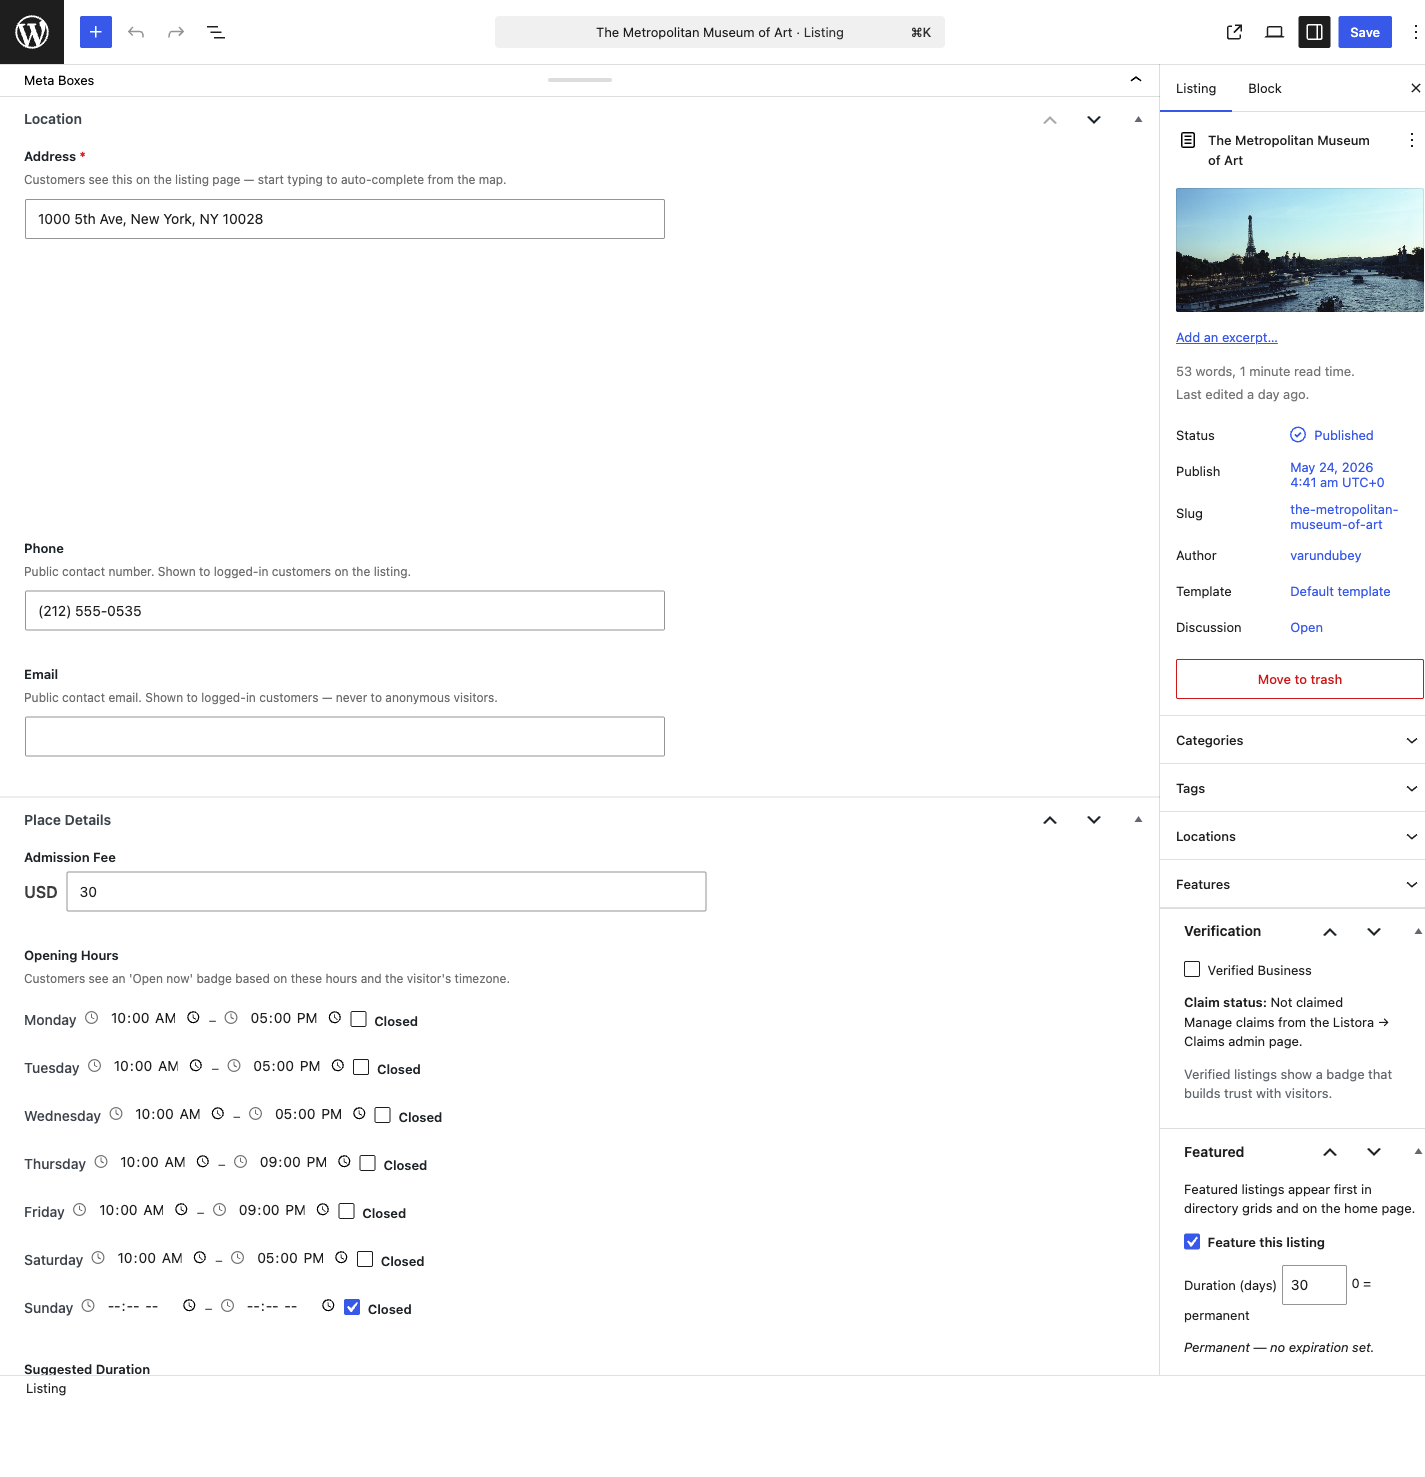
Editing listings in wp-admin

Site admins and editors edit every listing field directly from the WordPress edit screen. The edit page now exposes a meta box per type-defined field group (Location, Place Details, Media, Services) alongside the existing Verification, Featured, and Badges boxes. No more switching to the frontend submission wizard to change a phone number or business hour.

Edit Listing screen showing all field-group meta boxes (Location, Place Details, Media, Services, Verification, Featured, Badges)

This documentation covers both WB Listora Free and WB Listora Pro. Pages that document Pro-only features are marked with a Pro feature callout at the top. Browse by what you're trying to do:


Find the docs you need by role

Setup & Configuration

"How do I install and configure my directory?"

Start here if you're standing up a new directory. Covers installation, the setup wizard, your first directory page, listing types, Pro activation, and every settings tab.

Setup & Configuration

For Site Owners

"How do I run my directory day-to-day?"

Moderating reviews, approving claims, managing moderators (Pro), tracking analytics (Pro), running coupons (Pro), awarding verification badges (Pro), coming-soon mode (Pro), white-label (Pro).

For Site Owners

For Listing Owners

"How do I add and manage my listings?"

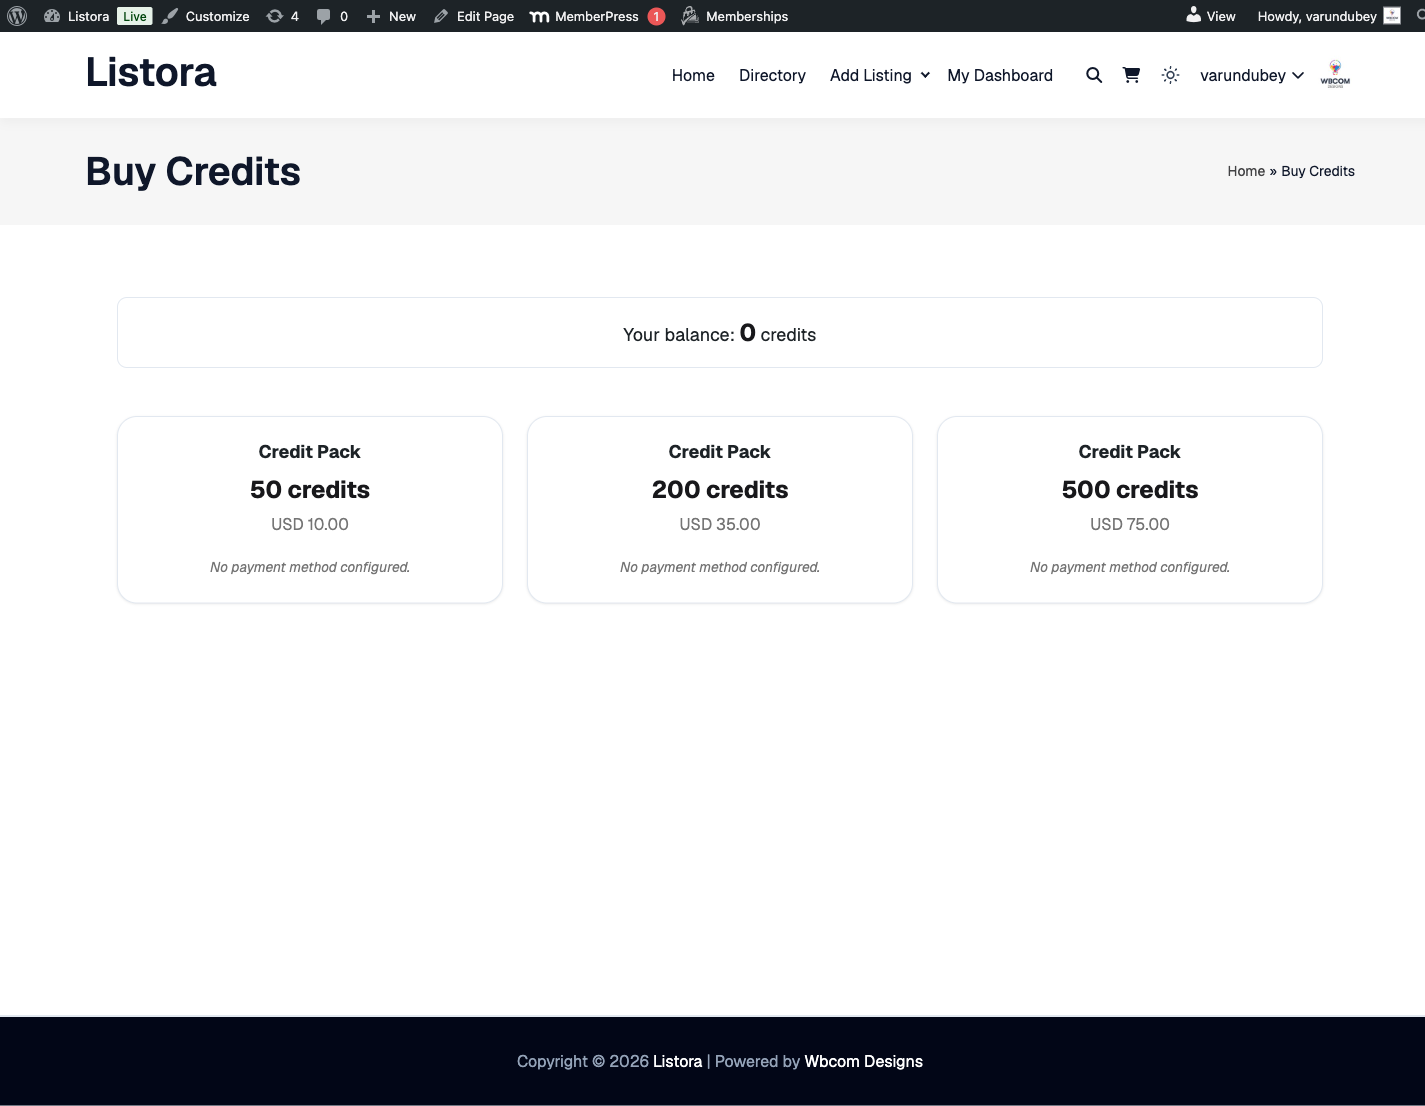
Submitting a listing from the frontend, the user dashboard, adding services, and (Pro) buying credits to activate listing plans.

For Listing Owners

For Visitors

"How do I find what I need and engage with listings?"

Search and filters, saving favorites, saved-search alerts (Pro), writing reviews (incl. multi-criteria and photo reviews on Pro), contacting owners via lead forms (Pro), comparing listings (Pro), posting needs to the reverse marketplace (Pro).

For Visitors

Maps

"How do I use maps in my directory?"

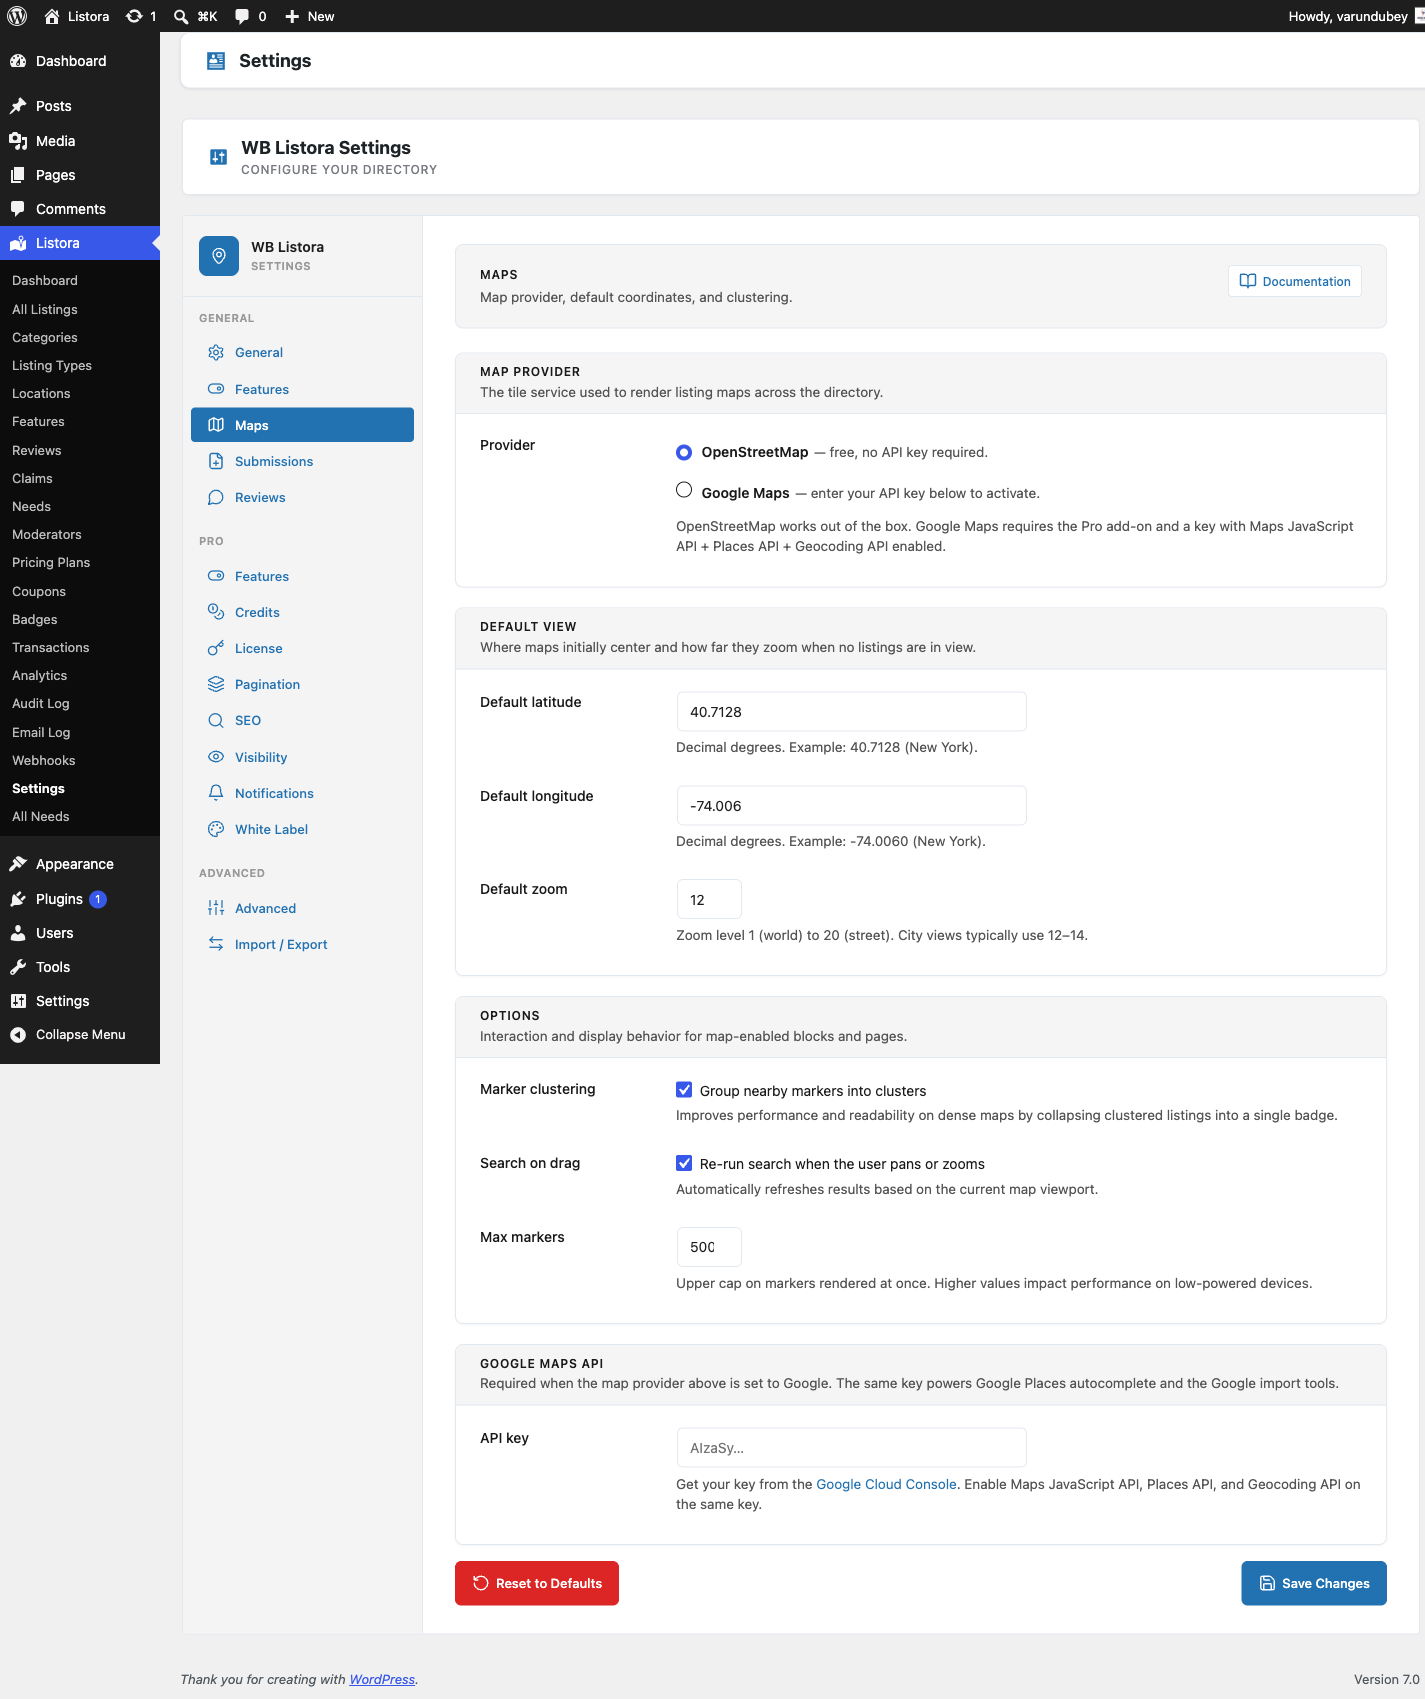
OpenStreetMap on Free (no API key), Google Maps on Pro (Places autocomplete, marker clustering).

Maps

Migration & Import

"How do I move from another directory plugin?"

Step-by-step guides for migrating from Directorist, GeoDirectory, Business Directory Plugin, and ListingPro.

Migration & Import

‍ Developer Reference

"How do I extend or integrate with WB Listora?"

The 11 Free + 5 Pro Gutenberg blocks, every action and filter hook, the complete REST API contract, custom-field types, and the Pro extension surface.

Developer Reference


Setup & Configuration

Bring your directory online in under an hour.

What you do Guide
1. Install WB Listora Installation & Activation
2. Run the setup wizard Setup Wizard
3. Create your directory page Creating Your Directory Page
4. Define listing types (Restaurant, Hotel, etc.) Understanding Listing Types
5. (Pro) Install and activate WB Listora Pro Installing WB Listora Pro
6. (Pro) Activate your license key License Management (Pro)
Configure global behaviour General Settings
Tune search behaviour Search Settings
Configure submission & moderation Submission & Moderation Settings

For Site Owners

Day-to-day operation of your directory.

What you do Guide
Manage star ratings, written reviews, helpful votes, replies Reviews & Ratings
Approve or reject business claim requests Business Claims
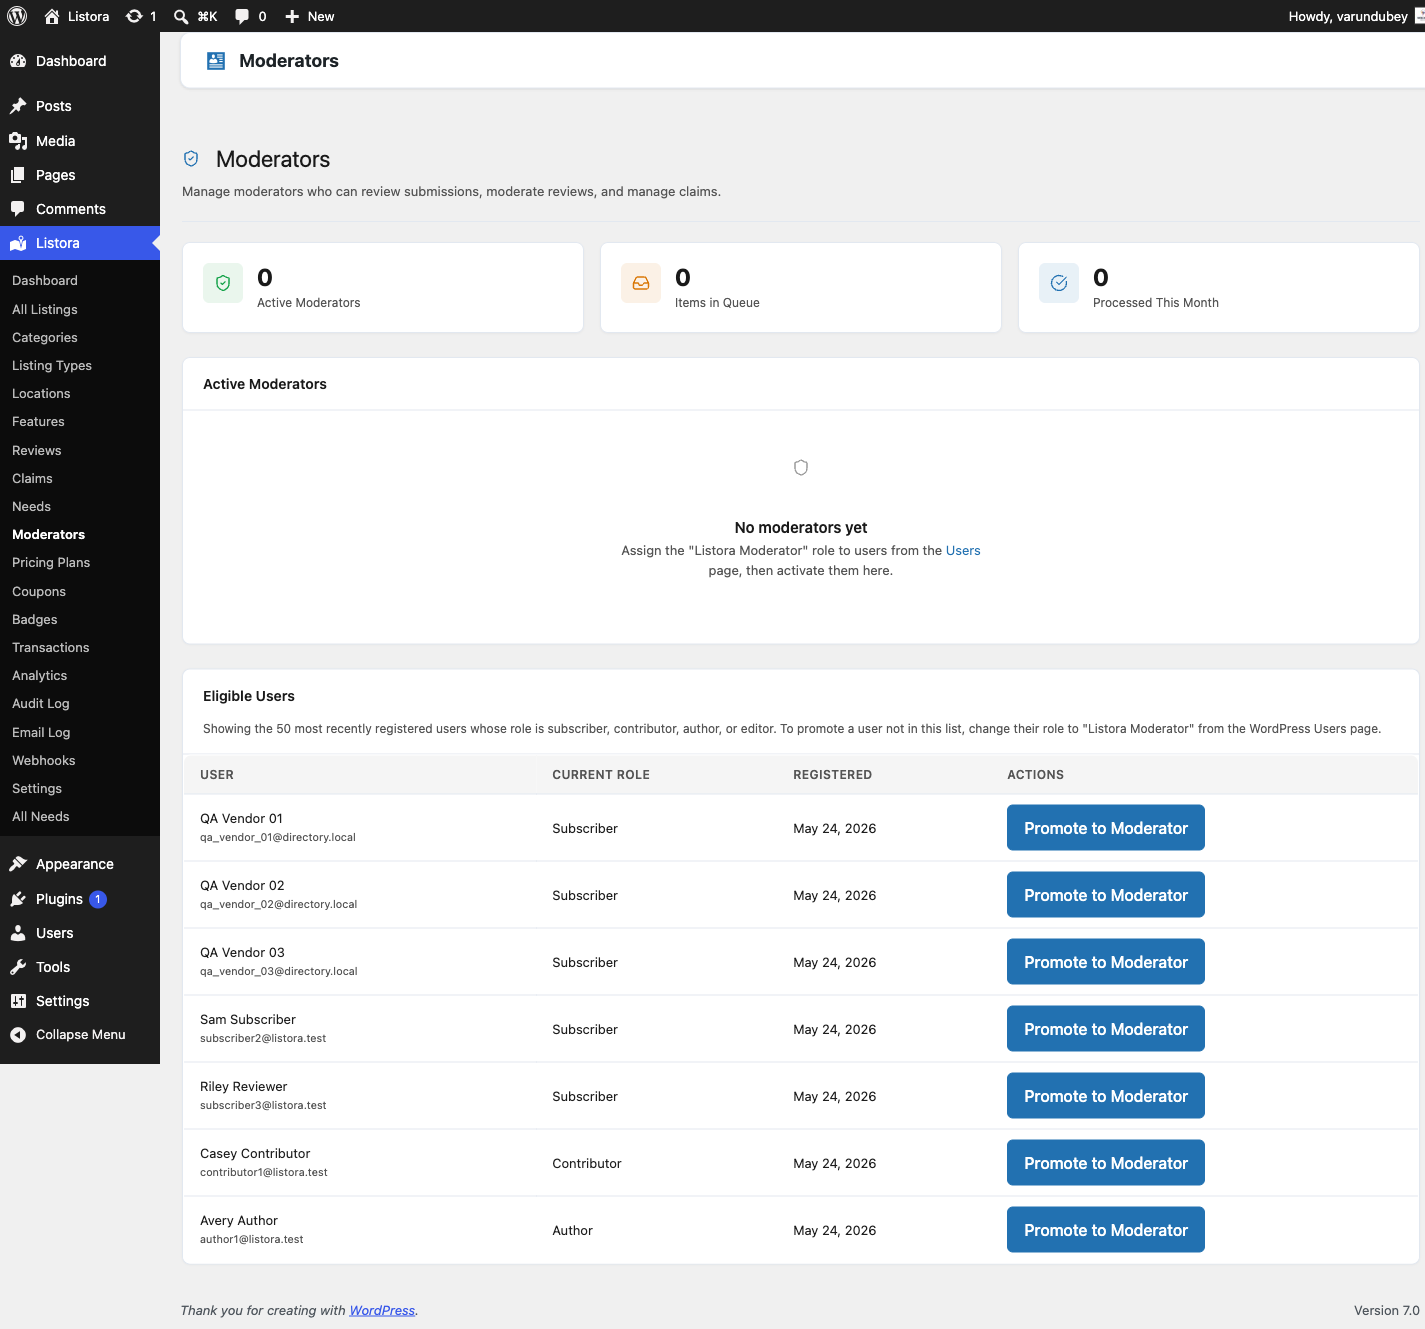
(Pro) Assign trusted team members as moderators Moderator Role (Pro)
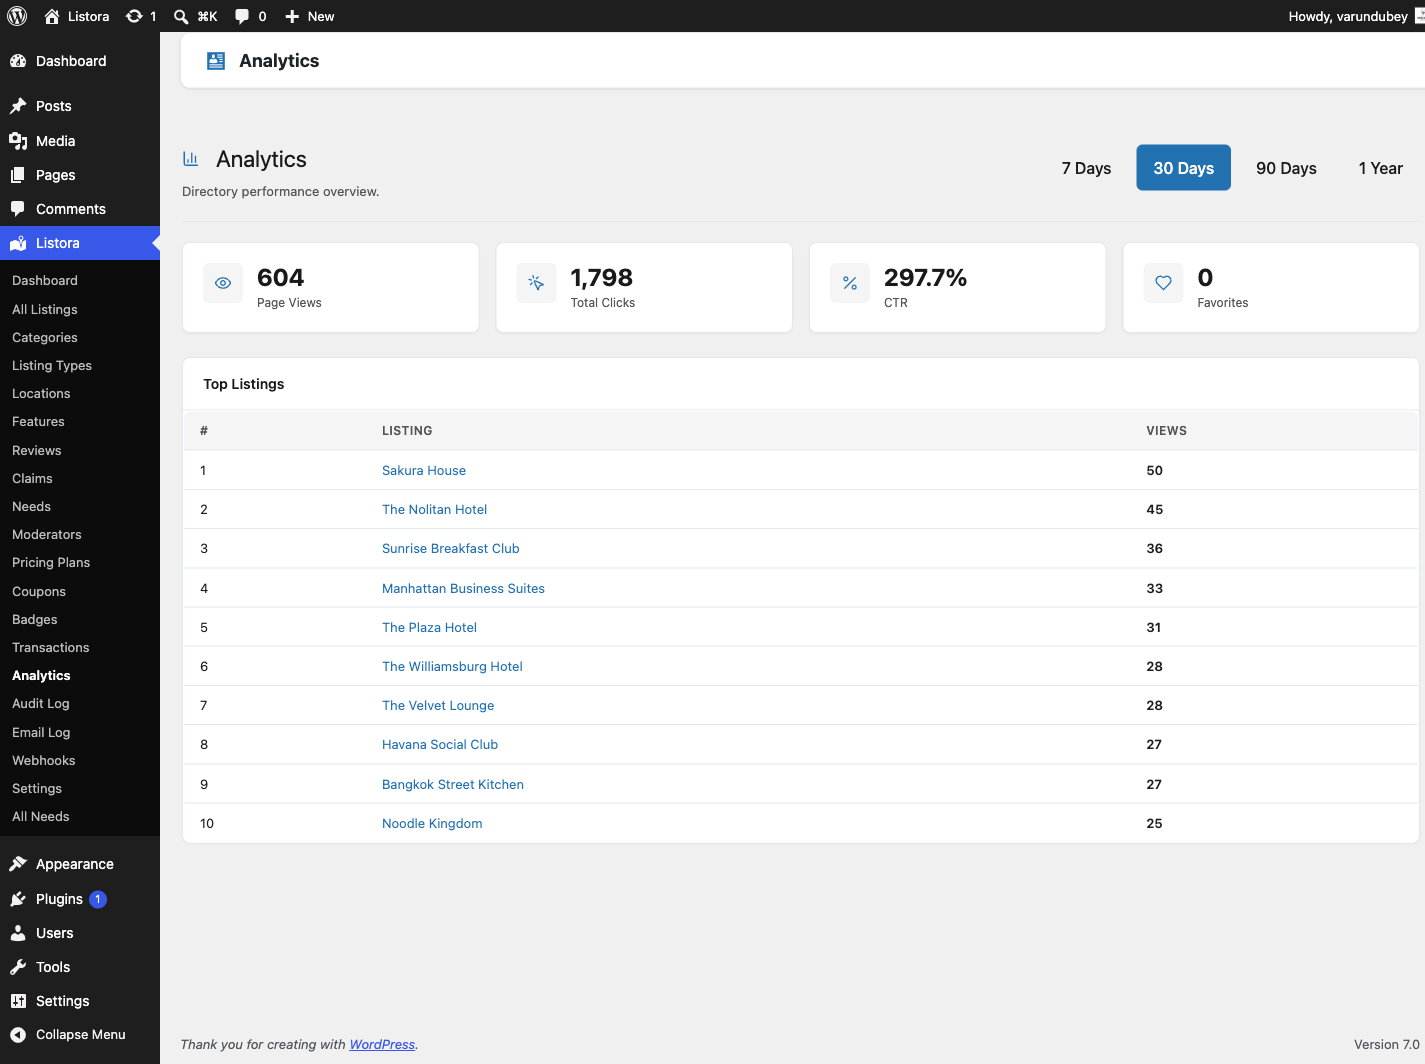
(Pro) Track views and clicks per listing Analytics (Pro)
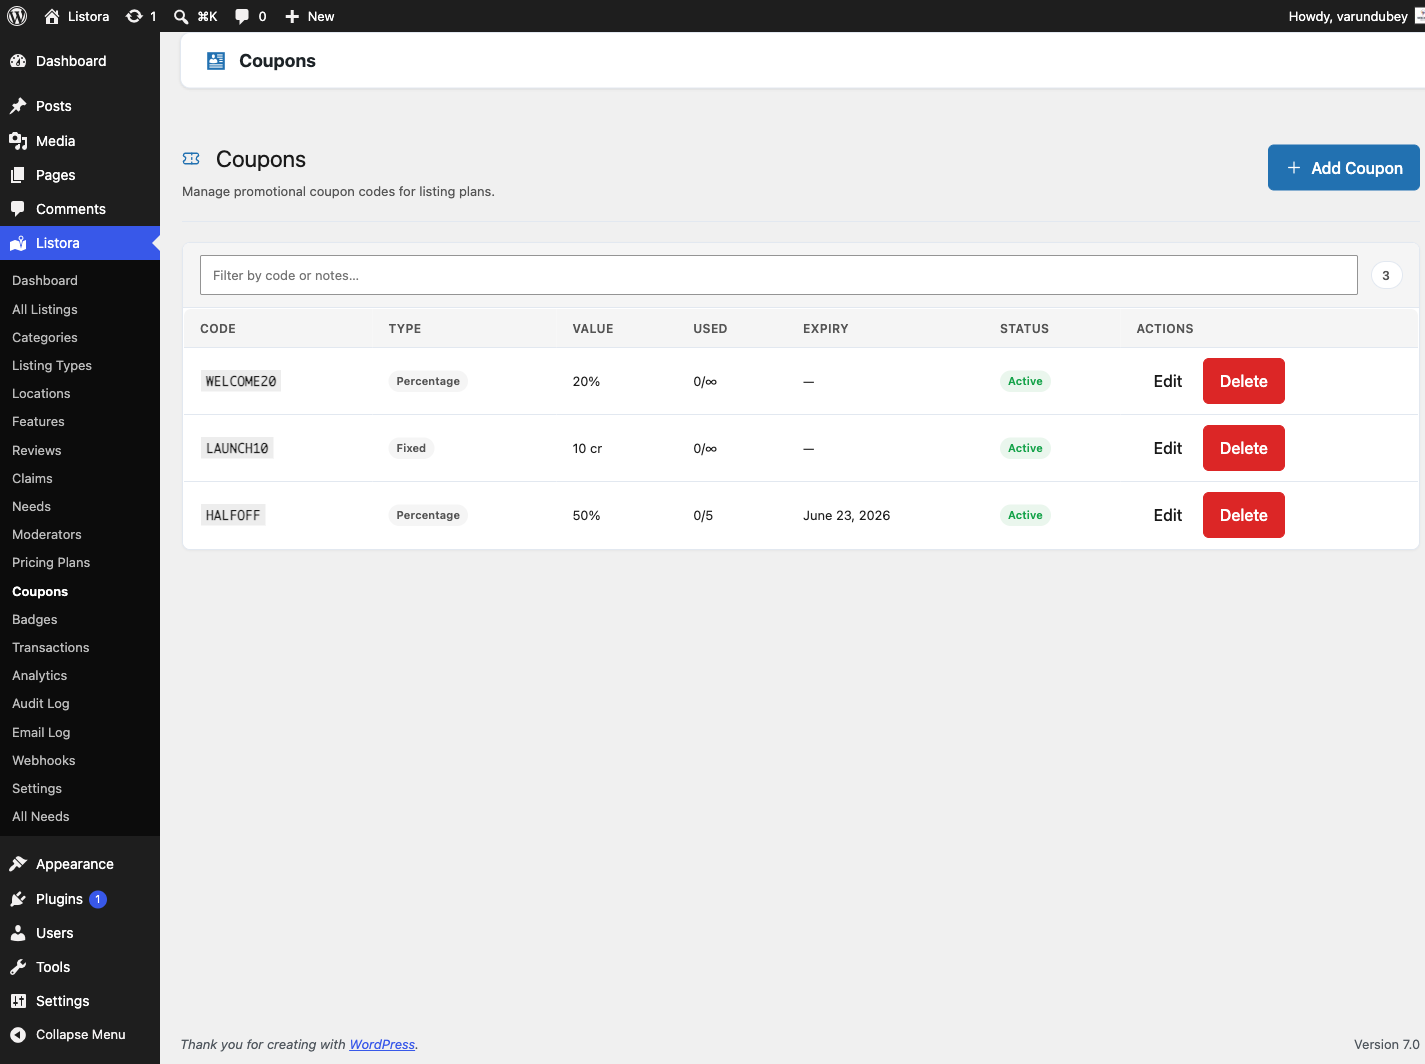
(Pro) Create discount codes for listing plans Coupons (Pro)
(Pro) Award verified badges to vetted businesses Verification Badges (Pro)
(Pro) Hide the directory while setting up, or run a members-only directory Coming Soon & Private Mode (Pro)
(Pro) Rename the plugin for client handoff White Label (Pro)
(Pro) Batch notifications into a daily digest Digest Notifications (Pro)

For Listing Owners

Adding and managing your own listings.

What you do Guide
Submit a listing from the frontend Submitting a Listing
Manage your listings, reviews, favorites from one place User Dashboard
Add a service catalog to your listing Services on Your Listing
(Pro) Purchase credits and activate a listing plan Credits & Pricing Plans (Pro)

For Visitors

Finding what you need and engaging with listings.

What you do Guide
Search, filter, narrow by geography Search & Filters
Save listings to revisit Favorites
(Pro) Save a search and get daily email alerts when new matches arrive Saved Searches (Pro)
Write a review (star rating + text) Reviews & Ratings
(Pro) Rate per criterion (Food, Service, Ambiance for restaurants etc.) Multi-Criteria Reviews (Pro)
(Pro) Attach photos to your review Photo Reviews (Pro)
(Pro) Contact a listing owner via a Contact form Lead Forms / Contact Owner (Pro)
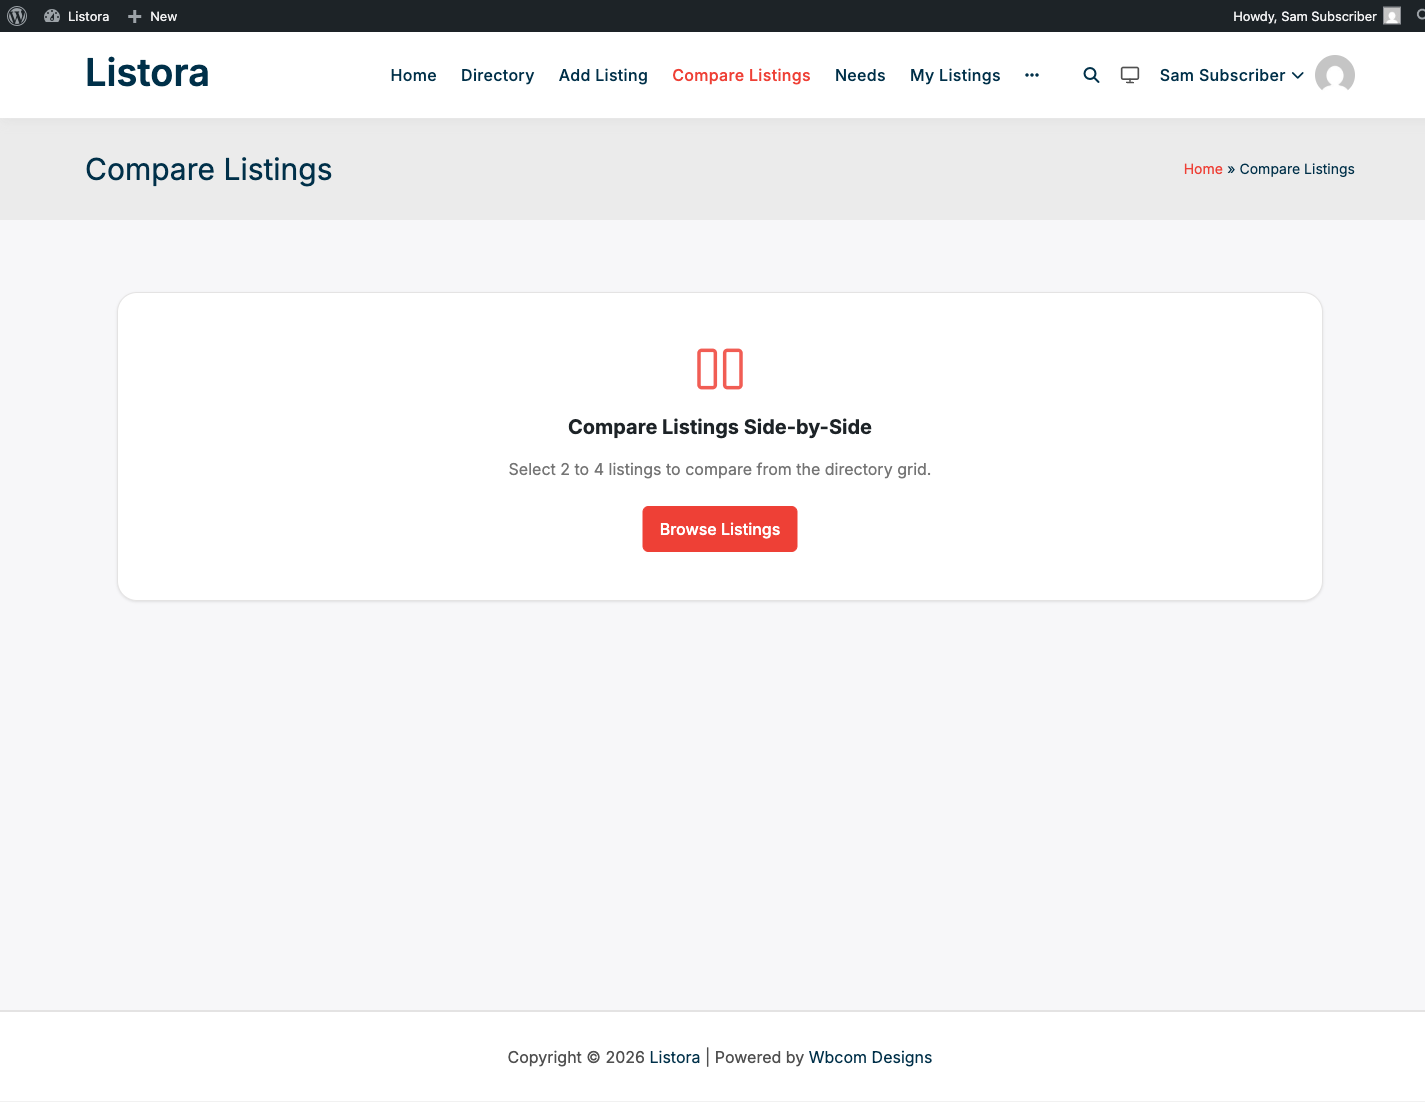
(Pro) Compare listings side by side Documentation in progress - see Comparison block
(Pro) Post what you need; businesses respond Needs Marketplace (Pro)

Maps

Maps in WB Listora work on both Free and Pro - the difference is the provider.

What you do Guide
Use OpenStreetMap (no API key required) OpenStreetMap (Free)
(Pro) Replace OSM with Google Maps + Places autocomplete + clustering Google Maps (Pro)

Migration & Import

Moving from another directory plugin?


Developer Reference

Build on top of WB Listora.

What you need Guide
Block-by-block overview (11 Free + 5 Pro blocks) Gutenberg Blocks Overview
Every action and filter hook Hooks Reference
Full REST API contract REST API
Define your own field types Custom Fields & Field Types
Extend the Free plugin from Pro or a third-party add-on Extending with WB Listora Pro

Also useful

Why WB Listora?

For site owners

Modern block-based architecture

WB Listora is built entirely with Gutenberg blocks and the WordPress Interactivity API. Directorist and GeoDirectory still rely heavily on shortcodes. WB Listora's blocks work in the block editor's visual canvas — no memorizing shortcode parameters.

Why Wb Listora — screenshot from the modernized 1.0.5 site

Built-in claims workflow

Every listing has a claim system out of the box. With Directorist, Business Directory Plugin, and HivePress, claims require a paid add-on or a custom implementation. In WB Listora, claims, status tracking, email notifications, and the owner dashboard are all included in the free plugin.

Full REST API, no add-on required

39 REST endpoints covering listings, search, reviews, favorites, claims, services, and the user dashboard are available in the free plugin. GeoDirectory's REST support is limited; Directorist's API requires the Pro version. WB Listora's API is ready for mobile apps and headless integrations from day one.

Overridable templates for theme authors

WB Listora uses WooCommerce-style template overrides. Copy any template from wb-listora/templates/ to {theme}/wb-listora/ and edit it. No child theme gymnastics, no fighting with shortcode output.

Fast at scale

Search uses a dedicated listora_search_index table — not WordPress meta_query. Geographic queries use a Haversine calculation against a listora_geo table. The plugin handles large listing counts without degrading search performance.

Genuine multisite awareness

Capability and role checks use WordPress's standard current_user_can() system. The plugin does not hard-code is_admin() checks in frontend logic, making it compatible with multisite and membership setups.


For directory users

  • Save listings to favorites and return to them from your dashboard — no bookmarks needed.
  • Claim your business without contacting the site owner — the claim form is self-service and status is visible in real time on your dashboard.
  • Write richer reviews — star ratings, helpful votes, report abuse, and get an owner reply all from one page.
  • Find listings near you — the "Near Me" geolocation button works on mobile without any extra steps.
  • Manage your listing yourself — edit details, update hours, add services, upload photos all from the frontend dashboard, not the WordPress admin.
  • Works with any theme — the blocks include per-instance style controls (spacing, shadow, border radius), so they adapt to your theme's design.
  • Fully mobile-optimized — every block has responsive controls and breakpoints tested at 1024px, 767px, 480px, and 390px.

Free vs Pro comparison

Feature Free Pro Notes
Listing blocks (11 blocks) Yes Yes
REST API (39 endpoints) Yes Yes
Frontend submission Yes Yes
Business claims Yes Yes
Reviews with owner reply Yes Yes Free: single overall star rating
Multi-criteria reviews Yes Multi-Criteria Reviews — define criteria per listing type (e.g., Food, Service, Ambiance)
Photo reviews Yes Photo Reviews — reviewers upload images with their review
Favorites Yes Yes
Saved searches + email alerts Yes Saved Searches — daily alerts for new matching listings
Services per listing Yes Yes
User dashboard (6 tabs) Yes Yes Credits tab shows an upgrade prompt in Free
Setup wizard Yes Yes
Import / Export Yes Yes
OpenStreetMap (no API key) Yes Yes
Google Maps + Places autocomplete Yes Google Maps — requires a Google Cloud API key
Credit-based payment system Yes Credits and Plans — webhook-based, works with Stripe/PayPal/Paddle
Pricing plans Yes Credits and Plans — listing tiers with duration, perks, and featured placement
Coupons Yes Coupons — discount codes for plan credit costs
Per-listing analytics Yes Analytics — cookie-free views and click tracking
Lead forms Yes Lead Forms — Contact Owner form emailed to listing owner
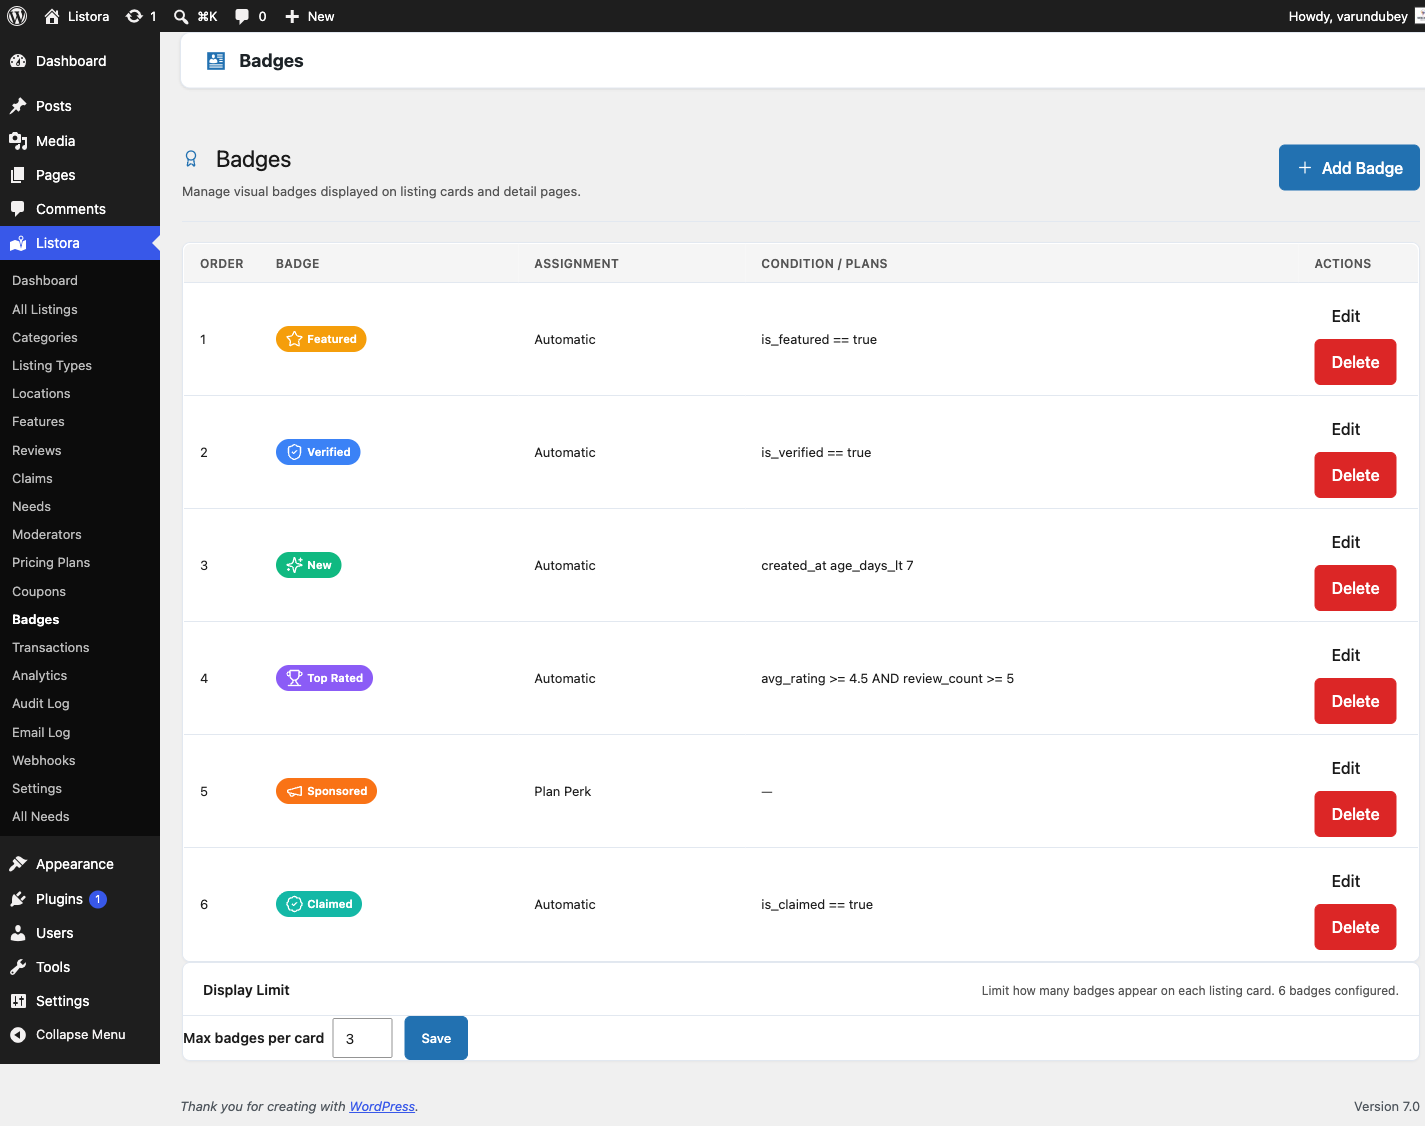
Verification badges Yes Verification Badges — manual admin award, visible on listing cards
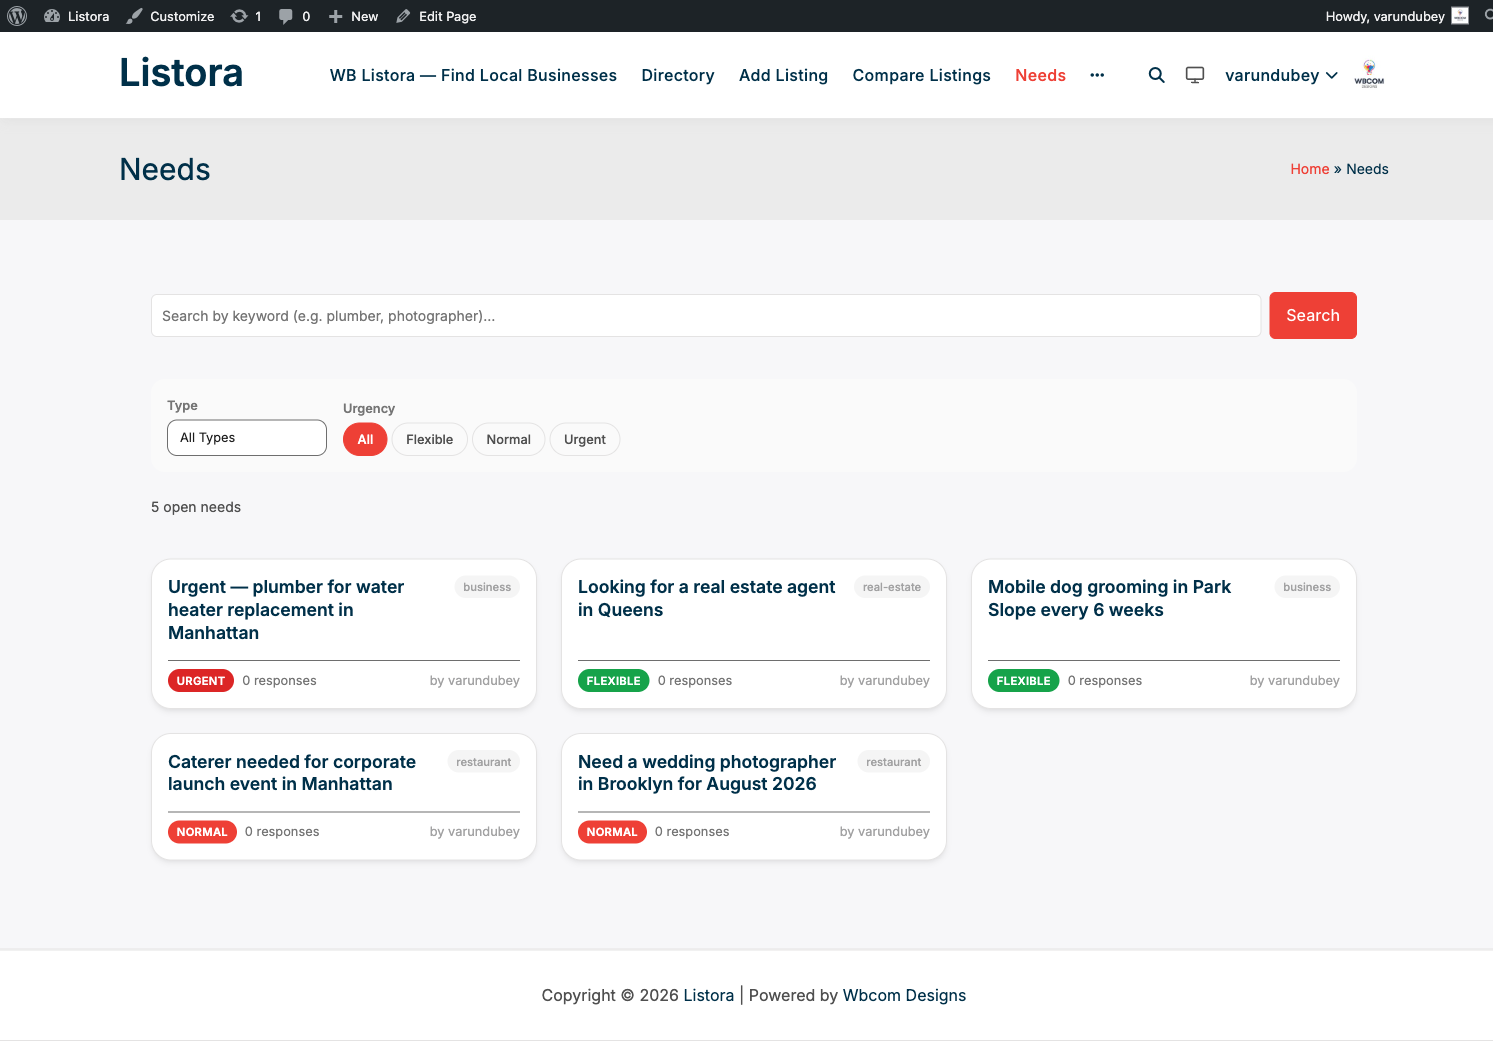
Needs marketplace Yes Needs Marketplace — reverse directory for buyer requests
Moderator role Yes Moderators — scoped role for content moderation without full admin access
Digest notifications Yes Digest Notifications — batch emails into a daily summary
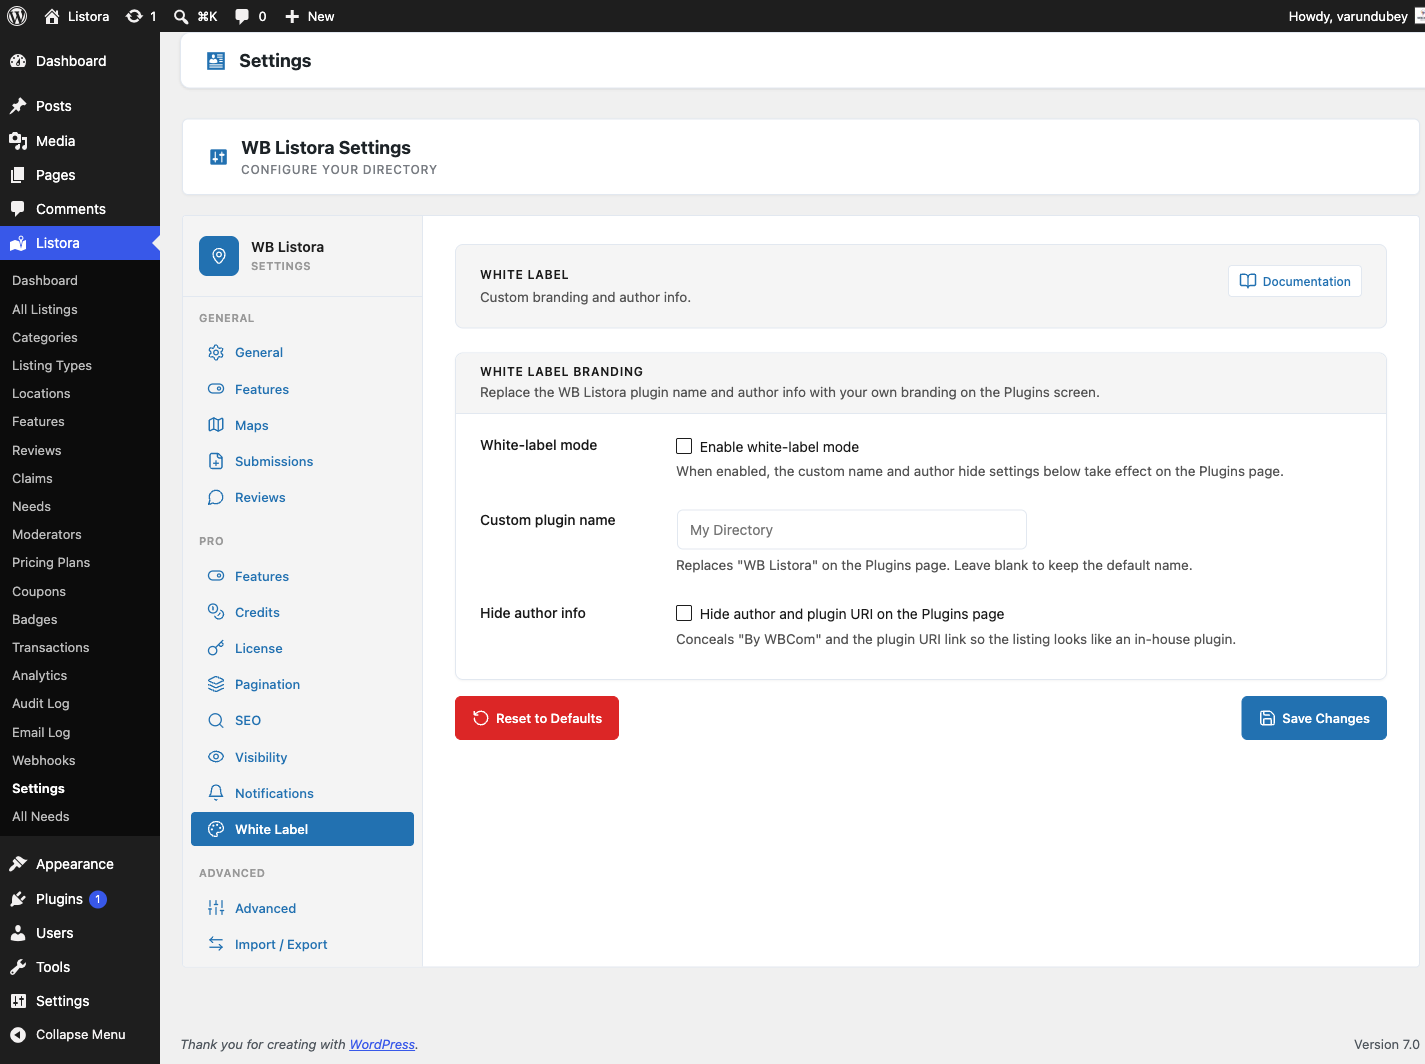
White label Yes White Label — rename admin menu and Plugins list for client handoff
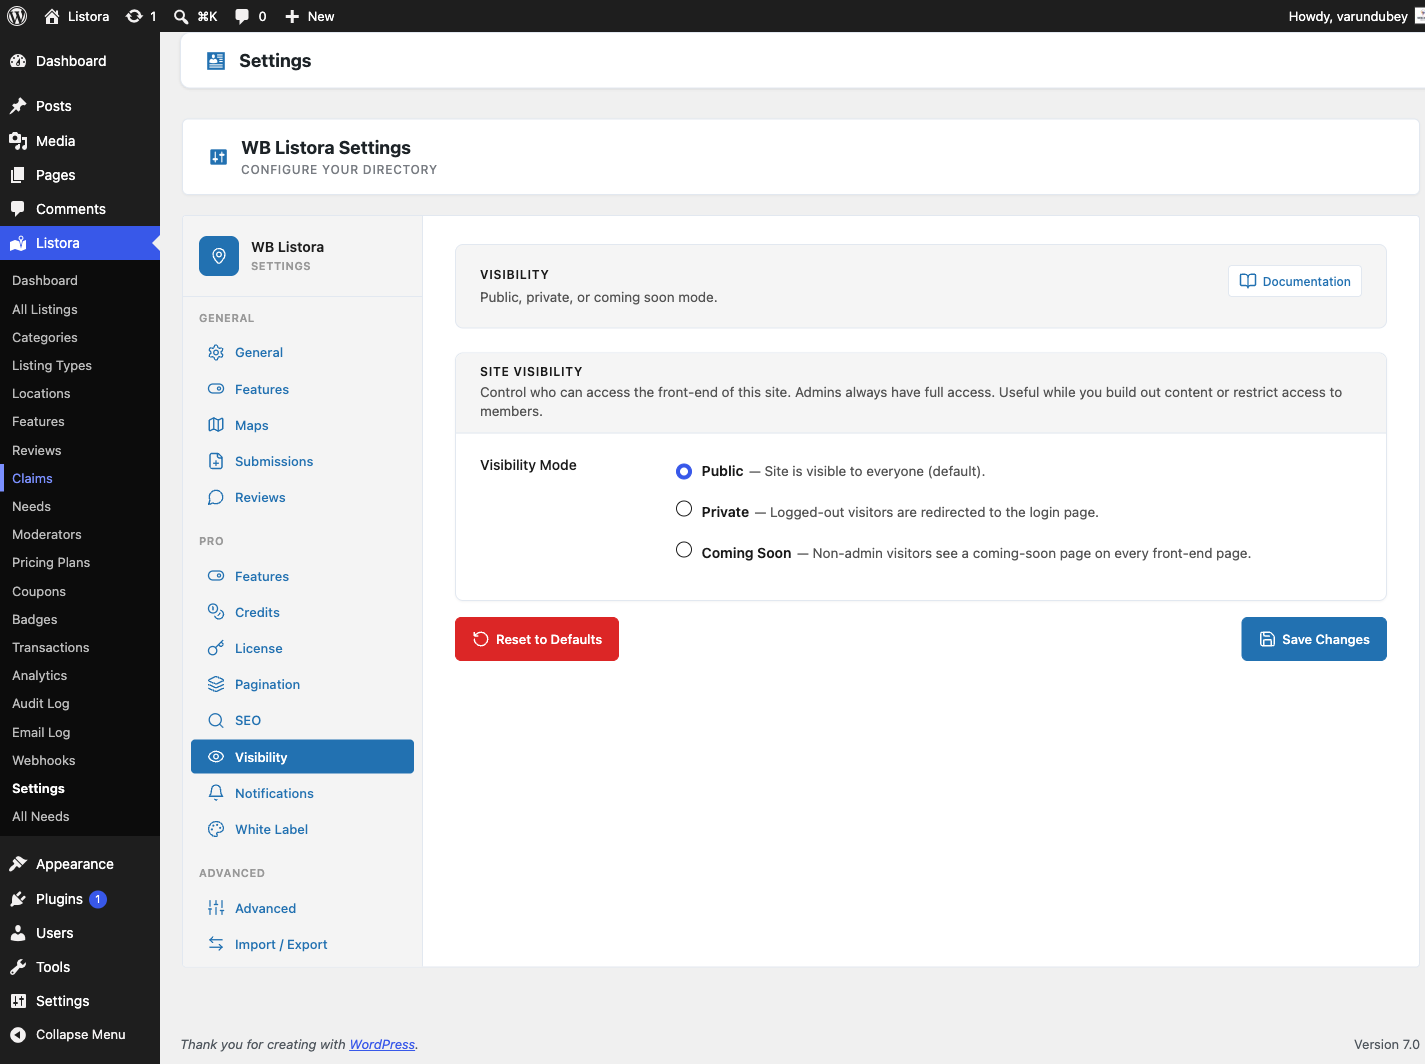
Coming Soon / Private mode Yes Coming Soon Mode — hide directory during setup or require login
Auto-updates via license Yes License Management — updates appear in Dashboard → Updates

Get Pro

Install the add-on and activate your license: Installing WB Listora Pro


Related

Feature Catalog

Every feature in WB Listora Free and Pro, organized by tier and journey.

Feature Catalog — screenshot from the modernized 1.0.5 site

Feature Tier What it does Journey Guide
Installation & Activation Free Install the plugin and run the first-time setup. Set up your directory Guide
Setup Wizard Free Six-step wizard that creates pages, configures map, and optionally installs demo content. Set up your directory Guide
Directory Page Free Place the Listing Grid and Search blocks on a page to create your main directory. Set up your directory Guide
Listing Types Free Define field sets per listing category (Restaurant, Hotel, Real Estate, etc.). Set up your directory Guide
Installing Pro Pro Download and activate the WB Listora Pro add-on. Set up your directory Guide
License Management Pro Activate, deactivate, and renew your Pro license key for auto-updates. Set up your directory Guide
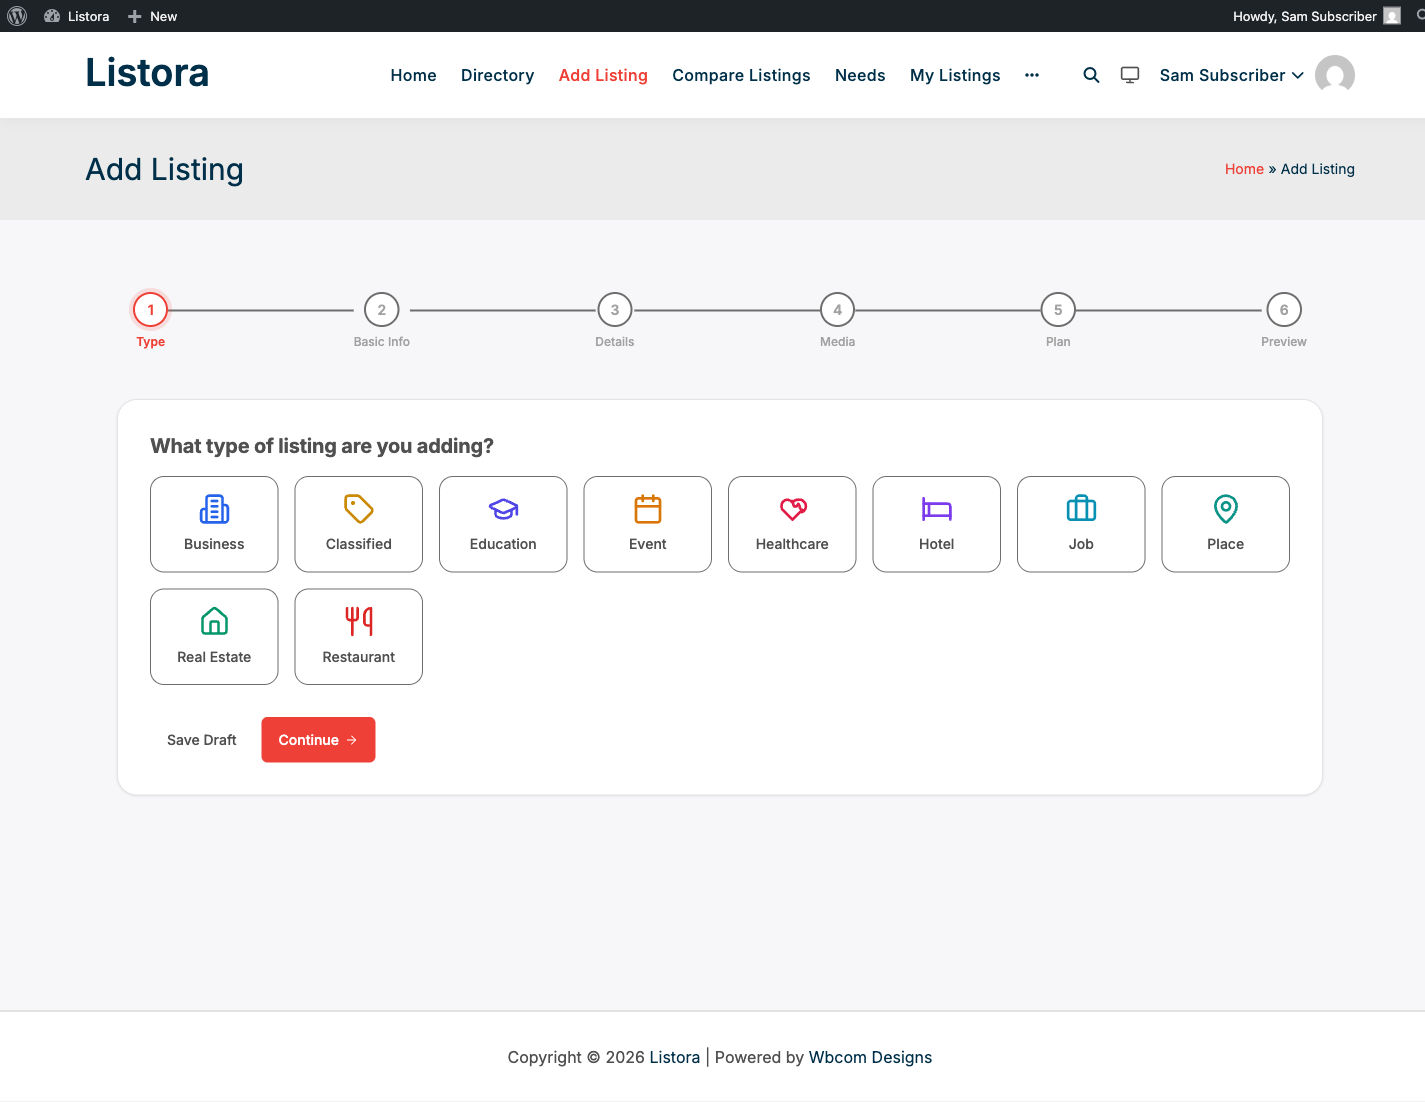
Frontend Submission Free Multi-step form so users can add listings without WordPress admin access. Grow your listings Guide
Business Claims Free Business owners can claim an existing listing and take over management. Grow your listings Guide
Draft Reminder Free Automatic email to users who start a submission but don't finish within 24 hours. Grow your listings Guide
Duplicate Check Free Pre-submit check that warns users if a similar listing already exists. Grow your listings Guide
Import / Export Free JSON and GeoJSON importers plus four competitor migration tools. Grow your listings Guide
OpenStreetMap Free Interactive maps with no API key required. Set up your directory Guide
Google Maps Pro Replace OpenStreetMap with Google Maps including Places autocomplete and marker clustering. Set up your directory Guide
Credit System Pro Users purchase credits via webhook; credits are spent to activate listing plans. Monetize your directory Guide
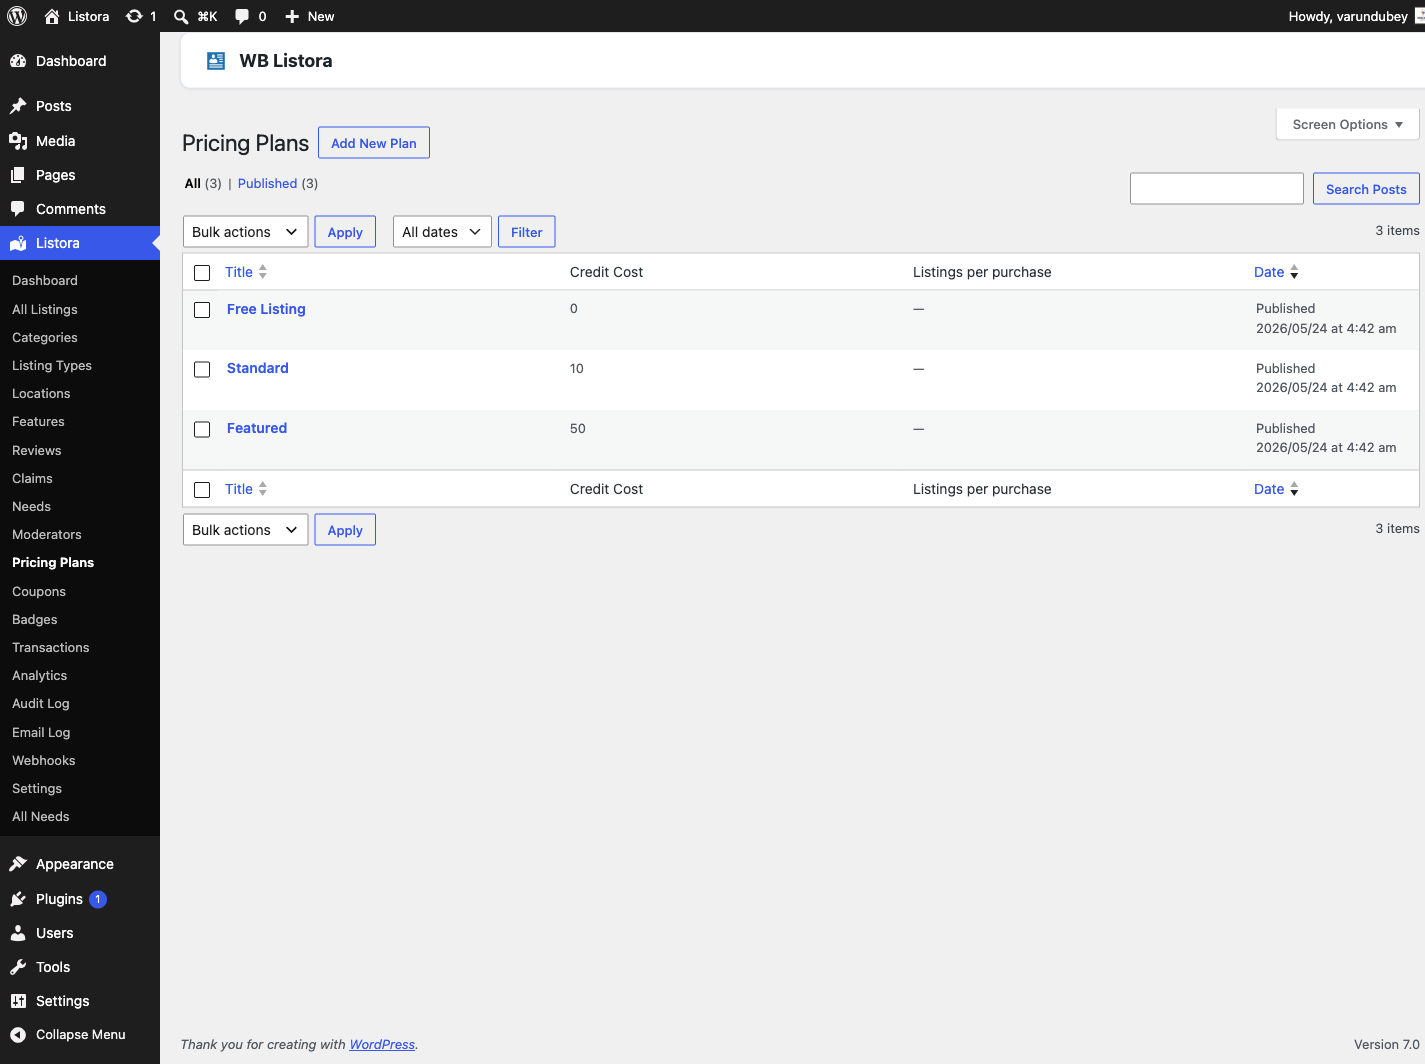
Pricing Plans Pro Define listing tiers with duration, featured placement, and perks. Monetize your directory Guide
Coupons Pro Discount codes that reduce the credit cost of a listing plan at submission. Monetize your directory Guide
Webhook Payments Pro Payment-processor-agnostic webhook receiver for Stripe, PayPal, Paddle, or custom gateways. Monetize your directory Guide
Search and Filters Free Full-text search with facets, geo proximity, category, feature amenities, price, and rating filters. Engage your visitors Guide
Reviews System Free 1–5 star ratings, written reviews, helpful votes, reporting, and owner replies. Engage your visitors Guide
Multi-Criteria Reviews Pro Per-listing-type criteria ratings (e.g., Food, Service, Ambiance for restaurants). Engage your visitors Guide
Photo Reviews Pro Reviewers can upload images alongside their written review. Engage your visitors Guide
Favorites Free Logged-in users save listings to a personal favorites list accessible from their dashboard. Engage your visitors Guide
Saved Searches Pro Users save a search with filters and receive daily email alerts for new matching listings. Engage your visitors Guide
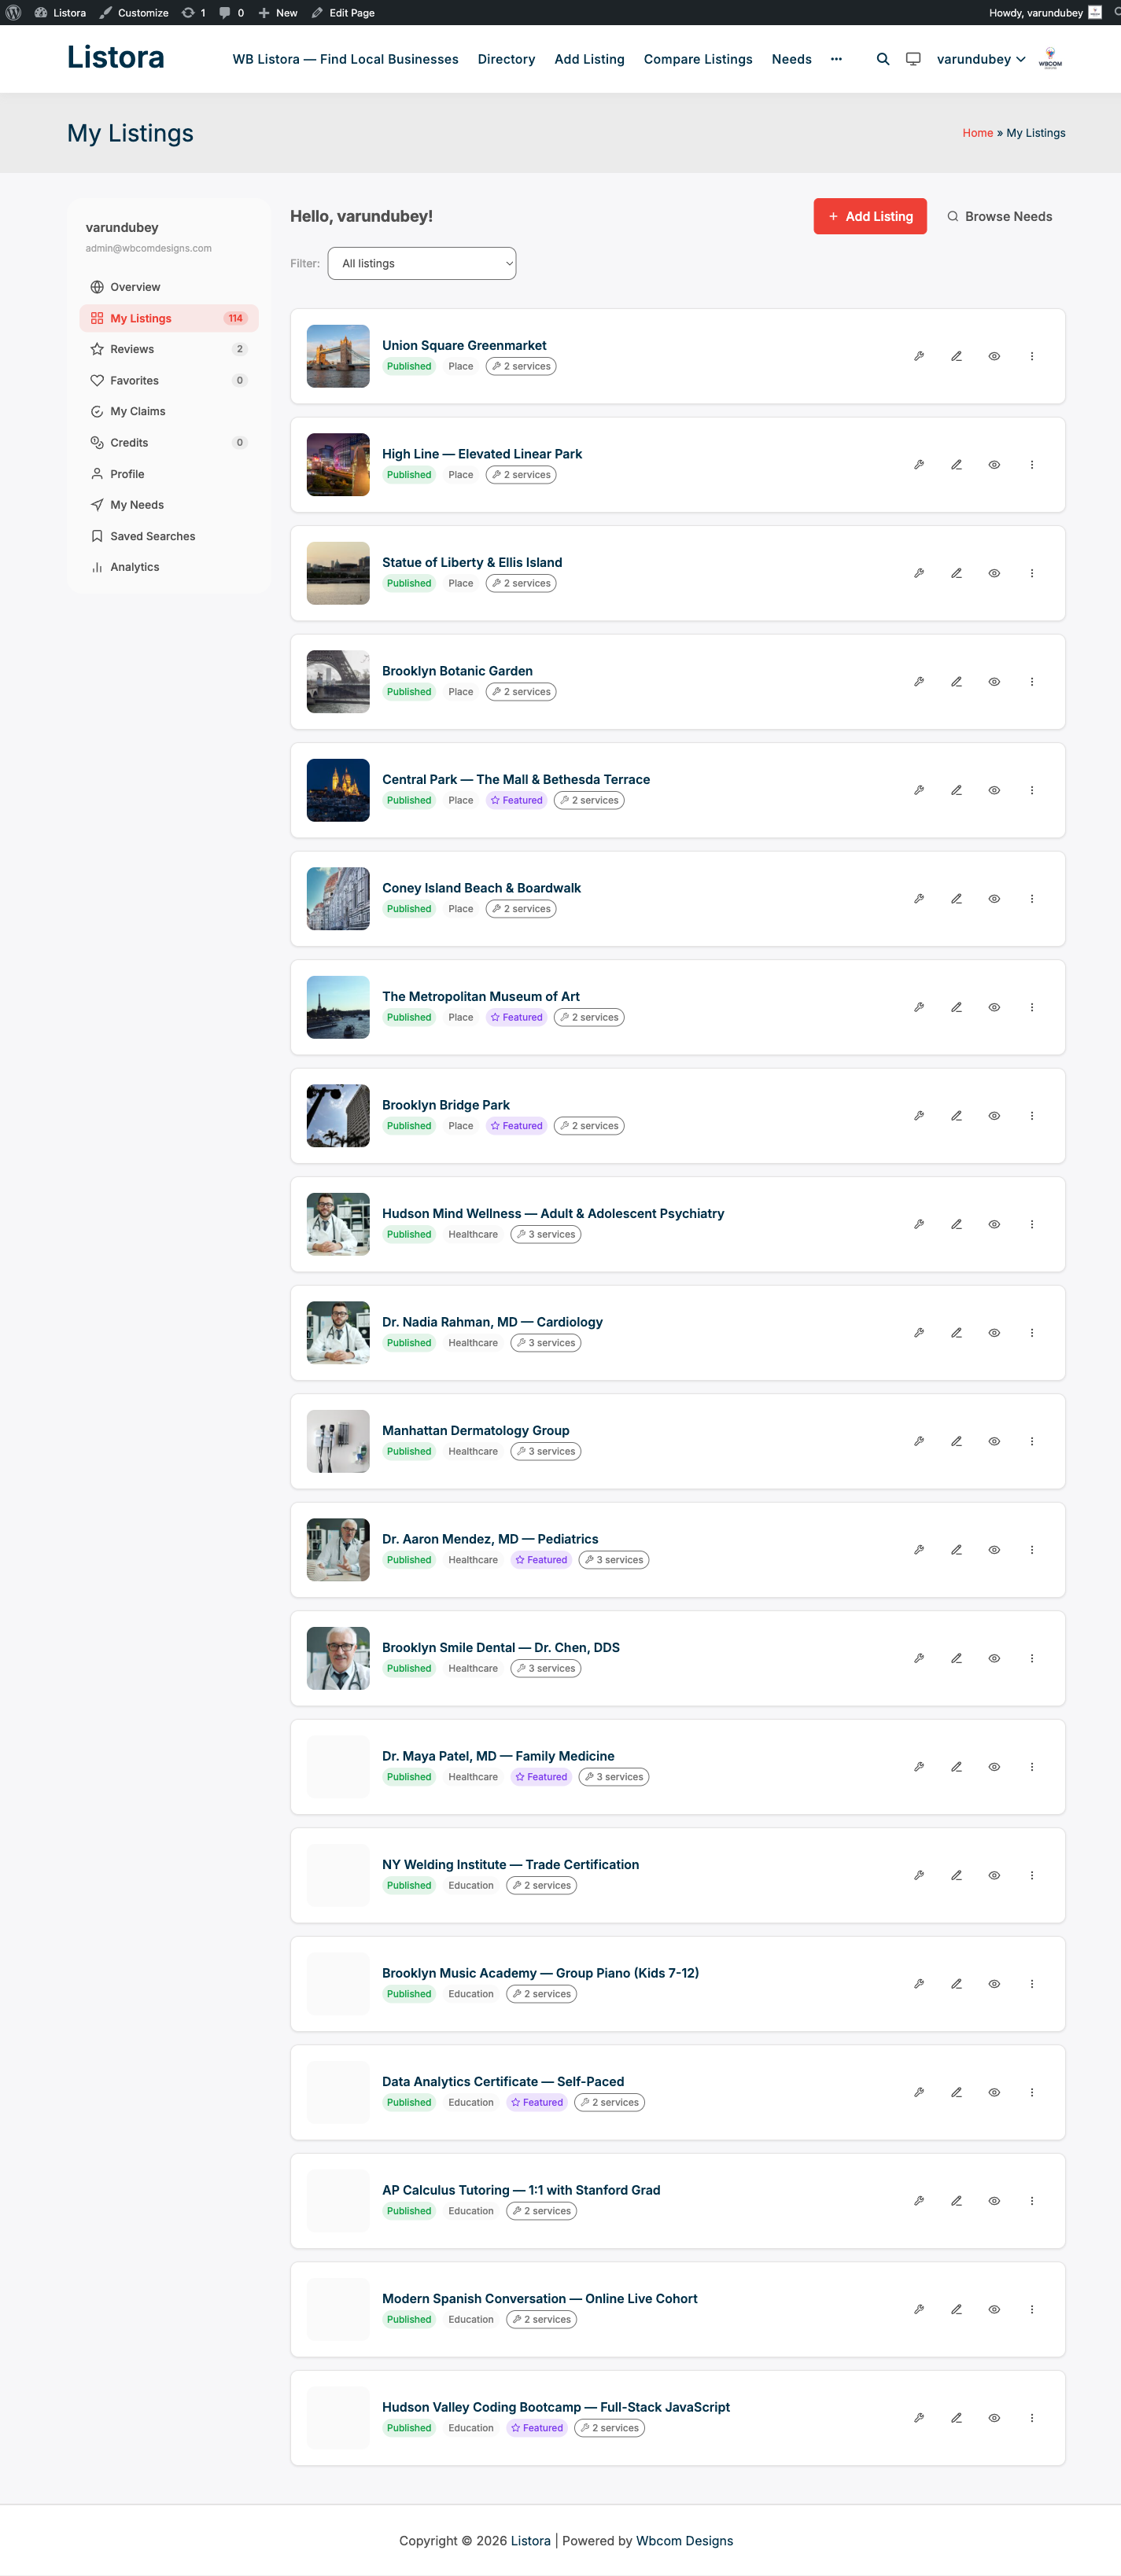
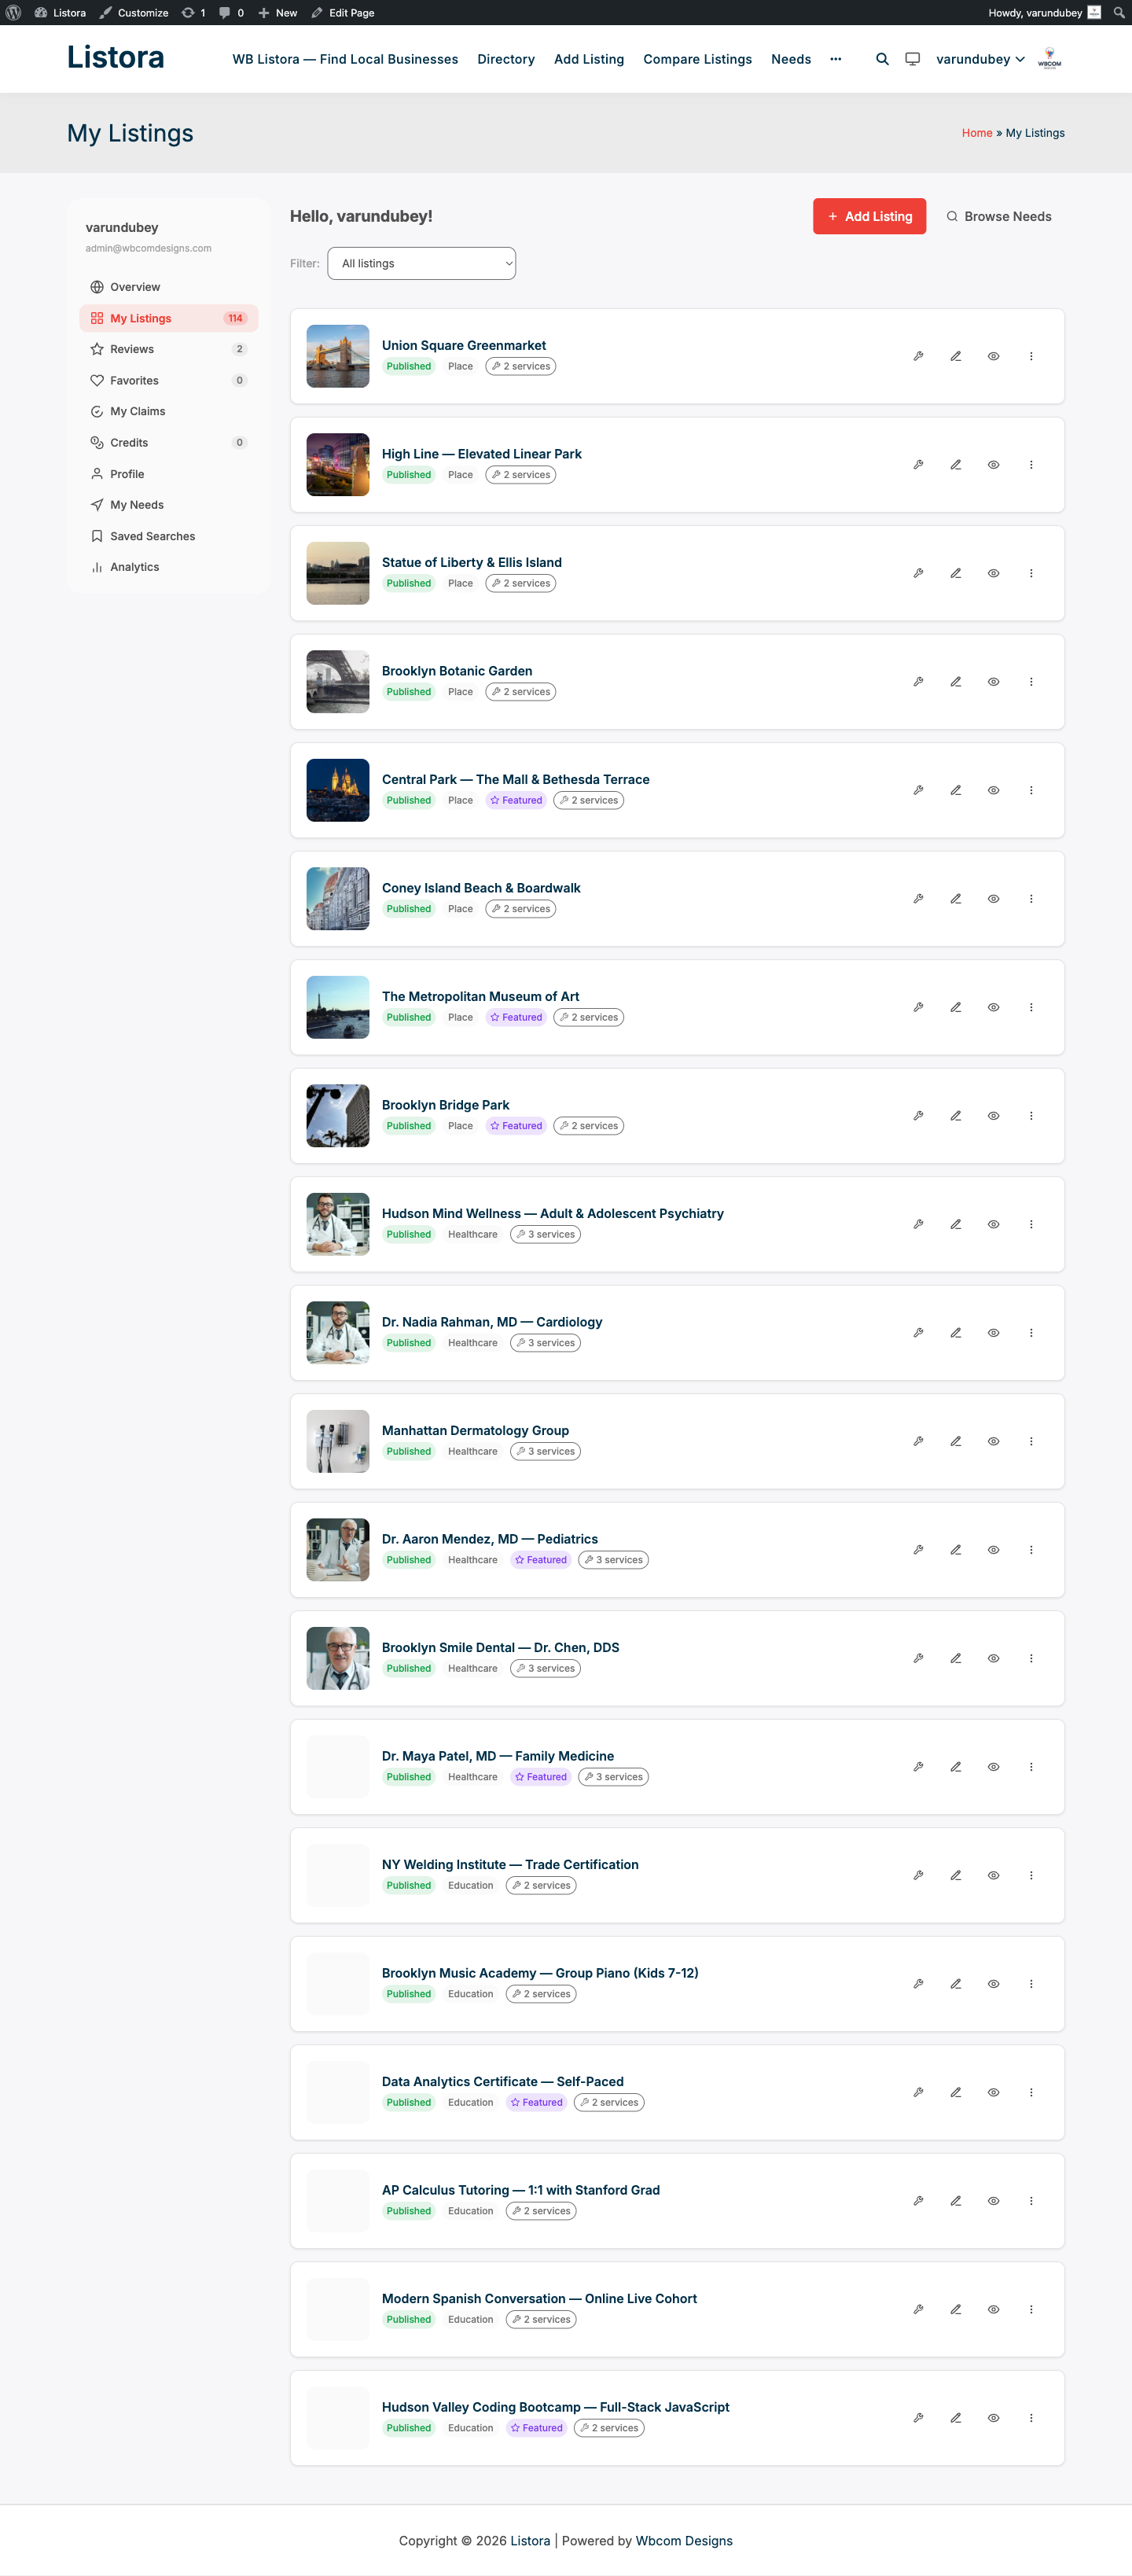
User Dashboard Free Six-tab frontend panel: My Listings, Reviews, Favorites, Claims, Credits, Profile. Build a community Guide
Services per Listing Free Listing owners attach a service catalog (name, price, duration) to their listing. Build a community Guide
Needs Marketplace Pro Reverse directory where visitors post what they need and businesses respond. Build a community Guide
Lead Forms Pro Contact Owner form on every listing detail page; messages emailed to the listing owner. Build a community Guide
Verification Badges Pro Site owner awards a verified badge to vetted listings; badge appears on cards and detail pages. Build a community Guide
11 Gutenberg Blocks Free Listing Grid, Search, Map, Detail, Reviews, Submission, Dashboard, Categories, Featured, Calendar, Card. Set up your directory Guide
REST API (39 endpoints) Free Full REST coverage for listings, search, reviews, favorites, claims, services, and dashboard. Set up your directory Guide
Template Overrides Free WooCommerce-style theme overrides for block and email templates. Set up your directory Guide
Moderation (listings) Free Manual review queue for submitted listings with approve/reject controls. Run your directory Guide
Moderators Pro Dedicated WordPress role scoped to listing approval, review moderation, and claims management. Run your directory Guide
Analytics Pro Cookie-free per-listing view counts and click tracking (phone, website, email, directions). Run your directory Guide
Digest Notifications Pro Batch notification emails into a daily digest to reduce inbox noise. Run your directory Guide
Coming Soon Mode Pro Hide the directory from public view during setup or migration. Run your directory Guide
Private Mode Pro Require login to access any directory page — for members-only directories. Run your directory Guide
White Label Pro Rename the plugin and admin menu to your own brand for client handoff. Run your directory Guide
Auto-Updates Pro Plugin updates delivered via your license — no manual ZIP uploads. Set up your directory Guide

Related

WB Listora vs GeoDirectory vs Directorist vs Business Directory Plugin -- Feature Comparison

Choosing the right WordPress directory plugin depends on what features you need, how much you are willing to pay, and whether you want a modern development foundation. This page compares WB Listora (Free and Pro), GeoDirectory, Directorist, and Business Directory Plugin (BDP) across every major feature category.

Comparison — screenshot from the modernized 1.0.5 site

All feature information is based on each plugin's WordPress.org listing and official documentation as of early 2026. "Paid addon" means the feature requires purchasing a separate extension or module beyond the free plugin.

Quick Summary

WB Listora includes the most features in its free version. GeoDirectory and Directorist offer solid core functionality but gate many features behind paid add-ons. Business Directory Plugin covers the basics but lacks several features that modern directories need.

Full Feature Comparison Table

Core: Listings, Types, and Fields

Feature Listora Free Listora Pro GeoDirectory Directorist BDP
Custom post type for listings Yes Yes Yes Yes Yes
Multiple listing types Yes (10 pre-built) Yes Paid addon Paid addon No
Custom fields per type Yes Yes Paid addon Paid addon Yes (via form builder)
Field groups Yes Yes Paid addon Paid addon No
Hierarchical categories Yes Yes Yes Yes Yes
Location taxonomy Yes Yes Yes Yes No
Feature/amenity tags Yes Yes Yes Yes Yes
Business hours Yes Yes Paid addon Paid addon No
"Open now" filtering Yes Yes Paid addon No No

Search and Filters

Feature Listora Free Listora Pro GeoDirectory Directorist BDP
Keyword search Yes Yes Yes Yes Yes
FULLTEXT search index Yes Yes No No No
Category filtering Yes Yes Yes Yes Yes
Location filtering Yes Yes Yes Yes No
Custom field filters Yes Yes Paid addon Paid addon Paid addon
Faceted counts Yes Yes No No No
Geo radius search Yes Yes Yes Paid addon No
"Near me" search Yes Yes Yes Paid addon No
Saved search alerts No Yes Paid addon Paid addon No

Maps

Feature Listora Free Listora Pro GeoDirectory Directorist BDP
Map display Yes Yes Yes Yes Yes
OpenStreetMap Yes Yes Yes Yes No
Google Maps No Yes Yes Paid addon Yes
Marker clustering Yes Yes Yes Yes No
Drag-to-search Yes Yes No No No
Map + list split view Yes Yes Yes Yes No

Reviews and Ratings

Feature Listora Free Listora Pro GeoDirectory Directorist BDP
Star ratings Yes Yes Yes Yes Paid addon
Review text Yes Yes Yes Yes Paid addon
Multi-criteria reviews No Yes Paid addon Paid addon No
Helpful votes Yes Yes No No No
Owner replies Yes Yes No No No
Review moderation Yes Yes Yes Yes Paid addon
Photo reviews No Yes No No No
Review reports Yes Yes No No No

Claims

Feature Listora Free Listora Pro GeoDirectory Directorist BDP
Claim listing Yes Yes Paid addon Paid addon Paid addon
Claim moderation Yes Yes Paid addon Paid addon Paid addon
Verification badges No Yes Paid addon No No

Events and Calendar

Feature Listora Free Listora Pro GeoDirectory Directorist BDP
Event listings Yes Yes Paid addon No No
Calendar view block Yes Yes Paid addon No No
Event date filtering Yes Yes Paid addon No No

Import and Export

Feature Listora Free Listora Pro GeoDirectory Directorist BDP
CSV import Yes Yes Yes Yes Yes
CSV export Yes Yes Yes Yes Yes
Column mapping Yes Yes Paid addon No Paid addon
JSON import Yes Yes No No No
GeoJSON import Yes Yes No No No
Migrate from competitors Yes Yes No No No

Submission Form

Feature Listora Free Listora Pro GeoDirectory Directorist BDP
Frontend submission Yes Yes Yes Yes Yes
Multi-step wizard Yes Yes No No No
Type selection step Yes Yes No No No
Media upload Yes Yes Yes Yes Yes
Field validation Yes Yes Yes Yes Yes
Submission moderation Yes Yes Yes Yes Yes

User Dashboard

Feature Listora Free Listora Pro GeoDirectory Directorist BDP
Frontend dashboard Yes Yes Paid addon Yes No
Manage own listings Yes Yes Paid addon Yes No
Manage reviews Yes Yes No No No
Favorites/bookmarks Yes Yes Paid addon Paid addon No
Profile management Yes Yes No Yes No
Analytics dashboard No Yes No No No

Email Notifications

Feature Listora Free Listora Pro GeoDirectory Directorist BDP
Submission notification Yes Yes Yes Yes Yes
Review notification Yes Yes Yes Yes Paid addon
Claim notification Yes Yes Paid addon Paid addon Paid addon
Digest emails No Yes No No No

SEO

Feature Listora Free Listora Pro GeoDirectory Directorist BDP
Schema.org JSON-LD Yes Yes Paid addon Paid addon No
Meta title/description Yes Yes Yes Yes Yes
Clean permalink structure Yes Yes Yes Yes Yes
Sitemap support Yes Yes Yes Yes Yes

Developer Features

Feature Listora Free Listora Pro GeoDirectory Directorist BDP
REST API endpoints Yes (41 endpoints) Yes Limited Limited Limited
WP-CLI commands Yes Yes No No Limited
Action/filter hooks Yes (30+) Yes Yes Yes Yes
Gutenberg blocks Yes (11 blocks) Yes Limited Limited Limited
Interactivity API Yes Yes No No No
Theme.json integration Yes Yes No No No
CSS custom properties Yes Yes No No No
jQuery dependency None None Required Required Required

Price

Listora Free Listora Pro GeoDirectory Directorist BDP
Base plugin Free Paid (annual) Free Free Free
All features unlocked N/A Single purchase $200+ in add-ons $150+ in extensions $150+ in modules
Per-feature pricing N/A N/A $29-$99 per add-on $29-$69 per extension $29-$99 per module

Note: Competitor pricing reflects published rates and may vary with bundles or promotions.

Architecture Comparison

Frontend Technology

WB Listora is the only plugin in this comparison built on the WordPress Interactivity API. This is significant for performance:

  • No jQuery dependency -- Listora does not load jQuery for its frontend. GeoDirectory, Directorist, and BDP all require jQuery.
  • Reactive DOM updates -- Search filtering, map interactions, and form validation happen instantly without full page reloads or traditional AJAX round-trips.
  • Native block editor integration -- All 11 blocks are registered through block.json with proper viewScriptModule integration, following WordPress core patterns.

Data Architecture

Listora uses a two-phase search architecture with a denormalized search index table. Phase 1 queries this index with FULLTEXT matching for fast keyword search. Phase 2 filters by custom field values using a separate field index. Geo queries use bounding box pre-filtering with Haversine distance calculation.

GeoDirectory uses its own detail tables per post type. Directorist and BDP use standard wp_postmeta for field storage, which can become slow at scale due to the EAV (Entity-Attribute-Value) pattern.

Theme Compatibility

Listora uses CSS custom properties that inherit from theme.json, making it automatically adaptive to any block theme. It also works with classic themes. GeoDirectory, Directorist, and BDP each have their own CSS that may or may not match your theme's design language.

Which Plugin Is Right for You?

Choose WB Listora if:

  • You want the most features in a free plugin
  • You prefer modern WordPress architecture (blocks, Interactivity API, REST API)
  • You need multiple listing types without paying for add-ons
  • You want built-in migration from other directory plugins
  • You value developer tools (WP-CLI, 41 REST endpoints, 30+ hooks)

Choose GeoDirectory if:

  • You need a mature plugin with a large extension ecosystem
  • You are willing to purchase add-ons for the features you need
  • You have an existing GeoDirectory site and are satisfied with it

Choose Directorist if:

  • You need a directory with a basic free version
  • You prefer Directorist's specific admin UI
  • You are comfortable with shortcode-based layouts

Choose Business Directory Plugin if:

  • You need a minimal directory with basic listing and category support
  • You do not need reviews, claims, events, or a user dashboard in the free version

Ready to Try WB Listora?

Install WB Listora free from WordPress.org. If you are currently using GeoDirectory, Directorist, Business Directory Plugin, or ListingPro, the built-in migration tool transfers your existing data automatically.

Install WB Listora from WordPress.org

Related

Feature Matrix — Free vs Pro

Every WB Listora capability at a glance. Use this page to decide whether Free covers your launch needs or you need Pro from day one.

Rule of thumb: Free gives you a complete, public, searchable directory with reviews, claims, frontend submission, and full taxonomy / map / spam-protection support. Pro adds the business model layer — credit-based plans, lead capture, advanced analytics, moderator team, comparison, verification, white-label, BuddyPress sync, and the reverse "Needs marketplace."

Feature Catalog — complete capability grid

Setup & content infrastructure

Capability Free Pro
Setup wizard (6-step onboarding: type → location → maps → pages → demo → done) Yes Yes + Pro overlay (license, credit packs, plans, Google Maps key)
Multiple listing types (Restaurant / Hotel / Real Estate / Job Board / Place / Classified / …) Yes 9 demo packs Yes
Custom field framework per listing type Yes Yes + Pro fields (badges, criteria, services)
Categories taxonomy (listora_listing_cat) Yes Yes
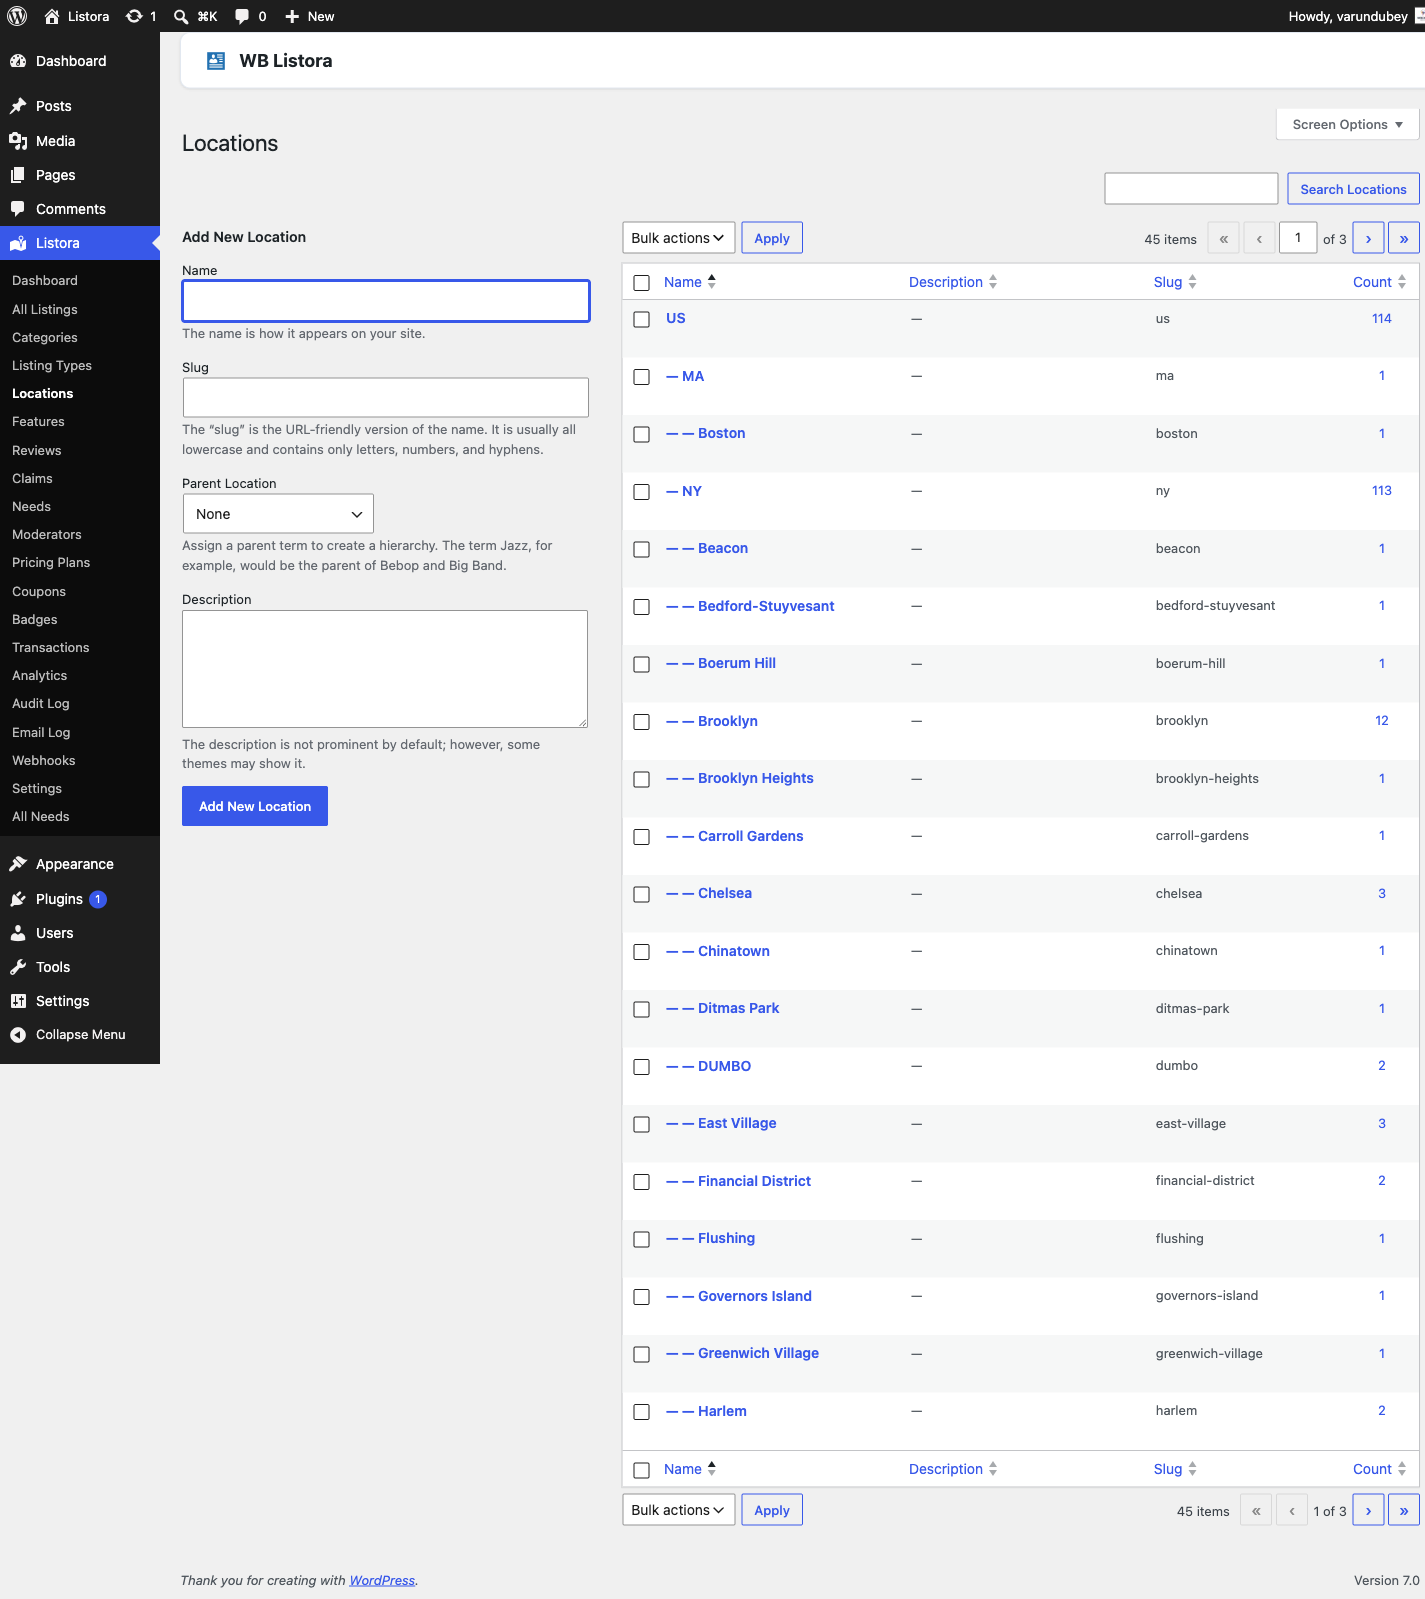
Locations taxonomy (hierarchical, Country/State/City) Yes Yes
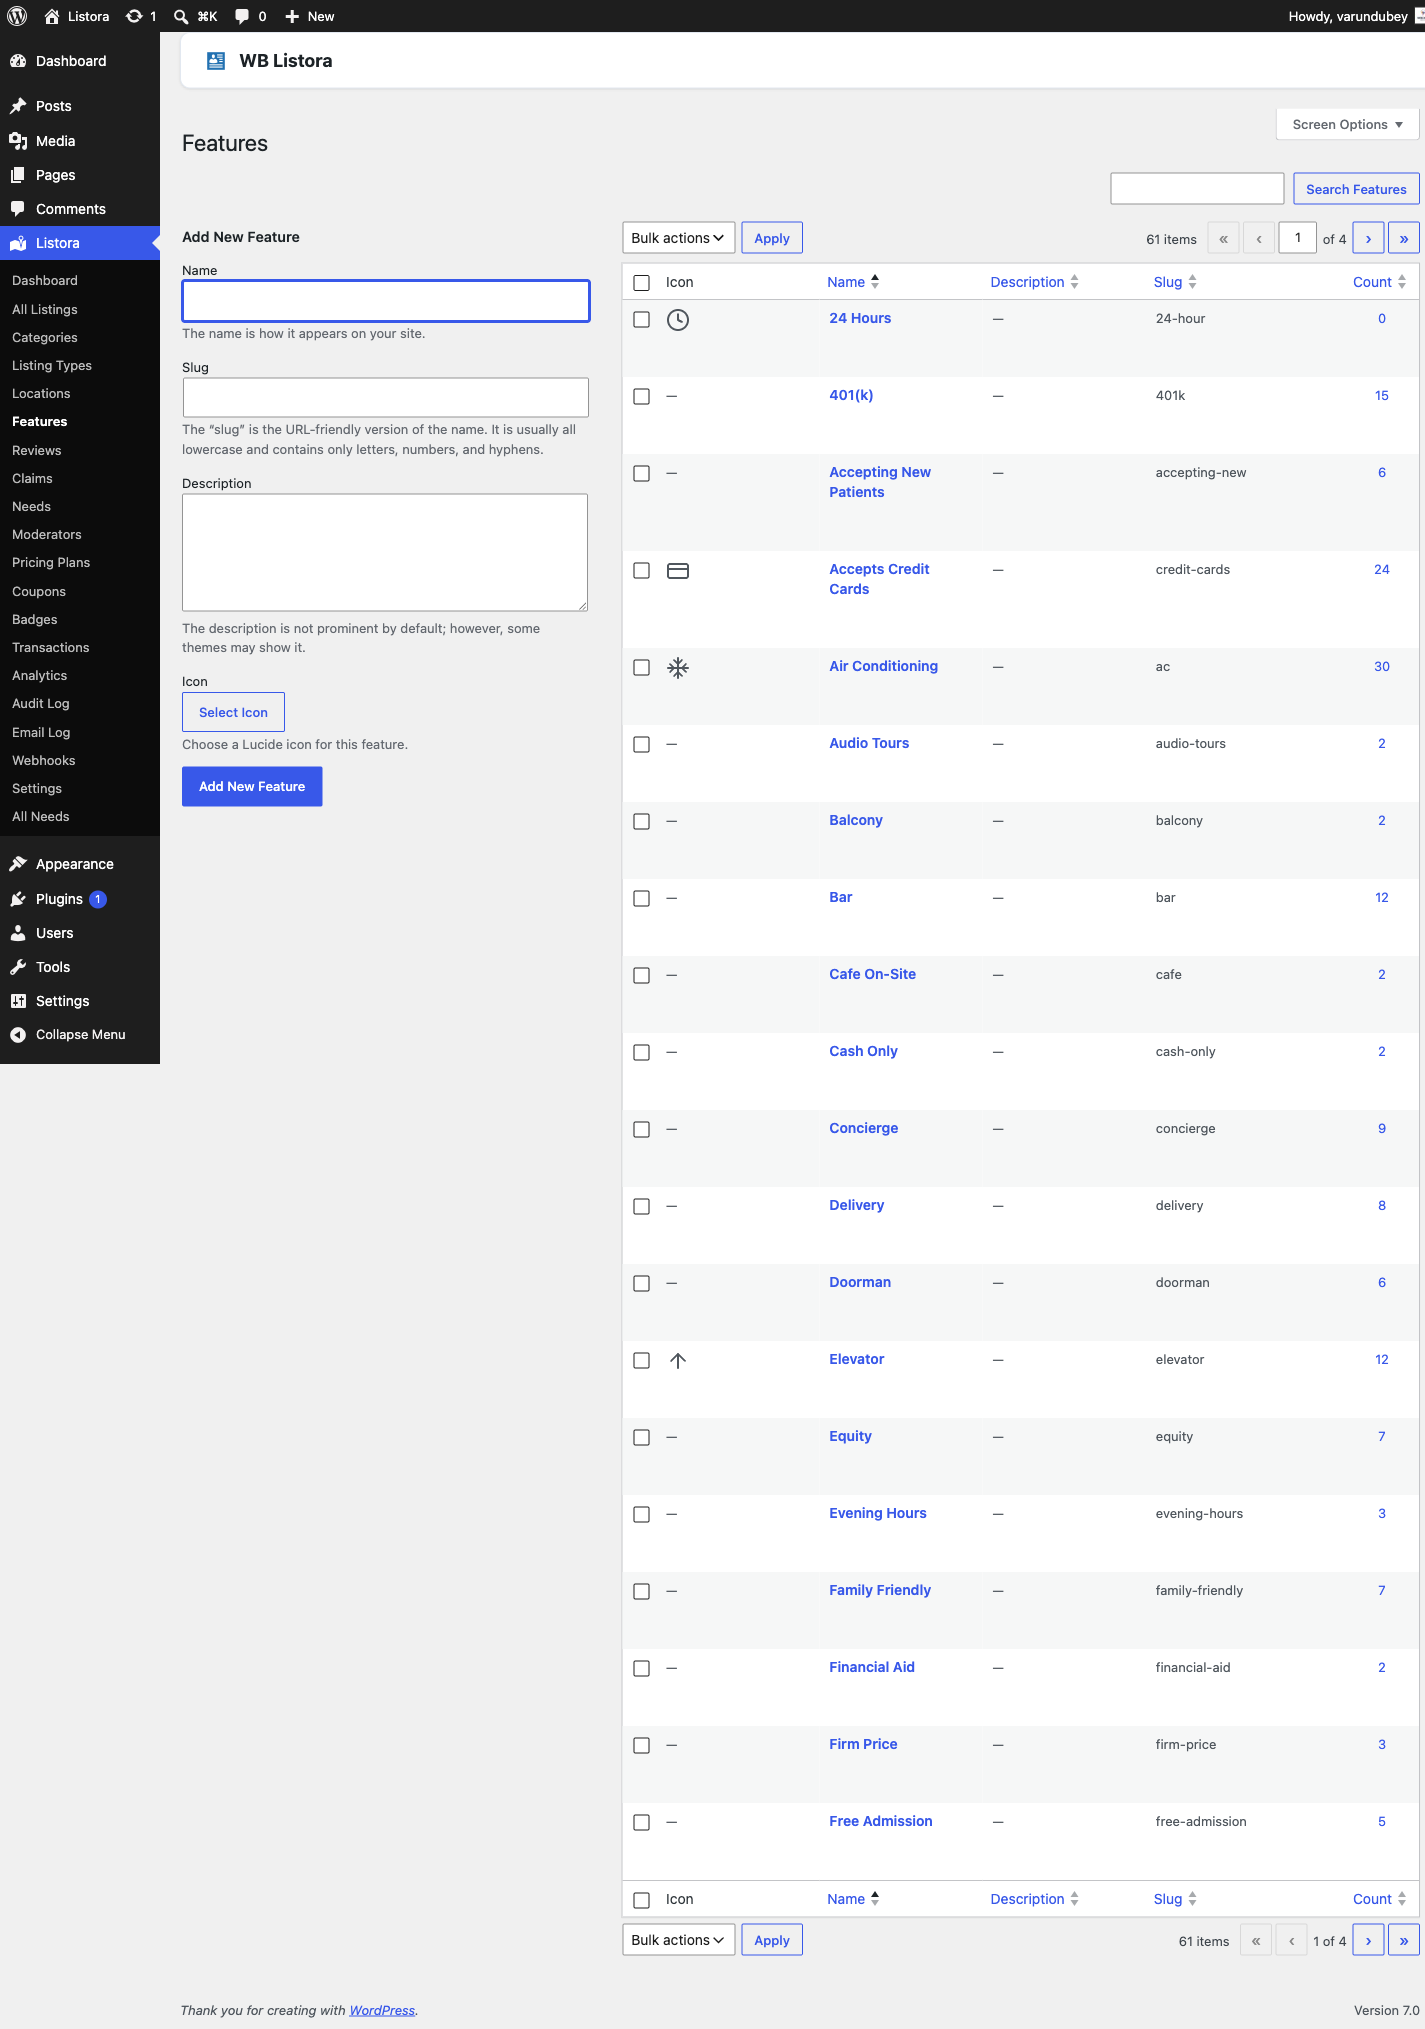
Amenities / Features taxonomy (flat tags) Yes Yes
Listing Tags Yes Yes
Listing Type Editor (icon, fields, schema mapping) Yes Yes
Schema.org JSON-LD (LocalBusiness, Restaurant, Hotel…) Yes 10 schema types Yes
OpenGraph + Twitter cards Yes Yes
Breadcrumbs Yes Yes
Sitemap integration (WP core sitemap) Yes Yes
Demo content packs (9 verticals — restaurant, hotel, real-estate, job-board, general, classified, education, healthcare, place — 128+ seeded listings) Yes via wp listora demo seed --pack=all Yes Pro overlay (wp listora-pro demo seed)
Setup wizard auto-creates Add Listing / My Listings / Directory pages Yes Yes + Compare / Buy Credits / Needs

Search & discovery

Capability Free Pro
Full-text search (denormalized index table) Yes Yes
Faceted filters (category, location, feature, type) Yes Yes
Geo radius search (Near Me, distance) Yes Haversine Yes
"Search this area" (drag-to-update bounds) Yes Yes
Sort by date, rating, name, distance, featured Yes Yes
Saved searches with alerts Yes
Advanced search builder (custom field filters) Yes
Infinite scroll on listing grid Yes
Quick view modal on cards Yes
SEO landing pages (auto-generated /type-in-location/ pages) Yes
Compare listings (2–4 side by side) Yes

Frontend blocks (Gutenberg)

Block Free Pro
listora/listing-grid Yes Yes
listora/listing-card Yes Yes
listora/listing-search Yes Yes
listora/listing-map Yes Leaflet + OSM Yes + Google Maps + clustering
listora/listing-detail Yes Yes
listora/listing-reviews Yes Yes + multi-criteria + photos
listora/listing-submission (wizard) Yes Yes + duplicate-check + plan picker
listora/listing-categories Yes Yes
listora/listing-featured (carousel) Yes Yes + paid rotation
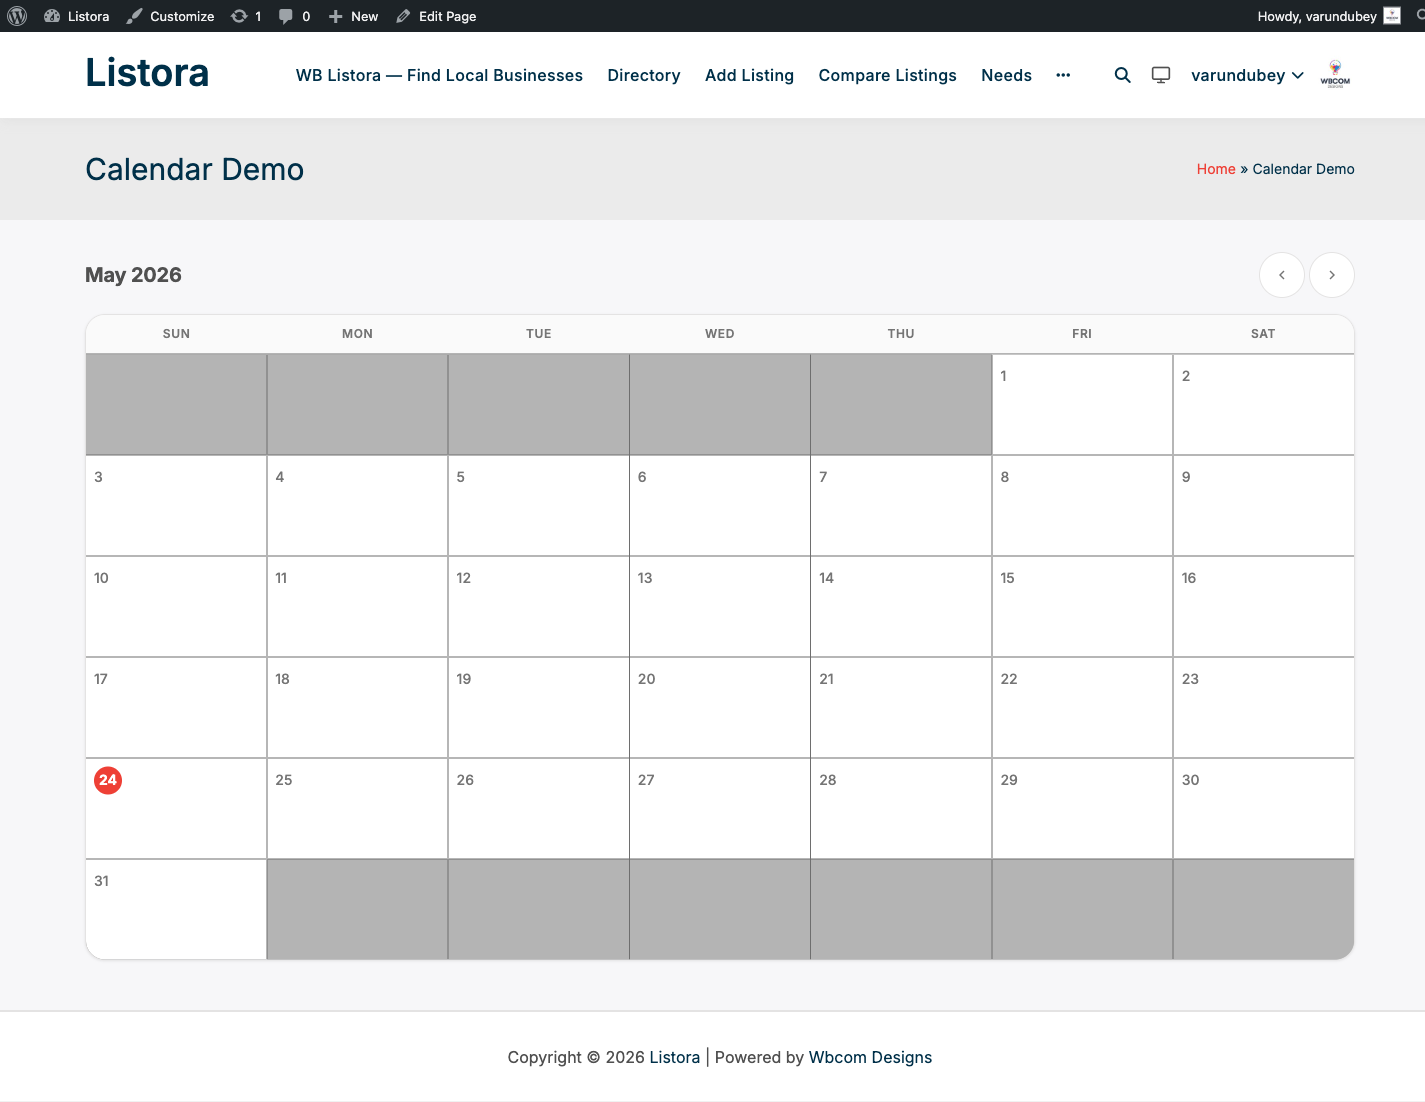
listora/listing-calendar (events) Yes Yes
listora/user-dashboard Yes Yes + Saved Searches + Needs tabs
listora-pro/comparison Yes
listora-pro/needs-grid Yes
listora-pro/post-need Yes
listora-pro/moderator-queue Yes
listora-pro/credit-purchase Yes

Submission & lifecycle

Capability Free Pro
Frontend submission wizard (multi-step, draft-saving) Yes Yes
Guest submission (with email-verification gate) Yes Yes
Conditional fields Yes Yes
Draggable map pin for address Yes Yes
Image gallery upload Yes Yes
Business hours with timezone Yes Yes
Social links (7 platforms) Yes Yes
Email verification for guest submissions Yes Yes
Duplicate detection at submit Yes
Listing renewal (extend expiration) Yes Yes + credit-gated pricing
Self-service deactivate / reactivate Yes Yes
Pricing plans (free / paid / featured) Yes
Credit system (Hold-and-Commit activation) Yes
Coupons (discount codes for plans) Yes

Reviews

Capability Free Pro
5-star rating + written reviews Yes Yes
Owner replies to reviews Yes Yes
Helpful-vote + milestone notifications Yes Yes
Report-a-review workflow Yes Yes
Auto-approve / require moderation toggle Yes Yes
Multi-criteria reviews (per-aspect stars: Food / Service / Value …) Yes
Photo reviews (reviewers attach photos) Yes

Trust & moderation

Capability Free Pro
Business claims ("Is this your business?" flow) Yes Yes
Moderation queue (pending listings / reviews / claims) Yes Yes
Bulk-moderate (REST + admin) Yes Yes
Approve / Reject row actions on Listings list Yes Yes
Verification badges (verified, top-rated, choice-of-…) Yes
Moderators team (non-admin users with moderate caps) Yes
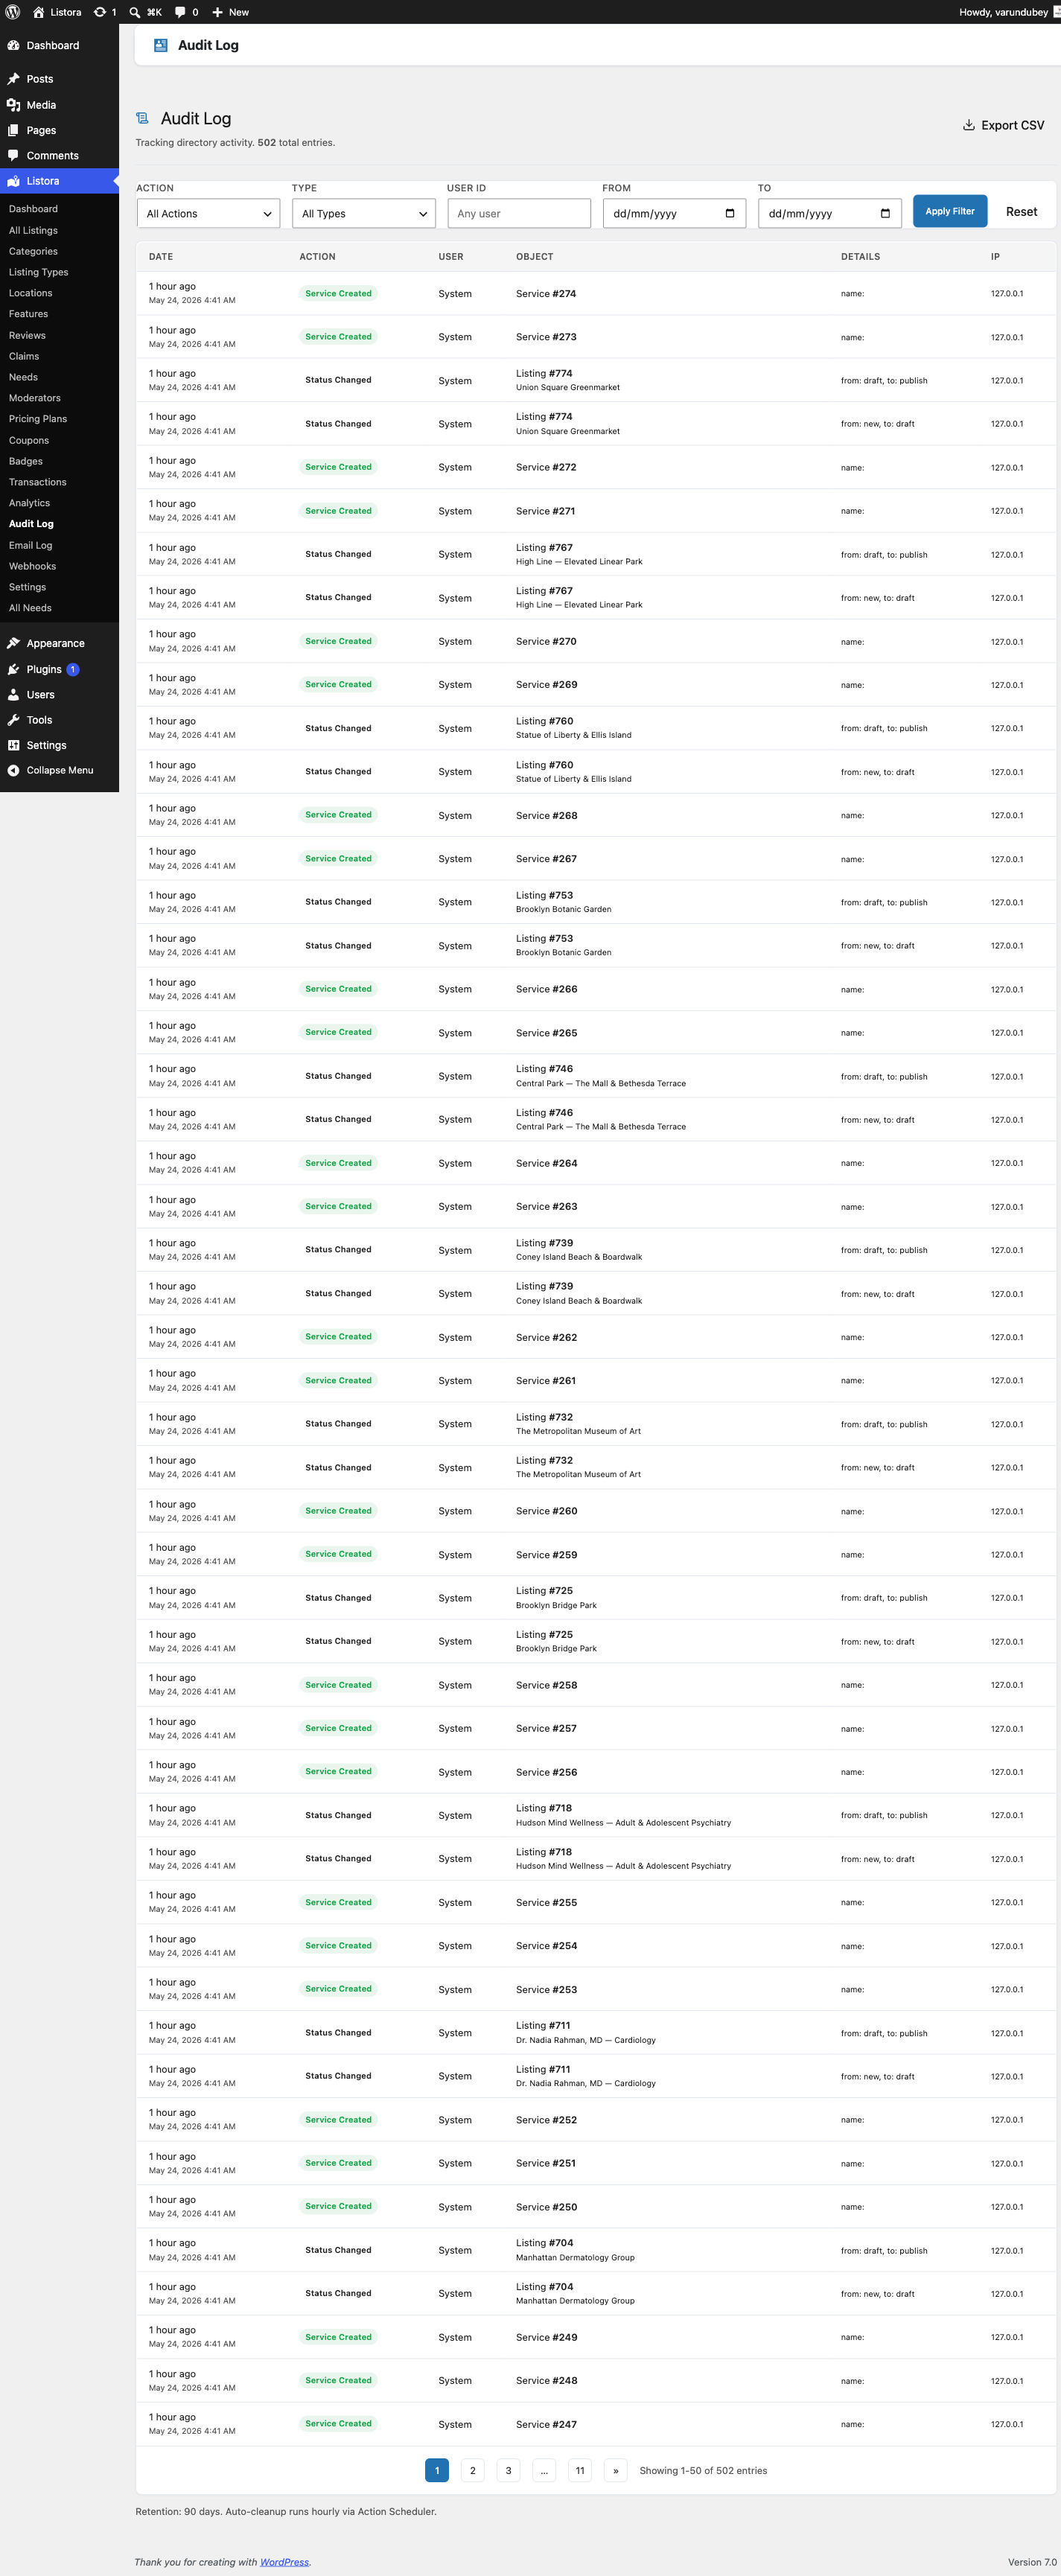
Audit log (every transition recorded) Yes

Owner / vendor tools

Capability Free Pro
Frontend dashboard (My Listings overview) Yes Yes
Edit listing from dashboard Yes Yes
Favorites with collections Yes Yes
Contact form on listing detail Yes Free contact form Yes replaced by Lead Form
Lead form (analytics, custom fields, integrations) Yes
Services per listing (sub-products with prices) Yes Yes + cross-listing service search
Featured listing (rotation entitlement) Yes admin-set Yes self-serve via credits
Service-level booking CTA Yes

Marketing / Analytics

Capability Free Pro
Per-listing analytics (views, clicks, contact submits) Yes
Directory-wide analytics (top listings, top categories) Yes
Outgoing webhooks (listing.created, review.created, …) Yes
Inbound payment webhooks (Stripe / PayPal + WooCommerce / WooSubscriptions / MemberPress / PMPro / WooMemberships bridges) Yes
Notification digest (daily / weekly bundle email) Yes
White-label (custom brand color + logo across admin) Yes

Anti-spam & abuse controls

Capability Free Pro
Honeypot on every form Yes Yes
Per-IP sliding-window rate limits Yes Yes
CAPTCHA (reCAPTCHA v3 + Cloudflare Turnstile) Yes Yes
Akismet integration for reviews + claims Yes Yes
Keyword blacklist Yes Yes
URL-density cap per event Yes Yes
Coming Soon mode (gate the directory) Yes

Migration & import

Capability Free Pro
CSV import / export (per listing type) Yes Yes
JSON import Yes Yes
GeoJSON import (FeatureCollection) Yes Yes
Settings JSON export / import Yes Yes
Competitor migrators (Directorist / GeoDirectory / WPBDP / ListingPro) Yes CLI + admin Yes + Visual Importer (mapping UI)
Google Places import (single + bulk) Yes
Visual bulk importer (auto-detect fields + preview) Yes

Integrations

Capability Free Pro
WooCommerce (credits via WC product) Yes
WooCommerce Subscriptions Yes
MemberPress Yes
Paid Memberships Pro Yes
WooMemberships Yes
BuddyPress activity sync (listing actions → activity stream) Yes
Stripe / PayPal (direct via the bundled SDK gateways) Yes
License / auto-updates (Pro license server at wblistora.com) Yes
Akismet Yes Yes
Google Maps API Yes

Reverse marketplace ("Needs")

Capability Free Pro
Buyer posts a need ("Looking for caterer in Brooklyn") Yes
Needs grid + filters (type, urgency, budget) Yes
Business responds with a quote Yes
Needs dashboard tab for buyers + responders Yes
Auto-match by type + location Yes

Developer surface

Capability Free Pro
REST API Yes 55 routes Yes +65 endpoints (62 unique routes)
Action / filter hooks Yes 226 fired hooks (120 actions + 106 filters) Yes adds extension points
WP-CLI commands Yes 8: stats, reindex, listing-types, import, export, repair, migrate, demo Yes Pro QA seeder (wp listora-pro demo seed/remove)
Template overrides (WooCommerce-style) Yes Yes
Custom capabilities Yes 15 stored caps + 1 virtual (view_listora_dashboard) granted at runtime Yes + 3 Pro caps (wb_listora_pro_view_analytics, manage_listora_moderators, reverse-listings caps)
Interactivity API (single store) Yes Yes extends
Block development kit (shared editor controls, hooks, utils) Yes Yes
Action Scheduler (bundled — bullet-proof background jobs) Yes 3.9.3 vendored Yes consumes Free's copy

Compatibility

Requirement Free + Pro
PHP 7.4+
WordPress 6.9+
MySQL / MariaDB 5.7+ / 10.3+
Translation-ready (wb-listora text domain) Yes
RTL stylesheets Yes
Multisite Yes
Headless (Next.js / Astro / mobile via REST) Yes

What this means for you

You're building… What you need
Open directory of free listings Free only
Niche directory (yoga studios, food trucks, …) with submission gate Free only
Job board for a single industry Free is enough
Paid business directory (vendors pay to list) Free + Pro
Premium listings with featured rotation Free + Pro
B2B services marketplace with lead capture Free + Pro (Lead Forms)
Reverse marketplace where buyers post needs Free + Pro (Needs)
Multi-city / multi-vertical directory with SEO landing pages Free + Pro (SEO Pages)
Membership-gated directory Free + Pro (with MemberPress / PMP / WooMemberships)
Community + directory hybrid Free + Pro (+ BuddyPress)
White-label / agency reseller Free + Pro (White Label feature)

Related

Setup & Configuration

Installation & Activation

Installation Admin Page — admin UI screenshot (1.0.5)

Requirements

  • WordPress 6.4 or higher
  • PHP 7.4 or higher
  • MySQL 5.7+ or MariaDB 10.3+

Install from WordPress.org

  1. Go to Plugins > Add New in your WordPress admin
  2. Search for "WB Listora"
  3. Click Install Now, then Activate

Install from ZIP

  1. Download the plugin ZIP from wblistora.com
  2. Go to Plugins > Add New > Upload Plugin
  3. Choose the ZIP file and click Install Now
  4. Click Activate

Listora Dashboard — first-look admin overview after activation

After Activation

WB Listora automatically:

  • Creates 10 custom database tables for fast queries
  • Registers the listora_listing post type and taxonomies
  • Adds the Listora menu to your admin sidebar
  • Redirects you to the Setup Wizard

Verify Installation

Check that everything is working:

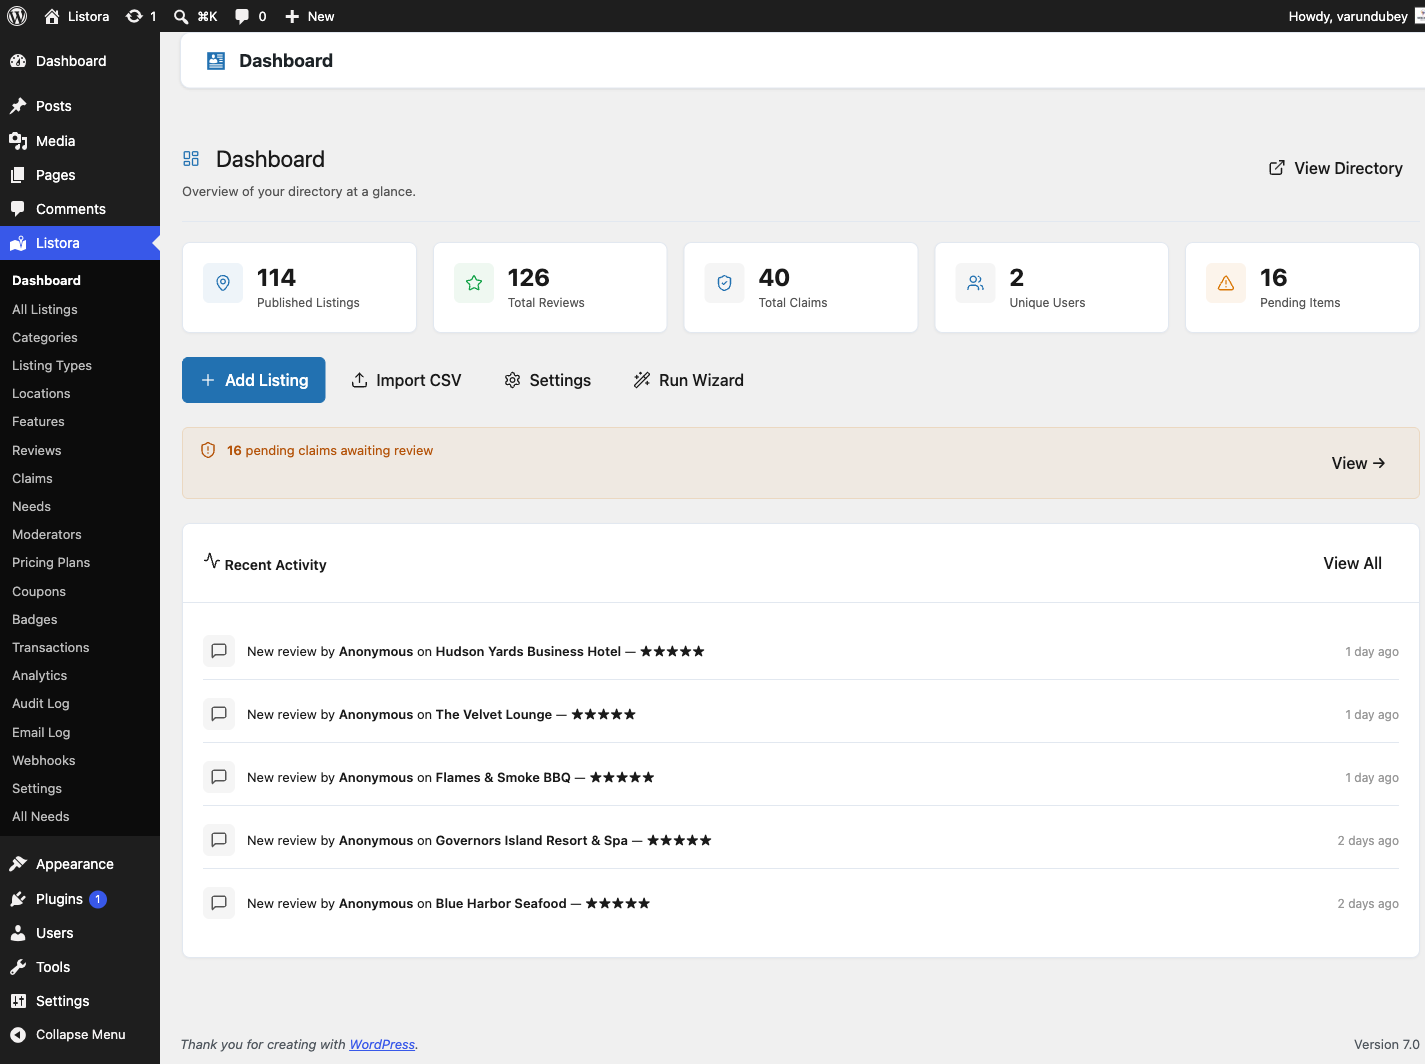
  1. Go to Listora > Dashboard — you should see the main dashboard
  2. Go to Listora > Settings — verify settings are accessible
  3. Visit any page on your site — no errors should appear

Troubleshooting

Plugin won't activate:

  • Ensure PHP 7.4+ is installed (php -v in terminal)
  • Check for conflicts: deactivate other plugins temporarily

Database tables not created:

  • Deactivate and reactivate the plugin
  • Check your database user has CREATE TABLE permissions

Menu not appearing:

  • Clear your browser cache
  • Check your user role has manage_options capability

Related

Setup Wizard

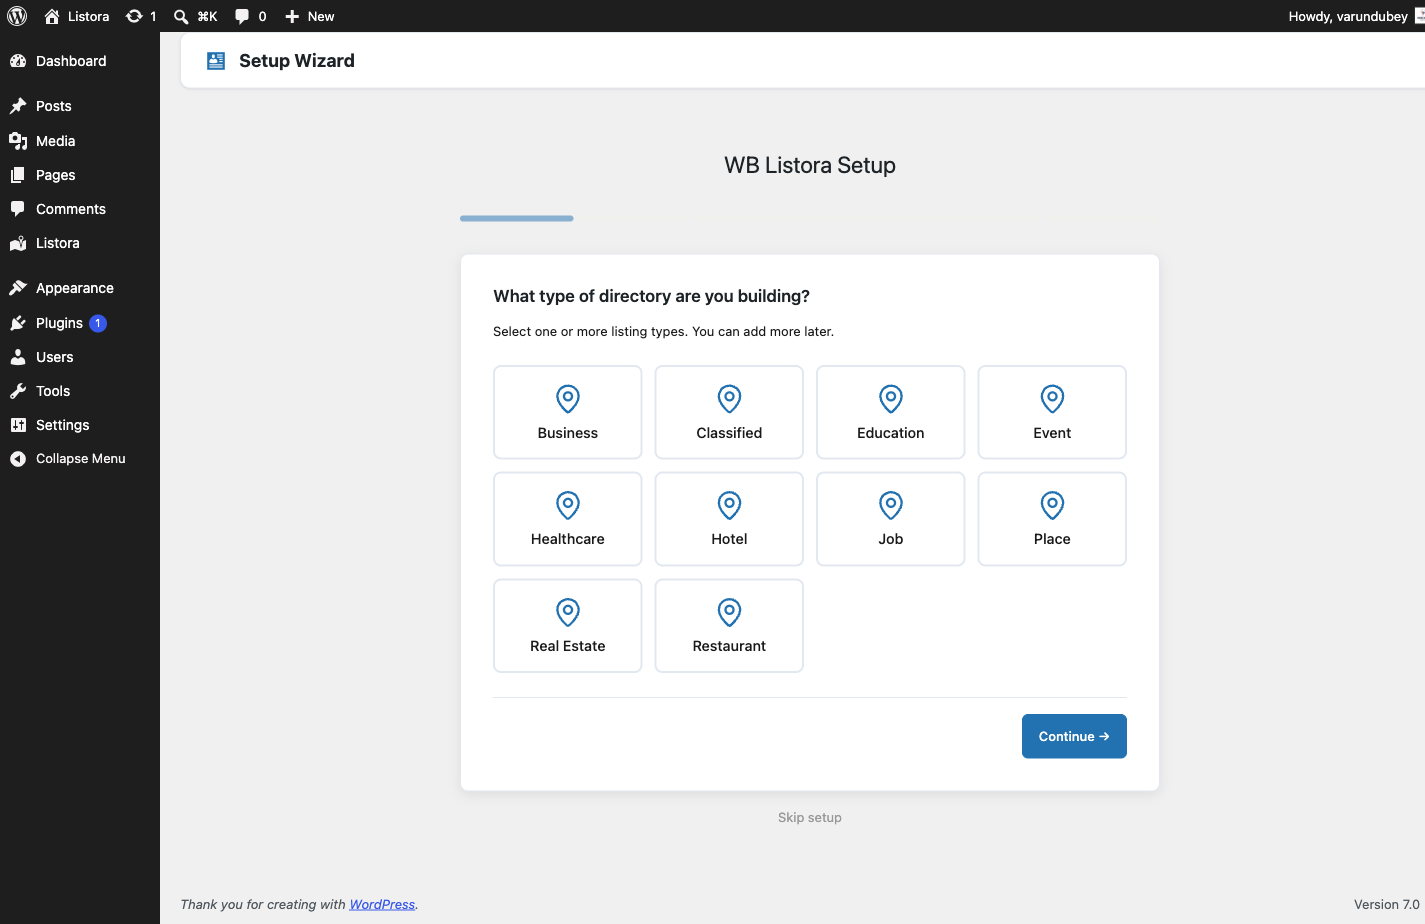
The Setup Wizard runs automatically after activation and walks you through configuring your directory in 6 steps.

Setup Wizard Step1 — admin UI screenshot (1.0.5)

Step 1: Welcome

Choose your directory type — the wizard pre-configures settings based on your choice:

  • General Directory — businesses, services, shops
  • Restaurant Directory — restaurants, cafes, bars
  • Hotel Directory — hotels, resorts, vacation rentals
  • Real Estate — properties, apartments, houses
  • Custom — start from scratch

Step 2: Listing Types

Select which listing types to enable. Each type comes with pre-configured fields:

  • Business (8 fields)
  • Restaurant (14 fields including cuisine, price range, hours)
  • Hotel (12 fields including star rating, amenities)
  • Real Estate (12 fields including price, bedrooms, area)
  • Healthcare, Education, Event, Job, Automotive, Pet Services

You can add, remove, or customize types later from Listora > Listing Types.

Step 3: Map Settings

Configure your map provider and defaults:

  • Map Provider: OpenStreetMap (free, no API key) or Google Maps (Pro)
  • Default Location: Set the center point for your directory
  • Default Zoom Level: How zoomed in the map starts

Step 4: Pages

The wizard creates essential pages automatically:

  • Directory — main listing search and grid page
  • Add Listing — frontend submission form
  • Dashboard — user dashboard for managing listings
  • Compare — side-by-side listing comparison

Step 5: Demo Content

Optionally install demo listings to see how your directory looks. Demo content includes 20 listings across multiple types with images, reviews, and map locations.

Step 6: Done

Your directory is ready. The wizard shows links to:

  • View your directory
  • Add your first listing
  • Customize settings
  • Read the documentation

Re-running the Wizard

Go to Listora > Settings > General and click Re-run Setup Wizard, or navigate directly to wp-admin/admin.php?page=listora-setup.

Related

Creating Your Directory Page

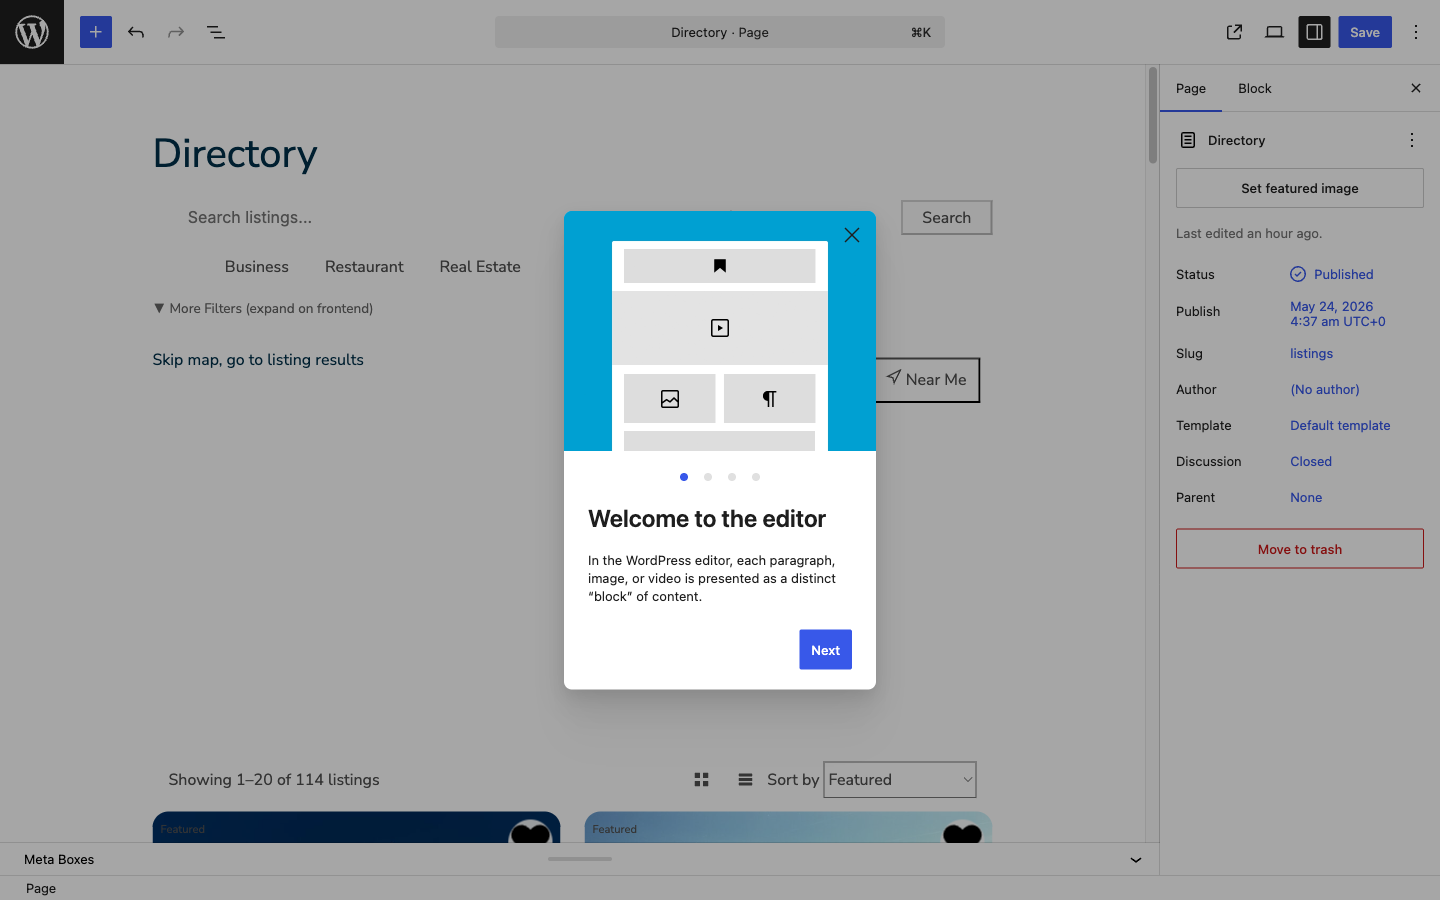
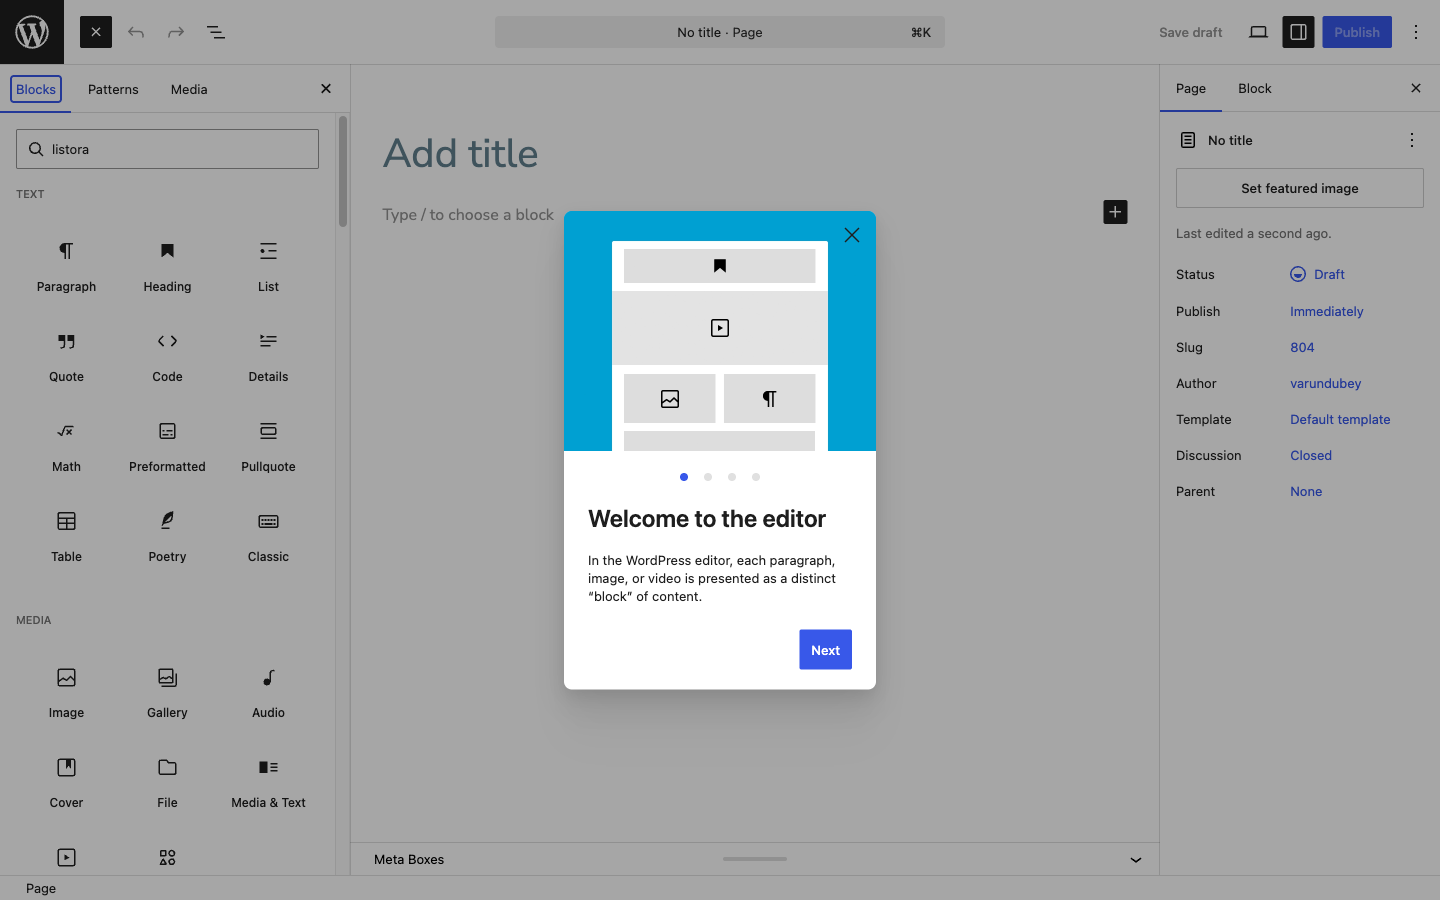
WB Listora uses WordPress blocks to build directory pages. You can combine blocks in the block editor to create any layout.

Directory Page Blocks — admin UI screenshot (1.0.5)

Quick Start: Full Directory Page

  1. Create a new page (or edit the one the wizard created)
  2. Add the Listing Search block — provides the search bar with filters
  3. Add the Listing Grid block below it — displays the listing cards
  4. Set both blocks to Wide alignment for full-width layout
  5. Publish the page

Available Blocks

Block Purpose
Listing Search Search bar with keyword, location, type filters, and advanced filters
Listing Grid Responsive card grid with sort, view toggle, and pagination
Listing Map Interactive map with markers and clustering
Listing Card Single listing card (for custom layouts)
Listing Detail Full listing detail page (auto-used on single listings)
Listing Reviews Review list with submission form
Listing Submission Frontend listing submission form
Listing Categories Category grid with icons and counts
Listing Featured Featured listings carousel
Listing Calendar Event calendar view
User Dashboard User's listing management dashboard

Layout Examples

Search + Grid (Simple)

[Listing Search - wide]
[Listing Grid - wide, 3 columns]

Search + Grid + Map (Split)

[Listing Search - wide]
[Columns: 65% / 35%]
[Listing Grid - 2 columns] | [Listing Map - 600px]
Category Landing Page

[Listing Categories - wide]
[Listing Featured - wide]
[Listing Search - wide]
[Listing Grid - wide]

Setting as Homepage

  1. Go to Settings > Reading
  2. Select A static page
  3. Set Homepage to your directory page
  4. Save

Block Settings

Each block has settings in the sidebar:

  • Listing Grid: columns (1-4), items per page, default sort, listing type filter
  • Listing Search: layout (horizontal/stacked), show type tabs, show filters
  • Listing Map: height, default zoom, clustering, search on drag

Related

Listing Types

What it does

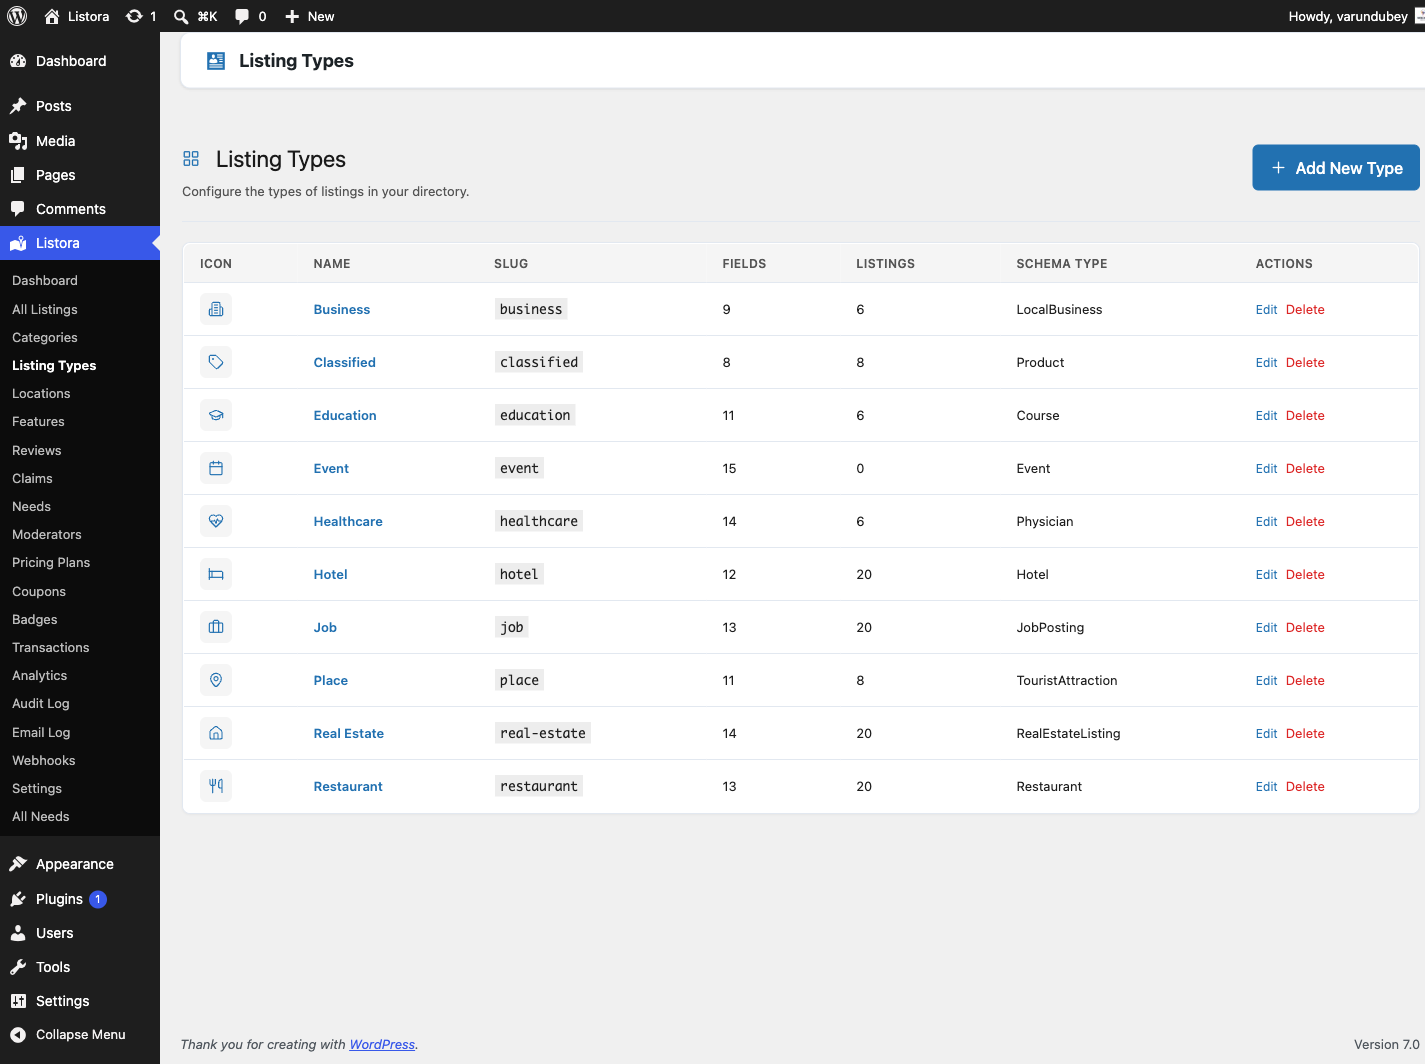
Listing types define the shape of your directory. Each type determines which fields appear on submissions, what schema markup is output for SEO, and what filters are available in search. You can use the built-in types or create completely custom ones.

Listing Types — screenshot from the modernized 1.0.5 site

Why you'd use it

  • A restaurant directory needs cuisine, price range, and hours fields. A real estate directory needs bedrooms, square footage, and price. Listing types give each category its own fields.
  • Schema.org markup per type improves how Google displays your listings in search results.
  • Separate types mean visitors filter by the right attributes — restaurant visitors don't see hotel amenity checkboxes.
  • You can create as many custom types as your directory needs.

How to use it

For site owners (admin steps)

Using built-in types:

  1. Go to Listora → Listing Types.
  2. The 10 built-in types are listed with their field count, active listing count, and status.
  3. Click any type to view or edit its fields and settings.

Built-in types:

Type Fields Schema.org
Business 8 LocalBusiness
Restaurant 14 Restaurant
Hotel 12 Hotel
Real Estate 12 RealEstateListing
Healthcare 10 MedicalOrganization
Education 10 EducationalOrganization
Event 10 Event
Job 10 JobPosting
Automotive 10 AutoDealer
Pet Services 8 LocalBusiness

Creating a custom type:

  1. Go to Listora → Listing Types and click Add New Type.
  2. Set the type name, icon (choose from the Lucide icon picker), color, and Schema.org type.
  3. Add field groups using the visual builder. A field group is a section (e.g., "Contact Info", "Hours").
  4. Inside each group, add individual fields. Supported field types:
  • Basic: Text, Textarea, Number, Email, Phone, URL
  • Choice: Select, Multi-Select, Checkbox, Radio
  • Date & Time: Date, Time, Date & Time
  • Media: Gallery, File Upload, Video
  • Location: Map Location
  • Structured: Business Hours, Social Links, Price Range
  1. Configure type settings: enable/disable map, reviews, and submissions for this type.
  2. Click Save Type.

Modifying an existing type:

  1. Go to Listora → Listing Types and click the type name.
  2. Add, remove, or reorder fields in the visual builder.
  3. Save. Existing listings of that type keep their saved data; any removed fields no longer appear on new submissions.

Deleting a type:

Delete a type from Listora → Listing Types. Listings assigned to that type are preserved — they remain as published posts, but they no longer have a type assigned.

Tips

  • Start with the Setup Wizard (see Setup Wizard) — it installs pre-configured demo types with realistic field sets. Editing a demo type is faster than building from scratch.
  • Use the Event type for time-limited listings (concerts, pop-up markets). The date fields power the Listing Calendar block.
  • Assign a unique color to each type — it appears on listing cards and map pins, helping visitors distinguish types at a glance.
  • If you remove a field from a type, the stored data for that field is not deleted from the database. If you re-add the same field later, existing data will reappear.
  • Custom types support the same search filters as built-in types. Price Range, Rating, and Feature filters are available on any type.

Common issues

Symptom Fix
New type not appearing in submission form Clear the page cache; new types register on the next request
Custom field not saving Check the field has a unique key — duplicate keys within a type cause the latter field to be ignored
Schema.org type not appearing in Google Search Console Schema markup requires the listing to be published and indexed; allow up to a week for Google to crawl
Deleting a type breaks existing listings Listings are preserved but lose their type assignment; reassign them from the WordPress admin

Related features

Installing WB Listora Pro

Pro feature — This page covers the installation of WB Listora Pro, the premium add-on.

What it does

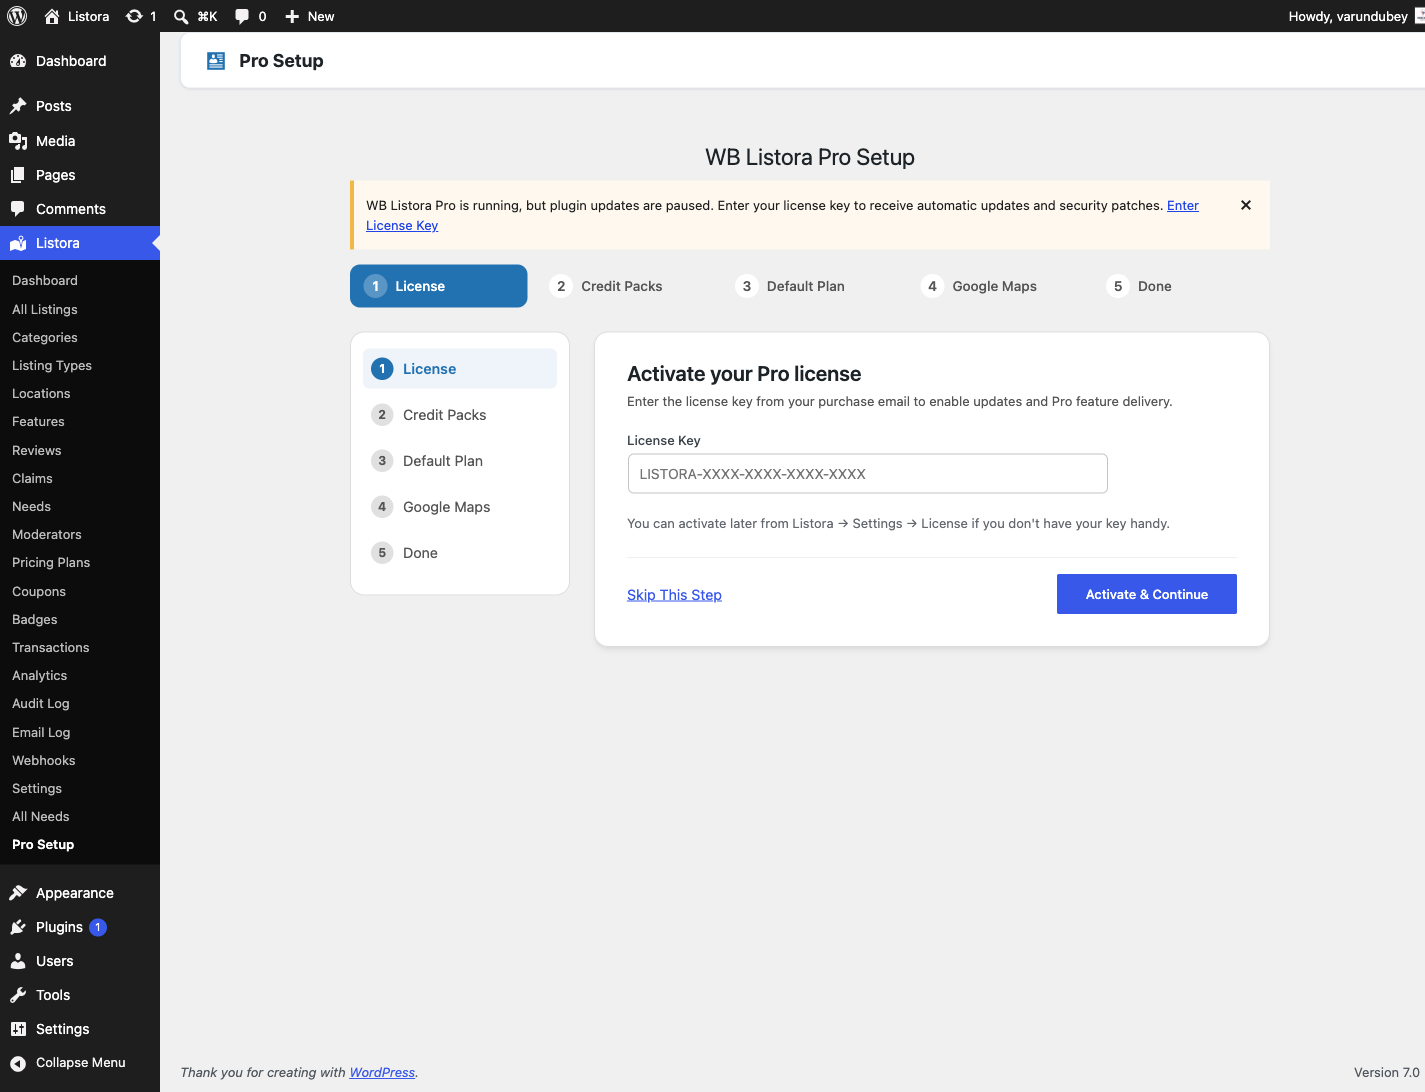
WB Listora Pro is a premium add-on for WB Listora (Free). It adds Google Maps, a credit-based payment system, analytics, multi-criteria reviews, lead forms, and more. This guide covers installing Pro and verifying it is active.

Activating Pro — screenshot from the modernized 1.0.5 site

Requirements

  • WB Listora (Free) version 1.0.5 or higher, installed and activated.
  • WordPress 6.4 or higher.
  • PHP 7.4 or higher.
  • A valid WB Listora Pro license key (from wblistora.com).

How to install

For site owners (admin steps)

  1. Log in to wblistora.com, go to your account, and download the latest wb-listora-pro.zip.
  2. In your WordPress admin, go to Plugins → Add New → Upload Plugin.
  3. Choose the ZIP file and click Install Now.
  4. Click Activate Plugin.
  5. Pro activates and you'll see a notice asking you to enter your license key.

Verify activation

  1. Go to Listora → Settings → License.
  2. Enter your license key and click Activate License.
  3. A green "License activated" notice confirms success.
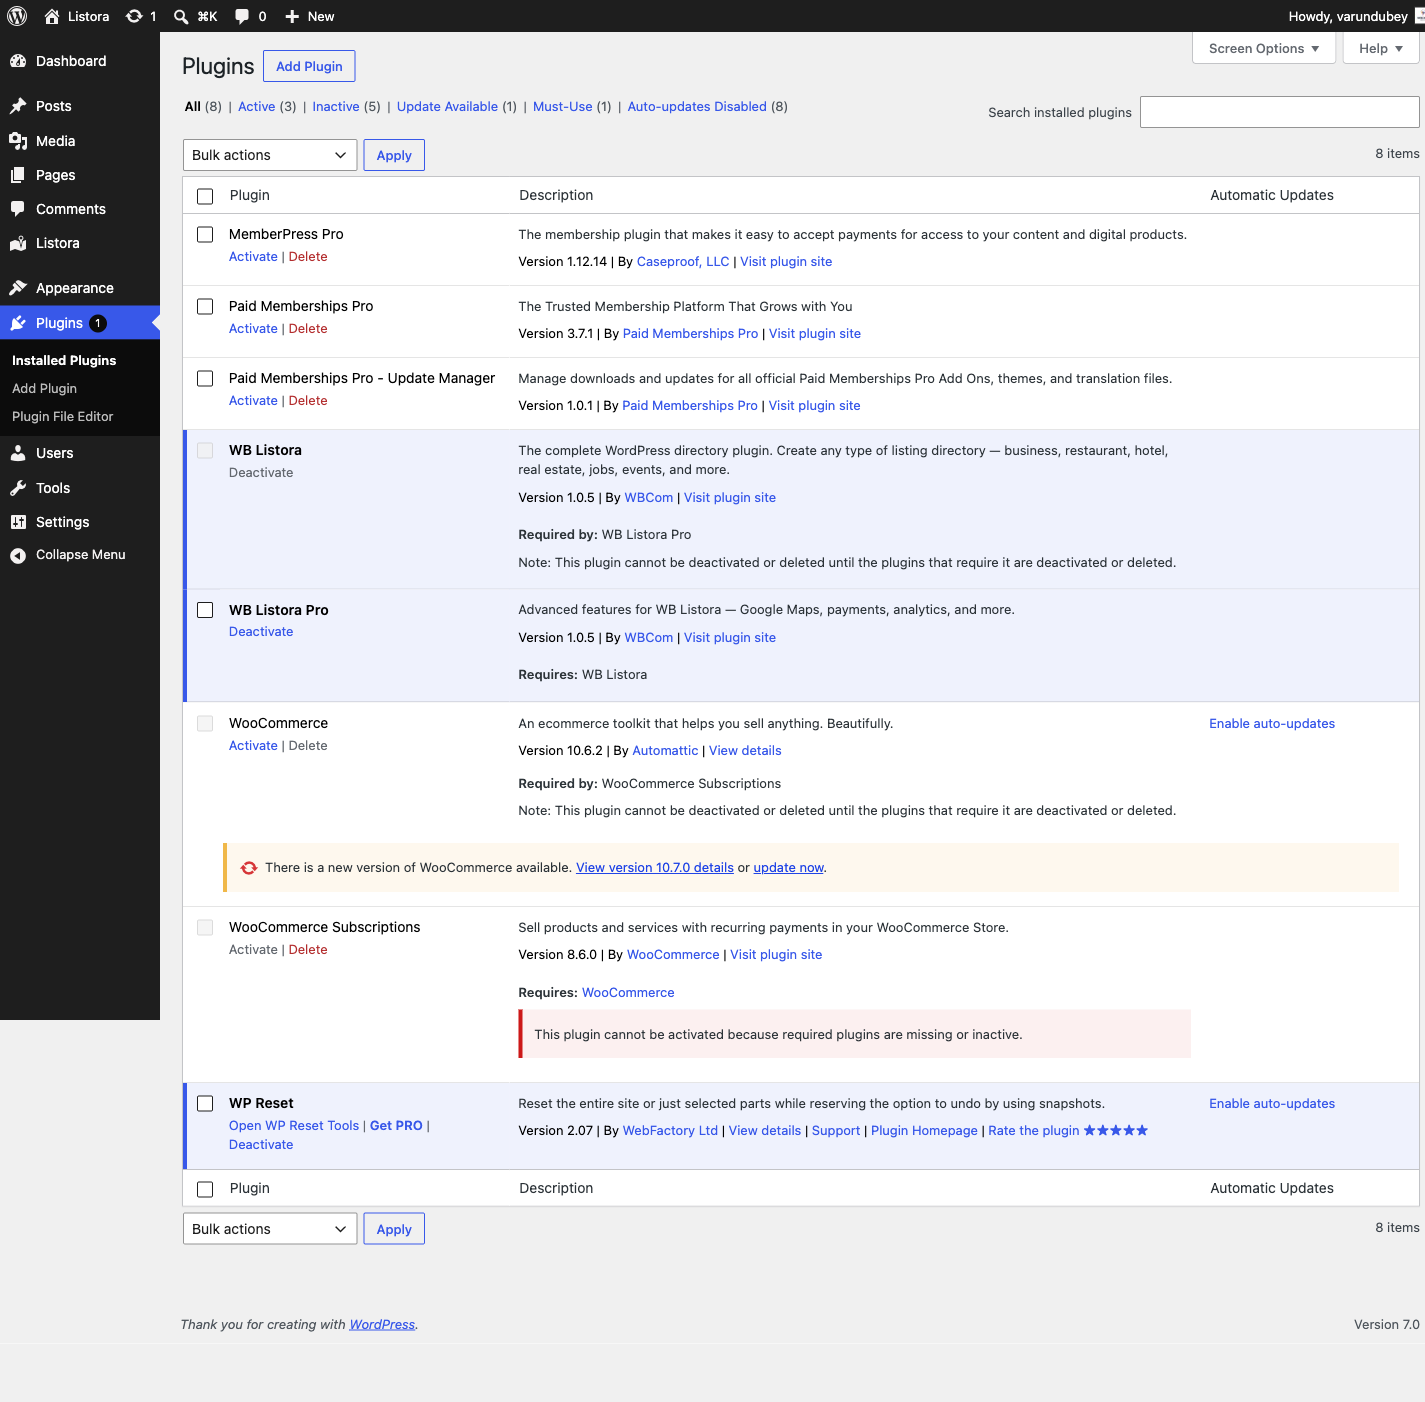
  4. Under Plugins, confirm both WB Listora and WB Listora Pro are listed as active.
  5. Go to Listora → Settings — you should see a Pro tab in the settings navigation.

Tips

  • Do not delete WB Listora (Free) after installing Pro — Pro is an add-on, not a replacement.
  • Local development environments (Local by Flywheel, DevKinsta, etc.) skip remote license validation automatically. You'll see a "local mode" notice instead of an error.
  • If you manage multiple sites, each site requires a separate license activation. Deactivate on one site before activating on another if your license has a site limit.
  • Auto-updates: once your license is active, Pro updates appear in Dashboard → Updates alongside your other plugins.

Common issues

Symptom Fix
Pro menu items not appearing Ensure WB Listora (Free) is active — Pro requires it
"Invalid license key" error Double-check the key from your account at wblistora.com; copy-paste rather than typing
ZIP upload fails Check upload_max_filesize in your PHP settings; increase to at least 32MB
Pro settings tab missing Deactivate and reactivate WB Listora Pro

Related

License Management

Pro feature — requires WB Listora Pro. Free sites do not need a license key.

What it does

Your WB Listora Pro license key unlocks all Pro features and enables automatic plugin updates directly from your WordPress dashboard. This page explains how to activate, deactivate, and renew your license.

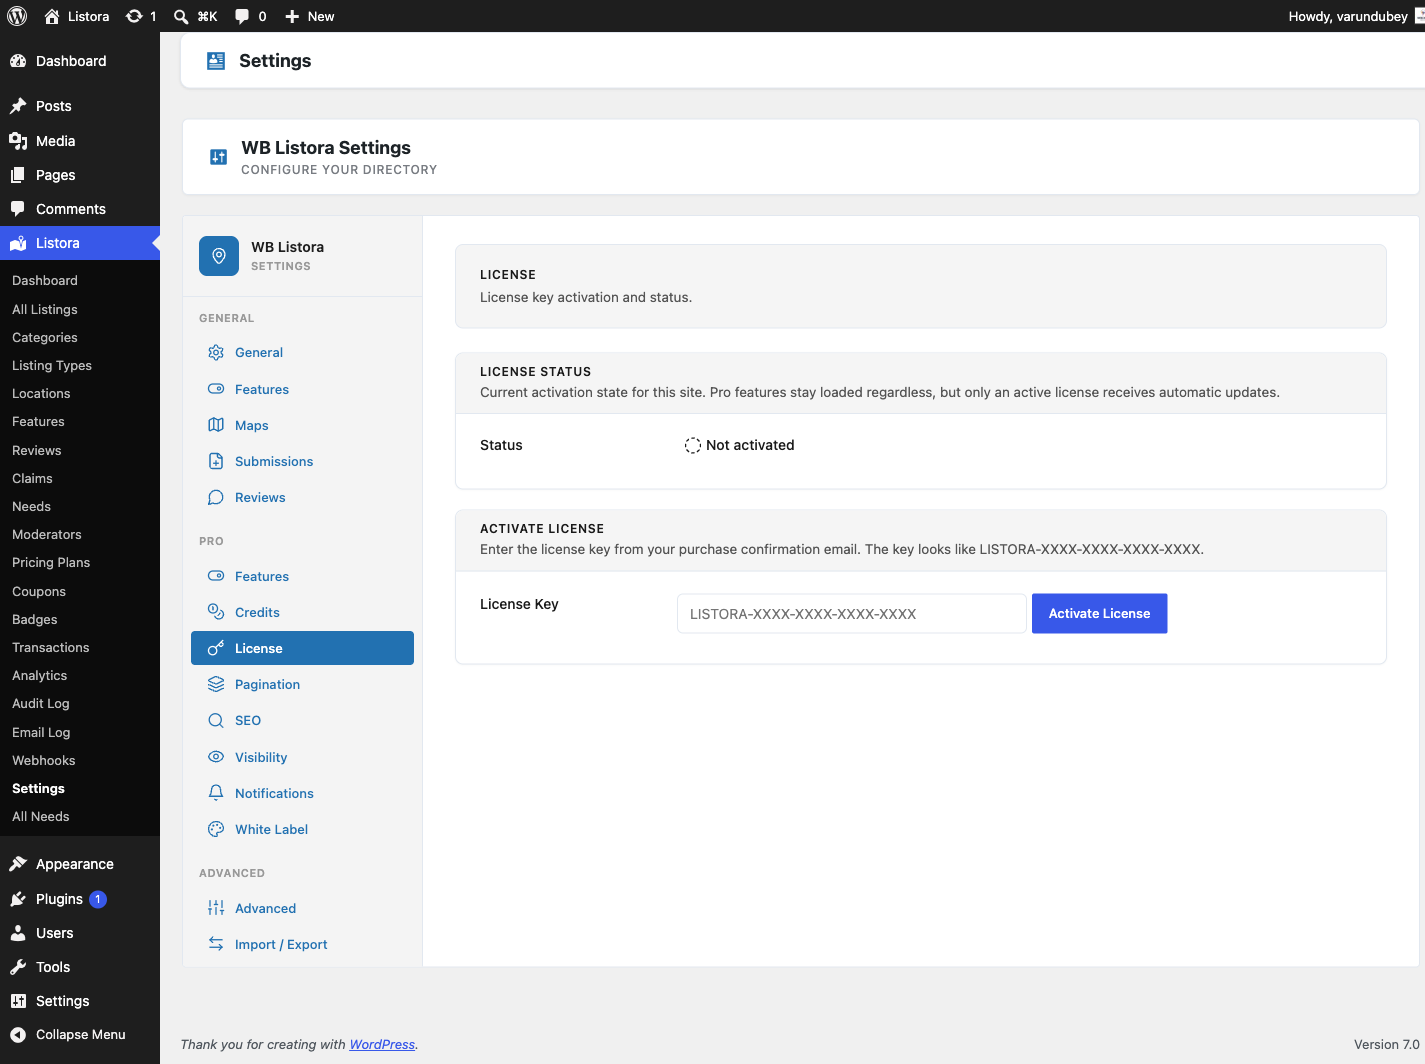
Pro License — screenshot from the modernized 1.0.5 site

Why you'd use it

  • A valid license is required to receive automatic updates and security patches.
  • Deactivating a license on one site lets you move it to another without buying a new key.
  • WB Listora automatically re-validates your license weekly so you don't need to manage it manually.

How to use it

For site owners (admin steps)

Activating a license:

  1. Go to Listora → Settings → License.
  2. Paste your license key into the License Key field.
  3. Click Activate License.
  4. A green success notice confirms activation. The license status changes to Active.

Deactivating a license:

  1. Go to Listora → Settings → License.
  2. Click Deactivate License.
  3. The key is released from this site. You can now activate it on a different site.

Renewing a license:

  1. Visit wblistora.com and log in to your account.
  2. Find your license under My Licenses and click Renew.
  3. After renewing, return to Listora → Settings → License and click Check Status to refresh the expiry date shown in WordPress.

Checking license status:

The License settings page shows:

  • Status: Active, Expired, or Invalid.
  • Expiry date: When the current license period ends.
  • Activations used: How many sites this key is currently activated on.

What happens when a license expires

  • All Pro features remain active — nothing breaks on your live site immediately.
  • Automatic updates stop. You will no longer receive new versions or security patches.
  • A notice appears in your WordPress admin reminding you to renew.
  • To restore updates, renew your license at wblistora.com and click Check Status.

Tips

  • Keep the license key stored somewhere safe (e.g., your password manager). You can always retrieve it from your wblistora.com account.
  • If you're moving your site to a new domain, deactivate the license on the old domain first, then activate on the new domain.
  • WB Listora validates the license remotely once per week. If your server blocks outbound HTTPS requests, the validation may fail — whitelist wblistora.com in your firewall rules.
  • On local development environments, remote validation is skipped. The license activates in local mode and shows a notice confirming this.

Common issues

Symptom Fix
"Invalid license key" error Check the key is copied correctly with no extra spaces
Status shows "Active" but updates don't appear Go to Dashboard → Updates and click Check Again
"Too many activations" error Deactivate the license on other sites from your wblistora.com account, then try again
License check fails on schedule Your server may block outbound requests; contact your host to allow connections to wblistora.com

Related

General Settings

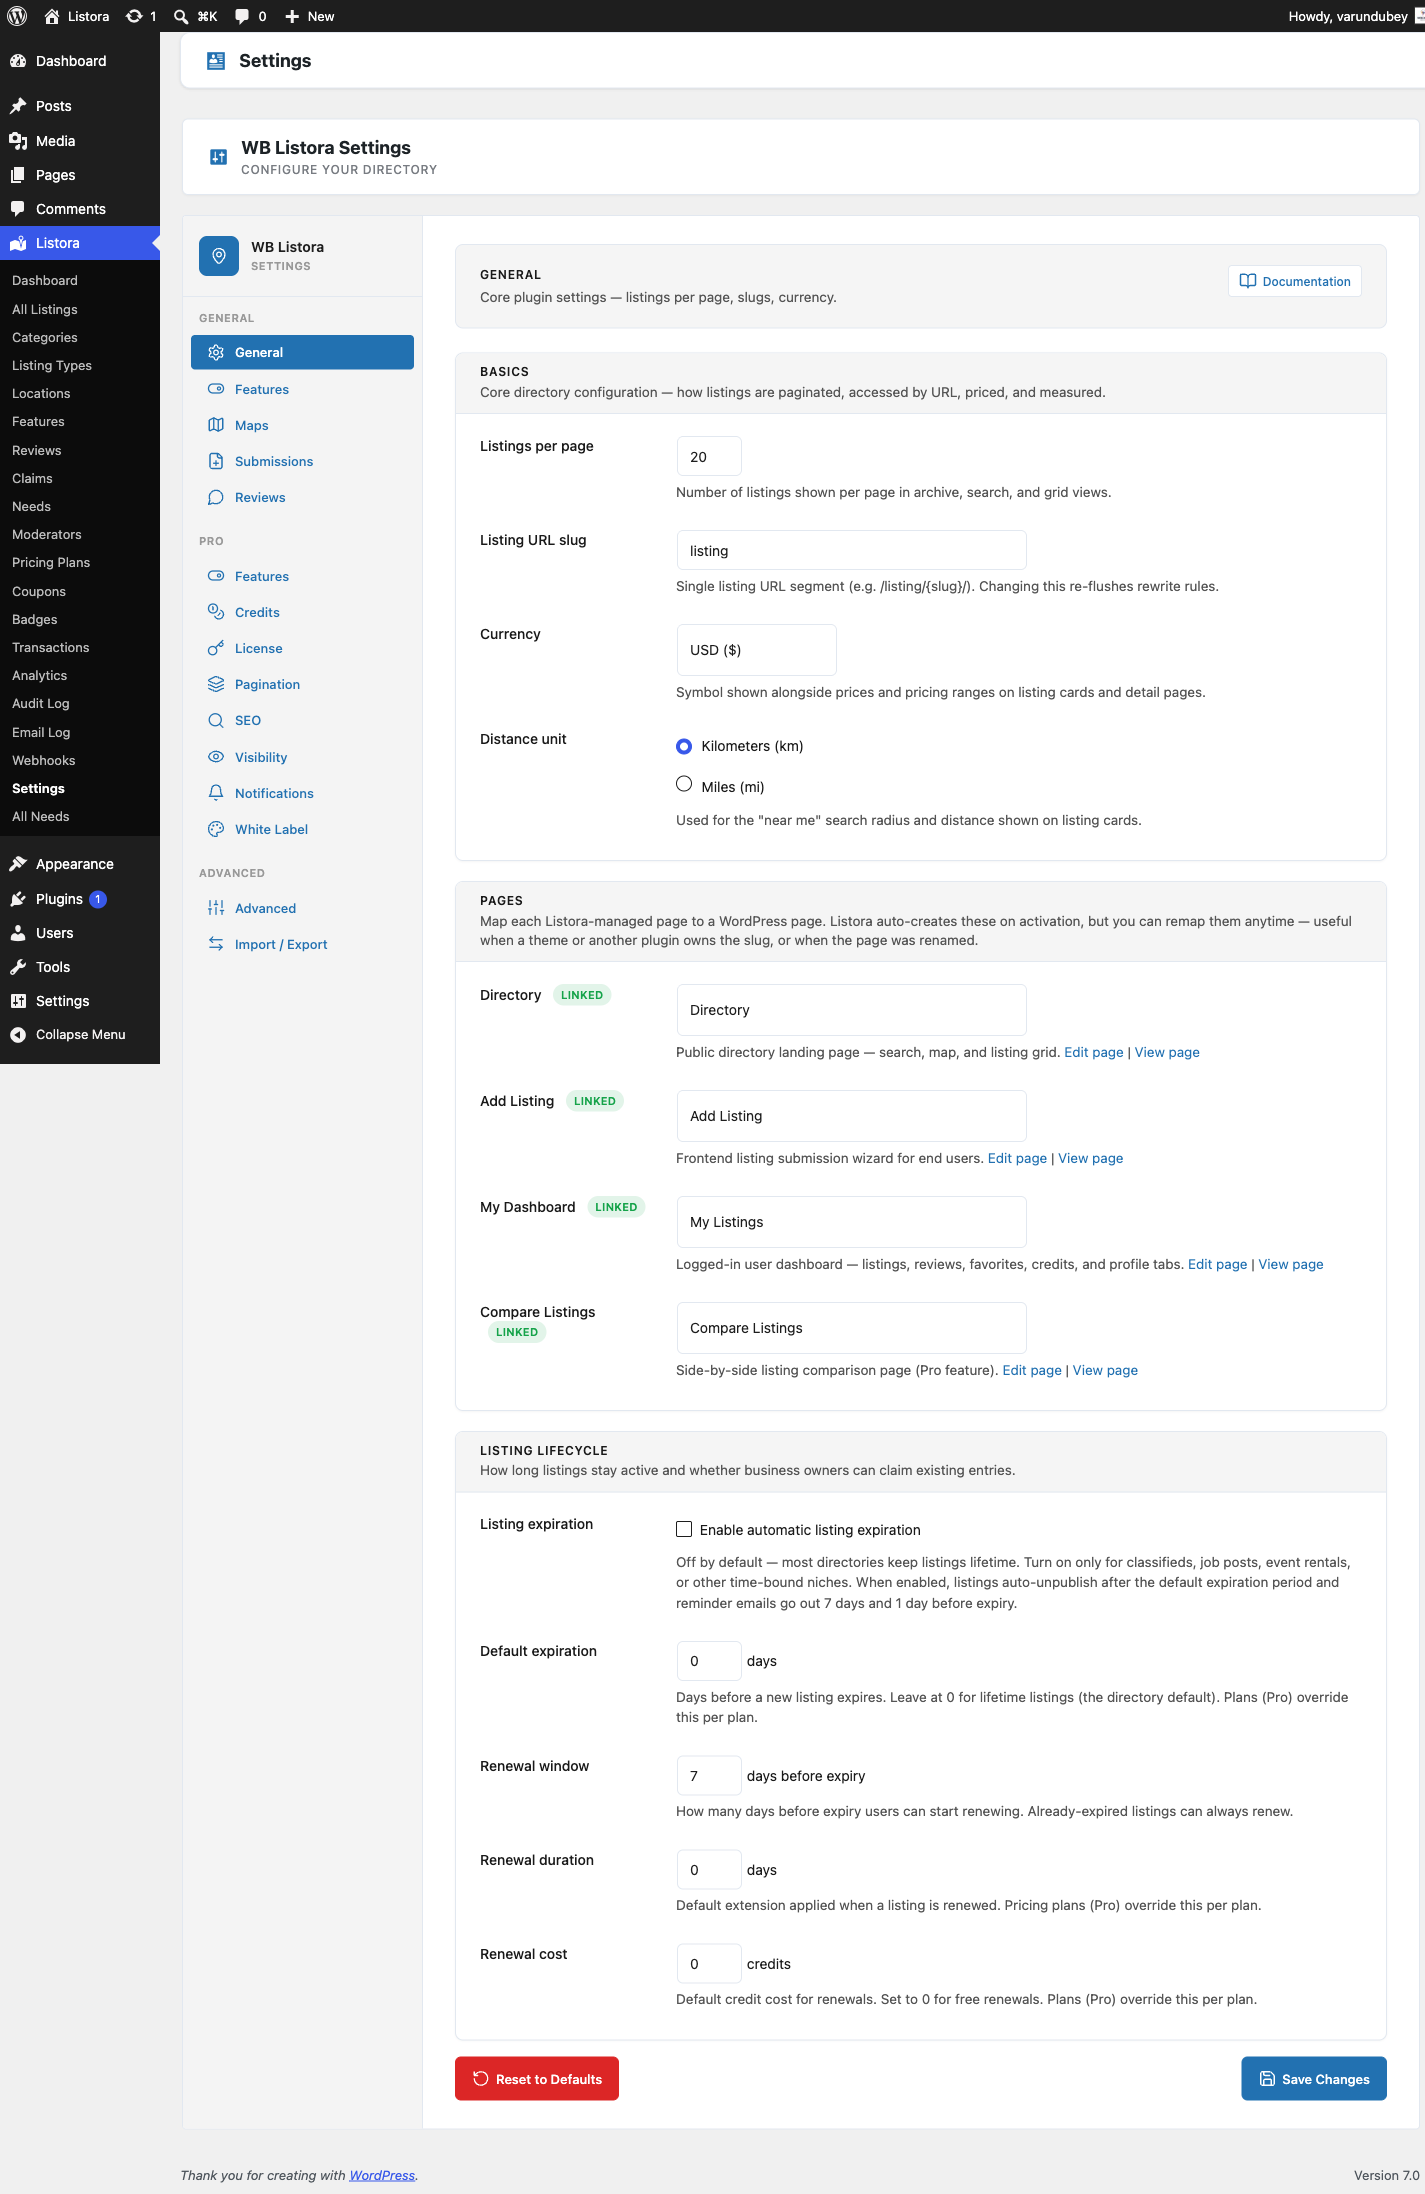
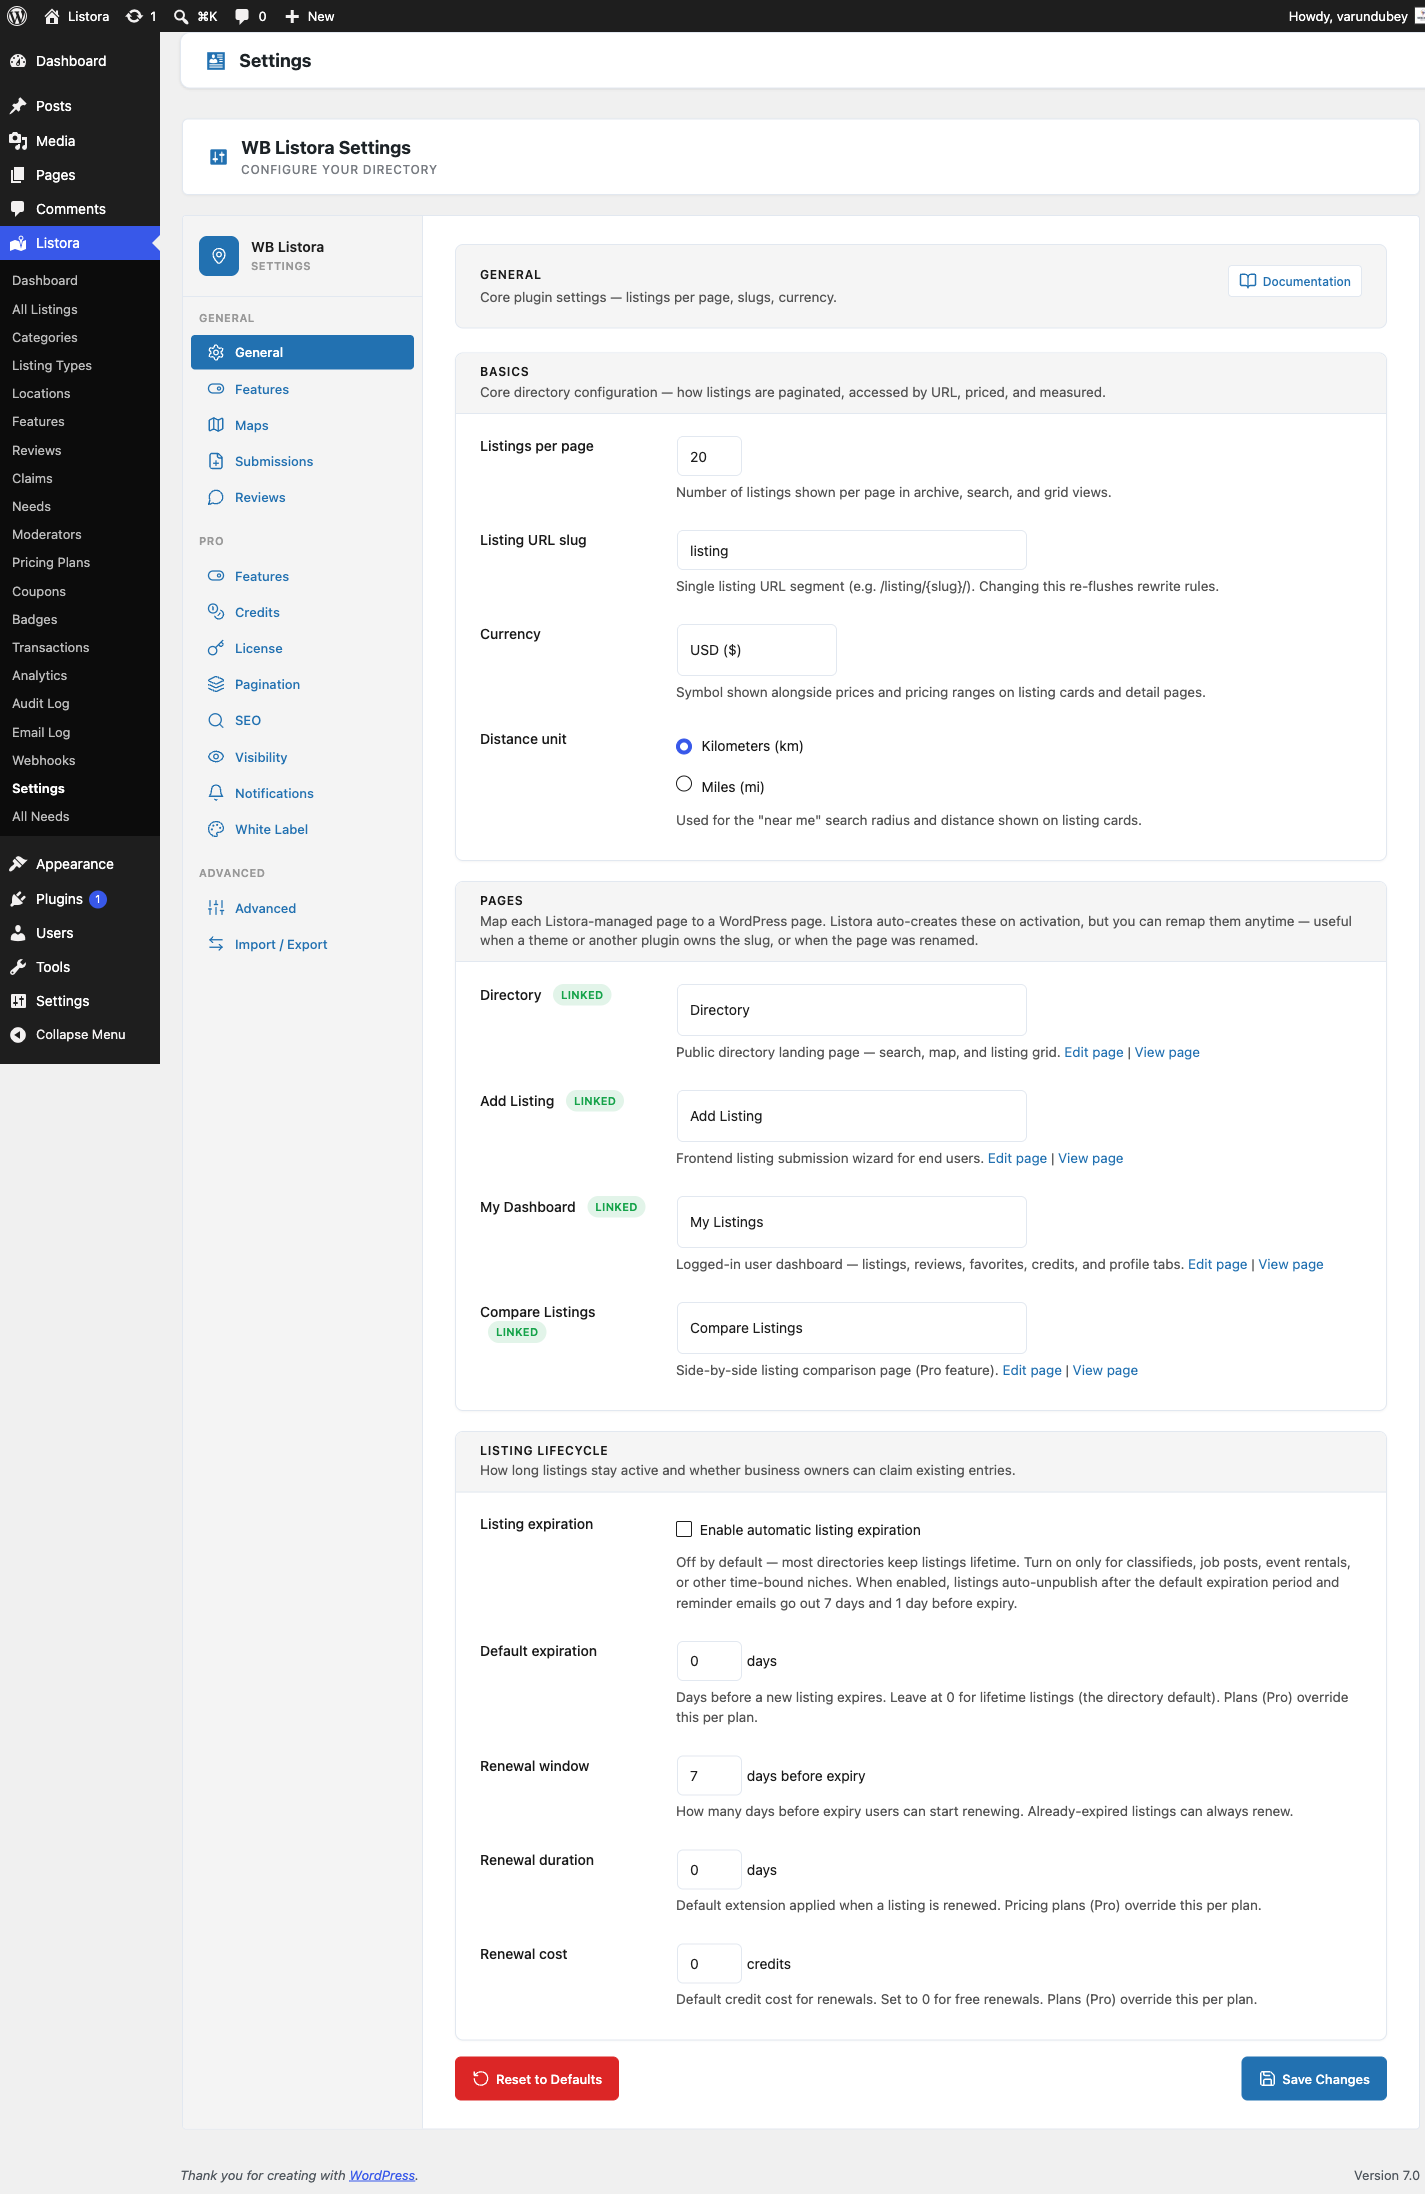
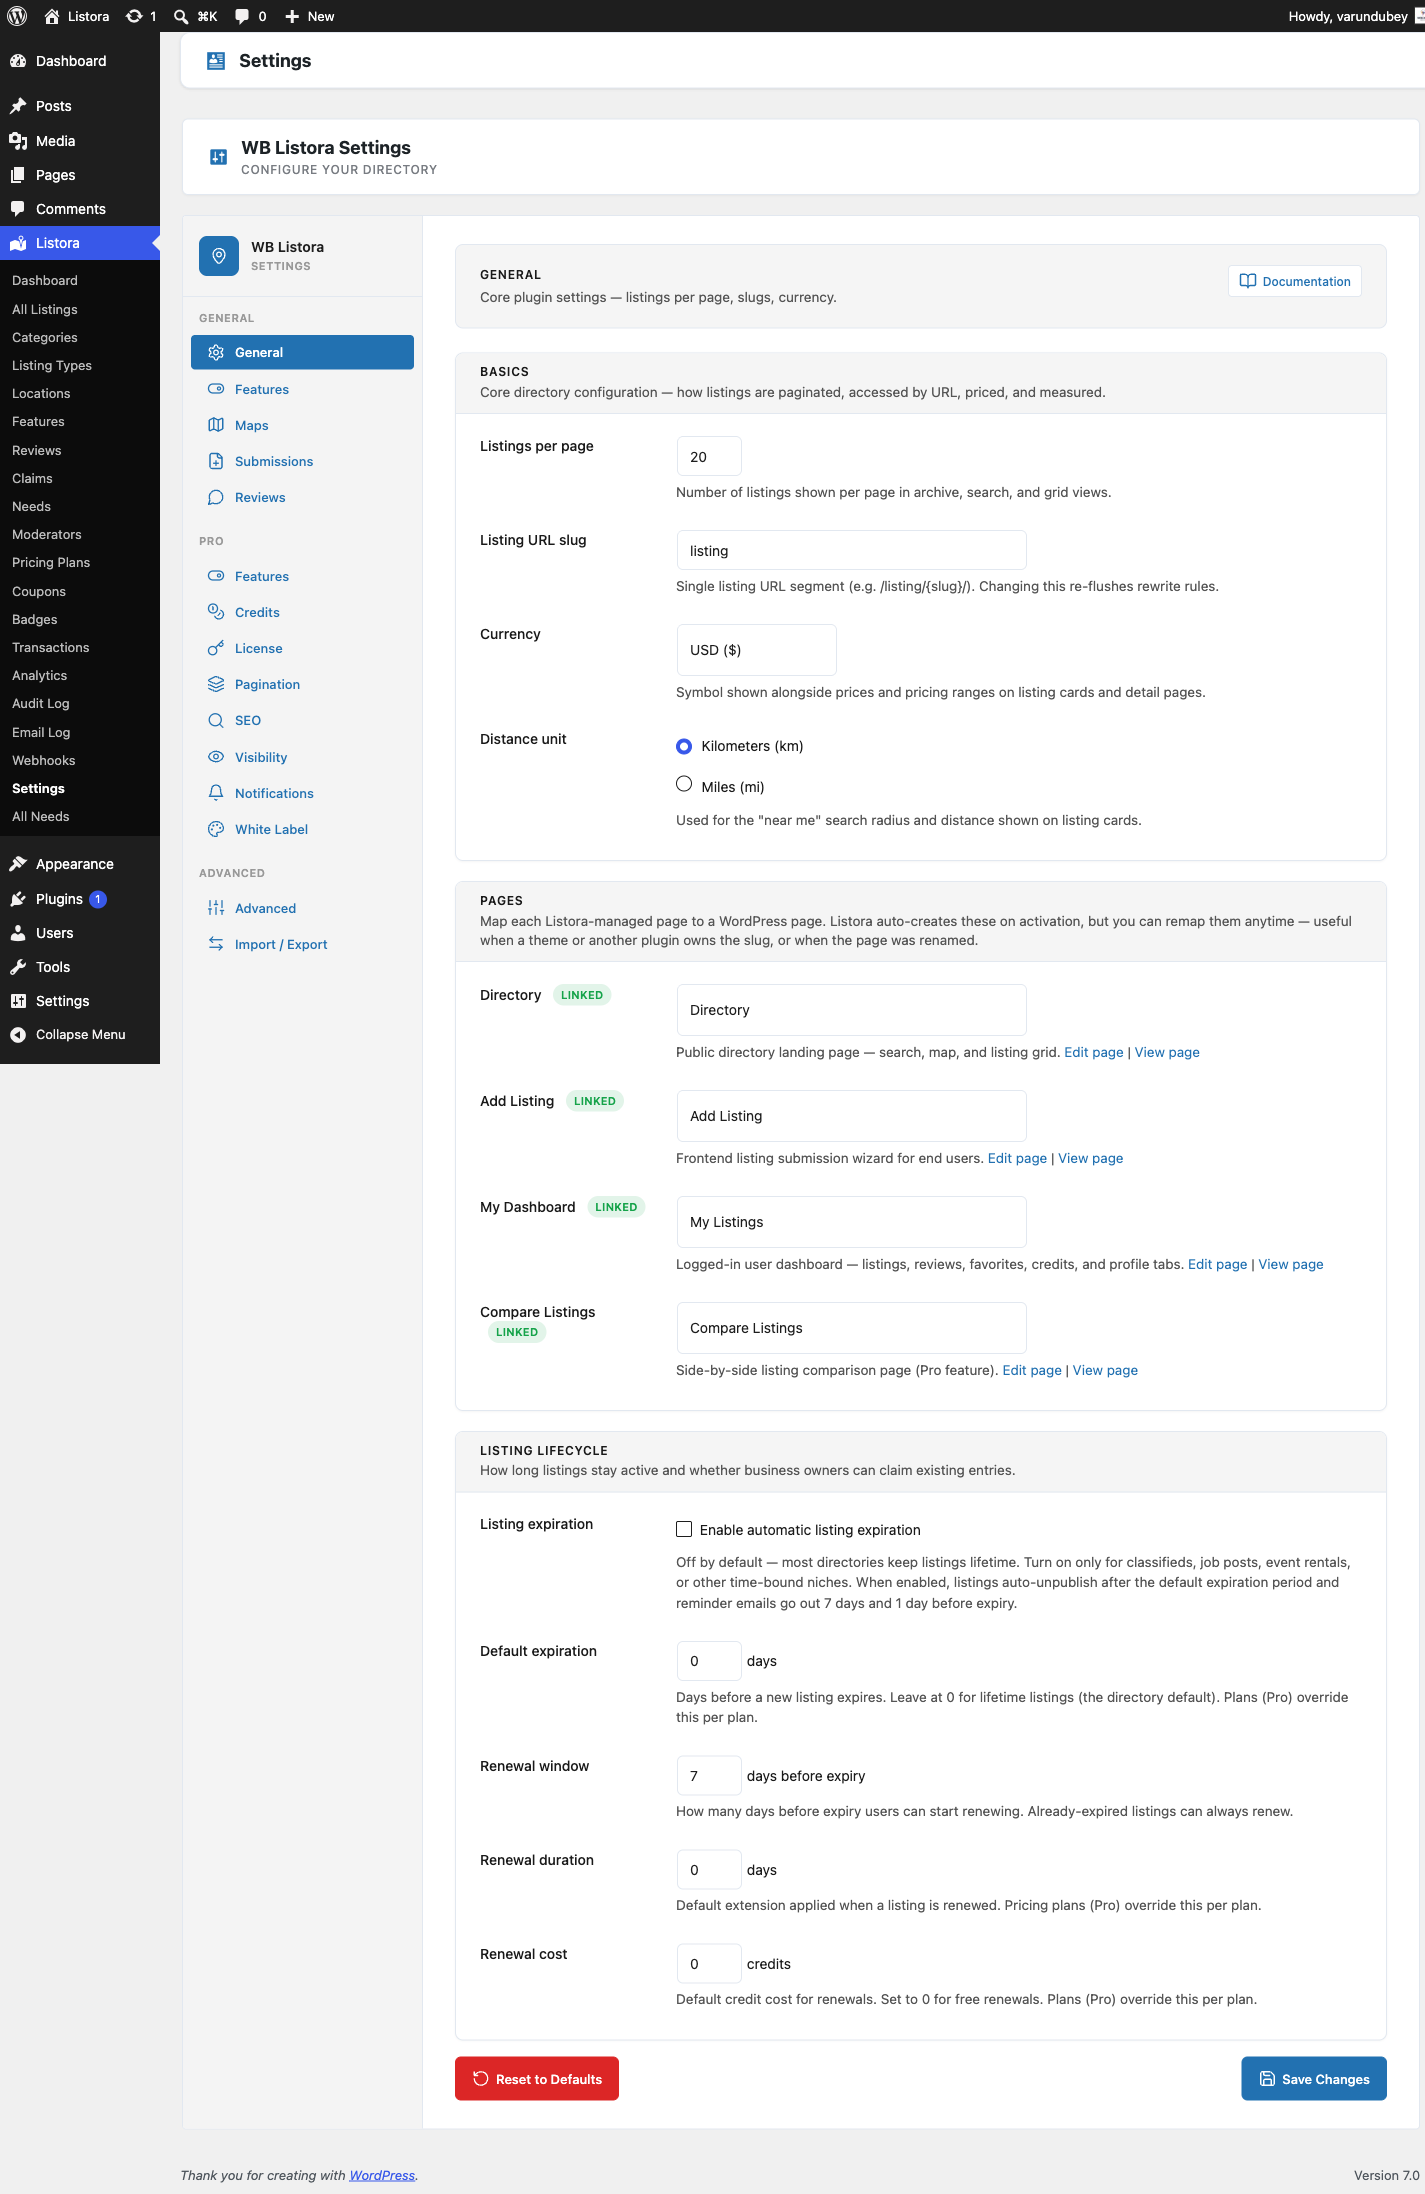
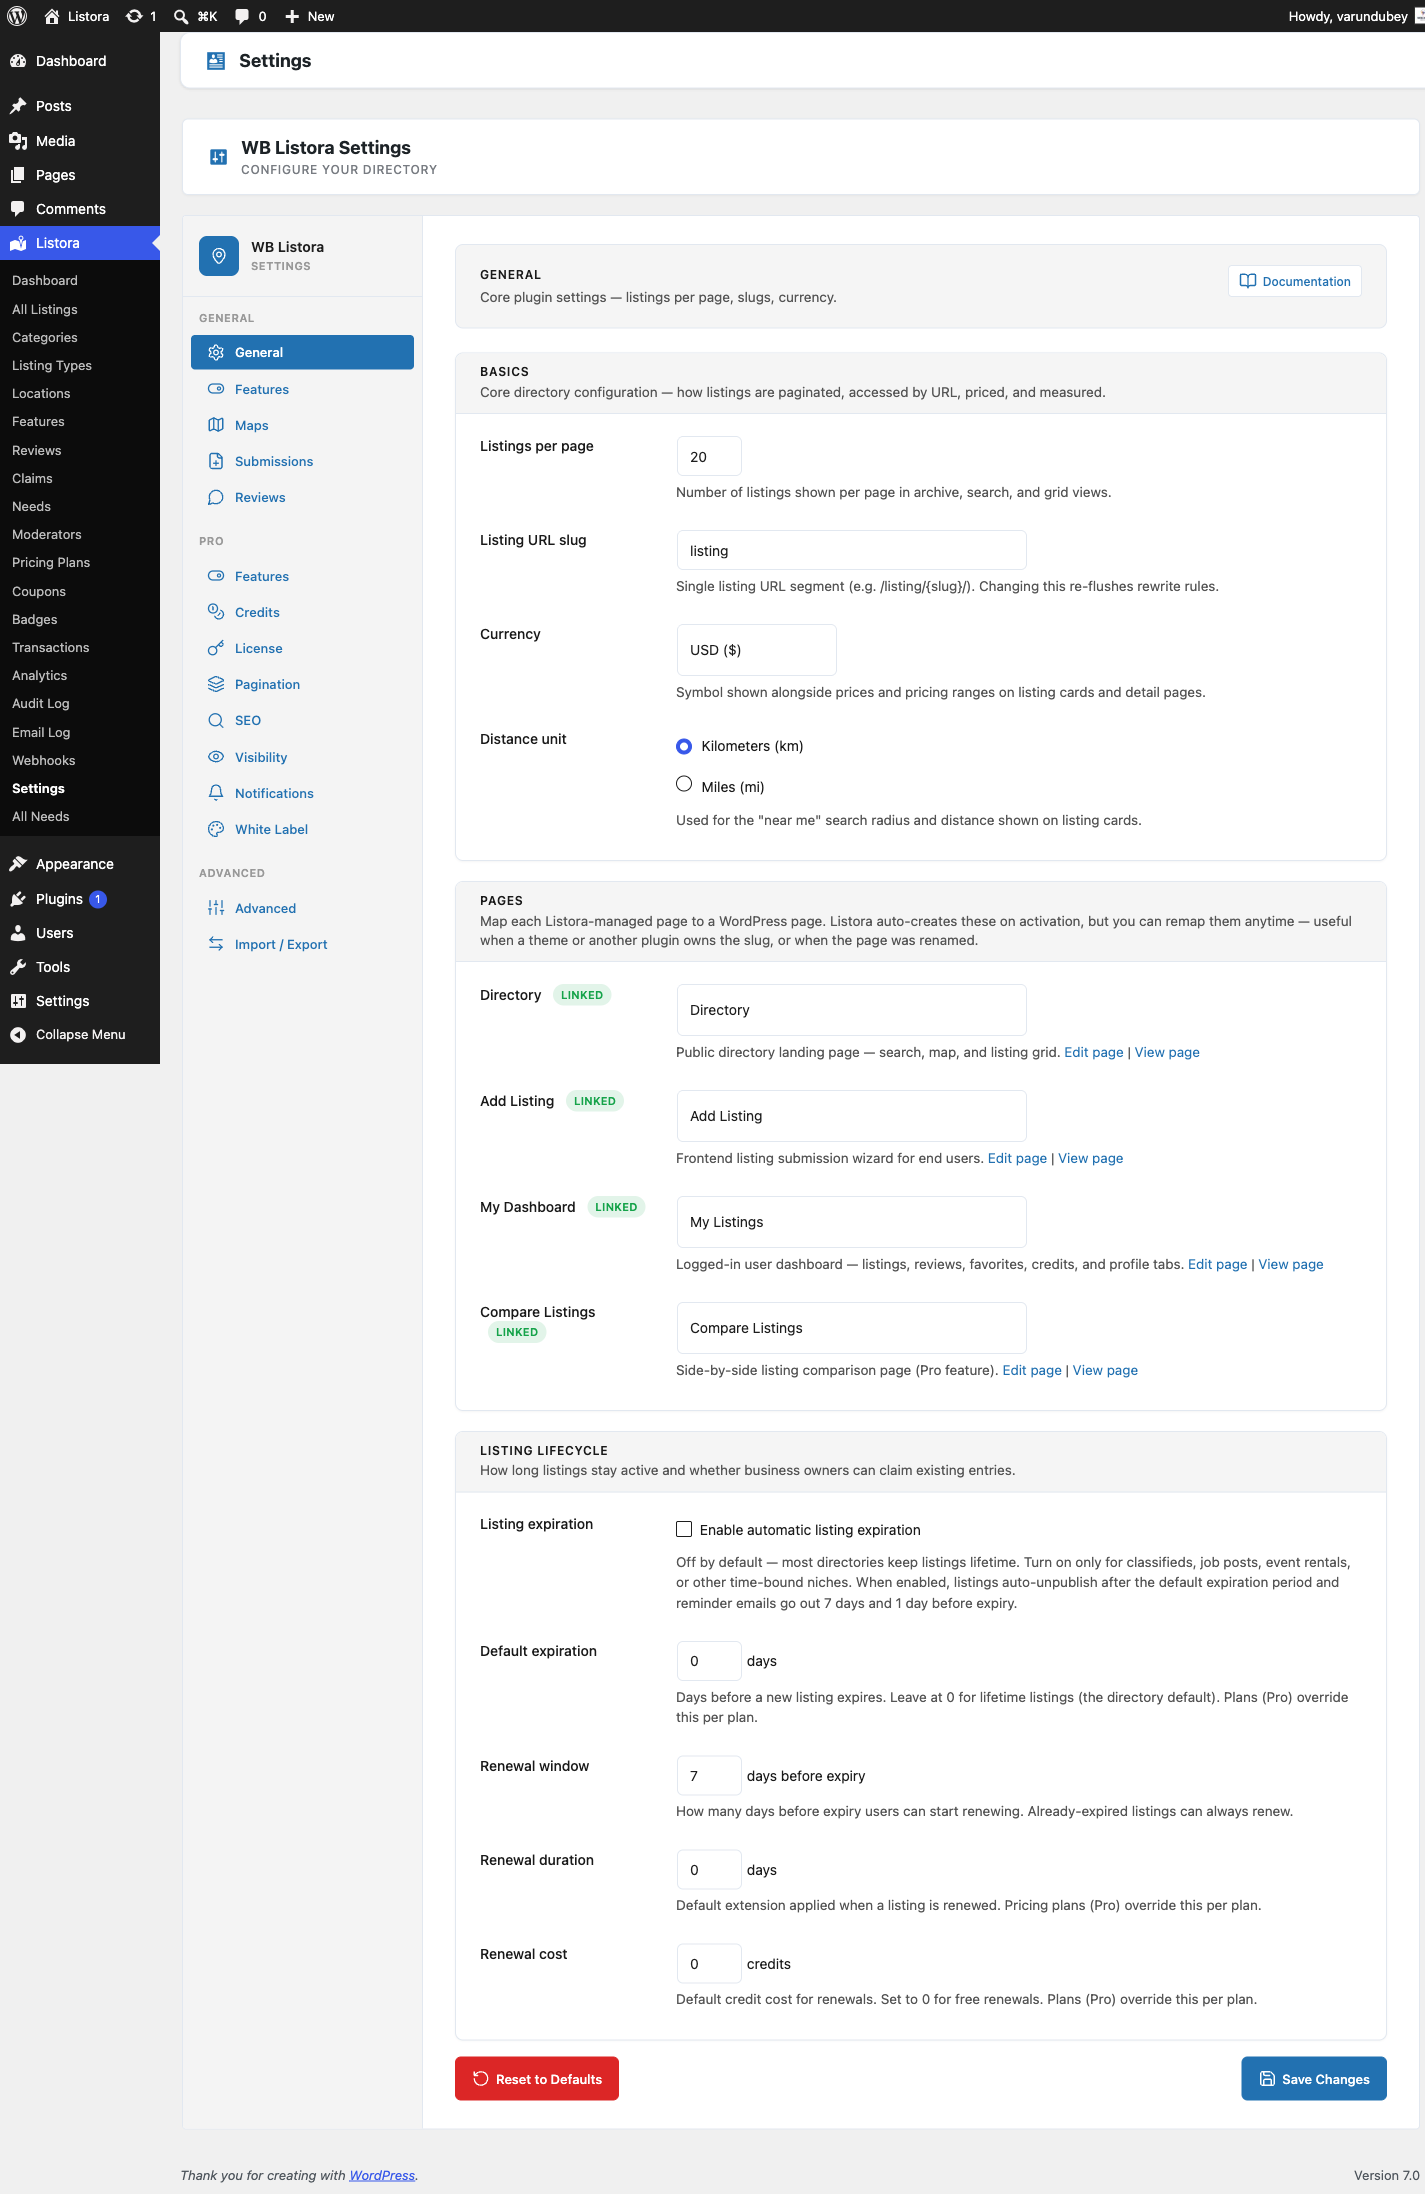
Access general settings at Listora > Settings > General.

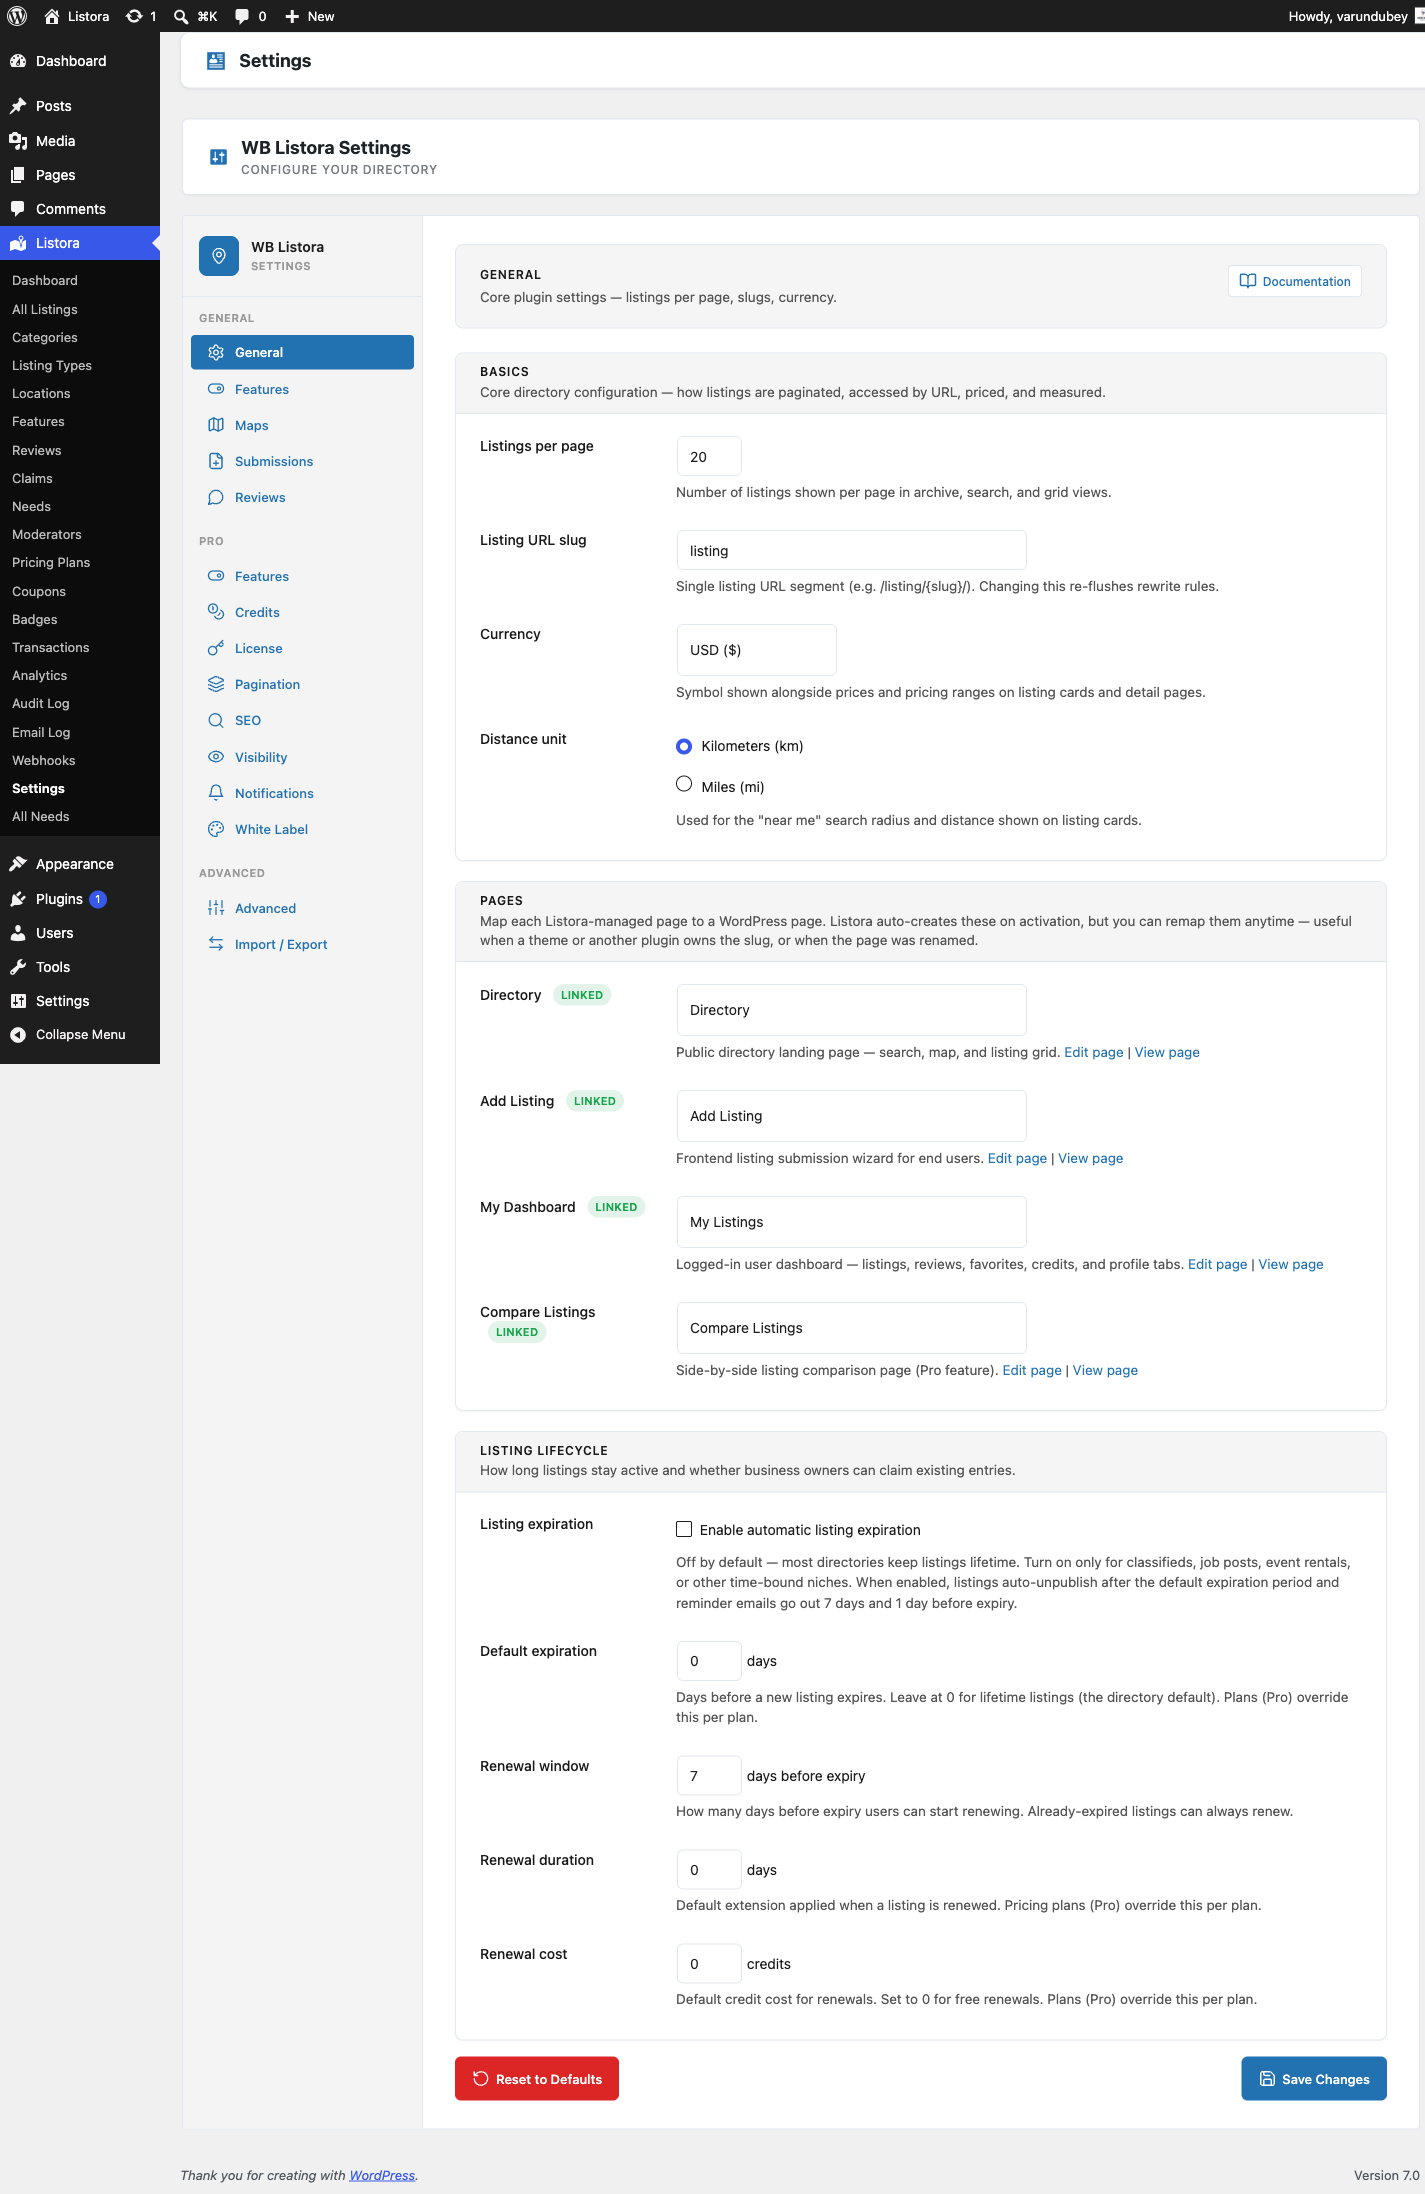
Settings General — admin UI screenshot (1.0.5)

Directory Name

The name displayed in the admin sidebar and default page titles.

Listings Per Page

Number of listings shown per page in grid views. Default: 20.

Distance Unit

Choose between Kilometers (km) and Miles (mi) for location-based searches.

Currency

Set the default currency for pricing fields (USD, EUR, GBP, etc.).

Date Format

Choose how dates are displayed in listings (follows WordPress date format settings).

Re-run Setup Wizard

Click this link to re-run the setup wizard if you need to reconfigure your directory.

Related

Search Settings

Access search settings at Listora > Settings > Search.

Settings Search — admin UI screenshot (1.0.5)

Results Per Page

Number of listings per page in search results. Default: 20.

Default Sort Order

The initial sort when no search keyword is entered:

  • Featured — Featured listings first, then by date
  • Newest — Most recently published
  • Rating — Highest rated first
  • Alphabetical — A to Z

Search Radius

Default radius for "Near Me" searches. Applied when users click the location button without specifying a distance.

Autocomplete

Enable real-time search suggestions as users type. Suggestions include matching listings, categories, and locations.

Indexing

WB Listora maintains a denormalized search index for performance. The index is updated automatically when listings are created, edited, or deleted.

To rebuild the search index manually:

wp listora reindex

This is useful after bulk imports or database changes.

Related

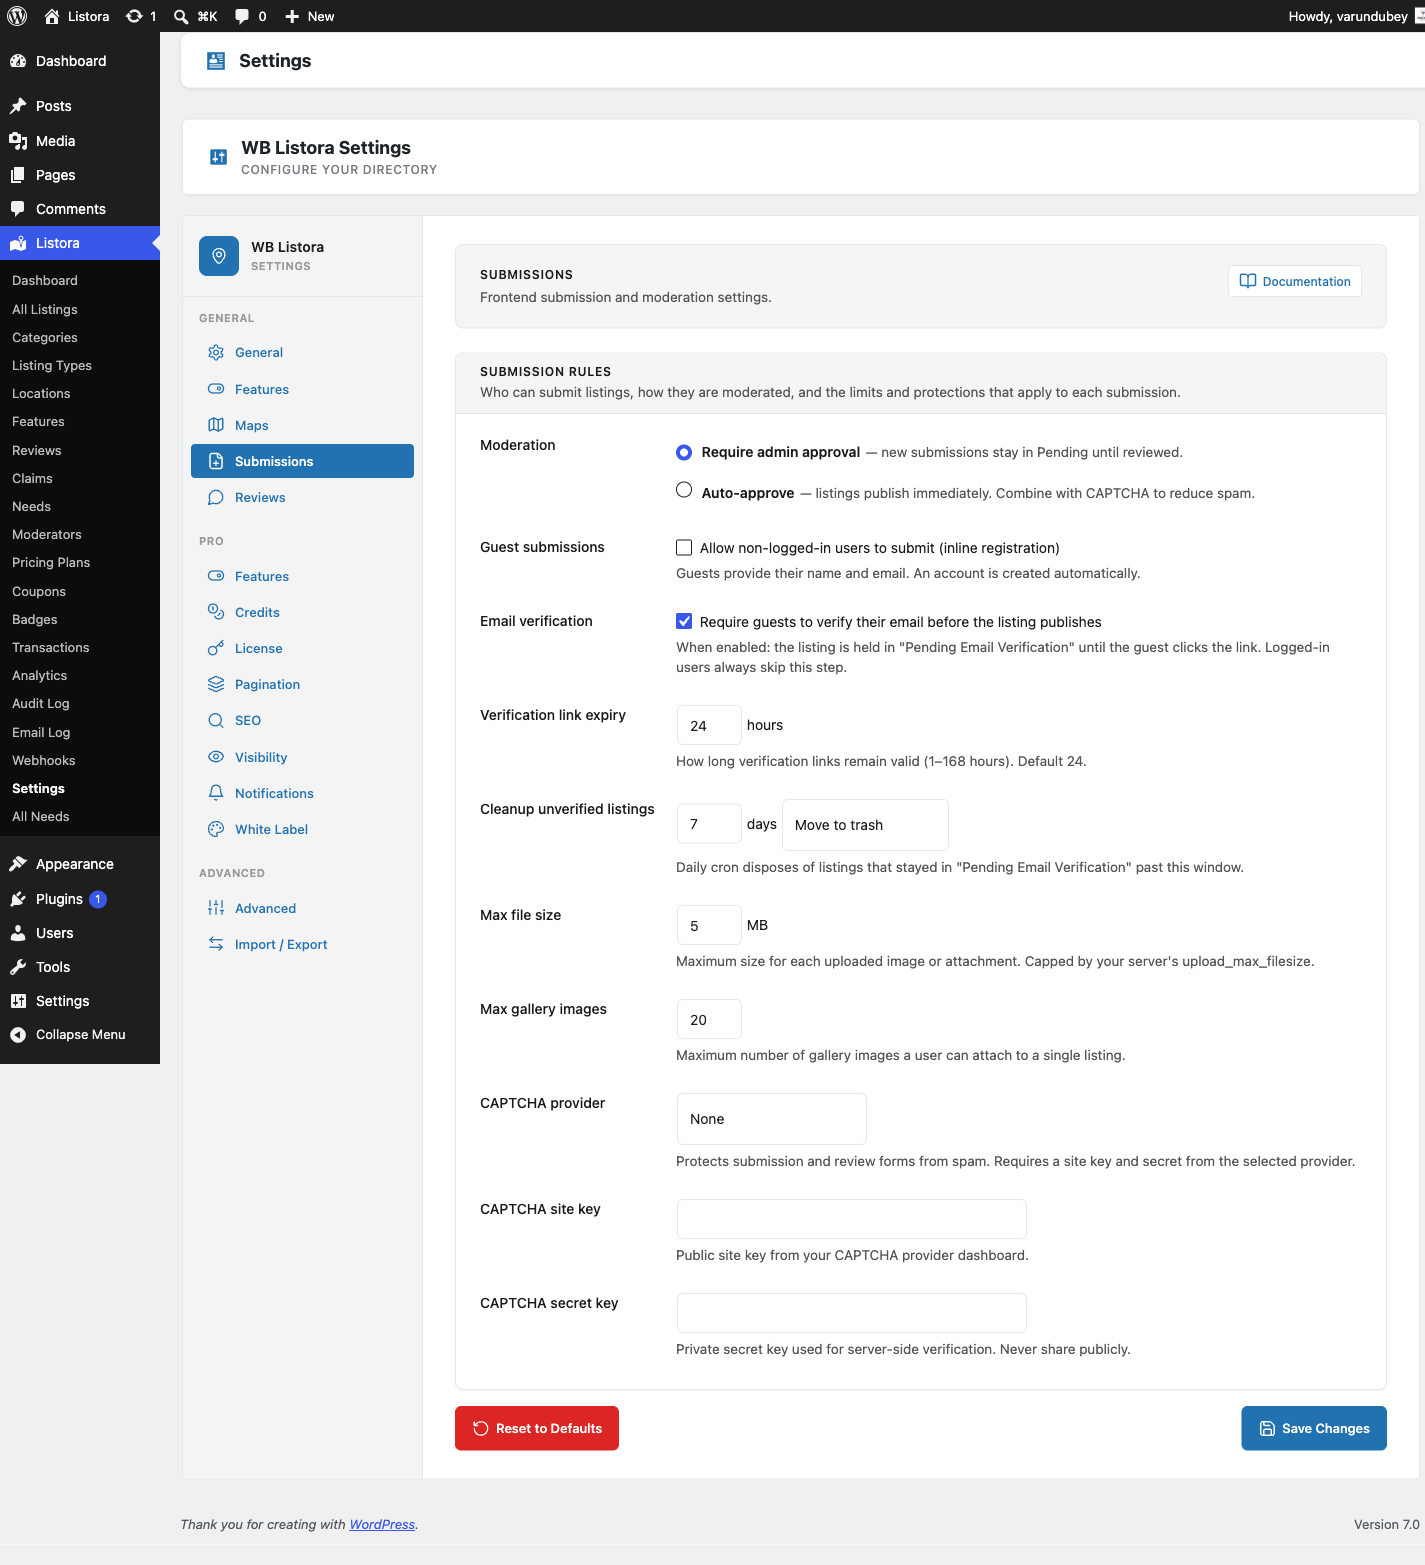
Submission & Moderation

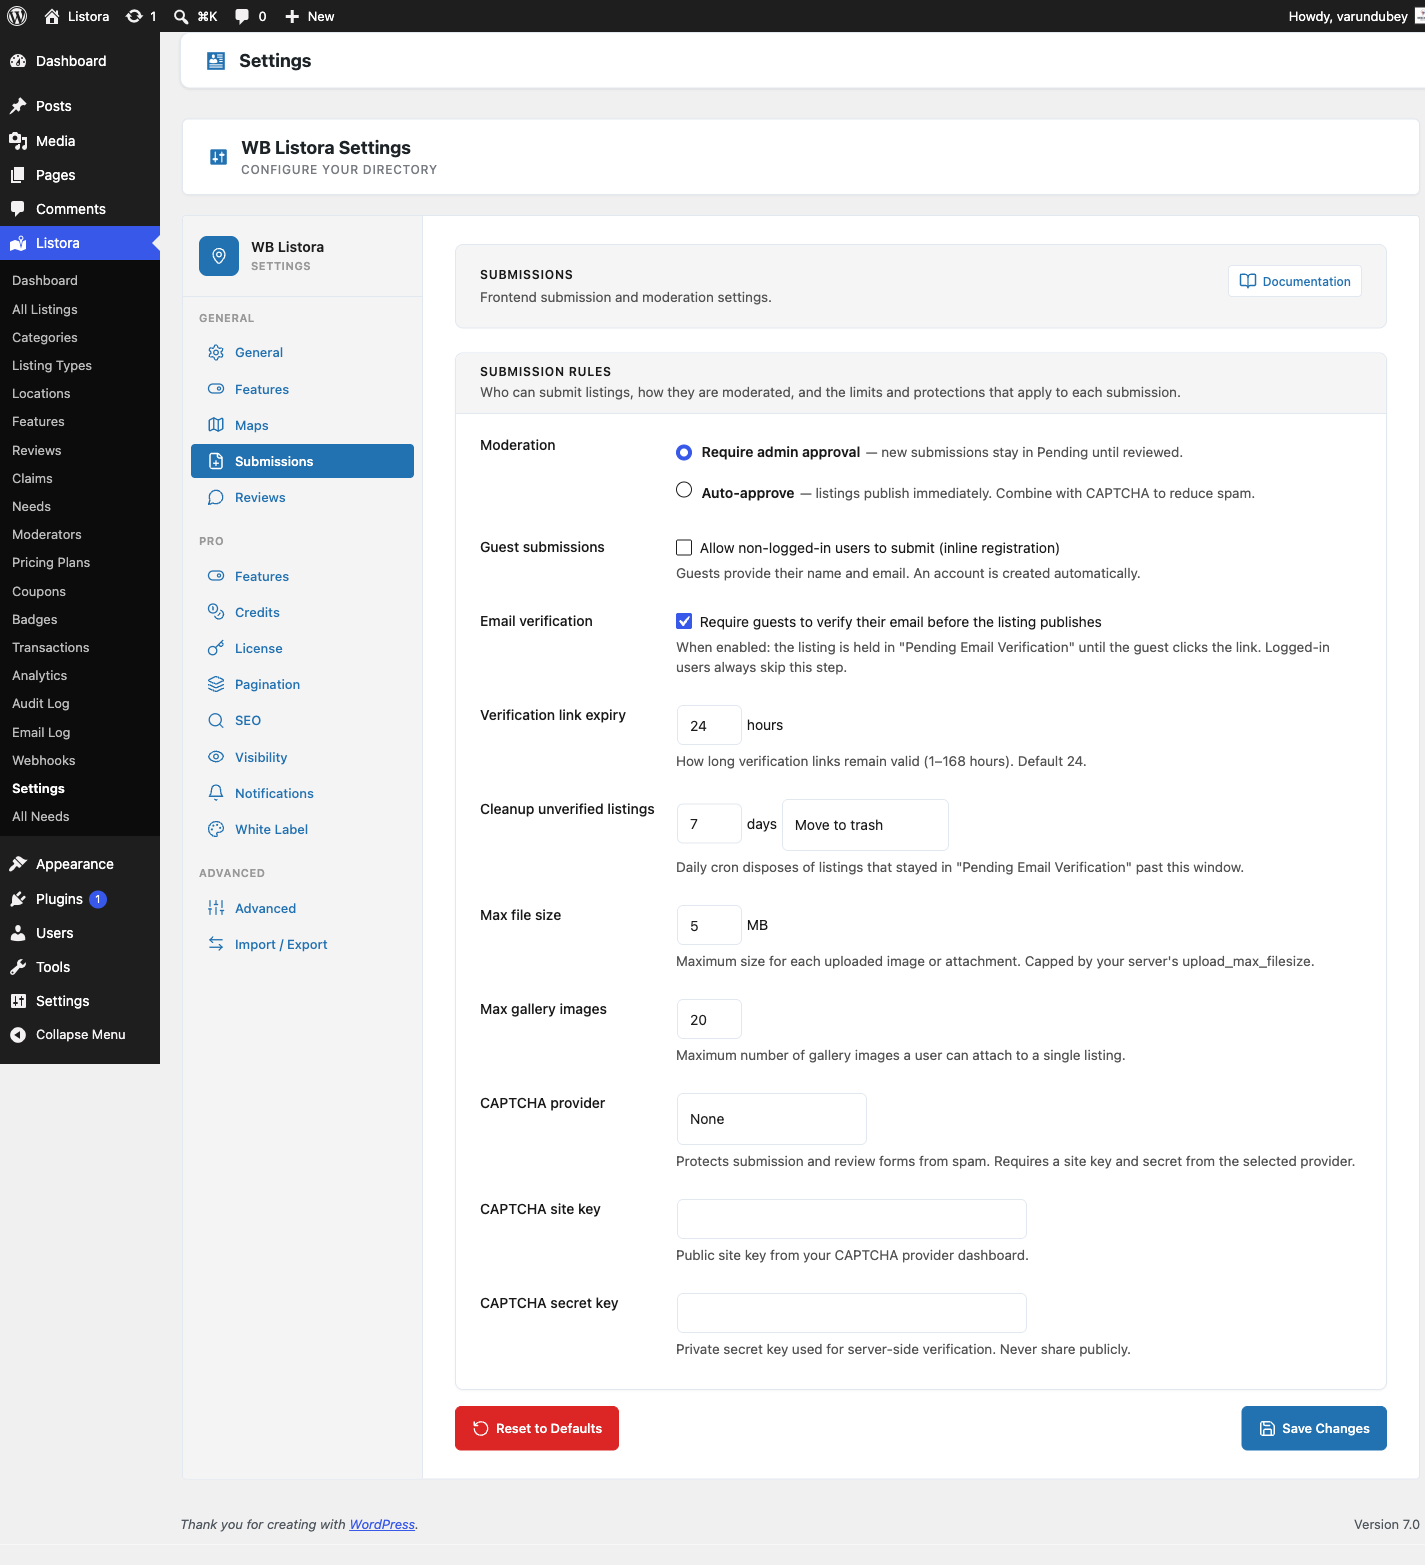
Access submission settings at Listora > Settings > Submissions.

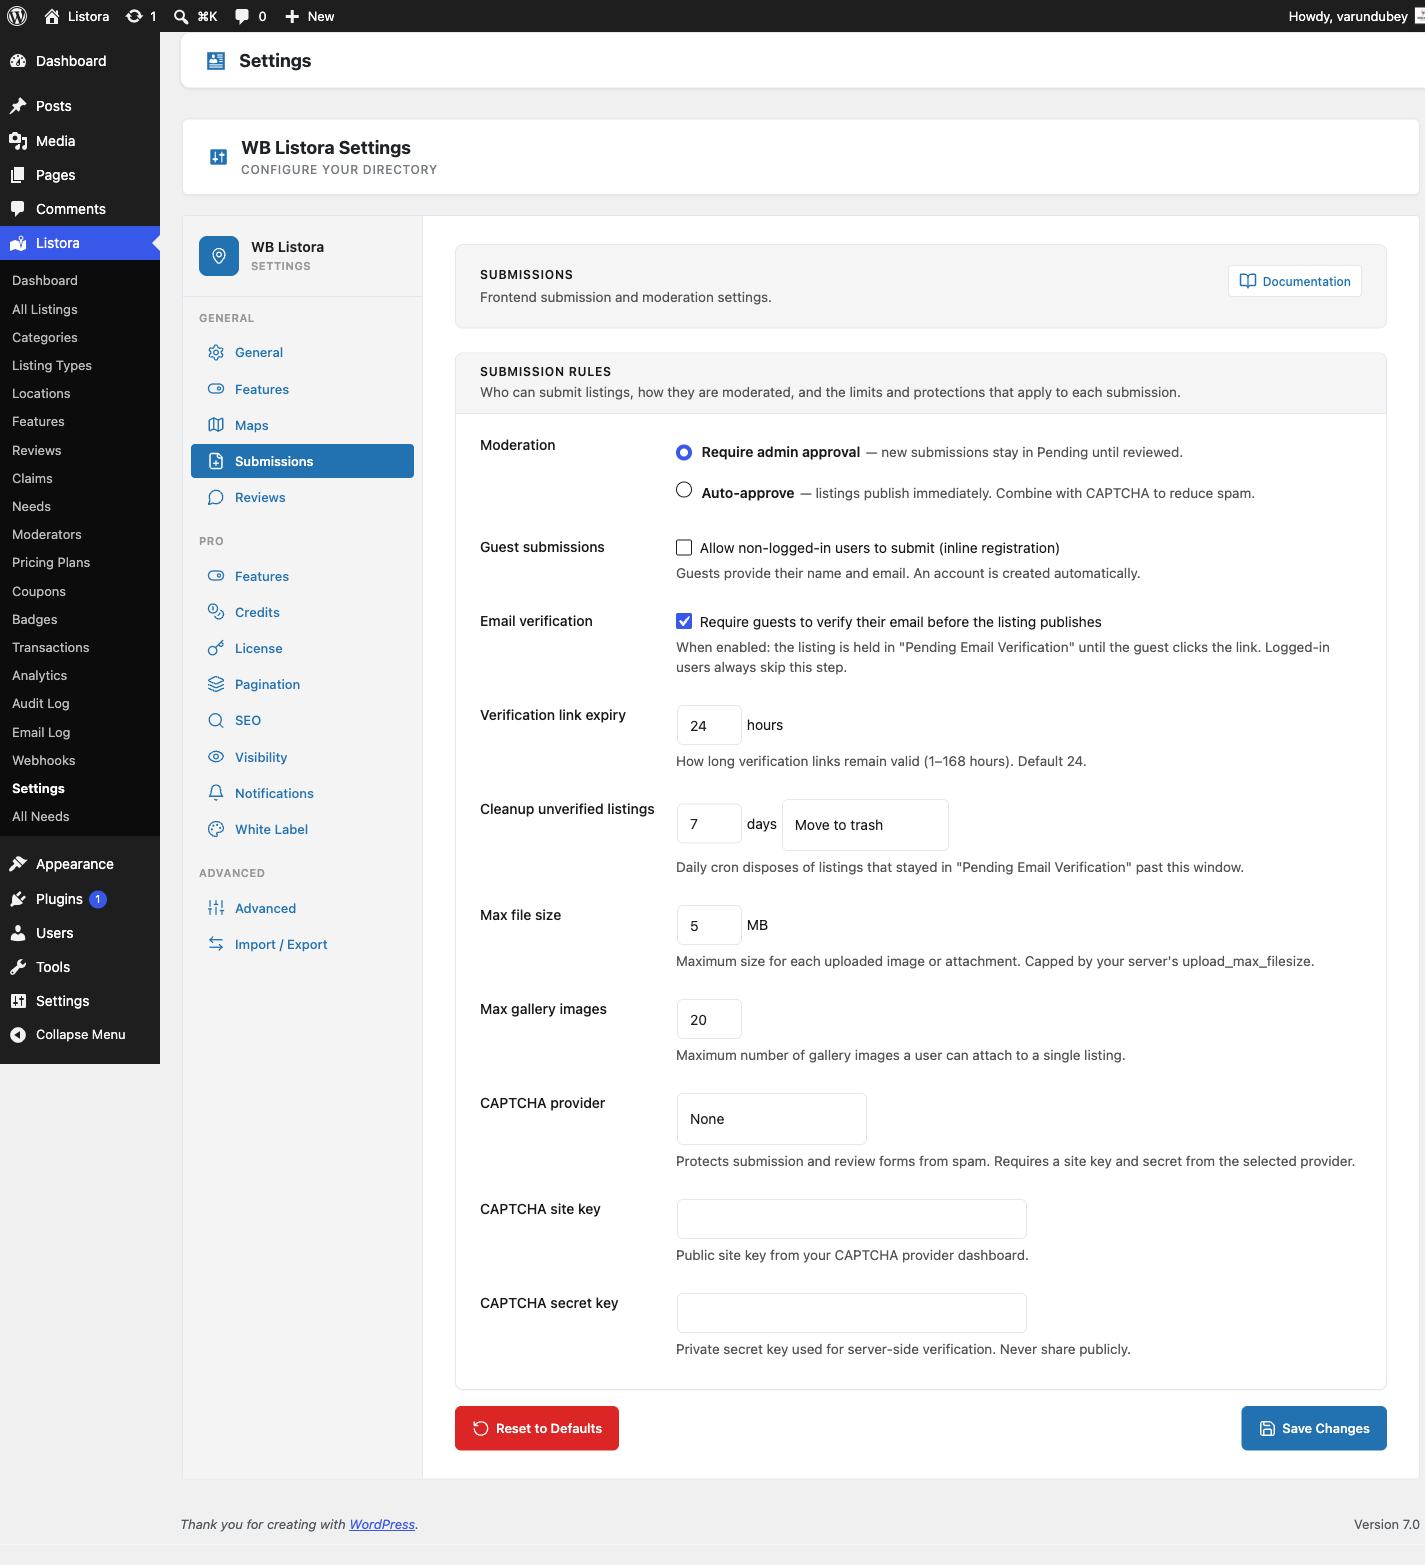
Settings Submission — admin UI screenshot (1.0.5)

Frontend Submissions

Toggle whether users can submit listings from the frontend. When disabled, only admins can create listings.

Require Login

When enabled, users must be logged in to submit listings. When disabled, a registration form is shown inline.

Moderation Mode

  • Auto-publish: Submitted listings are published immediately
  • Manual review: Listings are saved as "Pending" and require admin approval
  • Trusted users: Auto-publish for users with 3+ approved listings, manual for others

Allowed Listing Types

Select which listing types accept frontend submissions. Unchecked types can only be created by admins.

Image Settings

  • Maximum gallery images: Limit the number of images per listing (default: 10)
  • Maximum file size: Per-image upload limit in MB
  • Allowed formats: JPG, PNG, WebP

Listing Expiration

  • Days until expiration: Number of days before a listing expires (0 = never)
  • Expiration warning: Days before expiration to send a warning email
  • Auto-renewal: Allow listing owners to renew from their dashboard

Edit Approval

When enabled, edits to published listings require re-approval before going live.

Related

Reviews Settings

The Reviews tab in Listora → Settings controls how new reviews are approved, the minimum length required, whether each user can submit more than one review per listing, and whether listing owners can publicly reply. This is the configuration surface for the core Reviews System feature.

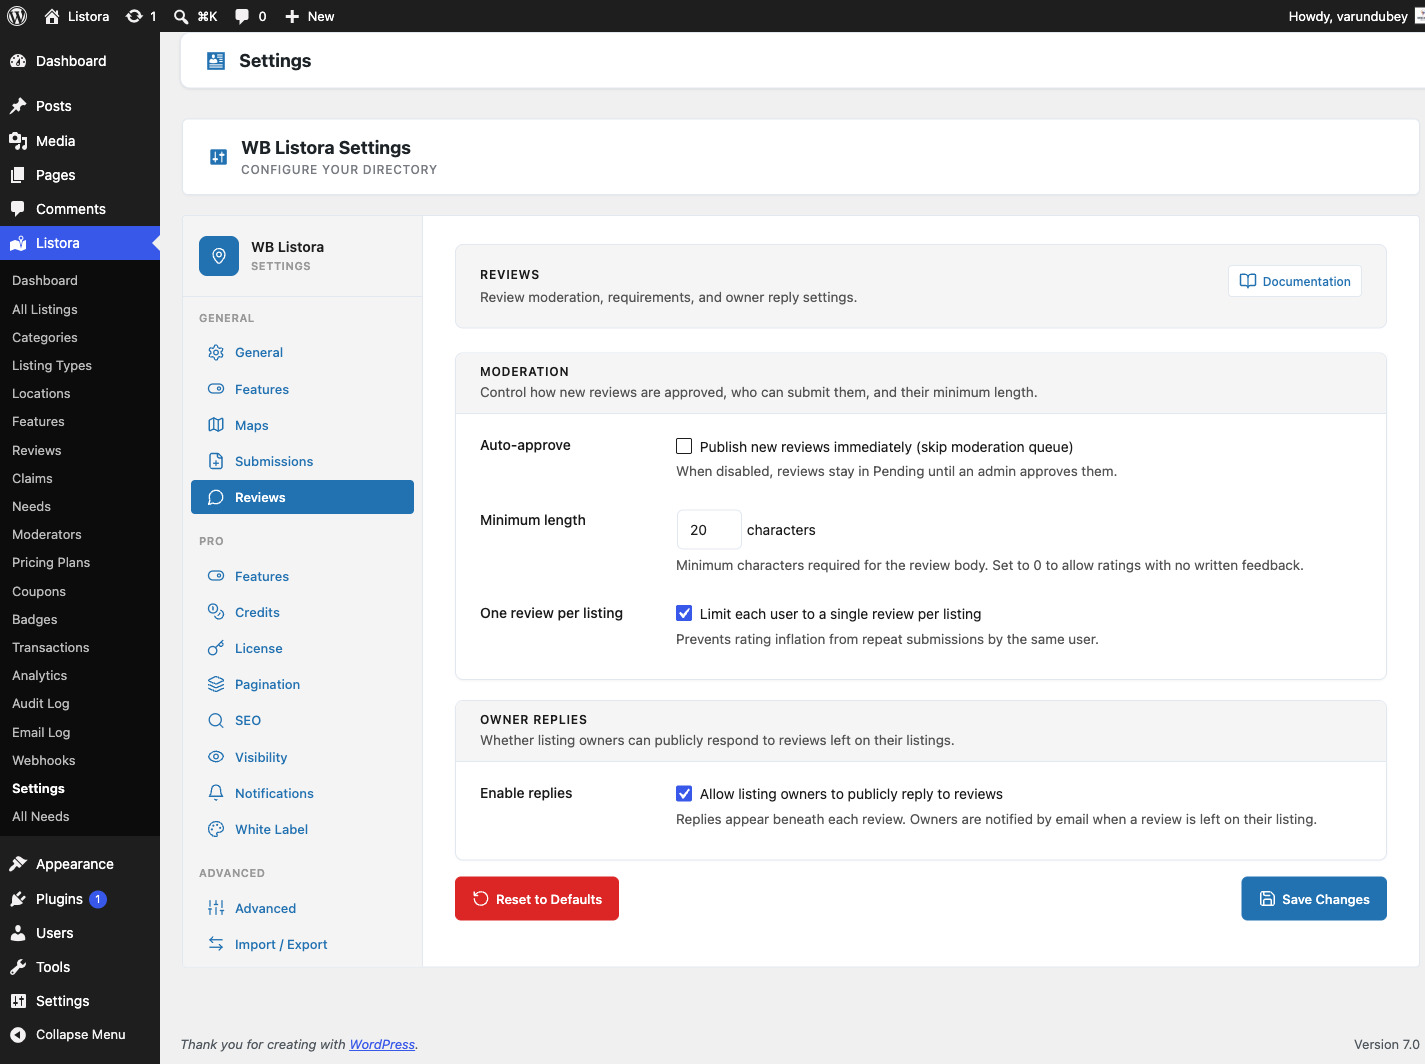
Reviews Settings — Moderation + Owner Replies blocks with toggle controls

Where it lives

WP Admin → Listora → Settings → Reviews (?page=listora-settings&tab=reviews)

Requires the manage_listora_settings capability.

Setting reference

Moderation

Setting Default What it does
Auto-approve Off When on, new reviews skip the moderation queue and publish immediately. When off, reviews stay in Pending until an admin approves them from the Reviews admin page or the Moderation Queue.
Minimum length 20 characters The minimum number of characters required in a review body. Set to 0 to allow ratings with no written feedback (star-only reviews). Validation runs both client-side (inline error before submit) and server-side (the REST controller rejects short submissions).
One review per listing On When on, each logged-in user is limited to a single review per listing — prevents rating inflation from repeat submissions. When off, a user can submit multiple reviews on the same listing.

Note on "Guest reviews / Require login": this setting was removed in 1.0.5. Reviews always require a logged-in user — the REST permission callback at create_review_permissions() enforces it directly. The setting never actually changed behaviour, so it was misleading to show. Anonymous reviews would be a separate feature requiring schema, capture UI, dedupe, and spam handling.

Owner Replies

Setting Default What it does
Enable replies On When on, listing owners can publicly reply to reviews left on their listing. Replies appear beneath each review with a "Reply from owner" label. Owners are notified by email when a new review is left. When off, the reply UI disappears and the POST /reviews/{id}/reply REST endpoint returns 403.

How it interacts with the rest of the system

  • Moderation Queue. When Auto-approve is OFF, every new review lands in Pending and appears in the Moderation Queue. Admins approve / reject from there or from the standalone Reviews admin page.
  • Email Notifications. Toggle the review_received, review_reply, and review_helpful events on the Notifications tab to control which emails fire on each transition.
  • Capabilities. The moderate_listora_reviews cap gates the approve / reject / hide / spam actions. Editor and Administrator roles have it by default; grant to custom roles via the Capabilities reference.
  • REST. Settings changes take effect on the next REST request — no flush required. wb_listora_reviews_settings filter lets Pro / themes override any value at runtime.

Recommended configurations

Goal Settings
Hands-off public directory Auto-approve ON, Minimum length 0, One per listing ON, Replies ON
Hand-moderated reviews Auto-approve OFF, Minimum length 50, One per listing ON, Replies ON
Star-only (no written feedback) Auto-approve ON, Minimum length 0, One per listing ON, Replies OFF
Premium-vendor directory Auto-approve OFF, Minimum length 100, One per listing ON, Replies ON

Related

Features Toggles

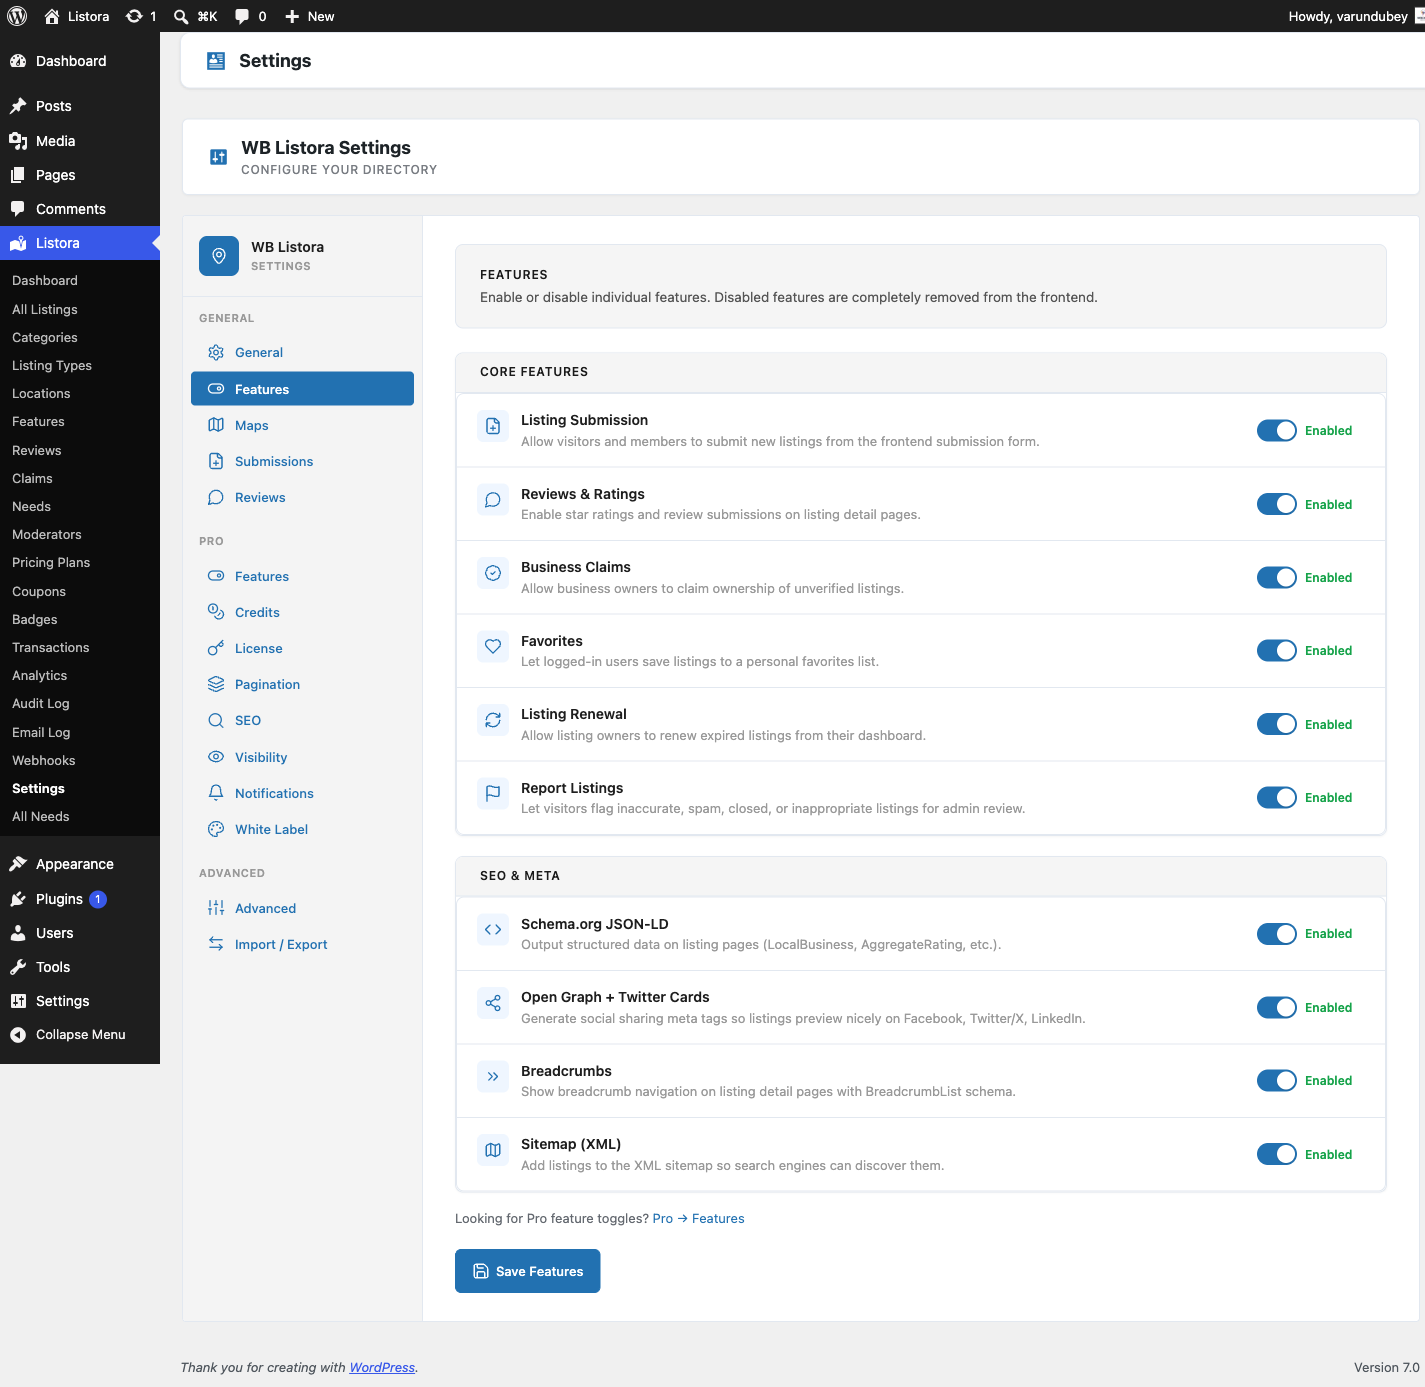
The Features tab in Listora → Settings is your master switchboard for every Listora capability that can be turned on or off site-wide. Toggle a feature off and its code paths short-circuit before any user-facing surface renders — saves CPU, network, and screen real estate when a directory doesn't need a particular capability.

Features Toggles — grid of feature rows grouped by category with on/off switches

Where it lives

WP Admin → Listora → Settings → Features (?page=listora-settings&tab=features)

Requires the manage_listora_settings capability.

How it works

Every toggle is read via wb_listora_get_features() and gates the feature class's boot() method. When a toggle flips OFF:

  • The feature's init() hooks don't fire.
  • Its REST routes don't register (404 if hit directly).
  • Its blocks unregister from the editor inserter.
  • Its admin menu items disappear.
  • Existing data is preserved — toggle back on and everything reappears with state intact.

Toggling does NOT delete listings, reviews, or settings. It's a render-time gate, not a destruction. If you need to wipe data, use Advanced → Uninstall + plugin deactivation.

Free features (grouped under Core Features)

Toggle What it gates Default
Frontend Submission The listora/listing-submission block + /listora/v1/submit REST + the Add Listing page wiring On
Reviews Star ratings, written reviews, helpful votes, owner replies, the Reviews tab on listing detail On
Business Claims "Is this your business?" claim modal + /listora/v1/claims REST + admin Claims page On
Favourites Heart icon on listing card / detail + /listora/v1/favorites REST + Favourites tab on user dashboard On
Renewal Self-service renewal CTA on expired listings + the renewal REST endpoint + email reminders On
Report Listings "Report this listing" link on detail page + admin Reports queue On

SEO & Meta

Toggle What it gates Default
Schema.org Adds structured-data JSON-LD to every listing detail page On
OpenGraph OG meta tags for social-card preview On
Breadcrumbs Breadcrumb navigation on listing detail and archive pages On
Sitemap Adds listora_listing posts to the WP Core sitemap (/wp-sitemap.xml) On

Pro features (separate Pro Features tab)

Pro features have their own toggle page at Settings → Pro Features (?page=listora-settings&tab=pro-features) — same UX, separate settings option (wb_listora_pro_features). See each feature doc for details: Advanced Search, Analytics, Audit Log, BuddyPress Integration, Coming Soon, Compare Listings, Coupons, Credits & Plans, Digest Notifications, Google Maps, Infinite Scroll, Lead Forms, Moderators, Multi-criteria Reviews, Needs Marketplace, Outgoing Webhooks, Photo Reviews, Pricing Plans, Quick View, SEO Pages, Services per Listing, Verification Badges, White Label.

How to use

  1. Open Settings → Features.
  2. Flip a toggle. Each toggle has a one-line description directly under its label.
  3. Click Save Features at the bottom. The page reloads with a "Features updated" notice.
  4. Verify in the relevant UI — turn off Favourites and the heart icon should disappear from every listing card on the next page load.

There's no "Apply changes" delay — toggles take effect immediately. Caching layers (page cache, object cache) may need a flush if your stack aggressively caches block output.

Programmatic access

Read and write toggle state from your own code:

// Read.
$enabled = wb_listora_get_features(); // ['submission' => true, 'reviews' => true, ...]
$is_on = ! empty( $enabled['reviews'] );

// Write (admin context only — respects the same nonce + cap as the form).
update_option( 'wb_listora_features', array(
'submission' => true,
'reviews' => false, // hide reviews everywhere
'claims' => true,
'favorites' => true,
'renewal' => true,
'report_listings' => true,
'schema' => true,
'opengraph' => true,
'breadcrumbs' => true,
'sitemap' => true,
) );

For Pro toggles, swap wb_listora_featureswb_listora_pro_features and use wb_listora_pro_feature_enabled( 'feature_key' ) to read.

WP-CLI

There is no WP-CLI command to toggle features (Pro's previous wp listora-pro features list / toggle were never shipped). To script toggles, use wp option update wb_listora_features '...' --format=json.

Related

Notifications Settings

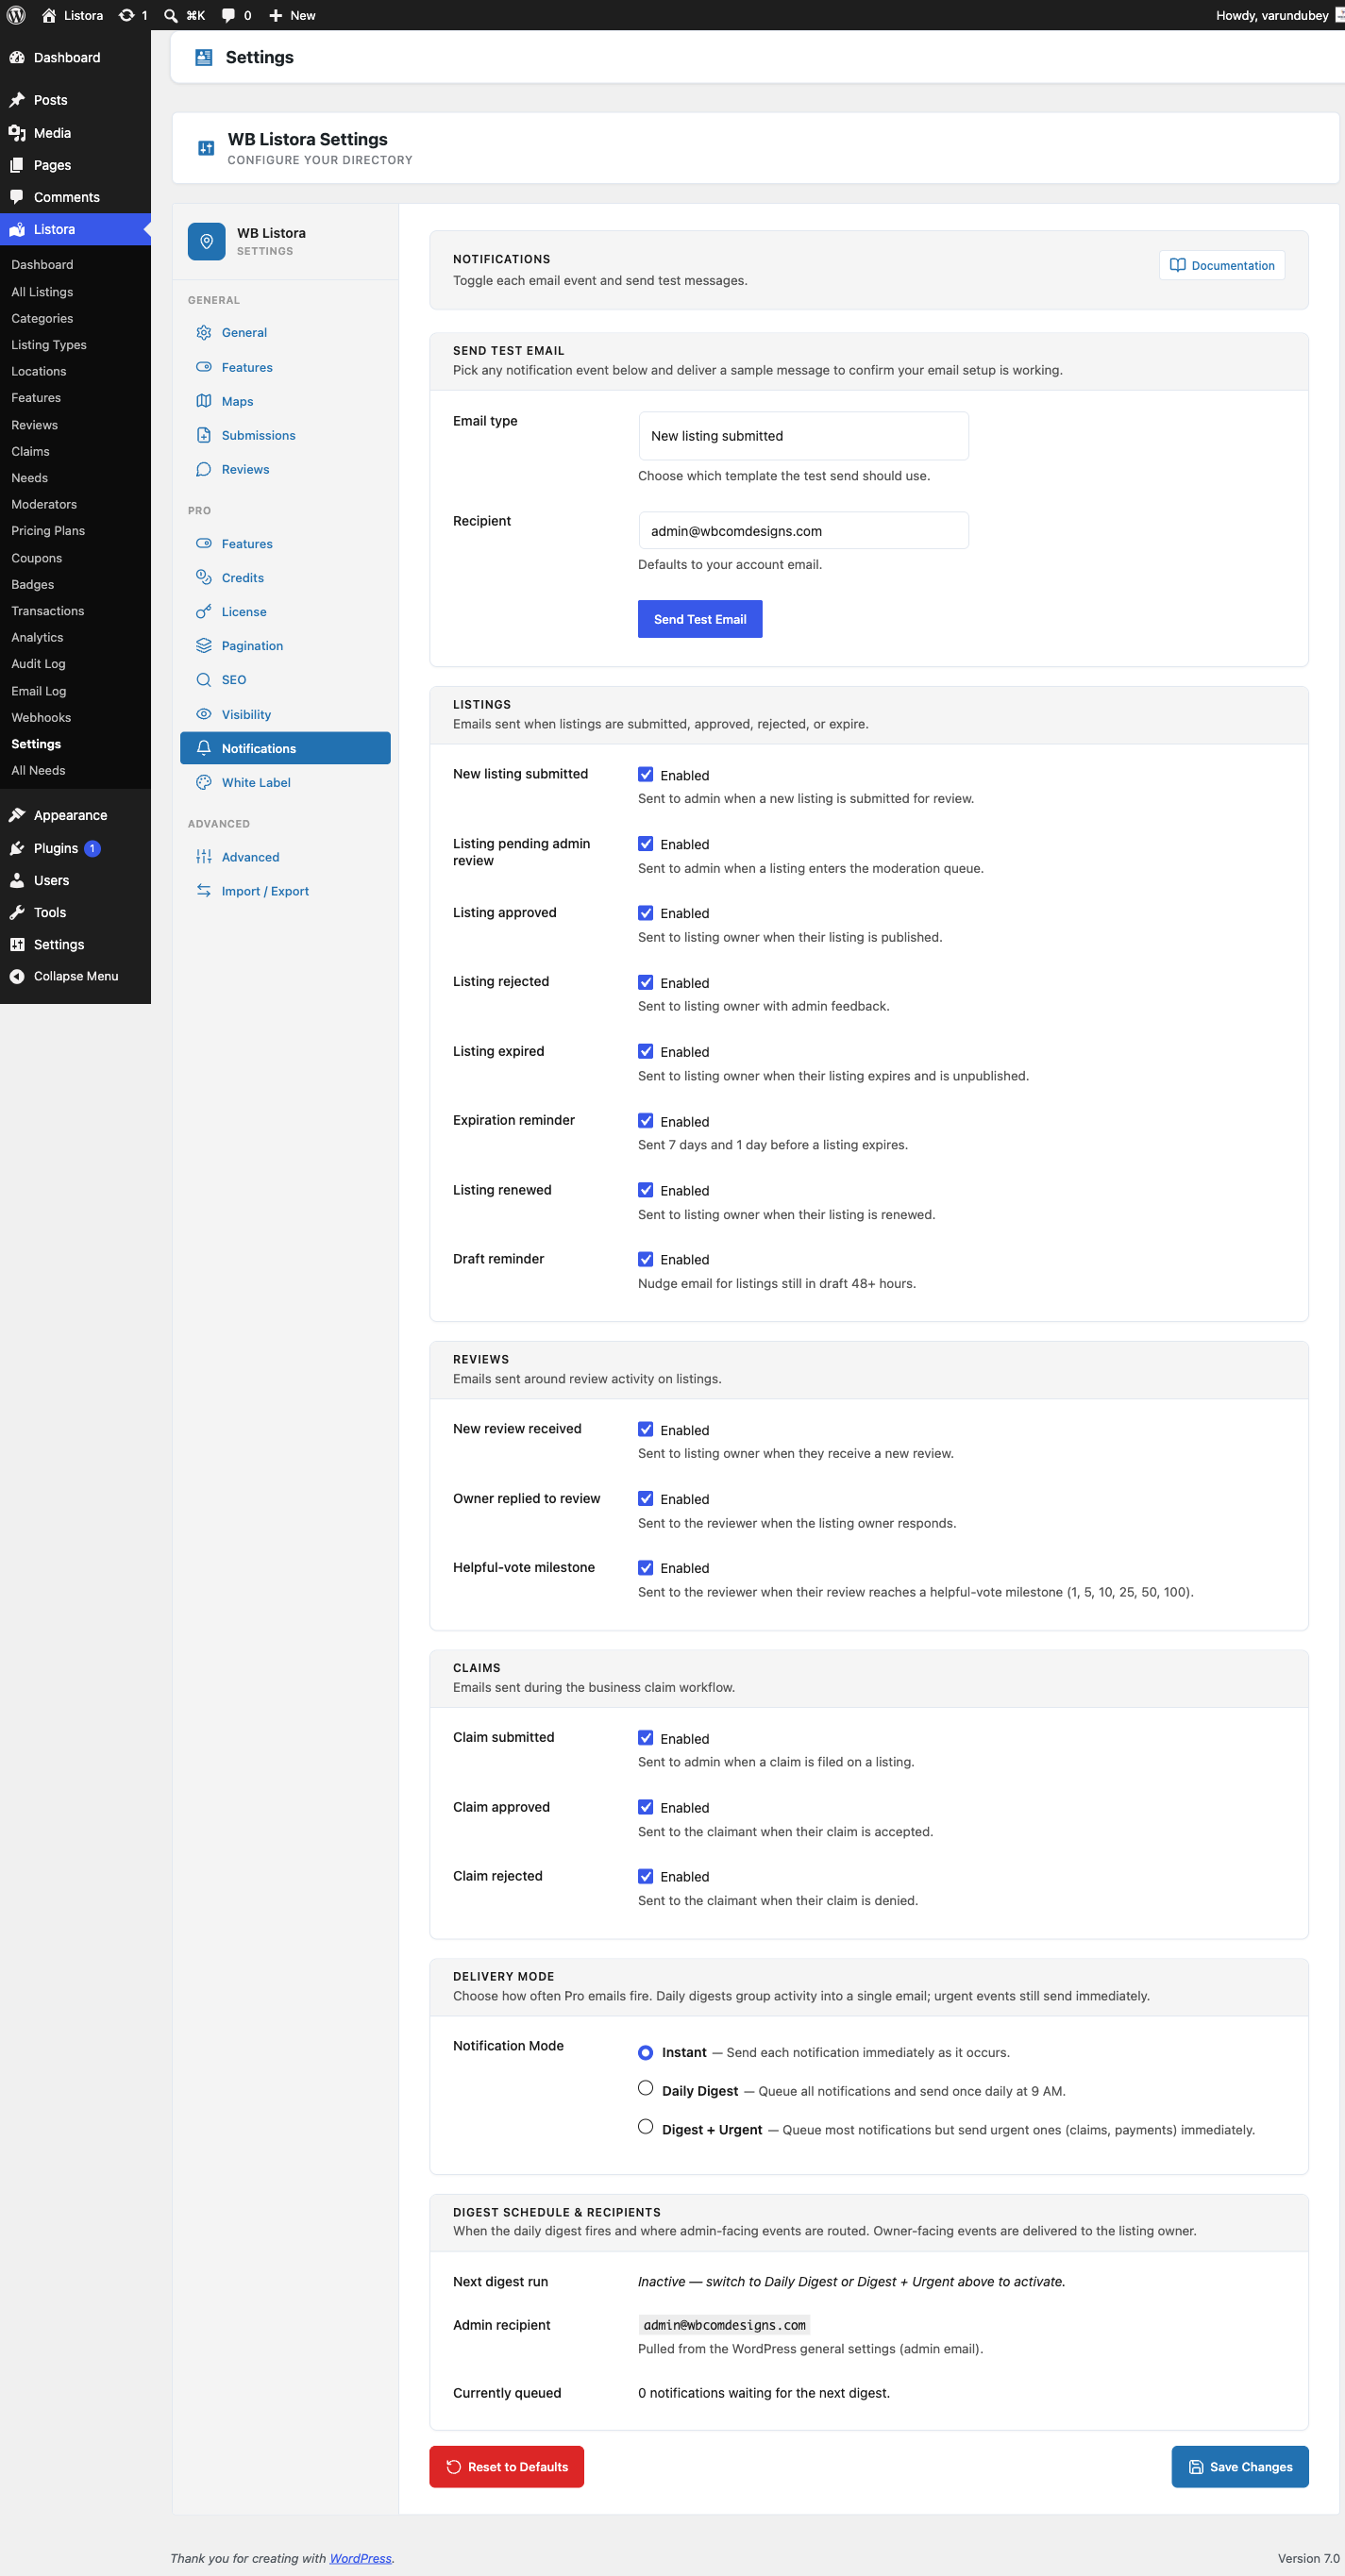
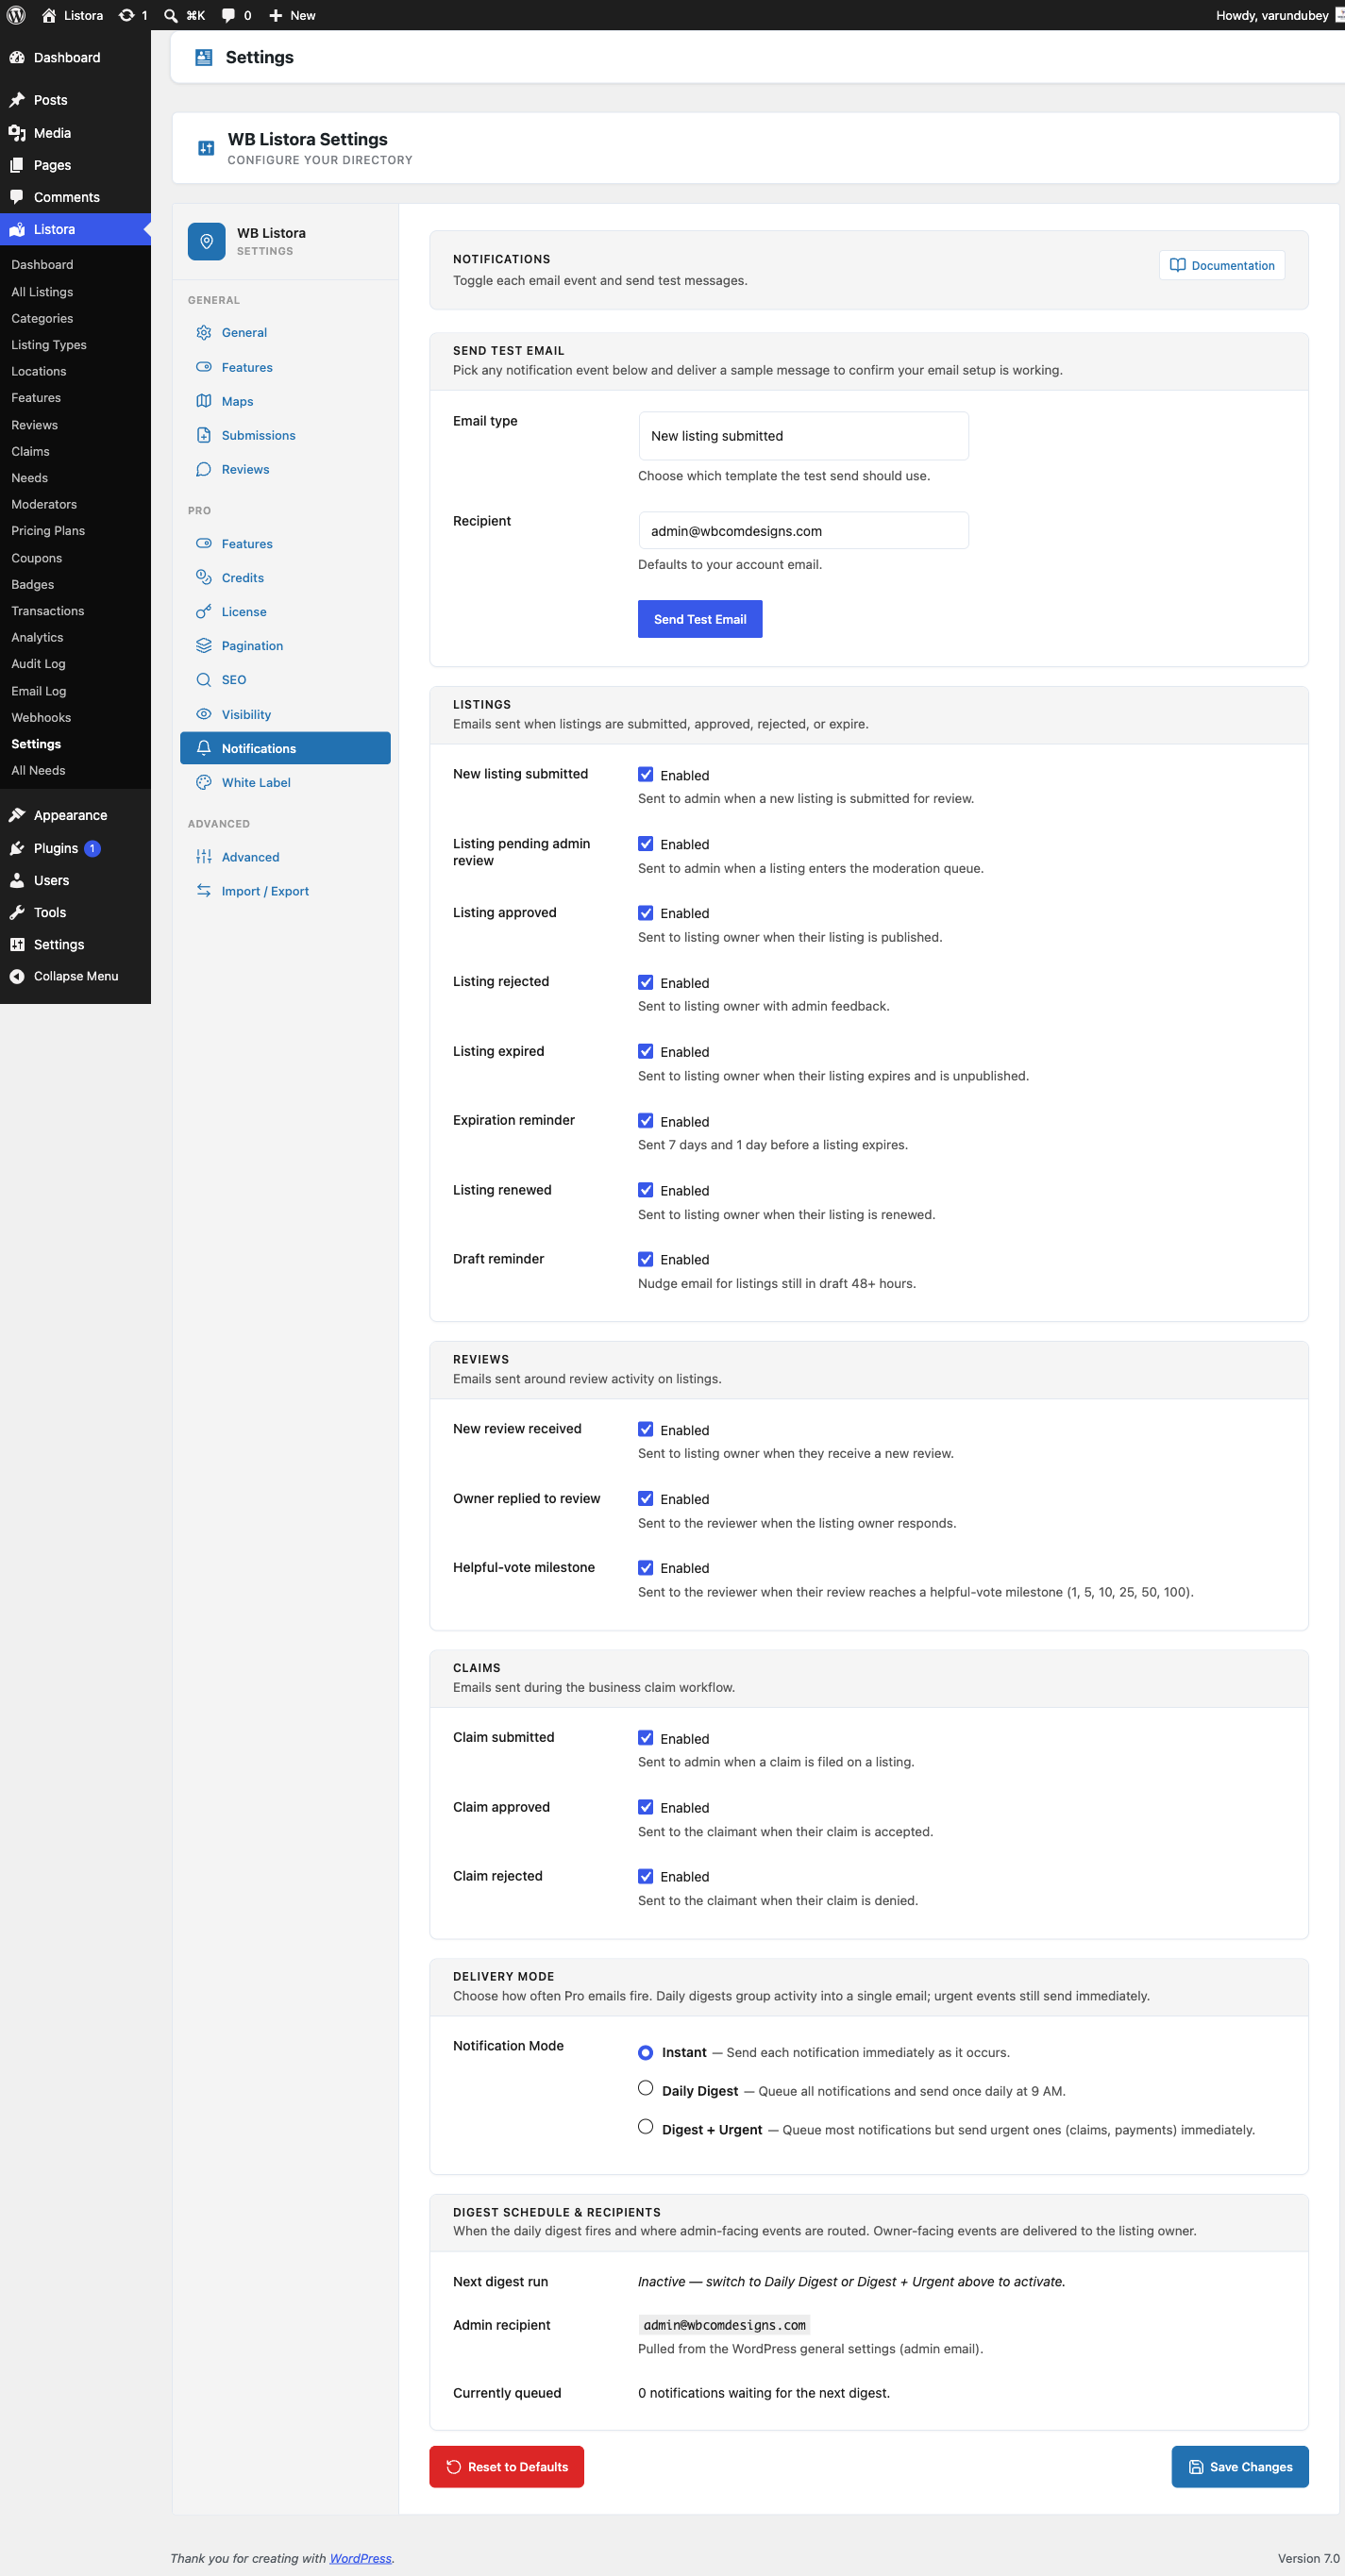
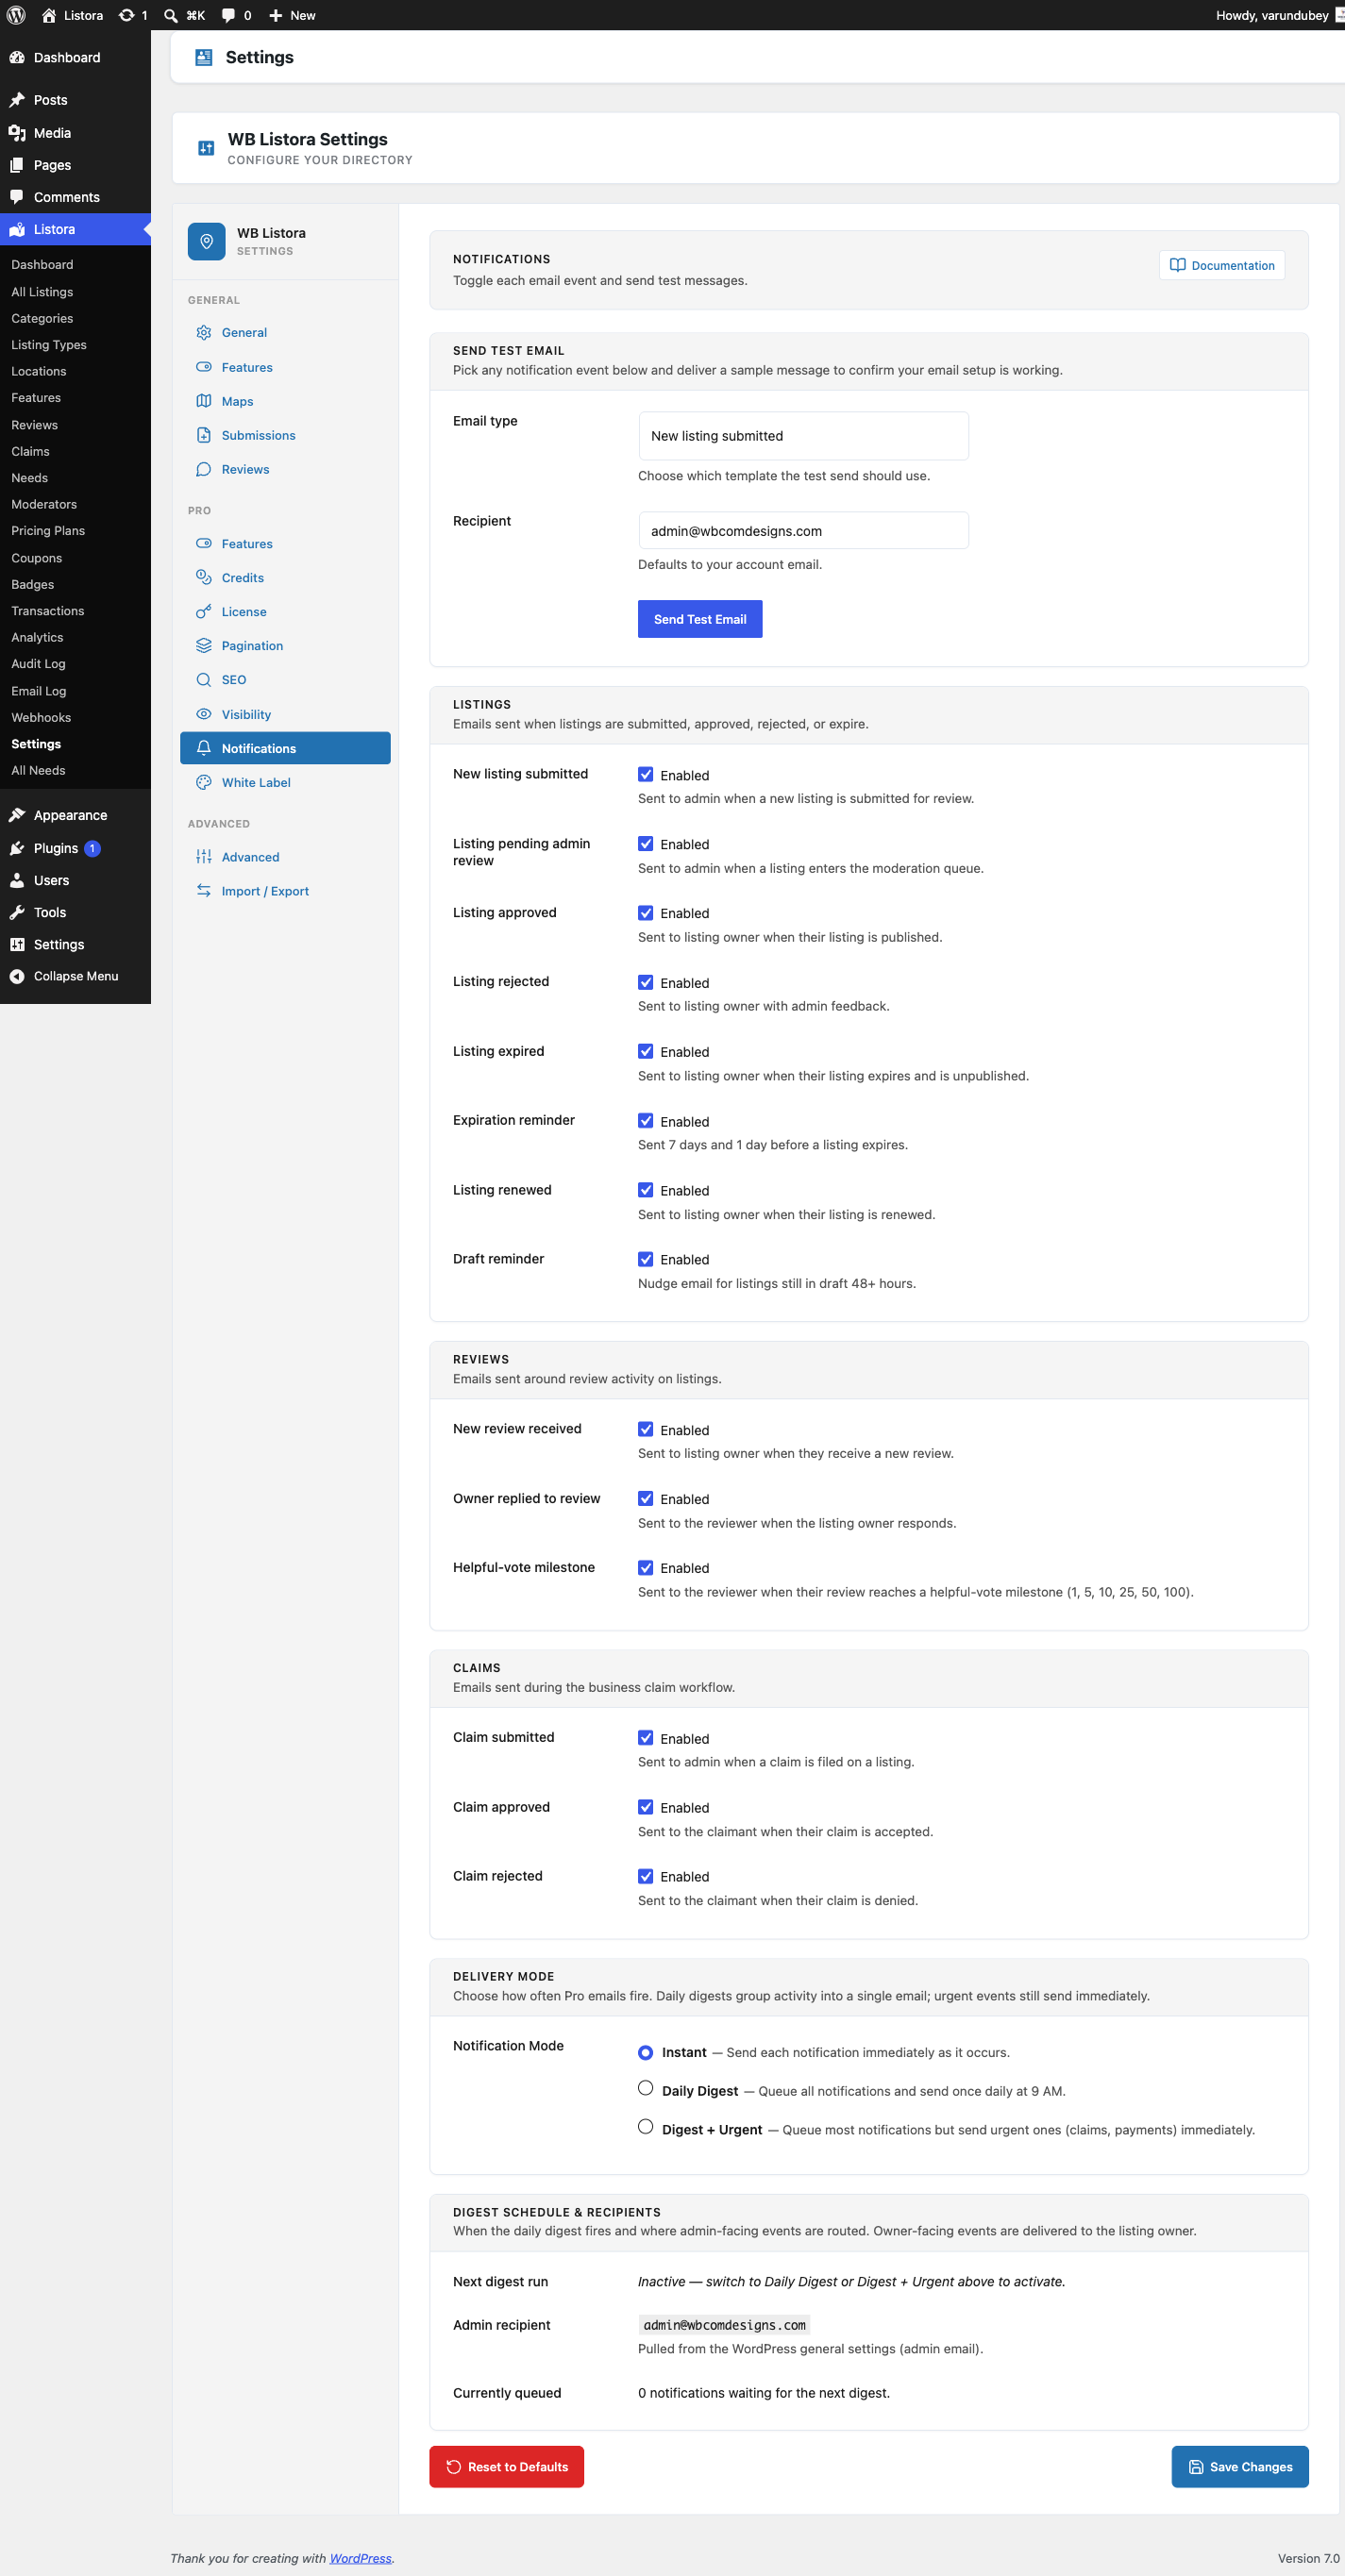
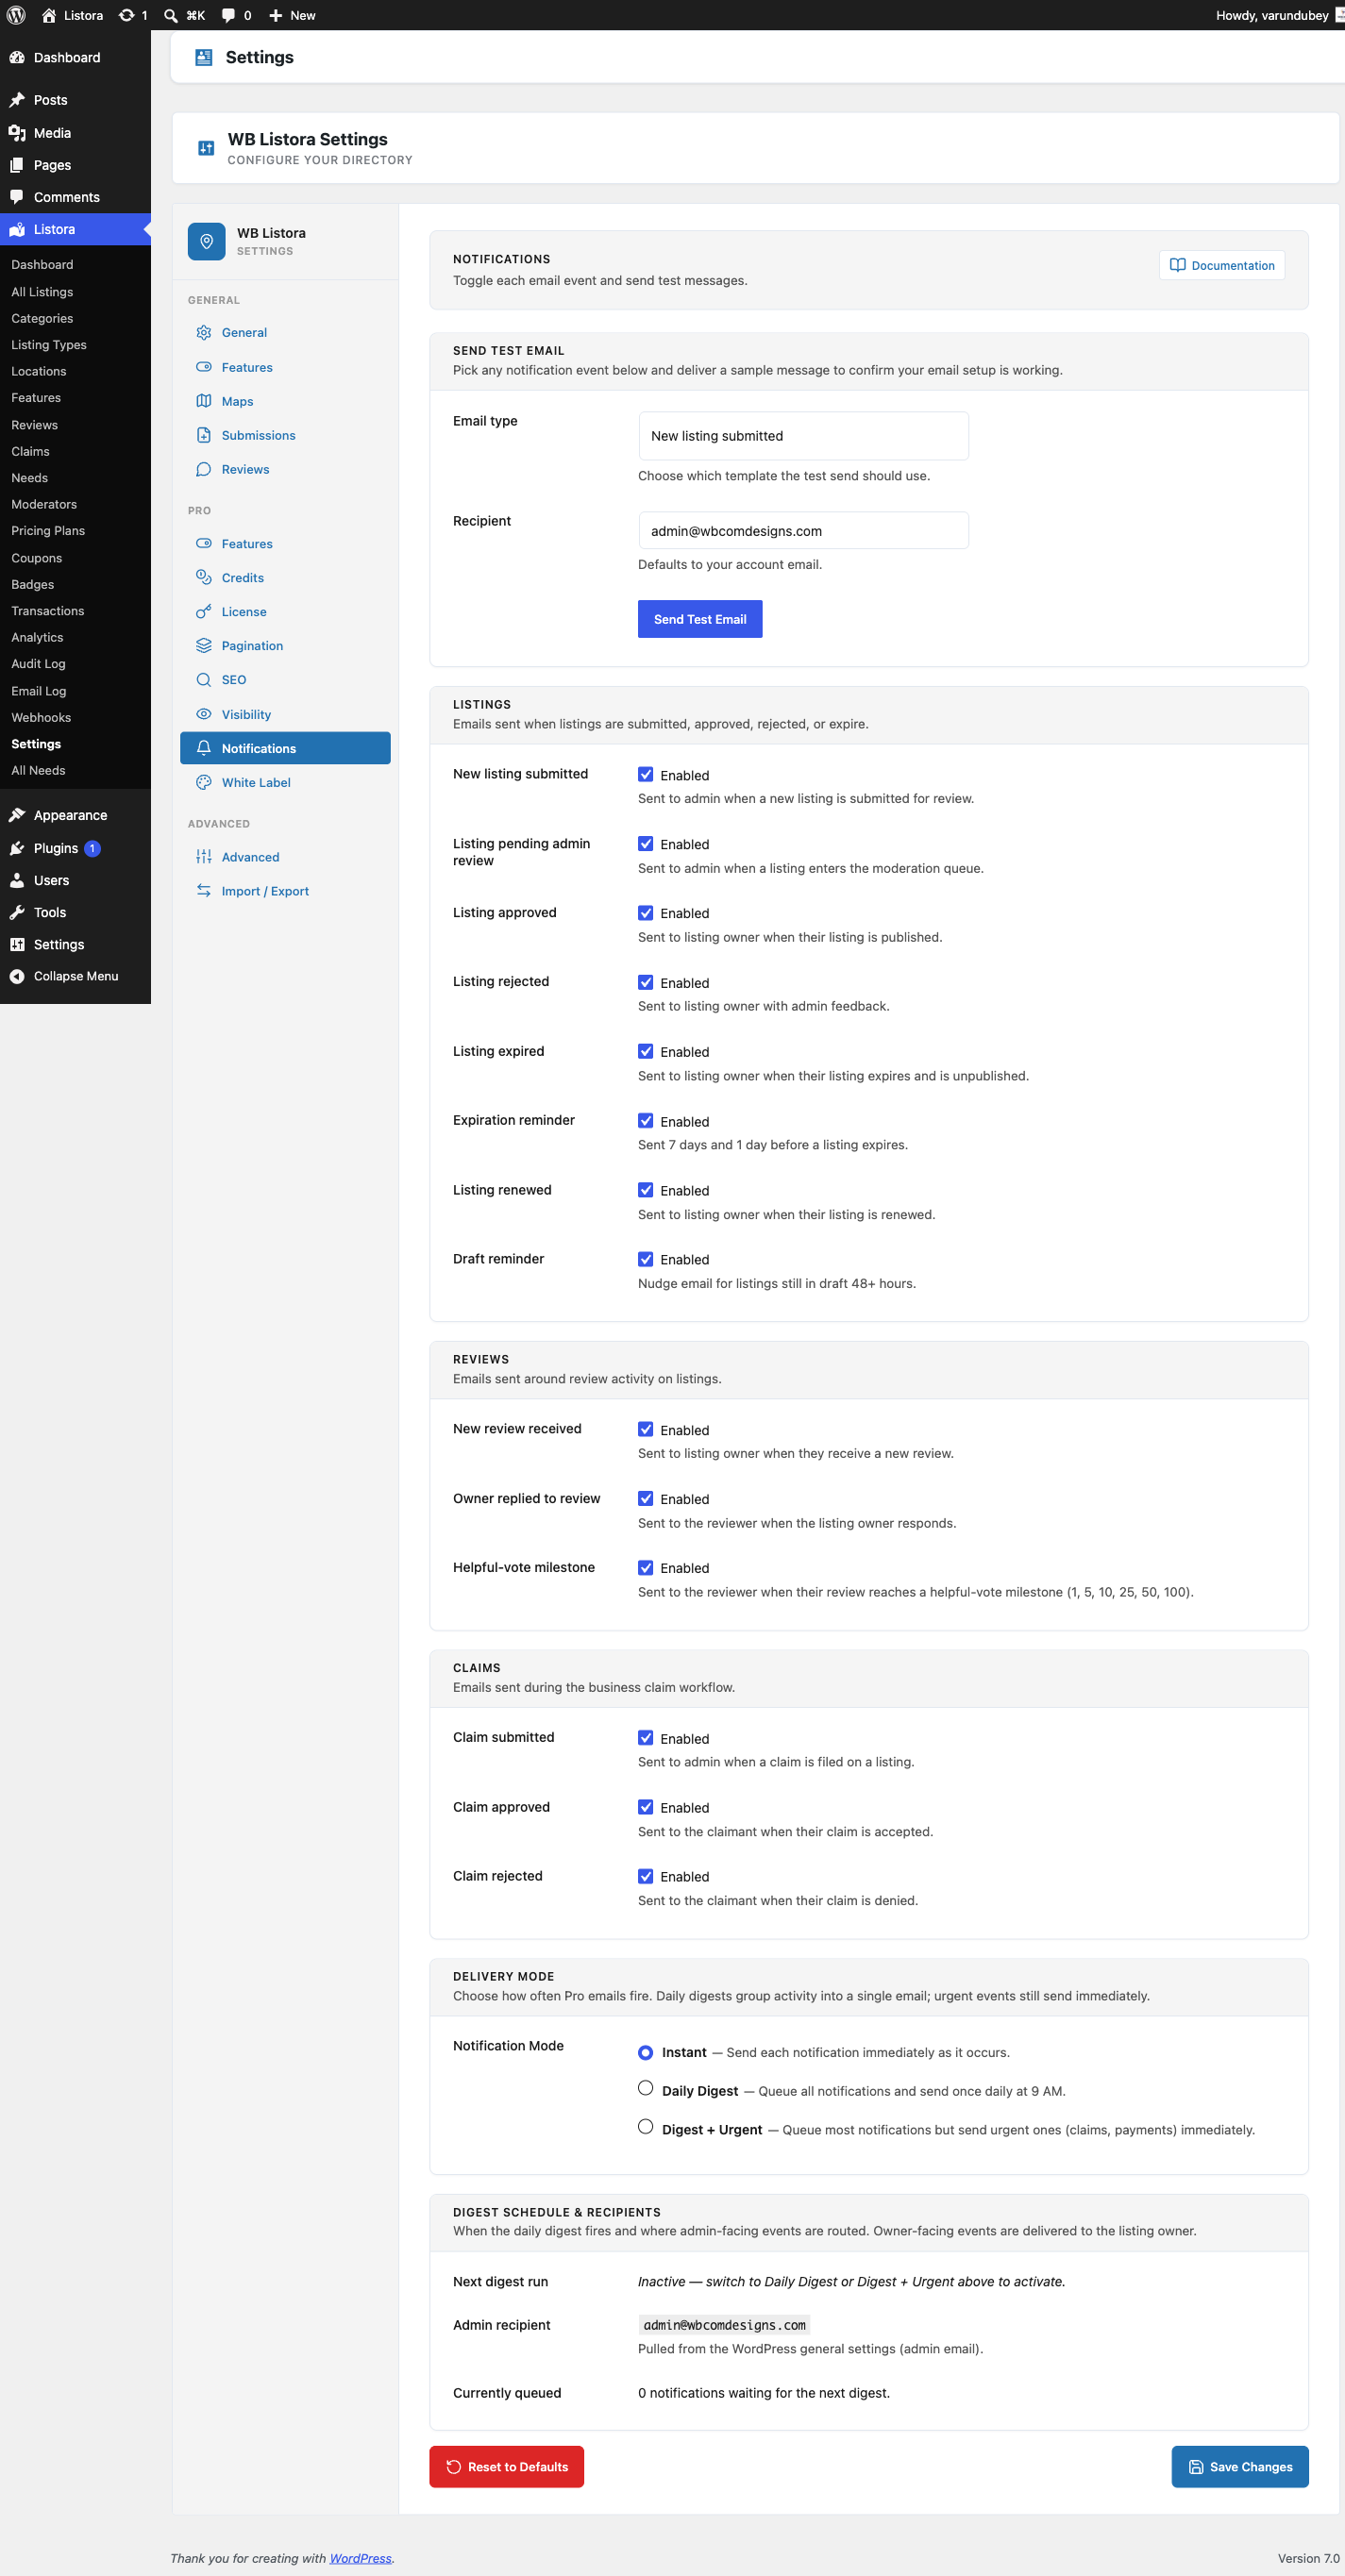
The Notifications tab in Listora → Settings controls which transactional emails Listora sends, the test-send tool for verifying your SMTP setup, and the retention window for the Email Log. Every event in the system can be individually toggled.

Notifications Settings — Send Test Email + Listings + Reviews + Claims groups

Where it lives

WP Admin → Listora → Settings → Notifications (?page=listora-settings&tab=notifications)

Requires the manage_listora_settings capability.

Sections

Send Test Email

The top block lets you dispatch a sample of any notification template to any address — useful for confirming your site's outgoing email actually delivers before going live.

Field What it does
Email type Dropdown grouped by category (Listings / Reviews / Claims). Pick which template the test should use.
Recipient Defaults to your account email. Override to send to a customer or test inbox.
Send Test Email button Fires wp_mail() with the chosen template + a test data payload. Inline status appears next to the button on send.

If the test arrives, every Listora event email will too. If it doesn't, the issue is in your site's mail stack (SMTP plugin, transactional service like SendGrid / Postmark / Mailgun) — not in Listora.

Listings (8 events)

Emails sent at every step of a listing's lifecycle.

Event Sent to When
listing_submitted Admin A new listing is submitted for review
listing_pending_admin Admin A listing enters the moderation queue
listing_approved Listing owner Their listing transitions to publish
listing_rejected Listing owner A listing is rejected (with admin feedback)
listing_expired Listing owner A listing expires and is unpublished
listing_expiring_soon Listing owner 7 days and 1 day before expiration
listing_renewed Listing owner A listing is renewed
draft_reminder Listing owner Nudge for listings still in draft 48+ hours (cron-driven)

Reviews (3 events)

Event Sent to When
review_received Listing owner A new review is left
review_reply Reviewer The listing owner publicly responds
review_helpful Reviewer The review reaches a helpful-vote milestone (1, 5, 10, 25, 50, 100)

Claims (3 events)

Event Sent to When
claim_submitted Admin A claim is filed on a listing
claim_approved Claimant Their claim is accepted (post_author transfers to them)
claim_rejected Claimant Their claim is denied

How to use

Turn an email off

  1. Open the tab.
  2. Find the event in its group.
  3. Uncheck Enabled.
  4. Click Save Changes at the bottom of the page.

The event still fires internally (#audit-log-ls) entries, Webhooks, and Digest Notifications still see the action) — only the per-event transactional email suppresses.

Customize email content

Per-event subject + body templates live as overrideable theme files. Copy wp-content/plugins/wb-listora/templates/emails/{event}.php to {your-theme}/wb-listora/emails/{event}.php and edit. See Email Templates for the full template variable list per event.

Tune Email Log retention

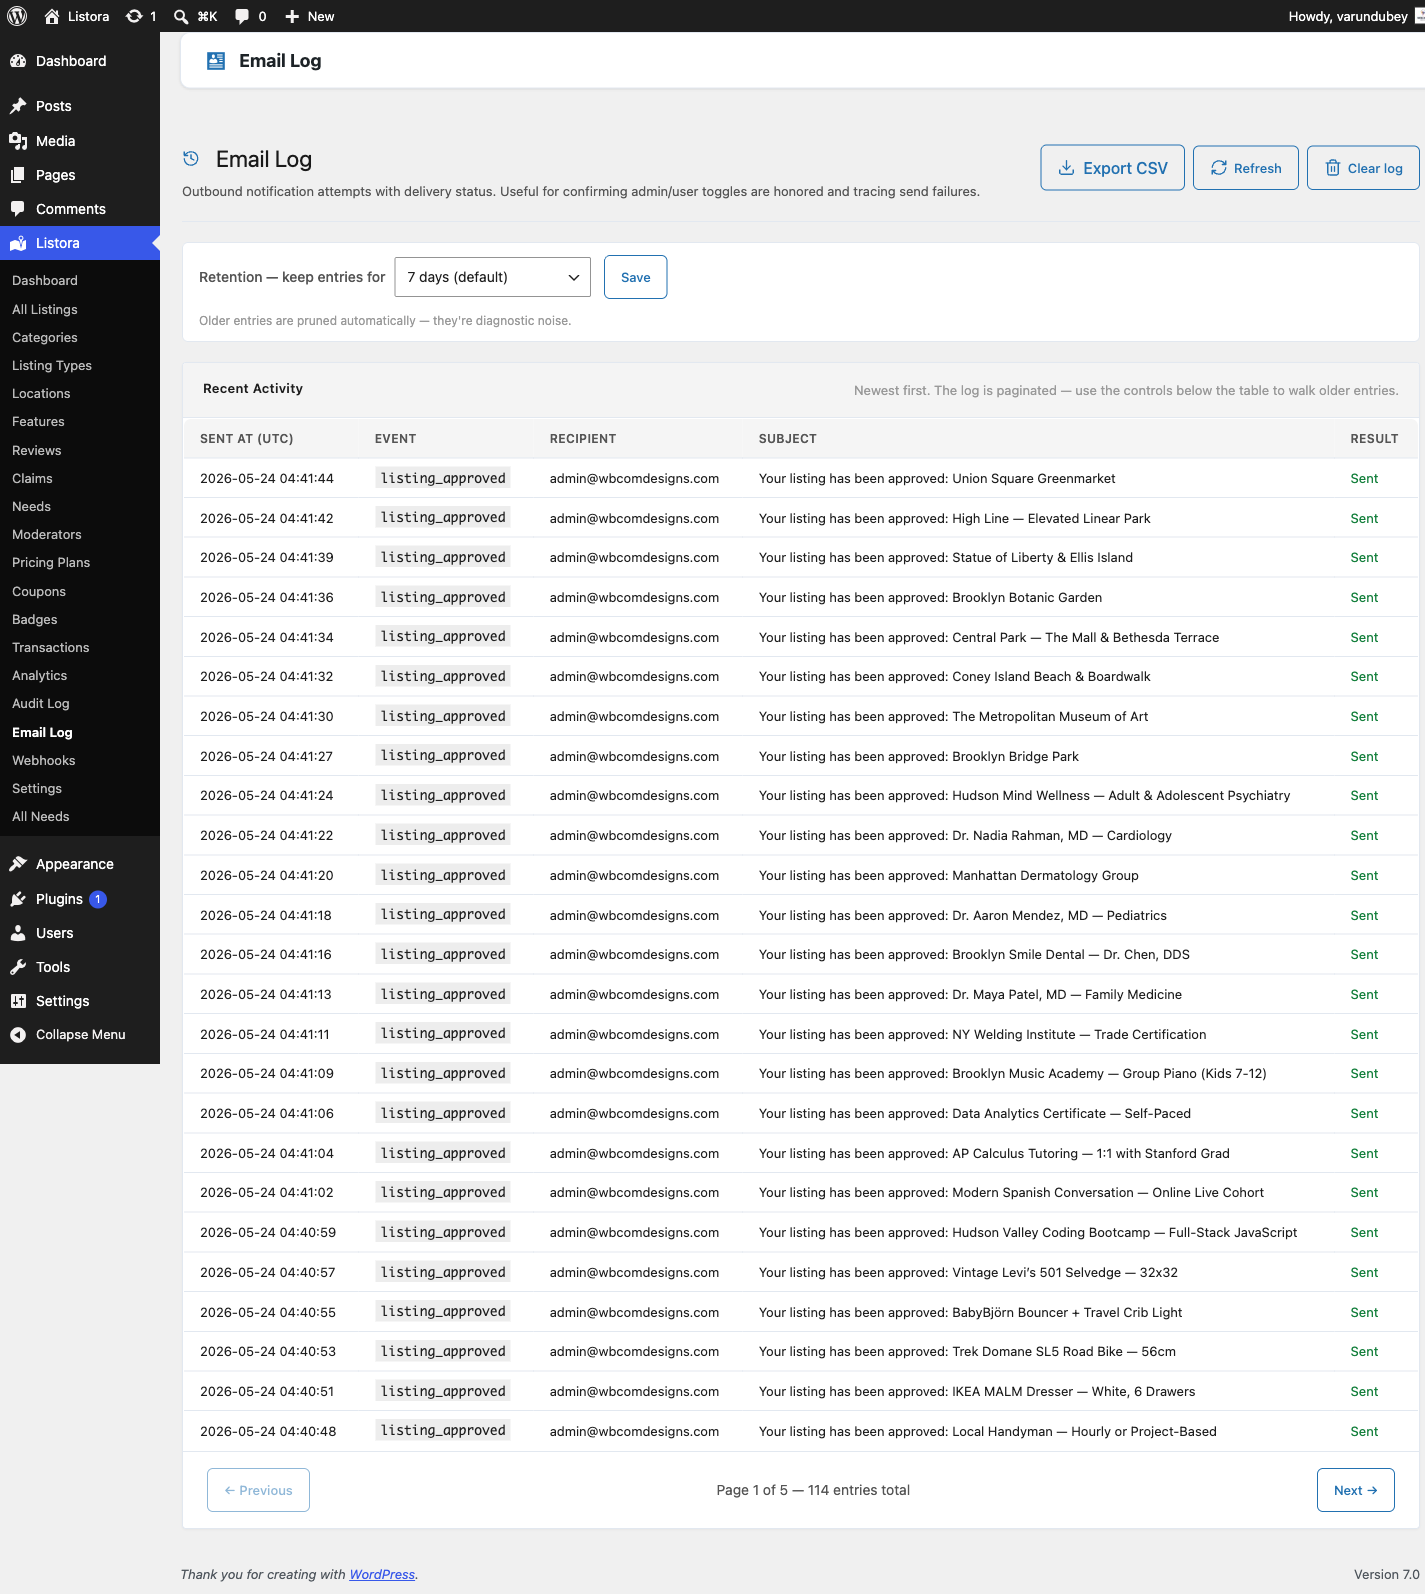
The Email Log page (Listora → Email Log) records every outbound notification attempt with delivery status. The retention dropdown lives at the top of that page (not on this Settings tab) — choose 7, 15, 30, or 0 (lifetime) days. Older entries are pruned automatically by the wb_listora_email_log_prune cron.

Pro: Digest Notifications

When the Digest Notifications feature is on, individual emails per event get bundled into one daily / weekly digest per recipient. The per-event toggles on this page still apply — turning an event off here suppresses both the individual email AND the digest entry.

Programmatic access

// Read every toggle state.
$settings = get_option( 'wb_listora_settings', array() );
$notif = $settings['notifications'] ?? array();
$enabled = ! empty( $notif['review_received'] );

// Or use the helper.
$is_on = wb_listora_notification_enabled( 'listing_approved' );

// Filter per-event default before option lookup.
add_filter( 'wb_listora_notification_default', function ( $default, $event_key ) {
return 'draft_reminder' === $event_key ? false : $default;
}, 10, 2 );

Related

Advanced Settings

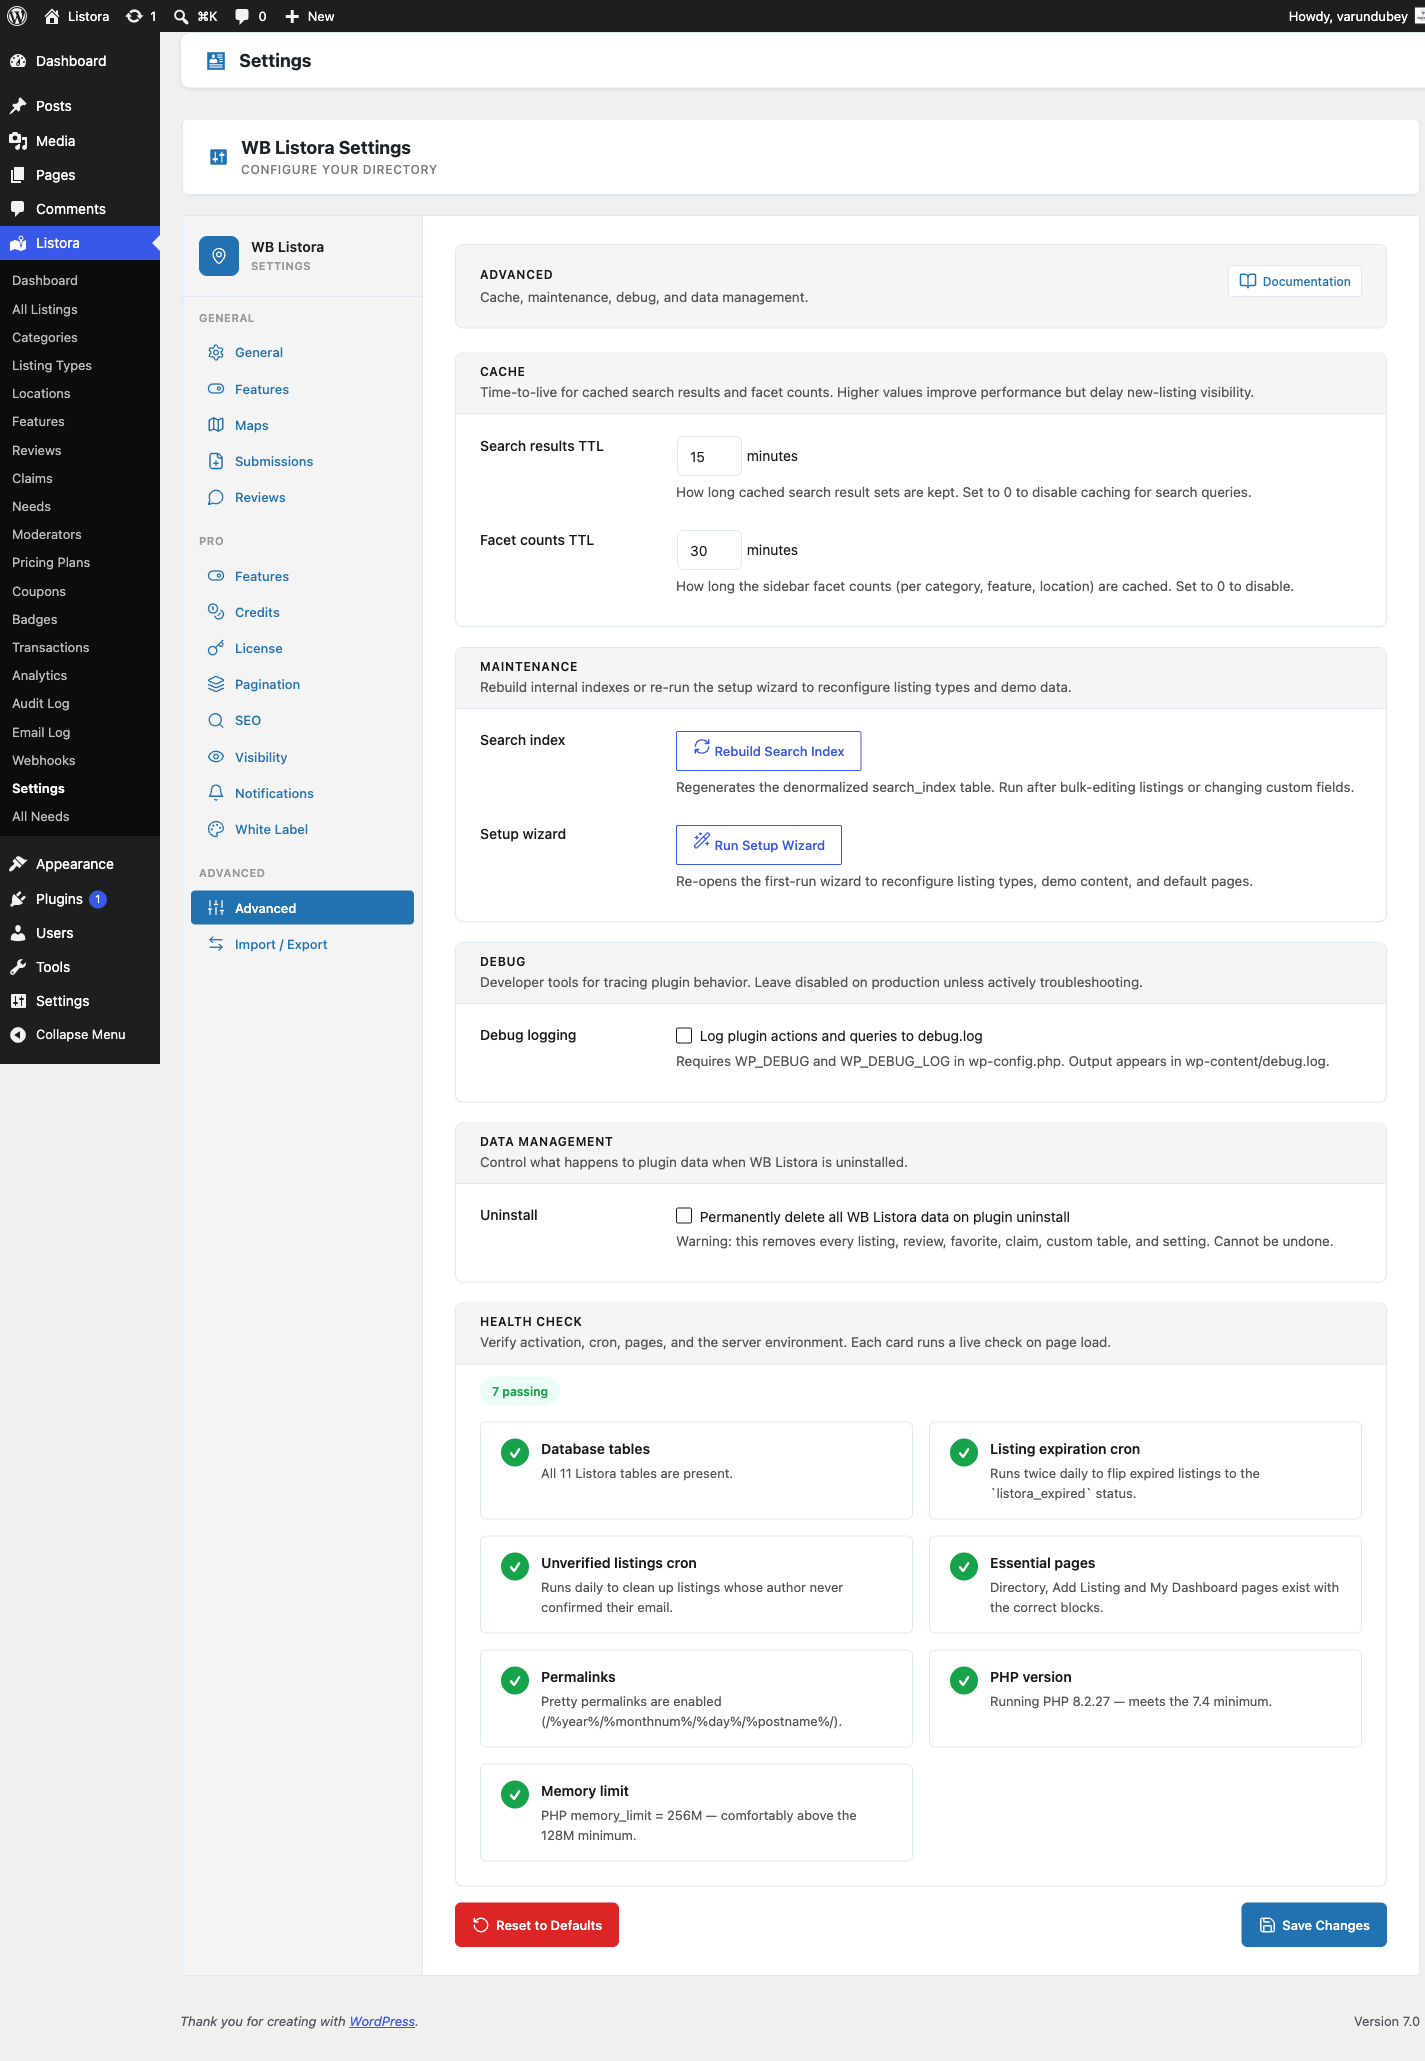
The Advanced tab in Listora → Settings is where the lower-traffic, higher-impact options live — cache TTLs for search results and facets, the index rebuild trigger, debug logging, uninstall behaviour, and the in-page Health Check report.

Advanced Settings — Cache, Maintenance, Debug, Data Management, Health Check sections

Where it lives

WP Admin → Listora → Settings → Advanced (?page=listora-settings&tab=advanced)

Requires the manage_listora_settings capability.

Sections

Cache

How long Listora keeps cached query results before refetching from the database.

Setting Default Range What it caches
Search results TTL (per defaults) 0–120 minutes The full result set of a search query (keywords + filters). Higher = faster page loads + delayed visibility of new listings. Set 0 to disable.
Facet counts TTL (per defaults) 0–120 minutes The sidebar facet counts (per category, feature, location). Higher = faster page loads + counts drift from reality. Set 0 to disable.

When to lower these: sites where new listings need to appear instantly in search (job boards, classifieds with frequent new posts).

When to raise these: high-traffic browse-heavy directories where most visitors land on the same popular searches.

Cache invalidation is automatic on any write: a new listing publish bumps the cache key namespace, so the next read recomputes. The TTL is the upper bound, not the only invalidation trigger.

Maintenance

Button What it does
Rebuild Search Index Regenerates the denormalized wp_listora_search_index table from current listing data. Use after bulk-editing many listings, changing a listing type's custom fields, or after a CSV import that bypassed the auto-rebuild path. Equivalent to wp listora reindex on the CLI.
Run Setup Wizard Re-opens the first-run wizard to reconfigure listing types, demo content, and default pages. Doesn't delete anything — wizard is idempotent.

Debug

Setting Default What it does
Debug logging Off When on, Listora writes per-query and per-action breadcrumbs to wp-content/debug.log. Requires WP_DEBUG + WP_DEBUG_LOG in wp-config.php — without those, this toggle has no effect. Leave off on production except for active troubleshooting.

Data Management

Setting Default What it does
Permanently delete all WB Listora data on plugin uninstall Off When on, deactivating + deleting the plugin removes every listing, review, favourite, claim, custom table, and Listora option. Cannot be undone. When off (default), data persists so reactivating brings everything back. Same safety pattern as WooCommerce.

Health Check

Inline diagnostic panel rendered by WBListora\Admin\Health_Check::render_section() — folds the previous standalone Health Check submenu into this tab so all diagnostics + maintenance live together. Shows green / amber / red signals for:

  • WordPress version + PHP version + memory limit
  • Listora database tables present and indexed
  • REST API reachable
  • Search index sync % (compares index row count to publish listings count)
  • Geo index sync %
  • Outbound email reachable (last wp_mail result)
  • Pro license status (if Pro active)
  • Cron scheduler (Action Scheduler vs WP-Cron fallback)

Any red flag links to the matching docs page or the relevant settings tab.

Equivalent WP-CLI

# Maintenance
wp listora reindex # = Rebuild Search Index button
wp listora reindex --type=hotel # Reindex one type only
wp listora repair # Clean orphan search_index + geo rows
wp listora stats # Show sync % + table sizes

# Cache flush (via WP-CLI cache commands)
wp cache flush # All-cache flush

How to use

  1. First-time tuning: leave the cache TTLs at defaults. Lower them only if you observe stale data.
  2. After bulk edits: click Rebuild Search Index to refresh the denormalized table.
  3. Troubleshooting: turn Debug logging on, reproduce the issue, check wp-content/debug.log, then turn it back off.
  4. Before going live: set Uninstall behaviour according to your data retention policy.
  5. Periodic health checks: scroll to the inline Health Check section to surface any red flags.

Related

Import & Export Settings

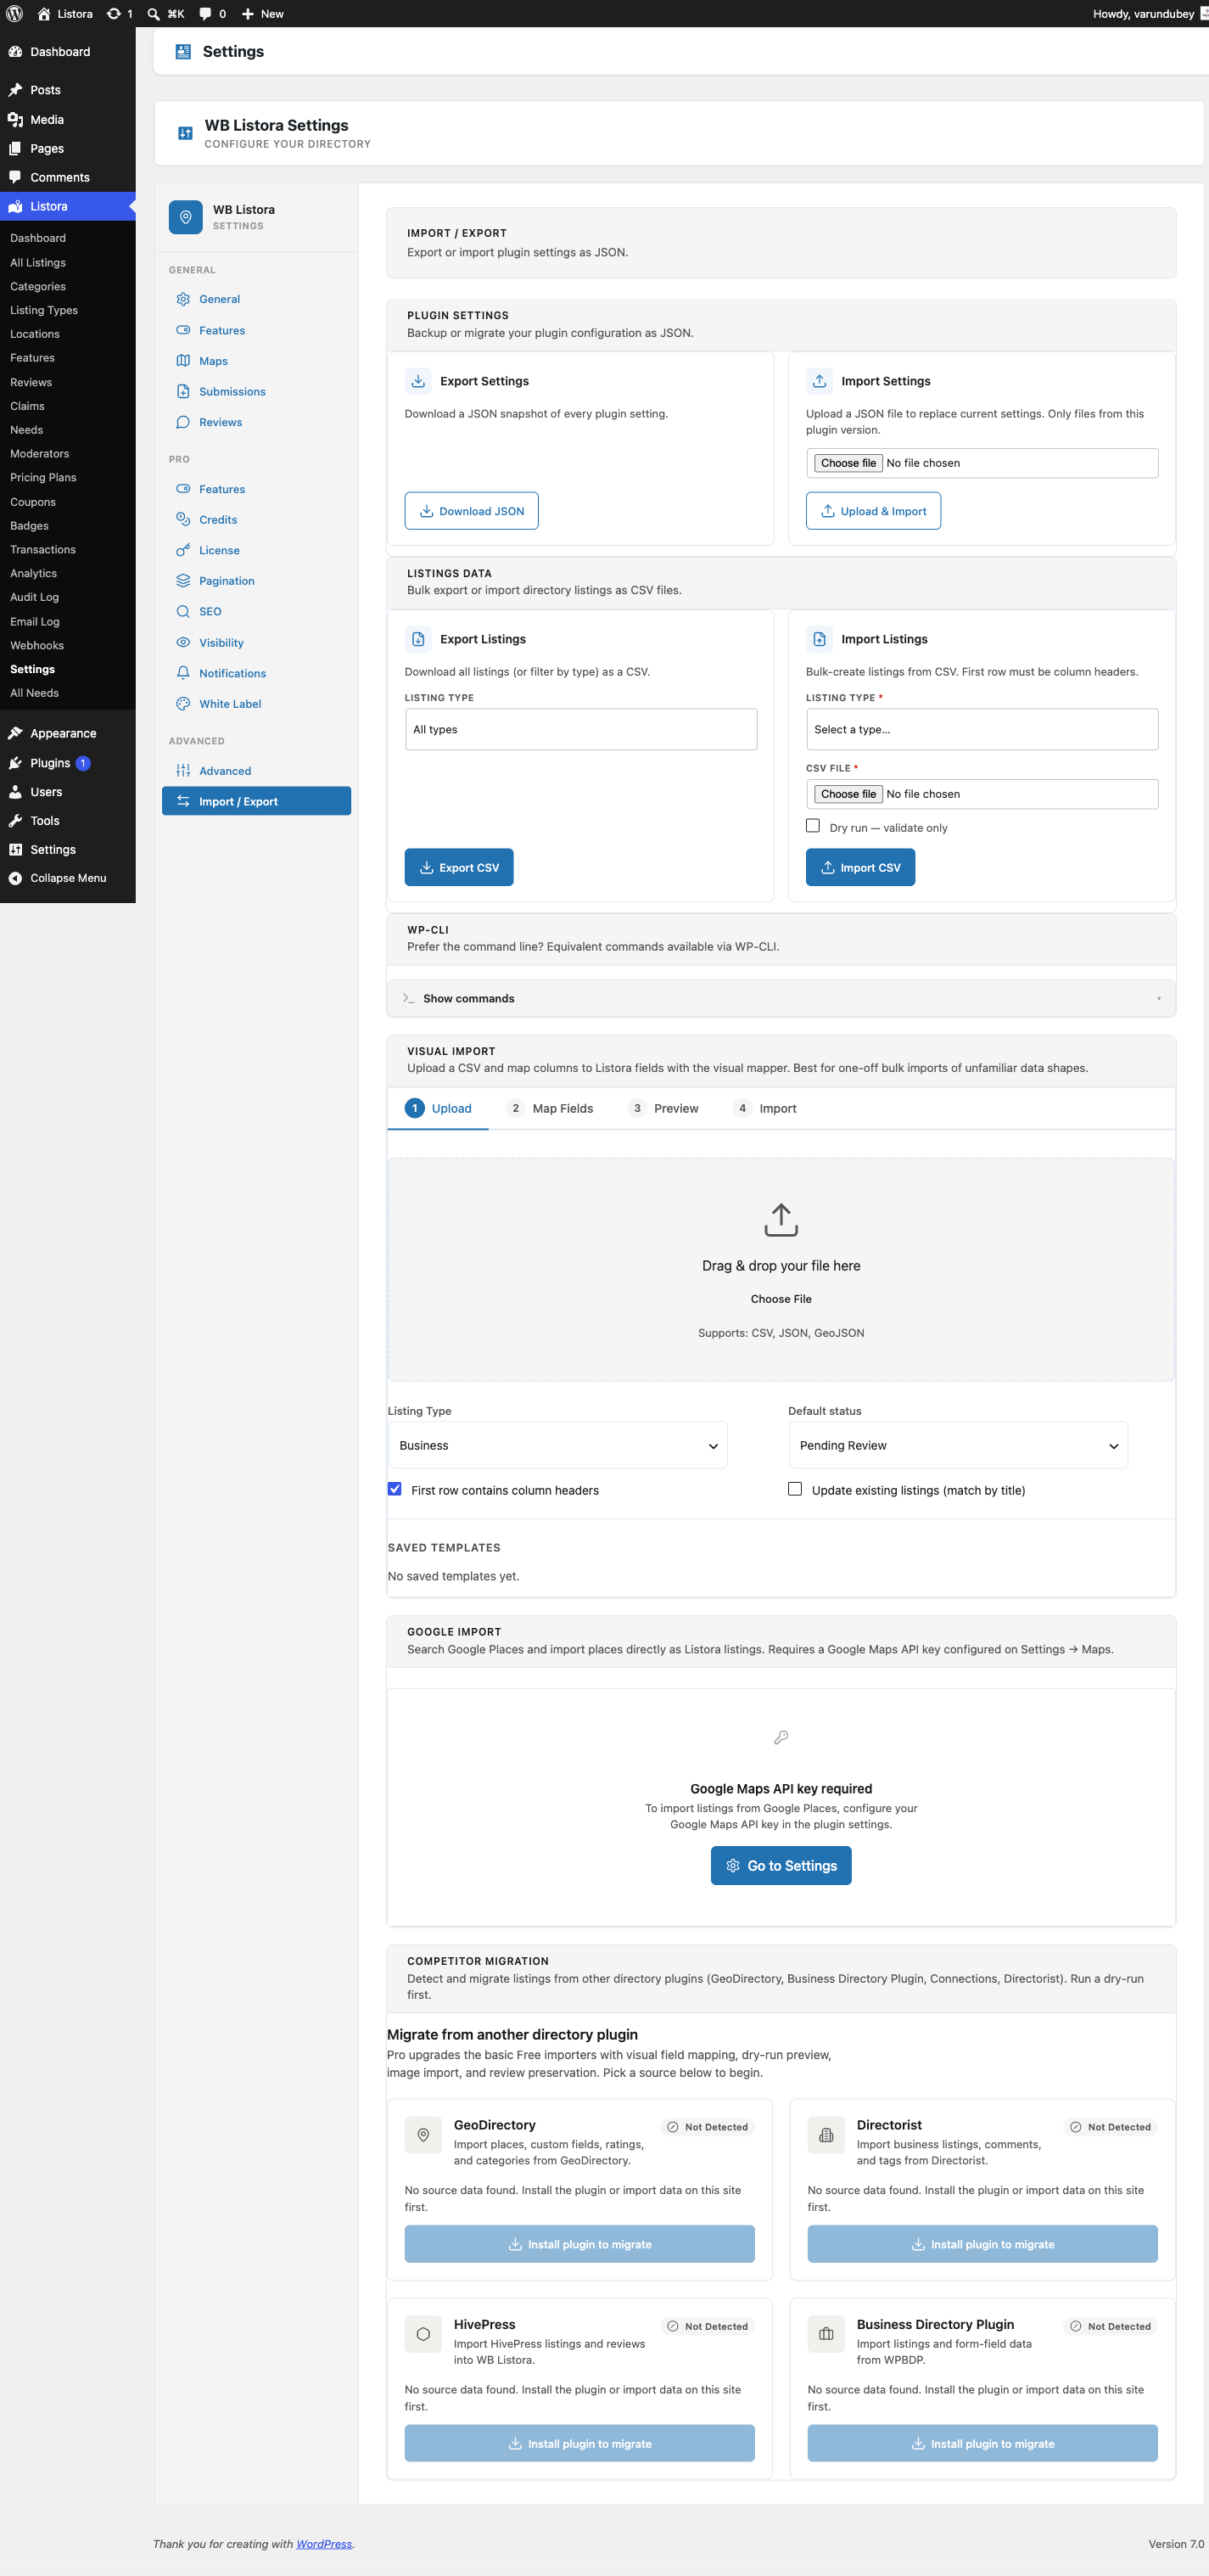
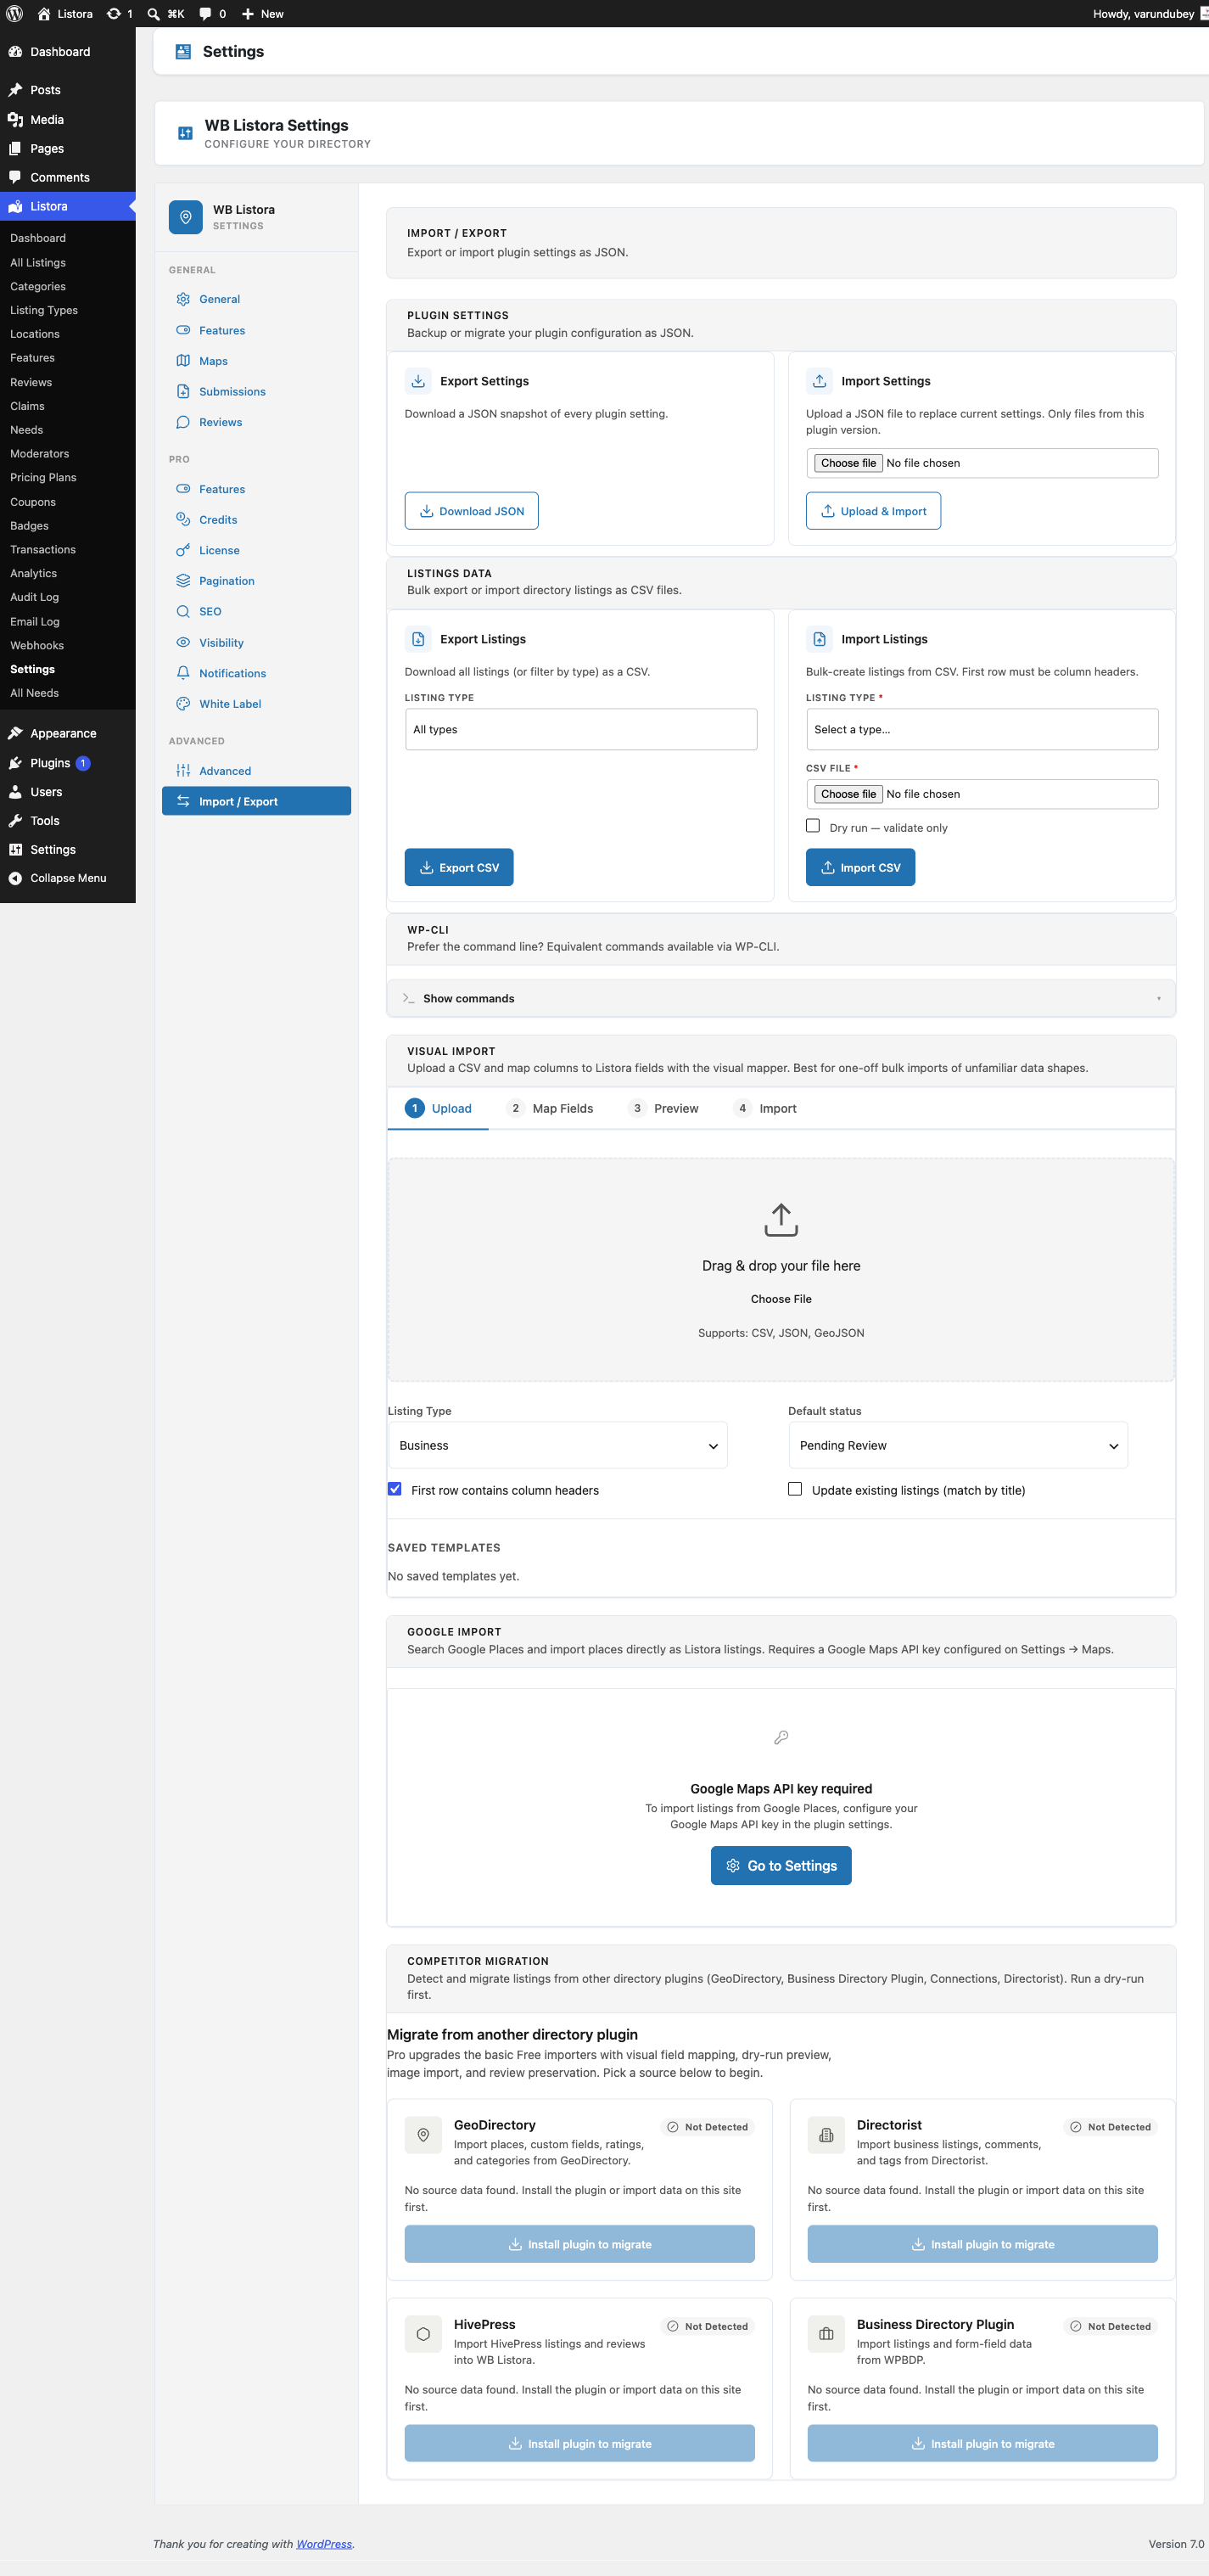
The Import / Export tab in Listora → Settings covers two distinct flows — plugin settings backup / restore as JSON, and bulk listings import / export as CSV. Use it for site clones, version-controlled config rollouts, supplier data feeds, and one-off bulk uploads that would otherwise hit max_execution_time.

Import / Export Settings — Plugin Settings JSON cards + Listings Data CSV cards + WP-CLI panel

Where it lives

WP Admin → Listora → Settings → Import / Export (?page=listora-settings&tab=import-export)

Requires the manage_listora_settings capability.

Plugin Settings (JSON)

Export Settings

Click Download JSON to get a wb-listora-settings-{date}.json snapshot of every plugin setting — wb_listora_settings, wb_listora_features, wb_listora_pro_features (if Pro is active), and every per-tab nested config. Version number embedded so the importer can warn on mismatch.

Common uses:

  • Back up before a major version upgrade.
  • Mirror a staging site's config to production after a tuning session.
  • Commit to a private repo so config changes are version-controlled.

Import Settings

Pick a previously-exported JSON file, click Upload & Import, and every value in the file overwrites the matching option key in your database. Only files exported from the same plugin version are accepted — version-mismatch import gets rejected with the version it expected.

Caution: import REPLACES, doesn't merge. Settings present on the live site but absent in the JSON get reset to their plugin defaults. Export first if you're not sure.

Listings Data (CSV)

Export Listings

Pick a Listing Type from the dropdown (or All types) and click Export CSV. The exporter streams every published listing of that type into a CSV with the headers Listora's importer expects on the round-trip.

Columns included:

  • Core post fields: ID, post_title, post_content, post_status, post_author, post_date
  • Built-in meta: address, lat, lng, phone, email, website, _listora_expiration_date
  • Every custom field for the chosen listing type (meta_*)
  • Taxonomy terms (listora_listing_cat, listora_listing_location, listora_listing_feature)

Default filename: listora-export-YYYY-MM-DD.csv. WP-CLI lets you target a specific output path with --output=.

Import Listings

  1. Pick the Listing type the rows belong to (required — every imported row must belong to a single type).
  2. Pick the CSV file.
  3. Optional: tick Dry run to validate without writing.
  4. Click Import CSV.

CSV requirements:

  • First row must be column headers.
  • Column headers should match field labels OR field slugs — the importer auto-maps by name on import. Headers it can't match get skipped (you'll see "Column X → SKIPPED" in the inline log).
  • One listing per row. Empty cells = field skipped, not "set to empty".

The importer streams row-by-row so a 50K-row file uses constant memory. Progress + per-row decisions stream into the inline log; completion summary shows total imported / skipped / errors.

For multi-type imports, run separate imports per type (admin UI) or use wp listora import per file (CLI).

WP-CLI equivalents

The same operations as CLI commands — useful when the file is large enough that the admin UI hits max_execution_time:

# Export every restaurant listing
wp listora export --type=restaurant --output=restaurants.csv

# Export every listing with status=publish (default) as a single CSV
wp listora export --output=full.csv

# Validate a CSV without importing
wp listora import file.csv --type=restaurant --dry-run

# Import for real
wp listora import file.csv --type=restaurant

Full reference: WP-CLI Commands.

Related

For Site Owners

Reviews System

Available in WB Listora Free + Pro. 1–5 star ratings, written reviews, helpful votes, owner replies, and the report-a-review workflow are Free. Pro adds Multi-Criteria Reviews (per-aspect stars) and Photo Reviews (reviewers attach images).

What it does

WB Listora includes a full review system. Visitors rate listings with 1–5 stars, write a review, vote on helpful reviews, report inappropriate ones, and read owner replies — all on the listing detail page without leaving the page.

Reviews System — screenshot from the modernized 1.0.5 site

Why you'd use it

  • Star ratings and reviews build social proof for listed businesses.
  • Owner replies show businesses are engaged, which keeps the directory active.
  • Helpful votes surface the most useful reviews at the top.
  • Moderation tools let you maintain quality without deleting all reviews manually.

How to use it

For site owners (admin steps)

  1. Go to Listora → Settings → Reviews to configure:
  • Auto-approve reviews — publish immediately or hold for moderation.
  • Minimum content length — require a minimum character count (e.g., 30 characters).
  • One review per listing — prevent duplicate reviews from the same user.
  • Require login — only registered users can submit reviews.
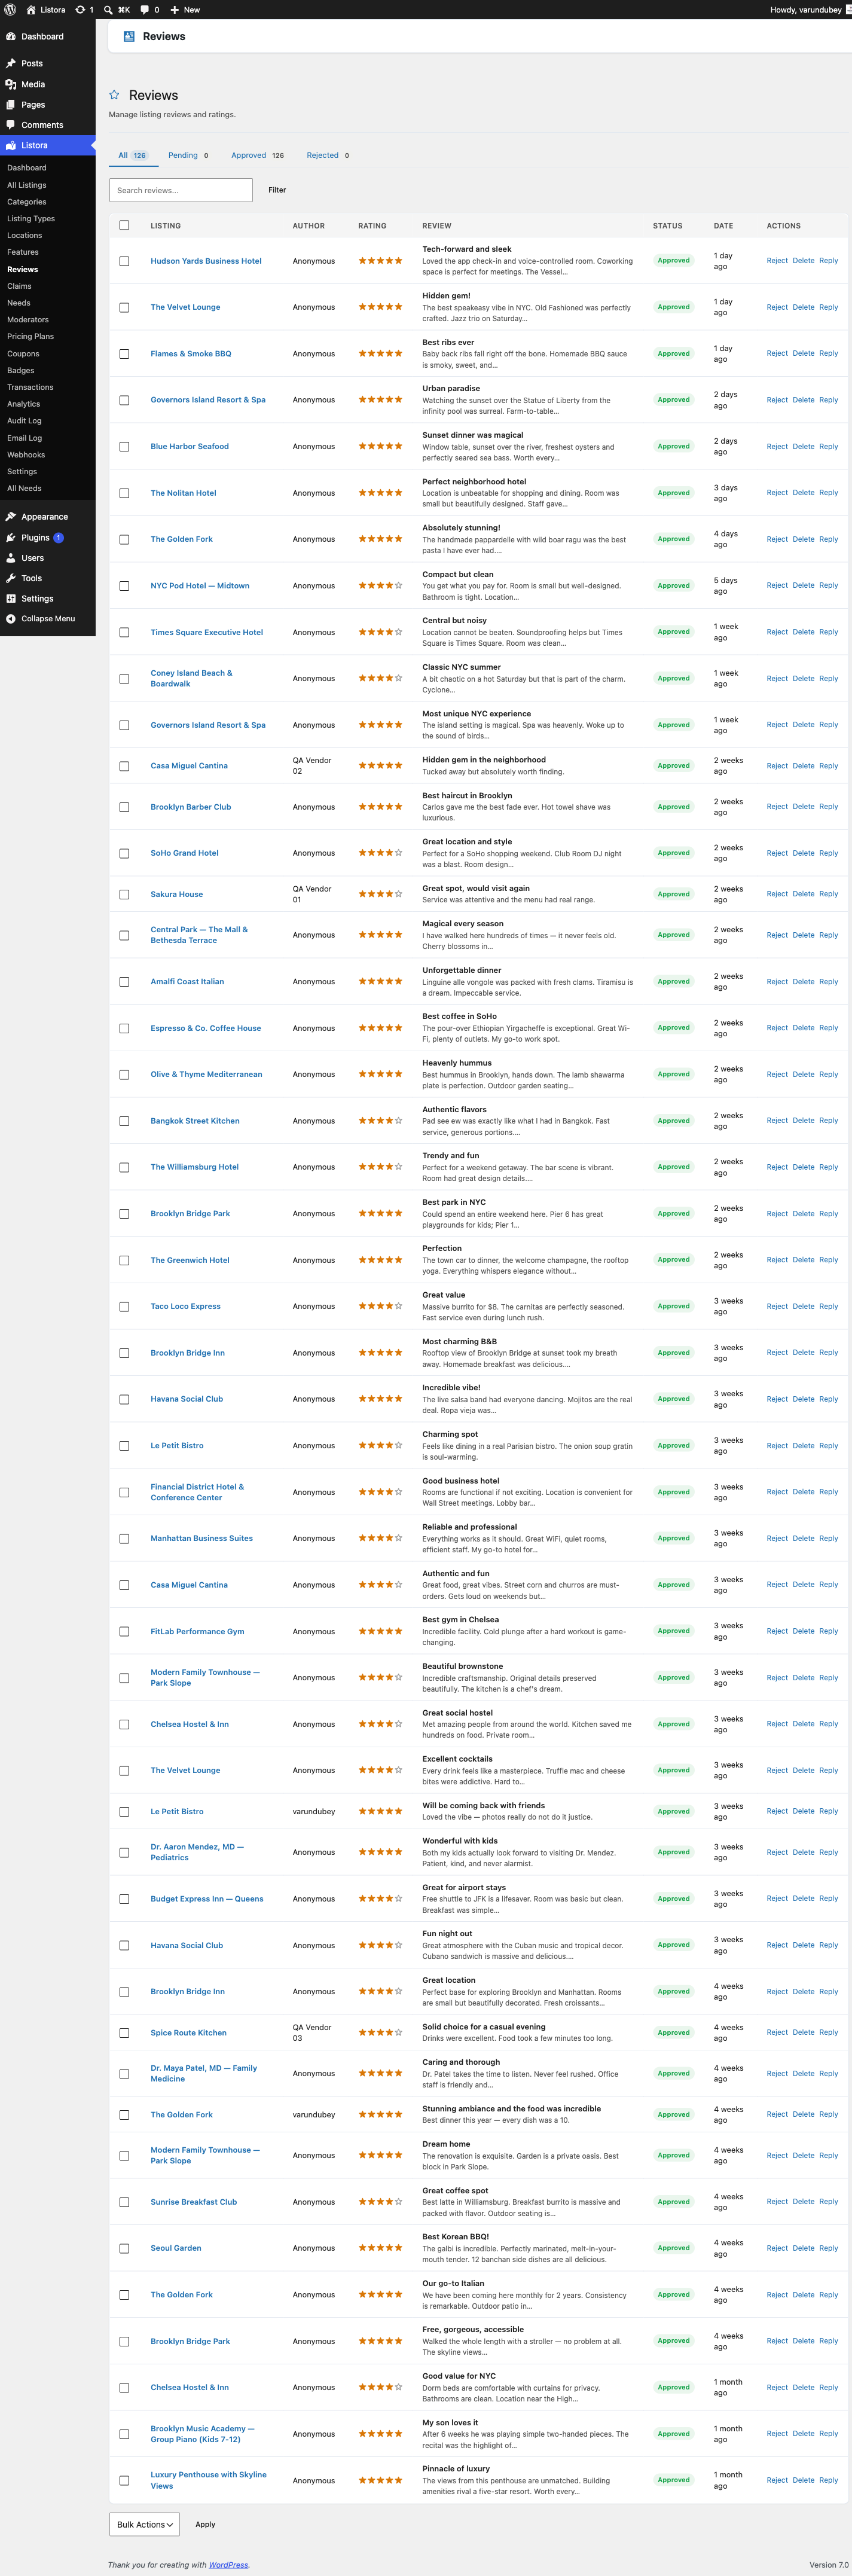
  1. To moderate held reviews, go to Listora → Reviews:
  • Filter by Pending, Approved, or Rejected.
  • Search by listing name or reviewer.
  • Bulk approve or reject using the checkboxes.
  • View the flag status of reported reviews.

For end users (visitor/user-facing)

Submitting a review:

  1. Navigate to a listing detail page and click Write a Review.
  2. Select a star rating (1–5).
  3. Write your review title and text.
  4. If the listing type has multi-criteria ratings enabled (Pro), rate each criterion separately.
  5. Click Submit. Depending on moderation settings, your review appears immediately or after admin approval.

Editing a review: If the site allows it, you can edit your review by clicking Edit next to your existing review.

Deleting a review: Click Delete on your own review to remove it.

Helpful votes: Click Helpful on any review to upvote it. The most helpful reviews rise to the top.

Reporting a review: Click Report to flag a review as inappropriate. Admins see flagged reviews in Listora → Reviews.

Owner reply: If you own a listing, navigate to the listing's detail page or your User Dashboard → Reviews tab and click Reply next to any review. Your reply appears below the review, labelled "Owner Response."

Tips

  • Enable One review per listing to prevent review manipulation — users can update their existing review instead of submitting duplicates.
  • Use Auto-approve only if your directory has a small, trusted user base. For public directories, manual moderation is safer.
  • Encourage listing owners to reply to reviews — directories with active owner replies see more review submissions.
  • Multi-criteria reviews (Pro) let you define custom rating aspects per listing type. For example, restaurants get Food, Service, Ambiance, and Value; hotels get Rooms, Cleanliness, Service, Location, and Value. See Multi-Criteria Reviews.
  • Photo reviews (Pro) let reviewers upload images. See Photo Reviews.

Common issues

Symptom Fix
Review form not visible Verify the Listing Reviews block is on the detail page template, or that the Listing Detail block is present
Reviews stuck in Pending Go to Listora → Reviews and approve them manually, or enable auto-approve
Owner can't see the Reply button Confirm the user is the listing author or has the moderate_listora_reviews capability
"One review per listing" not working Clear your site cache — the duplicate check uses a database query that caching may bypass

Related features

Business Claims

Available in WB Listora Free + Pro. The claim workflow is Free; Pro adds the Verification Badge that displays once a claim is approved.

What it does

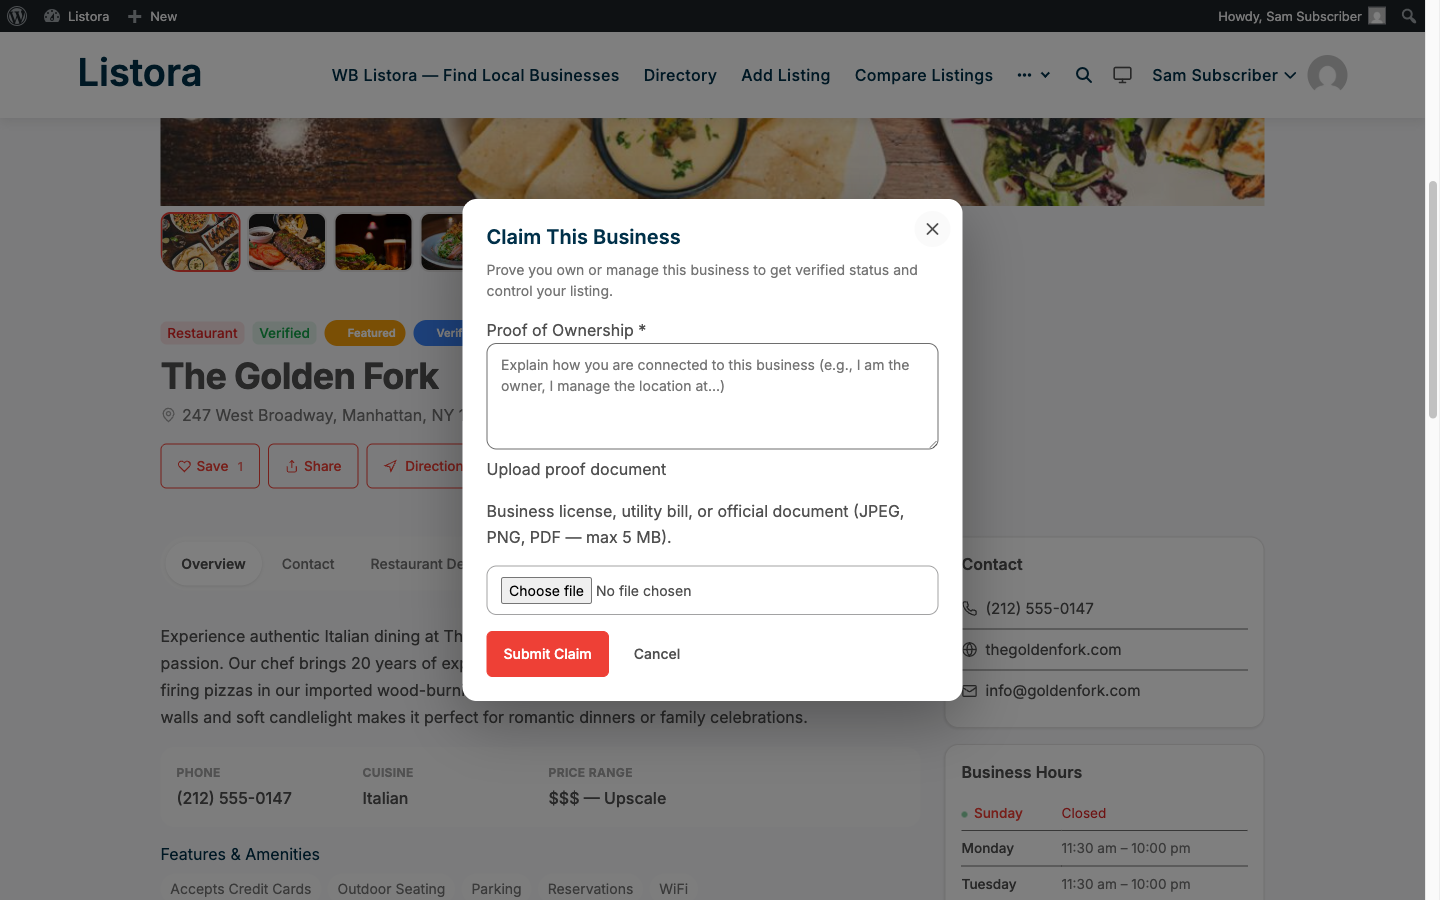
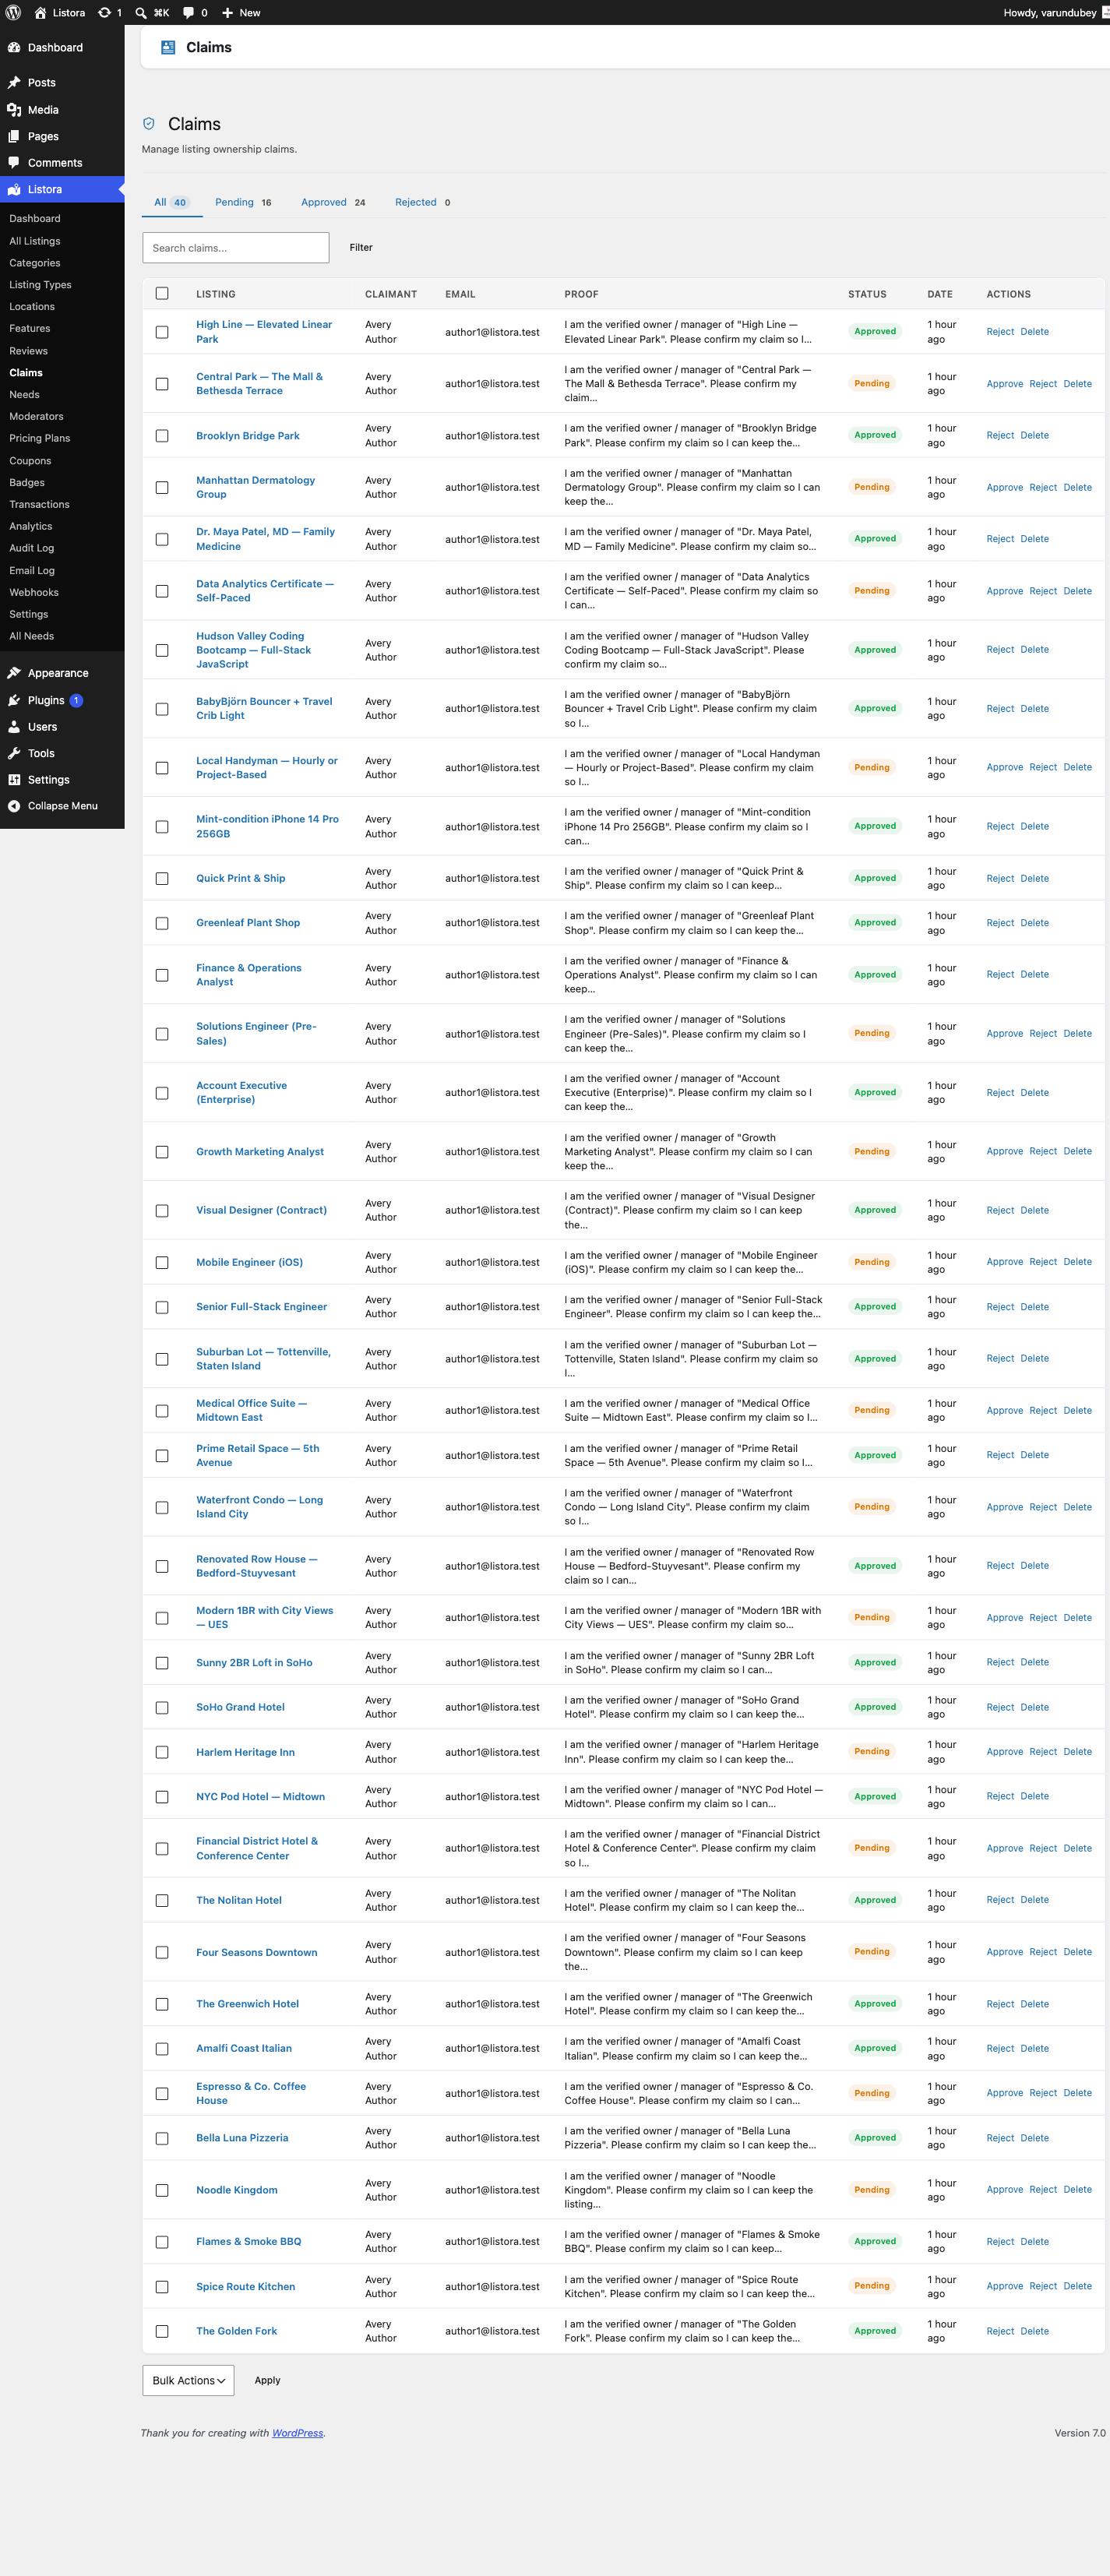
The claims system lets real business owners take ownership of a listing in your directory. Once a claim is approved, the owner can edit the listing, reply to reviews, and manage their services — all from their user dashboard.

Business Claims — screenshot from the modernized 1.0.5 site

Why you'd use it

  • Unclaimed listings get stale; claims give owners a reason to keep data accurate.
  • Transfers listing management to the owner — reducing your admin workload.
  • Creates trust signals: claimed listings can display a verification badge (Pro).
  • No code required — the entire flow is handled by the plugin.

Claims admin — pending claims with approve / reject / view-proof actions

How to use it

For site owners (admin steps)

  1. Go to Listora → Settings → Claims and toggle Enable claims on.
  2. Set Auto-approve to off (recommended) so you can review each claim before transferring ownership.
  3. Check Require login to ensure only registered users can submit claims.
  4. When a claim is submitted, go to Listora → Claims to review it:
  • Filter by status: Pending, Approved, Rejected.
  • Open a claim to see the business role, verification notes, and contact information provided by the claimant.
  • Click Approve to transfer the listing to the claimant, or Reject with an optional reason.

For end users (visitor/user-facing)

  1. Find an unclaimed listing (it shows a "Claim this listing" button on the detail page).
  2. Click the button and fill in the claim form:
  • Business role: Owner, Manager, or Authorized Representative.
  • Verification notes: How you can prove ownership (e.g., "I am listed on the company registration").
  • Contact information: Phone or email for verification follow-up.
  1. Submit the claim. A success message appears with a "View my claims" link pointing to the My Claims tab on your dashboard.
  2. You'll receive an email notification when the claim is approved. The email includes an Edit Listing button so you can start managing your listing immediately.

What happens on approval

  • The listing's author is changed to the claiming user.
  • The user gains edit access to that listing from their My Claims dashboard tab.
  • A verification badge can be added manually by the site owner (Pro — see Verification Badges).
  • An email confirmation is sent to the claimant with a direct link to edit the listing.

Tips

  • Require a phone number in the verification notes field — it makes it easier to contact claimants quickly.
  • Reject a claim with a clear reason (e.g., "Please contact support with proof of ownership") so claimants know what to provide.
  • Use Listora → Claims regularly — pending claims don't expire, so review them on a schedule.
  • If you auto-approve claims, be aware that anyone can claim any listing. Only enable auto-approve for directories where listings are pre-verified.
  • The My Claims tab on the user dashboard shows claim status in real time. Direct claimants there after submission.

Common issues

Symptom Fix
"Claim this listing" button not visible Verify claims are enabled under Listora → Settings → Claims
User doesn't receive approval email Check your WordPress mail configuration; test with a plugin like WP Mail SMTP
Approved claim user can't edit the listing Confirm the listing's author was transferred correctly in Posts → All Posts
Claim status not updating on dashboard Clear your site cache

Related features

Moderators

Pro feature — requires WB Listora Pro. Free sites manage moderation entirely through the admin role.

What it does

The Moderators feature creates a dedicated Listora Moderator WordPress role. Users assigned this role can approve listings, moderate reviews, and manage claims — without having full admin access to your site. New listing submissions can be assigned to moderators automatically using round-robin distribution.

Moderators — screenshot from the modernized 1.0.5 site

Why you'd use it

  • Delegate content moderation to trusted team members without giving them full WordPress admin access.
  • Scale your directory's content review process across multiple moderators.
  • Moderators can't change settings, delete listings, or manage listing types — the role is scoped specifically to moderation tasks.
  • Round-robin auto-assignment distributes the review workload evenly.

How to use it

For site owners (admin steps)

Assigning the Moderator role:

  1. Go to Users → All Users.
  2. Click on the user you want to make a moderator.
  3. Change their Role to Listora Moderator.
  4. Click Update User.

What moderators can do:

Permission Moderator
View all listings Yes
Edit listings (not delete) Yes
Approve/reject listings Yes
Moderate reviews Yes
Manage claims Yes
View reports Yes
Delete listings No
Change settings No
Manage listing types No
View analytics No
Manage other moderators No

Round-robin assignment: When a new listing is submitted, it is automatically assigned to the next moderator in the rotation. Moderators receive an email notification for their assigned submission.

Managing moderators: Go to Listora → Moderators to see all users with the moderator role and their assignment counts.

For end users (visitor/user-facing)

The Moderator role is admin-only — visitors and regular users do not interact with moderators directly. Moderators log in to the WordPress admin to perform their tasks.

Tips

  • Assign at least two moderators so submissions are covered if one is unavailable.
  • Moderators see only the listings assigned to them in round-robin mode — this prevents duplicate review effort on the same listing.
  • Brief your moderators on your content standards before assigning the role. The plugin provides the tools; your team provides the judgment.
  • If a moderator is on leave, temporarily change their role to Subscriber to pause their round-robin assignments. Re-assign to Listora Moderator when they return.
  • Administrators have the manage_listora_moderators capability added by Pro — use this to control which admins can assign and manage moderators.

Common issues

Symptom Fix
Moderator can't see the Listora menu The role should automatically have access — deactivate and reactivate Pro to re-register capabilities
Round-robin not distributing evenly Check the moderator list in Listora → Moderators; inactive users in the role may be receiving assignments
Moderator accidentally deleted a listing The Moderator role does not have delete capabilities — if this occurred, the user may have a secondary role (e.g., Editor) that grants delete access

Related features

Analytics

Pro feature — requires WB Listora Pro. Free sites do not include per-listing analytics.

What it does

WB Listora Pro tracks views and engagement clicks on every listing — automatically, without cookies or third-party scripts. Listing owners see their own analytics from their User Dashboard. You see aggregate data from the WordPress admin.

Analytics — screenshot from the modernized 1.0.5 site

Why you'd use it

  • Listing owners get data showing how their listing performs, giving them a reason to keep it updated and renew their plan.
  • You can identify underperforming listings that need attention.
  • Click events (phone, website, email, directions) show actual engagement, not just passive views.
  • Privacy-safe: no personally identifiable information is stored, only aggregate daily counts.

How to use it

For site owners (admin steps)

Analytics are enabled automatically with WB Listora Pro — no configuration is needed to start collecting data.

Bot traffic is excluded server-side. Views from users with the manage_listora_settings capability (site owners) are also excluded so your own browsing doesn't inflate counts.

For end users (visitor/user-facing)

Listing owners see the Analytics tab in their User Dashboard. The tab shows:

For each listing:

  • Views — total page views for the listing detail page.
  • Phone clicks — how many visitors clicked the phone number.
  • Website clicks — how many visitors clicked the website link.
  • Email clicks — how many visitors clicked the email address.
  • Direction clicks — how many visitors clicked "Get Directions."

Time period selector:

  • Last 7 days
  • Last 30 days
  • Last 90 days

Click any listing in the Analytics tab to see its breakdown by event type over the selected period.

Tips

  • Encourage listing owners to check their analytics monthly — it's a strong reason for them to renew paid plans.
  • If you run a featured listing upsell, point owners to their analytics to show the difference in view counts between standard and featured periods.
  • Analytics data is stored in the listora_analytics table (shared with Free, populated by Pro). Do not truncate this table manually.
  • Views are tracked server-side on single listing page loads. Click events (phone, website, etc.) are tracked via a POST /listora/v1/analytics/track REST call triggered by the frontend when a user clicks those elements.
  • To access analytics data programmatically, use the REST endpoint GET /listora/v1/analytics/{listing_id}?period=30. See docs/REST-API.md in the Pro plugin root.

TODO: Confirm whether the Analytics tab appears only when the user has analytics_access plan perk, or for all users regardless of plan.

Common issues

Symptom Fix
Analytics tab not appearing in dashboard Confirm WB Listora Pro is active and the license is valid
View counts not increasing Check that bot detection isn't blocking legitimate traffic; also confirm the page loads as a single listing (is_singular('listora_listing'))
Click events not tracking The click tracker fires via JavaScript REST call — check for JavaScript errors in the browser console
Counts reset or look wrong after migration The listora_analytics table is separate from post data; include it in any site migration

Related features

Audit Log

Pro feature — requires WB Listora Pro. A tamper-evident, searchable record of every meaningful action across your directory — who created, edited, approved, or deleted what, when, and why. Used by moderators to investigate disputes, by site owners to demonstrate compliance, and by support to reconstruct what happened on a problem listing.

Audit Log — admin page showing chronological activity feed

What it is

Most directory plugins log basic moderation actions but lose the trail of everyday edits. Audit Log records every meaningful change with the actor's user ID, IP, timestamp, before/after diff (where applicable), and a structured payload — stored in a dedicated audit_log table so the data outlives the originating row.

Events recorded:

Category Actions
Listings created, updated, deleted, status-changed, reactivated, claimed, verified
Reviews created, updated, deleted, status-changed
Claims submitted, approved, rejected, reassigned
Credits (Pro) added, deducted, refunded, plan activated, paused, resumed
Webhooks (Pro) endpoint created, delivery succeeded, delivery failed
Auth user role transitions, capability changes affecting listings

How it works:

  • Listeners attach to every wb_listora_after_* hook (create/update/delete) — see the long add_action list in class-audit-log.php:191-260.
  • Each entry persists actor (user_id + IP), event key, object reference (post_id / review_id / claim_id), timestamp, and a JSON data blob with the relevant fields.
  • The admin page (Listora → Audit Log) supports filter-by-event, filter-by-actor, filter-by-date, and a search box across the JSON payload.
  • Retention is automatic: a daily Action Scheduler job (wb_listora_pro_audit_cleanup, group wb-listora-pro) prunes rows older than the configured retention window.

Why this matters: when a customer disputes a charge, a listing owner says "I never edited that", or a reviewer claims their review was tampered with — Audit Log is the source of truth.

How you use it

As a site owner / moderator

  1. Enable the feature: Listora → Settings → Features → Audit Log (on by default).
  2. Browse: Listora menu → Audit Log. The chronological feed shows the most recent 50 events with one-line summaries.
  3. Filter:
  • By event type — pick "Listing updated", "Claim approved", etc.
  • By actor — type a username or pick from the dropdown.
  • By date range — start/end dates.
  • Search — full-text across the JSON payload (e.g. find every entry mentioning a specific listing title).
  1. Drill into an event: click the row → opens a detail panel with the full JSON payload + before/after diff (where the event recorded one).

As a compliance officer / auditor

  • Export filtered results as CSV via the Export button (top-right of the page).
  • Set retention to your jurisdiction's minimum via Settings → Audit Log → Retention.
  • Combine with Outgoing Webhooks (Pro) to stream audit events to an external SIEM in real time.

Settings & options

Setting Location Default Notes
Feature toggle Settings → Features → Audit Log On
Retention window Settings → Audit Log → Retention 90 days Older rows pruned by daily cron
Cleanup cron wb_listora_pro_audit_cleanup Daily Action Scheduler, group wb-listora-pro
Storage wp_listora_audit_log table InnoDB, indexed on event, user_id, object_id, created_at Survives plugin deactivation

Developer hooks worth knowing:

  • wb_listora_pro_audit_log_event (filter) — modify a recorded event before insert (add custom fields, redact PII).
  • wb_listora_pro_audit_log_record (action) — fire your own custom events into the log: do_action( 'wb_listora_pro_audit_log_record', 'my_event', $payload );

Related

Pricing Plans

Pro feature — requires WB Listora Pro. Define listing tiers (Free, Starter, Premium, Featured, etc.) with their own credit costs, durations, featured placement, expiration behavior, and perks. Listing owners pick a plan at submission; the plan controls how the listing renders, how long it lives, and what it costs.

Pricing Plans — admin list with cost, duration, and perks per plan

What it is

A directory doesn't monetize uniformly — a basic free listing is fine for indexing, but premium placements, longer visibility, and featured slots need to be paid. Pricing Plans is the data model that makes that possible.

Each plan is stored as a listora_plan custom post type so plans are versioned, ordered, taxonomy-filterable, and editable in the WordPress admin like any other content. A plan record carries:

  • Name + description — what the submitter sees at checkout.
  • Credit cost (_listora_plan_credits meta) — how many credits activating this plan deducts from the owner's balance (see Credits & Pricing Plans for the credit system).
  • Duration in days — how long the listing stays published before reverting to listora_expired status.
  • Featured flag — whether listings on this plan appear in the Featured Listings (Free) (docs in progress) carousel.
  • Listing-type scoping — restrict a plan to specific listing types (e.g. a "Hotel Premium" plan only available to Hotel submissions).
  • Listing-cap — optional hard limit on how many active listings one user can have on this plan.

How activation works (the Hold/Commit pattern, since v1.5.0):

  1. Submission lands; if the user picked a paid plan, the controller calls Credits::hold($cost) to reserve the credits without deducting.
  2. Listing meta + plan perks + status are written.
  3. Credits::deduct() commits the hold → real ledger debit.
  4. If any step fails, Credits::cancel_hold() releases the reservation — the ledger always shows either hold + deduct OR hold + cancel_hold, never an orphan debit.

If the owner's balance is short at submission, the listing saves with status listora_payment ("Awaiting Credits") and the response carries a paused: true flag — the dashboard shows a Recovery row + "Buy Credits" CTA so they top up and the listing self-resumes.

How you use it

As a site owner — create a plan

  1. Ensure Pro is enabled with pricing_plans toggle on (it's an always-on infrastructure feature, defaulted to on).
  2. WP Admin → Listora → Pricing Plans → Add New.
  3. Fill in:
  • Title — what users see (e.g. "Premium 30-Day").
  • Description — optional pitch line shown at plan selection.
  • Credit Cost — number of credits this plan deducts. Set to 0 to make it a free plan.
  • Duration (days) — how long the listing stays published. Set to 0 for unlimited (rarely useful — expirations are how directories stay fresh).
  • Featured — tick if listings on this plan should appear in featured carousels.
  • Listing Types — pick which types can use this plan (leave empty to allow all types).
  • Listing Cap — optional max active listings per user on this plan.
  1. Publish.
  2. Order plans: plans appear in the submission picker in menu_order ascending — drag to reorder in the Pricing Plans admin list.

As a listing owner — picking a plan at submission

  1. Start a listing submission (/add-listing/).
  2. At the Choose your plan step, see the available plans for the listing type you selected, each with its cost, duration, and perks.
  3. Click a plan → continue submitting. The plan's credit cost is deducted on publish.
  4. If balance is insufficient, the listing saves as "Awaiting Credits" — top up via Buy Credits, and the listing auto-publishes once balance covers the plan.

Settings & options

Setting Location Default Notes
Feature toggle Always-on infrastructure On Disable only by removing Pro
Plan CPT listora_plan (wp-admin/edit.php?post_type=listora_plan) Standard WP CPT — supports drafts, scheduled publish, etc.
Canonical cost meta key _listora_plan_credits Since v1.5.0 (was _listora_plan_credit_cost pre-release)
Hold/commit credit pattern (system) On Prevents orphan debits
Paused-listing recovery Dashboard → My Listings "Awaiting Credits" rows show buy-credits CTA

Developer hooks worth knowing:

  • wb_listora_pro_plan_cost (filter) — modify the credit cost of a plan at activation time (e.g. apply a coupon).
  • wb_listora_pro_plan_perks (filter) — modify the perks array applied to a listing on plan activation.
  • wb_listora_pro_listing_paused (action) — fires when a submission lacks credits and pauses; listeners can email the owner, queue a webhook, etc.
  • wb_listora_pro_listing_resumed (action, 4 args) — fires when a top-up auto-resumes a paused listing.

Related

Coupons

Pro feature — requires WB Listora Pro. Free sites do not have a coupon system.

What it does

Coupons let you offer discount codes that reduce the credit cost of a listing plan. Users enter a coupon code during the plan selection step of the submission form. The discount applies immediately — before the user confirms and credits are deducted.

Coupons — screenshot from the modernized 1.0.5 site

Why you'd use it

  • Run limited-time promotions to drive listing submissions.
  • Offer referral discounts or partner codes to specific business groups.
  • Restrict coupons to specific plans so a 50% discount only applies to your premium tier.
  • Set per-user usage limits to prevent a single person from using a code multiple times.

How to use it

For site owners (admin steps)

Creating a coupon:

  1. Go to Listora → Coupons → Add New Coupon.
  2. Set the coupon title (this is your internal reference name, not the code).
  3. Fill in the coupon fields:
  • Coupon Code — the code users will enter (e.g., LAUNCH50). Codes are case-insensitive.
  • Type — choose Fixed (deduct a set number of credits) or Percent (deduct a percentage of the plan cost).
  • Value — the discount amount (e.g., 10 for 10 credits off, or 20 for 20% off).
  • Usage Limit — total number of times the code can be used across all users. Set to 0 for unlimited.
  • Per User Limit — maximum times a single user can use the code. Set to 0 for unlimited.
  • Expiry Date — date after which the code is no longer valid. Leave blank for no expiry.
  • Minimum Credits — minimum plan credit cost required for the coupon to apply. Set to 0 for no minimum.
  • Restrict to Plans — optionally limit the coupon to one or more specific plans by selecting their names.
  1. Publish the coupon.
  2. Share the code with users.

Checking usage:

The coupon list at Listora → Coupons shows the usage count next to each coupon. Open a coupon to see the current count against the usage limit.

Deactivating a coupon:

Set the coupon's status to Draft to immediately disable it. Users who enter the code will see an "inactive" error.

For end users (visitor/user-facing)

  1. During listing submission, the Choose a Plan step includes a coupon field.
  2. Enter the code and click Apply.
  3. If the code is valid for the selected plan, the discounted credit cost appears immediately on the plan card.
  4. Select a plan and continue — the discounted amount is deducted from your balance at submission.

Tips

  • Use uppercase codes — they're easier to communicate and the system normalizes to uppercase automatically.
  • For launch promotions, set a short expiry date and a reasonable usage limit rather than a permanent unlimited coupon.
  • Restrict high-value coupons to your most expensive plan using Restrict to Plans — this prevents users from applying large discounts to free or low-cost plans.
  • If you want a coupon for a specific group (e.g., a partner organization), set Per User Limit to 1 and distribute unique codes via email — but this requires creating one coupon per recipient. For bulk codes, consider a single shared code with a tight Usage Limit.
  • A coupon with Minimum Credits set prevents applying it to free plans. Set min_credits to at least 1 to exclude free-plan submissions.

Common issues

Symptom Fix
"Coupon code not found" error Confirm the coupon is published (not Draft) in Listora → Coupons
"This coupon is not valid for the selected plan" The coupon has Restrict to Plans set — the user must select one of the restricted plans
Code applied but discount not showing The plan card updates the displayed cost; if it doesn't change, try clicking Apply again
"Coupon has reached its usage limit" Increase the Usage Limit or create a new coupon

Related features

Verification Badges

Pro feature — requires WB Listora Pro. Free sites can approve claims but cannot award verification badges.

What it does

Verification badges let you mark individual listings as verified businesses. A badge appears on the listing card in search results and on the listing detail page. Visitors see at a glance that this business has been vetted by the directory.

Verification Badges — screenshot from the modernized 1.0.5 site

Why you'd use it

  • Verified badges build trust with visitors making decisions about which business to contact.
  • Listings with badges stand out in the search grid, increasing click-through.
  • Awarding badges gives business owners an incentive to keep their listing information accurate.
  • You control which listings earn a badge — verification is always a manual, admin decision.

How to use it

For site owners (admin steps)

Verification badges are managed from the WordPress admin listing edit screen.

Awarding a verification badge:

  1. Go to Listora → All Listings (or Posts → All Posts filtered by Listora Listing).
  2. Click on the listing you want to verify.
  3. In the right sidebar, find the Verification metabox.
  4. Check Verified Business to award the badge.
  5. Optionally check Claimed to mark the listing as owner-claimed (separate from the claims workflow).
  6. Click Update to save.

The badge appears immediately on the listing card and detail page.

Removing a badge:

  1. Open the listing in the admin.
  2. Uncheck Verified Business in the Verification metabox.
  3. Click Update.

Search filter: Visitors can filter search results to show only verified listings. The verified_only=true parameter is supported in the search REST API.

For end users (visitor/user-facing)

Verification is managed entirely by the site owner — there is no self-service verification flow. Visitors see the badge on:

  • Listing cards in the search grid.
  • Listing detail pages near the listing title.

Tips

  • Establish a verification policy before awarding badges. For example: "We verify businesses that have been claimed and have a physical address confirmed by the owner."
  • Batch-verify listings after a claims approval workflow: approve a claim, then go to that listing and award the badge in the same session.
  • The verification badge and the claimed status are two separate checkboxes — a listing can be claimed without being verified, and verified without being claimed.
  • To filter search results to verified listings only via URL, append ?verified_only=1 to your directory page URL (requires the search block to respect this parameter).
  • For large directories, use the Listora → All Listings admin table with column sorting to review which listings are verified.

Common issues

Symptom Fix
Verification metabox not visible Confirm WB Listora Pro is active
Badge not appearing on listing card Clear your site and page cache after saving
"Verified only" search filter not working Confirm the verified_only parameter is supported in your version — check the REST API docs

Related features

Coming Soon Mode

Pro feature — requires WB Listora Pro. Free sites are always publicly visible once the directory page is published.

What it does

Coming Soon Mode hides your directory from the public while you set up content, configure settings, and import listings. Site owners retain full access. Visitors see a branded "Coming Soon" page instead of the directory.

Coming Soon — screenshot from the modernized 1.0.5 site

There is also a Private mode that requires visitors to be logged in — useful for members-only directories.

Why you'd use it

  • Set up a complete directory before going public — no half-finished pages visible to visitors or search engines.
  • The Coming Soon page is noindex by default, keeping your directory out of Google until it's ready.
  • Private mode creates a gated directory accessible only to registered users.
  • You can share a preview link with clients or stakeholders (by creating a user account) without making the directory public.

How to use it

For site owners (admin steps)

  1. Go to Listora → Settings → Pro and find the Directory Visibility section.
  2. Choose a visibility mode:
  • Public — the directory is visible to everyone (default).
  • Coming Soon — visitors see a "Coming Soon" page; site owners see the full directory.
  • Private — visitors who aren't logged in are redirected to the login page; logged-in users without directory access are redirected to the homepage.
  1. Save settings.

Who can bypass Coming Soon / Private mode:

Users with the manage_listora_settings capability (site owners and admins) see the full directory regardless of visibility mode.

The Coming Soon page:

The built-in Coming Soon page shows your site name and a "We're almost ready" message. It includes a noindex, nofollow meta tag to prevent search engine indexing.

To customize the Coming Soon page:

Override the template at {theme}/wb-listora/coming-soon.php. Copy the template from the Pro plugin's templates/coming-soon.php as a starting point.

Switching back to public:

Change Directory Visibility back to Public and save. The directory is immediately accessible to all visitors.

For end users (visitor/user-facing)

In Coming Soon mode, visitors to any listing URL, listing archive, or taxonomy page see the Coming Soon page.

In Private mode, visitors are redirected to the WordPress login page. After logging in, they are sent back to the page they requested.

Tips

  • Use Coming Soon mode during a migration from another directory plugin. Import and verify all content before going public.
  • The Coming Soon page does not affect your site's regular WordPress pages — only directory pages (listing URLs, archives, and taxonomy pages) are intercepted.
  • Give clients or reviewers a temporary WordPress account with the Subscriber role to preview the directory in Coming Soon mode without granting admin access.
  • Switch to Public mode at a specific date and time by scheduling it manually — Coming Soon has no built-in countdown timer, but you can schedule an admin task or use a WordPress scheduler plugin.
  • Private mode requires read_listora_listings capability for access. This capability is granted to all logged-in WordPress users by default.

Common issues

Symptom Fix
Admin still seeing Coming Soon page Confirm your user account has the manage_listora_settings capability — Administrators have it by default
Regular site pages showing Coming Soon Coming Soon only affects listing pages — if other pages are affected, check for a conflicting plugin
Coming Soon page not showing your site name Ensure your site name is set under Settings → General → Site Title
Google still indexing the directory Coming Soon adds noindex to the page; it may take Google several weeks to deindex existing pages

Related features

White Label

Pro feature — requires WB Listora Pro. Free sites show WB Listora branding in the admin interface.

What it does

White label mode removes WB Listora branding from the admin interface. You can rename the plugin and the admin menu to your own brand name, and optionally hide the author attribution. This is useful when you're building a directory for a client and want it to appear as your own product.

White Label — screenshot from the modernized 1.0.5 site

Why you'd use it

  • Clients see your brand, not the underlying plugin — strengthening your agency relationship.
  • Removes references to "WB Listora" and "Wbcom Designs" from menus and the Plugins list.
  • Requires no code — branding changes are configured from a settings panel.
  • The rename applies to both Free and Pro plugin entries in the Plugins list.

How to use it

For site owners (admin steps)

  1. Go to Listora → Settings → Pro and scroll to the White Label section.
  2. Toggle Enable White Label on.
  3. Fill in your custom settings:
  • Plugin Name — the name shown in the admin menu and Plugins list (e.g., "My Directory Pro").
  • Hide Author — check this to remove the "Wbcom Designs" author link from the Plugins list.
  1. Save settings.
  2. Refresh the page. The admin menu label and the Plugins list entries now show your custom name.

What changes:

Location Before After
Admin sidebar menu Listora Your custom name
Plugins list — Name WB Listora / WB Listora Pro Your custom name
Plugins list — Author Wbcom Designs (hidden if toggled) Hidden

What does not change:

  • Plugin file names and directories (wb-listora, wb-listora-pro) remain unchanged — this is necessary for updates to work correctly.
  • CSS class names and JavaScript store namespaces remain as listora/directory — this affects code only, not the visible UI.
  • REST API namespace remains listora/v1.

For end users (visitor/user-facing)

White label affects the admin interface only. The frontend blocks, listing cards, and user dashboard have no "WB Listora" branding visible to visitors by default.

Tips

  • White label is best applied after initial setup and testing. Enable it just before handing the site to a client.
  • If a client asks "what plugin is this?", the white label protects your product relationship — but do keep documentation of the underlying plugin for your own reference.
  • The plugin file paths (wb-listora/wb-listora.php) remain unchanged because WordPress auto-updates use the plugin file slug. Renaming files would break updates.
  • Combine white label with a custom admin color scheme (via WordPress's appearance settings) for a fully branded admin experience.

Common issues

Symptom Fix
Menu still shows "Listora" after enabling Refresh the admin page; browser caching may be showing the old label
Author still visible in Plugins list Confirm Hide Author is checked and settings were saved
Settings panel not appearing Confirm WB Listora Pro is active and the license is valid

Related features

Digest Notifications

Pro feature — requires WB Listora Pro. Free sites send all notification emails instantly as events occur.

What it does

By default, WB Listora sends each notification email immediately as events occur (a new review, a claim approval, a lead form submission). The Digest Notifications feature batches those emails into a daily summary instead — reducing inbox noise while ensuring nothing is missed.

Digest Notifications — screenshot from the modernized 1.0.5 site

Why you'd use it

  • Business owners with active listings can receive many notifications per day. A single daily digest is less disruptive.
  • Daily digests are easier to scan than individual emails scattered throughout the day.
  • Urgent notifications (claims, payments) can still send immediately even when digest mode is active.
  • You choose the mode per site — some directories benefit from instant alerts, others from digest.

How to use it

For site owners (admin steps)

  1. Go to Listora → Settings → Pro and scroll to the Notifications section.
  2. Choose a notification mode:
  • Instant — every notification sends immediately as it occurs (default).
  • Daily Digest — all notifications are queued and sent once per day at 9 AM (server time).
  • Digest + Urgent — queues most notifications as a daily digest, but sends urgent ones (claims, payments) immediately.
  1. Save settings.

How the digest is sent:

A WordPress cron event runs daily at 9 AM. It collects all queued notifications for each recipient, combines them into a single digest email, and sends it. The queue is cleared after sending.

Email template: The digest uses the template at templates/emails/digest.php. Override it at {theme}/wb-listora/emails/digest.php for custom branding.

For end users (visitor/user-facing)

Digest mode is a site-wide setting controlled by the site owner. Individual users cannot change their own notification frequency — this is a single mode applied to all recipients.

When a user receives a digest email, it lists all notifications from the previous 24 hours grouped by type (new reviews, claim updates, lead form messages, saved search matches).

Tips

  • Instant mode is best for directories where business owners expect real-time updates (e.g., a local services directory where a lead form response needs to be answered within hours).
  • Digest + Urgent is the recommended mode for most directories — it reduces noise while ensuring claim and payment events get through immediately.
  • The digest runs at 9 AM server time. Check your WordPress timezone setting under Settings → General to ensure 9 AM corresponds to a reasonable time for your audience.
  • If WordPress cron is unreliable on your host, consider using a real cron job via cPanel or your host's task scheduler to trigger wp-cron.php at 9 AM.
  • The notification queue is stored in the wb_listora_pro_notification_queue WordPress option. Do not manually modify this option.

Common issues

Symptom Fix
Digest not sending Verify WordPress cron is running with WP Crontrol; check for the wb_listora_pro_send_digest event
Digests arriving at wrong time Check Settings → General → Timezone — cron runs in server time, not necessarily your local time
Individual emails still sending in Digest mode Confirm you saved the notification mode setting; a page cache may be serving the old settings page
Urgent emails not sending immediately in Digest + Urgent mode Confirm the event type is classified as urgent — claims and payments are urgent by default

Related features

Email Templates

Available in WB Listora Free + Pro. Free ships 15 customer-facing templates; Pro adds 13 more (digest, lead-notification, listing-paused, listing-resumed, moderator-reassigned, need-approved, need-match, need-pending-mod, need-rejected, need-response, response-accepted, response-rejected, saved-search-alert).

Every customer-facing email — listing approved, review received, helpful-vote milestone, draft reminder, claim accepted — is rendered from a themeable PHP template with a shared header/footer, a unified token palette, and a single notifications class that pipes data into the template. Themes override templates the WooCommerce way: copy the file into {theme}/wb-listora/emails/ and edit.

Email — listing-approved template rendered in a desktop mail client

What it is

Plugins that hardcode emails ship inconsistent designs across notifications. Listora's email system is a small design system in its own right:

  • Shared partialstemplates/emails/parts/header.php and parts/footer.php are included by every template, so the wordmark, color palette, GDPR footer, and unsubscribe link all live in one place.
  • Tokenized paletteNotifications::get_palette() resolves the colors once per send (primary, success, warning, danger, neutral, text, text_muted, bg_alt, border, white). Templates read $colors['primary'], never hardcoded hex.
  • Variant resolver — each event picks a tone (success / warning / danger / neutral) via Notifications::resolve_variant(), applied to the header band and CTA button. Templates carry no conditional color logic.
  • Plain-text fallbackphpmailer_init AltBody filter generates a text version so clients that prefer plain text still get a readable message.
  • GDPR-friendly footer — marketing emails ($is_marketing = true) carry an $unsubscribe_url; transactional emails skip it.
  • Theme overrides — every template runs through wb_listora_locate_template(); drop a file at {theme}/wb-listora/emails/{name}.php and it wins over the plugin's copy.
  • WPML / Polylang ready — every string is wrapped in __() against the plugin text domain; make-pot extracts them.

The 15 Free templates (in wb-listora/templates/emails/):

claim-approved, claim-rejected, claim-submitted, draft-reminder, listing-approved, listing-expired, listing-expiring-soon, listing-pending-admin, listing-rejected, listing-renewed, listing-submitted, listing-verify-email, review-helpful, review-received, review-reply.

Pro adds (in wb-listora-pro/templates/emails/):

digest, lead-notification, listing-paused, listing-resumed, moderator-reassigned, need-approved, need-match, need-pending-mod, need-rejected, need-response, response-accepted, response-rejected, saved-search-alert.

How you use it

As a site owner — customize without code

For most customers the defaults are fine; if you need brand-specific tweaks:

  1. Override the primary color: Listora → Settings → General → Brand Color. The email palette inherits this token, so every notification picks up your brand.
  2. Logo in emails: drop a 240×60 logo at Listora → Settings → Notifications → Email Logo URL. Surfaces in parts/header.php.
  3. Footer text: Settings → Notifications → Email Footer Text (HTML allowed) — supports GDPR/Imprint requirements.
  4. Send a test: Settings → Notifications → click Send test email for any event.

As a developer — theme override

Themes shipping a directory layout often want their own email skin:

  1. Copy the template you want to change from the plugin (e.g. wp-content/plugins/wb-listora/templates/emails/listing-approved.php) to your theme: wp-content/themes/{your-theme}/wb-listora/emails/listing-approved.php.
  2. Edit the copy. Variables passed in (documented at the top of every template):
  • $site_name, $site_url, $logo_url, $footer_text
  • Per-event: $listing_title, $listing_url, $author_name, $dashboard_url, …
  • $colors (palette array), $variant (success / warning / danger / neutral)
  • $is_marketing, $unsubscribe_url (GDPR fields)
  1. Save. The next outbound email of that type uses your override.

Filter hooks for non-template tweaks

  • wb_listora_email_subject (filter) — modify any subject. Event-scoped variant: wb_listora_email_subject_{event}.
  • wb_listora_email_content (filter) — modify the rendered HTML body. Event-scoped: wb_listora_email_content_{event}.
  • wb_listora_email_recipients (filter) — add CC/BCC; e.g. send admin a copy of every approval.
  • wb_listora_email_headers (filter) — modify wp_mail() headers (Reply-To, custom X-headers).
  • wb_listora_email_logo_url / wb_listora_email_footer_text (filter) — programmatic overrides for the header logo + footer text.

Settings & options

Setting Location Default Notes
Brand color Settings → General → Brand Color Plugin red Drives the email palette via tokens
Email logo Settings → Notifications → Email Logo URL (empty) Rendered in shared header partial
Footer text Settings → Notifications → Email Footer Text "© {year} {site}" HTML allowed
From name Settings → Notifications → From Name Site title wp_mail() From header
Notification mode (Pro) Settings → Notifications → Mode Instant Switch to "Daily digest" to batch (see Digest Notifications)
Test send Settings → Notifications Per-event test button

Template lookup order (Free + Pro share the same locator):

  1. {stylesheet}/wb-listora/emails/{name}.php
  2. {template}/wb-listora/emails/{name}.php (parent theme)
  3. Plugin default

Related

Locations

Built into WB Listora Free.

Hierarchical geographic taxonomy that maps every listing to the place it lives — Country → State → City → Neighborhood, as deep as you need. Locations get their own admin page (Listora → Locations), their own pretty URL (/listing-location/new-york/manhattan/), their own WP-core REST endpoint (/wp-json/wp/v2/listing-locations), and they auto-populate the location facet on every search and grid block.

Locations — admin page showing the Country → State → City hierarchy with listing counts

What it is

Locations is the listora_listing_location taxonomy — same shape as WordPress's built-in category (hierarchical, parent/child, slug-based URLs), specialized for directory geography:

  • Hierarchical so you can nest as deep as the site needs. Single-city directory? One level. Country-wide directory? Three or four (Country → State → City → Neighborhood).
  • Public with its own archive URL — /listing-location/{slug}/ shows every listing in that location (and its children).
  • REST-exposed at /wp-json/wp/v2/listing-locations (WordPress core REST) and surfaced in Listora's own search facets at /wp-json/listora/v1/search?location[]={term-id}.
  • Searchable via the Locations facet in listing-search block — appears as a chip list or dropdown depending on the block's settings.
  • Distinct from physical address. A listing's address / lat / lng meta fields drive map markers and Near Me search. The listora_listing_location term assigned to the listing drives taxonomy navigation and search facets. Most listings carry both; they answer different customer questions.

How you use it

Build your location tree

  1. Admin → Listora → Locations.
  2. Add the top level first — typically Country or State. Leave Parent set to None.
  3. Add children with the Parent dropdown set to the parent term you just created. Repeat until you've covered the geography customers will browse.
  4. Bulk-import via WP-CLI when you have hundreds of terms:
wp term create listora_listing_location "Manhattan" --parent=42
  1. Or import a CSV via the Listings Import — the listora_listing_location column accepts comma-separated term slugs.

Assign locations to a listing

  • Wizard — the Locations field appears as a tag picker (autocomplete with suggestions) in step 2 of the submission wizard. Customers can pick existing terms only; new terms must come from an admin.
  • Admin — the standard WP taxonomy metabox on every listing's edit screen.
  • RESTPOST /listora/v1/submit accepts listora_listing_location: [12, 34] (term IDs) in the payload.

Browse / search by location

  • Archive page/listing-location/new-york/ automatically renders the term archive with every listing tagged to that term OR any of its children. Skin via your theme's taxonomy-listora_listing_location.php template, or via wb_listora_locate_template( 'taxonomy.php' ).
  • Search facet — the listing-search block's Locations facet uses the same term tree. Selecting "New York" matches every child (Manhattan, Brooklyn, etc.) without having to enumerate them.
  • Permalink slug — customizable in Settings → General → Slugs → Location archive base (default listing-location).

Permissions

Capability Who has it What it gates
manage_listora_types Admin, custom roles via Capabilities Create / edit / delete Location terms in admin
edit_listora_listings Admin, Editor, Author, Contributor, Subscriber Assign existing Location terms during submission

Customers cannot add new Location terms from the frontend wizard — only assign existing ones. That keeps the geography tree clean. If you need open user-submitted locations (rare in a directory), filter wb_listora_submission_can_create_terms to true.

Settings & options

Setting Default Where
Archive permalink base listing-location Settings → General → Slugs
Show location facet on search On Listing Search block → Inspector → Filters
Default location display on card None Listing Card block → Inspector → Display
Hierarchical search behavior Include children (filter wb_listora_search_location_children)

Developer hooks

  • wb_listora_location_terms — filter the term list shown in the submission wizard's autocomplete.
  • wb_listora_search_location_children — control whether selecting a parent term includes child terms in search results (default true).
  • wb_listora_rest_prepare_listing — modify what location data appears in the REST listing response.
  • See the Hooks reference for the full list.

Related

Amenities / Features Taxonomy

Built into WB Listora Free.

A flat (non-hierarchical) taxonomy for tagging listings with the amenities or attributes that matter to the customer — Free WiFi, Parking, Pet Friendly, Wheelchair Accessible, Outdoor Seating, etc. Different from Categories (what the listing IS) and Locations (where it IS) — amenities are the FACETS visitors filter on within a category.

Amenities — Features taxonomy admin page with non-hierarchical term list

What it is

The listora_listing_feature taxonomy. Same shape as WordPress's built-in post_tag (flat, comma-separated entry, no parent/child), specialized for directory amenities:

  • Flat — no parent/child. Amenities are independent attributes; nesting them adds friction without value.
  • Comma-entry on the listing edit screen — type "WiFi, Parking, Pet Friendly" and tab to add. Autocomplete suggests existing terms.
  • Public archive at /{feature_slug}/{term}/ — shows every listing with that amenity.
  • Search facet — the listing-search block's "Features" facet auto-populates from this taxonomy. Multi-select is the natural UX (visitors filter by "WiFi AND Parking AND Pet Friendly").
  • REST-exposed at /wp-json/wp/v2/listing-features (WP core) and /wp-json/listora/v1/search?feature[]=wifi,parking (Listora search facet).

Listora calls these "Features" in admin UI to keep terminology consistent with WordPress (we already overload "Categories" for listora_listing_cat, and the post type is "Listing", so "Features" is the natural complement). Many directories use the customer-facing label "Amenities" instead — change it via the wb_listora_taxonomy_labels filter or directly in the registration via register_taxonomy_for_object_type().

How you use it

Build your amenity list

  1. Admin → Listora → Features.
  2. Add the amenities customers will filter on. Common starter set:
  • WiFi, Parking, Wheelchair Accessible, Pet Friendly, Outdoor Seating, Takeout, Delivery, Reservations Required, Vegan Options, Family Friendly, 24/7, Credit Cards Accepted
  1. Keep the list FLAT and SCANNABLE. 8–15 amenities is the sweet spot for filtering UX. Bigger lists overwhelm the sidebar.
  2. Use existing terms — encourage listing owners to pick existing amenities rather than create new ones. The submission wizard's autocomplete makes this natural.

Assign amenities to a listing

  • Wizard — Features field appears as a tag picker (autocomplete from existing terms) in step 2 of the submission wizard. Customers can pick existing terms; creating new ones requires manage_listora_types.
  • Admin — the standard WP taxonomy metabox on listing edit screens.
  • CSV import — comma-separated term slugs in the listora_listing_feature column.
  • RESTPOST /listora/v1/submit accepts listora_listing_feature: ['wifi', 'parking'] (slugs).

Filter by amenity

  • Search block — Features facet on the sidebar / drawer of listing-search block. Multi-select (AND logic by default — listings matching ALL selected amenities). Switch to OR via wb_listora_search_feature_logic filter.
  • Archive page/{feature_slug}/wifi/ lists every listing tagged WiFi. Order via the standard pre_get_posts hook.
  • Card display — toggle the Features chips on the Listing Card block's Inspector → Display panel.

Permissions

Capability Who has it What it gates
manage_listora_types Administrator (#capabilities-ls)) Add / edit / delete Feature terms
edit_listora_listings Admin, Editor, Author, Contributor, Subscriber Assign existing Feature terms to listings

Customers can't add new amenities from the frontend wizard by default — they pick from the curated list. To allow open submission, filter wb_listora_submission_can_create_terms to true.

Customizing the customer-facing label

Default admin label is "Features" but many directories prefer "Amenities". Override globally:

add_filter( 'wb_listora_taxonomy_labels', function ( $labels, $taxonomy ) {
if ( 'listora_listing_feature' !== $taxonomy ) {
return $labels;
}
$labels['name'] = __( 'Amenities', 'your-textdomain' );
$labels['singular_name'] = __( 'Amenity', 'your-textdomain' );
$labels['menu_name'] = __( 'Amenities', 'your-textdomain' );
return $labels;
}, 10, 2 );

Settings & options

Setting Default Where
Archive permalink base listing-feature Settings → General → Slugs
Show Features facet on search On Listing Search block → Inspector → Filters
Show Features chips on card On Listing Card block → Inspector → Display
Multi-select logic AND (listings matching all selected) wb_listora_search_feature_logic filter

Related

Listing Type Editor

Built into WB Listora Free.

The admin page where you create, edit, and delete listing types — Restaurant, Hotel, Real Estate, Job, Event, anything else your directory needs. Each type has its own icon, schema mapping, and custom field set. The Type Editor is distinct from the Listing Types getting-started guide: the guide explains the CONCEPT; this page is the admin SURFACE where you manage them.

Listing Type Editor — list view with icon, name, slug, fields, schema columns

What it is

Listora ships with the listing-type system as a first-class concept: every listora_listing post belongs to exactly one type, and that type determines:

  • Which custom fields appear in the submission wizard.
  • Which Schema.org type the JSON-LD on the detail page emits.
  • Which default icon appears on cards / map markers.
  • Which filterable fields show up as facets on the search block.
  • Which demo pack seeds matching listings when you run wp listora demo seed --pack={slug}.

The Type Editor is where you configure all of that. It's the "schema-design" surface for the directory.

Where it lives

WP Admin → Listora → Listing Types (?page=listora-listing-types)

Requires the manage_listora_types capability.

The list view

Each row shows the type's icon (Lucide SVG), name, slug, field count, filterable-field count, Schema.org type, and a Default badge for whichever type new listings get when no type is specified. Default actions per row:

  • Edit → opens the editor view for that type.
  • Add new field → jump straight into the Fields tab of the editor.
  • Duplicate → clone the type with -copy slug suffix (useful when launching a new vertical).
  • Trash → soft-delete. Listings of this type get their type pointer cleared but stay in the database.

The header Add New Type button opens the editor with action=new.

The editor view

Three tabs.

Settings

Field What it does
Name Customer-facing label everywhere ("Restaurant", "Boutique Hotel").
Slug URL-safe identifier (restaurant). Used in admin URLs, REST routes, and filters. Once set, don't change — existing listings of this type lose their type pointer.
Icon Lucide icon identifier. Dropdown of 24 common directory icons (Building, Utensils, Home, Hotel, Briefcase, Calendar, Shopping Bag, etc.).
Schema.org type Which @type to emit in the listing detail JSON-LD. Pick the closest match from the 20-entry Schema.org catalog — LocalBusiness, Restaurant, Hotel, Store, MedicalBusiness, Event, etc.
Default Toggle on if this is the type new submissions default to. Only one type can be default at a time — selecting another type unsets the current one.

Fields

A drag-to-reorder list of every field that appears in the submission wizard for this type. Each field row:

  • Label — what customers see in the wizard.
  • Type — the field input type (text, textarea, number, select, multi-select, image, gallery, file, url, email, phone, date, time, business hours, social links, etc.).
  • Required / Optional toggle.
  • Filterable toggle — when on, the field appears as a search facet.
  • Validate — per-type validation rules (min/max length, regex pattern, allowed file types).

Add new fields with the + Add Field button. Reorder with the drag handle. Delete with the trash icon (confirmation required if the field has saved data on existing listings).

Schema mapping

Per-field mapping into the Schema.org JSON-LD output. For each field, pick which Schema property it should populate (e.g. address field → address, phone field → telephone, image field → image). Unmapped fields are still rendered on the detail page but don't appear in structured data.

How you use it

Add a new type

  1. Click + Add New Type.
  2. Fill in Name (e.g. "Coworking Space") and Slug (auto-generated from name; edit if needed).
  3. Pick an Icon that visually represents the type.
  4. Pick the Schema.org type closest to your data — LocalBusiness or Place are safe defaults.
  5. Save.
  6. Switch to the Fields tab and add the fields specific to this type (e.g. "Hot Desk Rate", "Meeting Rooms Available", "24/7 Access" for a coworking space).
  7. Optionally configure Schema mapping.
  8. Switch the type to Default if you want new submissions to land in it by default.

Edit an existing type

Click Edit on any row. Changes save per-tab; switching tabs prompts to save unsaved work.

Delete a type

Trash on the list view. Listings of the trashed type stay in the database but become "untyped" — they lose their type pointer and inherit fallback rendering (no custom fields). Use this when retiring a vertical; existing listings can be reassigned via bulk-edit.

Use a type from CLI

wp listora listing-types

Outputs a table of every registered type with field counts. Useful for verifying after CSV imports.

How types map to demo packs

Each type has an optional matching demo pack at demo/{slug}-pack.php. Listora ships packs for: restaurant, hotel, real-estate, job-board, general, classified, education, healthcare, place. Seed any pack via wp listora demo seed --pack={slug} — see WP-CLI Commands.

Permissions

Capability Who has it What it gates
manage_listora_types Administrator (#capabilities-ls)) View Type Editor, create / edit / delete types and their fields

This cap is the gate for the entire taxonomy admin surface — Categories, Locations, Features all check it too. If you grant manage_listora_types to a custom role, that role gets full type-system access.

Related

Email Log

Built into WB Listora Free.

A standalone admin page that records every outbound notification Listora attempts to send — listing approvals, review notifications, claim updates, contact-form messages, verification emails. Each entry shows the recipient, the event, the delivery status (sent / queued / failed), and the timestamp. Useful for confirming admin / user toggles are honoured and tracing send failures without having to dig through wp_mail() debug logs.

Email Log — admin page with retention selector + recent activity table

What it is

A persistent record of every Listora notification attempt:

  • Per-row data: event type (e.g. listing_approved), recipient email, listing context, delivery status, error message (if failed), exact timestamp.
  • Auto-pruned by a daily cron — older entries are diagnostic noise and disappear automatically once the retention window passes.
  • CSV exportable for compliance archives or external analysis. The export REST endpoint streams the full log within the current retention window.
  • Clearable — bulk delete every entry from the page (e.g. before a compliance audit window where you only want fresh sends recorded).

The log captures the send attempt, not delivery confirmation. A row marked sent means wp_mail() accepted the message — your mail provider (SMTP plugin / SES / Postmark) is responsible for downstream delivery. If you need delivery + open + click tracking, layer a transactional email service on top.

Where it lives

WP Admin → Listora → Email Log (?page=listora-email-log)

Requires the manage_listora_settings capability.

How you use it

Verify your email setup

  1. Go to Settings → Notifications → Send Test Email.
  2. Pick any template, send to your own address.
  3. Switch to Email Log and Refresh — the test send should appear with status sent and timestamp seconds ago.
  4. If the row shows failed, the error column tells you why (SMTP credential, blocked sender, etc.).
  5. If no row appears, the event isn't firing — check Notifications tab toggles first.

Trace a customer "I didn't get the email" report

  1. Open Email Log.
  2. Filter by the customer's email address (use browser find-in-page on the recipient column) and the rough time.
  3. Found row → sent means it left your server (the issue is on their side: spam folder, mail provider). Found row → failed means our send failed (check the error). No row → the event didn't fire (check the per-event toggle on Notifications tab + the underlying transition log).

Configure retention

The retention dropdown at the top of the page accepts:

  • 7 days — minimal noise, good for high-volume directories
  • 15 days — default for most installs
  • 30 days — useful when audit / compliance windows need a longer trail
  • 0 (lifetime) — keep everything. Diagnostic only; not recommended for high-volume sites without separate log rotation.

Older entries are pruned automatically by the wb_listora_email_log_prune cron event (daily).

Export the log

Click Export CSV at the top of the page. The download streams the current retention window: recipient, event, status, timestamp, error (if any), listing ID (if applicable). The URL carries a one-time wp_create_nonce( 'wp_rest' ) that expires after use.

Clear the log

Click Clear log to delete every entry. Useful before testing a new SMTP plugin so you have a clean slate. Cannot be undone.

How it interacts with the rest of the system

  • Settings → Notifications controls which events FIRE — Email Log records whichever events successfully reached wp_mail(). Toggle an event off → no email AND no log entry.
  • Digest Notifications (Pro) bundles individual events into a single send per day / week per recipient. The log records the digest send itself (digest_listings, digest_reviews) not the individual events bundled into it.
  • Audit Log (Pro) records every state transition that triggered an email. Email Log records the SEND ATTEMPT. The two complement each other: Audit answers "did this thing happen?", Email Log answers "did the email go out?".
  • Webhooks (Pro) fire independently of email events. A webhook delivering does NOT create an Email Log row.

Permissions

Capability Who has it by default What it gates
manage_listora_settings Administrator View + clear log, export CSV, change retention

Custom roles can be granted access via the Capabilities reference.

Equivalent WP-CLI

There is no wp listora email-log command. The log uses a custom table; query it directly if you need scripted access:

wp db query "SELECT recipient, event, status, sent_at FROM wp_listora_email_log ORDER BY sent_at DESC LIMIT 50"

Or use the REST endpoint:

GET /wp-json/listora/v1/settings/notifications/log
GET /wp-json/listora/v1/settings/notifications/log/export
POST /wp-json/listora/v1/settings/notifications/log/retention

See the REST API reference for full route + parameter details.

Related

For Listing Owners

Frontend Listing Submission

Available in WB Listora Free + Pro. The multi-step wizard, draft-saving, guest submission, and Duplicate Check are Free. Pro adds the plan picker / credit gating on submit and the auto-attached Verification Badge workflow.

What it does

The Listing Submission block gives registered users a multi-step form to add listings directly from your site's frontend. No WordPress admin access is required. Users can also edit existing listings, manage services per listing, and save drafts — all from the same interface.

Frontend Submission — screenshot from the modernized 1.0.5 site

Why you'd use it

  • Directory operators get community-sourced listings without manual data entry.
  • Businesses submit their own information, keeping it accurate.
  • The draft-reminder email brings back users who started a listing but didn't finish.
  • A pre-submit duplicate check prevents identical listings from cluttering your directory.

How to use it

For site owners (admin steps)

  1. The Setup Wizard creates an Add Listing page automatically with the Listing Submission block already placed.
  2. To create the page manually: add a new page, insert the Listing Submission block, and publish.
  3. Configure submission behavior under Listora → Settings → Submissions:
  • Require login — only registered users can submit (recommended).
  • Moderation mode — choose Auto-publish or Manual review (listings held as Pending).
  • Edit approval — require re-approval when a listing is edited.
  • Allowed types — restrict which listing types accept submissions.
  • Image limits — maximum number of gallery images per listing.
  • Expiration — days until a listing expires (0 = never).

For end users (visitor/user-facing)

Submitting a new listing:

  1. Go to the Add Listing page and click Start.
  2. A pre-submit duplicate check runs as you type the listing name. If a matching listing is found, you'll see a warning with a link to the existing listing — preventing accidental duplicates.
  3. Complete the five steps:
  • Choose Type — select the listing type (Restaurant, Hotel, Real Estate, etc.).
  • Basic Info — title, description, and featured image.
  • Type Fields — fields specific to the chosen type (address, phone, hours, price range, social links, etc.).
  • Categories — select relevant categories and feature tags.
  • Preview & Submit — review your listing before submitting.
  1. After submitting, the listing is either published immediately or set to Pending depending on your site's moderation mode.

Editing an existing listing:

  1. Go to User Dashboard → My Listings.
  2. Click Edit next to the listing you want to update.
  3. Make your changes and save. If the site requires edit approval, the listing returns to Pending until approved.

Managing services on a listing:

From My Listings, click Manage Services to add, edit, or delete services offered by that business. See Services per Listing.

Draft reminder: If a user starts a listing and doesn't submit within 24 hours, WB Listora sends an email reminder with a link to resume. This is handled automatically — no configuration required.

Tips

  • Set Moderation mode to Manual review for public directories. This prevents spam and low-quality listings from going live automatically.
  • Use Allowed types to restrict submissions to specific types. For example, a restaurant directory should only allow the Restaurant type.
  • The Guest registration option (under Submissions settings) lets unregistered users create an account during submission — useful for lowering the barrier to entry.
  • Conditional fields: some field types only appear based on earlier answers (e.g., a "Cuisines" field only appears after selecting the Restaurant type).
  • The draggable map pin on the address field lets submitters fine-tune their precise location on the map.

Common issues

Symptom Fix
Submission form is blank Confirm the Listing Submission block is on the page, not a shortcode
Users can't see the form Check Require login is enabled and the user is logged in
Submitted listing not visible If moderation is on, approve the listing under Listora → All Listings
Draft reminder not sending Verify WordPress cron is running — check with a plugin like WP Crontrol
Images not uploading Check your server's upload_max_filesize and post_max_size PHP settings

Related features

Duplicate Check

Built into WB Listora Free.

Prevent duplicate listings from polluting your directory before they're even submitted. When a listing owner types a title + picks a type during submission, the wizard quietly checks if a similar listing already exists — and if it does, shows a "Review duplicates" step with side-by-side cards so the owner can claim the existing listing instead of creating a duplicate.

Duplicate Check — submission wizard showing two potential duplicates the owner can claim or override

What it is

Duplicate listings are the single biggest source of customer-support pain in directories: when the same restaurant or service shows up three times because three different users submitted it, search-relevance suffers, reviews are split, and moderators end up manually merging records.

Duplicate Check intercepts that at submission time:

  • REST endpointPOST /listora/v1/submission/check-duplicate runs a fast, scoped query against the search_index table for listings matching the title + listing type, optionally weighted by geographic proximity if the owner has set lat/lng.
  • Submission wizard integration — the wizard fires the endpoint after the Basics step. If matches come back, a Duplicate Review step is inserted ahead of the rest of the form.
  • Side-by-side display — each potential duplicate shows as a card with title, type badge, address, and two actions: Claim this listing (jumps the owner into the claim flow for that existing record) or It's a different business (continues submitting their new listing).
  • Geographic weighting — when both submission lat/lng AND the existing listing's lat/lng are known, matches within ~250m boost their score; matches further away score lower so a "Mario's Pizza" in Brooklyn doesn't suppress a new "Mario's Pizza" in Queens.
  • Title similarity — uses MySQL MATCH AGAINST on the FULLTEXT search-index title column, with a configurable minimum similarity threshold.

Why this matters: directories that rely on moderator merge-after-the-fact never catch up. Duplicate Check shifts the prevention to the submitter, who's the only person with full context ("is this my business or a different one with the same name?").

How you use it

As a site owner — no configuration needed

Duplicate Check is on automatically. To verify it's working:

  1. Open /add-listing/ in an incognito window (or as a test user).
  2. Pick a listing type that already has at least one listing.
  3. In the Basics step, type the exact title of an existing listing.
  4. Advance to the next step. If a match was found, the wizard inserts a "Review possible duplicates" step.

If no duplicate step appears even on an exact-title match, check that the search_index table is populated (Listora → Tools → Rebuild Search Index).

As a listing owner — what you see

When the wizard finds a possible duplicate:

  1. A new step appears: "We found a similar listing — is this yours?"
  2. Each candidate appears as a card with title, type, address, and an existing-listing screenshot.
  3. If it's your business — click Claim this listing. The wizard switches into the Business Claims flow; the existing listing is reassigned to you once an admin approves the claim.
  4. If it's a different business — click It's a different business and continue submitting. The duplicate-check step disappears.
  5. Override required for admins — admins can always proceed past the duplicate-check step (e.g. legitimately re-listing for a chain franchise).

Settings & options

Setting Location Default Notes
Endpoint POST /listora/v1/submission/check-duplicate Always on Public-write endpoint, nonce-protected
Similarity threshold Hardcoded MySQL MATCH AGAINST weight (system) Tunable via wb_listora_duplicate_threshold filter
Geo radius (boost) Hardcoded 250m (system) Tunable via wb_listora_duplicate_geo_radius_meters filter
Max matches shown 3 Tunable via wb_listora_duplicate_max_matches filter

Developer hooks:

  • wb_listora_duplicate_threshold (filter) — increase or decrease how strict the title match needs to be.
  • wb_listora_duplicate_geo_radius_meters (filter) — change the boost radius (250m default).
  • wb_listora_duplicate_max_matches (filter) — return more or fewer candidates.
  • wb_listora_duplicate_check_results (filter) — modify the candidate list before showing in the wizard (filter out admins' own listings, etc.).

Related

Draft Reminder

Built into WB Listora Free.

Recover incomplete listing submissions automatically. When someone starts the Add Listing wizard, saves a draft, and walks away without finishing — the plugin sends a friendly reminder email 24 hours later with a one-click link back to where they left off. Twice-daily cron sweeps catch every stale draft; opt-out per user is respected.

Draft Reminder — example reminder email with "Continue your listing" CTA

What it is

Listing submission is multi-step (Type → Basics → Details → Media → Preview → Submit). Real submitters get interrupted, switch tabs, lose focus. Without nudging, a meaningful share of started drafts are never completed.

Draft Reminder is a tiny, reliable recovery system:

  • Cron eventwb_listora_draft_reminder_cron runs twice daily via Action Scheduler (group wb-listora).
  • Sweep logic — queries wp_posts for listora_listing rows with post_status = 'draft' that haven't been emailed yet, are older than the threshold (default 24h), and belong to a non-anonymous author.
  • Per-user state — each emailed draft is marked with a _listora_draft_reminder_sent meta flag, so a user gets one reminder per draft (not a daily stream).
  • Send path — fires do_action( 'wb_listora_draft_reminder', $post_id ) for each candidate; Notifications::draft_reminder() listens, builds the template variables, and sends templates/emails/draft-reminder.php via the same email infrastructure as every other notification.
  • Personalized CTA — the email's "Continue your listing" button deep-links to /add-listing/?edit={post_id} so the wizard resumes at the same step.
  • Opt-out aware — respects the user's per-event notification preference (should_send( 'draft_reminder', $user_id )); users who disabled drafts in their profile don't get a reminder.
  • Anonymous-author safety — drafts saved by anonymous submitters (no logged-in user) are skipped; there's no email to send.

The whole feature is one cron + one email template + a 50-line listener — Grade-A simplicity.

How you use it

As a site owner — no configuration needed

Draft Reminder is on by default. To verify:

  1. Check the cron is scheduled: WP Admin → Tools → Site Health → Info → Cron Events → look for wb_listora_draft_reminder_cron (Action Scheduler runs it twice daily).
  2. Trigger a test reminder: save a logged-in test user's listing as a draft; in Listora → Settings → Notifications, click Send Test → Draft Reminder. The reminder fires immediately to the user's email.
  3. Customize the template: copy wb-listora/templates/emails/draft-reminder.php to your theme at {theme}/wb-listora/emails/draft-reminder.php and edit; the override wins. See Email Templates.

As a listing owner — what you see

If you start a submission and don't finish:

  1. Within 24 hours, you receive an email titled "Your listing is almost ready" (or your site's customized variant).
  2. The body summarizes what you'd entered (title, type, optional description excerpt) so you remember the context.
  3. The "Continue your listing" button opens /add-listing/?edit={id} — the wizard resumes at the step you left off.
  4. Once you finish OR delete the draft, no further reminders for that draft.
  5. To opt out of all draft reminders: visit your dashboard → Profile → Email preferences → uncheck Draft reminders.

Settings & options

Setting Location Default Notes
Feature (always on) On Free — no toggle needed
Cron event wb_listora_draft_reminder_cron Twice daily Action Scheduler, group wb-listora
Reminder threshold 24 hours after draft saved (system) Filterable via wb_listora_draft_reminder_threshold
Per-draft cap 1 reminder per draft (system) _listora_draft_reminder_sent meta key gates re-sends
Per-user opt-out Dashboard → Profile → Email prefs Opted-in by default Honored by should_send()
Template wb-listora/templates/emails/draft-reminder.php Theme overridable per the Email Templates standard

Developer hooks:

  • wb_listora_draft_reminder (action) — fires per candidate; listen for custom routing (Slack, in-app notification, SMS, etc.).
  • wb_listora_draft_reminder_threshold (filter) — change the 24-hour threshold (in seconds).
  • wb_listora_draft_reminder_query_args (filter) — modify the candidate query (e.g. exclude admins, limit to specific types).
  • wb_listora_email_content_draft_reminder (filter) — modify the rendered HTML (subject/body/tone) without theme override.

Related

User Dashboard

Available in WB Listora Free + Pro. Free tabs: Overview (stat cards), Listings, Reviews, Favorites, Claims, Credits, Profile. Pro adds the Saved Searches tab (recurring alerts), the My Needs tab (the buyer's posted needs from Needs Marketplace), the My Responses tab (quotes sent by businesses), and Pro-funded credit-balance display in the existing Credits tab.

What it does

The User Dashboard gives listing owners a self-service frontend panel to manage everything related to their presence in your directory — listings, reviews, favorites, claims, credits, and profile — without needing access to the WordPress admin.

User Dashboard — screenshot from the modernized 1.0.5 site

Why you'd use it

  • Business owners update their own listing details 24/7, reducing support requests.
  • Claimants track their claim status without emailing you.
  • Users view all their activity in one place, improving retention.
  • The dashboard respects permissions — users only see their own data.

How to use it

For site owners (admin steps)

  1. The Setup Wizard creates a Dashboard page automatically. If you skipped the wizard, create a new page and add the User Dashboard block.
  2. Make sure the page is not restricted to logged-in users by your theme or a membership plugin — WB Listora handles its own login redirect.
  3. Go to Listora → Settings → General to confirm the Dashboard Page is set correctly.

For end users (visitor/user-facing)

Log in and navigate to the Dashboard page. You'll see four clickable stat cards at the top:

Card What it shows
Active Published listings
Pending Listings awaiting review
Reviews Total reviews received
Saved Favorited listings

Clicking any card jumps to the matching tab.

My Listings tab

  • See all your submissions with status badges: Published, Pending, Draft, Expired.
  • Click Edit to update any listing field, images, or description.
  • Click Renew on expired listings.
  • Click Delete to remove a listing.
  • Each listing row shows a Manage Services link (see Services per Listing).

Reviews tab

  • View every review left on your listings.
  • Click Reply to post an owner response directly from the dashboard.
  • Track your average rating across all listings.

Favorites tab

  • See listings you've saved.
  • Click the listing title to visit it, or click Remove to unsave.

My Claims tab

  • See every claim you've submitted, with a status pill: Pending, Approved, or Rejected.
  • Pending claims show an information message while your claim is under review.
  • Approved claims show an Edit Listing button — click it to start managing that listing immediately.
  • Rejected claims show the rejection reason if one was provided.

Credits tab

  • View your current credit balance.
  • See your transaction history (top-ups and deductions).
  • A Buy Credits CTA links to your credits page (Pro feature — upgrade prompt shown in Free).

Profile tab

  • Update your display name, bio, and contact details.
  • Changes apply to your WordPress user account.

Welcome banner

After completing the Setup Wizard for the first time, a welcome banner appears on the dashboard. It links to key next steps: add your first listing, customize settings, and read the docs. The banner appears once and disappears after you dismiss it.

Tips

  • Pin the dashboard URL in your navigation menu so users can find it easily.
  • Set the Dashboard page to Wide template or Full Width in your theme for the best layout.
  • If a user's listing is expired, the My Listings tab shows a Renew button — make sure your expiration settings are configured under Listora → Settings → Submissions.
  • The Credits tab always appears in Free, but displays a Pro upgrade prompt instead of a balance. This is intentional — it signals to power users that a credits system is available.
  • Stat card click-through only works when the matching tab has content. Empty states show a CTA to add a listing or save a favorite.

Common issues

Symptom Fix
Dashboard shows a login form instead of content Verify the Dashboard page uses the User Dashboard block, not a shortcode from another plugin
"My Claims" tab is missing Claims must be enabled under Listora → Settings → Claims
Stats show 0 even though listings exist Clear your site cache — stat cards are cached for 60 seconds
User can see other users' listings Check no third-party plugin is removing the edit_listora_listings capability

Related features

Services per Listing

Available in WB Listora Free + Pro. Per-listing service catalog, pricing, search indexing, and Schema.org OfferCatalog markup are Free. Pro adds cross-listing service discovery (/services/search), service-level comparison, and booking-CTA hooks via wb_listora_after_service_detail.

What it does

Listing owners can attach a catalog of services to their listing — each with a name, price, duration, and category. Services appear on the listing detail page in a card grid and are indexed for full-text search, so visitors can find listings by the services they offer.

Services Per Listing — screenshot from the modernized 1.0.5 site

Why you'd use it

  • Businesses showcase their service menu directly in the directory (e.g., a spa listing can list "60-min massage — $80").
  • Richer listings attract more engagement and give visitors a reason to contact the business.
  • Services are searchable — a visitor searching "haircut" can find salons that explicitly list that service.
  • Schema.org OfferCatalog markup is added automatically, improving how Google displays the listing.

How to use it

For site owners (admin steps)

  1. Services are enabled by default — no settings toggle required.
  2. To create service categories, go to Listora → Service Categories and add your categories (e.g., Treatments, Packages, Consultations).
  3. Service categories are optional. Listings can have uncategorized services.
  4. You can add services to any listing directly from the WordPress admin by editing a listing post and scrolling to the Services panel.

For end users (visitor/user-facing)

Adding services from the dashboard:

  1. Log in and go to your User Dashboard → My Listings.
  2. Click Manage Services next to the listing you want to update.
  3. Click Add Service.
  4. Fill in the service details:
  • Name — the service name (e.g., "Deep Tissue Massage").
  • Price — price as a number (e.g., 80).
  • Duration — duration in minutes (e.g., 60).
  • Category — optional service category.
  • Description — a brief description of the service.
  1. Click Save. The service appears immediately on the listing detail page.

Editing or deleting a service:

From the Manage Services panel, click the pencil icon to edit or the trash icon to delete any service.

How services appear to visitors:

Services display in a card grid on the Services tab of the listing detail page. Each card shows the name, price, duration, and category badge. Visitors can browse all services without leaving the page.

Tips

  • Use service categories to group related offerings — for example, a clinic might have categories "Consultations" and "Procedures."
  • Include a duration even for services without a fixed time — visitors appreciate knowing what to expect.
  • Set a price to 0 if the service is free or price-on-request — you can note "See website for pricing" in the description.
  • Services are included in the full-text search index, so adding specific service names improves discoverability in keyword searches.
  • Keep service names concise (under 60 characters) — they appear on cards with limited space.

Common issues

Symptom Fix
Services tab not visible on listing detail Confirm the listing has at least one published service
Services not showing in search results Wait for the search index to rebuild — it updates when a service is saved; or trigger a manual rebuild under Listora → Settings → Search
"Manage Services" link not visible on dashboard Check the user is the listing owner or has the edit_listora_listings capability

Related features

Credits and Pricing Plans

Pro feature — requires WB Listora Pro. Free sites can use listing limits per role without a credit system.

What it does

WB Listora Pro includes a credit-based payment system. Users purchase credits (via your payment provider of choice), and spend those credits to activate listing plans. Each plan determines how long a listing stays active, whether it gets featured placement, and what perks it includes.

Credits And Plans — screenshot from the modernized 1.0.5 site

Why you'd use it

  • Monetize your directory without a WooCommerce store — credits work with any payment gateway via webhook.
  • Pricing plans give you flexible packaging: a free basic plan, a paid featured plan, and a premium plan can all coexist.
  • Credits are reusable — users can top up once and submit multiple listings over time.
  • The webhook-based topup system is payment-processor-agnostic: Stripe, PayPal, Paddle, or any custom solution works.

Transactions admin — credit purchases + plan activations with gateway, amount, and status

How to use it

For site owners (admin steps)

Step 1: Set up the webhook

  1. Go to Listora → Settings → Pro and scroll to the Credit System section.
  2. Copy the Webhook URL and Webhook Secret.
  3. In your payment platform (e.g., Stripe), create a webhook that fires on payment success and posts to that URL. Set the webhook secret as the HMAC key.
  4. When a payment succeeds, the webhook credits the purchasing user automatically.

Step 2: Configure the credits page

  1. Create a page on your site where users can purchase credits (e.g., an embedded payment form or a link to your payment platform).
  2. Go to Listora → Settings → Pro → Credit System and set Credits Page to that page.
  3. This page URL is used for "Buy Credits" links throughout the plugin (e.g., when a user can't afford a plan).

Step 3: Create pricing plans

  1. Go to Listora → Pricing Plans → Add New Plan.
  2. Fill in the plan settings:
  • Plan title — the name shown to users (e.g., "Basic", "Featured", "Premium").
  • Plan Price (credits) — credits required to purchase this plan. Set to 0 for a free plan.
  • Credit Cost — credits deducted per listing submission on this plan.
  • Display Price — optional label shown to users (e.g., "$29/month"). This is for display only; actual charging happens via your webhook.
  • Duration (days) — how long the listing stays active. Set to 0 for permanent listings.
  • Featured Plan — tick this to highlight the plan as recommended in the plan selection step.
  • Badge Text — optional label on the plan card (e.g., "Most Popular", "Best Value").
  • Plan Perks — checkboxes for: Mark listing as Featured, Priority support, Analytics dashboard access.
  1. Publish the plan.
  2. Repeat for each plan you want to offer.

Step 4: Verify the plan selection step

When a user submits a new listing, a Choose a Plan step appears in the submission form showing all published plans. Plans the user can't afford are greyed out with a "Buy Credits" link.

Adding credits manually:

Go to Users → Edit User and use the Listora Credits panel to add credits directly without a payment. Useful for comping credits to early adopters or resolving disputes.

For end users (visitor/user-facing)

  1. Go to the credits purchase page to buy credits.
  2. When submitting a listing, the Choose a Plan step shows all available plans with their credit cost, duration, and perks.
  3. Select a plan. If you have a coupon code, enter it in the coupon field — the credit cost adjusts immediately.
  4. Your credit balance is shown on the plan selection screen. After submitting, the credit cost is deducted from your balance.
  5. View your current balance and transaction history in User Dashboard → Credits.

Tips

  • Create a free plan (0 credits) alongside paid plans — this lets listing owners submit basic listings without buying credits, then upgrade to paid plans for featured placement.
  • Set Duration (days) to 0 for the free plan and a finite number (e.g., 30, 90, or 365) for paid plans. This creates a natural renewal cycle.
  • The webhook system is idempotent — duplicate webhook calls (e.g., Stripe retries) will not double-credit a user.
  • Sort plans by setting a low Sort Order number for the plan you want shown first.
  • If you use the Wbcom Credits SDK alongside other Wbcom plugins, all credit balances are unified — users see a single balance across all products.

Common issues

Symptom Fix
Plan step not appearing in submission form Confirm at least one plan is published under Listora → Pricing Plans
Credits not added after payment Check the webhook URL and secret are entered correctly in your payment platform
User sees "Not enough credits" on all plans The user's balance is 0 — direct them to the credits purchase page
Plan duration not applying Confirm Duration (days) is set to a non-zero value on the plan

Related features

Listing Lifecycle Actions

Built into WB Listora Free.

The self-service actions a listing owner can take on their own listings from the My Listings dashboard — Renew (extend expiration), Feature (promote, Pro), Deactivate (hide from directory), Reactivate (restore deactivated), Edit (re-open in the submission wizard), Delete (trash), and Report (flag for admin review). These actions consolidate every state transition a vendor can perform without admin intervention.

Listing Lifecycle — My Listings dashboard showing per-row action buttons

What it is

Every listing transitions through a small state machine. The lifecycle actions on the dashboard are the customer-facing controls for these transitions:

Action Status before Status after Who can trigger
Renew publish, listora_expired publish with new expiration Listing owner
Feature (Pro) publish publish (Featured flag set) Listing owner with credits / plan
Deactivate publish listora_deactivated Listing owner
Reactivate listora_deactivated publish Listing owner
Edit any any (no transition) Listing owner
Delete any (trashed) Listing owner
Report any (no transition, admin notified) Any logged-in visitor

The same buttons surface in the Listings admin page for admins with edit_others_listora_listings.

How you use it

Renew an expired or expiring listing

  1. Open My Listings (/my-listings/).
  2. Find the listing showing Expired or Expiring soon.
  3. Click Renew.
  4. The modal shows the renewal cost (credits if Pro Pricing Plans is on, free otherwise) and the new expiration date.
  5. Confirm — the listing transitions back to publish with a fresh expiration.

Renewal pricing comes from /listings/{id}/renewal-quote and the actual renew posts to /listings/{id}/renew. Listings can be renewed at any time within the renewal window (configured on the Pricing Plans).

Deactivate a listing (vendor pause)

  1. Open My Listings.
  2. Click Deactivate on the row.
  3. Confirm in the design-system modal.
  4. The listing transitions to listora_deactivated. It disappears from the directory, search results, map markers, and category archives. It still exists in the database — the owner can reactivate any time.

Deactivation does NOT delete reviews, favourites, or claims. It's a soft pause. The View icon disappears from the row when deactivated (since the public URL would 404).

Reactivate a deactivated listing

  1. Open My Listings.
  2. The deactivated row shows Reactivate instead of Deactivate.
  3. Click it. Listing transitions back to publish and reappears everywhere it was before.

Feature a listing (Pro)

Requires the Pricing Plans feature to be on, the listing to have a plan with featured-rotation entitlement (or credits to spend), and featured_listings toggle enabled.

  1. Open My Listings.
  2. Click Feature on a published listing.
  3. The modal shows the cost (credits) and the duration the feature flag stays active.
  4. Confirm. The listing immediately joins the listing-featured block's rotation and gets the Featured badge on its card / detail page.

See Featured Listings for the full Featured rotation logic.

Edit an existing listing

  1. Open My Listings.
  2. Click Edit on the row.
  3. The submission wizard re-opens with all fields pre-populated.
  4. Make changes, save. Status transitions depend on your Settings → Submissions → Edited submissions flow:
  • Auto-publish edits → goes straight back to publish.
  • Re-moderate edits → goes to pending until admin re-approves.

Delete a listing

  1. Open My Listings.
  2. Click Delete on the row.
  3. Confirm. The listing transitions to trash (standard WordPress behavior).

Trashed listings disappear from the directory but stay recoverable for 30 days via WP Admin → Listings → Trash. After 30 days WordPress permanently deletes them.

Report a listing (any logged-in visitor)

  1. Open any listing detail page.
  2. Click Report in the action bar.
  3. Pick a reason (spam, inappropriate, wrong category, duplicate, etc.) and optionally add a note.
  4. Submit. Listing owner is NOT notified. The report enters the admin Reports queue (Listora → Reports).

REST endpoints

Every action above maps to a single REST route. See REST API for full parameter detail.

Action Endpoint Method
Renewal quote (pricing) /listings/{id}/renewal-quote GET
Renew /listings/{id}/renew POST
Deactivate /listings/{id}/deactivate POST
Reactivate /listings/{id}/reactivate POST
Feature (Pro) /listings/{id}/feature POST
Report /listings/{id}/report POST
Edit /listings/{id} PUT
Delete /listings/{id} DELETE

Permissions

Every action checks the user's relationship to the listing:

  • Owner-only (Renew / Feature / Deactivate / Reactivate / Edit / Delete) → post_author === current_user_id OR edit_others_listora_listings.
  • Public (Report) → is_user_logged_in() only. Guests can't report.

Admins with edit_others_listora_listings can do any of these from the Listings admin page bypassing the dashboard.

Hooks

Every transition fires a before_ filter (return WP_Error to abort) and after_ action:

  • wb_listora_before_renew_listing / wb_listora_after_reactivate_listing / wb_listora_after_deactivate_listing
  • wb_listora_listing_status_changed ($post_id, $new_status, $old_status) — single canonical listener point for any state transition. Free's Notifications dispatcher hooks here so approve / reject / expire / renew emails fire from one place.

Full list at Hooks reference.

Related

For Visitors

Search and Filters

Available in WB Listora Free + Pro. Keyword search, faceted filters, Near-Me geolocation, and "Search this area" are Free. Pro adds Advanced Search (custom field filters, saved alerts) and Infinite Scroll on results.

What it does

WB Listora's search system lets visitors find listings by keyword, type, category, location, and distance. It updates results reactively without reloading the page and supports geo-radius queries so users can find listings near them.

Search And Filters — screenshot from the modernized 1.0.5 site

Why you'd use it

  • Visitors find what they need without scrolling through hundreds of listings.
  • Location-based search with "Near Me" geolocation reduces friction on mobile.
  • Faceted filters (category, feature, price, rating) let users narrow results in any combination.
  • Results stay fast at scale — WB Listora uses a dedicated search index table, not generic WordPress queries.

Directory landing page — search block + filter sidebar + listing grid on the live model site

How to use it

For site owners (admin steps)

  1. Go to Listora → Settings → Search to configure defaults:
  • Results per page — how many listings appear per page (default: 12).
  • Default sort — the initial sort order when no keyword is entered.
  • Distance unit — Kilometers or Miles.
  • Default radius — the radius used when a user searches by location without adjusting the slider.
  1. Add the Listing Search block to your directory page. See Creating Your Directory Page.
  2. Optionally set the Listing Search block to Stacked layout for a taller, full-width appearance suited to homepage hero sections.

For end users (visitor/user-facing)

Keyword search: Type any word into the search bar. Autocomplete shows matching listing names. Results search titles, descriptions, custom field values, and service names.

Location search: Type an address into the location field, or click Near Me to use your device's GPS. Results are filtered by distance from that point.

Type tabs: Click a type tab (All, Restaurant, Hotel, etc.) to show only that type.

Advanced filters: Click the filters button to expand the panel. Available filters depend on your listing types:

Filter Description
Category Filter by listing category (e.g., Italian, French)
Features Filter by amenity checkboxes (WiFi, Parking, etc.)
Price range Minimum and maximum price slider
Rating Minimum star rating
Geo-radius Distance slider (requires a location to be entered)
Date range Start and end date (for Event listing types only)

Active filter pills: Applied filters appear as removable pills below the search bar. Click the × on any pill to remove that filter.

Sort options: Use the sort dropdown in the grid toolbar to change order:

  • Relevance (default for keyword searches)
  • Newest / Oldest
  • Rating (highest first)
  • Distance (requires a location)
  • Featured (featured listings first)
  • Alphabetical (A–Z)

Tips

  • Add the Listing Map block alongside the grid to let users see results geographically while filtering — the map updates with the same filters.
  • The geo-radius filter only activates once the user enters a location or clicks Near Me. Without a location, the radius slider is hidden.
  • For event directories, the date filter is specific to the Event listing type. Configure date fields in Listora → Listing Types → Event.
  • Saved Searches (Pro) let logged-in users save any filter combination and receive email alerts when new matching listings are published. See Saved Searches.
  • Re-indexing: if you bulk-import listings and search results don't reflect them, go to Listora → Settings → Search and click Rebuild Search Index.

Common issues

Symptom Fix
Keyword search returns no results Check that the search index was built — activate, then deactivate and reactivate the plugin to trigger a rebuild
"Near Me" button does nothing The user's browser must allow location access; HTTPS is required
Distance filter not appearing A location must be entered in the location field first
Date filter missing Confirm the listing type has date fields configured in Listora → Listing Types

Related features

Advanced Search

Pro feature — requires WB Listora Pro. Power-user search that goes beyond keyword + category — multi-facet filtering (price range, rating, distance radius, custom field values), saved-search alerts that email new matches daily, and a wider field weight tuned for relevance. Built on the same query engine as Free search, just unlocked with more signal.

Advanced Search — power filters expanded above the listing grid

What it is

Free WB Listora ships a solid search experience — keyword + listing type + category + map radius. Advanced Search extends it for the segments that need more:

  • Multi-facet UI — open a "More filters" panel and combine: keyword, type, category, location (with adjustable radius), price range, rating threshold, custom-field values (e.g. amenities for hotels, "remote OK" for jobs), open-now-only for businesses with hours.
  • Saved searches — once a visitor finds a filter combo they like, they save it (in their wp_user_meta under _listora_saved_searches).
  • Daily email alerts — Action Scheduler job wb_listora_pro_saved_search_alerts runs daily, finds new listings matching any user's saved searches since the last run, and emails matches via the saved-search-alert.php template.
  • Tuned relevance — Advanced Search uses a different MySQL MATCH AGAINST weight + a larger candidate pool than Free search, so long-tail queries return more results.
  • REST routesGET /listora/v1/saved-searches, POST /listora/v1/saved-searches, PATCH /listora/v1/saved-searches/{id}, DELETE /listora/v1/saved-searches/{id} — usable by your own mobile app.

Combined with Programmatic SEO Pages, Advanced Search turns the directory into a real search destination — not just a browsing surface.

How you use it

As a site owner — enable + configure

  1. Enable the feature: Listora → Settings → Features → Advanced Search (default: off per product design — turn on intentionally; defaults emphasize the simpler search UX).
  2. Visit your Directory page in an incognito window — verify a More filters button appears next to the existing search bar. Click it; the multi-facet panel slides open.
  3. Tune facet visibility (optional): Settings → Search → Advanced Filters — tick which facets appear (price, rating, custom fields, open-now). Some may not apply to all listing types.
  4. Saved-search alerts: Settings → Search → Daily Alerts — toggle on/off globally; per-user override is in each user's dashboard profile.

As a visitor — power-search

  1. On the Directory page, click More filters.
  2. Set price range, rating, radius, custom fields. Hit Apply.
  3. The grid + map update. Refine until you have what you want.
  4. Click Save this search → name it ("Pet-friendly hotels in NYC under $200"). The search is stored against your user account.
  5. From now on, when a new listing matches your search, you receive an email digest (daily) listing the matches with one-click links.
  6. Manage saved searches from your dashboard → Saved Searches tab — edit, rename, disable, delete.

Settings & options

Setting Location Default Notes
Feature toggle Settings → Features → Advanced Search Off Off by default — enable if your audience benefits from filter density
Facet visibility Settings → Search → Advanced Filters All on Per-facet toggle
Daily alerts Settings → Search → Daily Alerts On (when feature enabled) Per-user override available
Alert cron wb_listora_pro_saved_search_alerts Daily Action Scheduler
Storage (saved searches) wp_usermeta._listora_saved_searches Per-user, JSON-encoded
Storage (alert state) wp_usermeta._listora_saved_search_last_alert_at Per-saved-search timestamp

REST routes (logged-in):

  • GET /wp-json/listora/v1/saved-searches — list the current user's saved searches.
  • POST /wp-json/listora/v1/saved-searches — create one.
  • PATCH /wp-json/listora/v1/saved-searches/{id} — rename, change filter, toggle alerts.
  • DELETE /wp-json/listora/v1/saved-searches/{id} — delete.

Developer hooks:

  • wb_listora_pro_advanced_search_facets (filter) — modify the facet list shown in the More-Filters panel per page.
  • wb_listora_pro_saved_search_alert_subject (filter) — modify the daily alert email subject.
  • wb_listora_pro_saved_search_match_query (filter) — modify the candidate-match SQL (e.g. exclude listings older than 1 hour).

Related

Infinite Scroll

Pro feature — requires WB Listora Pro. Replace the paginated grid with infinite scroll or load-more button UX on listing grids — keeps visitors in flow, never breaks scroll position, never requires a click to advance. Choose the mode globally (pagination / load-more / infinite scroll) from Settings; works with every listing-grid block on the site.

Infinite Scroll — listings appending as the user scrolls past the viewport

What it is

Pagination is the safest default — clear, accessible, screen-reader friendly. But for high-engagement directory browsing (restaurants on a Friday night, real estate, events), endless scroll mirrors how visitors actually browse on phones.

Infinite Scroll is a drop-in mode swap for the existing listing-grid block:

  • Three modespagination (default), load_more (button at the end of the grid that fetches the next page), infinite_scroll (automatic fetch when the grid bottom enters the viewport).
  • One global setting controls all listing-grid blocks site-wide; per-block override is on the roadmap.
  • REST-driven — uses the existing GET /listora/v1/listings endpoint with cursor pagination so the n-th page is O(1) (not O(n) like OFFSET).
  • Filter wb_listora_grid_output is how the feature replaces the pagination markup with the infinite-scroll trigger / load-more button. Free's grid remains unchanged.
  • Card markup injection — the response includes a pre-rendered card_html field (added via inject_card_html) so the client doesn't have to re-render the card template, just append the HTML.
  • Sentinel element + IntersectionObserver — when in infinite_scroll mode, a sentinel <div class="listora-grid__load-more-sentinel"> appears at the grid bottom; an observer fires when it enters the viewport and triggers the fetch.
  • A11y-aware — pagination remains the default precisely because infinite scroll breaks keyboard-only navigation and the screen-reader experience. Pick the mode appropriate for your audience.

How you use it

As a site owner — choose your pagination mode

  1. Enable the feature: Listora → Settings → Features → Infinite Scroll (default: off per product design — pagination is the safe default).
  2. Settings → Search → Pagination Mode — radio choice between:
  • Pagination (numbered pages) — best for accessibility.
  • Load More (button at the end of the grid) — middle ground; keyboard-reachable.
  • Infinite Scroll (automatic) — best for mobile flow; weakest for accessibility.
  1. Save. The change takes effect site-wide; refresh any directory page to see the new mode.

As a visitor — what changes

Mode What you see
Pagination Numbered pagination at the bottom of the grid (1 2 3 …) — Free default.
Load More A "Load more listings" button at the bottom — click to fetch + append the next page. Scroll position preserved.
Infinite Scroll Listings auto-append as you scroll. A subtle loader spins near the bottom while fetching. Use the browser's "scroll to top" if you want to go back.

For accessibility, every mode preserves: aria-live updates for screen readers when new cards load; focus management on the next-page first card after Load More; ESC interrupts an active scroll-load.

Settings & options

Setting Location Default Notes
Feature toggle Settings → Features → Infinite Scroll Off Off by default; pagination is the safer accessibility floor
Pagination mode Settings → Search → Pagination Mode pagination Three modes: pagination / load_more / infinite_scroll
Cards per fetch (uses per_page from grid block) 12 Configurable per block in the editor
REST source GET /listora/v1/listings?cursor=… Cursor pagination — O(1) past page 1000

Developer hooks:

  • wb_listora_pro_pagination_type (filter) — programmatically override the mode (e.g. force load-more for one specific block).
  • wb_listora_pro_infinite_scroll_threshold_px (filter) — fire the next fetch when the sentinel is N pixels from entering the viewport (default 200).
  • wb_listora_grid_output (filter, Free) — the hook this feature uses to swap the pagination markup. Other extensions can hook the same filter.

Related

Browse by Category

Built into WB Listora Free.

Insert a Categories block on any page to give visitors a beautiful, image-and-icon-led category grid — each tile links to a filtered directory view scoped to that category. Tiles render with type colors, listing counts, and an empty-state CTA when no listings exist yet.

Browse by Category — colorful category tiles with listing counts on the modernized 1.0.5 UI

What it is

A directory homepage often needs a "browse" surface in addition to a search surface. The Categories block is that — a row or grid of category tiles that visitors click to jump into a pre-filtered listing view.

Each tile shows:

  • The category icon (Lucide icon, configurable per category in the admin)
  • The category name (taxonomy term)
  • A colored tint sourced from the category's --cat-color (set per term in the admin) — tile background is a soft 10% tint of the color; on hover the tile lifts with a -2px translate and a primary border (matches the modernized card surface).
  • The listing count in that category — server-rendered so accurate at page load.
  • An empty-state path — when a tile has zero listings, it links to the directory home instead of an empty results page.

Hook surface for developers:

  • do_action( 'wb_listora_before_categories_grid' ) and wb_listora_after_categories_grid fire around the block — hook your own banners, ads, or CTAs.
  • apply_filters( 'wb_listora_category_card_data', $card_data, $term_id ) lets you modify per-tile data before rendering (e.g. customize the link, swap the icon, override the count).

The block is server-rendered (no client-side fetch) and reuses the same --listora-card-border / --listora-radius-xl / --listora-shadow-md tokens as the other modernized list-container surfaces — automatically dark-mode-aware via the theme bridge.

How you use it

As a site owner — place the block

  1. Edit a page (your homepage, a "Browse" landing page, etc.).
  2. In the block editor, search for Listora Categories and insert it.
  3. Inspector controls:
  • Listing Type — restrict tiles to one type's categories (e.g. show Restaurant categories only).
  • Layout — grid (default) or row (horizontal scroll).
  • Columns per row — 2, 3, 4, 5, or 6 (responsive — collapses to 1 on mobile).
  • Show count — toggle the listing-count badge per tile.
  • Sort — alphabetical or by listing count (descending).
  1. Configure category colors + icons in the admin: WP Admin → Listora → Categories → edit a term → set Color + Icon (Lucide picker).

As a visitor — what you see

  1. The Categories block renders as a grid of colored tiles.
  2. Click a tile → land on the directory with that category pre-filtered (/listings/?category={slug}).
  3. The grid + map + count badge update; you can stack the category filter with search keywords or other facets.
  4. From the filtered view, click the category chip at the top to clear the filter.

Settings & options

Setting Location Default Notes
Block Editor → Insert → Listora Categories Server-rendered, no client JS needed for tiles
Per-category color WP Admin → Listora → Categories → edit term (auto-assigned) Drives the tile tint + hover border
Per-category icon WP Admin → Listora → Categories → edit term (none) Lucide icon picker
Per-block columns Inspector 4 Responsive: collapses to 1 at 640px
Sort Inspector Alphabetical Or by listing count desc
Show count Inspector On Hide the count badge per block if desired

Developer hooks:

  • wb_listora_before_categories_grid / wb_listora_after_categories_grid (actions) — hook before/after the grid.
  • wb_listora_category_card_data (filter) — modify per-tile data (name, link, count, color, icon, image_url).
  • wb_listora_categories_query_args (filter) — modify the get_terms() args (filter out specific categories, change ordering).

Related

  • Search & Filters — clicking a category tile navigates to the search with the category pre-filtered.
  • Listing Types — categories are scoped per listing type; the block's "Listing Type" control filters which categories appear.
  • Featured Listings — pair Categories with Featured for a strong homepage layout.
  • Developer Reference: Hooks — full categories hook signatures.

Calendar & Events

Built into WB Listora Free.

Show a true monthly events calendar driven by your directory — date-bound listings (Event listing type, or any type with date fields) render on the right day, recurring events expand to virtual occurrences for the current month, and clicking any day or event drills into the listings. Color-coded per listing type, accessible with proper ARIA, mobile-friendly.

Calendar — monthly view with event dots colored by listing type

What it is

A directory of events without a real calendar is a list of dates pretending to be a calendar. The Listora Calendar block solves three things together:

  1. Date-bound listings — any listing with a start_date (and optional end_date) field surfaces on the right day of the month. The Event listing type sets these by default; other types can opt in via custom fields.
  2. Recurring events — for listings flagged as recurring (weekly, monthly, custom intervals), the block generates virtual occurrences for the displayed month. A weekly meetup at 7pm Wednesdays produces 4–5 calendar entries automatically; no separate posts needed.
  3. Color coding by listing type — each event dot uses the listing's type color (--listora-type-color, the per-type class system) — so a calendar with restaurants, events, and jobs becomes glanceable by category.

How it renders:

  • Monthly grid — 7×5 or 7×6 grid, sized to the month. Hover/focus a day shows the event list as a tooltip; click drills into a day-detail view.
  • SQL — two phases:
  • Phase 1 — SELECT … WHERE start_date in this month for non-recurring events.
  • Phase 2 — SELECT … WHERE is_recurring = 1 then PHP-generates virtual occurrences from each recurrence rule within the displayed month.
  • Cache-friendly — generated occurrences are computed per-request; no DB rows are persisted for virtual occurrences (so deleting a recurring rule cleans up automatically).
  • Hook surfacedo_action( 'wb_listora_before_calendar' ), apply_filters( 'wb_listora_calendar_events', $events, $year, $month ), do_action( 'wb_listora_after_calendar' ).

For event-heavy directories (community calendars, meetup hubs, performance schedules) this turns the directory from a list into a navigable timeline.

How you use it

As a site owner — place the block

  1. Insert the Listora Calendar block on any page (homepage, dedicated /calendar/ page, sidebar).
  2. Inspector controls:
  • Listing Type — restrict to one type (e.g. Events only). Leave empty to show all date-bound listings.
  • Categories — restrict to specific categories.
  • Default month — current month (default) or a specific year+month.
  • Show navigation arrows — toggle the prev/next month buttons.
  • First day of week — Sunday or Monday (locale-aware default).
  1. Save the page. Date-bound listings auto-render on the right days.

As a listing owner — add a calendar event

  1. Submit a listing with the Event listing type (or any type that has Start Date in its fields).
  2. Fill in Start Date + optional End Date.
  3. For recurring events: check Recurring + pick the pattern (weekly / monthly / custom). Pick the days/dates within the pattern.
  4. Save. The event appears on the calendar block(s) on your site immediately.
  5. For one-off cancellation of a recurring instance: add a Skip Dates entry in the listing.

As a visitor — what you see

  • Monthly grid with colored event dots per day.
  • Hover a day → tooltip lists events with title + time.
  • Click a day → opens a panel listing all events that day, with click-throughs to each listing's detail page.
  • Click prev/next month arrows → calendar reloads via the IAPI store (no page reload).

Settings & options

Setting Location Default Notes
Block Editor → Insert → Listora Calendar Server-rendered, IAPI-powered nav
Date fields Event listing type (default) start_date, end_date, is_recurring, recurrence_rule Other types can opt in via custom fields
Color per dot --listora-type-color (auto) Per listing type Set per type in WP Admin → Listora → Listing Types
Virtual occurrence generation (system) Per request, per displayed month No DB rows; recurrence is computed on read
First day of week Inspector / locale Locale default Per-block override

Developer hooks:

  • wb_listora_before_calendar / wb_listora_after_calendar (actions).
  • wb_listora_calendar_events (filter) — modify the events array before render; useful to inject external calendar feeds.
  • wb_listora_calendar_query_args (filter) — modify the SQL query args.

Related

  • Listing Types — the Event type ships with the date fields by default; create custom types and add date fields to use the calendar for them.
  • Search & Filters — pair the calendar with type/category search for a discovery surface.
  • Featured Listings — a complementary block — Featured for "what's hot now", Calendar for "what's coming up".
  • Developer Reference: Hooks — full calendar hooks list.

Favorites

Built into WB Listora Free.

Logged-in visitors can save any listing to their favorites with a single click. Saved listings appear in the Favorites tab of their User Dashboard, making it easy to return to listings they care about.

Favorites — screenshot from the modernized 1.0.5 site

Why you'd use it

  • Users come back to your directory to check their saved listings, increasing repeat visits.
  • Favorite counts can signal popularity to other visitors.
  • With WB Listora Pro, users can turn a saved search into an alert — but favorites are a simpler "bookmark" that works in Free.
  • No configuration needed — favorites work out of the box after activation.

How to use it

For site owners (admin steps)

Favorites are enabled by default. No settings to configure.

To review favorite data programmatically, use the REST endpoint GET /listora/v1/favorites (requires authentication). See docs/REST-API.md in the plugin root.

For end users (visitor/user-facing)

Saving a listing:

  1. Navigate to a listing detail page or find a listing in the search grid.
  2. Click the heart icon (on the listing card or on the detail page action bar).
  3. The icon fills in to confirm the listing is saved.
  4. You must be logged in to save favorites. If you're not logged in, clicking the heart redirects you to the login page.

Viewing saved listings:

  1. Go to your User Dashboard.
  2. Click the Favorites tab, or click the Saved stat card at the top of the dashboard.
  3. Each saved listing appears as a card with a quick link to the detail page.

Removing a favorite:

Click the heart icon again on any listing card or detail page to unsave it. Or click Remove from the Favorites tab on the dashboard.

Tips

  • The Saved stat card on the dashboard is clickable — it jumps directly to the Favorites tab. Remind users about this in any onboarding email you send.
  • If you display listing cards on custom pages (using the Listing Card block), the heart icon is included automatically — users can save from any page that shows listing cards.
  • For directories with many listings, encourage users to save favorites as a way to shortlist options before contacting businesses.
  • Saved favorite counts are stored per-user in the database and are not displayed publicly by default. If you want to show a "X users saved this" count, this requires a custom filter on the wb_listora_rest_prepare_listing hook.

Common issues

Symptom Fix
Heart icon not visible on listing cards Confirm the Listing Grid and Listing Card blocks are using the latest version of the plugin
Clicking heart redirects to login This is expected behavior for non-logged-in users; check your login page is set correctly under Settings → General
Favorites tab empty after saving Clear your site cache — favorites are fetched via REST API and cached pages may show stale data
User can't remove a favorite Refresh the page; the remove action requires a valid nonce that may expire after long sessions

Related features

Saved Searches

Pro feature — requires WB Listora Pro. Free sites include the Favorites feature for bookmarking individual listings.

What it does

Logged-in visitors can save any search — keyword, location, type, filters — and receive a daily email alert when new listings match those criteria. Saved searches appear in the User Dashboard for easy management.

Saved Searches — screenshot from the modernized 1.0.5 site

Why you'd use it

  • Users who save a search come back to your directory when they receive alerts, driving repeat traffic.
  • Buyers and researchers get automatic updates without checking your directory manually.
  • Alert emails link directly to matching new listings, shortening the path to contact.
  • Users feel the directory is working for them, increasing satisfaction.

How to use it

For site owners (admin steps)

Saved searches are enabled automatically with WB Listora Pro.

How alerts are sent: A daily Action Scheduler job (wb_listora_pro_saved_search_alerts) runs once per day. It checks all saved searches against listings published in the last 24 hours and sends an email for any matches. (Action Scheduler is vendored in Free as of 1.0.5 — Pro consumes Free's copy.)

Email template: Alerts use the template at templates/emails/saved-search-alert.php. Override it at {theme}/wb-listora/emails/saved-search-alert.php for custom branding.

Disabling alerts for a specific user: There is no admin toggle per user. If a user no longer wants alerts, they disable them from their own dashboard.

For end users (visitor/user-facing)

Saving a search:

  1. Run a search on your directory page — enter keywords, set filters, select a location.
  2. After results load, a Save this search button appears below the search bar.
  3. Click the button.
  4. Enter a name for the saved search (e.g., "Italian restaurants in Brooklyn").
  5. Toggle Email alerts on or off.
  6. Click Save. The search is stored in your account.

Managing saved searches:

  1. Go to User Dashboard.
  2. The dashboard navigation includes a Saved Searches section (added by Pro).
  3. Each saved search is listed with its name and alert status.
  4. Toggle email alerts on or off per search.
  5. Click Delete to remove a saved search entirely.

Receiving alerts:

When new listings match your saved search criteria, you receive an email with a summary and direct links to the matching listings. Alerts are sent once daily — not in real time.

Tips

  • Encourage users to save searches during onboarding. A single saved search creates a recurring reason to return to your site.
  • The alert email links to individual listing pages — make sure your listing detail pages load quickly and look good on mobile.
  • Saved searches respect all active filters: type, category, location radius, price range, rating. The more specific the search, the fewer (but more relevant) alerts a user receives.
  • REST endpoint: GET /listora/v1/saved-searches returns the current user's saved searches. POST /listora/v1/saved-searches creates a new one. DELETE /listora/v1/saved-searches/{id} removes one. See docs/REST-API.md in the Pro plugin root.
  • Saved search data is stored in user meta (_listora_saved_searches). It is not tied to the listora_saved_searches database table (which is reserved for a future relational index).

Common issues

Symptom Fix
"Save this search" button not appearing Confirm the user is logged in and WB Listora Pro is active
Alerts not arriving Check the Action Scheduler queue at Tools → Scheduled Actions and search for wb_listora_pro_saved_search_alerts. If it's stuck in failed or in-progress, click Run to retry.
Alerts sending for old listings The alert checks listings published in the last 24 hours based on post_date
Saved Searches section missing from dashboard Confirm WB Listora Pro is active and the license is valid

Related features

Quick View Modal

Pro feature — requires WB Listora Pro. Let visitors preview a listing in an in-page modal — featured image, title, type badge, rating, excerpt, primary action — without losing their grid scroll position. A small eye-icon button appears on each listing card; clicking opens the modal on top of the page, dismissible with Esc, click-outside, or the close button. Card click and modal launch are independent, so the "open detail page" action stays one click away.

Quick View modal — listing preview overlay on the modernized 1.0.5 directory grid

What it is

Browsing a directory grid is friction-heavy: visitors click into a listing, decide it's not what they want, hit back, lose their scroll position, and start over. Quick View lets them peek without commitment.

The implementation:

  • A small eye-icon button is injected on each card via the wb_listora_card_actions hook (priority 5).
  • A single modal container is rendered once at wp_footer (the render_modal_container callback), so the same DOM element serves every card — no per-card modal markup, no memory leaks.
  • Modal content is fetched via REST when opened — the existing GET /listora/v1/listings/{id} endpoint, filtered through wb_listora_rest_prepare_listing so Pro can attach extra fields (Quick View uses filter_quick_view_response).
  • Theme-independent styling — the modal uses .listora-qv-modal classes with token-driven colors; tested on BuddyX / BuddyX Pro and dark mode. The close button is a 44px tap target (touch-accessible).
  • Click hierarchy — the entire card surface is clickable for "go to detail", and the eye icon stops propagation so Quick View opens without navigating. Stretched-link overlays don't intercept it.

Why this matters: directories with Quick View enabled see meaningfully lower "back button" bounce-back rates because visitors evaluate from the modal before committing to a full navigation.

How you use it

As a site owner — enable

  1. Enable the feature: Listora → Settings → Features → Quick View (default: off — turn it on if you want this UX). Save.
  2. Verify: browse the directory; every listing card now shows a small eye-icon button alongside the favorite heart and (if enabled) the Compare toggle.
  3. Test the modal: click the eye icon — modal opens; Esc closes it; click outside closes it; the close button (top-right) closes it. Card click (anywhere outside the eye icon) still navigates to the full detail page.

As a visitor

  1. Browsing the directory → click the eye icon on any card.
  2. The Quick View modal opens with the listing's featured image, title, type, rating, excerpt, and a "View Details →" button that opens the full page.
  3. Press Esc or click outside the modal to dismiss; you return to the same grid scroll position.

Quick View is read-only — to favorite, claim, or write a review, click through to the full detail page via the "View Details" button.

Settings & options

Setting Location Default Notes
Feature toggle Settings → Features → Quick View Off Off by default per product design — turn on intentionally
Modal trigger (auto, on card) Eye-icon button Rendered via wb_listora_card_actions hook
Modal mount point (auto) wp_footer Single shared instance for all cards
Modal data source REST GET /listora/v1/listings/{id} Cached client-side per session

Developer hooks worth knowing:

  • wb_listora_card_actions (action, Free) — the hook Quick View uses to render its trigger; you can hook your own card buttons at different priorities.
  • wb_listora_rest_prepare_listing (filter, Free) — Quick View's filter_quick_view_response listener uses this to add Quick-View-only fields to the response.
  • wb_listora_pro_quick_view_fields (filter) — customize which fields render inside the modal.

Related

Multi-Criteria Reviews

Pro feature — requires WB Listora Pro. Free sites use single overall star ratings.

What it does

Multi-criteria reviews let visitors rate a listing on several specific aspects instead of a single overall star. Each listing type gets its own set of rating criteria. Averages per criterion appear on the listing detail page alongside the overall rating.

Multi Criteria Reviews — screenshot from the modernized 1.0.5 site

Why you'd use it

  • Criteria-specific ratings give visitors more useful information when choosing a business (e.g., a restaurant rated 4/5 for food but 2/5 for service tells a clearer story).
  • Different listing types get relevant criteria — restaurant visitors rate food quality, hotel guests rate room cleanliness.
  • The overall rating is still displayed; criteria ratings are additive, not replacements.
  • Criteria averages appear directly on the listing detail page without any setup from the listing owner.

How to use it

For site owners (admin steps)

Multi-criteria reviews are enabled automatically when WB Listora Pro is active. No toggle required.

The default criteria per listing type are:

Listing Type Criteria
Restaurant Food, Service, Ambiance, Value
Hotel Rooms, Cleanliness, Service, Location, Value
Healthcare Expertise, Bedside Manner, Wait Time, Staff
All other types Quality, Service, Value for Money

To customize criteria for a listing type, use the wb_listora_review_criteria filter in a custom plugin or your theme's functions.php:

add_filter( 'wb_listora_review_criteria', function( $criteria, $type_slug ) {
if ( 'gym' === $type_slug ) {
return array(
array( 'key' => 'equipment', 'label' => 'Equipment' ),
array( 'key' => 'cleanliness', 'label' => 'Cleanliness' ),
array( 'key' => 'staff', 'label' => 'Staff' ),
);
}
return $criteria;
}, 10, 2 );

For end users (visitor/user-facing)

  1. Navigate to a listing detail page and click Write a Review.
  2. After the overall star rating, a set of criteria sliders or star inputs appears — one per criterion for that listing type.
  3. Rate each criterion (1–5 stars).
  4. Complete the review text and submit.

On the listing detail page, visitors see a Ratings breakdown section showing the average score for each criterion, displayed as a bar chart or star summary.

Tips

  • Keep criteria to 4–5 per type. More than 5 makes the review form feel long and reduces submission rates.
  • Criteria averages are calculated across all approved reviews for a listing. A listing needs at least a few reviews before the averages are meaningful.
  • The wb_listora_review_criteria filter receives the listing type slug — use it to define unique criteria for each custom type you create.
  • Criteria data is stored as review meta in the listora_reviews table. It is included in the REST response for reviews.
  • Criteria labels are translatable — wrap custom labels in __( 'Label', 'your-textdomain' ) in your filter callback.

Common issues

Symptom Fix
Criteria not appearing in review form Confirm WB Listora Pro is active; criteria only load when Pro is enabled
Averages not showing on listing page The listing needs at least one approved review with criteria ratings
Custom criteria not applying Verify the type slug in your filter matches exactly — use the slug shown in Listora → Listing Types

Related features

Photo Reviews

Pro feature — requires WB Listora Pro. Free sites support text-only reviews with star ratings.

What it does

Photo reviews allow visitors to upload images alongside their written review. Photos appear on the listing detail page in a gallery within the review. Site owners can moderate photos before they go live.

Photo Reviews — screenshot from the modernized 1.0.5 site

Why you'd use it

  • Visual reviews are more trustworthy and engaging than text alone.
  • Food photos on restaurant reviews, room photos on hotel reviews — these drive more clicks to the listing.
  • Photo moderation lets you remove inappropriate images before they appear publicly.
  • Photo uploads go through WordPress's standard media handling, so images are stored in your media library.

How to use it

For site owners (admin steps)

Photo reviews are enabled automatically with WB Listora Pro. No toggle required.

Moderating photo reviews:

  1. Go to Listora → Reviews.
  2. Reviews with photos show a photo icon in the list.
  3. Open a review to see the uploaded photos.
  4. Approve or reject the review. Rejecting removes the photos from public view.

Image settings: Photo uploads respect your WordPress upload_max_filesize PHP setting. The accepted file types are standard WordPress image types (JPEG, PNG, WebP, GIF).

For end users (visitor/user-facing)

  1. Navigate to a listing detail page and click Write a Review.
  2. After the star rating and review text fields, an Add Photos upload button appears.
  3. Click Add Photos and select one or more images from your device.
  4. Preview thumbnails appear below the button. Click the × on any thumbnail to remove a photo before submitting.
  5. Submit the review. Photos are processed along with the review text.
  6. If the site requires review moderation, photos will be visible only after the review is approved.

Viewing photos: Approved photos appear in a thumbnail row within the review card on the listing detail page. Clicking a thumbnail opens a lightbox.

Tips

  • Encourage photo reviews by mentioning them in your directory's onboarding emails to business owners and submitters.
  • If you have moderation enabled, review photo submissions regularly — photos need the same moderation attention as text.
  • Image file size: remind reviewers to upload reasonably sized images (under 5MB each) to keep upload times short. You can enforce this via server-side PHP settings.
  • Photos are stored as WordPress attachments attached to the review's entry in the listora_reviews table. They are included in the review REST response.

TODO: Confirm the maximum number of photos per review and whether this is configurable in settings.

Common issues

Symptom Fix
Photo upload button not appearing Confirm WB Listora Pro is active
Upload fails with an error Check upload_max_filesize and post_max_size in your PHP configuration
Photos visible before approval Check that review moderation is enabled under Listora → Settings → Reviews
Photos not showing after approval Clear your site cache

Related features

Lead Forms

Pro feature — requires WB Listora Pro. Free ships a basic Contact Form; Pro's Lead Form replaces it automatically (via the wb_listora_render_contact_form filter) and adds tracked analytics, custom fields, and integrations.

What it does

Lead forms add a Contact Owner form to every listing detail page. When a visitor submits the form, an email is sent directly to the listing owner. No message data is stored in the database — only an aggregate lead count is tracked for analytics.

Lead Forms — screenshot from the modernized 1.0.5 site

Why you'd use it

  • Listing owners receive inquiries directly to their inbox, increasing the value of having a listing.
  • Guests and logged-in users can both send messages — no account required.
  • GDPR-friendly: contact messages are emailed and not stored permanently as database records.
  • Lead count appears in the listing owner's analytics dashboard, showing how many contact attempts their listing generated.

How to use it

For site owners (admin steps)

Lead forms are enabled automatically with WB Listora Pro. They appear on all listing detail pages by default.

What the owner receives:

An email notification containing:

  • Sender's name and email address.
  • Sender's phone number (optional field).
  • Message text.
  • A link back to the listing.

The email is sent to the listing author's WordPress user email address.

Email template: The lead notification email uses the template at templates/emails/lead-notification.php inside the Pro plugin. Themes can override it by placing a file at {theme}/wb-listora/emails/lead-notification.php.

Spam protection: The form includes a honeypot field (hp) to filter automated bot submissions. Rate limiting applies at the REST level — repeated submissions from the same IP within a short window are rejected.

For end users (visitor/user-facing)

  1. Navigate to a listing detail page.
  2. Find the Contact Owner form in the listing's contact tab or sidebar.
  3. Fill in:
  • Name (required)
  • Email address (required)
  • Phone number (optional)
  • Message (required)
  1. Click Send Message.
  2. A success confirmation appears. The listing owner receives the email immediately.

Tips

  • Remind listing owners to check their email spam folder for lead notifications — depending on their email provider, automated WordPress emails may be filtered.
  • Configure WordPress to send email via an SMTP service (Mailgun, SendGrid, Postmark) to improve deliverability. Use a plugin like WP Mail SMTP.
  • Lead counts appear in the listing owner's Analytics tab. Point owners there to show them how many inquiries their listing is generating.
  • To disable lead forms on specific listing types, use the wb_listora_after_listing_fields action priority — the form renders at priority 10, so hooking at a lower priority with return false is not sufficient. Instead, use a custom check inside a child class or a conditional filter on the form output.

TODO: Confirm whether lead forms can be disabled per listing type from the admin settings, or only via code.

Common issues

Symptom Fix
Contact form not visible Confirm WB Listora Pro is active and the license is valid
Owner not receiving emails Check WordPress mail configuration; test with WP Mail Check
"Too many requests" error Rate limiting triggered — the visitor has submitted too many messages in a short time
Form submits but no email arrives The listing's author may have no email address set in Users → Edit User

Related features

Compare Listings

Pro feature — requires WB Listora Pro. Let visitors pick 2–4 listings and view them side by side in a clean comparison table — core info, pricing, features, ratings, services, hours, grouped by listing type so apples are compared with apples. Selections persist across the site via localStorage; a floating bar shows current selections and offers a one-click "Compare now" jump.

Compare Listings — side-by-side comparison table on the modernized 1.0.5 UI

What it is

For high-consideration directory categories — picking a hotel, comparing real-estate listings, evaluating two doctors — visitors don't decide from a list view. They want a table. Compare Listings gives them that table without leaving the site.

The feature is a self-contained system:

  • A native listora-pro/comparison Gutenberg block renders the side-by-side table — placed on a dedicated "Compare Listings" page that the activator auto-creates.
  • A "Compare" toggle on every listing card + detail page (rendered via the wb_listora_card_actions and wb_listora_after_listing_fields hooks) lets visitors add or remove a listing from their comparison set.
  • A floating comparison bar at the bottom of every page shows the current selection (2–4 listings), with a "Compare now" button that jumps to the comparison page.
  • Selection state is stored in localStorage, so visitors can keep browsing — open new tabs, follow links — and their comparison set survives.
  • Listings are grouped by type in the comparison table — restaurants under one heading, hotels under another — because comparing a restaurant against a hotel field-by-field isn't useful.
  • The comparison page also reachable via URL (/compare-listings/?compare=ID1,ID2,ID3) so visitors can share a comparison link.
  • REST routes GET /listora/v1/compare and POST /listora/v1/compare/preview power the table data + the floating-bar preview (public endpoints).
  • Field groups in the table are configurable per block via Inspector controls: Core / Pricing / Features / Ratings / Services / Hours.

How you use it

As a site owner — enable + place

  1. Enable the feature: Listora → Settings → Features → Comparison (default: off — turn it on if you want this UX).
  2. Verify the auto-created page: WP Admin → Pages → look for Compare Listings. The activator ensures it exists with the listora-pro/comparison block. If it's missing or has the wrong block, click Pages → Add New, title it "Compare Listings", and insert the block manually.
  3. Customize what gets compared (optional): in the block editor, select the Comparison block and use Inspector → Field Groups to toggle which sections appear (Core, Pricing, Features, Ratings, Services, Hours).
  4. Confirm the Compare button is showing on listings: visit a listing card in your directory; the "Compare" toggle should appear in the card-actions row.

As a visitor — compare two listings

  1. Browse the directory → click Compare on a listing card. The toggle becomes "Selected" + the floating bar appears at the bottom of the screen showing "1 listing selected".
  2. Add 1 to 3 more listings (max 4) the same way.
  3. Click Compare now on the floating bar (or visit the Compare Listings page directly).
  4. The table renders the listings side by side; remove any from the table via the in-row "Remove" button.
  5. To clear all selections, click Clear on the floating bar.

Sharing a comparison

The Compare page reads ?compare= from the URL, so a fully-formed link like /compare-listings/?compare=42,103,257 opens those three listings directly — useful for support, sales chats, or external embeds.

Settings & options

Setting Location Default Notes
Feature toggle Settings → Features → Comparison Off Off by default per product design — turn on intentionally
Compare page (auto-created on activation) /compare-listings/ Idempotent — the activator verifies the page exists with the right block
Block field groups Inspector → Field Groups All 6 enabled Per-block override; same Compare page can host multiple blocks with different field selections
Max selections (system) 4 Hardcoded UX limit; comparison tables wider than 4 columns hurt readability
Storage localStorage Cleared by the visitor's browser settings; not synced across devices

REST routes (public):

  • GET /wp-json/listora/v1/compare?ids=42,103 — returns the full comparison data
  • POST /wp-json/listora/v1/compare/preview (body: {ids:[42,103]}) — lightweight data for the floating-bar preview

Related

Needs Marketplace

Pro feature — requires WB Listora Pro. Free sites support standard listing submission from businesses outward.

What it does

The Needs Marketplace is a reverse directory: instead of businesses posting listings, visitors post what they're looking for. A need might be "Looking for a caterer for 200 guests in Austin, budget $5,000." Business owners browse posted needs and respond to the ones they can fulfill.

Needs Marketplace — screenshot from the modernized 1.0.5 site

Why you'd use it

  • Creates a two-sided marketplace dynamic — value flows from visitors to businesses and back.
  • Businesses in your directory see active demand they can respond to directly.
  • Users who post needs are highly motivated buyers, making each need a qualified lead opportunity.
  • Needs have urgency levels, so businesses can prioritize time-sensitive opportunities.

How to use it

For site owners (admin steps)

  1. WB Listora Pro registers a Needs section in the admin automatically when Pro is active.
  2. Go to Listora → Needs to see all posted needs, moderate them, and manage responses.
  3. Use Approve and Reject controls on each need to control what appears publicly.
  4. Needs can expire automatically — the expiration system runs in the background and marks needs as Expired after the configured period.

The Needs feed lives at /needs/ — that's the CPT archive of listora_need posts and works out of the box once Pro is active. To accept new buyer-posted needs from visitors, create a normal WordPress page with the [listora_post_need] block (or the legacy listora-pro/post-need block) — Pro doesn't auto-register the post-need page, so you choose its slug and placement.

For end users (visitor/user-facing)

Posting a need:

  1. Navigate to the Needs page on your directory (created or linked by the site owner).
  2. Click Post Your Need.
  3. Fill in the need details:
  • Title — a short description of what you need.
  • Description — details about your requirement, timeline, and budget.
  • Type — the type of service you're looking for (matches your directory's listing types).
  • Location — where you need the service.
  • Budget — optional budget range.
  • Urgency — Flexible, Normal, or Urgent.
  1. Submit. After admin approval, your need appears publicly.

Urgency levels:

Urgency Display
Flexible Default appearance
Normal Standard badge
Urgent Highlighted badge — appears prominently

Responding to a need (business owners):

  1. Browse the Needs page to find relevant needs.
  2. Click a need to view its full details.
  3. Click Respond and submit your offer or message.
  4. The need poster receives a notification with your response.

Need statuses:

Status Meaning
Open Accepting responses
Fulfilled The poster found what they needed
Expired Past the expiry date, no longer active

Tips

  • Set urgency to Urgent on your need to make it stand out in the list — urgent needs appear with a highlighted badge.
  • Business owners: respond to urgent needs quickly. Time-sensitive buyers are more likely to convert from a fast response.
  • As site owner, moderate needs promptly — long moderation queues discourage users from posting.
  • Encourage business owners to check the Needs page regularly as part of their directory participation.
  • Needs are stored as the listora_need custom post type. They support all standard WordPress moderation tools (bulk actions, filtering by status).

Common issues

Symptom Fix
Needs page not visible The site owner must create a page for needs browsing — this is not created automatically by the Setup Wizard
"Post Your Need" button not visible Confirm WB Listora Pro is active and the user has the required capability
Need stuck in Pending Go to Listora → Needs in the admin and approve it manually
Responses not sending notifications Check WordPress email configuration; use WP Mail SMTP for reliable delivery

Related features

Contact Form

Built into WB Listora Free.

A "Contact owner" form on every listing detail page. Visitors send a private message to the listing owner; the owner gets an email; no personally-identifying data is stored on the site. Honeypot + Akismet + per-IP and per-listing rate limits in front of every submission — and when Pro's Lead Forms feature is on, this Free surface automatically stands down so the two never render together.

Contact Form — Free Contact owner form on listing detail, with name + email + message fields

What it is

A minimal contact-owner surface for sites that don't need full Pro lead capture:

  • Renders inline on every listing detail page (after the fields, before reviews) — no shortcode or block placement required.
  • Three required inputs: name, email, message. Plus a hidden honeypot field bots can't resist filling.
  • Submits to POST /listora/v1/listings/{id}/contact-form with a per-listing nonce.
  • Anti-spam pipeline runs before any email is dispatched: honeypot rejection, keyword blacklist + URL density + Akismet, per-IP rate limit (3 messages per hour per listing), per-listing daily cap (default 20 — configurable via wb_listora_contact_form_per_listing_daily_cap filter).
  • Owner receives a plain-text email at their WordPress account email. Reply-To is set to the sender so a one-click reply goes straight back to the visitor — without exposing the owner's email to the sender on the page.
  • Self-suppresses for the listing owner viewing their own page (no "contact yourself" affordance).
  • Coupling rule: when Pro's lead_form feature toggle is ON, should_render() returns false and the Free form hides — Pro's analytics-enriched lead form takes over with the same UX shape. Set the wb_listora_render_contact_form filter to true to force the Free form on top of Pro (rarely useful).

How you use it

As an admin / site operator

  1. Activate WB Listora — the contact form is on by default.
  2. Confirm your site's outgoing email works. Try Settings → Notifications → Send Test Email with the "New listing submitted" template — if that arrives, the contact form's wp_mail() will too.
  3. Tune the per-listing daily cap if needed: 20 is right for most directories. Reduce for low-traffic high-value listings, raise for high-volume vendors.
  4. Listing owners get messages at their profile email (WordPress account email). Encourage them to keep that current.

As a visitor

  1. Open any listing detail page.
  2. Scroll past the fields tab to Contact owner.
  3. Enter your name, your email, and a message of any length.
  4. Submit. The page shows "Your message has been sent to the listing owner." inline.
  5. The owner replies directly to your email address — replies do NOT route back through the site.

As a listing owner

  1. New messages arrive at the email address on your WP profile.
  2. Subject format: New message from {sender} about {your listing title}.
  3. Hit reply in your mail client — your reply goes straight to the visitor's email (we set Reply-To).
  4. The site itself never stores the visitor's name / email / message text. If you need a record, save the email in your mail archive.

Anti-spam layers

The form runs every submission through the same anti-spam pipeline as listings, reviews, and claims:

Layer What it catches Configurable
Honeypot (hp field) Bots that fill every input. Silent reject — bots think they won. (no setting — built in)
Per-IP rate limit 3 messages per hour per listing per IP. Returns HTTP 429. (no setting — built in)
Per-listing daily cap 20 messages per listing per day across all IPs. Returns HTTP 429. wb_listora_contact_form_per_listing_daily_cap filter
Keyword blacklist Banned words from Settings → Security → Banned Words. Settings → Security
URL density cap Submissions over the per-event URL limit. Settings → Security
Akismet Spam content check via the Akismet API. Falls open on outage. Akismet plugin

See Spam Protection for the layered defence and Rate Limiting for the per-IP windows.

Settings & options

Setting Default Where
Per-listing daily cap 20 wb_listora_contact_form_per_listing_daily_cap filter
Per-IP cap 3 / hour / listing (no setting — built in)
Email subject template New message from %s about %s (translatable string)
Reply-To header Sender's email (filterable via wb_listora_contact_form_email_headers)
Render gate On when Pro lead_form is OFF wb_listora_render_contact_form filter

Developer hooks

// Raise the per-listing daily cap for verified listings.
add_filter( 'wb_listora_contact_form_per_listing_daily_cap', function ( $cap, $listing_id ) {
if ( wb_listora_is_verified( $listing_id ) ) {
return 50;
}
return $cap;
}, 10, 2 );

// Add a BCC for compliance archiving.
add_filter( 'wb_listora_contact_form_email_headers', function ( $headers, $post ) {
$headers[] = 'Bcc: compliance@example.com';
return $headers;
}, 10, 2 );

// Force the Free form to render even when Pro's lead form is active.
add_filter( 'wb_listora_render_contact_form', '__return_true' );

After every successful send, do_action( 'wb_listora_after_contact_form_submit', $listing_id, $context, $request ) fires — Pro's Audit Log + Analytics features listen here to record the event.

Free / Pro coupling

Scenario What renders
Free only Free contact form (this page)
Pro active, lead_form toggle ON (default) Pro Lead Forms — analytics-enriched, custom fields, integrations
Pro active, lead_form toggle OFF Free contact form (this page)
Pro active, lead_form ON, filter override Both render (use carefully)

Related

  • Lead Forms (Pro) — analytics-enriched replacement with custom fields, source attribution, integrations.
  • Spam Protection — the multi-layer defence the contact form runs through.
  • Rate Limiting — per-IP sliding window windows on every write endpoint.
  • Email Templates — message template customization.
  • REST APIPOST /listora/v1/listings/{id}/contact-form endpoint reference.

Maps

Map Settings

Access map settings at Listora > Settings > Map.

Settings Map — admin UI screenshot (1.0.5)

Map Provider

  • OpenStreetMap (default): Free, no API key required. Uses Leaflet.js with OpenStreetMap tiles.
  • Google Maps (Pro): Requires a Google Maps API key. Provides autocomplete, Street View, and custom styling.

Default Map Center

Set the latitude and longitude for the default map center. This is used when no location context is available.

Default Zoom Level

The initial zoom level for maps (1-18). Recommended: 12 for city-level, 6 for country-level.

Marker Clustering

Group nearby markers into clusters at lower zoom levels. Recommended for directories with many listings.

Search on Map Drag

Automatically search for listings when the user pans or zooms the map.

Google Maps Settings (Pro)

When using Google Maps via WB Listora Pro:

  • API Key: Your Google Maps JavaScript API key
  • Map Style: Choose from preset styles or enter custom JSON
  • Places Autocomplete: Enable address autocomplete in search

Related

Google Maps

Pro feature — requires WB Listora Pro. Free sites use OpenStreetMap out of the box — no API key needed.

What it does

WB Listora Pro replaces the default OpenStreetMap maps with Google Maps. Every map block on your site — the directory map, the listing detail map, and address fields in the submission form — switches to Google Maps automatically once you add your API key.

Google Maps — screenshot from the modernized 1.0.5 site

Why you'd use it

  • Google Maps is the map most visitors recognize and trust.
  • Marker clustering groups nearby listings into a single bubble, keeping the map readable when many listings are in the same area.
  • Google Places autocomplete on address fields helps submitters enter accurate addresses with fewer errors.
  • Custom map styles let you match the map's color palette to your brand.

How to use it

For site owners (admin steps)

Step 1: Get a Google Maps API key

  1. Go to the Google Cloud Console.
  2. Create a project (or select an existing one).
  3. Under APIs & Services → Library, enable these APIs:
  • Maps JavaScript API (required for the map blocks)
  • Places API (required for address autocomplete in the submission form)
  • Geocoding API (required for converting typed addresses to coordinates)
  1. Go to APIs & Services → Credentials, click Create Credentials → API Key, and copy the key.
  2. Restrict the key to your site's domain under API key restrictions → HTTP referrers.

Step 2: Enter the key in WB Listora Pro

  1. Go to Listora → Settings → Map.
  2. Set Map Provider to Google Maps.
  3. Paste your API key into the Google Maps API Key field.
  4. Click Save Settings.

Step 3: Verify

Visit any page with a map block. The map should now show Google Maps tiles instead of OpenStreetMap. The Listing Submission form's address field should show a Google Places autocomplete dropdown as you type.

Marker clustering: Clustering is enabled by default. Zoom in on the map to expand clusters into individual markers.

Custom map styles: To apply a custom color style (e.g., a dark mode map or brand colors):

  1. Generate a style JSON array from snazzymaps.com or Google's Map Styling Wizard.
  2. Go to Listora → Settings → Map and paste the JSON into the Custom Map Styles field.
  3. Save. The style applies to all maps on your site.

Tips

  • Restrict your API key to your production domain only. Use a separate unrestricted key for local development.
  • Google Maps usage is billed by Google after a monthly free tier. For most directories, the free tier is sufficient — check Google Maps Platform pricing to estimate costs before going live.
  • If you don't need Google Places autocomplete (e.g., you pre-fill addresses for all listings), you can disable the Places API to reduce API usage.
  • Marker clustering is handled by the open-source @googlemaps/markerclusterer library bundled with Pro — no additional API cost.
  • The map provider setting applies globally to all map blocks. You cannot mix Google Maps on one page and OpenStreetMap on another.

Common issues

Symptom Fix
Map shows a gray box with "For development purposes only" watermark The API key is not entered or is incorrect — check Listora → Settings → Map
Address autocomplete not working in submission form Ensure the Places API is enabled in Google Cloud Console for your key
Map loads but markers don't appear Geocoding may have failed on some listings; re-save those listings to trigger geocoding
Custom styles not applying Validate your style JSON at jsonlint.com — invalid JSON is silently ignored

Related features

Integrations

BuddyPress Integration

Pro feature — Available with WB Listora Pro. Requires BuddyPress (or BuddyBoss) active.

Turn a one-way business directory into a two-way community. When BuddyPress is active, WB Listora Pro automatically posts listing activity to BP activity streams, sends BP notifications, adds a "My Listings" tab to BP member profiles, and links review/claim activity to the actor's BP profile — so a directory site that already runs on BuddyPress feels native, not bolted on.

BuddyPress Integration — BP activity stream showing a Listora listing publication

What it is

A common Wbcom stack pairs a directory with a community plugin — most often BuddyPress (or BuddyBoss). Without integration, the two systems live side by side but don't talk: a member submits a listing and their BP friends never hear about it; a review is posted and the listing owner has to email-check to find out. BuddyPress Integration closes that gap.

When BuddyPress is detected, the feature wires in:

  • Activity stream entries for three lifecycle events:
  • A new listing is published (activity_listing_published on wb_listora_listing_submitted)
  • A review is posted on a listing (activity_review_posted on wb_listora_review_submitted)
  • A claim is approved (activity_claim_approved on wb_listora_claim_approved)
  • BP notifications (when the BP notifications component is active):
  • Owners are notified when a new review lands on their listing
  • Submitters are notified when their listing is approved (or rejected)
  • Claimants are notified when their claim is approved
  • A "My Listings" sub-nav on BP member profiles (under the user's profile) that lists everything the member owns — so a member's friends can browse what they've published without leaving BuddyPress.
  • Profile-linked review authors — review author names in the Listora UI link to the reviewer's BP profile (via the wb_listora_member_profile_url filter Free fires).
  • Notification formatting for the BP-standard notifications UI, so Listora notifications appear alongside friend requests, mentions, etc. in the same dropdown.

The integration is non-destructive: turning the feature off leaves no orphaned activity or notification rows; turning it on doesn't backfill historical events.

How you use it

As a site owner — enable + verify

  1. Ensure BuddyPress (or BuddyBoss) is active.
  2. Enable the feature: Listora → Settings → Features → BuddyPress Integration (on by default when BP is detected).
  3. Recommended BP components: activity stream (for activity entries) + notifications (for notifications). The integration auto-detects which are active.
  4. Verify activity: as a test user, submit a new listing → visit BP activity stream (/activity/) → confirm the publication appears with a link back to the listing.
  5. Verify notifications: post a review on a listing you don't own → log in as the listing owner → BP notification dropdown should show "New review on your listing".
  6. Verify the My Listings tab: visit your own BP profile → confirm the "My Listings" sub-nav appears and shows your published listings.

As a community member

  • Following another member's directory activity: activity entries appear in the BP stream you already read — no separate notification setting to manage.
  • Linking from a review back to your profile: when you post a review, your name on the review card links to your BP profile, helping you build reputation across both systems.

Settings & options

Setting Location Default Notes
Feature toggle Settings → Features → BuddyPress Integration On (when BP active) Auto-detects BP; idle when BP is not installed
Activity stream entries (auto) On with BP activity component Listings / reviews / claims
BP notifications (auto) On with BP notifications component New review, listing approved, claim approved
My Listings profile sub-nav (auto) On with BP active Surfaces a member's listings on their profile
Profile URL filter wb_listora_member_profile_url Returns bp_core_get_user_domain($user_id) Filter to customize per-user link in non-BP contexts

Developer hooks worth knowing:

  • wb_listora_member_profile_url (filter, Free) — Pro's BP integration listens to this to return BP profile URLs; you can override per-user.
  • bp_listora_activity_action (filter) — customize the text shown for each activity entry.
  • bp_listora_notification_format (filter) — customize notification rendering.

Related

  • Reviews & Ratings — every review event flows into BP activity when this integration is on.
  • Business Claims — claim approvals notify claimants via BP when active.
  • User Dashboard — the Listora dashboard remains the canonical management surface; BP profile tab is a discovery surface.
  • Outgoing Webhooks (Pro) — an alternative when you want to route the same events to non-BP destinations.

Outgoing Webhooks

Pro feature — requires WB Listora Pro. Send real-time HMAC-signed HTTP POSTs to external systems (Zapier, n8n, Make, Slack, your CRM, custom services) whenever something happens in your directory — a new listing is published, a review is posted, a claim is approved, a coupon is redeemed. Webhooks are queued via Action Scheduler, retried on failure, signed for authenticity, and individually toggleable per endpoint per event.

Outgoing Webhooks admin — endpoint list with delivery status

What it is

If you've ever wanted "when a new business listing is approved, post a message in Slack" or "when a review hits 5 stars, push the listing into our HubSpot pipeline" — that's what Outgoing Webhooks is for. It turns WB Listora into a first-class event source for the rest of your stack.

Under the hood:

  • Endpoints are stored as a custom post type (wb_listora_webhook) so each subscription has its own admin row, status, last-delivery log, and individually selectable event subscriptions.
  • Every event is HMAC-SHA256 signed with a per-endpoint secret in the X-Listora-Signature header, plus a timestamp + nonce for replay protection — your receiver verifies authenticity before processing.
  • Deliveries run on Action Scheduler (wb_listora_pro_deliver_webhook job, group wb-listora-pro), so a slow receiver never blocks your site. Failed deliveries retry with exponential backoff.
  • Delivery logs persist with response code, body excerpt, duration, attempt count — pruned automatically via wb_listora_pro_webhook_log_cleanup cron.
  • REST routes are registered (in wb_listora_rest_api_init) so you can also create + manage webhooks programmatically.

Events available out of the box:

Event Fires when
listing_created A listing is created via REST submission
listing_updated A listing's fields are edited
listing_status_changed Status transitions (pending → publish, publish → expired, etc.)
listing_expired Listing's expiration date passes (cron-driven)
review_submitted A new review is posted
review_updated A review is edited (or moderation status changes)
claim_submitted A business-claim request is submitted
claim_updated A claim is approved / rejected / reassigned
coupon_redeemed A discount code is used at submission
need_posted (Needs Marketplace) A need is posted publicly

How you use it

As a site owner — set up a webhook

  1. Enable the feature: Listora → Settings → Features → Outgoing Webhooks (on by default).
  2. Open the webhook admin: Listora menu → Webhooks.
  3. Add a new endpoint:
  • Name — e.g. "Slack: #new-listings"
  • URL — the receiver URL (https://hooks.slack.com/services/…, your Zap, etc.)
  • Secret — a long random string; share it with the receiver
  • Events — tick the events this endpoint should subscribe to
  • Status — Active
  1. Save. The endpoint is live.
  2. Test: edit a listing on your site → save → check the Delivery Log row for that endpoint. You should see a 2xx response code.

As a developer — verify HMAC signatures

The receiver should:

  1. Read the X-Listora-Signature header.
  2. Recompute hash_hmac('sha256', $raw_body, $secret) and compare with the header value using a constant-time comparison.
  3. Reject the request if the signatures don't match.
  4. Reject if the X-Listora-Timestamp is more than ~5 minutes off (replay protection).
  5. Process the JSON body — top-level keys: event, id, timestamp, data (the event payload).

Example PHP verification:

$body = file_get_contents( 'php://input' );
$signature = $_SERVER['HTTP_X_LISTORA_SIGNATURE'] ?? '';
$expected = hash_hmac( 'sha256', $body, $your_secret );
if ( ! hash_equals( $expected, $signature ) ) {
http_response_code( 401 );
exit;
}
$payload = json_decode( $body, true );
// ... process $payload ...

Settings & options

Setting Location Default Notes
Feature toggle Settings → Features → Outgoing Webhooks On
Endpoint CRUD Listora → Webhooks One row per receiver
Per-endpoint events (per row) None until ticked Subscribe each endpoint to specific events only
HMAC secret (per row) Required Used for X-Listora-Signature
Retry policy (system) Exponential backoff via Action Scheduler Retries on non-2xx responses
Log retention wb_listora_pro_webhook_log_cleanup cron 30 days Old delivery rows are pruned

Developer filters:

  • wb_listora_pro_webhook_payload — modify the payload before signing/sending.
  • wb_listora_pro_webhook_headers — add custom headers to outgoing requests.
  • wb_listora_pro_webhook_request_args — modify the wp_remote_post() args (e.g. timeout, sslverify).

Related

  • Payment Webhook Receiver (Pro) (docs in progress) — the inbound side: how WB Listora accepts payment webhooks from Stripe/PayPal/Paddle.
  • BuddyPress Integration (Pro) — another way to react to listing events, but routed into BP activity streams + notifications.
  • Developer Reference: REST API — webhooks are also manageable via REST.
  • Developer Reference: Hooks — the underlying wb_listora_* events these webhooks listen to.

Payment Webhook Receiver

Pro feature — requires WB Listora Pro. Accept payment-completed webhooks from Stripe, PayPal, Paddle, or any custom payment processor and convert them into credits on the user's balance — payment-gateway-agnostic by design. Strict HMAC verification (with timestamp + nonce replay protection) is on by default; the receiver follows ADR-002 (payload must be HMAC-verified AND replay-protected before crediting).

Payment Webhooks — settings tab showing endpoint URL, secret, and last-received log

What it is

WB Listora doesn't ship a payment gateway — that's a deliberate architectural choice (see Credits & Pricing Plans (Pro)). Instead, the plugin exposes a single hardened webhook endpoint and lets your payment processor of choice POST to it whenever a payment completes. The receiver converts the payment into credits on the user's balance.

Why payment-gateway-agnostic:

  • Sites that use Stripe Checkout point Stripe at the webhook URL.
  • Sites that use WooCommerce checkout flow use the Pro's bundled SDK adapters.
  • Sites that use Paddle / Gumroad / Lemon Squeezy / a custom gateway just need to POST a tiny JSON payload + an HMAC signature.

Security model (the non-negotiable part):

  • Strict HMAC mode is the default (wb_listora_pro_webhook_strict_hmac option, on by default since 1.0.5). The receiver requires:
  • X-Listora-Signature HMAC-SHA256 of the raw body, computed with the shared secret.
  • X-Listora-Timestamp within 5 minutes of server time (rejects replays past freshness window).
  • X-Listora-Nonce — a random per-request nonce stored in a short-TTL transient; reject if seen before (replay defence even within the freshness window).
  • Legacy fallback (legacy sites) — admin can disable strict mode in Settings → Webhooks → Strict HMAC to allow the old shared-secret header path. Disabling is admin-only, audited, and discouraged.
  • All accepted webhooks land in the Audit Log (Pro) so disputes are reconstructable.

What the endpoint does on a verified payment:

  1. Calls the Credits SDK Credits::topup($user_id, $amount, $context) — idempotent on gateway_payment_id so retries don't double-credit.
  2. Fires wb_listora_pro_payment_received action + the canonical wb_listora_pro_credits_added event (via the SDK bridge).
  3. Auto-resumes any of the user's listings currently in listora_payment ("Awaiting Credits") status whose plan cost is now covered.

How you use it

As a site owner — set up an integration

  1. Enable the feature: Listora → Settings → Features → Credit System / Webhook Receiver (always-on infrastructure; on by default).
  2. Visit Settings → Webhooks — copy your Webhook URL (https://yoursite.com/wp-json/listora/v1/webhooks/payment) + your Webhook Secret (regenerate if needed).
  3. Configure your payment processor:
  • Stripe — Stripe Dashboard → Developers → Webhooks → Add endpoint → URL = your webhook URL → events = checkout.session.completed + payment_intent.succeeded. Stripe's signing secret is separate; the bridge between Stripe's signature and Listora's signature is built into the receiver.
  • Paddle — Paddle Dashboard → Developer Tools → Notifications → Add → URL = your webhook URL → events = transaction.completed.
  • Custom processor — POST JSON to the URL with X-Listora-Signature: <HMAC-SHA256(body, secret)>, X-Listora-Timestamp: <unix>, X-Listora-Nonce: <random>.
  1. Test: trigger a small test payment → check Listora → Settings → Webhooks → Last received for a 2xx + the credit balance for that user updated.

Payload shape (custom processor)

POST /wp-json/listora/v1/webhooks/payment
Content-Type: application/json
X-Listora-Signature: 5e3a7c…
X-Listora-Timestamp: 1716232847
X-Listora-Nonce: a8f3-…

{
"event": "payment.completed",
"gateway": "your-gateway-id",
"gateway_payment_id": "ch_3OZ…", // idempotency key
"user_id": 42,
"user_email": "owner@example.com",
"amount_credits": 100,
"amount_currency": 19.99,
"currency": "USD",
"meta": { ... }
}

Settings & options

Setting Location Default Notes
Endpoint POST /wp-json/listora/v1/webhooks/payment Always registered Public-write endpoint, HMAC-gated
Strict HMAC Settings → Webhooks → Strict HMAC On Disable only to support legacy integrations
Webhook secret Settings → Webhooks → Secret Auto-generated on activation Regenerable; invalidates existing integrations
Idempotency window (system) Per-gateway_payment_id Same payment ID never credited twice
Replay protection Timestamp (5min) + Nonce (10min) (system) Both must pass
Log Audit Log (Pro) Every accepted/rejected webhook recorded

Developer hooks:

  • wb_listora_pro_payment_received (action, 4 args) — fires after credits land. Listeners email, push to CRM, notify Slack.
  • wb_listora_pro_webhook_strict_hmac (option / filter) — programmatic override of strict-mode (advisable: never disable in production).
  • wb_listora_pro_webhook_payload_normalized (filter) — modify the parsed payload before crediting (e.g. apply gateway-specific currency conversion).
  • wb_listora_pro_webhook_verification_failed (action) — listen for rejected webhooks for monitoring.

Related

Programmatic SEO Pages

Pro feature — requires WB Listora Pro. Auto-generate hundreds of long-tail SEO landing pages like /restaurants-in-mumbai/ or /hotels-in-london/ from your existing listings — fully indexed by Google, with proper meta tags, Schema.org markup, and a sitemap entry. Each page is a real WordPress URL backed by a filtered listing grid, not a JavaScript-only view.

SEO Pages — auto-generated city/type landing page on the modernized 1.0.5 UI

What it is

Most directory sites lose the entire "long-tail search" segment — people who Google "plumbers in Manchester" land on a competitor's dedicated city page, not a generic search-result URL. Programmatic SEO Pages closes that gap.

When enabled, WB Listora Pro:

  • Registers rewrite rules that turn URL patterns like /{type}-in-{location}/ (configurable) into real WordPress routes that resolve server-side.
  • Renders a filtered listing grid at each URL, scoped to the type + location combination — so /restaurants-in-mumbai/ shows exactly the Mumbai restaurants from your directory.
  • Emits meta tags, page titles, descriptions, Open Graph + Twitter Card markup matched to the page's combination — every page is uniquely titled and crawlable.
  • Outputs JSON-LD structured data (ItemList + BreadcrumbList) so Google understands the page as a directory listing, not a generic article.
  • Registers a sitemap provider so Google discovers every generated page automatically — works with WP core sitemaps + Yoast SEO + Rank Math.
  • Integrates with Yoast / Rank Math title + description filters so existing SEO workflows keep working.

Why this matters: directory plugins that don't ship this leave thousands of long-tail searches on the table. With it on, the same 500 listings produce hundreds of indexed landing pages.

How you use it

As a site owner — enable + configure

  1. Enable the feature: WordPress admin → Listora → Settings → Features → toggle Programmatic SEO Pages to on. (It is on by default.)
  2. Configure the URL pattern: Settings → SEO Pages tab. Choose the URL shape — common patterns:
  • /{type}-in-{location}//hotels-in-london/
  • /{location}/{type}//london/hotels/
  • /find/{type}/{location}//find/hotels/london/
  1. Flush rewrite rules: WordPress admin → Settings → Permalinks → click Save. (One-time, required after any URL-pattern change.)
  2. Set page-title + meta-description templates with the placeholders {type}, {location}, {count}, {site_name}. Example:
  • Title: Best {type} in {location} ({count} listed) — {site_name}
  • Description: Browse {count} {type} in {location}. Read reviews, get directions, contact owners directly.
  1. Save settings. Every type × location combination is now a live URL.

As a marketer — verify discoverability

  • Visit one of the generated URLs in an incognito window — confirm the page renders the right listings + title.
  • View page source — confirm the <title>, <meta name="description">, Open Graph tags, and JSON-LD ItemList are present.
  • Check https://yoursite.com/wp-sitemap.xml (or your SEO plugin's sitemap) — generated pages appear automatically.
  • Submit the sitemap to Google Search Console; pages typically begin getting impressions within 1–2 weeks.

Settings & options

Setting Location Default Notes
Feature toggle Settings → Features → Programmatic SEO Pages On Required for the rest to take effect.
URL pattern Settings → SEO Pages → URL Pattern /{type}-in-{location}/ Permalinks must be flushed after changing.
Title template Settings → SEO Pages → Title Template (placeholder) Supports {type}, {location}, {count}, {site_name}.
Description template Settings → SEO Pages → Description Template (placeholder) Same placeholders.
Sitemap provider (auto) On Registers with WP core, Yoast, Rank Math automatically.

Hook filters available for developers:

  • wb_listora_pro_seo_pages_title — override the <title> per page.
  • wb_listora_pro_seo_pages_description — override the meta description.
  • wb_listora_pro_seo_pages_schema — modify the JSON-LD payload.

Related

Import & Export

Built into WB Listora Free.

Bulk-import listings from CSV, JSON, or GeoJSON files, and bulk-export your directory in the same formats. Plus competitor migrators for the four most common WordPress directory plugins (GeoDirectory, Directorist, BDP, ListingPro) — read their data straight from the database and convert to Listora listings, no manual export step required.

Import/Export — settings tab with file picker, field-mapping preview, and run-as-WP-CLI option

What it is

Three integrated flows live under one Settings tab:

1. Universal file importers (CSV / JSON / GeoJSON)

  • CSV importer (Csv_Importer) — pick a file, map source columns to Listora fields in a visual mapper, optionally skip the header row, preview the first 10 rows, run the full import. Defaults to skip_first_row = true for CSV.
  • JSON importer — accepts an array of listing objects with title/type/lat/lng/fields keys.
  • GeoJSON importer — accepts a standard FeatureCollection; each feature becomes a listing with geometry → lat/lng + properties → fields.

Each importer:

  • Streams the file (10MB+ files run without exhausting memory)
  • Validates required fields before writing
  • Reports per-row errors so partial imports don't fail silently
  • Writes one batch at a time (default 100 listings/batch)

2. Competitor migrators (database-direct)

The four most common WordPress directory plugins are supported with database-direct readers — no need to export from the source plugin first:

Source plugin Migrator class What it reads
GeoDirectory Geodirectory_Migrator gd_place_detail + custom post types + taxonomies
Directorist Directorist_Migrator at_biz_dir posts + Directorist meta keys
Business Directory Plugin (BDP) Bdp_Migrator BDP custom tables + WP posts
ListingPro Listingpro_Migrator listing post type + ListingPro meta

All four extend a common base (Migration_Base) so the conversion logic (terms, addresses, custom fields) is shared. Each migrator's mapping decisions are documented at audit/architecture/competitor-schemas/{slug}.md in the plugin repo — every field's destination is verified, no guessing.

3. CSV exporter

  • Csv_Exporter produces a CSV of the full directory or any filtered slice (by type, by category, by date range, by status). Includes core fields + custom fields + lat/lng.
  • One-click export from the admin tab; WP-CLI equivalent for scripting: wp listora export --type=restaurant --output=file.csv.

How you use it

Import a CSV

  1. Listora → Settings → Tools tab (or Import/Export depending on settings layout).
  2. Click Choose File → pick your CSV. (For files >10MB, use the WP-CLI command instead.)
  3. Listing Type — pick which type to assign rows to (or leave blank if rows include their own type column).
  4. Field mapping — for each source column, pick the destination Listora field. The mapper auto-detects exact-name matches; only unmatched columns need manual selection.
  5. Preview first 10 rows.
  6. Run import. Progress bar shows N of M rows; errors per row report inline.

Migrate from a competitor

  1. Install the source plugin in the same WordPress (don't delete it yet).
  2. Listora → Settings → Tools → Migrate → pick the source plugin.
  3. The migrator runs in batches; progress bar shows N of M source rows. Existing Listora listings (matched by title + lat/lng) are not duplicated by default.
  4. After migration completes, verify a sample of listings on the front-end.
  5. Deactivate the source plugin once you're confident migration is complete.

WP-CLI alternative

# Import
wp listora import file.csv --type=restaurant --batch-size=200

# Export
wp listora export --type=restaurant --output=restaurants.csv
wp listora export --status=publish --output=full-directory.csv

# Migrate
wp listora migrate --from=geodirectory --dry-run # preview only
wp listora migrate --from=geodirectory # run for real

WP-CLI is recommended for >10K rows since it bypasses the admin UI's PHP max_execution_time constraint.

Settings & options

Tool Class Notes
CSV import Csv_Importer Streaming, batched, header-skip default on
JSON import Json_Importer Array of listing objects
GeoJSON import Geojson_Importer FeatureCollection
CSV export Csv_Exporter Full or filtered
GeoDirectory migrator Geodirectory_Migrator DB-direct
Directorist migrator Directorist_Migrator DB-direct
BDP migrator Bdp_Migrator DB-direct
ListingPro migrator Listingpro_Migrator DB-direct

Developer hooks:

  • wb_listora_import_row (filter) — transform a row before persisting; useful for data cleanup, custom field mapping, conditional rejection.
  • wb_listora_export_row (filter) — transform a row before writing to CSV/JSON.
  • wb_listora_get_migrators (filter) — register a custom competitor migrator. See Migrate from another plugin for details.

Related

Security & Anti-Spam

Spam Protection

Built into WB Listora Free.

Layered defence against spam submissions, fake reviews, and abusive claims — honeypot + per-IP rate limit + CAPTCHA (reCAPTCHA v3 or Cloudflare Turnstile) + Akismet integration + keyword blacklist + URL-density cap. All layers are independent; spam has to defeat every one to land. Defaults work out of the box; tune the layers individually for your audience.

Spam Protection — Settings tab showing CAPTCHA, Akismet, blacklist, rate-limit toggles

What it is

Public submission surfaces in a directory (Add Listing, Reviews, Claims, Contact-owner forms) attract spam — there's no way around it. Listora ships a defence-in-depth model: 6 independent layers, any of which can reject a submission. A single layer's failure mode doesn't open the floodgates.

The 6 layers, in order from cheapest to costliest:

  1. Honeypot field (Free, on by default) — a visually-hidden input named listora_hp_field. Real users leave it blank; spam bots fill every input. Submissions where it's filled get rejected immediately, no DB write. Costs zero per submission.

  2. Rate limiting per IP (Free, on by default) — sliding-window rate limit on POST /listora/v1/submit, /reviews, /claims, and /listings/{id}/contact-form. Defaults: 3 submissions per hour per listing per IP; 20 per day per listing; configurable per endpoint. Backed by a wp_options ring buffer (no extra tables).

  3. CAPTCHA (Free, off by default) — choose reCAPTCHA v3 or Cloudflare Turnstile from Settings → Security → CAPTCHA. Both are invisible (no checkbox interruption). Turnstile is recommended for GDPR-conscious sites since it doesn't track users. CAPTCHA gates submission, review, and claim endpoints.

  4. Akismet integration (Free, on by default if Akismet is active) — review content + claim explanations are checked via Akismet's comment-check API. Akismet decisions: ham (allow), spam (reject), unsure (queue for moderation). Falls open if Akismet is unreachable.

  5. Keyword blacklist (Free) — Settings → Security → Banned Words. Comma-separated list; any submission containing any word is rejected. Comparison is case-insensitive, word-boundary-aware.

  6. URL density cap (Free) — per-event maximum number of URLs in submission text fields. Default: 2 URLs per review, 3 URLs per claim explanation. Submissions over the cap are rejected. Tunable per event via wb_listora_url_density_max filter.

CAPTCHA-bypass for legitimate non-browser clients:

  • WP-CLI (if ( defined( 'WP_CLI' ) && WP_CLI ) → bypass)
  • WP-Cron (if ( defined( 'DOING_CRON' ) && DOING_CRON ) → bypass)
  • Authenticated REST (if ( REST_REQUEST && is_user_logged_in() ) → bypass — the app's authentication is the gate)

This is the function listora_should_skip_captcha() documented in the REST contract.

How you use it

As a site owner — turn each layer on

  1. Honeypot — already on; no action needed.
  2. Rate limiting — already on with defaults; tune in Settings → Security → Rate Limits if needed.
  3. CAPTCHA:
  • Pick a provider: Settings → Security → CAPTCHA Provider → reCAPTCHA v3 / Cloudflare Turnstile / None.
  • Paste the site + secret keys from the provider's dashboard.
  • Pick which forms it gates: Listing Submission / Reviews / Claims / Contact (each independently toggleable).
  1. Akismet — install + activate the official Akismet plugin from WP.org. As soon as it's active with a valid key, Listora auto-detects it and starts checking review content + claim explanations.
  2. Keyword blacklist — Settings → Security → Banned Words → enter comma-separated list. Updates apply immediately, no flush needed.
  3. URL density cap — Settings → Security → Max URLs per event → set per-event caps.

Monitoring how spam attempts are doing

  • Audit Log (Pro) records every spam rejection with the reason (honeypot / rate-limit / captcha / akismet / blacklist / url-density).
  • Settings → Security → Recent Rejections shows the last 50 rejected attempts with timestamp + IP + reason.

Settings & options

Layer Default Where to tune
Honeypot On (no setting — built in)
Rate limit 3/hr per IP per endpoint Settings → Security → Rate Limits
CAPTCHA Off Settings → Security → CAPTCHA
Akismet Auto-on if Akismet active (handled by Akismet plugin)
Keyword blacklist Empty Settings → Security → Banned Words
URL density 2 URLs per review Settings → Security → Max URLs
CAPTCHA bypass WP-CLI / WP-Cron / authenticated REST (built-in)

Developer hooks:

  • wb_listora_anti_spam_check (filter) — return a WP_Error to reject; receives $context with the submission data, IP, user.
  • wb_listora_should_skip_captcha (filter) — programmatically bypass CAPTCHA for a specific request.
  • wb_listora_rate_limit_check (filter) — modify per-IP rate-limit results; useful for IP allowlists.
  • wb_listora_url_density_max (filter) — change the URL-density cap per event.

Related

Moderation Queue

Built into WB Listora Free.

Three separate admin work queues — pending listings on All Listings (filtered by Pending), pending reviews on Listora → Reviews, pending claims on Listora → Claims, plus the Reports queue and photo-review uploads (Pro) — that share one consistent approve/reject/edit/bulk-action pattern. Per-row history is tracked everywhere; bulk-moderate (up to 100 IDs) is available via POST /listora/v1/listings/bulk-moderate. The architectural separation is intentional so capability gating stays clean per content type.

Moderation Queue — bulk-moderate UI with filter chips for type, status, and date

What it is

A directory's quality is the moderator's quality. Moderation has three different work queues that share one pattern:

  1. Pending listings — submissions with status pending waiting for approval. Row actions on the All Listings admin page: Approve (transitions to publish), Reject (transitions to listora_rejected, sends notification), Feature, Unfeature, Trash.
  2. Pending reviews — reviews in pending status (set when moderation is enabled in Settings → Reviews → Require Approval). Same row actions: approve, reject, edit, delete.
  3. Pending claims — business-claim requests in pending status. Approve transfers post_author to the claimant; reject sends a claim-rejected notification.
  4. Flagged content — any reviewer can flag a review as inappropriate; flags surface in their own queue for moderator action.

Bulk operations:

  • The All Listings admin page supports POST /listora/v1/listings/bulk-moderate — approve, reject, feature, unfeature, or trash up to 100 listings per call.
  • The Reviews admin page supports the same bulk operations for reviews.
  • Claims have a single-row workflow (approval triggers post-author transfer, not idempotent in bulk).

Moderator role (Pro):

  • Pro adds a dedicated listora_moderator role (see Moderator Role) — scoped to listing approval, review moderation, and claims management; cannot edit site settings.
  • Auto-assignment — Pro can round-robin assign new submissions to a pool of moderators (listora_last_moderator_index option drives the rotation).
  • Moderator Queue block (Pro listora-pro/moderator-queue) — surfaces all pending work in one frontend block, useful for a dedicated moderator dashboard page.

History + audit:

  • Every moderation action fires an wb_listora_after_* hook (e.g. wb_listora_after_update_claim with $old_status, $new_status, $actor_id).
  • Pro's Audit Log records every action with actor + timestamp + before/after, so disputes are reconstructable.

How you use it

As a site owner — work the queue daily

  1. Listings: WP Admin → Listora → All Listings → filter by Pending. The list view shows row actions: Approve / Reject / Edit / Feature / Unfeature.
  • Approve = one-click transition to publish. Sends the listing-approved notification automatically.
  • Reject = one-click transition to listora_rejected. Prompts for an optional rejection note that's included in the email.
  1. Reviews: Listora → Reviews → filter by Pending. Approve / Reject / Edit / Delete row actions.
  2. Claims: Listora → Claims → filter by Pending. Approve transfers post_author to the claimant and notifies; Reject sends a polite rejection.
  3. Bulk: select multiple rows → use the Bulk Actions dropdown at the top of the table → pick the action → Apply.

As a moderator (Pro role)

  • Visit /wp-admin/admin.php?page=listora-moderators for the Moderators admin page (or the Moderator Queue block on the frontend if your site offers one).
  • Your view is scoped: you see only items assigned to you (when auto-assignment is on) or all pending items (when it's off).
  • All your moderation actions are recorded against your user in the Audit Log — both for accountability and to surface stalled moderators to admins.

Configuration

  • Require approval for new listings: Settings → Submission → Moderation → set to manual (default) or auto (auto-publish — not recommended for public-submit directories).
  • Require approval for new reviews: Settings → Reviews → Require Approval.
  • Auto-assignment to moderators (Pro): Settings → Moderators → Auto-Assign New Submissions.

Settings & options

Setting Location Default Notes
Listing moderation mode Settings → Submission → Moderation manual manual / auto
Review moderation Settings → Reviews → Require Approval On When off, reviews go straight to publish
Bulk-moderate endpoint POST /listora/v1/listings/bulk-moderate Up to 100 IDs per call
Claims approval flow Listora → Claims → Pending Manual Approves transfer post_author
Pro: moderator role (auto-created on activation) listora_moderator
Pro: auto-assignment Settings → Moderators → Auto-Assign Off Round-robin via listora_last_moderator_index

Developer hooks:

  • wb_listora_after_update_claim (action, 3 args) — fires on approve/reject; listen to push to CRM, Slack, etc.
  • wb_listora_listing_status_changed (action) — fires on every listing transition; canonical signal for "a moderator did something".
  • wb_listora_pro_moderator_assigned (action) — fires when Pro auto-assigns a submission to a moderator.

Related

Rate Limiting & Abuse Controls

Built into WB Listora Free.

Per-IP sliding-window rate limits on every write-side public endpoint so a single bad actor can't flood your directory with submissions, reviews, claims, or contact-form spam. Sensible defaults; tunable per endpoint; honors authenticated REST requests (apps are gated by their auth token, not by IP).

Rate Limits — Settings tab showing per-endpoint cap, window, and current usage

What it is

Spam protection works at the form level; rate limiting works at the request level — and they reinforce each other. Even with CAPTCHA + honeypot + Akismet rejecting individual submissions, an attacker who finds a hole can still flood your moderation queue if there's no per-IP cap.

Listora's rate limiter:

  • Sliding-window counter per IP per endpoint — kept in wp_options as a tiny per-IP/per-endpoint ring buffer; expires automatically.
  • Per-endpoint cap + window — defaults tuned for the action's natural cadence:
Endpoint Default cap Window Why
POST /listora/v1/submit 5 1 hour Even a power-user adds 5 listings/hr at most
POST /listora/v1/listings/{id}/reviews 3 1 hour Reviewing 3 places an hour is plausible
POST /listora/v1/claims 3 1 day Claims are rare actions
POST /listora/v1/listings/{id}/contact-form 3 per listing 1 hour Per-listing window — a visitor inquiring about one business
POST /listora/v1/listings/{id}/contact-form 20 per listing 1 day Daily cap independent of hourly
POST /listora/v1/submission/check-duplicate 30 1 hour Duplicate check fires per wizard step
POST /listora/v1/search/suggest 60 1 hour Autocomplete fires per keystroke (debounced client-side)
  • IP resolution — uses REMOTE_ADDR by default, with optional X-Forwarded-For / CF-Connecting-IP honoring when the site is behind a known proxy (configured in Settings → Security → Trusted Proxies).
  • Authenticated REST bypass — requests with a valid user session (cookies + nonce) OR a valid app password bypass IP limits. Apps and logged-in users are gated by their auth, not by IP — preventing legitimate-app-on-shared-WiFi false positives.
  • WP-CLI bypass — CLI commands always bypass; same logic as the CAPTCHA bypass helper.

When a request hits the cap:

  • 429 Too Many Requests response with a Retry-After header.
  • Body is a structured WP_Error with code listora_rate_limited so clients can render friendly UX.
  • The rejection is recorded in Audit Log (Pro) for repeated abusers.

How you use it

As a site owner — defaults work; tune if needed

  1. Verify the limiter is on: Listora → Settings → Security → Rate Limits. Each endpoint shows its current cap + window.
  2. Tighten caps if you're being targeted: lower the per-IP per-hour cap on Submissions to 2 (or 1). High-value endpoints can go very tight.
  3. Loosen caps for trusted scenarios: e.g. allow more contact-form sends per listing per day if your directory is service-marketplace style.
  4. Trusted proxies: if your site is behind Cloudflare/Fastly/a custom CDN, add the proxy's IP range to Trusted Proxies so the limiter reads X-Forwarded-For correctly instead of seeing every request as the proxy's IP (which would cap to nothing).
  5. IP allowlist (advanced): Settings → Security → IP Allowlist — add IPs that bypass all rate limits (your office, your monitoring service).

As a developer — react to rate-limit decisions

  • wb_listora_rate_limit_check (filter) — return WP_Error to reject earlier, or return null to allow; receives $endpoint, $ip, $user_id, $current_count.
  • wb_listora_rate_limit_cap (filter) — programmatically override the cap per endpoint per request (e.g. higher cap for VIP users).
  • wb_listora_rate_limit_window (filter) — override the window (in seconds).
  • wb_listora_rate_limit_exceeded (action) — fires when a request is rejected; useful for alerting on sustained abuse.

Settings & options

Setting Location Default
Per-endpoint caps + windows Settings → Security → Rate Limits See table above
Trusted proxies Settings → Security → Trusted Proxies (none)
IP allowlist Settings → Security → IP Allowlist (none)
Authenticated REST bypass (built-in) On
WP-CLI bypass (built-in) On
Rejection logging Audit Log (Pro) when Pro is active On

Related

Email Verification

Built into WB Listora Free.

Token-gated verification for guest-submission flows. When a visitor submits a listing without being logged in, the listing stays in a draft-equivalent state until they prove ownership of the email address they used — by clicking a unique link in the verification email. Stops anonymous spam without forcing every visitor to register.

Email Verification — verification email entry in the admin Email Log showing token-link delivery

What it is

A token-and-cron pipeline that runs around the guest-submission flow:

  • Token generation. On guest submission, the system creates a 64-char hex token, stores it as _listora_verify_token post-meta, sets _listora_verify_expires_at 7 days out, and emails the verification link to the submitter.
  • Verification. Visitor clicks /?listora-verify=1&listing=<id>&token=<token>. The template_redirect handler matches the token, sets _listora_verified_at to now, deletes the token meta, and transitions the listing through Listora's normal moderation flow (auto-publish or queue depending on your Submissions settings).
  • Resend (rate-limited). If the email got lost, the submitter can request a fresh token from a "Resend verification" link. New tokens are gated by a 5-minute cooldown to prevent abuse.
  • Auto-cleanup. A daily cron (wb_listora_cleanup_unverified_listings) sweeps up listings still in the unverified state after 7 days. They get hard-deleted along with any attached media — the assumption is that 7 days is plenty for a real submitter to click the link.

The flow is invisible to admins doing manual submissions (they're already logged in, so verification skips). It only applies to the guest path.

Settings & options

The feature is gated by Settings → Submissions → Allow guest submissions — turn that off and email verification doesn't run because guests can't submit in the first place. Tune the verification timing via filters; no admin UI for it.

Setting Default Where
Guest submissions allowed On Settings → Submissions
Token expiration window 7 days wb_listora_verify_token_ttl filter (seconds)
Resend cooldown 300 seconds Email_Verification::RESEND_COOLDOWN constant
Unverified cleanup window 7 days wb_listora_unverified_listing_max_age filter (seconds)
Cleanup cron schedule Daily wb_listora_cleanup_unverified_listings action

How you use it

As a visitor (guest submitter)

  1. Submit a listing from /add-listing/ without being logged in.
  2. Enter your email in the wizard's contact step.
  3. Wizard shows "Check your email — we sent a verification link to {email}. Click it to publish your listing."
  4. Open the email within 7 days. Click the verify link.
  5. Listing transitions to whatever your site's Submissions settings dictate — either straight to publish (auto-approve) or to pending for admin review.

If the email got lost, scroll to the bottom of the same screen and click Resend verification — limited to one fresh email per 5 minutes per listing.

As an admin debugging a stuck guest submission

  1. Open WP Admin → Listings and filter by status listora_pending_verification (or whatever the unverified state is).
  2. Find the row. The _listora_verify_token post-meta confirms a token exists.
  3. Open the Email Log to confirm the verification email actually sent.
  4. If sent → the visitor never clicked. Either ping them out-of-band or wait for the cleanup cron to drop the abandoned listing.
  5. If never sent → the issue is in your mail stack. Try Settings → Notifications → Send Test Email with the same recipient to confirm.

Manual override (bypass verification for a trusted submitter)

wp post meta delete <listing_id> _listora_verify_token
wp post meta delete <listing_id> _listora_verify_expires_at
wp post meta update <listing_id> _listora_verified_at "$(date '+%Y-%m-%d %H:%M:%S')"
wp post update <listing_id> --post_status=publish

How it interacts with the rest of the system

  • Settings → Submissions controls whether guest submissions are allowed in the first place. Turn this off and email verification never runs.
  • Settings → Notifications has a listing_verify_email event toggle. Off → no verification email sent, which effectively breaks the guest flow. Keep on.
  • Anti-spam pipeline runs BEFORE token generation — honeypot, Akismet, blacklist, URL density. A spammy submission never gets a verification email; the verification gate is the SECOND defence layer.
  • Cleanup cron runs daily via Action Scheduler (or WP-Cron fallback). Verify it's queued via WP Admin → Tools → Scheduled Actions if cleanup seems stuck.
  • REST mirror at GET /listora/v1/submission/verify (token in query string) gives headless / mobile clients the same verify path the public URL handler uses.
  • Resend REST at POST /listora/v1/submission/resend-verification accepts the listing ID + the submitter's email (must match the stored value).

Email template

The verification email uses the listing_verify_email template. Override per Email Templates — copy wp-content/plugins/wb-listora/templates/emails/listing_verify_email.php to {your-theme}/wb-listora/emails/listing_verify_email.php and edit. Template variables:

  • {listing_title} — the listing title the submitter entered.
  • {verify_url} — the full ?listora-verify=... link.
  • {expires_in} — human-readable expiration window ("7 days").
  • {site_name}, {site_url} — standard.

Permissions

Capability Who has it What it gates
(anonymous) Anyone Click a valid ?listora-verify= link
manage_listora_settings Administrator Manually clear / set verification meta via the Listings admin

The verify URL is unauthenticated by design — anyone with a valid token can complete verification. The token itself is the auth.

Related

Migration & Import

How to Migrate from GeoDirectory to WB Listora

Moving your directory website from GeoDirectory to WB Listora is straightforward. Listora includes a built-in GeoDirectory migrator that transfers your listings, categories, locations, reviews, geo data, and custom fields automatically -- no CSV exports or manual re-entry required.

Migrate From Geodirectory — screenshot from the modernized 1.0.5 site

This guide walks you through the full migration process, explains what gets transferred, and highlights the features you gain by switching.

Why Switch from GeoDirectory to WB Listora?

GeoDirectory is one of the older WordPress directory plugins on the market. It works, but many of its most useful features are locked behind paid add-ons that can add up quickly.

WB Listora was built to deliver a complete directory experience in the free version. Features that GeoDirectory charges extra for -- reviews, claims, events, advanced search, custom fields per listing type, and frontend submission -- are all included at no cost.

Feature Comparison: GeoDirectory vs WB Listora

Feature GeoDirectory (Free) GeoDirectory (Paid Add-ons) WB Listora (Free)
Listing types 1 (Places) Multiple via paid add-on 10 pre-built types
Custom fields per type Basic Advanced via paid add-on Full field system included
Reviews & ratings Basic stars only Multi-criteria via paid add-on Star ratings, helpful votes, owner replies, moderation
Claim listings Not included Paid add-on (~$59) Included free
Frontend submission Basic Advanced via paid add-on Multi-step wizard with validation
User dashboard Not included Paid add-on Included free
Events & calendar Not included Paid add-on (~$79) Calendar block included
Business hours Basic Advanced via paid add-on Weekly schedule with "open now" filter
CSV import/export Basic Advanced via paid add-on Full import/export with column mapping
JSON / GeoJSON import Not available Not available Included free
Gutenberg blocks Limited Some via paid add-ons 11 blocks included
Interactivity API No (jQuery-based) No Yes, no jQuery dependency
Schema.org structured data Basic Advanced via paid add-on Automatic JSON-LD included
WP-CLI commands Not available Not available Full CLI: stats, reindex, import, export
REST API Limited Limited 41 endpoints included

What Does This Mean for Your Budget?

To match the features WB Listora offers for free, you would typically need to purchase several GeoDirectory add-ons. The Claim Manager, Event Manager, Advanced Search, and Multi-location add-ons alone can cost over $200 per year. With Listora, these features come standard.

Before You Begin

Before starting the migration, take these precautions:

  1. Back up your database. Use a plugin like UpdraftPlus or run wp db export from the command line.
  2. Keep GeoDirectory installed (active or inactive). The migrator reads directly from GeoDirectory's database tables, so the data needs to be present. You do not need GeoDirectory to be active -- the migrator detects its data tables regardless.
  3. Install WB Listora. Download it from WordPress.org and activate it. Run through the setup wizard to configure your basic settings.

Step-by-Step Migration Guide

Step 1: Install and Activate WB Listora

Install WB Listora from the WordPress plugin repository. After activation, the setup wizard will guide you through initial configuration -- listing types, default location settings, and page creation. Complete the wizard before migrating.

Step 2: Open the Migration Tool

Navigate to Listora > Tools > Migration in your WordPress admin. The plugin automatically scans for data from supported directory plugins. If GeoDirectory data is detected, you will see a "GeoDirectory" source card showing the number of listings available for migration.

Step 3: Review the Pre-Migration Summary

Click the GeoDirectory source to see a breakdown of what will be migrated:

  • Listings -- All published, pending, and draft listings from GeoDirectory's detail table.
  • Categories -- Mapped to Listora's listora_listing_cat taxonomy.
  • Locations -- Geographic data (latitude, longitude, address, city, state, country) migrated to Listora's geo index table.
  • Reviews -- Star ratings and review text transferred to Listora's reviews system.
  • Images -- Featured images and gallery attachments linked to the new listings.
  • Custom fields -- GeoDirectory custom field values mapped to Listora's field system.

Step 4: Run the Migration

Click Start Migration to begin. The process runs in batches of 50 listings to avoid memory issues. A progress bar shows the current status. Each listing is checked for duplicates -- if you run the migration again, already-migrated listings are skipped automatically.

You can also run the migration via WP-CLI for large sites:

wp listora migrate --source=geodirectory --batch-size=100

Step 5: Verify Your Data

After migration completes, check your listings:

  • Visit Listora > Listings to browse all migrated entries.
  • Open individual listings to verify categories, location data, and custom fields.
  • Check the frontend to confirm reviews and ratings appear correctly.
  • Test the map to ensure geo coordinates transferred properly.

Step 6: Rebuild the Search Index

Run a full reindex to ensure all migrated listings appear in search results:

wp listora reindex --all

Or trigger a reindex from the admin at Listora > Tools > Reindex.

What Gets Migrated

Data Type Source (GeoDirectory) Destination (WB Listora)
Listings gd_place CPT + detail table listora_listing CPT + meta
Categories gd_placecategory taxonomy listora_listing_cat taxonomy
Tags gd_place_tags taxonomy Post tags
Locations Detail table lat/lng columns listora_geo table
Reviews GeoDirectory reviews listora_reviews table
Images Post thumbnail + gallery Post thumbnail + gallery
Custom fields Detail table columns Listora field index + meta
Business hours If present in detail data listora_hours table

What Does Not Get Migrated

  • GeoDirectory add-on specific data -- Pricing packages, paid listing plans, and payment transactions are not migrated since WB Listora handles these differently in the Pro version.
  • GeoDirectory shortcodes -- Any pages using GeoDirectory shortcodes will need to be updated with Listora blocks. The block editor makes this simple -- just add the appropriate Listora block (grid, search, map, etc.) to your pages.

Frequently Asked Questions

Can I run the migration with GeoDirectory deactivated?

Yes. The migrator reads directly from the database tables, not through GeoDirectory's API. As long as the tables and posts exist in the database, migration works regardless of plugin status.

Will migration break my existing GeoDirectory listings?

No. The migration creates new Listora listings. Your original GeoDirectory data is never modified or deleted. Both plugins can coexist during the transition.

How long does migration take?

For most sites, migration completes in under a minute. Sites with thousands of listings may take several minutes. The batch processing system prevents timeouts.

Can I migrate only specific listing types?

The current migrator imports all GeoDirectory listings. After migration, you can reassign listing types within Listora's admin.

What about my SEO rankings?

WB Listora generates Schema.org JSON-LD structured data automatically, which helps maintain search visibility. You should set up 301 redirects from your old GeoDirectory URLs to the new Listora URLs to preserve link equity.

Ready to Switch?

Install WB Listora free from WordPress.org and use the built-in migration tool to bring your GeoDirectory data over in minutes. No data loss, no manual re-entry, and you get access to reviews, claims, events, frontend submission, and 11 Gutenberg blocks -- all at no cost.

Install WB Listora from WordPress.org

Related

How to Migrate from Directorist to WB Listora

Switching from Directorist to WB Listora takes just a few clicks. Listora ships with a dedicated Directorist migrator that automatically transfers your listings, categories, locations, reviews, and custom field data. No exports, no spreadsheets, no manual data entry.

Migrate From Directorist — screenshot from the modernized 1.0.5 site

This guide covers the full migration process, what data is preserved, and the advantages you gain by moving to Listora.

Why Switch from Directorist to WB Listora?

Directorist is a capable directory plugin, but it relies heavily on paid extensions for features that many directory sites need from day one. It also depends on jQuery for its frontend interactions and uses shortcode-based layouts rather than native Gutenberg blocks.

WB Listora takes a different approach. It is built entirely on the WordPress Interactivity API -- no jQuery dependency, no shortcodes. The frontend is fast, accessible, and works natively with the block editor. Features like reviews, claims, events, frontend submission, and an interactive map are included in the free version.

Feature Comparison: Directorist vs WB Listora

Feature Directorist (Free) Directorist (Paid) WB Listora (Free)
Listing types 1 Multiple via extension (~$39) 10 pre-built types
Custom fields Basic Form builder via extension Full field system per type
Reviews & ratings Basic Multi-criteria via extension Star ratings, helpful votes, owner replies, moderation
Claim listings Not included Paid extension (~$39) Included free
Frontend submission Basic shortcode Advanced via extension Multi-step wizard with block editor
User dashboard Basic shortcode Enhanced via extension Full dashboard block
Events Not included Not available Calendar block included
Business hours Basic Enhanced via extension Weekly schedule with "open now" filter
Map provider OpenStreetMap Google Maps via extension OpenStreetMap with clustering, near-me, drag search
Search & filters Basic Advanced filtering extension Two-phase FULLTEXT search with faceted counts
CSV import/export Basic Advanced via extension Full import/export with column mapping
JSON / GeoJSON import Not available Not available Included free
Block editor support Limited (shortcode-based) Limited 11 native Gutenberg blocks
Interactivity API No (jQuery-based) No Yes, zero jQuery
Schema.org Basic Advanced via extension Automatic JSON-LD
REST API Limited Limited 41 endpoints
WP-CLI Not available Not available Full CLI commands

Modern Architecture Matters

Directorist's reliance on jQuery and shortcodes means its frontend interactions often involve full page reloads or AJAX calls that load the entire jQuery library. WB Listora uses the WordPress Interactivity API, which provides instant search filtering, real-time faceted counts, and smooth map interactions without any external JavaScript dependencies. The result is a noticeably faster experience for your visitors.

Before You Begin

  1. Back up your database. Use your preferred backup tool or run wp db export from WP-CLI.
  2. Keep Directorist data accessible. The migrator reads from Directorist's at_biz_dir custom post type and its associated meta/taxonomy data. Directorist can be active or deactivated -- the migrator checks for posts directly in the database.
  3. Install and activate WB Listora. Complete the setup wizard to create your pages and configure listing types.

Step-by-Step Migration Guide

Step 1: Install WB Listora

Download WB Listora from the WordPress plugin repository and activate it. Walk through the setup wizard to set your default listing types, location format, and create the required pages (directory, submission, dashboard).

Step 2: Access the Migration Panel

Go to Listora > Tools > Migration in wp-admin. The migrator automatically scans for Directorist data by checking for the at_biz_dir post type. If data is found, you will see a "Directorist" card with the total listing count.

Step 3: Preview the Migration

Click the Directorist source to review what will be transferred:

  • Listings -- All published, pending, and draft at_biz_dir posts.
  • Categories -- at_biz_dir-category terms mapped to listora_listing_cat.
  • Locations -- at_biz_dir-location terms and geo meta mapped to Listora's geo index.
  • Tags -- at_biz_dir-tags terms preserved.
  • Reviews -- Rating and review data migrated to listora_reviews table.
  • Images -- Featured images and gallery attachments transferred.
  • Custom field values -- Directorist meta values mapped to Listora's field system.

Step 4: Start the Migration

Click Start Migration. The tool processes listings in batches of 50 to prevent timeouts. Duplicate detection ensures safe re-runs -- already-migrated listings are skipped.

For large directories, use WP-CLI:

wp listora migrate --source=directorist --batch-size=100

Step 5: Verify and Reindex

After migration:

  • Browse Listora > Listings to verify your data.
  • Check individual listings for correct categories, locations, and field values.
  • Rebuild the search index: Listora > Tools > Reindex or wp listora reindex --all.

Step 6: Update Your Pages

Replace any Directorist shortcodes on your pages with Listora blocks:

Directorist Shortcode WB Listora Block
[directorist_all_listing] Listing Grid block
[directorist_search_listing] Listing Search block
[directorist_add_listing] Listing Submission block
[directorist_user_dashboard] User Dashboard block
[directorist_all_categories] Listing Categories block

Each block is configurable through the block editor sidebar -- no shortcode attributes to memorize.

What Gets Migrated

Data Type Source (Directorist) Destination (WB Listora)
Listings at_biz_dir CPT listora_listing CPT
Categories at_biz_dir-category listora_listing_cat
Locations at_biz_dir-location + geo meta listora_geo table + location taxonomy
Tags at_biz_dir-tags Post tags
Reviews Directorist review meta listora_reviews table
Images Post thumbnail + gallery meta Post thumbnail + gallery
Custom fields Post meta values Listora field index + meta

What Does Not Get Migrated

  • Directorist extension data -- Pricing plans, payment history, and extension-specific settings are not migrated. WB Listora Pro handles monetization differently.
  • Shortcode configurations -- Since Listora uses Gutenberg blocks, shortcodes need to be replaced manually (see the table above).
  • Form builder layouts -- If you used Directorist's paid form builder, you will configure field groups through Listora's listing type system instead.

Frequently Asked Questions

Can I migrate with Directorist deactivated?

Yes. The migrator queries the database directly for at_biz_dir posts and associated meta. Directorist does not need to be active.

Does migration affect my Directorist data?

No. Migration is read-only. Your original Directorist listings remain untouched. You can safely run both plugins side by side during the transition.

Will my URLs change?

Yes -- Listora uses its own listora_listing post type with different URL slugs. Set up 301 redirects from your old Directorist URLs (/at_biz_dir/...) to the new Listora URLs to maintain search engine rankings.

How do I handle custom fields I created in Directorist?

The migrator maps standard Directorist meta values to Listora fields. If you have custom fields unique to your setup, the meta values are still transferred as post meta. You can then register matching fields in Listora's field system to display them properly.

Is the Interactivity API really faster than jQuery?

Yes. The Interactivity API is built into WordPress core. It handles DOM updates with a lightweight reactive system, eliminating the need to load jQuery (90KB+) and additional AJAX libraries. Search filtering, map interactions, and form validation all happen instantly without page reloads.

Ready to Switch?

Install WB Listora free from WordPress.org and migrate your Directorist data with the built-in migration tool. You get 10 listing types, 11 Gutenberg blocks, a modern Interactivity API frontend, and features like reviews, claims, and events -- all included at no cost.

Install WB Listora from WordPress.org

Related

How to Migrate from Business Directory Plugin to WB Listora

WB Listora includes a built-in migration tool for Business Directory Plugin (BDP). It reads directly from BDP's custom database tables and post data, transferring your listings, categories, tags, and custom field values into Listora's system automatically.

Migrate From Business Directory Plugin — screenshot from the modernized 1.0.5 site

This guide covers the complete migration process, what data transfers over, and the features you gain by switching.

Why Switch from Business Directory Plugin to WB Listora?

Business Directory Plugin has been around for years and handles basic directory functionality well. However, it was designed in an era before the block editor, the Interactivity API, and modern WordPress development patterns. Several features that directory sites need -- reviews, claims, events, frontend dashboards -- are either missing or require paid add-ons.

WB Listora provides a more complete package in the free version. It is built on Gutenberg blocks and the Interactivity API, supports 10 listing types out of the box, and includes features like reviews, claims, business hours, and an event calendar at no additional cost.

Feature Comparison: Business Directory Plugin vs WB Listora

Feature BDP (Free) BDP (Paid Modules) WB Listora (Free)
Listing types 1 Not available 10 pre-built types
Custom fields Via form fields table Included Full field system per listing type
Reviews & ratings Not included Paid module (~$49) Star ratings, helpful votes, owner replies, moderation
Claim listings Not included Paid module (~$49) Included free
Frontend submission Basic form Enhanced via paid module Multi-step wizard with type selection and validation
User dashboard Not included Not available Full frontend dashboard block
Events & calendar Not included Not available Calendar block included
Business hours Not included Not available Weekly schedule with "open now" filter
Map integration Google Maps (API key required) Included OpenStreetMap (free, no API key) with clustering
Search & filters Basic Enhanced via paid module Two-phase FULLTEXT search with faceted counts
CSV import/export Basic Advanced via paid module Full import/export with column mapping
JSON import Not available Not available JSON import included
GeoJSON import Not available Not available GeoJSON import included
Block editor support Limited Limited 11 native Gutenberg blocks
Interactivity API No No Yes, zero jQuery dependency
Schema.org Basic Advanced via paid module Automatic JSON-LD included
REST API Limited Limited 41 endpoints
WP-CLI Limited Limited Full CLI: stats, reindex, import, export, demo
Favorites Not included Not available Included with collections

Import Format Flexibility

One area where WB Listora stands apart is import flexibility. In addition to CSV import/export, Listora supports JSON and GeoJSON import. If you have location data from external sources -- government open data portals, mapping services, or third-party APIs -- you can import it directly into Listora without converting to CSV first. GeoJSON FeatureCollection files automatically map coordinates to listings with proper geo indexing.

Before You Begin

  1. Back up your database. Always create a full database backup before any migration. Use wp db export or your preferred backup plugin.
  2. Keep BDP data in place. The migrator reads from BDP's wpbdp_listing post type and its wpbdp_form_fields table. BDP can be active or deactivated -- the migrator detects its data tables regardless of plugin status.
  3. Install and activate WB Listora. Run through the setup wizard to configure your listing types and create required pages.

Step-by-Step Migration Guide

Step 1: Install WB Listora

Install WB Listora from WordPress.org and activate it. Complete the setup wizard to configure listing types, location settings, and generate the directory, submission, and dashboard pages.

Step 2: Open the Migration Tool

Navigate to Listora > Tools > Migration. The plugin scans for BDP data by checking for the wpbdp_listing post type and the wpbdp_form_fields database table. If either is found, you will see a "Business Directory Plugin" source card with the available listing count.

Step 3: Review What Will Be Migrated

Click the BDP source to see the migration summary:

  • Listings -- All wpbdp_listing posts (published, pending, draft).
  • Categories -- wpbdp_category terms mapped to listora_listing_cat.
  • Tags -- wpbdp_tag terms preserved.
  • Custom field values -- BDP stores field data in post meta with keys like _wpbdp[fields][{id}]. The migrator reads the field definitions from wpbdp_form_fields and maps values to Listora's field system.
  • Images -- Featured images and any attached media.

Step 4: Run the Migration

Click Start Migration. Processing runs in batches of 50 listings. The progress bar tracks completion. Already-migrated listings are detected and skipped, making it safe to re-run.

For sites with hundreds or thousands of listings, use the CLI:

wp listora migrate --source=bdp --batch-size=100

Step 5: Verify and Reindex

After migration:

  • Check Listora > Listings for your migrated entries.
  • Open individual listings to confirm custom field values, categories, and images.
  • Rebuild the search index at Listora > Tools > Reindex or via CLI: wp listora reindex --all.
  • Test the frontend directory page to verify listings appear in search results and on the map.

Step 6: Replace BDP Shortcodes

BDP uses shortcodes for its frontend pages. Replace them with Listora blocks:

BDP Shortcode WB Listora Block
[businessdirectory] Listing Grid block
[businessdirectory-submitlisting] Listing Submission block
[businessdirectory-managelisting] User Dashboard block

Open each page in the block editor, remove the shortcode block, and add the corresponding Listora block. Each block is configurable through the sidebar panel.

What Gets Migrated

Data Type Source (BDP) Destination (WB Listora)
Listings wpbdp_listing CPT listora_listing CPT
Categories wpbdp_category taxonomy listora_listing_cat taxonomy
Tags wpbdp_tag taxonomy Post tags
Custom fields wpbdp_form_fields table + post meta Listora field index + meta
Images Post thumbnail + attachments Post thumbnail + attachments
Geo data Address/coordinates meta (if present) listora_geo table

What Does Not Get Migrated

  • Payment and fee data -- BDP's payment transactions, listing fees, and plan assignments are not migrated. WB Listora Pro handles monetization through its own pricing plan system.
  • BDP modules data -- Data from paid BDP modules (ratings, claim, discount codes) uses BDP-specific storage formats that do not have direct equivalents in the free migration.
  • Shortcode layouts -- BDP shortcodes must be replaced with Listora blocks (see the table above).

Frequently Asked Questions

Can I migrate with Business Directory Plugin deactivated?

Yes. The migrator checks for the wpbdp_form_fields table and wpbdp_listing posts directly in the database. BDP does not need to be active.

How are BDP custom fields handled?

BDP stores field definitions in the wpbdp_form_fields table and values in post meta. The migrator reads both, extracts the field values, and maps them to Listora's meta system. Standard fields (address, phone, email, website) are mapped to their Listora equivalents. Other fields are stored as custom meta that you can register in Listora's field system for display.

Does BDP use the same map provider?

BDP defaults to Google Maps, which requires an API key. WB Listora uses OpenStreetMap by default, which is free and requires no API key. The Pro version adds Google Maps as an option if you prefer it.

What about my existing URLs and SEO?

BDP uses the wpbdp_listing post type slug in its URLs. Listora uses listora_listing. Set up 301 redirects from your old BDP URLs to the new Listora URLs. Listora's automatic Schema.org JSON-LD output helps maintain structured data in search results.

Can I import additional data from external sources after migration?

Yes. Listora supports CSV, JSON, and GeoJSON imports. If you have listing data from government databases, open data portals, or API exports, you can import them directly into Listora using the appropriate format. GeoJSON is particularly useful for location data with coordinates.

Ready to Switch?

Install WB Listora free from WordPress.org and migrate your Business Directory Plugin data in minutes. You gain 10 listing types, reviews, claims, events, a user dashboard, GeoJSON import, and 11 Gutenberg blocks -- all included in the free version.

Install WB Listora from WordPress.org

Related

How to Migrate from ListingPro Theme to WB Listora Plugin

ListingPro is a WordPress theme, not a plugin. That distinction matters. When your directory functionality is tied to your theme, you cannot change your site's design without losing your directory. WB Listora is a plugin that works with any WordPress theme, giving you full control over both your directory and your design.

Migrate From Listingpro — screenshot from the modernized 1.0.5 site

Listora includes a built-in ListingPro migrator that transfers your listings, categories, locations, features, reviews, and images automatically. This guide walks you through the process and explains the benefits of moving from a theme-locked directory to a plugin-based one.

Why Switch from ListingPro to WB Listora?

Theme Lock-In vs Plugin Freedom

The most significant limitation of ListingPro is theme lock-in. Your entire directory -- listings, search, maps, reviews, submission forms -- is tied to the ListingPro theme. If you want to redesign your site, use a different theme for branding, or adopt a block theme, you have to either stay on ListingPro or lose your directory functionality.

WB Listora is a standalone plugin. It works with any WordPress theme -- block themes, classic themes, starter themes, or custom themes. Change your theme whenever you want without touching your directory data or functionality.

Beyond Theme Lock-In

There are other practical reasons to consider the switch:

Aspect ListingPro (Theme) WB Listora (Plugin)
Architecture Theme-dependent, all directory logic in theme files Independent plugin, works with any theme
Updates Theme + directory updates bundled together Plugin updates independently of your theme
Customization Limited to theme's design options Full block editor control, CSS custom properties
Block editor Not built for Gutenberg 11 native Gutenberg blocks
Interactivity API No (jQuery-based) Yes, no jQuery dependency
Listing types Configurable 10 pre-built types with custom fields
Reviews Included in theme Included: stars, helpful votes, owner replies, moderation
Claims Included in theme Included free
Events & calendar Limited Calendar block included
Business hours Basic Weekly schedule with "open now" filter
Frontend submission Theme-specific form Multi-step wizard block
User dashboard Theme-specific Dashboard block (works in any theme)
Search Theme-specific Two-phase FULLTEXT with faceted counts, geo queries
Map Google Maps (theme-rendered) OpenStreetMap with clustering, near-me, drag search
CSV import/export Basic Full import/export with column mapping
JSON / GeoJSON import Not available Included free
Schema.org Theme-dependent Automatic JSON-LD
REST API Limited 41 endpoints
WP-CLI Not available Full CLI commands
Price model One-time theme purchase ($59+) Free plugin, optional Pro upgrade

Cost Comparison

ListingPro is a premium theme typically purchased from ThemeForest. While the initial cost includes directory features, you are paying for a theme and a directory bundled together. If you later want a different look, you start over.

WB Listora is free on WordPress.org. Pair it with any free or premium theme. The Pro version adds advanced features like Google Maps, analytics, pricing plans, and multi-criteria reviews -- but the free version includes everything most directories need.

Before You Begin

  1. Back up your entire site. Since you will eventually be changing themes, a full backup (files + database) is essential. Use UpdraftPlus, BlogVault, or wp db export.
  2. Keep ListingPro active or its data in the database. The migrator detects ListingPro data by checking for the listing post type with listing-category taxonomy and ListingPro-specific meta keys (_lp_listingpro_options). The theme can be active or inactive -- the migrator reads from the database directly.
  3. Install and activate WB Listora. Complete the setup wizard.
  4. Choose your new theme. Since you are leaving ListingPro, pick a theme you like. Any WordPress theme works -- Twenty Twenty-Five, Flavor, Flavor Developer, Flavor Developer, or any commercial theme. You can switch themes after migration.

Step-by-Step Migration Guide

Step 1: Install WB Listora (Keep ListingPro Active for Now)

Install WB Listora from WordPress.org and activate it alongside ListingPro. Run the setup wizard. At this point, both the theme's directory and Listora exist -- they do not conflict since they use different post types.

Step 2: Open the Migration Tool

Go to Listora > Tools > Migration. The migrator scans for ListingPro data by checking for listing posts that have _lp_listingpro_options meta. If detected, you will see a "ListingPro" source card.

Step 3: Preview the Migration

Click the ListingPro source to review what transfers:

  • Listings -- All listing posts (published, pending, draft).
  • Categories -- listing-category terms mapped to listora_listing_cat.
  • Locations -- listing-location terms and geo meta mapped to Listora's geo index.
  • Features -- listing-feature terms mapped to listora_listing_feature.
  • Reviews -- ListingPro review data migrated to listora_reviews.
  • Images -- Featured images and gallery images transferred.
  • Custom field values -- ListingPro meta values mapped to Listora fields.

Step 4: Run the Migration

Click Start Migration. Batch processing handles large directories safely. Duplicate detection prevents double-imports if you re-run.

CLI option for large sites:

wp listora migrate --source=listingpro --batch-size=100

Step 5: Verify Your Data

  • Browse Listora > Listings to check migrated entries.
  • Open listings to verify categories, locations, features, and reviews.
  • Test the map view to confirm geo data transferred correctly.
  • Rebuild the search index: wp listora reindex --all.

Step 6: Set Up Listora Pages

Create (or update) your directory pages using Listora blocks:

  • Directory page -- Add the Listing Grid and Listing Search blocks.
  • Submission page -- Add the Listing Submission block.
  • Dashboard page -- Add the User Dashboard block.
  • Map page -- Add the Listing Map block.

Step 7: Switch Themes

Once you have verified your Listora pages work correctly, you can switch away from ListingPro to any theme you choose. Your Listora directory continues to work because it is a plugin, not theme-dependent code. Set up your new theme, configure its design settings, and your directory pages will adapt through CSS custom properties.

Step 8: Set Up Redirects

Create 301 redirects from your old ListingPro listing URLs to the new Listora URLs. Use a redirection plugin or add rules to your .htaccess / Nginx config.

What Gets Migrated

Data Type Source (ListingPro) Destination (WB Listora)
Listings listing CPT listora_listing CPT
Categories listing-category listora_listing_cat
Locations listing-location + geo meta listora_geo table + location taxonomy
Features listing-feature listora_listing_feature
Reviews ListingPro review meta listora_reviews table
Images Post thumbnail + gallery Post thumbnail + gallery
Custom fields _lp_* meta keys Listora field index + meta

What Does Not Get Migrated

  • Theme design settings -- ListingPro's theme customizer options, color schemes, and layout choices are theme-specific. Your new theme will have its own design system, and Listora adapts through CSS custom properties.
  • ListingPro payment/plan data -- Paid listing plans and transaction history are theme-specific. WB Listora Pro has its own pricing plan system.
  • Theme-specific widgets and sidebars -- These are tied to ListingPro's theme structure and will be replaced by your new theme's layout.

Frequently Asked Questions

Can I migrate after I have already switched themes?

Yes. As long as the ListingPro listing data remains in the database (the listing posts and their meta), the migrator can read it regardless of which theme is active. Even if you deactivate ListingPro, the posts persist in wp_posts.

Will I lose my reviews?

No. ListingPro reviews are stored as post meta. The migrator reads this data and creates entries in Listora's listora_reviews table, preserving ratings, review text, and reviewer information.

Do I need to keep ListingPro installed after migration?

No. Once migration is complete and verified, you can deactivate and delete the ListingPro theme. Your directory data now lives entirely in Listora's system.

How does Listora handle theme compatibility?

Listora uses CSS custom properties that automatically inherit values from theme.json. This means colors, fonts, spacing, and border-radius values from your theme are reflected in Listora's blocks without manual configuration. It works with both block themes and classic themes.

What if I want Google Maps instead of OpenStreetMap?

The free version of WB Listora uses OpenStreetMap, which requires no API key and has no usage fees. WB Listora Pro adds Google Maps as an option for sites that prefer it.

Ready to Switch?

Install WB Listora free from WordPress.org and free your directory from theme lock-in. Migrate your ListingPro data with the built-in tool, switch to any theme you want, and keep your reviews, claims, maps, and search -- all working independently of your theme choice.

Install WB Listora from WordPress.org

Related

Developer Reference

Blocks Overview

Available in WB Listora Free + Pro. 11 layout-owning blocks ship in Free (Search, Grid, Card, Map, Detail, Reviews, Submission, Categories, Featured, Calendar, User Dashboard). Pro adds 5 more: Comparison, Needs Grid, Post a Need, Moderator Queue, Credit Purchase.

What it does

WB Listora provides 11 WordPress blocks built with the Interactivity API. They work in the block editor like any native WordPress block. Combine them on any page to build your directory layout — no coding required.

Blocks Overview — screenshot from the modernized 1.0.5 site

Why you'd use it

  • Every block is reactive: search results update without page reloads.
  • Block settings are configured visually in the editor sidebar — no shortcodes.
  • All blocks work with any block theme and include responsive controls for desktop, tablet, and mobile.
  • Per-instance styling (spacing, shadow, border radius, colors) means each block on each page can look different.

The 11 blocks

Listing Search

Renders a command-palette-style search bar. Visitors type a keyword and see autocomplete suggestions immediately. Includes a location field with a "Near Me" geolocation button, type filter tabs, and an advanced filters panel (category, feature amenities, price range, rating).

Block settings: Layout (Horizontal / Stacked), show/hide type tabs, show/hide advanced filters.

Listing Grid

Displays listing cards in a responsive grid. Visitors can switch between Grid view (1–4 columns) and List view (horizontal cards). A toolbar shows the result count, a view toggle, and a sort dropdown. Pagination uses numbered pages with prev/next links. Skeleton placeholders show during loading.

Block settings: Default columns (1–4), items per page, default sort, pre-filter by listing type.

Listing Detail

Used automatically on single listing pages — you don't need to add this block manually. Shows the hero gallery with thumbnails, tabbed content (Details, Reviews, Map, Contact), a sidebar with contact info, business hours, and social links, and a related listings section. Outputs Schema.org JSON-LD for rich snippets.

Action buttons on detail page: Share, Favorite, Claim, Compare.

Listing Reviews

Displays the review summary (average rating, distribution chart), the review list, and the submission form. Includes helpful vote buttons, review reporting, and owner reply. Multi-criteria ratings (Pro) appear on the same block.

Listing Map

An interactive map with marker clustering. Free uses OpenStreetMap (no API key needed). Pro upgrades this to Google Maps with custom styles. The Search on drag option re-runs the query as the user pans the map.

Block settings: Map height, default zoom level, clustering on/off.

Listing Submission

The multi-step frontend form for submitting a new listing. Logged-in users select a type, fill in basic info, answer type-specific fields, choose categories, then preview and submit. Includes a pre-submit duplicate check to prevent identical listings.

User Dashboard

The full user dashboard panel (see User Dashboard). Place this block on any page to give logged-in users their management interface.

Listing Categories

An icon grid showing all active categories with listing counts. Clicking a category filters the directory automatically. Displays an empty state if no categories exist.

Block settings: Number of columns, show/hide counts, icon size.

Listing Featured

A featured listings carousel or grid showing listings marked as featured. Useful on homepage sections or category landing pages.

Block settings: Layout (carousel / grid), number of listings, listing type filter.

Listing Calendar

An event calendar view for listings of type Event. Shows recurring events, supports date-range filters, and links each event to its listing detail page.

Listing Card

A standalone single-listing card for custom layouts. Use this block when you want to manually highlight a specific listing anywhere on your site — a sidebar, a landing page section, or a blog post.

Tips

  • Combine Listing Search + Listing Grid + Listing Map in a two-column layout for a split search-and-map experience.
  • Set both Listing Search and Listing Grid to Wide alignment for a full-width directory page.
  • Use Listing Featured on your homepage to promote top listings without affecting the main search results.
  • Each block has a Device Visibility setting — hide the map on mobile to save screen space.
  • The Listing Grid block's Listing Type setting lets you create a page that shows only restaurants, only hotels, etc., without building a custom query.

Common issues

Symptom Fix
Block not appearing in editor Verify WB Listora is active under Plugins
Search results don't update reactively The page must load the Interactivity API — check that WordPress 6.4+ is installed
Map shows no markers Ensure listings have an address saved; geocoding runs on save
Calendar shows no events Confirm at least one listing is assigned the Event type with a future date

Related features

Hooks Reference (Actions & Filters)

Every WB Listora action and filter, grounded in the current manifest at audit/manifest.json (refreshed 2026-05-21T13:03:34Z). The plugin fires 224 hooks across the categories below — 119 actions + 105 filters. Pro consumes a subset of these; the Consumed by column lists every Pro listener so you can see at a glance which hooks already have wiring.

Generated from audit/manifest.json. Re-run /wp-plugin-onboard --refresh after non-trivial commits to regenerate.

Naming convention

  • wb_listora_before_{action}_{resource} — write-lifecycle filter; return WP_Error to abort the write.
  • wb_listora_after_{action}_{resource} — write-lifecycle action; canonical extension point.
  • wb_listora_rest_prepare_{resource} — modify REST response shape; receives ($data, $context, $request).
  • wb_listora_{event} — domain event (e.g. wb_listora_listing_submitted).

Bootstrap (2)

Hook Type Args Fired at Consumed by
wb_listora_loaded action (none) class-plugin.php:49 wb-listora-pro
wb_listora_rest_api_init action (none) class-plugin.php:251 wb-listora-pro

Listings — Write-Lifecycle (25)

Hook Type Args Fired at Consumed by
wb_listora_after_approve_listing action `WP_Post int $post->ID` wb-listora.php:406
wb_listora_after_bulk_moderate action string $action, array $ok, array $failed rest/class-listings-controller.php:531
wb_listora_after_contact_form_submit action int $listing_id, array $context, WP_REST_Request $request class-contact-form.php:253
wb_listora_after_create_listing action int $post_id, WP_REST_Request $request rest/class-submission-controller.php:512 wb-listora-pro
wb_listora_after_dashboard_listings action mixed($view_data) $view_data templates/blocks/user-dashboard/tab-listings.php:404
wb_listora_after_deactivate_listing action int $post_id, WP_REST_Request $request rest/class-listings-controller.php:970
wb_listora_after_delete_listing action int $post_id, WP_REST_Request $request rest/class-listings-controller.php:876 wb-listora-pro
wb_listora_after_feature_listing action int $post_id, mixed($context) $context core/class-featured.php:179
wb_listora_after_featured_listings action mixed($featured_block_attributes) $featured_block_attributes blocks/listing-featured/render.php:96
wb_listora_after_listing_fields action int $post_id, mixed($detail_type_slug) $detail_type_slug templates/blocks/listing-detail/sidebar.php:70 wb-listora-pro
wb_listora_after_listing_grid action mixed($grid_block_attributes) $grid_block_attributes blocks/listing-grid/render.php:216
wb_listora_after_reactivate_listing action int $post_id, WP_REST_Request $request rest/class-listings-controller.php:1106
wb_listora_after_reject_listing action `WP_Post int $post->ID` wb-listora.php:410
wb_listora_after_renew_listing action int $post_id, mixed rest/class-listings-controller.php:1562 wb-listora-pro
wb_listora_after_unfeature_listing action int $post_id, mixed($reason) $reason core/class-featured.php:228
wb_listora_after_update_listing action int $post_id, WP_REST_Request $request rest/class-submission-controller.php:676 wb-listora-pro
wb_listora_before_create_listing filter bool, mixed($title) $title, WP_REST_Request $request rest/class-submission-controller.php:405
wb_listora_before_dashboard_listings action mixed($view_data) $view_data templates/blocks/user-dashboard/tab-listings.php:24
wb_listora_before_delete_listing filter bool, int $post_id, WP_REST_Request $request rest/class-listings-controller.php:843
wb_listora_before_feature_listing filter bool, int $post_id, mixed($context) $context core/class-featured.php:156
wb_listora_before_featured_listings action mixed($featured_block_attributes) $featured_block_attributes blocks/listing-featured/render.php:75
wb_listora_before_listing_grid action mixed($grid_block_attributes) $grid_block_attributes blocks/listing-grid/render.php:209
wb_listora_before_renew_listing filter bool, int $post_id, mixed($context) $context rest/class-listings-controller.php:1469 wb-listora-pro
wb_listora_before_unfeature_listing filter bool, int $post_id, mixed($context) $context core/class-featured.php:214
wb_listora_before_update_listing filter bool, int $post_id, WP_REST_Request $request rest/class-submission-controller.php:584

Reviews — Write-Lifecycle (10)

Hook Type Args Fired at Consumed by
wb_listora_after_create_review action int $review_id, int $listing_id, WP_REST_Request $request rest/class-reviews-controller.php:533 wb-listora-pro
wb_listora_after_dashboard_reviews action mixed($view_data) $view_data templates/blocks/user-dashboard/tab-reviews.php:80
wb_listora_after_delete_review action int $review_id, int $review ? (int) $review->listing_id : null, WP… rest/class-reviews-controller.php:682 wb-listora-pro
wb_listora_after_reviews action mixed($view_data) $view_data templates/blocks/listing-reviews/reviews.php:128
wb_listora_after_update_review action int $review_id, WP_REST_Request $request rest/class-reviews-controller.php:615 wb-listora-pro
wb_listora_before_create_review filter bool, int $listing_id, WP_REST_Request $request rest/class-reviews-controller.php:455
wb_listora_before_dashboard_reviews action mixed($view_data) $view_data templates/blocks/user-dashboard/tab-reviews.php:20
wb_listora_before_delete_review filter bool, int $review_id, WP_REST_Request $request rest/class-reviews-controller.php:649
wb_listora_before_reviews action mixed($view_data) $view_data templates/blocks/listing-reviews/reviews.php:31
wb_listora_before_update_review filter bool, int $review_id, WP_REST_Request $request rest/class-reviews-controller.php:573

Favorites — Write-Lifecycle (4)

Hook Type Args Fired at Consumed by
wb_listora_after_add_favorite action int $listing_id, int $user_id, WP_REST_Request $request rest/class-favorites-controller.php:258 wb-listora-pro
wb_listora_after_remove_favorite action int $listing_id, int $user_id, WP_REST_Request $request rest/class-favorites-controller.php:316 wb-listora-pro
wb_listora_before_add_favorite filter bool, int $listing_id, WP_REST_Request $request rest/class-favorites-controller.php:205
wb_listora_before_remove_favorite filter bool, int $listing_id, WP_REST_Request $request rest/class-favorites-controller.php:290

Claims — Write-Lifecycle (6)

Hook Type Args Fired at Consumed by
wb_listora_after_dashboard_claims action mixed($view_data) $view_data templates/blocks/user-dashboard/tab-claims.php:123
wb_listora_after_submit_claim action int $claim_id, int $listing_id, WP_REST_Request $request rest/class-claims-controller.php:219 wb-listora-pro
wb_listora_after_update_claim action int $claim_id, mixed($new_status) $new_status, WP_REST_Request $re… rest/class-claims-controller.php:549 wb-listora-pro
wb_listora_before_dashboard_claims action mixed($view_data) $view_data templates/blocks/user-dashboard/tab-claims.php:36
wb_listora_before_submit_claim filter bool, int $listing_id, WP_REST_Request $request rest/class-claims-controller.php:169
wb_listora_before_update_claim filter bool, int $claim_id, WP_REST_Request $request rest/class-claims-controller.php:481

Services — Write-Lifecycle (7)

Hook Type Args Fired at Consumed by
wb_listora_after_create_service action `int $service_id, array mixed $data` core/class-services.php:196
wb_listora_after_delete_service action int $service_id, mixed($existing) $existing core/class-services.php:342 wb-listora-pro
wb_listora_after_service_detail action mixed $svc, mixed $post_id, mixed $show_reviews, mixed $detail_rev… templates/blocks/listing-detail/tabs.php:313
wb_listora_after_update_service action `int $service_id, array mixed $data` core/class-services.php:289
wb_listora_before_create_service filter `array mixed $data` core/class-services.php:117
wb_listora_before_delete_service filter int $service_id core/class-services.php:316
wb_listora_before_update_service filter `array mixed $data, int $service_id` core/class-services.php:227

Listing Lifecycle Events (28)

Hook Type Args Fired at Consumed by
wb_listora_claim_submitted action int $claim_id, int $listing_id, int $user_id rest/class-claims-controller.php:210
wb_listora_contact_form_per_listing_daily_cap filter int $cap, int $listing_id class-contact-form.php:198
wb_listora_expired_listing_notice filter mixed($message) $message, mixed class-plugin.php:432
wb_listora_is_verified filter bool $verified, int $post_id class-features.php:232 wb-listora-pro
wb_listora_listing_claimed action int $listing_id, array $context rest/class-claims-controller.php:512 wb-listora-pro
wb_listora_listing_expiration_date filter string $expiry_iso, int $post_id, array $context workflow/class-status-manager.php:99,118; rest/class-listings-controller.php:1654 wb-listora-pro
wb_listora_listing_expired action int $post_id workflow/class-expiration-cron.php:169 wb-listora-pro
wb_listora_listing_expiring action int, mixed($days) $days admin/class-listing-columns.php:524
wb_listora_listing_indexed action int $post_id search/class-search-indexer.php:224
wb_listora_listing_limit_counted_statuses filter array core/class-listing-limits.php:430
wb_listora_listing_limit_overflow action int $user_id, mixed($overflow_cost) $overflow_cost core/class-listing-limits.php:255
wb_listora_listing_pending_admin action int $post_id admin/class-listing-columns.php:472
wb_listora_listing_renewed action int $post_id rest/class-listings-controller.php:1572
wb_listora_listing_reported action mixed $listing_id, mixed $report, mixed $reports, mixed $request rest/class-listings-controller.php:1387
wb_listora_listing_reports_cleared action mixed $post_id admin/class-report-metabox.php:185
wb_listora_listing_status_changed action `WP_Post int $post->ID, mixed($new) $new, mixed($old) $old` search/class-search-indexer.php:553
wb_listora_listing_submitted action int $post_id, mixed($new_status) $new_status, mixed($synthetic_req… admin/class-listing-columns.php:470 wb-listora-pro
wb_listora_listing_title_badges action int $post_id, mixed($type ? $type->get_slug() : '') $type ? $type-… blocks/listing-detail/render.php:275 wb-listora-pro
wb_listora_listing_trashed action int $post_id, mixed rest/class-listings-controller.php:868
wb_listora_listing_updated action int $post_id, mixed, WP_REST_Request $request rest/class-submission-controller.php:668
wb_listora_listing_verify_email action int $post_id, mixed($token) $token workflow/class-email-verification.php:223
wb_listora_listing_{$new_status} action mixed $new_status, mixed $old_status, mixed $post_id, mixed $regis… workflow/class-status-manager.php:98
wb_listora_register_listing_types action mixed($this) $this core/class-listing-type-registry.php:78
wb_listora_rest_listing_response filter `mixed($listing) $listing, WP_Post int $post` rest/class-search-controller.php:461
wb_listora_review_status_changed action int $review_id, string $status, int $listing_id rest/class-reviews-controller.php:650
wb_listora_review_submitted action int $review_id, int $listing_id, int $user_id, mixed($criteria_rat… rest/class-reviews-controller.php:524 wb-listora-pro
wb_listora_unverified_listing_cleaned action int $post_id, mixed($action) $action workflow/class-email-verification.php:544
wb_listora_user_listing_limit filter mixed($best) $best, int $user_id core/class-listing-limits.php:382

Review Events (5)

Hook Type Args Fired at Consumed by
wb_listora_review_after_content action mixed($review) $review templates/blocks/listing-reviews/review-card.php:54 wb-listora-pro
wb_listora_review_criteria filter array, mixed($listing_type_slug) $listing_type_slug blocks/listing-reviews/render.php:78 wb-listora-pro
wb_listora_review_form_after_content action int $post_id templates/blocks/listing-detail/tabs.php:399 wb-listora-pro
wb_listora_review_helpful_milestone action int $review_id, mixed($new_count) $new_count rest/class-reviews-controller.php:772
wb_listora_review_reply action int $review_id rest/class-reviews-controller.php:807

REST Response Filters (8)

Hook Type Args Fired at Consumed by
wb_listora_rest_prepare_claim filter mixed($response_data) $response_data, int $claim_id, WP_REST_Reque… rest/class-claims-controller.php:238
wb_listora_rest_prepare_dashboard_stats filter `array mixed $data, int $user_id, WP_REST_Request $request` rest/class-dashboard-controller.php:284
wb_listora_rest_prepare_favorite filter mixed($fav_data) $fav_data, int, WP_REST_Request $request rest/class-favorites-controller.php:155
wb_listora_rest_prepare_listing filter `array mixed $data, WP_Post int $post, WP_REST_Request $request`
wb_listora_rest_prepare_listing_type filter mixed($type_data) $type_data, mixed($type) $type, WP_REST_Request … rest/class-listing-types-controller.php:152
wb_listora_rest_prepare_review filter mixed($review_data) $review_data, int, WP_REST_Request $request rest/class-reviews-controller.php:342 wb-listora-pro
wb_listora_rest_prepare_search_result filter mixed($response_data) $response_data, WP_REST_Request $request rest/class-search-controller.php:290 wb-listora-pro
wb_listora_rest_prepare_service filter `array mixed $data, int, WP_REST_Request $request` rest/class-services-controller.php:421

Block Render (45)

Hook Type Args Fired at Consumed by
wb_listora_after_card action mixed($view_data) $view_data templates/blocks/listing-card/card.php:66
wb_listora_after_card_actions action mixed($view_data) $view_data templates/blocks/listing-card/card-actions.php:29
wb_listora_after_card_content action mixed($view_data) $view_data templates/blocks/listing-card/card-content.php:130
wb_listora_after_card_image action mixed($view_data) $view_data templates/blocks/listing-card/card-image.php:75
wb_listora_after_dashboard_credits action mixed($view_data) $view_data templates/blocks/user-dashboard/tab-credits.php:218
wb_listora_after_dashboard_nav action mixed($view_data) $view_data templates/blocks/user-dashboard/nav.php:113
wb_listora_after_dashboard_profile action mixed($view_data) $view_data templates/blocks/user-dashboard/tab-profile.php:86
wb_listora_after_detail_gallery action mixed($view_data) $view_data templates/blocks/listing-detail/gallery.php:67
wb_listora_after_detail_sidebar action mixed($view_data) $view_data templates/blocks/listing-detail/sidebar.php:83
wb_listora_after_detail_tabs action mixed($view_data) $view_data templates/blocks/listing-detail/tabs.php:464
wb_listora_after_listing_card action mixed $id, mixed $layout, mixed $show_rating, mixed $show_favorite… blocks/listing-card/render.php:197
wb_listora_before_card action mixed($view_data) $view_data templates/blocks/listing-card/card.php:43
wb_listora_before_card_actions action mixed($view_data) $view_data templates/blocks/listing-card/card-actions.php:18
wb_listora_before_card_content action mixed($view_data) $view_data templates/blocks/listing-card/card-content.php:31
wb_listora_before_card_image action mixed($view_data) $view_data templates/blocks/listing-card/card-image.php:27
wb_listora_before_dashboard_credits action mixed($view_data) $view_data templates/blocks/user-dashboard/tab-credits.php:24
wb_listora_before_dashboard_nav action mixed($view_data) $view_data templates/blocks/user-dashboard/nav.php:29
wb_listora_before_dashboard_profile action mixed($view_data) $view_data templates/blocks/user-dashboard/tab-profile.php:19
wb_listora_before_detail_gallery action mixed($view_data) $view_data templates/blocks/listing-detail/gallery.php:26
wb_listora_before_detail_sidebar action mixed($view_data) $view_data templates/blocks/listing-detail/sidebar.php:24
wb_listora_before_detail_tabs action mixed($view_data) $view_data templates/blocks/listing-detail/tabs.php:39
wb_listora_before_listing_card action mixed $id, mixed $layout, mixed $show_rating, mixed $show_favorite… blocks/listing-card/render.php:174
wb_listora_calendar_events filter mixed($events) $events, mixed($attributes) $attributes blocks/listing-calendar/render.php:125
wb_listora_card_actions action `int string $id` templates/blocks/listing-card/card-actions.php:27
wb_listora_card_view_data filter `mixed($card_data) $card_data, int $post_id, WP_Post int $post` class-template-helpers.php:517
wb_listora_category_card_data filter array, mixed($cat) $cat templates/blocks/listing-categories/categories.php:49
wb_listora_dashboard_header_actions action mixed $user_id, mixed $user, mixed $default_tab blocks/user-dashboard/render.php:530
wb_listora_dashboard_nav_items action int $user_id templates/blocks/user-dashboard/nav.php:109 wb-listora-pro
wb_listora_dashboard_sections action int $user_id blocks/user-dashboard/render.php:660 wb-listora-pro
wb_listora_dashboard_url filter mixed($default) $default class-template-helpers.php:236
wb_listora_detail_actions action int $post_id blocks/listing-detail/render.php:340 wb-listora-pro
wb_listora_detail_owner_bar_actions action mixed $breadcrumbs, mixed $i, mixed $crumb blocks/listing-detail/render.php:381
wb_listora_detail_reviews_limit filter int, int $post_id blocks/listing-detail/render.php:424
wb_listora_detail_tabs_view_data filter mixed($tabs_view_data) $tabs_view_data, int $post_id blocks/listing-detail/render.php:479
wb_listora_grid_after_card action mixed($listing['id']) $listing['id'], mixed($grid_block_attributes… templates/blocks/listing-grid/grid.php:71
wb_listora_grid_query_args filter mixed($search_args) $search_args, mixed($attributes) $attributes blocks/listing-grid/render.php:95
wb_listora_map_config filter mixed($map_config) $map_config blocks/listing-map/render.php:113 wb-listora-pro
wb_listora_map_provider filter string $value wb-listora.php:288 wb-listora-pro
wb_listora_search_after_form action mixed $layout, mixed $listing_type, mixed $search_url_keyword, mix… blocks/listing-search/render.php:210
wb_listora_search_before_form action mixed $layout, mixed $listing_type, mixed $search_url_keyword, mix… blocks/listing-search/render.php:190
wb_listora_submission_captcha action int $form_id class-captcha.php:106
wb_listora_submission_login_buttons action (none) templates/blocks/listing-submission/submission.php:67
wb_listora_submission_plan_step action mixed($listing_type) $listing_type templates/blocks/listing-submission/submission.php:111 wb-listora-pro
wb_listora_submission_register_url filter mixed $submission_register_url, mixed $submission_current_permalin… blocks/listing-submission/render.php:125
wb_listora_submission_steps filter mixed($steps) $steps, mixed($listing_type) $listing_type, mixed($i… blocks/listing-submission/render.php:165 wb-listora-pro

Search & Submission (3)

Hook Type Args Fired at Consumed by
wb_listora_edit_auto_single_form filter mixed $auto_single, mixed $edit_listing_id, mixed $layout_mode, mi… blocks/listing-submission/render.php:287
wb_listora_search_args filter array $args, WP_REST_Request $request rest/class-search-controller.php:252 wb-listora-pro
wb_listora_search_results filter mixed($response_data) $response_data, array $args, WP_REST_Request… rest/class-search-controller.php:282

Settings & Admin (17)

Hook Type Args Fired at Consumed by
wb_listora_after_reset_settings action array $option_keys rest/class-settings-controller.php:371 wb-listora-pro
wb_listora_feature_duration_days filter mixed($days) $days, int $post_id core/class-featured.php:140
wb_listora_feature_{$key}_enabled filter mixed $key, mixed $enabled, mixed $features class-features.php:182
wb_listora_field_default_descriptions filter mixed $default_descriptions, mixed $key, mixed $description, mixed… submission-field-renderer.php:76
wb_listora_field_sanitize_callbacks filter mixed($callbacks) $callbacks core/class-field.php:247
wb_listora_field_types filter mixed($types) $types core/class-field-registry.php:208
wb_listora_has_payment_gateway filter mixed $has_payment_gateway, mixed $user_id, mixed $credit_mappings… blocks/user-dashboard/render.php:300
wb_listora_is_admin_screen filter mixed $is_listora, mixed $screen class-template-helpers.php:748
wb_listora_list_page_slugs filter mixed $list_pages admin/class-admin.php:213
wb_listora_register_field_types action mixed($this) $this core/class-field-registry.php:54
wb_listora_settings_nav_groups filter mixed($groups) $groups admin/class-settings-page.php:288 wb-listora-pro
wb_listora_settings_skip_form_tabs filter array admin/class-settings-page.php:377 wb-listora-pro
wb_listora_settings_tab_content action int $tab_id admin/class-settings-page.php:469 wb-listora-pro
wb_listora_settings_tab_content_after_form action mixed $tab_id, mixed $skip_form_tabs, mixed $groups, mixed $group,… admin/class-settings-page.php:565
wb_listora_settings_tabs filter mixed($tabs) $tabs admin/class-settings-page.php:311 wb-listora-pro
wb_listora_skip_admin_header filter mixed $screen, mixed $submenu, mixed $title, mixed $plugin, mixed … admin/class-admin.php:2057
wb_listora_theme_bridges filter mixed $bridges, mixed $bridge_slug, mixed $child_theme, mixed $act… class-assets.php:100

Notifications & Email (15)

Hook Type Args Fired at Consumed by
wb_listora_contact_form_email_headers filter array $headers, WP_Post $post class-contact-form.php:239
wb_listora_email_content filter mixed($body) $body, mixed($event) $event, mixed($vars) $vars workflow/class-notifications.php:907
wb_listora_email_content_{$event} filter mixed $body, mixed $event, mixed $vars, mixed $to, mixed $headers workflow/class-notifications.php:1099
wb_listora_email_footer_text filter string, mixed($event) $event, mixed($vars) $vars workflow/class-notifications.php:881
wb_listora_email_from_address filter mixed, mixed($event) $event, mixed($vars) $vars workflow/class-notifications.php:941
wb_listora_email_from_name filter mixed($site_name) $site_name, mixed($event) $event, mixed($vars) $… workflow/class-notifications.php:933
wb_listora_email_headers filter mixed($headers) $headers, mixed($event) $event, mixed($vars) $vars workflow/class-notifications.php:949
wb_listora_email_logo_url filter string, mixed($event) $event, mixed($vars) $vars workflow/class-notifications.php:870
wb_listora_email_palette filter array workflow/class-notifications.php:1064
wb_listora_email_subject filter mixed($subject) $subject, mixed($event) $event, mixed($vars) $vars workflow/class-notifications.php:891
wb_listora_email_subject_{$event} filter mixed $subject, mixed $event, mixed $vars, mixed $body workflow/class-notifications.php:1084
wb_listora_notification_log_enabled filter bool workflow/class-notifications.php:1010
wb_listora_notification_recipients filter mixed($to) $to, mixed($event) $event, mixed($vars) $vars workflow/class-notifications.php:922
wb_listora_notification_skipped action mixed($event_key) $event_key, string, mixed($context) $context workflow/class-notifications.php:668
wb_listora_send_notification filter bool, mixed($event) $event, mixed($vars) $vars workflow/class-notifications.php:840 wb-listora-pro

Page Registry (3)

Hook Type Args Fired at Consumed by
wb_listora_page_id filter mixed $id, mixed $key, mixed $context core/class-page-registry.php:138
wb_listora_page_url filter mixed $url, mixed $key, mixed $args, mixed $id, mixed $out core/class-page-registry.php:190
wb_listora_register_pages action (none) page-registry-helpers.php:269 wb-listora-pro

Spam & Rate Limit (7)

Hook Type Args Fired at Consumed by
wb_listora_antispam_keyword_blacklist filter mixed $patterns, mixed $default_patterns, mixed $haystack, mixed $… class-anti-spam.php:125
wb_listora_antispam_max_urls filter mixed $max, mixed $haystack, mixed $context, mixed $matches, mixed… class-anti-spam.php:173
wb_listora_antispam_should_check filter mixed $should_check, mixed $context, mixed $blacklist_result, mixe… class-anti-spam.php:68
wb_listora_captcha_bypass filter mixed($bypass) $bypass, mixed($provider) $provider class-captcha.php:144
wb_listora_rate_limit_bypass filter bool, mixed($action) $action, int class-rate-limiter.php:137
wb_listora_rate_limit_config filter mixed($config) $config, mixed($action) $action class-rate-limiter.php:188
wb_listora_trust_proxy_headers filter bool class-rate-limiter.php:227

Templates (2)

Hook Type Args Fired at Consumed by
wb_listora_locate_template filter mixed($template) $template, mixed($template_name) $template_name, … class-template-helpers.php:51
wb_listora_template_args filter array $args, mixed($template_name) $template_name class-template-helpers.php:81

Members & Profiles (1)

Hook Type Args Fired at Consumed by
wb_listora_member_profile_url filter mixed $user_profile_url, mixed $user_id, mixed $review_data, mixed… rest/class-reviews-controller.php:343

Lifecycle (10)

Hook Type Args Fired at Consumed by
wb_listora_after_calendar action mixed($attributes) $attributes blocks/listing-calendar/render.php:215
wb_listora_after_categories_grid action mixed($attributes) $attributes blocks/listing-categories/render.php:89
wb_listora_after_email_verified action int $post_id, mixed($new_status) $new_status admin/class-listing-columns.php:468
wb_listora_after_map action mixed($attributes) $attributes blocks/listing-map/render.php:155
wb_listora_after_search_results action (none) templates/blocks/listing-search/search.php:85 wb-listora-pro
wb_listora_after_template action mixed($template_name) $template_name, mixed($template_path) $templ… class-template-helpers.php:89
wb_listora_before_calendar action mixed($attributes) $attributes blocks/listing-calendar/render.php:190
wb_listora_before_categories_grid action mixed($attributes) $attributes blocks/listing-categories/render.php:82
wb_listora_before_map action mixed($attributes) $attributes blocks/listing-map/render.php:135
wb_listora_before_template action mixed($template_name) $template_name, mixed($template_path) $templ… class-template-helpers.php:87

Miscellaneous (26)

Hook Type Args Fired at Consumed by
wb_listora_analytics_retention_days filter int workflow/class-expiration-cron.php:232
wb_listora_app_config filter `array mixed $data` rest/class-settings-controller.php:327
wb_listora_appointment_button action int $post_id, mixed($detail_type_slug) $detail_type_slug templates/blocks/listing-detail/sidebar.php:79
wb_listora_claim_approved action int $claim_id, int $listing_id, mixed($claimant) $claimant rest/class-claims-controller.php:531 wb-listora-pro
wb_listora_claim_rejected action int $claim_id, int rest/class-claims-controller.php:539
wb_listora_credits_purchase_url filter mixed($override) $override wb-listora.php:198
wb_listora_default_features filter mixed($defaults) $defaults class-features.php:120
wb_listora_directory_url filter mixed($default) $default class-template-helpers.php:188
wb_listora_draft_reminder action int $post_id workflow/class-expiration-cron.php:210
wb_listora_favorite_added action int $listing_id, int $user_id rest/class-favorites-controller.php:249 wb-listora-pro
wb_listora_favorite_removed action int $listing_id, int $user_id rest/class-favorites-controller.php:307
wb_listora_featured_query_args filter mixed($featured_q_args) $featured_q_args, mixed($attributes) $attr… blocks/listing-featured/render.php:30
wb_listora_features_registry filter mixed($registry) $registry class-features.php:99
wb_listora_fullwidth_blocks filter `mixed, WP_Post int $post` core/class-theme-defenses.php:77
wb_listora_login_modal_register_url filter string $url, int $listing_id, string $current_permalink blocks/listing-detail/render.php:801
wb_listora_placeholder_url filter mixed($url) $url class-template-helpers.php:129
wb_listora_pro_cta_should_show filter bool, mixed($surface) $surface admin/class-pro-promotion.php:139
wb_listora_render_contact_form filter bool $should_render class-contact-form.php:56
wb_listora_renewal_cost filter mixed($cost) $cost, int $post_id, int $plan_id rest/class-listings-controller.php:1335
wb_listora_renewal_duration_days filter mixed($duration_days) $duration_days, int $post_id, int $plan_id rest/class-listings-controller.php:1338
wb_listora_reset_option_keys filter array $option_keys rest/class-settings-controller.php:360 wb-listora-pro
wb_listora_schema_data filter `array mixed $data, int $this->post_id` schema/class-schema-generator.php:166
wb_listora_submit_url filter mixed($default) $default class-template-helpers.php:211
wb_listora_upgrade_url filter mixed($default) $default class-template-helpers.php:258
wb_listora_user_credit_balance filter mixed($balance) $balance, int $user_id core/class-listing-limits.php:554 wb-listora.php:418
wb_listora_webhook_secret filter string $default, array $context admin/class-settings-page.php:998 wb-listora-pro

How to subscribe

// Action: fires after a listing is created via REST submission.
add_action( 'wb_listora_after_create_listing', function ( $post_id, $request ) {
error_log( "Listing $post_id created" );
}, 10, 2 );

// Filter: modify the response shape.
add_filter( 'wb_listora_rest_prepare_listing', function ( $data, $post, $request ) {
$data['custom_field'] = get_post_meta( $post->ID, '_custom_field', true );
return $data;
}, 10, 3 );

// Filter that aborts a write: return WP_Error to block.
add_filter( 'wb_listora_before_create_review', function ( $value, $listing_id, $args ) {
if ( /* your gate */ ) return new WP_Error( 'gate_blocked', 'Reviews paused.' );
return $value;
}, 10, 3 );

Reading the table

  • Hook — the action/filter name to add_action / add_filter against.
  • Typeaction (no return) or filter (must return a value, possibly WP_Error for before-filters).
  • Args — the parameter signature passed to your callback.
  • Fired at — the file:line where do_action() / apply_filters() calls — useful for reading the surrounding code for context.
  • Consumed by — every plugin/site that currently listens. means the hook is documented but no internal consumer exists yet — first-extender territory.

Related

REST API

WB Listora exposes 55 REST endpoints under the listora/v1 namespace. Every customer-facing surface (frontend listing UI, submission wizard, user dashboard, search, reviews, claims, favorites) is REST-driven; AJAX is reserved for admin-only operations (per the plugin's REST-first architecture rule).

Base URL: <your-site>/wp-json/listora/v1/

Auth model:

  • PublicGET reads (listings, search, single listing). No authentication required.
  • Auth — requires a valid user session (cookies + nonce) OR a WordPress Application Password.
  • Owner — only the listing's author (or a user with the listing's edit capability) can modify.
  • Admin — requires manage_options or manage_listora_settings.

Nonce header for browser clients: X-WP-Nonce: <wp_create_nonce("wp_rest")>. Apps using Application Passwords don't need this.

Response envelope (lists):

{
"listings": [ /* array of resource objects */ ],
"total": 247,
"pages": 21,
"has_more": true,
"cursor": "WyJsaXN0aW5nIiwxMjM0XQ==",
"next_cursor": "WyJsaXN0aW5nIiwxNDQ0XQ=="
}

Error contract:

{
"code": "listora_invalid_field",
"message": "Field 'price' is required",
"data": { "status": 400 }
}

Generated from audit/manifest.json. Re-run /wp-plugin-onboard --refresh after non-trivial commits to regenerate.

Listings (12)

Method Route Auth Handler Purpose
GET /listora/v1/dashboard/listings logged_in_permissions Dashboard_Controller::get_listings User's listings (cursor pagination)
GET /listora/v1/listings Public Listings_Controller::get_items List published listings (cursor pagination)
POST /listora/v1/listings/bulk Public Listings_Controller::get_bulk Fetch up to 50 listings by ID (offline cache)
DELETE /listora/v1/listings/{id} delete_listing_permissions Listings_Controller::delete_listing Owner soft-delete
POST /listora/v1/listings/{id}/deactivate deactivate_listing_permissions Listings_Controller::deactivate_listing Owner hides their listing from the directory (sets listor…
GET /listora/v1/listings/{id}/detail Public Listings_Controller::get_listing Single listing detail (card or full)
POST /listora/v1/listings/{id}/feature feature_listing_permissions Listings_Controller::feature_listing Upgrade listing to Featured
GET /listora/v1/listings/{id}/related Public Listings_Controller::get_related Related listings
POST /listora/v1/listings/{id}/renew renew_listing_permissions Listings_Controller::renew_listing Renew expired listing
GET /listora/v1/listings/{id}/renewal-quote renew_listing_permissions Listings_Controller::get_renewal_quote Renewal pricing/status
GET, POST /listora/v1/listings/{listing_id}/services __return_true / create_service_permissions Services_Controller::get_listing_services / create_service Listing services list/create
POST /listora/v1/listings/{listing_id}/services/reorder create_service_permissions Services_Controller::reorder_services Reorder services

Listings — Lifecycle (1)

Method Route Auth Handler Purpose
POST /listora/v1/listings/{id}/reactivate reactivate_listing_permissions Listings_Controller::reactivate_listing Owner restores a deactivated listing back to its prior pu…

Listings — Moderation (1)

Method Route Auth Handler Purpose
POST /listora/v1/listings/bulk-moderate Owner WBListora\REST\Listings_Controller::bulk_moderate Bulk moderation — approve/reject/feature/unfeature/trash …

Listings — Contact (1)

Method Route Auth Handler Purpose
POST /listora/v1/listings/(?P<id>[\d]+)/contact-form __return_true (anonymous allowed; nonce + honeypot + Anti_Spam pipeline gate inside handler) WBListora\Contact_Form::handle_rest_submission Free's listing contact form. Per-IP-per-listing 3/hour ca…

Reviews (5)

Method Route Auth Handler Purpose
GET /listora/v1/dashboard/reviews logged_in_permissions Dashboard_Controller::get_reviews User's reviews received/written
PUT, DELETE /listora/v1/reviews/{id} update_review_permissions / delete_review_permissions Reviews_Controller::update_review / delete_review Update/delete review
POST /listora/v1/reviews/{id}/helpful logged_in_permissions Reviews_Controller::vote_helpful Helpful vote
POST /listora/v1/reviews/{id}/reply owner_reply_permissions Reviews_Controller::owner_reply Listing owner reply
POST /listora/v1/reviews/{id}/report logged_in_permissions Reviews_Controller::report_review Report inappropriate review

Reviews (per-listing) (1)

Method Route Auth Handler Purpose
GET, POST /listora/v1/listings/{listing_id}/reviews Auth Reviews_Controller::get_listing_reviews / create_review List reviews / submit new review

Search (2)

Method Route Auth Handler Purpose
GET /listora/v1/search Public Search_Controller::search Filtered/geo/fulltext/facet search
GET /listora/v1/search/suggest Public Search_Controller::suggest Autocomplete suggestions

Submission (2)

Method Route Auth Handler Purpose
POST /listora/v1/submission/resend-verification Public Submission_Controller::resend_verification_endpoint Resend email verification
GET /listora/v1/submission/verify Public Submission_Controller::verify_endpoint REST mirror of email verify URL

Claims (3)

Method Route Auth Handler Purpose
GET, POST /listora/v1/claims admin_permissions / logged_in_permissions Claims_Controller::get_claims / submit_claim List all claims (admin) / submit claim
PUT /listora/v1/claims/{id} admin_permissions Claims_Controller::update_claim Approve/reject claim
GET /listora/v1/dashboard/claims logged_in_permissions Dashboard_Controller::get_my_claims User's claim requests

Favorites (2)

Method Route Auth Handler Purpose
GET, POST /listora/v1/favorites logged_in_permissions Favorites_Controller::get_favorites / add_favorite List/add favorites
DELETE /listora/v1/favorites/{listing_id} logged_in_permissions Favorites_Controller::remove_favorite Remove favorite

Services (1)

Method Route Auth Handler Purpose
GET, PUT, DELETE /listora/v1/services/{id} scoped Services_Controller::get_service / update_service / delete_service CRUD single service

User Dashboard (4)

Method Route Auth Handler Purpose
GET /listora/v1/dashboard/notifications logged_in_permissions Dashboard_Controller::get_notifications In-app notifications
PUT /listora/v1/dashboard/notifications/read logged_in_permissions Dashboard_Controller::mark_notifications_read Mark notifications read
GET, PUT /listora/v1/dashboard/profile logged_in_permissions Dashboard_Controller::get_profile / update_profile Dashboard profile (name, bio)
GET /listora/v1/dashboard/stats logged_in_permissions Dashboard_Controller::get_stats User dashboard stats (60s transient)

Listing Types (4)

Method Route Auth Handler Purpose
GET, POST /listora/v1/listing-types __return_true / create_item_permissions_check Listing_Types_Controller::get_items / create_item List/create listing types
GET, PUT, DELETE /listora/v1/listing-types/{slug} scoped Listing_Types_Controller::get_item / update_item / delete_item CRUD single listing type
GET /listora/v1/listing-types/{slug}/categories Public Listing_Types_Controller::get_categories Categories scoped to a listing type
GET /listora/v1/listing-types/{slug}/fields Public Listing_Types_Controller::get_fields Type fields schema

Settings (9)

Method Route Auth Handler Purpose
GET, PUT, DELETE /listora/v1/settings Admin Settings_Controller::get_all_settings / update_settings / reset_settings Plugin settings CRUD
GET /listora/v1/settings/app-config Public Settings_Controller::get_app_config Public bootstrap config (app/frontend)
GET /listora/v1/settings/export Admin Settings_Controller::export_settings Export settings JSON
POST /listora/v1/settings/import Admin Settings_Controller::import_settings Import settings JSON
GET /listora/v1/settings/maps Public Settings_Controller::get_map_settings Public map config
GET, DELETE /listora/v1/settings/notifications/log Admin Settings_Controller::get_notification_log / clear_notification_log View/clear notification log
GET /listora/v1/settings/notifications/log/export Admin Settings_Controller::export_notification_log Download notification log as CSV/JSON for archiving
POST /listora/v1/settings/notifications/log/retention Admin Settings_Controller::set_notification_retention Set notification log retention policy (days)
POST /listora/v1/settings/notifications/test Admin Settings_Controller::send_test_notification Send test notification email

Miscellaneous (7)

Method Route Auth Handler Purpose
GET /listora/v1/export/csv Admin Import_Export_Controller::export_csv Export listings CSV
POST /listora/v1/import/csv Admin Import_Export_Controller::import_csv Import CSV
POST /listora/v1/import/geojson Admin Import_Export_Controller::import_geojson Import GeoJSON with geo
POST /listora/v1/import/json Admin Import_Export_Controller::import_json Import JSON
POST /listora/v1/submit submit_listing_permissions Submission_Controller::submit_listing Frontend listing submission
POST /listora/v1/submit/check-duplicate logged_in_permissions Submission_Controller::check_duplicate_endpoint Pre-submit duplicate check
PUT /listora/v1/submit/{id} Owner Submission_Controller::edit_listing Owner edit listing

Authentication examples

Cookie + nonce (logged-in browser session)

WordPress core localizes the REST nonce automatically. Read it from wp.apiFetch (when using @wordpress/api-fetch) or the page's localized wpApiSettings.nonce:

// In a block's view.js (uses the apiFetch helper):
import apiFetch from '@wordpress/api-fetch';
const data = await apiFetch( { path: '/listora/v1/listings?per_page=12' } );

// Plain fetch with manual nonce:
const res = await fetch( '/wp-json/listora/v1/favorites', {
method: 'POST',
credentials: 'include',
headers: { 'Content-Type': 'application/json', 'X-WP-Nonce': window.wpApiSettings.nonce },
body: JSON.stringify( { listing_id: 42 } )
} );

Application Password (apps / scripts)

# Generate an Application Password under wp-admin → Users → Your Profile → Application Passwords
curl -u "username:xxxx xxxx xxxx xxxx xxxx xxxx" \
-H "Content-Type: application/json" \
-d '{"title":"My Listing","type":"restaurant"}' \
https://yoursite.com/wp-json/listora/v1/submit

Pro endpoints

When wb-listora-pro is active, every route below registers under the same listora/v1 namespace and respects the same auth + nonce + rate-limit rules as Free. Permission per route is annotated as public (anyone), auth (logged-in only), cap:foo (requires that capability), or pro-toggle (feature toggle must be on at Settings → Pro Features).

Needs (Reverse Listings)

Method Route Permission Purpose
GET /needs public Public needs feed (with filters: type, location, status)
GET /needs/{id} public Single need detail
POST /needs auth Submit a new need
PUT /needs/{id} auth + owner Edit a need
DELETE /needs/{id} auth + owner Delete a need
GET /needs/matching/{listing_id} auth + listing owner Needs matching a listing's type / location
GET /dashboard/needs auth "My Needs" + "My Responses" dashboard data

Credits & Plans

Method Route Permission Purpose
GET /credits/plans public Available pricing plans + entitlements
GET /credits/credit-packs public Credit packs available for purchase
POST /credits/purchase-plan auth Purchase / activate a plan (Hold-and-Commit flow)
POST /credits/admin-add cap:manage_listora_settings Manually grant credits to a user

Coupons

Method Route Permission Purpose
POST /coupons/validate public Validate a coupon code (returns discount + eligibility)
POST /coupons/generate-code cap:manage_listora_settings Auto-generate a unique coupon code

Badges & Verification

Method Route Permission Purpose
GET /listings/{listing_id}/badges public Badges assigned to a listing
POST /listings/{listing_id}/badges/{badge_id} cap:manage_listora_settings Assign a badge
DELETE /listings/{listing_id}/badges/{badge_id} cap:manage_listora_settings Remove a badge

Outgoing Webhooks

Method Route Permission Purpose
GET /webhooks cap:manage_listora_settings List configured outgoing webhooks
POST /webhooks cap:manage_listora_settings Create a webhook
GET /webhooks/{id} cap:manage_listora_settings Get webhook config
PUT /webhooks/{id} cap:manage_listora_settings Update webhook
DELETE /webhooks/{id} cap:manage_listora_settings Delete webhook
POST /webhooks/{id}/test cap:manage_listora_settings Fire a test payload
GET /webhooks/{id}/log cap:manage_listora_settings Recent delivery log
POST /webhooks/payment public + HMAC Inbound payment webhook receiver (Stripe + PayPal direct + WooCommerce / WooSubscriptions / MemberPress / PMPro / WooMemberships bridges)

Moderators

Method Route Permission Purpose
GET /moderators cap:manage_listora_moderators List configured moderators
POST /moderators/{user_id}/activate cap:manage_listora_moderators Promote a WP user to moderator
POST /moderators/{user_id}/deactivate cap:manage_listora_moderators Demote a moderator
GET /moderators/{user_id}/queue moderator or above Items assigned to this moderator
POST /moderators/reassign cap:manage_listora_moderators Re-route queue items to a different moderator
GET /moderators/stats moderator or above Throughput / SLA stats per moderator

Migration (Competitor)

Method Route Permission Purpose
GET /migration/detect cap:manage_listora_settings Detect installed source plugin + row counts
GET /migration/fields cap:manage_listora_settings Source-field schema for the picked source
POST /migration/preview cap:manage_listora_settings Dry-run preview of N rows
POST /migration/run cap:manage_listora_settings Run the migration (batched, queueable)

Google Import

Method Route Permission Purpose
GET /import/google/search cap:manage_listora_settings Google Places text search
GET /import/google/details cap:manage_listora_settings Get Place Details for a place_id
POST /import/google/import cap:manage_listora_settings Import a Place as a listing
GET /import/google/test cap:manage_listora_settings Smoke-test the API key

Visual / Bulk Import

Method Route Permission Purpose
POST /import/upload cap:manage_listora_settings Upload a CSV / JSON file for visual mapping
GET /import/fields cap:manage_listora_settings Auto-detected source fields
POST /import/preview cap:manage_listora_settings Preview rows with the proposed mapping
POST /import/start cap:manage_listora_settings Kick off the batched import
GET /import/status/{batch_id} cap:manage_listora_settings Poll batch progress
POST /import/cancel/{batch_id} cap:manage_listora_settings Abort a running batch
GET /import/templates cap:manage_listora_settings Saved mapping templates
GET/PUT/DELETE /import/templates/{id} cap:manage_listora_settings Manage a saved template

Compare Listings

Method Route Permission Purpose
GET /compare public Compare 2-4 listings side by side (returns merged data)
POST /compare/preview public Preview comparison set (used by Quick Compare modal)

Services Discovery

Method Route Permission Purpose
GET /services/search public Cross-listing service search ("find SEO services near me")
POST /services/compare public Compare service offerings across multiple listings

Audit Log

Method Route Permission Purpose
GET /audit-log cap:manage_listora_settings Recent audit entries (with filters)
GET /audit-log/export cap:manage_listora_settings CSV export of the current view
GET /audit-log/stats cap:manage_listora_settings Per-actor / per-event aggregates

Analytics

Method Route Permission Purpose
GET /analytics/overview cap:manage_listora_settings Site-wide views / clicks / submissions over time
GET /analytics/listing/{id} listing owner or admin Per-listing analytics
POST /analytics/track public Beacon endpoint — record a view / phone-click / website-click

Saved Searches

Method Route Permission Purpose
GET /saved-searches auth List my saved searches
POST /saved-searches auth Save the current search
PUT /saved-searches/{id} auth + owner Rename or update frequency
DELETE /saved-searches/{id} auth + owner Delete

Lead Forms (Pro contact)

Method Route Permission Purpose
POST /listings/{id}/contact public + nonce Pro lead form (replaces Free /contact-form when lead_form toggle is on)

Filters & extensibility

Every endpoint that returns a resource also fires a wb_listora_rest_prepare_{resource} filter so Pro / themes / third-party code can inject custom fields without forking the controller:

add_filter( 'wb_listora_rest_prepare_listing', function ( $data, $post, $request ) {
$data['my_field'] = get_post_meta( $post->ID, '_my_field', true );
return $data;
}, 10, 3 );

See Hooks Reference → REST Response Filters for the full list of wb_listora_rest_prepare_* filters.

Rate limits

Public-write endpoints (POST /submissions, POST /listings/{id}/reviews, POST /claims, POST /listings/{id}/contact-form) are rate-limited per IP via sliding-window counters. See Rate Limiting & Abuse Controls for the default caps + per-endpoint windows + how to tune.

Related

Custom Fields & Field Types

WB Listora includes 22 built-in field types organized into 6 categories.

Field Types

Basic

  • Text — Single-line text input
  • Textarea — Multi-line text input
  • Number — Numeric input with optional min/max
  • Email — Email address with validation
  • Phone — Phone number input
  • URL — Website URL with validation

Choice

  • Select — Dropdown select (single value)
  • Multi-Select — Dropdown with multiple selections
  • Checkbox — Single checkbox (yes/no)
  • Radio — Radio button group (single selection)

Date & Time

  • Date — Date picker
  • Time — Time picker
  • Date & Time — Combined date and time

Media

  • Gallery — Image gallery with drag-to-reorder
  • File Upload — File attachment
  • Video — Video URL (YouTube, Vimeo)

Location

  • Map Location — Address with lat/lng coordinates

Structured

  • Business Hours — Weekly hours with open/closed states
  • Social Links — Social media profile URLs
  • Price Range — Price level indicator ($, $$, $$$, $$$$)
  • Color — Color picker
  • Rating — Star rating input

Field Properties

Each field has configurable properties:

Property Description
key Unique field identifier (auto-generated from label)
label Display name shown in forms
type Field type from the list above
required Whether the field is mandatory
searchable Include in full-text search index
filterable Show as a filter option in search
show_in_card Display on listing cards
schema_prop Schema.org property mapping
placeholder Placeholder text for inputs
help_text Helper text below the field
options Available options (for select/radio/checkbox)

Field Groups

Fields are organized into groups for the submission form and detail page:

$field_groups = array(
array(
'key' => 'contact',
'label' => 'Contact Information',
'icon' => 'phone',
'fields' => array(
array( 'key' => 'address', 'type' => 'map_location', 'label' => 'Address' ),
array( 'key' => 'phone', 'type' => 'phone', 'label' => 'Phone' ),
),
),
);

Adding Custom Fields

Use the visual field builder at Listora > Listing Types > Edit Type, or programmatically:

add_filter( 'wb_listora_register_listing_types', function( $types ) {
$types['my-type']['field_groups'][] = array(
'key' => 'custom-group',
'label' => 'Custom Fields',
'fields' => array(
array(
'key' => 'custom_field',
'type' => 'text',
'label' => 'My Custom Field',
'required' => false,
),
),
);
return $types;
});

Social Links field (since 2026-05-12)

The social_links field stores 7 platform URLs as an associative array:

// Stored shape (in _listora_meta JSON or via REST):
array(
'website' => 'https://example.com',
'facebook' => 'https://facebook.com/example',
'twitter' => 'https://twitter.com/example',
'instagram' => 'https://instagram.com/example',
'linkedin' => 'https://linkedin.com/in/example',
'youtube' => 'https://youtube.com/@example',
'tiktok' => 'https://tiktok.com/@example',
)

The canonical 7 platforms are returned by \WBListora\Core\Field::social_link_platforms() so renderers / Pro extensions don't drift. Sanitization is centralized at Field::sanitize_social_links() — every URL passes esc_url_raw + a platform-specific host whitelist (a Facebook URL must be on facebook.com, etc.). The field's schema-generator output emits a sameAs array on the listing's JSON-LD so Google reads the same set.

To add an 8th platform, filter wb_listora_social_link_platforms:

add_filter( 'wb_listora_social_link_platforms', function ( array $platforms ): array {
$platforms['threads'] = array(
'label' => 'Threads',
'icon' => 'message-circle',
'host' => 'threads.net',
);
return $platforms;
} );

Registering a custom field type

The 22 built-in types live in \WBListora\Core\Field_Registry. To add your own type:

add_filter( 'wb_listora_field_types', function ( array $types ): array {
$types['my_special_field'] = array(
'label' => __( 'My Special Field', 'my-plugin' ),
'category' => 'choice', // 'basic' | 'choice' | 'date_time' | 'media' | 'location' | 'structured'
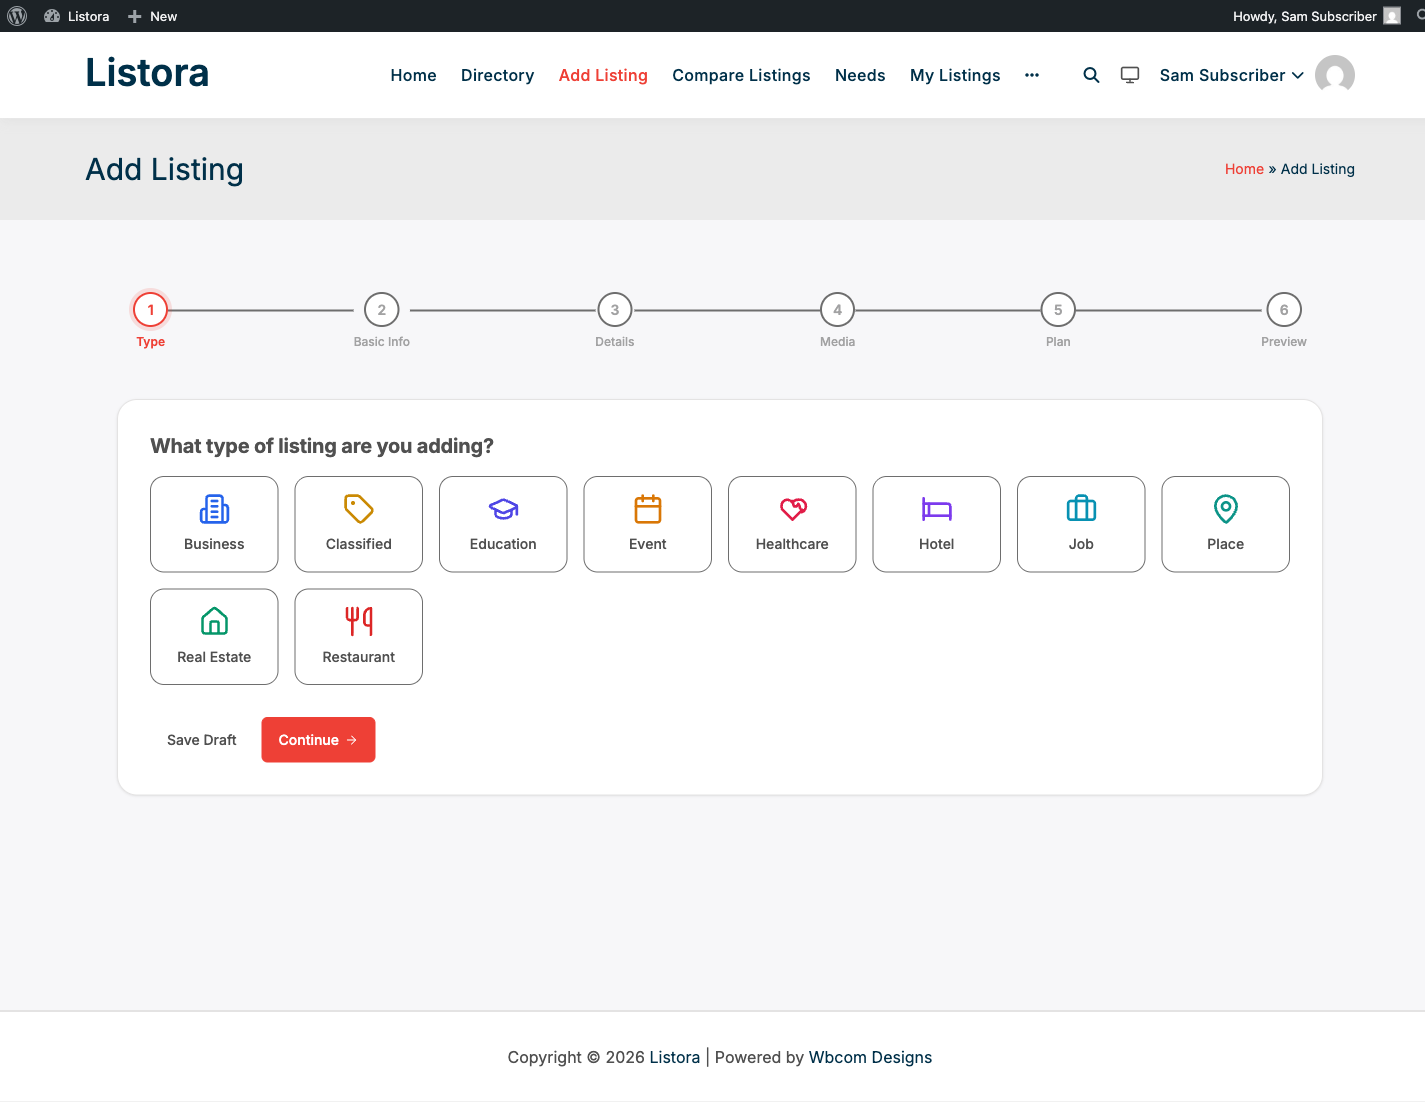
'sanitizer' => array( My_Field_Handler::class, 'sanitize' ),
'renderer' => array( My_Field_Handler::class, 'render_submission' ),
'display' => array( My_Field_Handler::class, 'render_display' ),
'searchable' => true,
'filterable' => false,
);
return $types;
} );

The handler is responsible for:

  • Sanitization at REST + admin entry points (sanitize($value, $field_config): mixed).
  • Submission rendering — the form field HTML inside the submission wizard.
  • Display rendering — the read-side HTML on the detail page.

Once registered, the new type appears in the Listing Types admin field-builder dropdown and accepts REST + WP-CLI imports like any built-in type.

Related

Extending with WB Listora Pro

WB Listora is Free + Pro by design — Pro never replaces Free, it consumes Free's documented surfaces (197 hooks + 55 REST endpoints + template overrides). The same surfaces are open to you for third-party extensions, themes, and custom integrations.

How Pro extends Free

┌──────────────┐ do_action / apply_filters ┌──────────────┐
│ WB Listora │ ───────────────────────────► │ WB Listora │
│ (Free) │ + REST request shaping │ Pro │
│ │ ◄─────────────────────────── │ │
└──────────────┘ filter return values └──────────────┘

Pro only consumes documented surfaces — no direct refs to Free's \WBListora\Core\* internals (enforced by architecture invariant INV-3 in bin/architecture-checks.sh). The current Free→Pro coupling is 29 documented pairs, all listed in audit/derived/cross-plugin-coupling.json.

The four extension surfaces

1. Action hooks (canonical extension point)

Every write operation fires a wb_listora_after_{action}_{resource} action. Pro's Audit Log, Outgoing Webhooks, BuddyPress integration, and Analytics features all hook these:

// Pro's class-outgoing-webhooks.php:144 (Free fires, Pro listens)
add_action( 'wb_listora_after_create_listing', array( $this, 'on_listing_created' ), 50, 2 );

public function on_listing_created( int $post_id, WP_REST_Request $request ): void {
$payload = $this->build_listing_payload( $post_id );
$this->dispatch_event( 'listing_created', $payload );
}

See Hooks Reference for the full list of 109 actions.

2. REST response filters

Every REST controller fires a wb_listora_rest_prepare_{resource} filter so Pro can inject Pro-only fields without forking the controller:

// Pro's Quick_View::filter_quick_view_response
add_filter( 'wb_listora_rest_prepare_listing', array( $this, 'filter_quick_view_response' ), 10, 3 );

public function filter_quick_view_response( array $data, WP_Post $post, WP_REST_Request $request ): array {
if ( $request->get_param( 'view' ) === 'quick-view' ) {
$data['quick_view_fields'] = $this->get_quick_view_fields( $post );
}
return $data;
}

3. Before-write filters (write gates)

Every write fires a wb_listora_before_{action}_{resource} filter — return WP_Error to abort:

add_filter( 'wb_listora_before_create_review', function ( $value, $listing_id, $args ) {
if ( $this->is_suspected_spam( $args ) ) {
return new WP_Error( 'spam_blocked', 'Submission blocked by anti-spam.' );
}
return $value;
}, 5, 3 ); // Priority 5 — runs before Free's own checks

4. Template overrides (theme-style)

Drop a file at {theme}/wb-listora/{template-name}.php to override any Listora template. See Template Overrides for the full file index.

What every Pro feature plugs into

Drawn from audit/derived/cross-plugin-coupling.json (29 pairs as of 2026-05-20):

Pro feature Free hook it consumes Why
Audit Log wb_listora_after_create_listing, _update_listing, _delete_listing, _create_review, _update_review, _delete_review, _submit_claim, _update_claim, _add_favorite, _remove_favorite Records every write with actor + before/after diff
Outgoing Webhooks Same write-lifecycle surface + wb_listora_listing_submitted, wb_listora_listing_status_changed, wb_listora_review_submitted, wb_listora_claim_approved Dispatches HMAC-signed payloads to external endpoints
BuddyPress Integration wb_listora_listing_submitted, wb_listora_review_submitted, wb_listora_claim_approved, wb_listora_member_profile_url (filter) Activity stream + notifications + profile-linked reviewer names
Analytics wb_listora_after_create_listing, wb_listora_listing_status_changed View/click tracking per listing
Comparison wb_listora_card_actions (action), wb_listora_after_listing_fields (action) Renders Compare-toggle on cards + detail page
Quick View wb_listora_card_actions + wb_listora_rest_prepare_listing Eye-icon button + REST response shape
Verification Badges wb_listora_is_verified (filter) — Pro answers with feature-gate state Toggle-aware badge visibility
SEO Pages wb_listora_rest_prepare_listing + init rewrite rules URL /type-in-location/ pattern rendering
Saved Searches wb_listora_rest_api_init (action) Registers Pro's /saved-searches REST routes
Credits / Pricing Plans wb_listora_after_create_listing + wb_listora_listing_paused/resumed Credit-gated submission flow
Pages auto-creation wb_listora_register_pages (action) — Pro registers Compare / Buy Credits / Needs pages Single canonical activator-time page-registration surface
Reset Settings wb_listora_after_reset_settings (action) + wb_listora_reset_option_keys (filter) Purge Pro options when admin clicks "Reset all settings"

Pro features at a glance

WB Listora Pro adds these features on top of Free's foundation. Each is independently toggleable from Listora → Settings → Features.

Feature What it does Doc
Google Maps Replaces OSM with Google Maps + Places autocomplete + marker clustering Google Maps
Multi-Criteria Reviews Per-aspect star ratings (Food / Service / Ambiance for restaurants etc.) Multi-Criteria Reviews
Photo Reviews Image uploads attached to reviews Photo Reviews
Lead Forms Contact-owner form on every listing Lead Forms
Comparison Side-by-side listing comparison page Compare Listings
Quick View In-page modal preview from any card Quick View Modal
Analytics Per-listing view + click tracking Analytics
Saved Searches Save searches + daily email digest Saved Searches
Verification Badges Verified-business badges Verification Badges
Advanced Search Multi-facet filter UI Advanced Search
Credit System Credit-based payment flow Credits & Pricing Plans
Pricing Plans Subscription tiers for listing submission Pricing Plans
Coupons Discount codes for listing plans Coupons
White Label Remove Listora branding from admin White Label
Coming Soon Hide directory while setting up Coming Soon & Private Mode
Notification Digest Batch transactional emails into a daily summary Digest Notifications
Programmatic SEO Pages Auto-generate /type-in-location/ landing pages SEO Pages
Outgoing Webhooks HMAC-signed event webhooks for integrations Outgoing Webhooks
BuddyPress Integration Activity + notifications + profile sub-nav BuddyPress Integration
Audit Log Tamper-evident record of every write Audit Log
Needs Marketplace Reverse-listing flow (buyers post, businesses respond) Needs Marketplace
Moderator Role Dedicated listora_moderator WP role Moderator Role
Infinite Scroll Replace pagination with load-more or infinite scroll Infinite Scroll

Building your own extension

The same surfaces work for your own plugin / theme / mu-plugin. A minimal "log every new listing to Slack" extension is ~10 lines:

<?php
/**
* Plugin Name: My Listora → Slack
*/
add_action( 'wb_listora_after_create_listing', function ( int $post_id, $request ) {
if ( get_post_status( $post_id ) !== 'publish' ) return;
wp_remote_post( 'https://hooks.slack.com/services/...', array(
'headers' => array( 'Content-Type' => 'application/json' ),
'body' => wp_json_encode( array(
'text' => sprintf( '*New listing:* %s — %s', get_the_title( $post_id ), get_permalink( $post_id ) ),
) ),
'timeout' => 5,
) );
}, 10, 2 );

For multi-event listeners (mirror Pro's pattern), subscribe to the canonical event hooks:

Event Hook Args
New listing submitted wb_listora_listing_submitted ($post_id, $status, $request, $context)
Status changed wb_listora_listing_status_changed ($post_id, $old_status, $new_status)
Review posted wb_listora_review_submitted ($review_id, $listing_id, $user_id)
Claim approved wb_listora_claim_approved ($claim_id, $listing_id, $user_id)
Coupon redeemed (Pro) wb_listora_pro_coupon_redeemed ($coupon_id, $context)
Need posted (Pro) wb_listora_pro_need_posted ($need_id, $context)

Service locator

For services Free wants to expose to Pro (and that Pro might need to swap), Free uses a service locator pattern:

// Free defines:
wb_listora_service( 'cache' ); // returns the Cache singleton
wb_listora_service( 'search_engine' ); // returns Search_Engine
wb_listora_service( 'capabilities' ); // returns Capabilities helper

// Pro consumes:
$cache = wb_listora_service( 'cache' );
$cache->bust( 'listings' );

This is the only way to reach Free's internal classes from Pro. Direct namespace refs (new \WBListora\Core\Cache()) are forbidden by INV-3.

License model

All Pro features are gated behind an active license:

  • License key entered at Listora → Settings → License (Pro).
  • Weekly remote check via Action Scheduler — verifies key + expiry against the wbcom.com licensing endpoint.
  • License expired → Pro features are deactivated. Existing Pro data (audit log entries, analytics, criteria ratings) is preserved. The Free plugin continues to work normally.
  • License renewed → Pro features reactivate automatically on the next remote check (or manually via wp listora-pro license check).

See License Management (Pro) for the customer-side flow + WP-CLI alternatives.

Architecture invariants (enforced)

These rules are enforced by bin/architecture-checks.sh and bin/cleanup-duplicate-detect.php. Any PR that violates them is blocked.

  • INV-3: Pro never directly imports \WBListora\Core\* internal classes — only hooks, REST, service-locator keys.
  • INV-12: Cross-plugin coupling pairs are listed in audit/derived/cross-plugin-coupling.json — every new Pro listener gets a row.
  • INV-13: Canonical credit-cost meta key is _listora_plan_credits (never _listora_plan_credit_cost).
  • INV-14: Pro never re-fires a Free hook (would cause double-firing of Free's listeners — notifications, indexer, etc.). Exception: competitor migration sets 'context' => 'migration' so Free listeners can opt out.

Related

Template Overrides

Override any WB Listora frontend or email template from your theme — WooCommerce-style. Drop a file at {theme}/wb-listora/{template-name}.php and your version wins. Works for block templates (cards, detail, dashboard), email templates (15 Free + 13 Pro), and the full-width page-template the plugin registers for its shortcode pages.

What it is

Every template the plugin renders goes through wb_listora_locate_template() — defined in wb-listora/includes/class-template-helpers.php:23. The locator walks three paths in order:

  1. Child theme: {stylesheet}/wb-listora/{name}.php
  2. Parent theme: {template}/wb-listora/{name}.php
  3. Plugin default: wb-listora/templates/{name}.php

The first hit wins. This is the same pattern WooCommerce, Easy Digital Downloads, and BuddyPress use — battle-tested, expected behaviour for WP devs.

Hookable: apply_filters( 'wb_listora_locate_template', $template, $template_name, $template_path ) lets you override the lookup result entirely (e.g. serve a tenant-specific template in a multisite).

Templates that respect the locator:

Block templates (frontend listing UI)

templates/blocks/listing-card/card.php
templates/blocks/listing-card/card-image.php
templates/blocks/listing-card/card-meta.php
templates/blocks/listing-card/card-actions.php
templates/blocks/listing-detail/hero.php
templates/blocks/listing-detail/sidebar.php
templates/blocks/listing-detail/tabs.php
templates/blocks/listing-detail/review-card.php
templates/blocks/listing-grid/grid.php
templates/blocks/listing-grid/toolbar.php
templates/blocks/listing-grid/pagination.php
templates/blocks/listing-search/search.php
templates/blocks/listing-search/search-bar.php
templates/blocks/listing-search/filters.php
templates/blocks/listing-map/map.php
templates/blocks/listing-submission/submission.php
templates/blocks/listing-submission/step-type.php
templates/blocks/listing-submission/step-basic.php
templates/blocks/listing-submission/step-details.php
templates/blocks/listing-submission/step-media.php
templates/blocks/listing-submission/step-preview.php
templates/blocks/listing-submission/step-duplicate-review.php
templates/blocks/listing-submission/stepper.php
templates/blocks/listing-submission/navigation.php
templates/blocks/listing-reviews/reviews.php
templates/blocks/listing-reviews/review-card.php
templates/blocks/listing-categories/categories.php
templates/blocks/listing-categories/category-card.php
templates/blocks/listing-featured/featured.php
templates/blocks/listing-calendar/calendar.php
templates/blocks/user-dashboard/dashboard.php
templates/blocks/user-dashboard/tab-listings.php
templates/blocks/user-dashboard/tab-reviews.php
templates/blocks/user-dashboard/tab-favorites.php
templates/blocks/user-dashboard/tab-claims.php
templates/blocks/user-dashboard/tab-credits.php
templates/blocks/user-dashboard/tab-profile.php

Single-listing + page templates

templates/single-listora_listing.php
templates/template-listora-full-width.php

Email templates (15 Free)

templates/emails/parts/header.php
templates/emails/parts/footer.php
templates/emails/claim-approved.php
templates/emails/claim-rejected.php
templates/emails/claim-submitted.php
templates/emails/draft-reminder.php
templates/emails/listing-approved.php
templates/emails/listing-expired.php
templates/emails/listing-expiring-soon.php
templates/emails/listing-pending-admin.php
templates/emails/listing-rejected.php
templates/emails/listing-renewed.php
templates/emails/listing-submitted.php
templates/emails/listing-verify-email.php
templates/emails/review-helpful.php
templates/emails/review-received.php
templates/emails/review-reply.php

Pro templates (13)

Pro templates live in wb-listora-pro/templates/ but use the same locator — overrides go in the same {theme}/wb-listora/ folder:

templates/blocks/comparison/comparison.php
templates/blocks/credit-purchase/credit-purchase.php
templates/blocks/needs-grid/needs-grid.php
templates/blocks/needs-grid/need-card.php
templates/blocks/need-detail/need-detail.php
templates/blocks/post-need/post-need.php
templates/dashboard/tab-needs.php
templates/single-listora_need.php
templates/emails/digest.php
templates/emails/lead-notification.php
templates/emails/listing-paused.php
templates/emails/listing-resumed.php
templates/emails/moderator-reassigned.php
templates/emails/need-*.php
templates/emails/response-*.php
templates/emails/saved-search-alert.php

How you use it

Override a single template

  1. Pick the template you want to change — e.g. wb-listora/templates/blocks/listing-card/card.php.
  2. Create the matching path in your theme: wp-content/themes/{your-theme}/wb-listora/blocks/listing-card/card.php.
  3. Copy the plugin file's contents as your starting point.
  4. Edit. Save. The next request renders your version.

Variables available

Every template starts with a docblock listing the variables passed in ($id, $title, $listing_url, $colors, $variant, etc.). The plugin extracts $view_data into template scope, so:

<?php
defined( 'ABSPATH' ) || exit;
/**
* @var int $id Listing ID.
* @var string $title Sanitized title.
* @var string $excerpt Trimmed excerpt.
* @var array $type ['slug','name','color','icon','schema'].
* @var bool $show_rating Block attribute.
* …
*/
?>
<article class="listora-card listora-card--<?php echo esc_attr( $layout ); ?> listora-type--<?php echo esc_attr( $type['slug'] ); ?>">
<!-- your override -->
</article>

Every template ships with the variable docblock at the top — the contract is explicit, not implied.

Best practices

  • Don't fork the whole template if you only need to add one line. Use the action hooks fired around the template instead (wb_listora_before_card, wb_listora_after_card_actions, etc.). See Hooks Reference.
  • Keep override files small. If your override is 90% identical to the plugin's template, the override is a maintenance burden — fork only the specific section that differs.
  • Track plugin updates. When the plugin updates a template significantly, your override might diverge. Diff your version vs the new plugin version on each release.
  • Email templates: keep variable docblock. Lots of plugins forget to update email-template variables across versions; the docblock at the top of each email template is the contract — don't strip it.

Settings & options

Filter / hook Purpose
wb_listora_locate_template (filter) Override the located template path.
wb_listora_template_args (filter) Modify the $args array passed into the template (before extract()).
wb_listora_get_template (action) Fires after a template is loaded; useful for instrumentation.

For block-level extension without forking the template, see the per-block action hooks documented in Hooks Reference.

Related

WP-CLI Commands

WB Listora ships two CLI command namespaces — wp listora (Free) and wp listora-pro (Pro) — for the operations admins do most: directory statistics, search-index rebuilds, imports, exports, competitor migrations, database repair, and demo content management. Use them whenever the admin UI's PHP max_execution_time would cap a large operation, or when scripting deployments.

What it is

Both namespaces register at WP_CLI::add_command() and extend \WP_CLI_Command. Discoverable from any shell with WP-CLI installed: wp listora lists Free subcommands; wp listora-pro lists Pro subcommands.

Free namespace — wp listora

8 subcommands, every one matching includes/class-cli-commands.php.

# Statistics + health
wp listora stats # Directory totals, index sync %, DB table sizes
wp listora repair # Clean orphaned search_index + geo rows (--dry-run supported)
wp listora reindex # Rebuild search_index for all listings
wp listora reindex --type=restaurant # Reindex one listing type
wp listora reindex --batch-size=500 --dry-run # Preview without writing

# Type registry
wp listora listing-types # Table of registered types: slug, name, field count, schema

# CSV import / export
wp listora import listings.csv --type=restaurant
wp listora import listings.csv --type=restaurant --dry-run
wp listora export # Default: publish status, all types, dated filename
wp listora export --type=restaurant --output=restaurants.csv
wp listora export --status=pending --output=pending.csv

# Competitor migration (any of 4 sources)
wp listora migrate --from=directorist
wp listora migrate --from=geodirectory --dry-run
wp listora migrate --from=bdp --batch-size=25
wp listora migrate --from=listingpro

# Demo content
wp listora demo seed # All 9 packs + test users (default)
wp listora demo seed --pack=restaurant # One pack only
wp listora demo seed --pack=restaurant,hotel # Multiple packs
wp listora demo seed --pack=all --with-users --reindex
wp listora demo seed --pack=classified --skip-images
wp listora demo remove # Removes only listings tagged _listora_demo_content
wp listora demo reseed --pack=restaurant # Remove + re-seed in one go

Common flags

Flag Subcommands Purpose
--type=<slug> reindex, import, export Restrict to a specific listing type.
--status=<status> export Post status filter. Default publish.
--batch-size=<N> reindex, migrate Override default batch size (500 reindex, 50 migrate). Lower for memory-constrained servers.
--dry-run reindex, import, repair, migrate Preview without writing.
--output=<path> export Output file path. Default listora-export-YYYY-MM-DD.csv.
--from=<source> migrate One of: directorist, geodirectory, bdp, listingpro.
--pack=<slug> demo seed/reseed Comma-separated or all. Available: restaurant, hotel, real-estate, job-board, general, classified, education, healthcare, place.
--with-users demo seed/reseed Also create the four default test users (contributor1, author1, subscriber2, subscriber3).
--skip-images demo seed/reseed Skip image sideloading. Useful for CI / slow networks.
--reindex demo seed/reseed Run Search_Indexer::batch_reindex() after seeding.

Pro namespace — wp listora-pro

1 subcommand, matching wb-listora-pro/includes/class-cli-commands.php.

# Demo QA dataset (full Pro overlay — moderators, badges, plans, coupons, needs, webhooks, audit log)
wp listora-pro demo seed
wp listora-pro demo seed --reindex # Run wp listora reindex after seeding
wp listora-pro demo seed --skip-images # Skip Picsum photo-review sideload
wp listora-pro demo seed --user-id=42 # Use a specific user as primary actor
wp listora-pro demo remove

Pro flags

Flag Purpose
--reindex After seeding, refresh the Free search index.
--skip-images Skip Picsum image sideload for photo reviews (faster, offline-safe).
--user-id=<id> Use a specific user as primary actor. When omitted the seeder provisions three QA test users (pro-vendor, pro-moderator, pro-customer).

Pro management operations that the previous version of this doc claimed as CLI commands (license activate/deactivate, webhooks, credit ledger, audit-log export, feature toggles, pages ensure) are admin-UI only — they're not exposed via WP-CLI. Use the Settings page or the REST API instead.

How you use it

Common scripted workflows

# Onboard a fresh staging clone end-to-end (Free + Pro demo data)
wp listora demo seed --pack=all --with-users --reindex
wp listora-pro demo seed --reindex

# Health check before an upgrade
wp listora stats # Confirm sync % is at 100; flag if not
wp listora repair --dry-run # Preview orphan rows; run without --dry-run to clean

# Bulk import 50K listings without the UI hitting max_execution_time
wp listora import huge-file.csv --type=restaurant

# Reindex after editing field configuration
wp listora reindex --type=restaurant --batch-size=200

# Competitor migration with safety preview
wp listora migrate --from=directorist --dry-run # See row count + sample
wp listora migrate --from=directorist # Run for real

# Reseed demo content after seeder improvements
wp listora demo reseed --pack=all --with-users --reindex

Bypass behaviour

WP-CLI execution automatically bypasses:

  • CAPTCHA — admins running imports shouldn't be CAPTCHA'd.
  • Rate limits — bulk imports don't trip the per-IP submission cap.
  • Required-login REST permission callbacks — CLI runs as the system, not as a user.

This is documented behaviour, not a backdoor: WP-CLI execution already requires shell access to the server, a much stronger gate than CAPTCHA or per-IP windows.

Adding your own subcommands

Add subcommands to either namespace without forking by registering on WP_CLI:

add_action( 'cli_init', function () {
WP_CLI::add_command( 'listora my-custom', 'My_Custom_CLI' );
} );

class My_Custom_CLI {

/**
* Check geo-coverage of all listings.
*
* ## EXAMPLES
*
* wp listora my-custom check-geo-coverage
*/
public function check_geo_coverage( $args, $assoc_args ) {
global $wpdb;
$covered = (int) $wpdb->get_var( "SELECT COUNT(*) FROM {$wpdb->prefix}listora_geo" );
$total = (int) wp_count_posts( 'listora_listing' )->publish;
WP_CLI::success( sprintf( 'Geo coverage: %d / %d (%.1f%%)', $covered, $total, ( $total ? $covered / $total * 100 : 0 ) ) );
}
}

Then: wp listora my-custom check-geo-coverage.

Settings & options

Class Namespace Subcommands
WBListora\CLI_Commands (Free) wp listora stats, reindex, listing-types, import, export, repair, migrate, demo
WBListoraPro\CLI_Commands (Pro) wp listora-pro demo

CLI commands fire the same hooks as the equivalent admin / REST actions — wb_listora_after_create_listing, wb_listora_listing_status_changed, wb_listora_pro_credits_added, etc. — so listeners (notifications, audit log, outgoing webhooks) work uniformly whether the action came from a UI click, a REST call, or a CLI script.

Related

  • Import & Export — customer-facing CSV / JSON / GeoJSON import-export UI and CLI equivalents.
  • Competitor migration guides — step-by-step for each supported source.
  • REST API — what CLI commands operate on at the data layer; many CLI flows also have a REST equivalent.
  • Custom Fields — reindex after changing field configuration.

Capabilities & Roles

WB Listora ships 15 custom capabilities that gate every admin and frontend surface in the plugin. Capabilities are added to the standard WordPress roles (administrator, editor, author, contributor, subscriber) on plugin activation and removed on uninstall — no role editor required for a default install. Use this reference when you need to grant directory-management permissions to a custom role, audit who can do what, or write a permissions-aware integration.

The capability map

Listing CRUD capabilities (10)

The standard WordPress capability_type map for the listora_listing custom post type — every CPT gets these.

Capability What it gates
edit_listora_listing Edit a single owned listing
edit_listora_listings See the Listings admin list table
edit_others_listora_listings Edit listings owned by other users
edit_published_listora_listings Edit listings after they've been published
publish_listora_listings Publish a listing (set status to publish)
delete_listora_listing Delete a single owned listing
delete_listora_listings Bulk-delete listings
delete_others_listora_listings Delete listings owned by other users
delete_published_listora_listings Delete published listings
read_private_listora_listings View listings with status private

Management capabilities (5)

Custom caps for the plugin's own admin surfaces. Each is exposed as a Capabilities class constant so call-sites can avoid magic strings.

Capability Constant Gates
manage_listora_settings Capabilities::CAP_MANAGE_SETTINGS Settings pages, REST /settings/*, Email Log page, Setup Wizard, Pro license activation
moderate_listora_reviews Capabilities::CAP_MODERATE_REVIEWS Approve / reject / hide / spam reviews from the Reviews admin page and /reviews/{id} REST
manage_listora_claims Capabilities::CAP_MANAGE_CLAIMS Approve / reject business-claim requests (transfers post_author on approve)
manage_listora_types Capabilities::CAP_MANAGE_TYPES Create / edit / delete listing types and the taxonomies (Categories, Locations, Features, Tags)
submit_listora_listing Capabilities::CAP_SUBMIT_LISTING Use the frontend submission wizard / block

Virtual capability (1)

view_listora_dashboard (Capabilities::CAP_VIEW_DASHBOARD) is granted at runtime — never persisted in the role table — to any user who has either manage_listora_settings OR edit_listora_listings. Lets one menu page (Listora → Dashboard) act as a shared entry point for settings-managers and listing-editors without registering the menu twice. Set up by Capabilities::grant_view_dashboard_to_managers() in includes/core/class-capabilities.php.

Default role assignments

Activate the plugin and these caps are added to each role automatically (full grid at includes/core/class-capabilities.php:get_caps_map()).

Role Listing CRUD Settings Reviews Claims Types Submit Notes
administrator All 9 listing-CRUD caps Yes Yes Yes Yes Yes Full access
editor All listing-CRUD caps EXCEPT delete_others_listora_listings Yes Yes Yes Moderates content but can't delete other users' listings or edit types
author Own listings + publish Yes Standard listing owner. Gets upload_files by default.
contributor Own listings (no publish, no edit-after-publish) Yes Explicit upload_files grant so the submission wizard's media zones work
subscriber None Yes Frontend submission only. Explicit upload_files grant so the wizard works

Why subscriber + contributor get upload_files

The submission wizard's Featured Image / Gallery / file fields open the standard wp.media modal which POSTs to admin-ajax's upload-attachment action. That handler checks the upload_files cap directly. WordPress contributors and subscribers don't have it by default, so the modal would open and uploads would silently fail (no error toast from wp.media, just a hidden modal and no attachment). The cap is granted explicitly on activation AND boosted at runtime by grant_upload_files_to_submitters() for installs that pre-date the fix (QA card 9856831966).

The runtime grant is defensive: it only adds upload_files when the user already has submit_listora_listing. Strip the submit cap from a role and the implicit upload grant evaporates too.

Pro capabilities (when wb-listora-pro is active)

Pro adds two capability families on top of Free.

Moderator caps

The Pro Moderators feature (Listora → Moderators) gives non-admin team members targeted permissions across the moderation queue. Caps are added by \WBListoraPro\Features\Moderator::register_caps() and removed when the feature is toggled off.

Capability Gates
manage_listora_moderators Add / remove team members from the moderators list
moderate_listora_listings Approve / reject pending listings (without full edit_others_listora_listings)
moderate_listora_claims Approve / reject pending business claims (without full manage_listora_claims)
moderate_listora_reports Resolve user-reported reviews and listings

A WordPress user added to the Moderators list gets these caps automatically. Remove them from the list and the caps are revoked.

Reverse-listing caps (Needs marketplace)

The Pro Needs Marketplace feature adds CPT-style caps for the listora_need post type (buyer-posted requests).

Capability Gates
edit_listora_need Edit a single owned need
edit_listora_needs Edit list of needs
edit_others_listora_needs Edit needs posted by other users
publish_listora_needs Publish a need (status publish)
delete_listora_need Delete a single owned need
delete_others_listora_needs Delete needs posted by others

Usage in code

Check the current user (recommended)

Prefer the static helpers — a future cap rename only has to update one file.

use WBListora\Core\Capabilities;

if ( Capabilities::can_manage_settings() ) {
// Render the settings link.
}

if ( Capabilities::can_moderate_reviews() ) {
// Show the bulk-moderate UI.
}

if ( Capabilities::can_submit_listing() ) {
// Render the submission CTA.
}

Check a specific user

Pass a user ID to any helper, or use the generic dispatcher.

Capabilities::can_manage_claims( $user_id );

Capabilities::user_can( Capabilities::CAP_MANAGE_TYPES, $user_id );

Add caps to a custom role

add_action( 'init', function () {
$role = get_role( 'shop_manager' );
if ( ! $role ) {
return;
}
$role->add_cap( 'moderate_listora_reviews', true );
$role->add_cap( 'manage_listora_claims', true );
$role->add_cap( 'submit_listora_listing', true );
}, 20 ); // Priority 20 so it runs after our Capabilities::register() at 10.

Restrict a built-in role

Same pattern with remove_cap() — useful when an editor shouldn't moderate reviews on a particular site.

add_action( 'init', function () {
$role = get_role( 'editor' );
if ( $role ) {
$role->remove_cap( 'moderate_listora_reviews' );
}
}, 20 );

How REST permission callbacks use these

Every Listora REST controller's permission_callback returns either true, current_user_can('cap_name'), or a WP_Error with HTTP 401 / 403. Pattern:

'permission_callback' => function () {
if ( ! is_user_logged_in() ) {
return new \WP_Error( 'rest_forbidden', __( 'Authentication required.', 'wb-listora' ), array( 'status' => 401 ) );
}
if ( ! current_user_can( 'moderate_listora_reviews' ) ) {
return new \WP_Error( 'rest_forbidden', __( 'You cannot moderate reviews.', 'wb-listora' ), array( 'status' => 403 ) );
}
return true;
},

This is why removing a cap from a role automatically blocks both the admin UI AND the REST endpoint — the JS frontend code calls the same REST routes the admin pages call.

Uninstall behaviour

Capabilities::remove_caps() iterates every WordPress role and removes all 15 standard caps when the plugin is uninstalled (it runs from uninstall.php). The virtual view_listora_dashboard cap is granted at runtime by a filter — it has no persisted state, so nothing to clean up. Pro adds its own removal logic for moderator + reverse-listing caps when uninstalled.

Related

User Journeys

Site Owner Journey

You operate the directory. You decide what gets listed, who can submit, how reviews are moderated, and how (or whether) money changes hands. This is your end-to-end playbook from a fresh WordPress install to a fully monetized vendor directory.

Directory site homepage — your customer-facing front door

Who this is for

  • Operator of a community directory (city food guide, niche industry directory, local services hub)
  • Lead-gen site owner monetizing via paid placement / verified badges
  • Agency building a multi-tenant directory product for a client
  • Marketplace builder layering vendor signups on top of a content site

Stage 1 — Get the site standing up (Day 1, ~30 minutes)

What you expect from a directory plugin: install, see something usable in minutes, no wrestling with placeholder pages.

What you do:

  1. Install Free from WordPress.org plugin search ("WB Listora"). Activate.
  2. The Setup Wizard auto-runs — pick 1-2 listing types (Restaurant, Hotel, Real Estate, Job, Event, Classified, …), set your default location, choose your slug structure.
  3. Wizard auto-creates 3 pages: Add Listing, My Listings, Directory — already wired with the correct blocks.
  4. Optionally load a demo pack: wp listora demo seed --pack=restaurant --with-users --reindex adds ~20 realistic listings + 4 test users so you can browse a populated site immediately.
  5. Visit your site — the Directory page shows search + filters + grid. Pages live. You're operational.

What you're left with: a working directory with real-looking content, ready to demo to clients or share with early vendors.

Stage 2 — Customize the look (Day 1-2, ~1 hour)

What you expect: make it look like YOUR brand, not "another WP plugin."

What you do:

  • Open Settings → General — adjust permalink slugs (listing-cat, listing-location, listing-feature defaults work but you can rename to match your taxonomy language).
  • Visit Listora → Listing Types — change icons, rename labels, mark a default type for new submissions.
  • Tweak any block's Inspector (per-instance padding, color, layout) — every block has 20 standard responsive attributes.
  • Override the listing card template if needed: copy wp-content/plugins/wb-listora/templates/blocks/listing-card/card.php to {your-theme}/wb-listora/blocks/listing-card/card.php and edit.

Listing Type Editor — change icons, fields, schema mapping per type

Stage 3 — Build your taxonomy (Day 2-3, ~2 hours)

What you expect: a clean, scannable browse experience — visitors find what they need without overwhelm.

What you do:

  1. Categories — define your top-level groupings (food, professional services, retail, …) and 2-3 levels of children.
  2. Locations — build your geo tree (Country → State → City → Neighborhood as deep as you need).
  3. Amenities / Features — flat list of 10-15 attributes customers will filter on (WiFi, Parking, Pet Friendly, Outdoor Seating, …). Keep it short.

Rule of thumb: customers can name 5-10 categories before getting bored. Anything beyond that should be a secondary filter (Feature) or a sub-category.

Stage 4 — Configure submissions (Day 3, ~30 minutes)

What you expect: decide who can submit, whether you moderate, how much it costs.

What you do:

  • Settings → Submissions — toggle guest submissions on/off, set the per-listing expiration window, enable auto-publish or moderation-queue flow.
  • Settings → Security — turn on reCAPTCHA v3 OR Cloudflare Turnstile (Turnstile is GDPR-friendly).
  • Settings → Notifications — confirm the per-event emails are on; send a test email to confirm SMTP works.
  • Settings → Reviews — auto-approve or hand-moderate; set minimum review length.

Settings Submissions — moderation toggle + expiration window + per-step config

Stage 5 — Activate Pro (Day 3-4, ~20 minutes) — optional

What you expect: if you're charging vendors or need lead capture / verification badges / multi-criteria reviews, add Pro without rebuilding what Free already gives you.

What you do:

  1. Install WB Listora Pro → activate → run the Pro setup wizard.
  2. Configure your credit packs (e.g. "5 credits / $25", "20 credits / $80", "100 credits / $300").
  3. Define your pricing plans (Basic / Featured / Premium with credit cost + duration + entitlements).
  4. Toggle the Pro features you actually need from Settings → Pro Features: Lead Forms, Verification, Badges, Audit Log, Analytics, Compare, Quick View, Coming Soon, etc. (You can leave the rest off.)
  5. Add a payment integration — easiest path is the bundled WooCommerce bridge or the direct Stripe webhook receiver.

Stage 6 — Open the floodgates (Week 1+)

What you expect: start onboarding real vendors, see real traffic, get real reviews — no surprise failure modes.

What you do:

Analytics — directory-wide view + top listings + traffic over time

Stage 7 — Ongoing operations (Weekly)

Cadence What Tool
Daily Approve pending listings + reviews All Listings (filter by Pending) + Listora → Reviews — pending items live on separate admin pages, NOT in a single unified queue
Daily Reply to flagged content reports Reports queue
Weekly Check Audit Log for anomalies Audit Log admin
Weekly Send digest to vendors (auto, if Pro Digest is on) Pro Digest Notifications
Monthly Run wp listora repair to clean orphan index rows CLI
Monthly Renewal reminders (auto-fire 7 days + 1 day before expiry) (handled by cron)
Quarterly Update credit pack pricing if needed Pro settings

What you do NOT have to do (because Listora handles it)

  • No Set up cron manually — Action Scheduler is bundled in Free.
  • No Worry about scale — denormalized search_index table + facet caching handles 100K+ listings.
  • No Build a separate "Verified Owner" badge — Pro has it.
  • No Stitch together payment integrations — credit-and-plan with 7 payment providers built-in (Stripe + PayPal direct + WooCommerce + WooSubscriptions + MemberPress + PMPro + WooMemberships adapters).
  • No Manually email expiring listings — cron + the renewal flow handle it.
  • No Roll your own spam protection — honeypot + rate limits + Akismet + CAPTCHA + URL density all layered out of the box.

Common pitfalls (and how to avoid them)

Pitfall Avoid by
Listing duplication when migrating from a competitor Run wp listora migrate --dry-run first
Vendors confused by submission failures Test the wizard yourself end-to-end before going live
Lost emails Always send a test email from Settings → Notifications before launch
Outdated search results Rebuild search index after bulk edits: Settings → Advanced → Rebuild Search Index
Pro features showing on Free-only sites Pro features are gated by toggles — confirm in Settings → Pro Features

Related

Listing Owner Journey

You run a business. The directory operator (Site Owner) has invited you — or you found the site organically and want to claim your free listing. This is what you experience from "I want my business in this directory" through to "I'm running ongoing renewal cycles and replying to reviews."

Add Listing wizard — multi-step submission form

Who this is for

  • Restaurant / shop / studio owner wanting to be discovered locally
  • Service professional (photographer, electrician, designer) hunting for leads
  • Hotel / B&B operator building presence in a city guide
  • Real estate agent posting listings or running a personal directory
  • Job board poster publishing openings

Stage 1 — Discover the directory + decide to submit (~3 minutes)

What you expect: understand within 30 seconds whether this directory matters for my business.

What you experience:

  1. You land on the directory home (Google, social, word of mouth).
  2. Search for your category — see existing listings, get a sense of quality + traffic.
  3. Find an "Add Listing" CTA in the header or hero. Click.
  4. Either:
  • Already a member? Log in.
  • Guest submission allowed? Skip directly to the wizard (you'll verify your email at the end).
  • Free signup required? Quick register, then continue.

Stage 2 — Submit your listing (~10-15 minutes)

What you expect: a guided form, not a 50-field PHP relic. Save drafts. Don't lose my work.

What you experience:

  1. The submission wizard walks you through 4-6 steps depending on your listing type:
  • Basics — title, type, category, location.
  • Details — description, custom fields (cuisine, price range, capacity, …).
  • Media — featured image, gallery, video URL.
  • Contact — phone, email, website, social links (7 platforms supported).
  • Hours — business hours per day, timezone, 24/7 toggle.
  • Services (Pro / optional) — sub-products under the listing (e.g. menu items, service tiers).
  • Plan (Pro) — pick a plan if the operator charges for placement.
  1. Drafts auto-save as you go. Step back to any step without losing data.
  2. Map pin is draggable — pick the exact storefront.
  3. Submit. Status depends on operator setting:
  • Auto-publish → live immediately
  • Pending review → email confirms submission, you'll get another when approved/rejected
  • Awaiting credits (Pro) → "Pay X credits to activate" if your plan requires it

Listing detail — your listing live on the directory

Stage 3 — Optional: Claim an existing listing (~5 minutes)

What you expect: if my business is already in the directory (someone else added it), I should be able to take ownership without making a duplicate.

What you experience:

  1. Find your listing on the directory.
  2. Click "Claim this business" at the top of the listing.
  3. Upload proof of ownership (utility bill, business license, …).
  4. Admin reviews → approves → post_author transfers to you. You're now the owner.
  5. You can edit, reply to reviews, manage services from your dashboard.

Stage 4 — Manage your listings (ongoing)

What you expect: a clean dashboard where I can see status, edit, renew, reply to reviews — no WordPress admin needed.

What you experience:

Visit your dashboard page — the operator names it on setup; the canonical Pro slug is /my-dashboard/, the legacy auto-created Free slug is /my-listings/. Both work. The dashboard block (#user-dashboard-ls)) renders the same tabs either way:

Tab What you do here
Listings Edit any owned listing, see status (Live / Pending / Expired / Awaiting Credits / Deactivated), renew/feature/deactivate per-row
Reviews See reviews received, reply publicly, mark helpful
Favorites Listings you've heart-saved across the site (for research or your own customers)
Claims Track the status of business-claim requests you've filed
Saved Searches (Pro) Recurring search alerts ("Notify me when a new restaurant appears in Brooklyn") — shared with visitors; available to any logged-in user who saves a search
My Needs (Pro) The buyer-posted needs you've submitted (if you also browse the marketplace as a buyer)
My Responses (Pro) Quotes you've sent in response to buyer needs

My Listings dashboard — overview + per-row actions

Stage 5 — Get found + engage (ongoing)

What you expect: traffic, reviews, leads. Not just a static directory entry.

What you do:

  • Reply to reviews — public replies build trust and bump SEO.
  • Add Services (Pro) — sub-products under your listing get their own search facets and comparison.
  • Featured listing (Pro) — spend credits to rotate into the homepage carousel for N days.
  • Lead Form / Contact Owner — every new lead arrives at your account email with Reply-To set so a one-click reply goes straight to the visitor.
  • Verification badge (Pro) — when the admin verifies you, the badge appears on your card + detail + search results, boosting click-through.
  • Saved searches (Pro) — set alerts for new posted needs in your category so you can respond fast.

Stage 6 — Respond to buyer needs (Pro, ongoing)

What you expect: if this is a reverse marketplace, I want to see what buyers are looking for and respond fast.

What you experience:

  1. Visit /needs/ or your dashboard → My Needs tab (for needs you've posted) — to RESPOND, visit /needs/ and filter to find ones in your category.
  2. Filter by type / urgency / location — see open requests.
  3. Click a need that fits your business — read the full request.
  4. Respond with a message + quote (price + lead time).
  5. Buyer reviews your quote. If they accept, they reach out directly via the message thread.
  6. Your responses live in the My Responses tab — track status.

Stage 7 — Renewal cycle (every N months)

What you expect: plenty of warning before my listing expires, easy one-click renewal.

What you experience:

  1. 7 days before expiration → email reminder ("Your listing renews in 7 days") via wb_listora_listing_expiring event.
  2. At expiration → listing transitions to Expired status (hidden from public). Renewal is always manual — no auto-renew today.
  3. From dashboard → click Renew on the expired row, confirm the credit cost via GET /listings/{id}/renewal-quote, then POST /listings/{id}/renew transitions the listing back to Live with a fresh expiration date.

What you do NOT have to do (because Listora handles it)

  • No Worry about HTML / CSS / shortcodes — wizard is form-based.
  • No Track expiration manually — the 7-day reminder cron fires before expiry.
  • No Email new leads to a spreadsheet — Lead Form delivers each lead to your inbox with Reply-To set.
  • No Reload your dashboard for status — REST + IAPI keep state in sync.
  • No Re-upload photos if you change your plan — gallery persists across plan changes.

Common pitfalls

Pitfall Avoid by
Listing rejected for missing details Read the rejection email — admin includes specific feedback
Email verification link expired Click "Resend" in the same screen — 5-min rate-limit only
Lead form fills not arriving Check your spam folder + verify the email in your WP profile is current
Renewal failed Buy more credits from /buy-credits/ then click Renew again
Photos look small in the gallery Upload at 1200px or larger — Listora handles thumbnail generation

Related

Visitor Journey

You're a real person who needs to find a real business — a restaurant for tonight, a plumber for tomorrow, a venue for next month. You don't care about the plugin. You just want answers, fast. This is what Listora gives you out of the box.

Directory landing — search + filters + map + grid all on one page

Who this is for

  • Tonight diner looking for "Italian near me, open now, takes reservations"
  • Urgent buyer needing a plumber / electrician / mobile vet today
  • Researcher comparing 3 venues for an event
  • Tourist browsing for things to do in a new city
  • Subscriber wanting to be notified when a new listing matches their criteria (Pro)

Stage 1 — Land on the directory (~10 seconds)

What you expect: see relevant listings immediately, no signup wall, no popup, no confusion.

What you experience:

  1. Land on the homepage or /listings/.
  2. Above the fold: search bar with autocomplete + popular categories + featured listings.
  3. Below: a grid of recent or top-rated listings.
  4. No login required. Browse anonymously as long as you want.

Stage 2 — Search & filter (~30 seconds)

What you expect: type, narrow down, get answers.

What you experience:

You want… You do…
"Italian restaurants" Type "italian" in search — autocomplete suggests as you type
"…near me" Click the Near Me button — browser asks for location, results re-sort by distance
"…with outdoor seating" Tick the Outdoor Seating facet in the sidebar
"…under $$" Use the Price filter (custom field facet)
"…with 4+ stars" Set the Minimum Rating dropdown
"…in Brooklyn" Click the location chip in the sidebar
"…open right now" Toggle Open Now (if business-hours filter is on)

Results update reactively — no page reload, the URL updates so you can share/bookmark the exact filter set.

Search & filters — facet sidebar + reactive results grid

Stage 3 — Compare candidates (~1-3 minutes)

What you expect: side-by-side comparison without opening 5 tabs.

What you experience (Pro):

  1. Heart any listing card to save to favorites.
  2. Use the Compare checkbox on cards to add 2-4 to comparison.
  3. Hit Compare now in the floating bar → side-by-side table of every detail (price, rating, hours, services, amenities).
  4. Pick a winner.

Compare Listings — 2-4 listings side by side

Stage 4 — Open the detail page (~30 seconds)

What you expect: everything I need to make a decision, all on one page.

What you experience:

  • Hero gallery with photos + video URL
  • Tabs: Overview, Location, Reviews, Services, Map, Place Details (varies per type)
  • Sidebar: Contact owner CTA + claim link + share buttons + listing meta
  • Schema.org JSON-LD embedded — Google rich-result eligible automatically

Listing detail — Reviews tab with multi-criteria scoring

Stage 5 — Decide → contact / book / visit (~1 minute)

What you expect: one click to reach the business — phone, email, website, directions.

What you do:

  • Click phone → mobile tel: link launches dialer; analytics records the click (Pro).
  • Click website → opens vendor site in new tab; analytics tracked.
  • Get directions → opens Google Maps / Apple Maps with the listing's address.
  • Contact owner → fill the contact form (Free) or Lead Form (Pro) — owner gets your message; you can reply directly to their email.
  • Submit a quote request via Needs marketplace (Pro) — buyer flow that auto-distributes to matching businesses.

Stage 6 — Write a review (~2 minutes, post-experience)

What you expect: share my honest opinion in a way that helps the next visitor — not a 12-field interrogation.

What you experience:

  1. Visit the listing detail.
  2. Click Write a review.
  3. (If not logged in) Quick signup or social login.
  4. Rate overall (1-5 stars) + write a few sentences.
  5. (Pro: multi-criteria) Rate per aspect — Food / Service / Value / Ambiance.
  6. (Pro: photo reviews) Attach up to 3 photos.
  7. Submit — review goes live (or to moderation queue depending on operator setting).
  8. Get email when the owner replies (review_reply event).
  9. Get email when your review hits a helpful-vote milestone (1, 5, 10, 25, 50, 100).

Stage 7 — Stay engaged (ongoing, Pro)

What you expect: don't make me re-search every time. Notify me when something new matches.

What you do (Pro):

  1. Sign up for a free account (if not already) — Saved Searches require a logged-in user. The dashboard appears at your site's My Listings page (the operator names it; canonical slugs are /my-listings/ or /my-dashboard/).
  2. From dashboard → Saved Searches tab. (This tab is shared with vendors — any logged-in user who saves a search gets it.)
  3. Save your current filter set with a name ("Italian in Brooklyn, 4+ stars, outdoor").
  4. Toggle alerts.
  5. Get an email every time a new listing matches.

Saved Searches — recurring alerts for criteria you care about

Stage 8 — Optional: Post a need (Pro reverse marketplace)

What you expect: flip the script — instead of searching, post what I'm looking for and let businesses come to me.

What you do:

  1. Visit /needs/ (the marketplace feed — auto-created by Pro as the CPT archive). To post a need, your site owner has added the Post a Need block to a page they choose (often titled "Post a Need" or "Request a Quote") — find that page from the directory menu.
  2. Describe what you need (catering for 100 guests, plumber for water heater, real estate agent in Queens).
  3. Pick type + urgency + budget.
  4. Submit.
  5. Matching businesses see your need and respond with quotes.
  6. Review quotes in your dashboard → Needs tab → pick a winner.

Needs Marketplace — buyers post requests, businesses respond

What you do NOT have to do (because Listora handles it)

  • No Sign up to browse — guest browsing is unlimited.
  • No Re-enter your filters after a page reload — URL state preserves them.
  • No Pinch-zoom on mobile — block themes adapt to your screen.
  • No Worry about fake reviews — moderation + Akismet + helpful-vote weighting filter spam.
  • No Track which businesses you've contacted — your activity (favorites, contact form fills, saved searches) lives in your dashboard.

Common pitfalls (operator-side problems you'd see)

You see Operator should fix
"No results" for common queries Operator should reindex search OR check facet visibility
Map shows no markers Operator should set the Google Maps API key (Pro) or Leaflet OSM endpoint (Free)
Contact form says "rate-limited" You hit the per-IP / per-listing cap — wait 1 hour or contact via phone
Verification badge missing Operator hasn't approved the business yet (Pro Verification feature)
Phone number not clickable on mobile Browser bug — manually long-press to call

Related

Moderator Journey

You're not the site owner. You don't need access to settings, payment gateways, or plugin code. You DO need to approve / reject / triage everything the operator delegates to you: pending listings, flagged reviews, pending claims, user reports. The Pro Moderators feature gives you exactly those tools and nothing more.

Moderation Queue — pending listings + reviews + claims + reports in one inbox

Who this is for

  • Community manager for a large directory
  • Junior team member doing first-line review approval
  • Vetted vendor trusted to approve their own category's listings
  • Outsourced agency handling moderation for multiple client directories

Stage 1 — You get invited (~5 minutes, one-time)

What happens:

  1. Site Owner goes to Listora → Moderators in the admin (admin-only — that page requires manage_listora_moderators which only admins hold).
  2. Adds your WordPress user account to the moderators list with selected scopes (Listings / Reviews / Claims / Reports).
  3. You receive an email notification when assigned.
  4. Log in — your sidebar surfaces only the moderation-relevant Listora screens (All Listings, Reviews, Claims, Reports). You do NOT see Settings, Pricing Plans, Coupons, Webhooks, Audit Log, Email Log, or the Moderators page itself.

Moderators admin — Site Owner manages who has moderator caps

Stage 2 — Daily triage (~15-30 minutes/day)

What you expect: clear separate queues for each pending item type, with enough info to decide approve/reject in seconds.

What you do — each pending type lives on its own admin page (there's no single unified inbox; the separation is intentional so capability gating stays clean):

  1. Pending listingsListora → All Listings → filter by Pending. Row actions: Approve / Reject / Edit / Trash. Bulk-moderate (up to 100 IDs) via POST /listora/v1/listings/bulk-moderate.
  2. Pending reviewsListora → Reviews. Filter by pending status; per-row approve / reject / edit / hide.
  3. Pending claimsListora → Claims. Each row shows claimant + proof file + approve / reject.
  4. ReportsListora → Reports. Filed by visitors via the Report link on listings.
  5. Status notifications fire automatically — submitters get the appropriate email per Settings → Notifications event toggles.

Stage 3 — Per-listing review (~30 seconds per item)

What you expect: see the listing exactly as a visitor would, plus admin context (IP, submitter history, anti-spam flags).

What you experience:

  1. Click into a pending listing.
  2. Top of the page: admin-only bar showing submitter, IP, anti-spam flags, prior approval count.
  3. Below: the listing rendered as visitors will see it.
  4. Approve → transitions to publish, owner gets listing_approved email.
  5. Reject → transitions to listora_rejected, owner gets listing_rejected email with the note you wrote.

Stage 4 — Claim approval (~1 minute per item)

What you expect: verify the proof, transfer ownership, move on.

What you do:

  1. Open the pending claim.
  2. Download / preview the proof document the claimant uploaded.
  3. If legitimate → Approvepost_author transfers to the claimant + they get claim_approved email.
  4. If suspicious → Reject + add a note (e.g. "Proof document was for a different business — please re-upload").

Stage 5 — Review moderation (~10 seconds per item)

What you expect: scan the review, decide if it's spam / personal attack / valid criticism.

What you do:

  1. Look at the review row in the Reviews queue.
  2. Quick decision based on rating + content + reviewer history:
  • Approve → goes live; reviewer + listing owner get notification emails.
  • Reject → goes to rejected status; reviewer is silently notified (no public airing of the issue).
  • Edit → fix typos or trim profanity without rejecting (rare).
  • Mark as spam → routed to Akismet learning.

Stage 6 — Handle reports (~1 minute per item)

What you expect: see WHY something was reported, decide.

What you do:

  1. Reports queue shows: reporter, reported item, reason (spam / inappropriate / wrong category / duplicate / other), optional note.
  2. For each report:
  • Resolve as no-action → mark addressed, no change to the reported item.
  • Hide the item → remove from public view pending Site Owner review.
  • Delete → permanently remove (requires extended caps).

What you can and cannot do

You CAN You CANNOT
Approve / reject pending listings Edit Settings
Approve / reject pending reviews Manage Pricing Plans
Approve / reject business claims Manage Coupons
Resolve reports View Webhooks
Hide flagged content View Audit Log
Add admin notes Manage Moderators (only Site Owner can)
See pending-item counts in dashboard See revenue / Transactions
Use bulk-moderate operations Modify the moderator list

This separation is enforced by capability gating — the moderator caps grant exactly these surfaces and nothing else.

What you do NOT have to do

  • No Worry about email delivery — auto-notifications fire on every transition.
  • No Manually track who reported what — Reports queue is the audit trail.
  • No Edit settings to enable a feature — Site Owner controls toggles.
  • No Manage the moderator list yourself — only Site Owner can add/remove moderators.

Common pitfalls

Pitfall Avoid by
Approving a low-quality listing because you didn't read the description Always click into the listing detail before approving
Rejecting a valid claim because proof format is unfamiliar Ask the Site Owner; err on side of "more info" via admin note
Bulk-approving without spot-checking Sample 1-in-10 manually before bulk-action
Reviewing the same item twice Approved/rejected items disappear from queue — use filter chips to re-find

Related

WB Listora Customer Journey Book

A customer journey is the documented path a real person takes from "I have a problem" through "I have a result" - the screens they see, the decisions they make, the emails they get, the moments where they choose to keep going or walk away. We write these so anyone on the team (product, marketing, support, engineering) can talk about Listora using the same map. When you ship a feature, you change a journey. When you fix a bug, you fix a journey. When you write a help article, you anchor it to a journey stage.

Personas (5)

The full cast of people who interact with a WB Listora directory. Each has their own end-to-end journey doc.

Persona One-line description Journey
Site Owner The directory operator - chooses the niche, runs the install, sets the rules, takes the money site-owner.md
Agency / Reseller Developer-fluent builder shipping a directory product to a client, often white-labeled covered inside site-owner.md (agency persona shares the operator journey + white-label / REST notes)
Listing Owner Local business owner who wants to be found, manages their own listing from a frontend dashboard listing-owner.md
Visitor The end customer - lands from Google, needs an answer fast, leaves in 10 seconds if nothing fits visitor.md
Moderator Trusted team member with capped permissions - approves / rejects / hides content, nothing else moderator.md

Full persona profiles with goals, pain points, and content tone live in persona-profiles.md.

Cross-cutting journeys

Where the persona journeys answer "what does Sarah do?", these answer "what happens across the whole product?" Use them when you need the macro view or a specific task-shaped slice.

Journey Use when
lifecycle.md You need the full Awareness → Advocacy arc - the marketing-and-success view that ties all 5 personas together
task-based-journeys.md A real person is asking "how do I do X?" - 10 specific tasks across vendor / visitor / operator with step-by-step paths
journey-book.md The bound atlas you hand to a new product manager or marketing director on day 1 - personas + lifecycle + tasks + the cross-persona orchestration map

How to read these journeys

Every persona journey uses the same skeleton so you can scan one and predict the shape of the next.

Section What it answers
Who this is for The 3-5 real-world variants this persona covers (operator, agency, lead-gen owner …)
Stage N - title (duration) One numbered stage per major leap in the customer's relationship with the product. Title says what changed. Duration anchors expectations
What you expect The customer's mental model - what they think this stage should feel like
What you do / experience The actual click-by-click or step-by-step. Specific surfaces (block names, REST routes, email events)
What you do NOT have to do The friction Listora removes. Defines the product's value proposition by negation
Common pitfalls The thing that breaks for real customers + the exact fix
Related Cross-links to other journeys + feature docs so the reader doesn't dead-end

Sub-heading legend used throughout:

  • What you do - active steps the customer takes
  • What you experience - the system's response, the email that arrives, the badge that appears
  • What you expect - the contract the customer brings to this stage. If we miss it, they leave

Cross-reference matrix: which features each persona touches

A single feature usually shows up in 2-3 persona journeys. This grid is the map.

Feature Site Owner Agency Listing Owner Visitor Moderator
Setup wizard (6 steps) full full - - -
Listing types + custom fields full full configures own listing - -
Frontend submission wizard configures configures full - -
Frontend dashboard (/my-dashboard/, /my-listings/) configures configures full - -
Business claims configures configures claim own listing - approves claims
Search + facets configures configures + REST reviews via "Saved Searches" full -
Reviews + helpful votes configures + moderates configures replies to own reads + writes approves
Listing detail page designs designs / templates views own listing full spot-checks
Listing renewal (manual via REST) configures expiry window configures renews own - -
Verification badges (Pro) grants grants earns trusts -
Lead Forms (Pro) configures configures + integrates receives leads submits -
Pricing plans + credits (Pro) configures + earns configures pays for plan - -
Needs marketplace (Pro) enables enables responds to needs posts needs -
Compare listings (Pro) enables enables - full -
Saved searches (Pro) enables enables - full -
Moderators feature (Pro) grants caps grants caps - - full
Audit Log (Pro) reads reads - - -
Email Log + notifications configures configures receives receives review-reply email receives assignment email
Anti-spam (6-layer) configures CAPTCHA + Akismet configures benefits benefits benefits
Migration (CSV / JSON / GeoJSON / 4 competitors) runs runs - - -
Analytics (Pro) reads reads reads own - -
White-label (Pro) - full - - -
REST API (55 Free + 65 Pro) - full (headless / mobile) - - -
Template overrides designs full - - -
226 hooks - full - - -

Legend: full = primary user of the feature - configures = sets it up but doesn't use it daily - - = doesn't touch this feature.

When to update these docs

Anchor every customer-visible change to a journey:

  • New feature ships → add a stage or sub-section to the persona(s) it serves + a task entry to task-based-journeys.md if it has a discrete "I want to X" shape
  • Bug fix that changes a flow → update the affected stage so the doc matches reality
  • Pricing or packaging change → revise lifecycle.md (Purchase + Activation stages) and journey-book.md cross-persona map
  • New persona surfaces (e.g. "API consumer", "translator") → add a profile to persona-profiles.md and either fold into an existing journey or create a new one here

The journey docs are the product's narrative source of truth. Keep them green.

Customer Lifecycle Journey

The macro view of how a real person becomes a Site Owner, a Vendor, or a Visitor in the WB Listora world - and what we do at every stage to keep them moving forward. This is the journey marketing, sales, and customer success share. It is the canvas the 4 persona journeys are painted on.

The model

Awareness → Consideration → Purchase → Onboarding → Activation → Retention → Advocacy.

The same arc applies to a Site Owner buying Pro, a Vendor signing up to a directory, and a Visitor returning to the same directory month after month. Different surfaces, same shape.

Where each persona journey lives in the lifecycle

Stage | Site Owner / Agency | Listing Owner | Visitor | Moderator
-----------|------------------------------------|------------------------|-------------------------|--------------------
Awareness | Google / YouTube / WP Tavern | Search the directory | Google a category | Invitation only
Consider | Compare with Directorist + GeoDir | Read existing reviews | Skim grid + filters | (n/a)
Purchase | Buy Pro at wblistora.com | Submit / Claim / Plan | (free to browse) | (n/a)
Onboarding | Setup wizard + demo packs | Submission wizard | First search | Caps assigned
Activation | First vendor + first review | First lead / first 5* | First contact-form fill | First 10 approvals
Retention | Audit log + analytics weekly | 7-day renewal cron | Saved searches alerts | Daily triage rhythm
Advocacy | Case study / white-label resell | Recommends to peers | Shares listings | Tier-up to senior mod

Stage 1 - Awareness

What the customer is doing / thinking / feeling

  • Site Owner: "I want to monetize a niche I know - vegan restaurants, medical spas, indie bookshops - by building a directory people in that niche actually use."
  • Listing Owner: "My business needs more local visibility. I am searching for 'add my restaurant to [city] guide' or I clicked a 'List your business' CTA in the directory's nav."
  • Visitor: "I need an Italian restaurant near me tonight." Types it into Google. Lands on a directory page that already ranks.

Listora touchpoint

  • Public marketing site at wblistora.com (Site Owner)
  • The directory's homepage, top-rated grid, featured carousel (Visitor + Listing Owner)
  • Schema.org JSON-LD on every listing detail page (LocalBusiness, Restaurant, Hotel - 10 schema types). Google rich-results eligibility is on by default
  • 9 demo packs (restaurant, hotel, real-estate, job-board, general, classified, education, healthcare, place) so a brand new install shows traffic-worthy content from minute one

Channels marketing should activate

  • WordPress-focused channels: WP Tavern, Post Status, WP Builds, agency Slacks, the WP Entrepreneurs Facebook group
  • YouTube tutorial videos on building niche directories
  • Long-form blog posts that target "directory plugin" comparison search intent
  • For Visitor awareness: the directory's own SEO is the work - we don't market the plugin to visitors

KPI

  • Site Owner: monthly organic sessions on wblistora.com, demo-pack installs (wp listora demo seed --pack=*)
  • Visitor: organic traffic per listing, Google CTR on schema-enhanced results

Common failure modes + fixes

Failure Fix
Site Owner reaches the marketing page but cannot tell what makes Listora different from Directorist / GeoDirectory / WPBDP / ListingPro The comparison page (docs/website/comparison.md) leads with one differentiator per competitor. Update every release
Visitor lands on an empty directory and bounces Operator did not load a demo pack. Onboarding checklist nudges them to run wp listora demo seed before launch
Schema markup invisible to Google Pages need to be in the sitemap. Setup wizard does this; if disabled the operator must add manually

Stage 2 - Consideration

What the customer is doing / thinking / feeling

  • Site Owner: comparison-shopping. Reading feature matrices. Watching demo videos. Wondering whether Free is enough or they need Pro from day one
  • Agency: reading the REST docs and the hook reference. Cloning the Free zip and grepping for do_action. Asking "can I white-label this?"
  • Listing Owner: looking at the existing listings - do they look polished? Will my business fit here? Is there traffic?
  • Visitor: scanning the grid, applying filters, deciding which 2-3 listings deserve a closer look

Listora touchpoint

  • Feature Matrix - the Free vs Pro grid at a glance
  • Why WB Listora? - the architectural reasoning
  • The directory's own quality - photo coverage, review density, listing freshness
  • Compare Listings block (Pro) for Visitor side-by-side decision
  • Featured carousel for Listing Owner social-proof

Channels

  • Email nurture sequence from the Site Owner-facing newsletter
  • Developer-targeted content for Agency (architecture write-ups, hooks reference)
  • The directory itself for Visitor + Listing Owner - the UI is the pitch

KPI

  • Site Owner: Free → Pro conversion rate (Pro license activations vs Free installs)
  • Visitor: bounce rate on the directory homepage, filter engagement rate
  • Listing Owner: click-through on "Add Listing" CTA from listing detail pages

Common failure modes + fixes

Failure Fix
Site Owner cannot find the answer "does this scale to 50K listings?" Performance budgets page + the case for the denormalized search_index table. 100K-readiness sprint already shipped (Phase 1-3, 2026-05-07)
Agency cannot evaluate without source access Free is openly distributable (private to Wbcom but installable on any site). REST + hooks are documented. White-label flag exists in Pro
Visitor compare flow needs Pro The free Compare-via-favorites fallback still works. Pro upgrade is a Site Owner decision, not Visitor's

Stage 3 - Purchase

What the customer is doing / thinking / feeling

  • Site Owner: "I have decided. I am buying the Pro license. Where do I pay and how fast can I activate?"
  • Listing Owner: "The plan costs N credits. Do I have a balance? If not, where do I top up?" If Free directory: no purchase decision, only the submit decision
  • Visitor: free to browse forever. No purchase

Listora touchpoint

  • Pro license purchase at wblistora.com (NOT wordpress.org - WB Listora is privately distributed)
  • The license-and-updates server at wblistora.com powers auto-updates inside the customer's WP admin
  • For Listing Owner: the credit-purchase flow runs through one of 7 payment integrations - Stripe (direct), PayPal (direct), WooCommerce, WooSubscriptions, MemberPress, Paid Memberships Pro, WooMemberships
  • Pricing Plans page renders the operator's plans with credit cost + duration + entitlements

Channels

  • Site Owner: wblistora.com pricing page, email receipt with license key and download link
  • Listing Owner: the operator's own checkout - the gateway is the operator's chosen one

KPI

  • Site Owner: average revenue per Pro install, churn at 12 / 24 / 36 months
  • Listing Owner: average plan revenue per active vendor, credit-pack repurchase rate

Common failure modes + fixes

Failure Fix
Site Owner cannot find the Pro download after purchase License email links to the download URL + the activation guide. Auto-update kicks in once the license key is entered
Listing Owner abandons checkout because the credit math is unclear Plan picker on the submission wizard shows "X credits = $Y from your current balance" in real time
Wrong gateway assumption (Razorpay / EDD bridge) Listora does not ship Razorpay or an EDD bridge. The 7 integrations above are the supported set

Stage 4 - Onboarding

What the customer is doing / thinking / feeling

  • Site Owner: "I want to see something working in 30 minutes. I do not want to read a 40-page manual."
  • Listing Owner: "I just want to submit my business and get on with my day."
  • Visitor: "First search. Did it work? Are the results good?"
  • Moderator: "I just got invited. What does my queue look like?"

Listora touchpoint

  • Setup Wizard - 6 steps: type → location → maps → pages → demo → done. Auto-creates Add Listing, My Listings, Directory pages
  • Frontend submission wizard - 4-6 steps with auto-save drafts so the vendor can leave mid-form and come back
  • Visitor search-and-facet experience powered by the denormalized search_index table + 6 taxonomies
  • Moderator: capability-gated sidebar shows only All Listings, Reviews, Claims, Reports - everything else is hidden

Channels

  • In-product onboarding checklist on first admin visit
  • Welcome email after activation
  • Tooltips in the setup wizard
  • Demo packs that ship with the plugin (wp listora demo seed --pack=restaurant --with-users --reindex)

KPI

  • Site Owner: time-to-first-listing (target: under 30 minutes from install)
  • Listing Owner: submission completion rate (target: > 70%)
  • Visitor: zero-result rate (target: < 5%)
  • Moderator: first-approval time (target: same day as invite)

Common failure modes + fixes

Failure Fix
Setup wizard fails because pages already exist Wizard detects existing pages and links them instead of recreating
Vendor submission fails on a required field that was hidden by conditional logic Submission step skip-list was wrong - regression covered by journey submission-wizard-end-to-end.md
Visitor sees no markers on the map Operator did not enable map provider. Free uses Leaflet + OSM (no key); Pro adds Google Maps (key required)
Moderator sees admin screens they should not Capability gating bug. Covered by role-cap-matrix journey

Stage 5 - Activation

What the customer is doing / thinking / feeling

  • Site Owner: "I have my first paying vendor. My first 5-star review. I have proof of life."
  • Listing Owner: "I got my first lead through the directory. The receipts are arriving in my inbox."
  • Visitor: "I contacted a business through the directory and got a useful reply. This site is real to me now."
  • Moderator: "I cleared a 30-item queue in 20 minutes. I know the rhythm."

Listora touchpoint

  • For Site Owner: Audit Log (Pro) recording the first vendor approval + first revenue event. Email Log confirming notifications fire
  • For Listing Owner: Lead Form (Pro) or the free Contact Form delivering the first inquiry email with Reply-To set to the visitor
  • For Visitor: a clean detail page with the click-phone / get-directions / contact-owner flow + the post-experience review prompt
  • For Moderator: bulk-moderate REST endpoint (POST /listora/v1/listings/bulk-moderate, up to 100 IDs) + per-row Approve / Reject actions on the Listings list

Channels

  • Transactional emails from Listora (14 notification templates)
  • The dashboard at /my-dashboard/ (canonical Pro slug) or /my-listings/ (legacy Free slug)
  • In-product activity counters (pending counts in the moderator dashboard)

KPI

  • Site Owner: weeks-to-first-revenue (Pro), first-month MRR
  • Listing Owner: leads per listing per month
  • Visitor: contact-form fill rate, review submission rate
  • Moderator: items per hour throughput

Common failure modes + fixes

Failure Fix
Listing Owner submits but listing flips to "Awaiting Credits" with no explanation Submission response carries paused: true + the exact credits-short + Buy Credits CTA inline (post 2026-05-13 refactor)
Visitor's contact form is rate-limited Per-IP-per-listing 3/hr + per-listing 20/day caps. Adjustable via wb_listora_contact_form_per_listing_daily_cap filter
Moderator approves but submitter never gets the email Notifications listener listens on the canonical wb_listora_listing_status_changed action (fixed in 0aa62ca, 2026-04-30)

Stage 6 - Retention

What the customer is doing / thinking / feeling

  • Site Owner: "It is week 12. The directory is producing revenue. I need to keep vendors renewing and keep search quality high."
  • Listing Owner: "My listing renews next week. The 7-day reminder just arrived. I have 1 click to renew."
  • Visitor: "I have come back twice. I want a Saved Search so the directory tells me when something new matches."
  • Moderator: "I have a daily 15-minute rhythm. It works."

Listora touchpoint

  • 7-day renewal reminder cron fires via the wb_listora_listing_expiring event (Action Scheduler-driven since the Phase 1 migration). Renewal itself is manual via POST /listings/{id}/renew - there is no auto-renew today
  • Audit Log (Pro) for Site Owner anomaly review
  • Notification Digest (Pro) for daily / weekly bundle emails
  • Saved Searches (Pro) for Visitor recurring alerts
  • Moderation queue rhythm: each pending item type lives on its own admin page (Listings / Reviews / Claims / Reports) - there is no single unified "Moderation Queue" admin page

Channels

  • The 14 transactional email templates
  • The dashboard
  • Pro Digest (opt-in)

KPI

  • Site Owner: monthly vendor renewal rate, MRR retention
  • Listing Owner: own renewal cadence (does the reminder convert?)
  • Visitor: return-visit rate, Saved Search subscribers
  • Moderator: queue clearance rate over time

Common failure modes + fixes

Failure Fix
Listing Owner missed the 7-day reminder and lost leads The reminder is the only proactive nudge. No 1-day reminder. Set a calendar entry on renewal day
Site Owner sees stale Featured carousel Featured rotation runs via Action Scheduler - the wb_listora_featured_rotation cron is bullet-proof since the Phase 1 migration
Visitor's Saved Search produces too many alerts Saved Search dashboard tab has per-search toggle for alert frequency

Stage 7 - Advocacy

What the customer is doing / thinking / feeling

  • Site Owner: "I love this product. I want to recommend it. I am writing a case study, building a course, or selling a directory-template to other operators."
  • Agency: "I am white-labelling Listora for client B because client A loves the result. I am pitching this as a productized package."
  • Listing Owner: "I recommend the directory to other businesses in my city."
  • Visitor: "I shared this listing on social. I write reviews here."

Listora touchpoint

  • White-label (Pro) so the agency / reseller can ship under their brand
  • Outgoing webhooks (Pro) so customers can build their own integrations
  • Public REST API (55 Free + 65 Pro) so headless / mobile clients can be built on top
  • Share buttons on listing detail pages so Visitors push listings into their own networks

Channels

  • Case-study collaboration (Site Owner + marketing team co-author)
  • Customer-success retention emails that include "refer a friend" CTAs
  • Public Slack / Discord / community spaces (when active)

KPI

  • Site Owner: referral attribution, NPS, public testimonials
  • Listing Owner: cross-vendor referrals
  • Visitor: review submissions per visitor, social shares per listing

Common failure modes + fixes

Failure Fix
Site Owner pitches white-label but cannot strip the "WB Listora" branding from admin White Label (Pro) feature toggles brand color + logo. Setup wizard skip-flag is on the roadmap
Agency wants a custom field that does not exist 226 hooks (120 actions + 106 filters) give the extension point. WooCommerce-style template overrides keep customizations safe across updates
Visitor wants to delete their account Self-service deletion is a manual support request today (hello@wblistora.com). Roadmap item

How to use this doc

  • Marketing: pick the stage your campaign targets. Activate the channels listed. Measure against the KPI
  • Product: when a feature is proposed, ask "which lifecycle stage does it improve?" If the answer is "I don't know" - the brief is incomplete
  • Customer Success: when a customer churns, walk back through the stages. Where did they stall? That is the next product investment
  • Engineering: when a bug is filed, anchor it to a stage. Bug at Onboarding (setup wizard) is higher priority than bug at Advocacy (white-label edge case)

Related

Task-Based Journeys

Ten specific "I want to X" flows, each scoped to a real persona doing a real task. Use these when you are writing a help article, drafting a support reply, or planning an onboarding email - they are the shortest path between "the customer's words" and "the screens we ship."

Index

# Task Persona Tier
1 Add my business to the directory Listing Owner Free
2 Claim an existing listing I see is mine Listing Owner Free
3 Upgrade my listing to Featured Listing Owner Pro
4 Promote my plumbing services to people who need them Listing Owner Pro (Needs Marketplace)
5 Find a restaurant near me right now Visitor Free
6 Compare 3 dentists side by side Visitor Pro
7 Be notified when a new venue opens in my city Visitor Pro (Saved Searches)
8 Add a teammate who can only moderate reviews Site Owner Pro (Moderators)
9 Start charging vendors for premium placement Site Owner Pro (Pricing Plans)
10 Migrate 5,000 listings from Directorist without downtime Site Owner Free (Migration)

1. "I want to add my business to the directory" (Listing Owner)

Setup needed: None. If the operator allows guest submissions you do not even need an account up front - you will verify your email at the end.

Steps:

  1. Land on the directory home. Click the Add Listing CTA in the header or hero.
  2. The submission wizard opens. Pick your listing type (Restaurant, Hotel, Service, …) - the form re-shapes per type.
  3. Fill 4-6 steps: Basics → Details → Media → Contact → Hours (and Services / Plan if the operator enabled them). Drafts auto-save so you can step away and resume.
  4. Drag the map pin to the exact storefront. Upload your gallery (1200px or larger - thumbnails are generated for you).
  5. Click Submit. If the operator auto-publishes, your listing is live. If they moderate, you get a confirmation email + a second email when it is approved or rejected. If a plan requires credits and your balance is short, the listing saves with status "Awaiting Credits" + a Buy Credits CTA.

Expected result: Listing live on the directory with a public URL, or in the pending queue with a clear next step.

What could go wrong + recovery:

Problem Recovery
Submit fails on a required field hidden by conditional logic Scroll up - the wizard highlights the missing field on the relevant step
Email verification link expired Click Resend in the same screen - 5-minute rate-limit only
Submission stuck on "Awaiting Credits" Visit /buy-credits/ (or the operator's named credit-purchase page) and top up. The listing auto-activates the moment your balance covers the plan cost (Hold-and-Commit pattern)

2. "I want to claim an existing listing I see is mine" (Listing Owner)

Setup needed: A WordPress account on the directory (free signup). The listing must already exist - someone added it before you found this directory.

Steps:

  1. Find your business listing through search.
  2. Click "Claim this business" at the top of the listing detail.
  3. Upload proof of ownership - utility bill, business license, or anything that ties you to the address.
  4. Submit. You get a confirmation email. The operator (or a moderator with claims scope) reviews your proof.
  5. On approval, the listing's post_author transfers to you. You receive a claim_approved email + the listing now appears in your dashboard at /my-dashboard/ (or /my-listings/ if the operator stuck with the legacy slug). You can now edit, reply to reviews, manage services.

Expected result: Ownership of the listing transferred to your account, with full edit access from the frontend dashboard.

What could go wrong + recovery:

Problem Recovery
Claim rejected because the proof was unclear Operator emails you with the specific reason. Upload better proof and re-submit
Multiple people claim the same listing First valid claim wins. Subsequent claims are auto-rejected
You cannot find a "Claim this business" button Operator disabled claims in Settings → Submissions. Contact them directly

3. "I want to upgrade my listing to Featured" (Listing Owner, Pro)

Setup needed: Pro must be active on the site. The operator must have configured pricing for Featured placement.

Steps:

  1. Open your dashboard → Listings tab.
  2. Find the listing row. Click the Feature action.
  3. The plan selector shows the credit cost for N days of Featured rotation. Confirm.
  4. Credits are deducted. Your listing rotates into the homepage Featured carousel for the chosen duration. A scheduled job (wb_listora_featured_rotation) re-evaluates the carousel via Action Scheduler.

Expected result: Your listing appears in the Featured carousel + carries a "Featured" badge on its card across the directory until the entitlement expires.

What could go wrong + recovery:

Problem Recovery
Not enough credits Visit /buy-credits/ and top up
Featured rotation seems stuck on the same 3 listings The carousel rotates with Action Scheduler. Site Owner can re-trigger via the Pro admin or wp listora-pro featured-rotate
You unfeature accidentally Per-listing actions are reversible up until the credits are committed. After that, the cost is non-refundable by default

4. "I want to promote my plumbing services to people who need them" (Listing Owner, Pro Needs Marketplace)

Setup needed: Pro + the Needs Marketplace feature toggle ON. Your listing must be in a category that buyers post needs in.

Steps:

  1. Visit /needs/ - the marketplace CPT archive Pro auto-creates.
  2. Filter by type / urgency / location. Find open buyer needs in your category ("plumber for water heater, Brooklyn, urgent").
  3. Click into a need. Read the full request.
  4. Click Respond. Write your quote (price + lead time + a short message).
  5. Submit. The buyer sees your response in their dashboard → Needs tab. If they accept, they reach out via the message thread.
  6. Track your sent quotes in your dashboard → My Responses tab.

Expected result: Direct, buyer-initiated lead flow without paying per click - the buyer came to you with intent.

What could go wrong + recovery:

Problem Recovery
You cannot find /needs/ Operator did not enable the reverse_listings toggle. Ask them to flip it ON
Your response is invisible to other businesses Responses are private to the buyer + the operator. By design
Need was deleted before you could respond Needs expire via the wb_listora_pro_expire_needs job when the operator's expiry window passes. Faster bird gets the worm

5. "I want to find a restaurant near me right now" (Visitor)

Setup needed: None. Browse anonymously. The browser will ask for location permission when you tap Near Me.

Steps:

  1. Land on the directory home or /listings/.
  2. Type "italian" (or whatever cuisine) in the search bar - autocomplete suggests as you type.
  3. Click the Near Me button. Allow location. Results re-sort by distance via the Haversine query.
  4. Toggle Open Now if the directory has business-hours filtering enabled. Tick Outdoor Seating in the facet sidebar if you want it.
  5. Click a card. Read the detail. Click the phone number (mobile launches dialer) or Get Directions (opens Maps).

Expected result: A short list of relevant, open, nearby restaurants - decision-ready in under 30 seconds.

What could go wrong + recovery:

Problem Recovery
"No results" for a common query Operator should reindex search (Settings → Advanced → Rebuild Search Index) or check that the facet is visible
Map shows no markers Operator did not set the Google Maps API key (Pro) or fell back to Leaflet + OSM (Free, no key)
Location prompt was denied Re-enable in browser site settings, refresh, click Near Me again

6. "I want to compare 3 dentists side by side" (Visitor, Pro)

Setup needed: The operator must have Pro enabled with the Compare feature ON.

Steps:

  1. Search for "dentist" + your area.
  2. On each candidate card, tick the Compare checkbox.
  3. A floating bar appears showing "3 selected." Click Compare now.
  4. The comparison table opens with all three side-by-side: price, rating, hours, services, amenities, distance, reviews summary.
  5. Pick your winner. Open the detail page. Contact directly.

Expected result: One-screen decision instead of 3 open browser tabs.

What could go wrong + recovery:

Problem Recovery
Compare checkbox missing on cards Feature is Pro-only. Operator needs to flip the comparison toggle in Pro Features
Compare table is missing a field you care about Operator can extend the comparison via the wb_listora_compare_table_columns filter or template override
You exceed 4 listings The hard cap is 4 - any more would not fit on a typical screen. Remove one to add another

7. "I want to be notified when a new venue opens in my city" (Visitor, Pro Saved Searches)

Setup needed: Pro + Saved Searches feature ON. You need a free account so the alerts have somewhere to go.

Steps:

  1. Run your normal search ("event venues in Queens, capacity 100+").
  2. From the results page, click Save this search.
  3. Name it ("Queens venues 100+"). Toggle email alerts ON.
  4. From now on, every time a new listing is published that matches all the filters in your saved search, you get an email.
  5. Manage / pause / delete in your dashboard → Saved Searches tab.

Expected result: A passive lead-generation loop - the directory tells you when something new fits, instead of you re-searching every week.

What could go wrong + recovery:

Problem Recovery
Save this search button missing Pro feature not enabled, or you are not logged in
Alerts arriving too often Pause the saved search from the dashboard, or tighten your filters
New listings match but no email arrived Check spam folder + your account email. Email Log (operator side) confirms whether the email was dispatched

8. "I want to add a teammate who can only moderate reviews" (Site Owner, Pro Moderators)

Setup needed: Pro + the Moderators feature toggle ON. The teammate needs an existing WordPress user account on your site.

Steps:

  1. Open Listora → Moderators in the admin (requires manage_listora_moderators - admin only).
  2. Click Add Moderator. Search for the teammate's WP user.
  3. Select the Reviews scope only. Leave Listings / Claims / Reports off.
  4. Save. The teammate receives an email notification telling them they have been assigned.
  5. When they log in, their sidebar surfaces only the moderation-relevant screens (in this case, Reviews). They do not see Settings, Pricing Plans, Coupons, Webhooks, Audit Log, Email Log, or the Moderators page itself.

Expected result: A capped-permission teammate who can approve / reject reviews and nothing else - enforced at the capability layer, not just hidden UI.

What could go wrong + recovery:

Problem Recovery
Teammate cannot find the Reviews screen They need to log out and back in for the new capability map to take effect
You want to remove them later Same Moderators page → remove. The capability is revoked immediately on next page load
Teammate accidentally given Settings access Only admins (manage_listora_settings) can see Settings. Moderator scopes do not include it - this would mean their WP role itself is too high

9. "I want to start charging vendors for premium placement" (Site Owner, Pro Pricing Plans)

Setup needed: Pro active + at least one payment integration configured (Stripe direct, PayPal direct, or one of: WooCommerce, WooSubscriptions, MemberPress, Paid Memberships Pro, WooMemberships).

Steps:

  1. Open Listora → Credit Packs. Define your credit-pack pricing (e.g. "5 credits / $25", "20 credits / $80", "100 credits / $300").
  2. Open Listora → Pricing Plans. Create your tier set (e.g. Basic / Featured / Premium) - each plan has credit cost + duration + entitlements (Featured rotation, photo count, etc.).
  3. Connect your gateway via the SDK consumer config (Pro setup wizard step 3, or Settings → Pro → Payments).
  4. Update your submission wizard's Plan step to show your plans + cost in credits.
  5. Run a test submission yourself with a Stripe test card or PayPal sandbox account. Confirm credits land in your test user's balance.
  6. Switch the gateway from test → live. Vendors now top up + pay per listing via the Hold-and-Commit pattern - credits hold on submission, commit when the listing is approved.

Expected result: Vendors can buy credits, pick a plan, and your directory earns revenue without you building any payment plumbing.

What could go wrong + recovery:

Problem Recovery
Plan picker shows no plans Plans need at least one credit cost + duration. Saving a plan with empty fields fails silently in some older themes - check browser console
Vendor paid via WooCommerce but credits did not land Bridge order completion is required. Check that the WC order moved to completed, not just processing. Webhook receiver logs are in Pro → Webhooks
Submission gets stuck on "Awaiting Credits" even though credits exist The plan cost meta key is canonical at _listora_plan_credits. If a custom integration writes to the old _listora_plan_credit_cost, activation fails. INV-13 guards against this in the architecture check

10. "I want to migrate 5,000 listings from Directorist without downtime" (Site Owner, Free Migration)

Setup needed: WP-CLI access (SSH to your host). The source Directorist plugin must still be installed and active so the data is readable. Take a full DB backup before starting.

Steps:

  1. SSH to the site. Run a dry-run first:
wp listora migrate --from=directorist --dry-run

This reports what would be migrated without writing anything. Review the count + sample output. 2. Run the real migration:

wp listora migrate --from=directorist

The migrator (extending Migration_Base in Free's includes/import-export/) reads Directorist's schema (documented at audit/architecture/competitor-schemas/directorist.md), maps fields, and writes new listora_listing posts. Each migrated listing fires wb_listora_listing_submitted with 'source' => 'migration' context, so the notifications listener does NOT email the admin for every legacy entry. 3. Watch the progress in the terminal. 5,000 listings on average hardware takes 15-30 minutes. 4. After migration, reindex search:

wp listora reindex
  1. Spot-check 10 random migrated listings on the frontend. Verify categories, locations, gallery images, hours.
  2. Optionally deactivate Directorist once you are happy. Original posts are NOT deleted - they remain as directorist_listing posts and can be removed manually after a verification window.

Expected result: 5,000 listings in WB Listora with full taxonomy mapping, intact media, no flood of admin emails, and search indexed. Site remains live throughout - the migrator does not lock tables or take down the frontend.

What could go wrong + recovery:

Problem Recovery
Migration runs out of memory Re-run with --batch=200 to process in smaller chunks
A field did not map Check audit/architecture/competitor-schemas/directorist.md. If the field is genuinely missing, file a Free PR adding it to the migrator's extract_* template method
Duplicate listings The migrator stamps each new listing with _listora_migrated_from. Re-running the migration skips already-migrated source posts via the Migrated_From_Tracker deduplication
Visitor sees stale facet counts Run wp listora reindex again - facet counts come from the denormalized search_index table and refresh on reindex

If you want the visual mapping UI (drag-drop source-to-target field assignment, import preview, saved templates), upgrade to Pro Visual Importer. The same migration pipeline runs underneath - Pro only adds the premium UX wrapper.


How to extend this list

When a new task pattern surfaces in support tickets ("how do I X?"), promote it here. Each entry should be:

  • 1-2 paragraphs total
  • A real, single-sentence task statement in the customer's voice
  • Setup → steps → expected result → what-could-go-wrong table
  • Anchored to a specific persona (no "anyone can do this")

If a task does not have a clean answer yet, that is a feature brief. File it.

WB Listora Journey Book

The bound atlas. One document you can hand to a new product manager, marketing director, or customer-success lead on day one and have them understand what the product actually does, who it serves, and how the pieces connect.

WB Listora is a private WordPress directory plugin distributed at wblistora.com (never on wordpress.org). It ships in two halves - a mandatory Free plugin that delivers a complete, public, searchable directory with reviews, claims, frontend submission, and the full taxonomy / map / spam-protection stack, plus an optional Pro plugin that layers on the business-model parts (credit-based plans, lead capture, advanced analytics, moderators team, comparison, verification, white-label, BuddyPress sync, and the reverse Needs marketplace). Pro extends Free, never stands alone. Together they support WordPress 6.9 or newer on PHP 7.4 or newer, with 226 fired hooks (120 actions + 106 filters), 55 Free REST routes (Pro adds 65 more), 11 Free blocks, 5 Pro blocks, 32 Pro feature modules, 9 demo packs, a 6-layer anti-spam stack, and 7 payment integrations (Stripe direct, PayPal direct, WooCommerce, WooSubscriptions, MemberPress, Paid Memberships Pro, WooMemberships).

The lifecycle model

Every persona we serve moves through the same seven-stage arc. Different surfaces, same shape.

Stage What the customer wants What we deliver
Awareness Discover that a tool exists for the problem they have wblistora.com marketing, the directory's own SEO, demo packs that make a fresh install look traffic-worthy from day one
Consideration Compare options. Decide if Free is enough or Pro from day one Feature matrix, comparison page, the directory's own quality (photo coverage, review density)
Purchase Commit money or commit time wblistora.com checkout (Pro), credit purchase via one of 7 integrations (Vendor), free browsing (Visitor)
Onboarding First success in under 30 minutes 6-step setup wizard, frontend submission wizard, capability-gated moderator sidebar
Activation First real proof of life First paying vendor (Site Owner), first lead (Vendor), first contact (Visitor), first 10 approvals (Moderator)
Retention Stay valuable week over week 7-day renewal reminder cron, audit log, saved searches, daily moderation rhythm
Advocacy Recommend, refer, resell White-label, public REST API, share buttons, case-study collaboration

The full lifecycle doc with channels and KPIs per stage lives at lifecycle.md. The grid below shows which persona owns which slice.

The 5 personas

The cast we write for. If a sentence does not serve at least one of them, cut it.

Site Owner / Operator - Sarah Chen

Independent directory operator (or someone who acts like one). Runs WordPress confidently, does not write code, and is on the hook for hosting + revenue. Wants to launch a directory that earns money from vendor subscriptions or featured placements within 90 days, keep operational overhead under 5 hours a week, and not get locked into a stack that prevents her from switching themes or pivoting later. Burned by plugins that took weekends to configure, bolted-on payment systems that required custom glue, and search performance that fell over past 5,000 listings.

Her journey in one paragraph: Install Free in 30 minutes via the 6-step setup wizard, load a demo pack so the directory looks alive from minute one, build out taxonomy (categories, locations, amenities), configure submissions + anti-spam + notifications, optionally activate Pro to charge vendors via credit packs + pricing plans + one of 7 payment integrations, open the floodgates to real vendors via frontend submission or CSV / GeoJSON / JSON import (or competitor migration from Directorist / GeoDirectory / WPBDP / ListingPro), then settle into a weekly rhythm of approving listings + reviews + claims, watching the audit log for anomalies, monitoring analytics, and confirming notifications deliver via the email log. The work is the directory, not the plugin.

Full journey: site-owner.md.

Agency / Reseller - Marcus Webb

WordPress agency owner or senior developer building client projects. Developer-fluent. Evaluates plugins the way an engineer evaluates a dependency: architecture first, support track record second, price third. Wants to deliver polished, white-labelled directory products to multiple clients without rebuilding the engine each time. Has been burned by plugins that ship breaking changes in minor versions, have no hooks, or require forking templates to add basic customization.

His journey in one paragraph: Reads the REST docs (55 Free + 65 Pro endpoints), greps the source for do_action (finds 120 actions + 106 filters - 226 in total - all documented with args_signature and consumed_by arrays), confirms WooCommerce-style template overrides and capability-gated moderator role exist, verifies the 2-minor-version deprecation policy, then ships the same Listora install to client A. Six months later, ships it to client B with a different brand color and logo via White Label, different demo pack, different Stripe account. Same engine, two productized packages. The agency journey is structurally the same as the Site Owner journey + the white-label and REST notes in site-owner.md Stage 5 and 6.

Full journey: shared with site-owner.md - read it through the agency lens.

Listing Owner / Vendor - Diego Ramirez

Small business owner with a listing on the directory. Not technical. Uses a phone for most tasks. Logs into WordPress only if forced - and only if the dashboard does not look like wp-admin. Did not choose Listora; the operator chose Listora. Wants to be visible, manage his listing in under 5 minutes per week, respond to reviews professionally, and never get blindsided by an expiring listing.

His journey in one paragraph: Discovers the directory through Google or word of mouth, decides in 30 seconds whether it is worth being on, fills the multi-step submission wizard (4-6 steps, drafts auto-save, draggable map pin, 7 social platforms supported) in 10-15 minutes from his phone, gets a confirmation email + a second one when the operator approves him, manages everything from the frontend dashboard at /my-dashboard/ (canonical Pro slug) or /my-listings/ (legacy Free slug - both work), replies to reviews publicly, optionally claims an existing listing if his business was already in the directory, optionally buys a Pro plan that gives him Featured rotation + Lead Form analytics + Verification badge eligibility, and gets a 7-day reminder before his listing expires so renewal is one click via POST /listings/{id}/renew. There is no auto-renew today - every renewal is intentional.

Full journey: listing-owner.md.

Visitor / End Customer - Priya Nair

The end customer. Arrived from Google, a social share, or a recommendation. Knows nothing about the plugin powering the site. Has an immediate need (a restaurant for tonight, a plumber for tomorrow, a venue for next month). Will leave within 10 seconds if the site does not show her relevant results. Will not sign up to browse. Mobile-first (70% of traffic).

Her journey in one paragraph: Lands on the directory home or /listings/, sees search + filters + featured grid above the fold, types a query (autocomplete suggests), clicks Near Me (Haversine query re-sorts by distance), narrows by facet (category, location, feature, custom field, minimum rating, open now), URL state preserves her filter set across reloads + makes it shareable. Picks 2-3 candidates, optionally compares them side-by-side (Pro), opens a detail page that shows the hero gallery + tabs (Overview, Location, Reviews, Services, Map, Place Details) + a sidebar with one-click contact / phone / directions / claim / share. Contacts the business via Free contact form or Pro Lead Form (operator-dependent), writes a review post-experience (5-star + optional multi-criteria + photos in Pro), optionally saves the search for recurring email alerts (Pro), optionally flips the script entirely and posts a Need (Pro reverse marketplace) so businesses respond to her with quotes instead of the other way around.

Full journey: visitor.md.

Moderator / Team Member - Aisha Okonkwo

Trusted team member with capped permissions. Could be a freelancer hired specifically for moderation, a junior team member, or a vendor elevated to moderate their own category. Cannot touch settings, pricing, or the moderator list itself - that requires manage_listora_moderators, which is admin-only. Needs to triage 20-50 items per day in clear, separated queues, with audit trail.

Her journey in one paragraph: Invited by the Site Owner via Listora → Moderators with a selected scope (Listings / Reviews / Claims / Reports - any combination), receives an assignment email, logs in to find her sidebar surfaces only the relevant Listora screens (NOT Settings, Pricing Plans, Coupons, Webhooks, Audit Log, Email Log, or the Moderators page itself), works through pending items on their separate admin pages (there is no single unified Moderation Queue admin page - the separation is intentional so capability gating stays clean), uses bulk-moderate via POST /listora/v1/listings/bulk-moderate for up to 100 items at once when she trusts the batch, leaves admin notes on rejections so the submitter gets the reason in their notification email, and never has to manually email anyone - status transitions auto-fire the appropriate notifications.

Full journey: moderator.md.

The 10 task-based journeys

Persona journeys answer "what does Diego do over time?" Task journeys answer "Diego has just asked me 'how do I X?' - what is the shortest correct answer?"

When the customer asks… Use task journey
"How do I add my business to this directory?" Task 1 - Add my business to the directory
"Someone else listed my business - how do I take it over?" Task 2 - Claim an existing listing I see is mine
"Can I pay to be more visible?" Task 3 - Upgrade my listing to Featured
"I am a plumber - how do I get leads from this directory?" Task 4 - Promote my plumbing services to people who need them
"I need a restaurant near me right now" Task 5 - Find a restaurant near me right now
"I want to compare a few candidates without opening 10 tabs" Task 6 - Compare 3 dentists side by side
"I keep searching the same thing - can the site tell me when something new fits?" Task 7 - Be notified when a new venue opens in my city
"I want my reviewer to handle reviews and nothing else" Task 8 - Add a teammate who can only moderate reviews
"How do I start making money from vendors?" Task 9 - Start charging vendors for premium placement
"I have 5,000 listings in Directorist - how do I move them over?" Task 10 - Migrate 5,000 listings from Directorist without downtime

Each task carries setup → steps → expected result → what-could-go-wrong table. Full file: task-based-journeys.md.

Where journeys overlap - the cross-persona orchestration map

The product's real value is in the loops between personas. A single listing publication touches every persona we serve.

Vendor Site Owner / Moderator Visitor Vendor
(submit) → (approve) → (find) → (get lead)
↑ ↑ ↓ ↓
└──────────────────┴────── feedback loop ─────┴────────────────┘
(renewal cron + review + reply + recommend)

Loop A - the submission loop

  1. Vendor opens /add-listing/ and walks the 4-6 step submission wizard. On submit, the listing transitions to pending (if moderation is on) and the wb_listora_listing_submitted action fires with the submitter context.
  2. Notifications listener (gated to skip migration context) sends the operator the new-submission email.
  3. Site Owner or Moderator opens the appropriate admin page, reviews the listing in full visitor-perspective context (admin notes panel on top shows submitter IP + anti-spam flags + prior approval count), clicks Approve.
  4. The status transitions to publish. wb_listora_listing_status_changed fires. The owner gets a listing_approved email. The denormalized search_index row is rebuilt.
  5. Visitor searches the directory, hits the now-public listing, contacts via Free contact form or Pro Lead Form.
  6. Vendor gets the lead email with Reply-To set to the visitor - one click and the reply goes straight to the visitor's inbox.
  7. Visitor writes a review post-experience. Moderator approves it. Vendor gets a review_reply email + the rating updates the listing's aggregated stars.
  8. Seven days before expiry, the wb_listora_listing_expiring cron fires. Vendor gets the reminder + opens the dashboard + clicks Renew + POST /listings/{id}/renew extends the expiration. The loop continues.

Loop B - the claim loop

  1. Visitor searches, finds a listing for a business she runs (added by someone else - the operator at bulk-migration time, or a community member).
  2. She does not have an account yet, so she registers via the claim modal (or logs in if she does).
  3. Visitor → Vendor transition begins: she clicks "Claim this business" + uploads proof of ownership.
  4. The claim hits listora_claims table + fires wb_listora_listing_claimed action.
  5. Site Owner or Moderator with claims scope reviews proof, approves. post_author transfers. Free's _listora_is_claimed flag is set + Pro's search-index syncs via the same action.
  6. The newly-minted Vendor receives claim_approved email + sees the listing in her dashboard.
  7. She is now in Loop A from step 4 onward.

Loop C - the reverse-marketplace loop (Pro only)

  1. Visitor has a specific need ("catering for 100 guests next weekend, Brooklyn"). The operator has added the Post a Need block to a page.
  2. Visitor posts the need on the page. The need surfaces at /needs/ (the auto-created CPT archive).
  3. Vendors in matching categories filter /needs/ and respond with quotes. The Saved Searches feature can auto-notify a Vendor of new needs in their category.
  4. Visitor sees responses in her dashboard → Needs tab. Picks a winner. The two communicate via the message thread.
  5. Post-job, the Visitor returns and writes a review on the Vendor's listing. Back to Loop A from step 7.

Loop D - the moderation loop

  1. Site Owner flips on Pro Moderators + invites a teammate with scope (e.g. Reviews only).
  2. Moderator receives the assignment email, logs in, sees the gated sidebar.
  3. Each pending review fires its own wb_listora_review_status_changed event when triaged - notifications go to the reviewer and the listing owner.
  4. Audit Log (Pro) records every transition + the moderator who performed it. Site Owner spot-checks weekly.
  5. When the queue size grows beyond what one moderator can carry, the Site Owner invites a second moderator with a different scope (e.g. Listings) - no role conflict because the capabilities are additive and isolated by scope.

Reading order

A new joiner walking into the team should read in this order:

  1. This file (journey-book.md) - 10 minutes - get the model
  2. persona-profiles.md - 15 minutes - meet the cast
  3. lifecycle.md - 20 minutes - see the channels + KPIs per stage
  4. task-based-journeys.md - read just the 2-3 tasks relevant to today's work
  5. The 4 persona deep-dive journeys (site-owner / listing-owner / visitor / moderator) - read the one for your immediate audience

After that, the feature matrix is the indexed reference.

The promise this book is built around

A directory plugin that earns its place by removing real work. The Site Owner does not glue payments together (7 integrations ship). The Vendor does not learn WordPress (frontend dashboard + wizard). The Visitor does not sign up to browse (anonymous browsing is unlimited). The Moderator does not see what she should not (capability-gated sidebar). The Agency does not fork templates (WooCommerce-style overrides + 226 hooks + 120 REST routes). Every journey in this book is a measurement of how well we keep that promise.

When a feature change crosses one of these journeys, update the journey in the same PR. The journey is the contract.

Related

Something unclear? Open a support ticket →

Buy Listora