Jetonomy fires over 140 hooks in the free plugin, plus another two dozen in Jetonomy Pro. This page documents the most useful ones; every hook follows the jetonomy_ prefix convention. Use them in your theme's functions.php, a site-specific mu-plugin, or a companion plugin.
Hook naming prefix: jetonomy_
Namespace: Jetonomy\
Content Hooks
These hooks fire around the full lifecycle of posts and replies.
jetonomy_after_create_post
Fires immediately after a new post is saved successfully via REST.
Parameters
| Parameter |
Type |
Description |
$post_id |
int |
ID of the newly created post |
$space_id |
int |
ID of the space the post was created in |
Source: includes/api/class-posts-controller.php, includes/class-abilities.php
add_action( 'jetonomy_after_create_post', function( int $post_id, int $space_id ) {
    // Push an event to your analytics pipeline.
    my_analytics_track( 'forum_post_created', [
        'post_id'  => $post_id,
        'space_id' => $space_id,
        'user_id'  => get_current_user_id(),
    ] );
}, 10, 2 );
For a hook that fires on every insert path (REST, admin, CLI, abilities, import) see jetonomy_post_created below.
jetonomy_post_created
Fires from the Post model right after a row is inserted, so it covers every insert path - REST, admin AJAX, WP-CLI, Abilities, imports. Use this when you want to score the creation event itself regardless of how it was triggered.
Fires for every status. Listeners that only care about published posts should inspect $context['status'].
Parameters
| Parameter |
Type |
Description |
$post_id |
int |
Inserted post ID |
$space_id |
int |
Parent space ID (0 if unset) |
$user_id |
int |
Author user ID (0 if unset) |
$context |
array |
The inserted column data (status, post_type, idea_status, slug, etc.) |
Source: includes/models/class-post.php
// WB Gamification example: award points the moment a post lands, not when it gets upvoted.
add_action( 'jetonomy_post_created', function( int $post_id, int $space_id, int $user_id, array $context ) {
    if ( $user_id <= 0 || 'publish' !== ( $context['status'] ?? 'publish' ) ) {
        return;
    }
    wb_gam_award_points( $user_id, 'forum_post_created', [
        'post_id'  => $post_id,
        'space_id' => $space_id,
    ] );
}, 10, 4 );
jetonomy_after_create_reply
Fires immediately after a new reply is saved successfully via REST. The built-in Notifier also listens to this hook to dispatch reply notifications.
Parameters
| Parameter |
Type |
Description |
$reply_id |
int |
ID of the newly created reply |
$post_id |
int |
ID of the post being replied to |
Source: includes/api/class-replies-controller.php, includes/class-abilities.php
add_action( 'jetonomy_after_create_reply', function( int $reply_id, int $post_id ) {
    // Award XP in your gamification plugin.
    my_gamification_award_xp( get_current_user_id(), 5, 'reply_created' );
}, 10, 2 );
For a hook that fires on every insert path see jetonomy_reply_created below.
jetonomy_reply_created
Mirrors jetonomy_post_created for the reply path. Fires from the Reply model so every insert path (REST, admin AJAX, CLI, Abilities, imports) is covered.
Parameters
| Parameter |
Type |
Description |
$reply_id |
int |
Inserted reply ID |
$post_id |
int |
Parent post ID (0 if unset) |
$user_id |
int |
Author user ID (0 if unset) |
$context |
array |
The inserted column data (status, parent_id, content, etc.) |
Source: includes/models/class-reply.php
add_action( 'jetonomy_reply_created', function( int $reply_id, int $post_id, int $user_id, array $context ) {
    if ( $user_id <= 0 || 'publish' !== ( $context['status'] ?? 'publish' ) ) {
        return;
    }
    wb_gam_award_points( $user_id, 'forum_reply_created', [
        'reply_id' => $reply_id,
        'post_id'  => $post_id,
    ] );
}, 10, 4 );
jetonomy_post_updated
Fires after a post is updated.
Parameters
| Parameter |
Type |
Description |
$post_id |
int |
ID of the updated post |
Source: includes/api/class-posts-controller.php
add_action( 'jetonomy_post_updated', function( int $post_id ) {
    // Bust an external cache when a post changes.
    my_cdn_purge( 'post', $post_id );
} );
jetonomy_post_deleted
Fires after a post is permanently deleted (not trashed).
Parameters
| Parameter |
Type |
Description |
$post_id |
int |
ID of the deleted post |
Source: includes/api/class-posts-controller.php
jetonomy_reply_updated
Fires after a reply is updated.
Parameters
| Parameter |
Type |
Description |
$reply_id |
int |
ID of the updated reply |
Source: includes/api/class-replies-controller.php
jetonomy_reply_deleted
Fires after a reply is permanently deleted.
Parameters
| Parameter |
Type |
Description |
$reply_id |
int |
ID of the deleted reply |
Source: includes/api/class-replies-controller.php
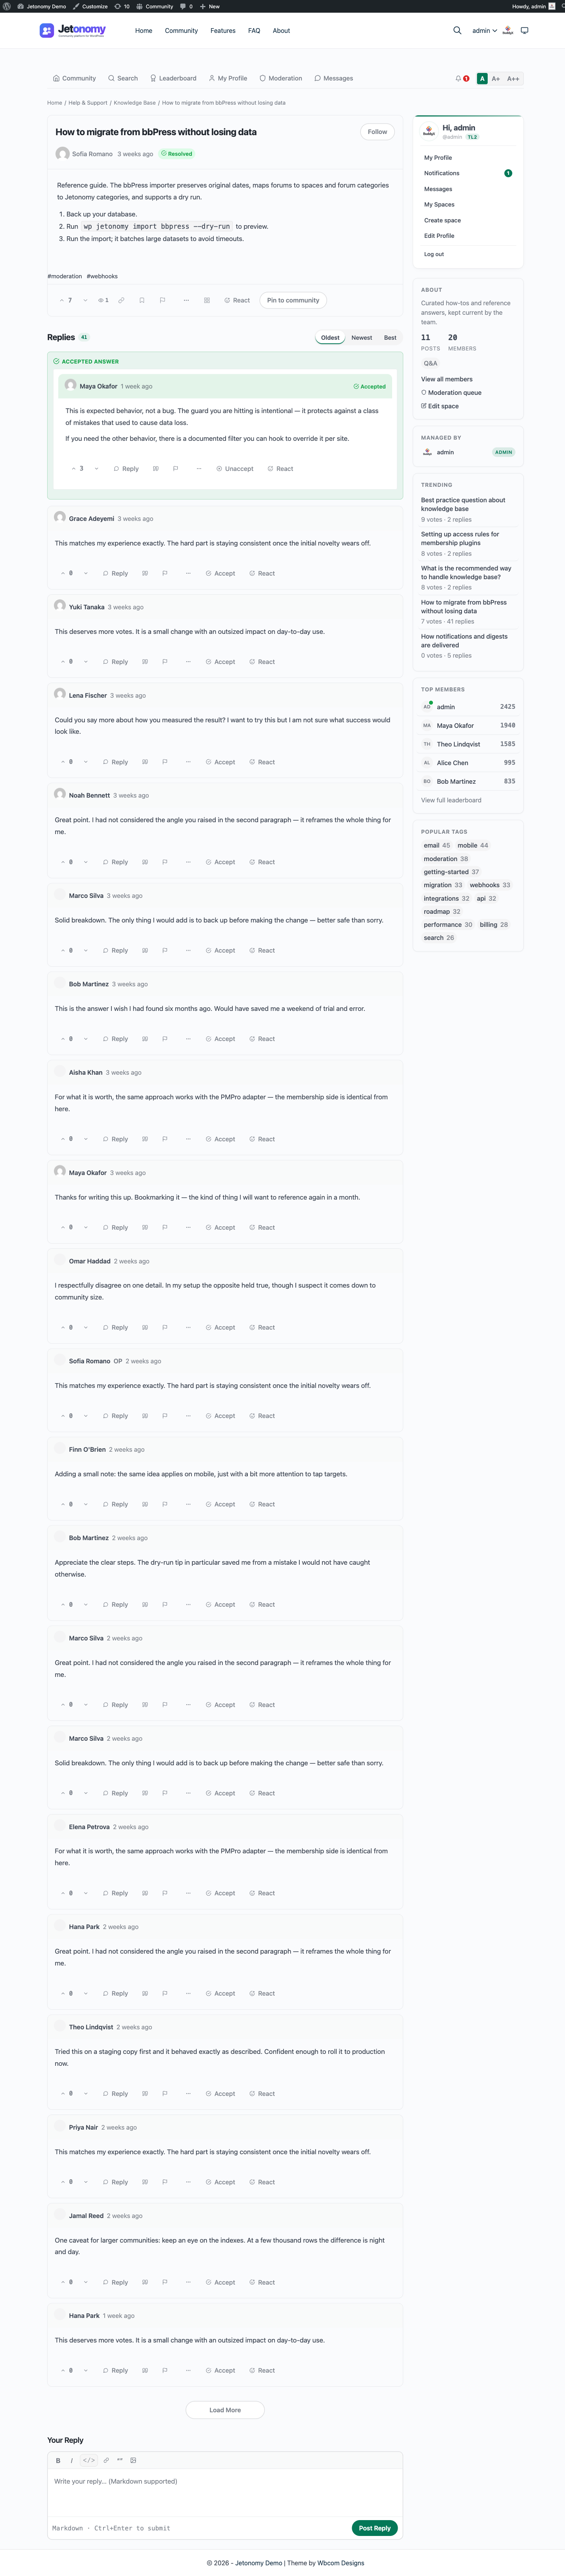
jetonomy_reply_accepted
Fires after a reply is marked as the accepted answer. The free plugin uses this to award +15 reputation to the reply author.
Parameters
| Parameter |
Type |
Description |
$reply_id |
int |
ID of the accepted reply |
$post_id |
int |
ID of the parent post |
Source: includes/api/class-replies-controller.php
add_action( 'jetonomy_reply_accepted', function( int $reply_id, int $post_id ) {
    // Grant a badge for having a reply accepted.
    my_badges_award( get_current_user_id(), 'answer-accepted' );
}, 10, 2 );
jetonomy_post_publish_transition
New in 1.5.0. Fires whenever a post enters or leaves the publish status - on publish-at-creation, on approval from the pending queue, on trashing a published post, and on restore. Consumers that maintain published-content counters subscribe here instead of guessing from create/update events; Jetonomy Pro's analytics aggregator uses it to keep daily totals accurate when content is trashed or approved later.
Parameters
| Parameter |
Type |
Description |
$post_id |
int |
ID of the post |
$delta |
int |
+1 when the post became published, -1 when it left published |
$created_at |
string |
The post's original created_at datetime - attribute the delta to this date, not today |
Source: includes/models/class-post.php
add_action( 'jetonomy_post_publish_transition', function( int $post_id, int $delta, string $created_at ) {
    // Keep an external "published posts per day" metric honest.
    my_metrics_adjust( 'posts_published', $delta, substr( $created_at, 0, 10 ) );
}, 10, 3 );
jetonomy_space_feed_posts
New in 1.5.0. Filters the posts included in a space RSS feed (/community/s/{slug}/feed/) before rendering - newest first, capped at 20.
| Parameter |
Type |
Description |
$posts |
array |
Post rows to render as feed items |
$space |
object |
The space the feed belongs to |
Source: includes/class-feed.php
jetonomy_reply_publish_transition
New in 1.5.0. The reply mirror of jetonomy_post_publish_transition - same parameters and semantics with a reply ID.
Source: includes/models/class-reply.php
Voting
jetonomy_after_vote
Fires after a vote is cast or changed on a post or reply via REST. Use this for receiver-side analytics; for voter-side gamification see jetonomy_vote_cast / jetonomy_vote_retracted below.
Parameters
| Parameter |
Type |
Description |
$object_type |
string |
'post' or 'reply' |
$object_id |
int |
ID of the voted-on item |
$direction |
string |
'up', 'down', or 'none' (vote removed) |
$user_id |
int |
The voting user's WP ID |
Source: includes/api/class-votes-controller.php, includes/class-abilities.php
add_action( 'jetonomy_after_vote', function( string $type, int $id, string $direction, int $user_id ) {
    if ( 'up' === $direction && 'post' === $type ) {
        // Award XP to the post author for receiving an upvote.
        $post = \Jetonomy\Models\Post::find( $id );
        if ( $post ) {
            my_xp_award( (int) $post->author_id, 2, 'post_upvoted' );
        }
    }
}, 10, 4 );
jetonomy_vote_cast
Fires when a voter casts a new vote (or flips an existing one). Used by gamification to reward the voter directly. Reputation handles the receiver; this hook is the missing voter-side signal.
When a voter flips from upvote to downvote (or vice versa) a jetonomy_vote_retracted fires for the old value, then jetonomy_vote_cast fires for the new value.
Parameters
| Parameter |
Type |
Description |
$vote_type |
int |
Raw vote value the voter chose (1 for upvote, -1 for downvote) |
$object_type |
string |
'post' or 'reply' |
$object_id |
int |
Target object ID |
$voter_id |
int |
Voting user ID |
Source: includes/models/class-vote.php
// "Voted 10x this week" challenge.
add_action( 'jetonomy_vote_cast', function( int $vote_type, string $object_type, int $object_id, int $voter_id ) {
    wb_gam_award_points( $voter_id, 'forum_vote_cast', [
        'vote_type'   => $vote_type,
        'object_type' => $object_type,
        'object_id'   => $object_id,
    ] );
}, 10, 4 );
jetonomy_vote_retracted
Fires when a voter retracts an existing vote (clicks the same arrow again or flips to the opposite arrow).
Parameters
| Parameter |
Type |
Description |
$vote_type |
int |
Raw value of the retracted vote (1 or -1) |
$object_type |
string |
'post' or 'reply' |
$object_id |
int |
Target object ID |
$voter_id |
int |
Voting user ID |
Source: includes/models/class-vote.php
add_action( 'jetonomy_vote_retracted', function( int $vote_type, string $object_type, int $object_id, int $voter_id ) {
    wb_gam_revoke_points( $voter_id, 'forum_vote_cast', [
        'object_type' => $object_type,
        'object_id'   => $object_id,
    ] );
}, 10, 4 );
Ideas / Roadmap
jetonomy_idea_status_changed
Fires after an idea's roadmap status changes (e.g. planned → in_progress → shipped). Use this to reward the post author on every transition, not just planned.
Parameters
| Parameter |
Type |
Description |
$post_id |
int |
Post ID |
$new_status |
string |
New idea_status value |
$old_status |
string |
Previous value (empty if unset) |
$actor_id |
int |
Moderator who changed it |
$author_id |
int |
Original post author (0 if unset) - added so listeners can reward the author without a second lookup |
Source: includes/api/class-posts-controller.php
add_action( 'jetonomy_idea_status_changed', function( int $post_id, string $new_status, string $old_status, int $actor_id, int $author_id ) {
    if ( $author_id <= 0 || $author_id === $actor_id ) {
        return; // Author can't farm their own status changes.
    }
    if ( 'shipped' === $new_status ) {
        wb_gam_award_points( $author_id, 'idea_shipped', [ 'post_id' => $post_id ] );
    }
}, 10, 5 );
Moderation
jetonomy_content_moderated
Fires when a moderator takes an action on a post or reply: approve, spam, or trash.
Parameters
| Parameter |
Type |
Description |
$action |
string |
'approve', 'spam', or 'trash' |
$object_type |
string |
'post' or 'reply' |
$object_id |
int |
ID of the moderated item |
$moderator_id |
int |
WP user ID of the moderator |
Source: includes/api/class-moderation-controller.php, includes/admin/class-admin.php
add_action( 'jetonomy_content_moderated', function( string $action, string $type, int $id, int $mod_id ) {
    if ( 'spam' === $action ) {
        my_spam_log( $type, $id, $mod_id );
    }
}, 10, 4 );
Trust & Reputation
jetonomy_trust_level_pre_change
Filter (not action). Lets you intercept an automatic trust-level promotion before it is written - to veto promotions for sandboxed users, fast-track a cohort during onboarding, or apply per-tenant ladder rules.
Only fires on automatic promotion paths: the daily cron evaluator and wp jetonomy trust-evaluate. Manual admin/CLI overrides bypass this filter on purpose so admins can always force-set a level.
Returning the user's current level short-circuits the write (no DB update, no jetonomy_trust_level_changed action).
Parameters
| Parameter |
Type |
Description |
$new_level |
int |
Level the evaluator chose (the proposed level) |
$user_id |
int |
Target user ID |
$stats |
array |
Stats fed to the evaluator: post_count, days_active, reputation, replies_received |
Returns: int - the level to actually write.
Source: includes/class-cron.php, includes/class-cli.php
// WB Gamification example: veto auto-promotion for users in the sandbox.
add_filter( 'jetonomy_trust_level_pre_change', function( int $new_level, int $user_id, array $stats ): int {
    if ( get_user_meta( $user_id, 'wb_gam_sandboxed', true ) ) {
        $current = (int) \Jetonomy\Models\UserProfile::find( $user_id )->trust_level;
        return $current; // short-circuit the write.
    }
    return $new_level;
}, 10, 3 );
jetonomy_trust_level_changed
Fires when a user's trust level is recalculated and changes. Runs from the daily cron job and the wp jetonomy recalculate-trust WP-CLI command.
Parameters
| Parameter |
Type |
Description |
$user_id |
int |
WP user ID |
$old_level |
int |
Previous trust level (0-5) |
$new_level |
int |
New trust level (0-5) |
Source: includes/class-cron.php, includes/class-cli.php
add_action( 'jetonomy_trust_level_changed', function( int $user_id, int $old, int $new ) {
    if ( $new > $old ) {
        // Grant a WP capability when a user reaches Trust Level 3.
        if ( 3 === $new ) {
            $user = get_user_by( 'ID', $user_id );
            $user->add_cap( 'my_plugin_advanced_features' );
        }
    }
}, 10, 3 );
jetonomy_reputation_changed
Fires whenever a user's reputation score changes.
Parameters
| Parameter |
Type |
Description |
$user_id |
int |
WP user ID |
$action |
string |
Action slug that triggered the change (e.g. 'post_upvoted', 'reply_accepted'). Revocations append _revoked (e.g. 'post_upvoted_revoked'). |
$delta |
int |
Points added (positive) or removed (negative) |
$context |
array |
Optional context payload supplied by Reputation::award_custom() (e.g. [ 'badge_id' => 42 ]). Empty array for award() / revoke() calls. |
Source: includes/trust/class-reputation.php
add_action( 'jetonomy_reputation_changed', function( int $user_id, string $action, int $delta, array $context ) {
    // Sync reputation to BuddyPress profile.
    bp_update_user_meta( $user_id, 'jetonomy_rep', \Jetonomy\Models\UserProfile::get_reputation( $user_id ) );
}, 10, 4 );
Notifications
jetonomy_notification_created
Fires after a notification is created and stored.
Parameters
| Parameter |
Type |
Description |
$notification_id |
int |
ID of the new notification record |
$user_id |
int |
Recipient WP user ID |
$type |
string |
Notification type slug (e.g. 'reply', 'mention', 'accepted') |
Source: includes/notifications/class-notifier.php
add_action( 'jetonomy_notification_created', function( int $notif_id, int $user_id, string $type ) {
    // Forward notifications to a mobile push service.
    if ( 'mention' === $type ) {
        my_push_service_notify( $user_id, 'You were mentioned in a discussion.' );
    }
}, 10, 3 );
Spaces
jetonomy_user_joined_space
Fires after a user successfully joins a space.
Parameters
| Parameter |
Type |
Description |
$space_id |
int |
ID of the space joined |
$user_id |
int |
WP user ID of the new member |
$role |
string |
The member's role in the space (e.g. member) |
Source: includes/models/class-space-member.php
// Note the argument order: $space_id comes first, then $user_id, then $role.
add_action( 'jetonomy_user_joined_space', function( int $space_id, int $user_id, string $role ) {
    // Auto-subscribe the user to a MailChimp list tied to this space.
    my_mailchimp_subscribe( $user_id, "space_{$space_id}" );
}, 10, 3 );
Membership
These hooks fire from both the MemberPress and PMPro adapters.
jetonomy_membership_activated
Fires when a user's membership subscription becomes active.
Parameters
| Parameter |
Type |
Description |
$user_id |
int |
WP user ID |
$level_id |
string |
Membership level identifier |
$adapter |
string |
Adapter identifier (e.g. 'memberpress', 'pmpro', 'woocommerce') |
Source: includes/adapters/class-member-press-adapter.php, class-pmpro-adapter.php
jetonomy_membership_deactivated
Fires when a user's membership expires or is cancelled.
Parameters
| Parameter |
Type |
Description |
$user_id |
int |
WP user ID |
$level_id |
string |
Membership level identifier |
$adapter |
string |
Adapter identifier (e.g. 'memberpress', 'pmpro', 'woocommerce') |
Source: includes/adapters/class-member-press-adapter.php, class-pmpro-adapter.php
add_action( 'jetonomy_membership_deactivated', function( int $user_id, string $level_id, string $adapter ) {
    // Revoke access to private spaces when membership lapses.
    $private_spaces = \Jetonomy\Models\Space::get_by_membership_level( $level_id );
    foreach ( $private_spaces as $space ) {
        \Jetonomy\Models\SpaceMember::remove( $user_id, $space->id );
    }
}, 10, 3 );
Topic Management
jetonomy_post_merged
Fires after two posts are merged (all replies moved to the target, source deleted).
Parameters
| Parameter |
Type |
Description |
$source_post_id |
int |
The post that was merged and deleted |
$target_post_id |
int |
The post that received the replies |
jetonomy_reply_split
Fires after a reply is split into a new standalone post.
Parameters
| Parameter |
Type |
Description |
$new_post_id |
int |
ID of the newly created post |
$original_reply_id |
int |
ID of the reply that was split out |
jetonomy_max_space_pins (filter)
Filters the maximum number of topics that can be pinned (made sticky) in a
single space. Returning 0 (or a negative value) disables the cap entirely.
Default is 3.
Parameters
| Parameter |
Type |
Description |
$max |
int |
Default maximum (3) |
$space_id |
int |
The space the pin is being attempted in |
// Allow up to 5 pinned topics in every space.
add_filter( 'jetonomy_max_space_pins', fn() => 5 );

// Different caps per space.
add_filter( 'jetonomy_max_space_pins', function ( $max, $space_id ) {
	return 10 === (int) $space_id ? 8 : $max;
}, 10, 2 );
This only governs the space-level pin (is_sticky). Community announcements
("Pin to community", Pro) have their own separate cap.
Template Hooks
These hooks fire inside the PHP templates and let you inject content without overriding template files.
jetonomy_before_content
Fires inside the .jt-app wrapper, before the header partial and content container. Bridge plugins (such as BuddyNext) use this to inject a community subnav in place of the default Jetonomy community nav.
Parameters
| Parameter |
Type |
Description |
$data |
array |
Route data: ['route' => string, 'slug' => string] |
Source: includes/class-template-loader.php
add_action( 'jetonomy_before_content', function( array $data ) {
    echo '<div class="my-subnav">Custom nav here</div>';
} );
jetonomy_after_content
Fires after the main .container closes, before the .jt-app wrapper closes.
Parameters
| Parameter |
Type |
Description |
$data |
array |
Route data |
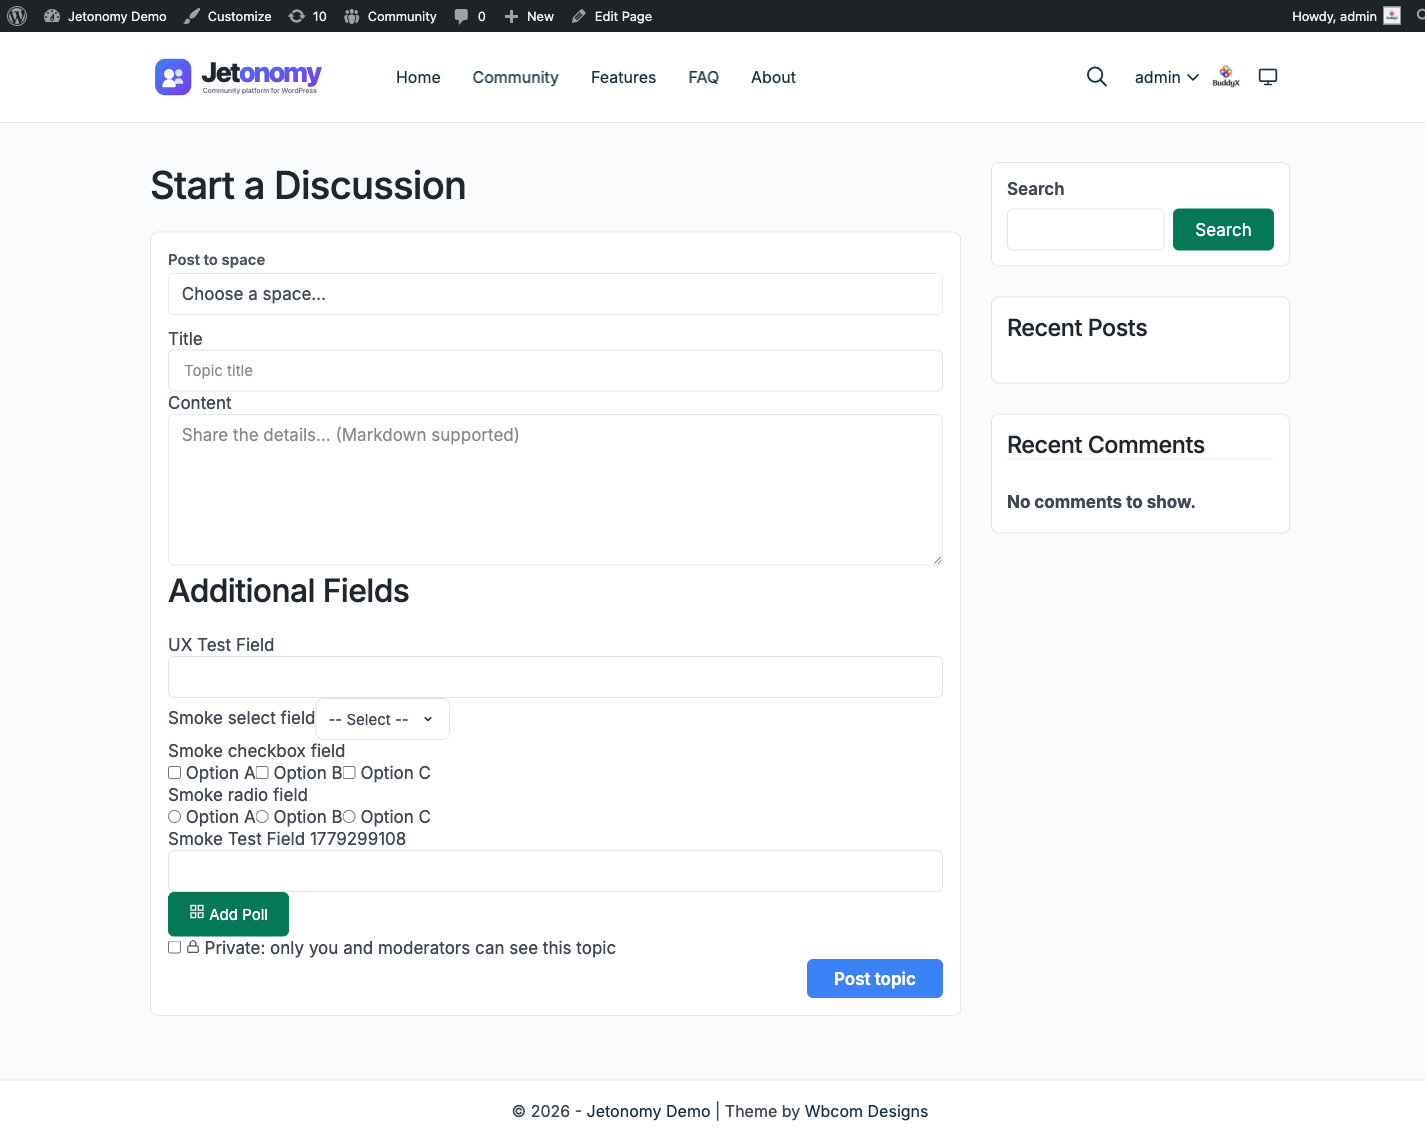
jetonomy_new_post_fields
Fires inside the new-post form, after the built-in fields. Use this to inject custom form fields (e.g. for Pro custom fields extension).
Source: templates/views/new-post.php
add_action( 'jetonomy_new_post_fields', function() {
    // Render an additional "Estimated time" field.
    echo '<label for="jt-estimated-time">' . esc_html__( 'Estimated time (hours)', 'my-plugin' ) . '</label>';
    echo '<input type="number" id="jt-estimated-time" name="estimated_time" min="0" />';
} );
jetonomy_post_meta_fields
Fires inside the single-post view, after the post meta line.
Source: templates/views/single-post.php
jetonomy_post_actions
Fires inside the single-post view, inside the post action toolbar.
Source: templates/views/single-post.php
jetonomy_post_card_after_badges
Fires right after the built-in status badges (sticky/Pinned, private) so add-ons can append their own markers - for example the Pro "Announcement" badge for community-pinned posts. As of 1.4.4 this fires in both the listing card and the single-post header, so a badge added here appears consistently on both surfaces.
Parameters
| Parameter |
Type |
Description |
$post |
object |
The post row being rendered |
$space |
object|null |
The post's space, if loaded |
Source: templates/partials/post-card.php, templates/views/single-post.php
jetonomy_reply_actions
Fires inside the reply card, inside the reply action row.
Source: templates/partials/reply-card.php
jetonomy_profile_after_stats
Fires on user profile pages, after the reputation/trust stats block.
Source: templates/views/user-profile.php
jetonomy_profile_display_fields
Fires on user profile pages in the display (read-only) section. Use this to render extra profile fields.
Source: templates/views/user-profile.php
add_action( 'jetonomy_profile_display_fields', function() {
    $user_id = get_queried_object_id(); // or extract from the URL
    $company = get_user_meta( $user_id, 'company', true );
    if ( $company ) {
        printf( '<p class="jt-profile-field"><strong>%s</strong> %s</p>',
            esc_html__( 'Company:', 'my-plugin' ),
            esc_html( $company )
        );
    }
} );
jetonomy_profile_edit_fields
Fires inside the edit-profile form. Pair with jetonomy_profile_display_fields and a custom save_post / REST action to persist data.
Source: templates/views/edit-profile.php
Fires inside the community header, after the built-in nav items. Add extra navigation links here.
Source: templates/partials/header.php
add_action( 'jetonomy_header_nav_items', function() {
    echo '<a href="/community/events/" class="jt-nav-link">Events</a>';
} );
Fires at the top of the Jetonomy sidebar, before any widgets render. Prime slot for ad plugins, announcement banners, or custom cards.
Parameters
| Parameter |
Type |
Description |
$space |
object|null |
Current space object, or null outside a space |
Source: templates/partials/sidebar.php
add_action( 'jetonomy_sidebar_before', function( $space ) {
    echo do_shortcode( '[wb_ads position="jetonomy_sidebar_top"]' );
} );
Fires at the bottom of the Jetonomy sidebar, after all widgets render.
Parameters
| Parameter |
Type |
Description |
$space |
object|null |
Current space object, or null outside a space |
Source: templates/partials/sidebar.php
add_action( 'jetonomy_sidebar_after', function( $space ) {
    echo do_shortcode( '[wb_ads position="jetonomy_sidebar_bottom"]' );
} );
Fires in the sidebar immediately after the "About" space card closes. Only fires when a space is present (i.e. on space-scoped pages). Ideal for ads, announcements, or CTAs pinned below the space intro, before Trending and other widgets.
Parameters
| Parameter |
Type |
Description |
$space |
object |
Current space object |
Source: templates/partials/sidebar.php
add_action( 'jetonomy_sidebar_after_about', function( $space ) {
    echo do_shortcode( '[wbam_ad id="42"]' );
} );
jetonomy_after_post_article
Fires after the main post <article> element and before the replies section on a single post view. Ideal for ads, related-topic blocks, or CTAs between the topic body and the reply list.
⚠️ Do not confuse with the jetonomy_after_post_content filter (below) which fires inside the post body. This hook is an action named _article to avoid collision.
Parameters
| Parameter |
Type |
Description |
$post |
object |
Current post object |
Source: templates/views/single-post.php
add_action( 'jetonomy_after_post_article', function( $post ) {
    echo do_shortcode( '[wb_ads position="jetonomy_after_topic"]' );
} );
jetonomy_before_replies
Fires inside .jt-replies-section, immediately before the replies list (above both the empty state and the populated list).
Parameters
| Parameter |
Type |
Description |
$post |
object |
Current post object |
$total_replies |
int |
Total reply count for the post |
Source: templates/views/single-post.php
add_action( 'jetonomy_before_replies', function( $post, $total_replies ) {
    if ( $total_replies > 5 ) {
        echo do_shortcode( '[wb_ads position="jetonomy_replies_top"]' );
    }
}, 10, 2 );
jetonomy_between_replies
Fires after each top-level reply in the reply list. Use the $index parameter to inject content every Nth reply (e.g. an ad every 5 replies).
Parameters
| Parameter |
Type |
Description |
$reply |
object |
The reply object just rendered |
$index |
int |
Zero-based index within the current batch (first batch or last batch) |
$post |
object |
Current post object |
Source: templates/views/single-post.php
The replies list renders in two batches (opening + latest). The index resets at the start of each batch. Use $reply->id for absolute identity.
add_action( 'jetonomy_between_replies', function( $reply, $index, $post ) {
    // Inject an ad after every 5th reply.
    if ( 4 === $index % 5 ) {
        echo '<div class="jt-reply-ad">' . do_shortcode( '[wb_ads position="jetonomy_between_replies"]' ) . '</div>';
    }
}, 10, 3 );
jetonomy_after_replies
Fires inside .jt-replies-section, after the replies list and before the composer.
Parameters
| Parameter |
Type |
Description |
$post |
object |
Current post object |
$total_replies |
int |
Total reply count for the post |
Source: templates/views/single-post.php
add_action( 'jetonomy_after_replies', function( $post, $total_replies ) {
    echo do_shortcode( '[wb_ads position="jetonomy_replies_bottom"]' );
}, 10, 2 );
Admin Extension Hooks
Use these to add content to the Jetonomy admin pages without overriding core admin files.
| Hook |
Parameters |
Where it fires |
jetonomy_admin_dashboard_widgets |
none |
Dashboard page - add custom stat cards |
jetonomy_admin_dashboard_after_stats |
none |
Dashboard - below the stats row |
jetonomy_admin_settings_tabs |
none |
Settings page - register new tab nav items |
jetonomy_admin_settings_tab_content |
$active_tab (string) |
Settings page - render tab content |
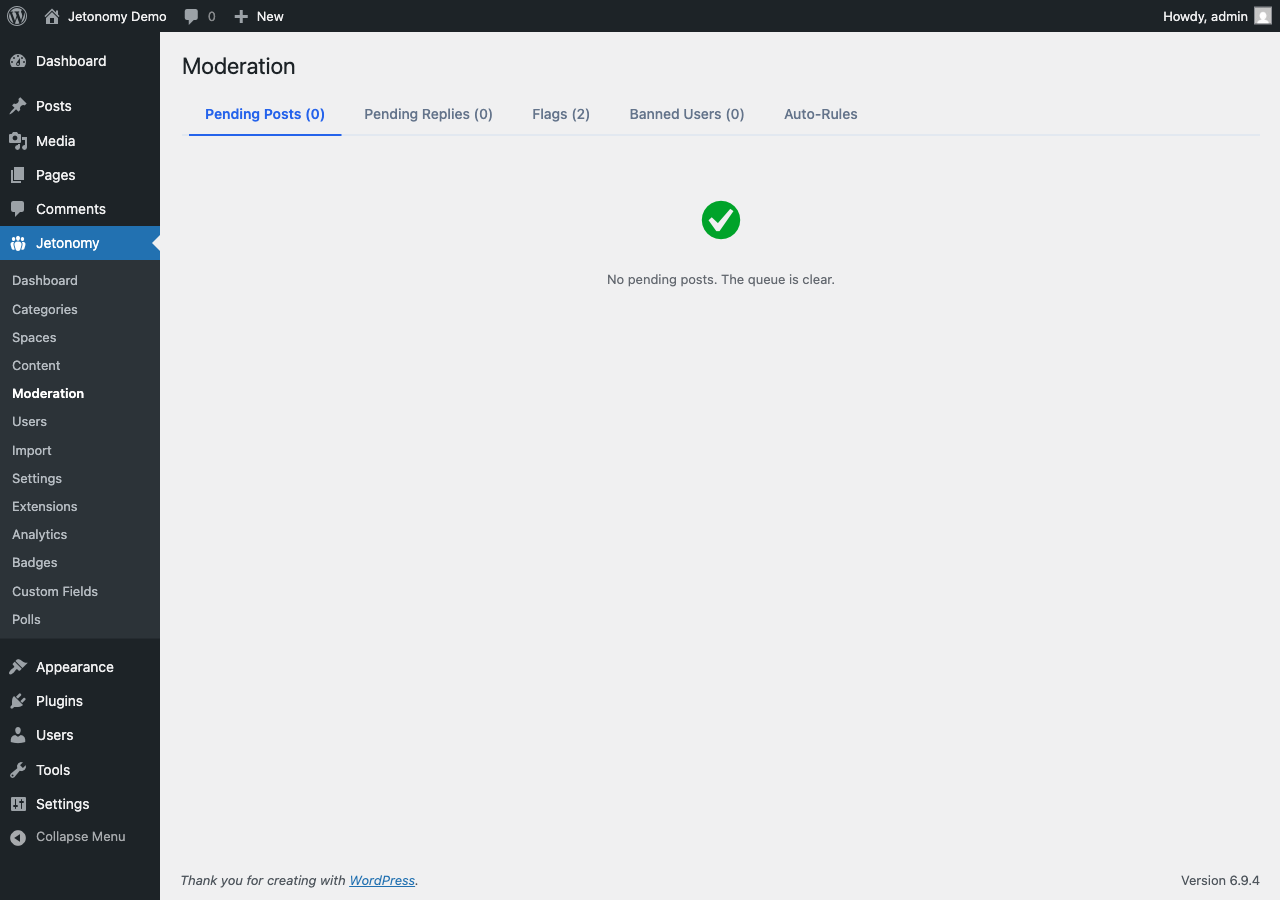
jetonomy_admin_moderation_tabs |
none |
Moderation page - extra tab nav items |
jetonomy_admin_moderation_tab_content |
$active_tab (string) |
Moderation page - render tab content |
jetonomy_admin_space_edit_tabs |
$space_id (int) |
Space edit page - extra tab nav items |
jetonomy_admin_space_edit_tab_content |
$active_tab (string), $space_id (int) |
Space edit page - render tab content |
jetonomy_admin_render_extensions |
none |
Admin - Extensions tab placeholder |
jetonomy_admin_render_license |
none |
Admin - License tab placeholder |
Example: adding a Settings tab
// Register the tab nav item.
add_action( 'jetonomy_admin_settings_tabs', function() {
    $active = $_GET['tab'] ?? 'general';
    $class  = 'my-custom' === $active ? 'nav-tab-active' : '';
    printf(
        '<a href="?page=jetonomy-settings&tab=my-custom" class="nav-tab %s">%s</a>',
        esc_attr( $class ),
        esc_html__( 'My Settings', 'my-plugin' )
    );
} );

// Render the tab content.
add_action( 'jetonomy_admin_settings_tab_content', function( string $active_tab ) {
    if ( 'my-custom' !== $active_tab ) {
        return;
    }
    echo '<div class="jt-settings-card">';
    echo '<div class="jt-settings-card__head">';
    echo '<p class="jt-settings-card__title">My Settings</p>';
    echo '</div>';
    // Your settings form here.
    echo '</div>';
} );
jetonomy_cron_batch_size
Filters the maximum number of rows processed per run by any of Jetonomy's background cleanup handlers. The default is 500 rows per run, which prevents cron jobs from timing out on large sites with high activity volumes.
Parameters
| Parameter |
Type |
Description |
$batch_size |
int |
Maximum rows to process. Default: 500 |
$handler |
string |
The handler name, e.g. 'prune_activity_log', 'expire_restrictions', 'cleanup_notifications', 'publish_scheduled_posts' |
Return: int
Source: includes/class-cron.php
Use the $handler parameter to set different limits per job:
add_filter( 'jetonomy_cron_batch_size', function( int $batch_size, string $handler ): int {
    // Allow the activity log pruner to work through larger batches on this high-traffic site.
    if ( 'prune_activity_log' === $handler ) {
        return 1000;
    }
    return $batch_size;
}, 10, 2 );
Filter Hooks
jetonomy_template_map
Filters the route-to-template map used by Template_Loader. Pass an absolute path to override an existing template or add a completely new route. See Template Overrides for the complete guide.
Parameters
| Parameter |
Type |
Description |
$map |
array |
['route' => 'relative/path.php'] |
Return: array Modified map
add_filter( 'jetonomy_template_map', function( array $map ): array {
    // Register a new 'events' route resolved against the Pro plugin directory.
    $map['events'] = MYPLUGIN_DIR . 'templates/events.php';
    return $map;
} );
jetonomy_check_content
Filters content before it is saved as a post or reply. Return a WP_Error to reject the content with a message shown to the user.
Parameters
| Parameter |
Type |
Description |
$result |
true|WP_Error |
Pass through or return a WP_Error to block |
$content |
string |
The sanitized HTML content string |
$user_id |
int |
Author's WP user ID |
Return: true|WP_Error
Source: includes/api/class-posts-controller.php, class-replies-controller.php
add_filter( 'jetonomy_check_content', function( $result, string $content, int $user_id ) {
    // Block posts containing a forbidden phrase.
    if ( str_contains( strtolower( $content ), 'buy cheap followers' ) ) {
        return new WP_Error( 'spam_blocked', __( 'This content was flagged as spam.', 'my-plugin' ) );
    }
    return $result;
}, 10, 3 );
jetonomy_after_post_content
Filters output rendered after the main post content area in single-post view. Return an HTML string.
Parameters
| Parameter |
Type |
Description |
$html |
string |
HTML to render after post content (empty by default) |
$post |
\Jetonomy\Models\Post |
The current post object |
Return: string
Source: templates/views/single-post.php
add_filter( 'jetonomy_after_post_content', function( string $html, $post ): string {
    $html .= '<div class="my-related-posts">' . my_get_related_posts( $post->id ) . '</div>';
    return $html;
}, 10, 2 );
Filters the email headers array passed to wp_mail() for all Jetonomy notifications.
Parameters
| Parameter |
Type |
Description |
$headers |
array |
Array of mail headers |
Return: array
Source: includes/adapters/class-wp-mail-adapter.php
add_filter( 'jetonomy_notification_email_headers', function( array $headers ): array {
    $headers[] = 'Reply-To: noreply@example.com';
    return $headers;
} );
jetonomy_profile_url
Filters the public URL for a user's community profile.
Parameters
| Parameter |
Type |
Description |
$url |
string |
Default profile URL (e.g. /community/u/janedoe/) |
$user_id |
int |
WP user ID |
Return: string
Source: includes/functions.php
add_filter( 'jetonomy_profile_url', function( string $url, int $user_id ): string {
    // Point profile links to a BuddyPress profile instead.
    $bp_url = bp_core_get_user_domain( $user_id );
    return $bp_url ?: $url;
}, 10, 2 );
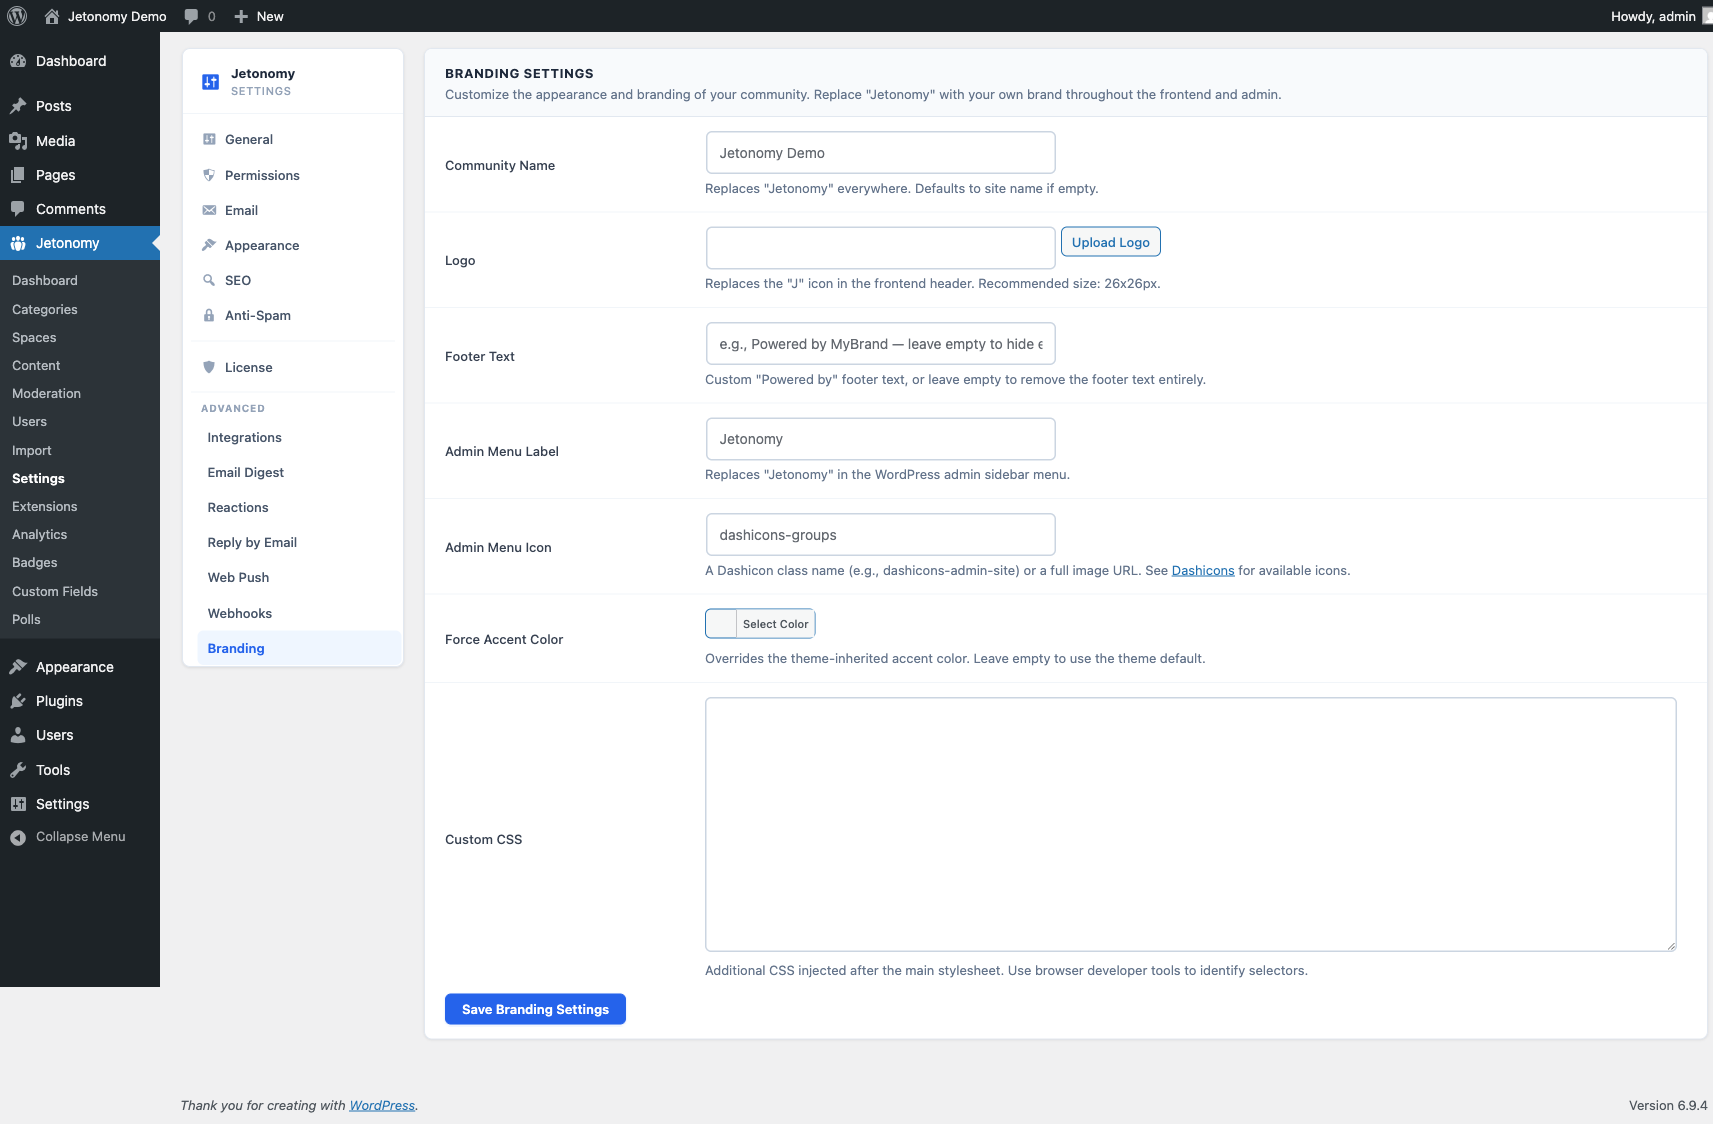
Filters the top-level admin menu label.
Return: string
add_filter( 'jetonomy_admin_menu_label', fn() => 'Forum' );
Filters the Dashicons icon for the admin menu item.
Return: string (Dashicons class, e.g. 'dashicons-format-chat')
Filters whether the built-in community nav bar is displayed. Return false to hide it (useful when a bridge plugin provides its own nav).
Parameters
| Parameter |
Type |
Description |
$show |
bool |
true by default |
Return: bool
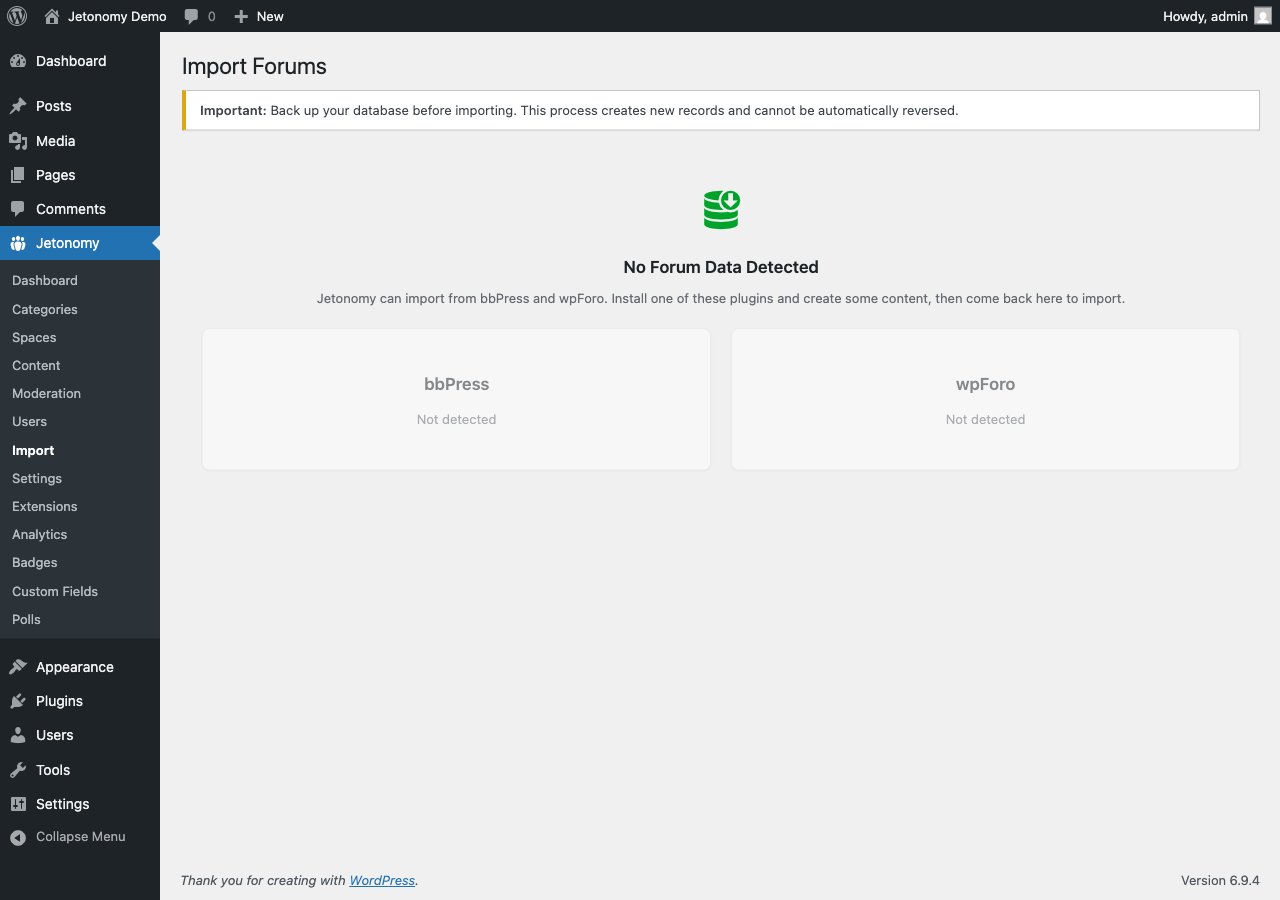
jetonomy_importers
Filters the list of registered importers shown in the Import tool.
Parameters
| Parameter |
Type |
Description |
$importers |
array |
['id' => Importer_Instance] |
Return: array
Source: includes/import/class-import-manager.php
add_filter( 'jetonomy_importers', function( array $importers ): array {
    $importers['my-forum'] = new My_Forum_Importer();
    return $importers;
} );
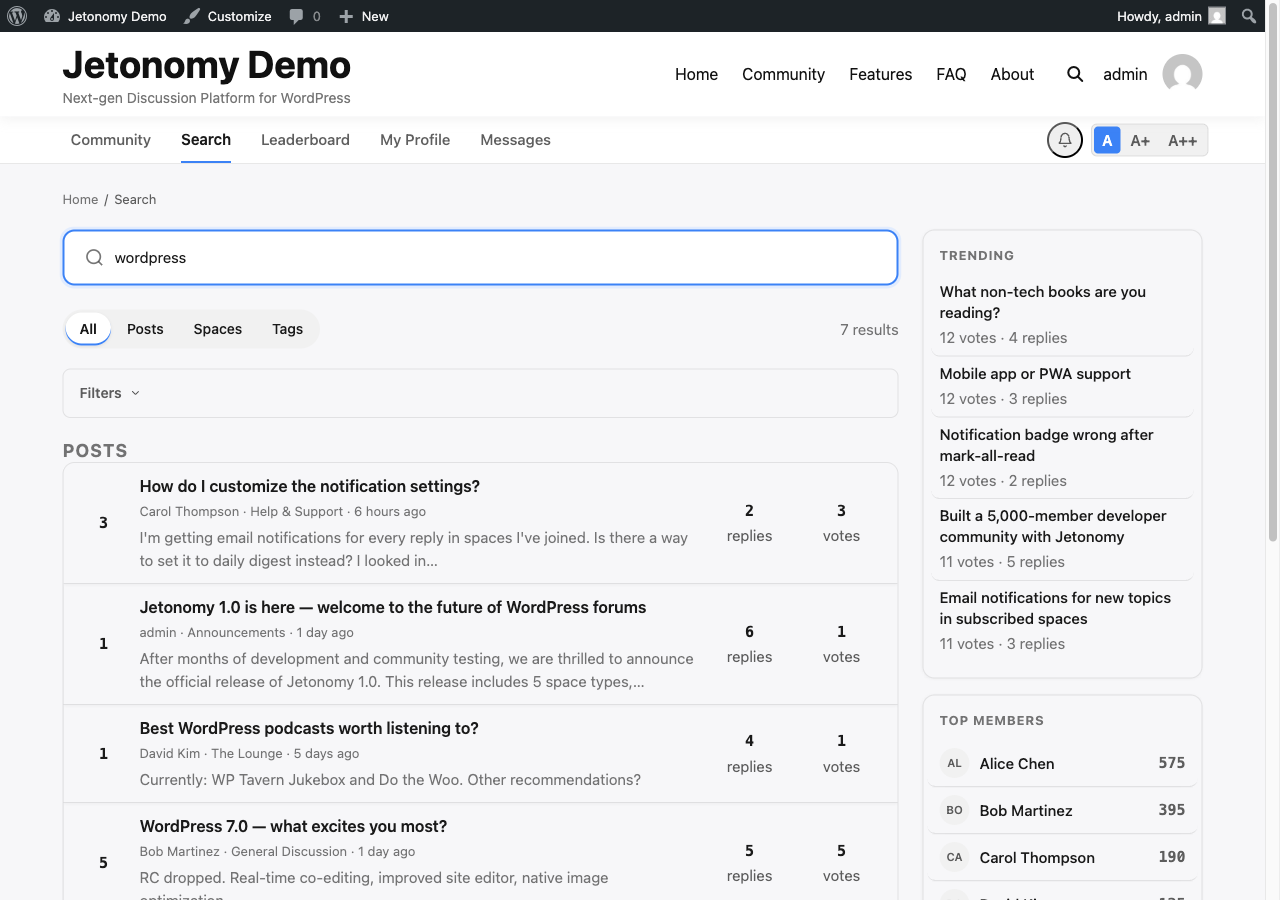
jetonomy_search_query_args
Fires inside the Search controller before the SQL is built. Use this to modify search parameters.
Parameters
| Parameter |
Type |
Description |
$args |
array |
Keys: q, space_id, date_from, date_to, author_id, tag_slug, sort |
Return: array
Source: includes/api/class-search-controller.php
Registration & Boot Hooks
jetonomy_admin_license_tab_content
Fires inside the Settings page License tab placeholder. Use this to render a license activation form or status block.
Parameters
None.
Source: includes/admin/views/settings.php
User Lifecycle Hooks
jetonomy_user_registered
Fires after a new user account is created via the REST registration endpoint.
Parameters
| Parameter |
Type |
Description |
$user_id |
int |
WP user ID of the newly registered user |
Source: includes/api/class-auth-controller.php
jetonomy_user_pending_verification
Fires after a new user is created but email verification is required and the account is in a pending state.
Parameters
| Parameter |
Type |
Description |
$user_id |
int |
WP user ID of the pending user |
Source: includes/api/class-auth-controller.php
jetonomy_email_verified
Fires after a user successfully verifies their email address via the verification token link.
Parameters
| Parameter |
Type |
Description |
$user_id |
int |
WP user ID of the verified user |
Source: includes/api/class-auth-controller.php
jetonomy_verification_reminder_sent
Fires after the cron-driven single-shot verification reminder email is dispatched to an unverified user.
Parameters
| Parameter |
Type |
Description |
$user_id |
int |
WP user ID of the nudged user |
$user |
WP_User |
WP_User object for the nudged user |
Source: includes/notifications/class-verification-reminder.php
Content Lifecycle Hooks
jetonomy_before_create_post
Filter (not action). Runs immediately before a new post row is inserted. Modify the data array to change what gets written, or use it to pre-process content.
Parameters
| Parameter |
Type |
Description |
$data |
array |
Column data about to be inserted (keys: title, content, status, space_id, author_id, post_type, etc.) |
$author_id |
int |
Author user ID (convenience copy from $data['author_id']) |
$space_id |
int |
Target space ID (convenience copy from $data['space_id']) |
Return: array Modified data array.
Source: includes/models/class-post.php
jetonomy_before_create_reply
Filter (not action). Runs immediately before a new reply row is inserted.
Parameters
| Parameter |
Type |
Description |
$data |
array |
Column data about to be inserted (keys: content, status, post_id, author_id, parent_id, etc.) |
$author_id |
int |
Author user ID (convenience copy from $data['author_id']) |
$post_id |
int |
Parent post ID (convenience copy from $data['post_id']) |
Return: array Modified data array.
Source: includes/models/class-reply.php
jetonomy_before_delete_post
Filter (not action). Fires before a post is permanently deleted. Return false to abort the delete.
Parameters
| Parameter |
Type |
Description |
$proceed |
bool |
true to allow deletion; return false to cancel |
$post_id |
int |
ID of the post about to be deleted |
Return: bool
Source: includes/models/class-post.php
jetonomy_before_delete_reply
Filter (not action). Fires before a reply is permanently deleted. Return false to abort.
Parameters
| Parameter |
Type |
Description |
$proceed |
bool |
true to allow deletion |
$reply_id |
int |
ID of the reply about to be deleted |
Return: bool
Source: includes/models/class-reply.php
jetonomy_reply_unaccepted
Fires after the accepted-answer mark is removed from a reply.
Parameters
| Parameter |
Type |
Description |
$reply_id |
int |
ID of the reply that was un-accepted |
$post_id |
int |
ID of the parent post |
Source: includes/api/class-replies-controller.php
jetonomy_scheduled_post_published
Fires after a scheduled post is automatically published by the cron handler when its published_at datetime passes.
Parameters
| Parameter |
Type |
Description |
$post_id |
int |
ID of the published post |
$space_id |
int |
ID of the space the post belongs to |
Source: includes/models/class-post.php
Moderation & Flagging Hooks
jetonomy_flag_created
Fires after a new flag is saved against a post or reply.
Parameters
| Parameter |
Type |
Description |
$flag_id |
int |
ID of the created flag record |
$object_type |
string |
'post' or 'reply' |
Source: includes/api/class-moderation-controller.php
jetonomy_flag_resolved
Fires after a flag is resolved (approved, dismissed, or actioned). For a version that includes the full flag object see jetonomy_after_resolve_flag below.
Parameters
| Parameter |
Type |
Description |
$flag_id |
int |
ID of the resolved flag |
$status |
string |
Resolution status (e.g. 'approved', 'dismissed') |
$user_id |
int |
ID of the moderator who resolved it |
Source: includes/moderation/class-moderation-service.php
jetonomy_after_resolve_flag
Fires after a flag is resolved and provides the full flag object plus context. Counterpart to jetonomy_flag_resolved - use this when you need to read the flag's fields without a second lookup.
Parameters
| Parameter |
Type |
Description |
$flag |
object |
The full flag row object (post-resolution state) |
$context |
array |
Associative array with keys status (string) and user_id (int) |
Source: includes/moderation/class-moderation-service.php
Space Membership Hooks
jetonomy_before_join_space
Filter (not action). Fires before a user is added to a space. Return false to block the join.
Parameters
| Parameter |
Type |
Description |
$proceed |
bool |
true to allow the join |
$user_id |
int |
User attempting to join |
$space_id |
int |
Target space ID |
$role |
string |
Role being assigned (e.g. 'member', 'admin') |
Return: bool
Source: includes/models/class-space-member.php
jetonomy_user_left_space
Fires after a user is removed from a space.
Parameters
| Parameter |
Type |
Description |
$space_id |
int |
ID of the space the user left |
$user_id |
int |
WP user ID of the departing member |
Source: includes/models/class-space-member.php
jetonomy_space_member_joined
Alias of jetonomy_user_joined_space without the role argument, matching the Pro webhooks listener contract. Fires at the same time as jetonomy_user_joined_space.
Parameters
| Parameter |
Type |
Description |
$space_id |
int |
ID of the space |
$user_id |
int |
WP user ID of the new member |
Source: includes/models/class-space-member.php
jetonomy_space_member_left
Alias of jetonomy_user_left_space, matching the Pro webhooks listener contract.
Parameters
| Parameter |
Type |
Description |
$space_id |
int |
ID of the space |
$user_id |
int |
WP user ID of the departing member |
Source: includes/models/class-space-member.php
jetonomy_join_request_created
Fires after a join request is submitted for a private space.
Parameters
| Parameter |
Type |
Description |
$space_id |
int |
ID of the space being requested |
$user_id |
int |
ID of the requesting user |
$message |
string |
Optional message submitted with the request (empty string if none) |
Source: includes/api/class-spaces-controller.php
Voting Hooks
jetonomy_before_vote
Filter (not action). Fires before a vote is recorded. Return false to block the vote entirely.
Parameters
| Parameter |
Type |
Description |
$proceed |
bool |
true to allow the vote |
$user_id |
int |
Voting user ID |
$object_type |
string |
'post' or 'reply' |
$object_id |
int |
Target object ID |
$value |
int |
Vote value: 1 for upvote, -1 for downvote |
Return: bool
Source: includes/models/class-vote.php
Trust & Reputation Hooks
jetonomy_reputation_points_map
Filter (not action). Filters the entire POINTS_MAP (action → delta) before per-action resolution. Use this to add new action keys or wholesale-replace the scoring table per community. Composes with jetonomy_reputation_points_for, which runs afterwards on the resolved value for the requested action.
Parameters
| Parameter |
Type |
Description |
$map |
array<string,int> |
Default POINTS_MAP keyed by action slug. |
Return: array<string,int>
Source: includes/trust/class-reputation.php
add_filter( 'jetonomy_reputation_points_map', function( array $map ): array {
    // Boost the entire ladder by 50% for this community.
    return array_map( fn( int $points ) => (int) round( $points * 1.5 ), $map );
} );
jetonomy_reputation_points_for
Filter (not action). Filters the point value for a specific reputation action after the map / settings override resolves. Allows per-site tuning of the reputation ladder without editing plugin settings.
Parameters
| Parameter |
Type |
Description |
$points |
int |
Default point value for the action |
$action |
string |
Action slug (e.g. 'post_upvoted', 'reply_accepted', 'flag_validated') |
Return: int
Source: includes/trust/class-reputation.php
add_filter( 'jetonomy_reputation_points_for', function( int $points, string $action ): int {
    // Double the reward for accepted answers on this site.
    if ( 'reply_accepted' === $action ) {
        return $points * 2;
    }
    return $points;
}, 10, 2 );
jetonomy_reputation_pre_change
Filter (not action). Filters the signed delta immediately before it is persisted to user_profiles.reputation. Returning 0 short-circuits the write entirely - the jetonomy_reputation_changed action will not fire and no DB row is touched. Use this to scale deltas during campaigns, veto changes for sandboxed users, or redirect reputation to an external scoring engine.
Parameters
| Parameter |
Type |
Description |
$delta |
int |
Signed point delta about to be applied. |
$user_id |
int |
WP user ID whose reputation will change. |
$action |
string |
Action slug (revocations append _revoked). |
$context |
array |
Optional context payload (e.g. [ 'badge_id' => 42 ]). |
Return: int - return 0 to veto the change.
Source: includes/trust/class-reputation.php
add_filter( 'jetonomy_reputation_pre_change', function( int $delta, int $user_id, string $action, array $context ): int {
    // Veto rep changes for sandboxed users.
    if ( get_user_meta( $user_id, 'wb_gam_sandboxed', true ) ) {
        return 0;
    }
    // Double points during a weekend campaign.
    if ( wb_gam_campaign_active( 'double_points' ) ) {
        return $delta * 2;
    }
    return $delta;
}, 10, 4 );
jetonomy_leaderboard_items
Filter (not action). Filters the leaderboard response rows in GET /jetonomy/v1/leaderboards immediately before they are wrapped in the paginated envelope. Use this to enrich each row with cross-engine totals (badge count, level name, alternate currency) without a second REST round-trip.
Parameters
| Parameter |
Type |
Description |
$items |
array |
Leaderboard rows. Each row has rank, user_id, display_name, user_login, avatar_url, profile_url, reputation, post_count, reply_count, trust_level. |
$request |
WP_REST_Request |
Original REST request - inspect get_param('period'), etc. |
Return: array
Source: includes/api/class-leaderboards-controller.php
add_filter( 'jetonomy_leaderboard_items', function( array $items, WP_REST_Request $request ): array {
    foreach ( $items as &$row ) {
        $row['wb_gam_points'] = (int) WB_Gam\Points::for_user( $row['user_id'] );
        $row['wb_gam_badges_count'] = (int) WB_Gam\Badges::count_for_user( $row['user_id'] );
    }
    return $items;
}, 10, 2 );
Email & Notification Filter Hooks
jetonomy_email_subject
Filter (not action). Filters the email subject line before the notification is sent.
Parameters
| Parameter |
Type |
Description |
$subject |
string |
Rendered subject string |
$type |
string |
Notification type slug (e.g. 'reply_to_post', 'mention', 'accepted_answer') |
$user |
WP_User |
Notification recipient |
Return: string
Source: includes/notifications/class-notifier.php
jetonomy_email_body
Filter (not action). Filters the plain-text email body before the notification is sent.
Parameters
| Parameter |
Type |
Description |
$body |
string |
Plain-text body string |
$type |
string |
Notification type slug |
$user |
WP_User |
Notification recipient |
Return: string
Source: includes/notifications/class-notifier.php
jetonomy_email_html
Filter (not action). Filters the fully rendered HTML of the notification email just before it is passed to wp_mail().
Parameters
| Parameter |
Type |
Description |
$html |
string |
Full rendered HTML string |
$type |
string |
Notification type slug |
$user |
WP_User |
Notification recipient |
Return: string
Source: includes/notifications/class-notifier.php
Filter (not action). Filters the headers array passed to wp_mail() for all notification emails. Note: for adding a Reply-To header for reply-by-email support, use jetonomy_notification_email_headers instead (also available).
Parameters
| Parameter |
Type |
Description |
$headers |
array |
Array of mail header strings |
$type |
string |
Notification type slug |
$user |
WP_User |
Notification recipient |
Return: array
Source: includes/notifications/class-notifier.php
jetonomy_email_logo_url
Filter (not action). Filters the logo URL rendered inside notification emails. Return an empty string to suppress the logo.
Parameters
| Parameter |
Type |
Description |
$url |
string |
Logo URL (empty string if none configured) |
$type |
string |
Notification type slug providing context for per-type overrides |
Return: string
Source: includes/notifications/class-notifier.php
jetonomy_email_accent_color
Filter (not action). Filters the hex accent color used in notification email templates for buttons and highlights.
Parameters
| Parameter |
Type |
Description |
$color |
string |
Hex color string (e.g. '#3B82F6') |
$type |
string |
Notification type slug |
Return: string
Source: includes/notifications/class-notifier.php
jetonomy_email_template_context
Filter (not action). Filters the full template context array before it is passed to the email template renderer. Use this to inject extra variables into any notification email template.
Parameters
| Parameter |
Type |
Description |
$ctx |
array |
Template variables array (keys vary by notification type) |
$type |
string |
Notification type slug |
$user |
WP_User |
Notification recipient |
Return: array
Source: includes/notifications/class-notifier.php
jetonomy_email_template_path
Filter (not action). Filters the resolved filesystem path to the email template file before it is loaded.
Parameters
| Parameter |
Type |
Description |
$path |
string |
Absolute path to the email template .php file |
$type |
string |
Notification type slug |
Return: string
Source: includes/notifications/class-notifier.php
jetonomy_disposable_email_domains
Filter (not action). Filters the list of blocked disposable email domains used during registration validation.
Parameters
| Parameter |
Type |
Description |
$domains |
array |
Array of blocked domain strings (e.g. ['mailinator.com', 'guerrillamail.com']) |
Return: array
Source: includes/api/class-auth-controller.php
REST Response Filter Hooks
jetonomy_rest_prepare_post
Filter (not action). Filters the prepared post data array before it is returned in any REST response. Use this for fine-grained control over individual fields. For appending extension-level payload use jetonomy_post_response instead.
Parameters
| Parameter |
Type |
Description |
$data |
array |
Prepared REST response data for the post |
$post |
object |
Raw post row object |
$request |
WP_REST_Request|null |
The current request, or null in non-request contexts |
Return: array
Source: includes/api/class-posts-controller.php
jetonomy_rest_prepare_reply
Filter (not action). Filters the prepared reply data array before it is returned in any REST response.
Parameters
| Parameter |
Type |
Description |
$data |
array |
Prepared REST response data for the reply |
$reply |
object |
Raw reply row object |
$request |
WP_REST_Request|null |
The current request, or null in non-request contexts |
Return: array
Source: includes/api/class-replies-controller.php
jetonomy_rest_prepare_space
Filter (not action). Filters the prepared space data array before it is returned in any REST response.
Parameters
| Parameter |
Type |
Description |
$data |
array |
Prepared REST response data for the space |
$space |
object |
Raw space row object |
$request |
WP_REST_Request|null |
The current request, or null |
Return: array
Source: includes/api/class-spaces-controller.php
jetonomy_rest_prepare_user
Filter (not action). Filters the prepared user data array before it is returned in any REST response.
Parameters
| Parameter |
Type |
Description |
$data |
array |
Prepared REST response data for the user |
$wp_user |
WP_User |
WP user object |
$request |
WP_REST_Request|null |
The current request, or null |
Return: array
Source: includes/api/class-users-controller.php
jetonomy_rest_prepare_notification
Filter (not action). Filters the prepared notification data array before it is returned in any REST response.
Parameters
| Parameter |
Type |
Description |
$data |
array |
Prepared REST response data for the notification |
$notification |
object |
Raw notification row object |
$request |
WP_REST_Request|null |
The current request, or null |
Return: array
Source: includes/api/class-notifications-controller.php
jetonomy_post_response
Filter (not action). Alias filter matching the Pro custom-fields listener contract. Lets extensions append per-post payload (custom field values, reactions, polls) to the REST response. The $context array carries object_type and object_id so generic extension handlers can route on type.
Parameters
| Parameter |
Type |
Description |
$data |
array |
Prepared REST response data |
$context |
array |
Associative array with keys object_type ('post') and object_id (int) |
Return: array
Source: includes/api/class-posts-controller.php
jetonomy_profile_response
Filter (not action). Lets extensions append data to user profile REST responses (custom fields, badges).
Parameters
| Parameter |
Type |
Description |
$data |
array |
Prepared profile response data |
$context |
array |
Associative array with keys object_type ('user') and object_id (int) |
Return: array
Source: includes/api/class-users-controller.php
jetonomy_oembed_response
Filter (not action). Filters the oEmbed response data for a forum post before it is returned.
Parameters
| Parameter |
Type |
Description |
$data |
array |
oEmbed response fields (title, url, thumbnail_url, etc.) |
$post |
object |
The post row object |
$space |
object |
The parent space row object |
Return: array
Source: includes/api/class-oembed-controller.php
Link Preview Filter Hooks
jetonomy_link_preview_data
Filter (not action). Filters the extracted link preview data (OG metadata) for a URL before it is cached and returned.
Parameters
| Parameter |
Type |
Description |
$out |
array |
Extracted metadata: title, description, image, url, site_name |
$url |
string |
The URL being previewed |
Return: array
Source: includes/services/links/class-preview-service.php
jetonomy_link_preview_cache_ttl
Filter (not action). Filters the cache TTL (in seconds) for link preview results.
Parameters
| Parameter |
Type |
Description |
$ttl |
int |
Cache duration in seconds (default: 3600) |
$url |
string |
The URL being previewed |
Return: int
Source: includes/services/links/class-preview-service.php
jetonomy_link_preview_providers
Filter (not action). Filters the list of registered link preview provider handlers.
Parameters
| Parameter |
Type |
Description |
$providers |
array |
Ordered list of provider objects/callables |
Return: array
Source: includes/services/links/class-preview-service.php
jetonomy_link_preview_user_agent
Filter (not action). Filters the User-Agent header used when fetching remote URLs for link preview extraction.
Parameters
| Parameter |
Type |
Description |
$ua |
string |
User-Agent string |
$url |
string |
The URL about to be fetched |
Return: string
Source: includes/services/links/class-html-fetcher.php
Template Filter Hooks
Filter (not action). Return false to hide the sidebar entirely on the current page.
Parameters
| Parameter |
Type |
Description |
$show |
bool |
true by default |
Return: bool
Source: templates/partials/sidebar.php
Filter (not action). Filters whether the default anonymous-user auth card is rendered in the sidebar. Return false (or an HTML string to replace it) to suppress or override it. Jetonomy Pro's White Label extension uses this to inject a custom card via jetonomy_sidebar_before.
Parameters
| Parameter |
Type |
Description |
$show |
bool |
true to render the default auth card |
Return: bool
Source: includes/class-blocks.php
Fires inside the sidebar "About this space" card, after the meta row (member count, post count). Only fires on space-scoped pages where a space object is available.
Parameters
| Parameter |
Type |
Description |
$space |
object |
Current space row object |
Source: templates/partials/sidebar.php
Filter (not action). Filters the URL of the logo shown in the community header bar. Return an empty string to hide the logo.
Parameters
| Parameter |
Type |
Description |
$url |
string |
Default logo URL (empty string if none set) |
Return: string
Source: includes/functions.php
Filter (not action). Filters the text shown in the community footer. Return an empty string to suppress the footer text.
Parameters
| Parameter |
Type |
Description |
$text |
string |
Default footer text |
Return: string
Source: includes/functions.php
jetonomy_new_post_submit_action
Filter (not action). Filters the Interactivity API store action name wired to the new-post form's submit event. Jetonomy Pro overrides this to 'actions.submitNewPostWithPoll' when the polls extension is active.
Parameters
| Parameter |
Type |
Description |
$action |
string |
Default action name: 'actions.submitNewPost' |
Return: string
Source: templates/views/new-post.php
jetonomy_search_filters
Fires inside the search results page, inside the filter panel, after the built-in filters. Use this to render additional search filter controls.
Parameters
| Parameter |
Type |
Description |
$q |
string |
Current search query string |
$filter |
string |
Active content-type filter ('all', 'posts', 'replies', 'spaces', 'users') |
$context |
array |
Other active filter values: date_from, date_to, author_id, tag_slug, sort |
Source: templates/views/search.php
Permissions Filter Hooks
jetonomy_space_role_permissions
Filter (not action). Filters the permissions array for a given space role. Use this to grant or revoke individual permissions for custom role configurations.
Parameters
| Parameter |
Type |
Description |
$permissions |
array |
Array of allowed action strings for the role (e.g. ['create_posts', 'vote', 'flag']) |
$role |
string |
Role name: 'member', 'moderator', or 'admin' |
$space_id |
int |
ID of the space the check applies to |
Return: array
Source: includes/permissions/class-permission-engine.php
jetonomy_use_frontend_space_edit
Filter (not action). Filters whether the space settings form should be served via the frontend (in-page) UI rather than redirecting to the admin panel. Return false to force the admin redirect.
Parameters
| Parameter |
Type |
Description |
$use_frontend |
bool |
true by default (uses frontend form) |
$space |
object |
Space row object |
Return: bool
Source: includes/functions.php
Theme Integration Filter Hooks
jetonomy_theme_light_tokens
Filter (not action). Filters the CSS custom property token map written for light mode. Return a modified array to override or add tokens injected into the page <head>.
Parameters
| Parameter |
Type |
Description |
$tokens |
array |
Associative array of ['--token-name' => 'value'] pairs |
Return: array
Source: includes/integrations/class-theme-integration.php
jetonomy_theme_dark_tokens
Filter (not action). Filters the CSS custom property token map written for dark mode.
Parameters
| Parameter |
Type |
Description |
$tokens |
array |
Associative array of ['--token-name' => 'value'] pairs |
Return: array
Source: includes/integrations/class-theme-integration.php
Admin Filter Hooks
Filter (not action). Filters the footer text shown at the bottom of all Jetonomy admin pages (replaces the default WordPress "Thank you" text).
Parameters
| Parameter |
Type |
Description |
$text |
string |
Default footer text string |
Return: string
Source: includes/admin/class-admin.php
Pro Hooks
These hooks are available only when Jetonomy Pro is active. Pro injects into core admin via the standard admin hooks (jetonomy_admin_dashboard_widgets, jetonomy_admin_settings_tabs) and registers its own extension lifecycle events.
| Hook |
Type |
Description |
jetonomy_pro_extension_booted |
action |
Fires after a Pro extension's boot() runs. Params: $extension_id (string) |
jetonomy_pro_extension_enabled |
action |
Fires when an extension is toggled on in admin. Params: $extension_id (string) |
jetonomy_pro_extension_disabled |
action |
Fires when an extension is toggled off. Params: $extension_id (string) |
jetonomy_pro_message_sent |
action |
Fires after a private message is sent. Params: $message_id (int), $conversation_id (int), $sender_id (int) |
jetonomy_pro_dm_received |
action |
Fires once per recipient when a DM is delivered. Counterpart to jetonomy_pro_message_sent - lets you build "received first DM" or "active inbox" rules. Skipped for system messages. Params: $message_id (int), $conversation_id (int), $sender_id (int), $recipient_id (int) |
jetonomy_pro_webhook_sent |
action |
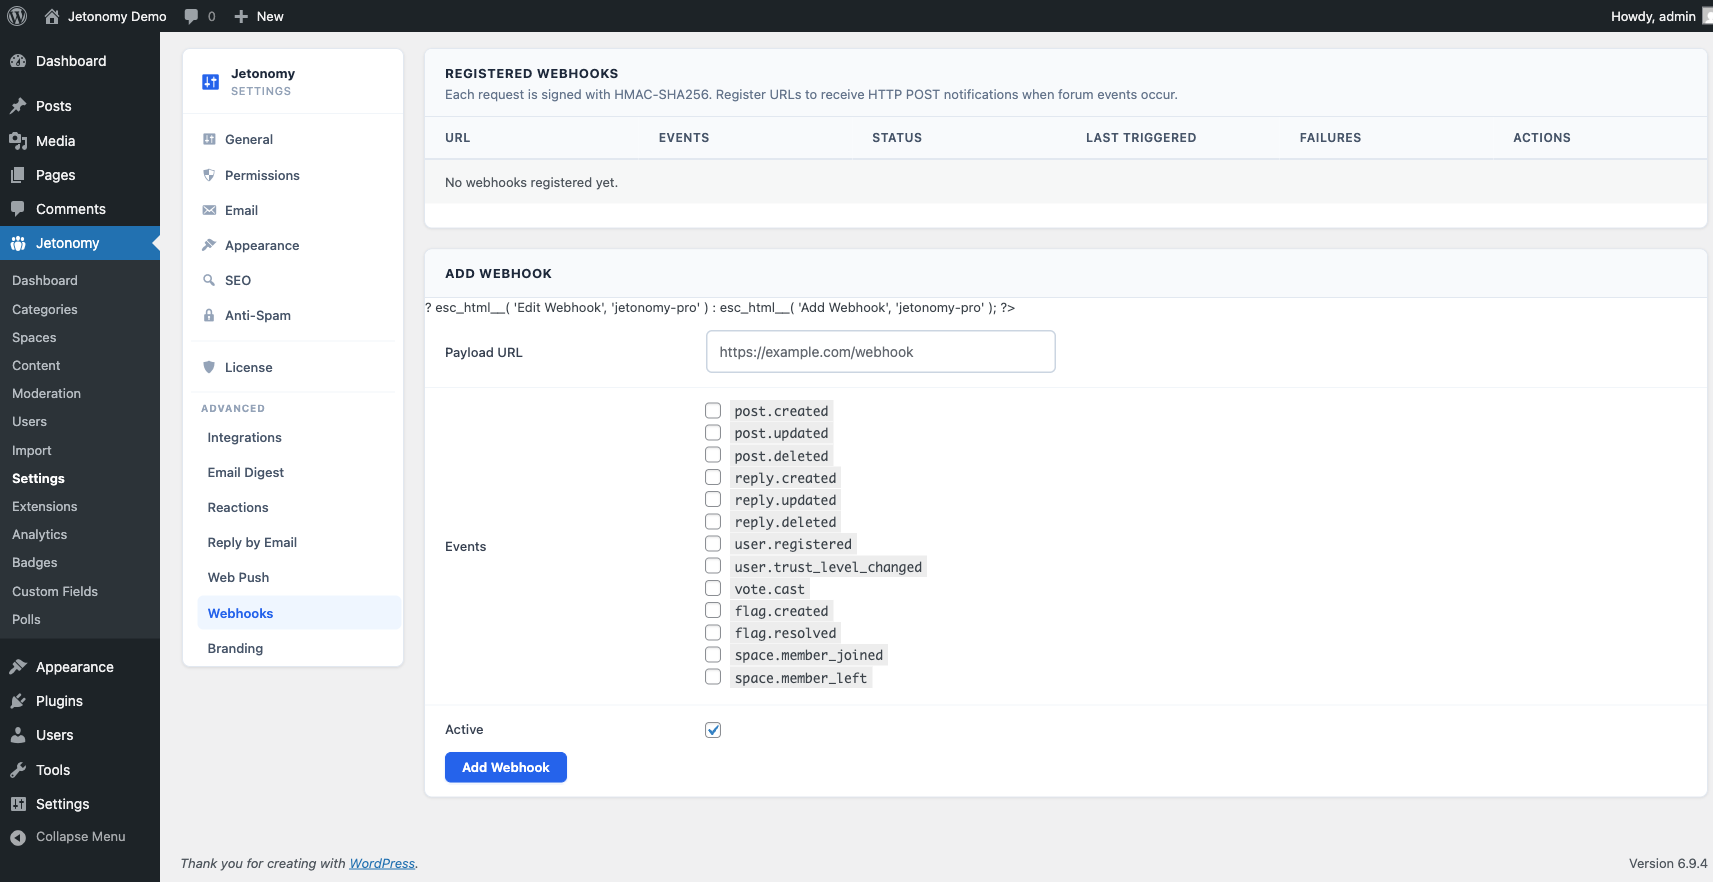
Fires after a webhook is dispatched. Params: $webhook_id (int), $event (string), $response_code (int) |
jetonomy_pro_digest_sent |
action |
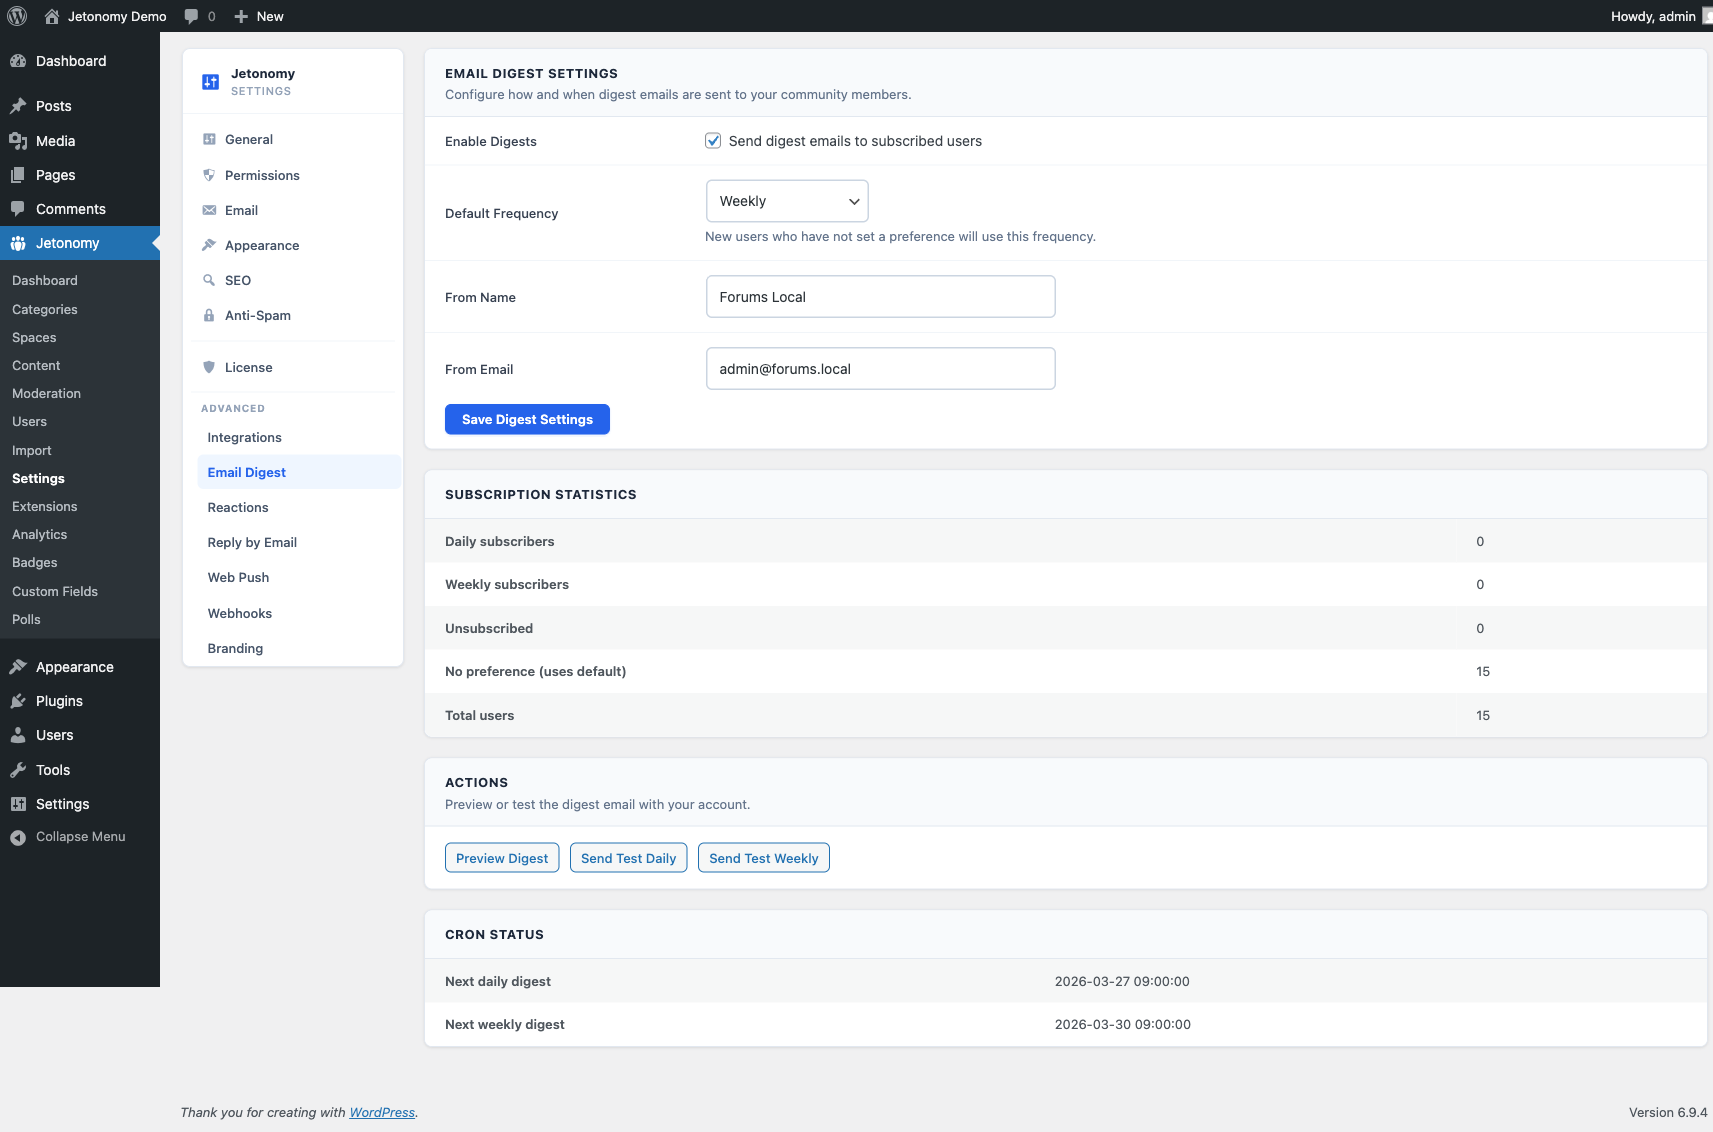
Fires after an email digest is sent. Params: $user_id (int), $frequency (string) |
jetonomy_pro_conversation_created
Fires after a new private conversation is created (both direct and group).
Parameters
| Parameter |
Type |
Description |
$conversation_id |
int |
ID of the newly created conversation |
$user_id |
int |
ID of the user who created the conversation |
$participants |
array |
Array of all participant user IDs (includes creator) |
Source: jetonomy-pro/includes/extensions/private-messaging/class-extension.php
jetonomy_pro_message_notified
Fires after in-app and/or email notifications are dispatched to conversation participants for a new message. The $preview string is the truncated message preview sent in the notification.
Parameters
| Parameter |
Type |
Description |
$conversation_id |
int |
ID of the conversation |
$sender_id |
int |
WP user ID of the message sender |
$preview |
string |
Truncated plain-text preview of the message |
Source: jetonomy-pro/includes/extensions/private-messaging/class-extension.php
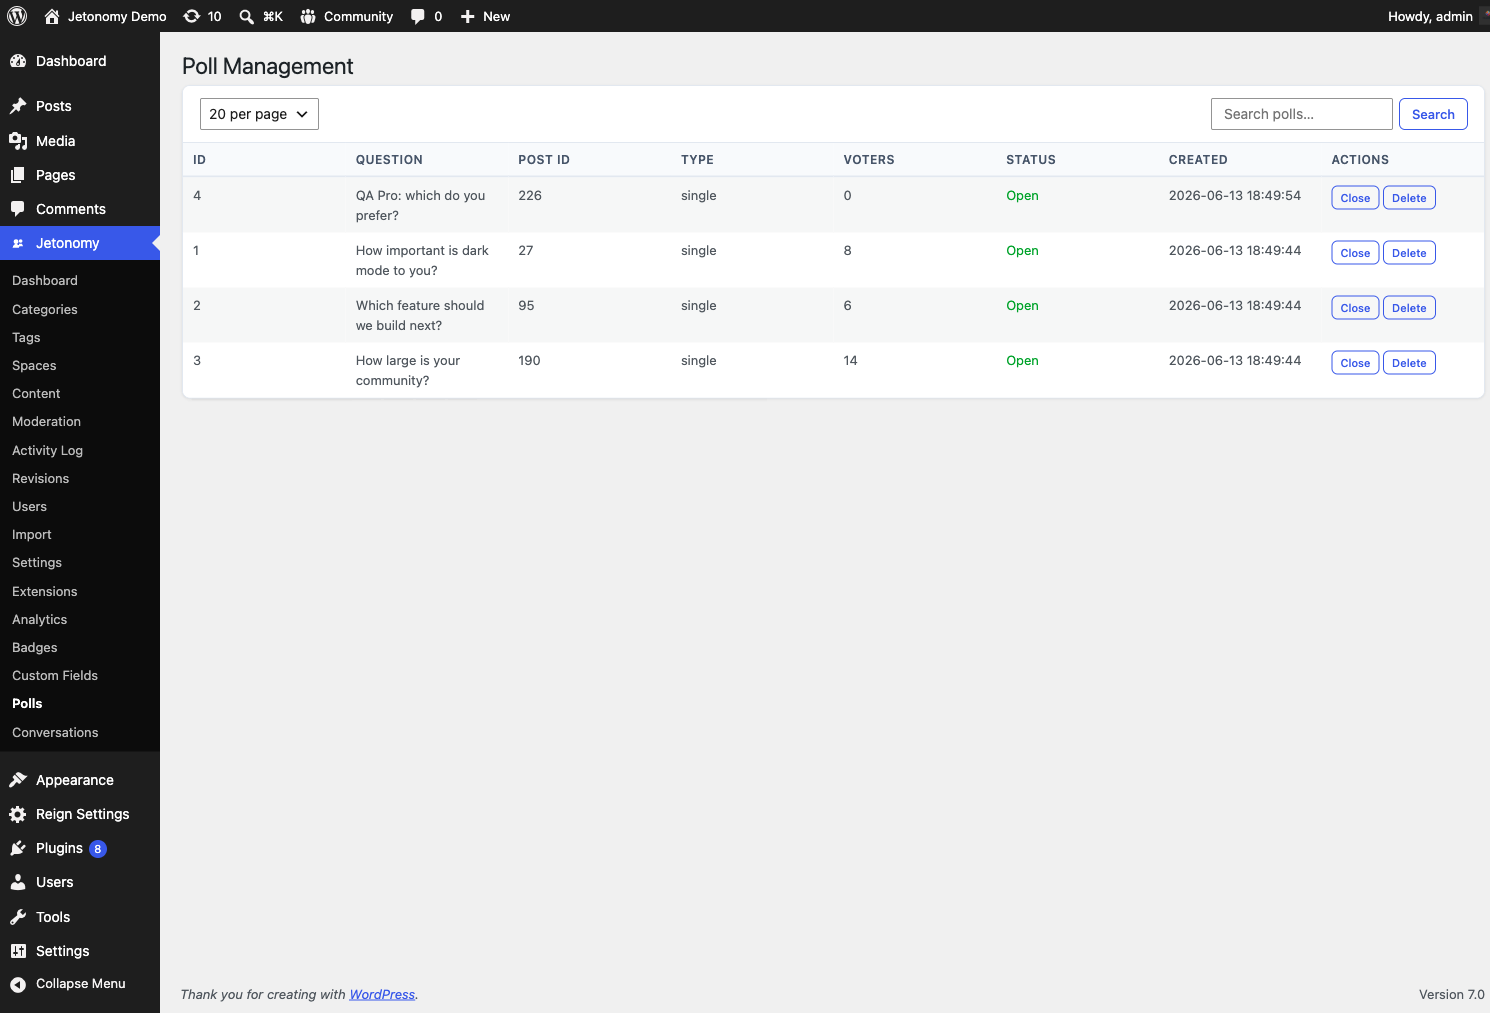
jetonomy_pro_poll_created
Fires after a poll is created and attached to a post.
Parameters
| Parameter |
Type |
Description |
$poll_id |
int |
ID of the newly created poll |
$post_id |
int |
ID of the post the poll is attached to |
$user_id |
int |
ID of the user who created the poll |
Source: jetonomy-pro/includes/extensions/polls/class-extension.php
jetonomy_pro_poll_voted
Fires after a user casts a vote on a poll.
Parameters
| Parameter |
Type |
Description |
$poll_id |
int |
ID of the poll |
$user_id |
int |
ID of the voting user |
$option_ids |
array |
Array of option IDs the user voted for (multi-select polls may have more than one) |
Source: jetonomy-pro/includes/extensions/polls/class-extension.php
jetonomy_pro_poll_unvoted
Fires after a user removes their vote from a poll.
Parameters
| Parameter |
Type |
Description |
$poll_id |
int |
ID of the poll |
$user_id |
int |
ID of the user who removed their vote |
Source: jetonomy-pro/includes/extensions/polls/class-extension.php
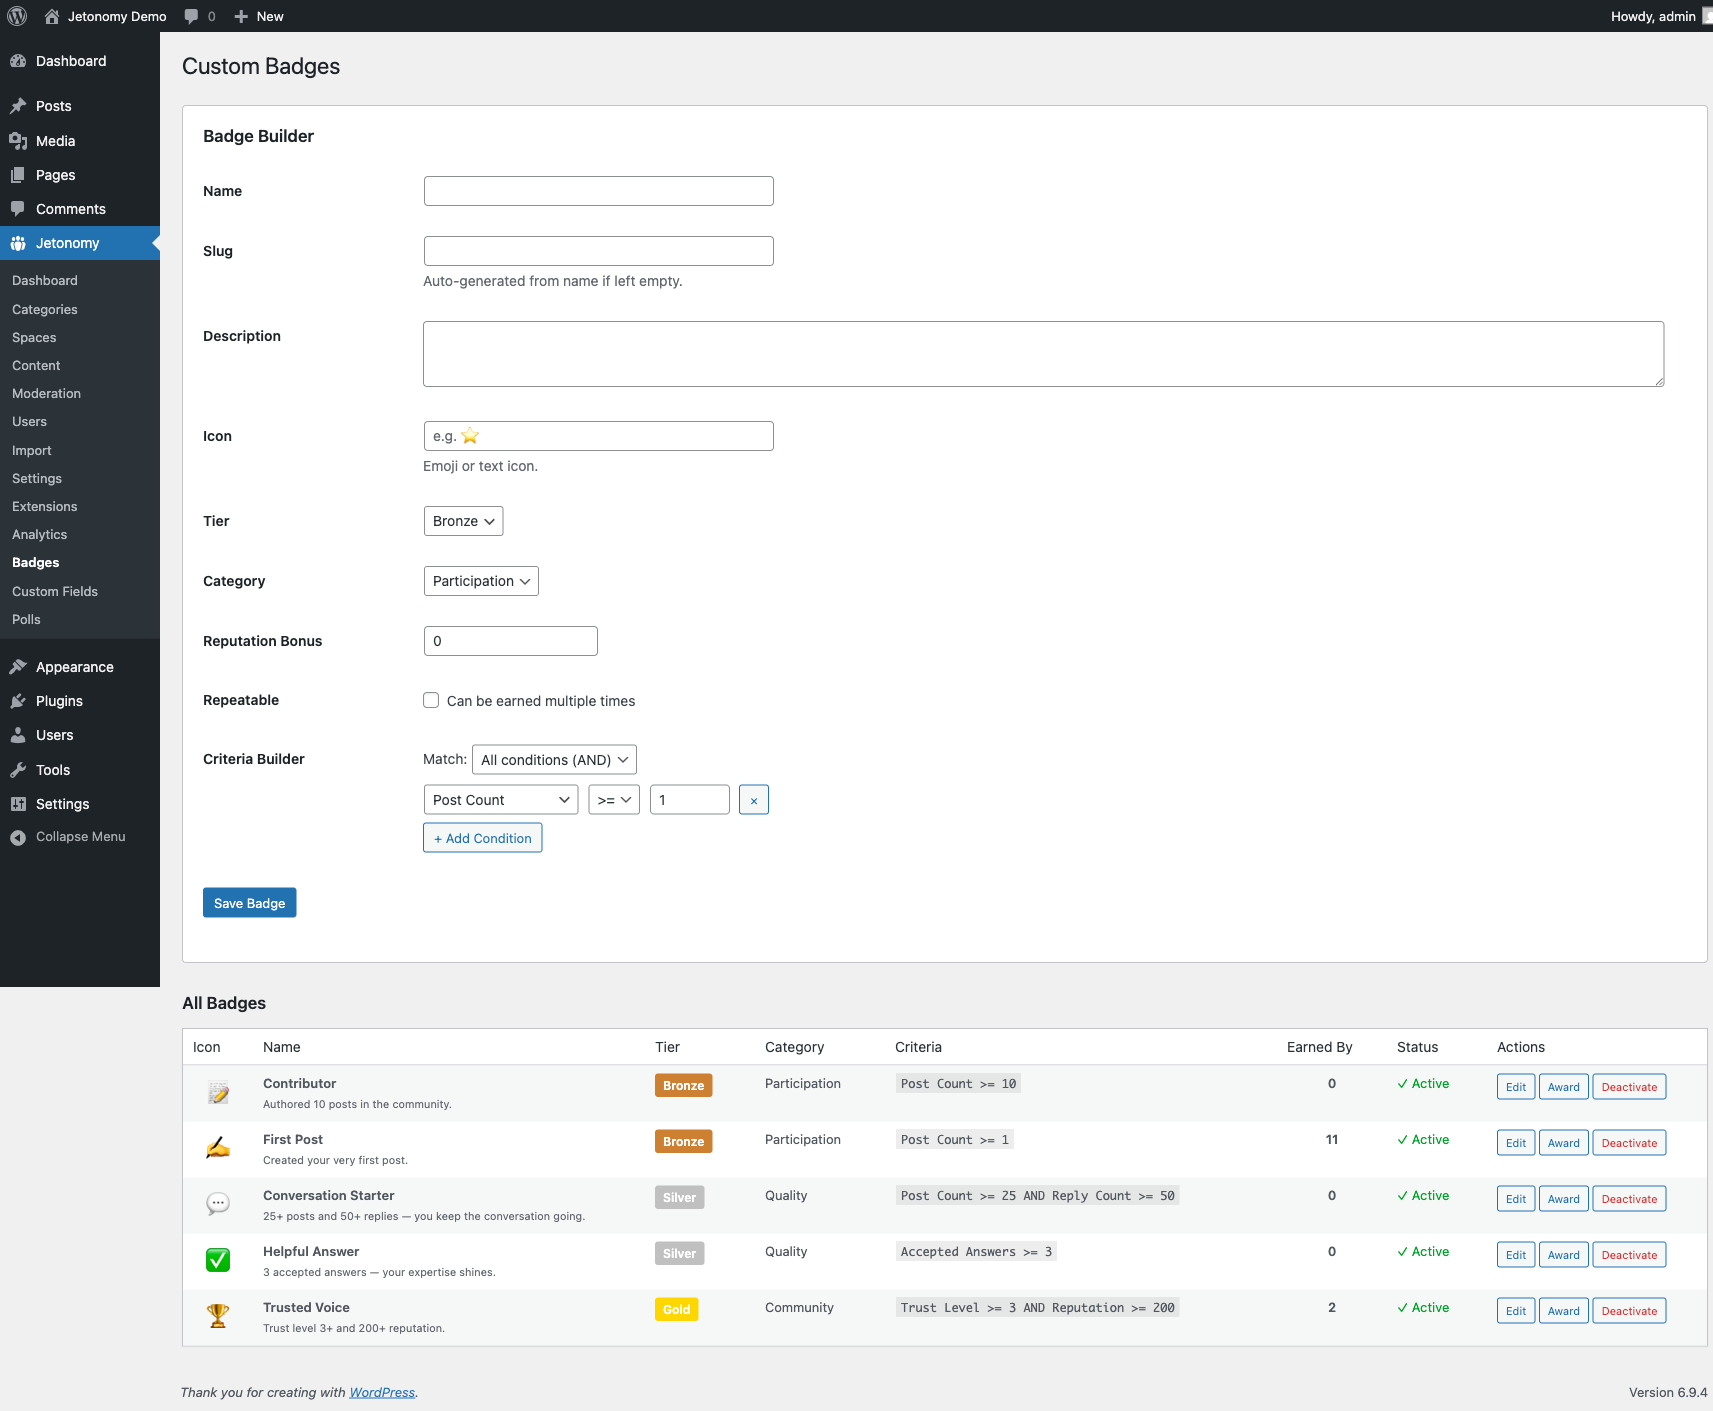
jetonomy_pro_badge_earned
Fires after a badge is awarded to a user (both manual awards via the REST API and auto-awards from the daily cron evaluator).
Parameters
| Parameter |
Type |
Description |
$user_id |
int |
ID of the user who earned the badge |
$badge_id |
int |
ID of the badge definition |
$badge |
object |
Full badge row object (name, description, icon, criteria, etc.) |
Source: jetonomy-pro/includes/extensions/custom-badges/class-extension.php
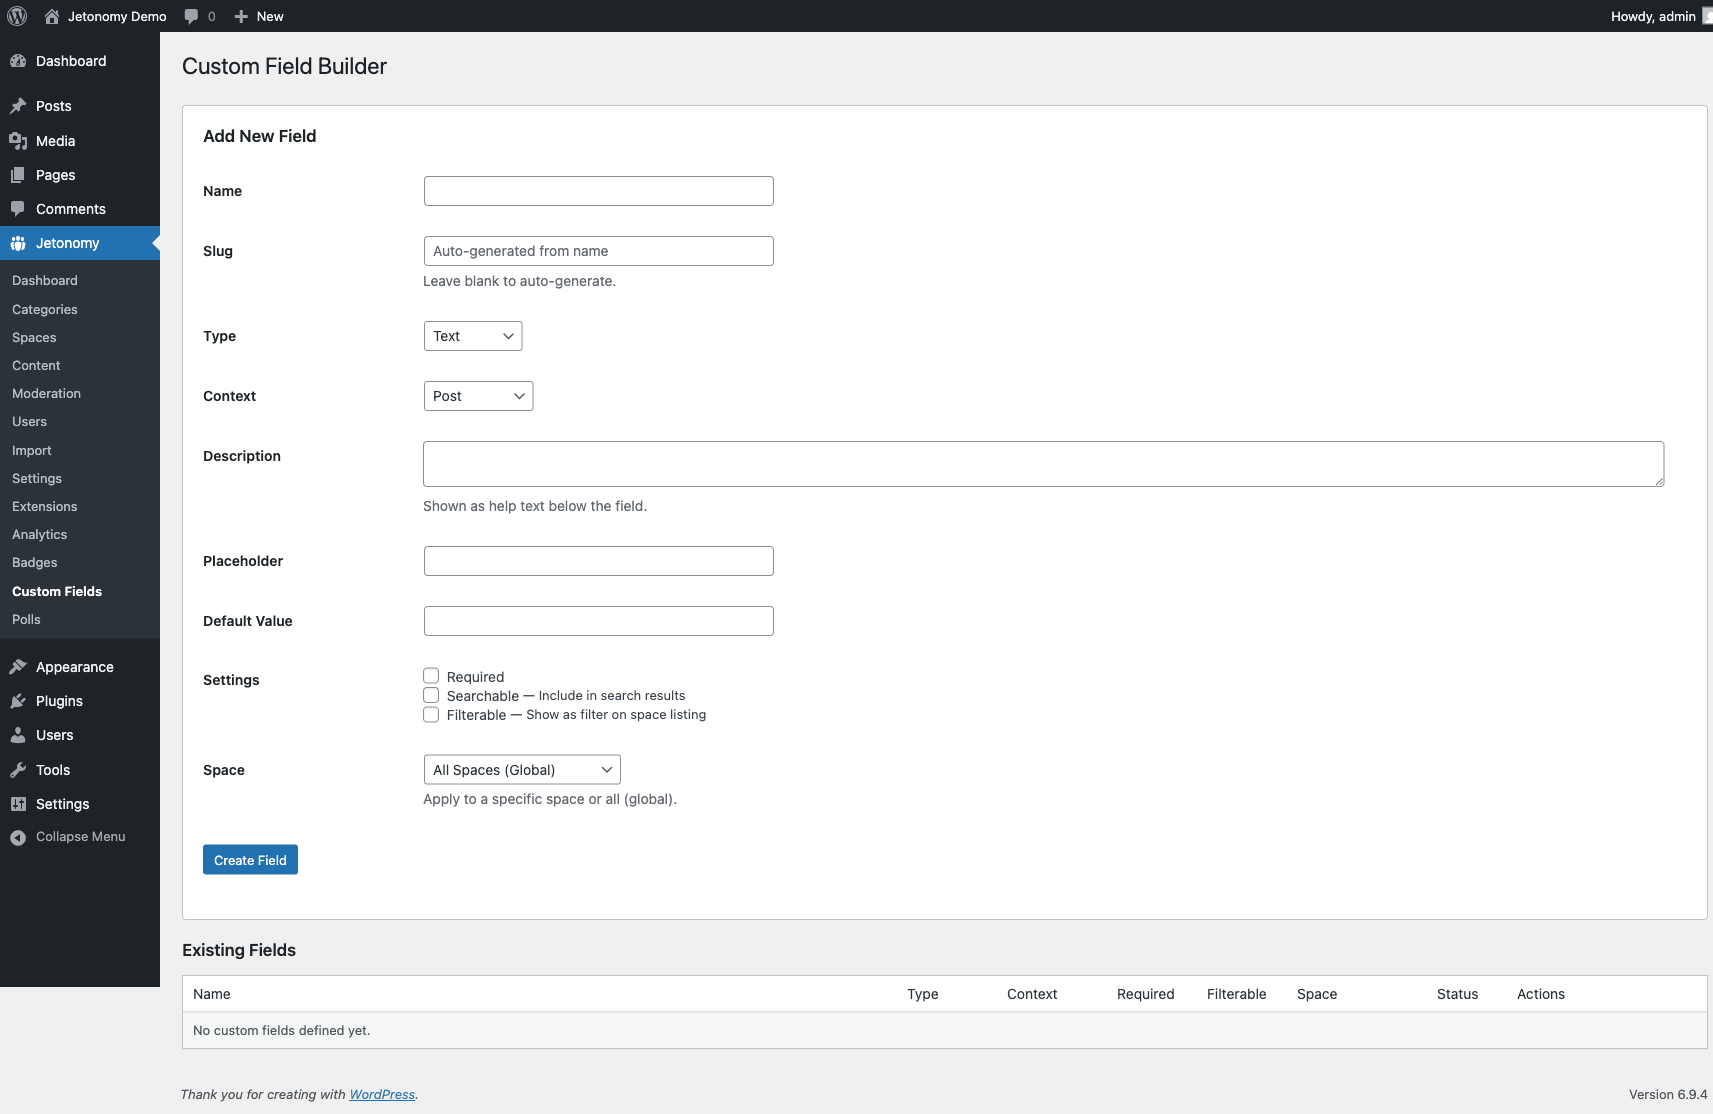
jetonomy_pro_field_created
Fires after a custom field definition is created.
Parameters
| Parameter |
Type |
Description |
$field_id |
int |
ID of the newly created custom field |
$context |
array |
Creation context, including object_type ('post', 'user', or 'space') and the full field data |
Source: jetonomy-pro/includes/extensions/custom-fields/class-extension.php
jetonomy_pro_reaction_toggled
Fires after an emoji reaction is added or removed. The $action parameter tells you which direction the toggle went.
Parameters
| Parameter |
Type |
Description |
$object_type |
string |
'post' or 'reply' |
$object_id |
int |
ID of the object that was reacted to |
$emoji |
string |
The emoji slug or character (e.g. 'thumbs_up', '+1') |
$user_id |
int |
ID of the reacting user |
$action |
string |
'added' or 'removed' |
Source: jetonomy-pro/includes/extensions/reactions/class-extension.php
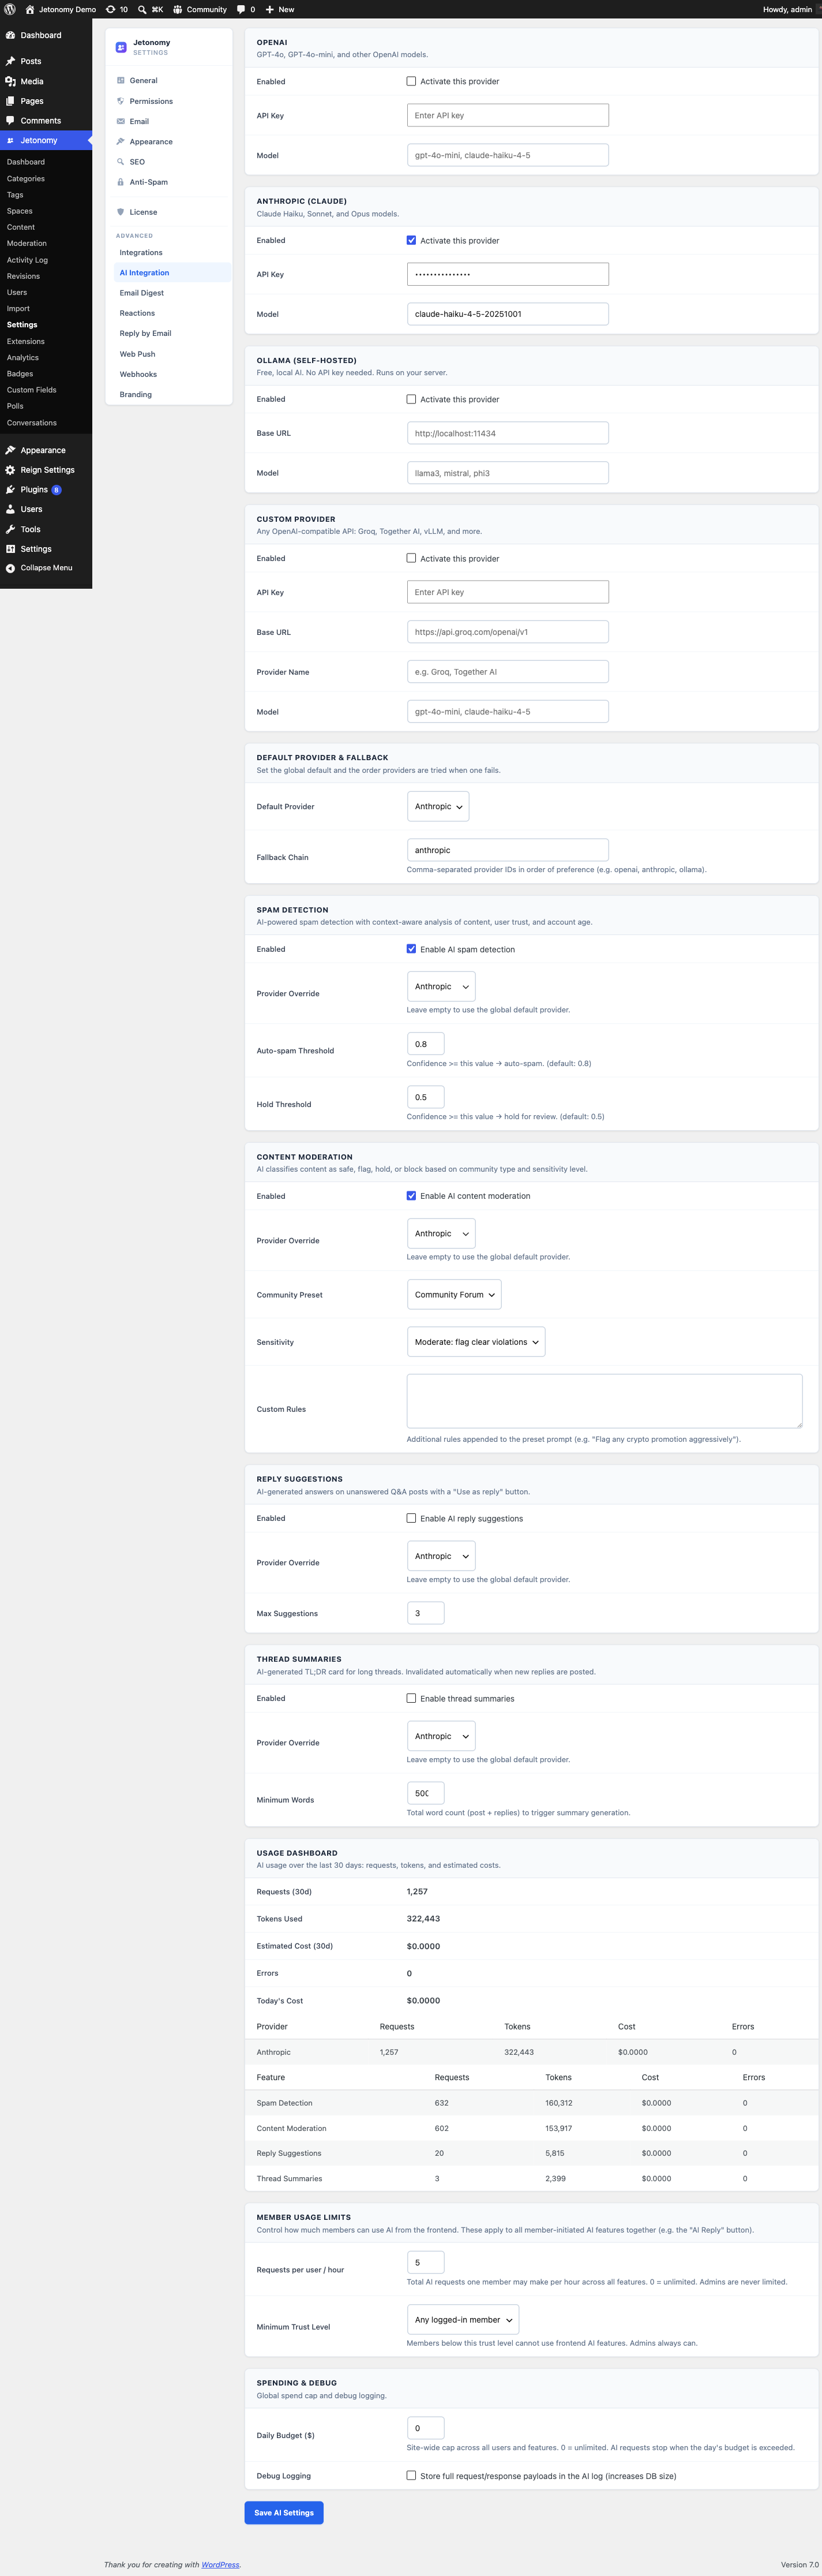
jetonomy_pro_ai_all_providers_failed
Fires when every configured AI provider has been tried and all returned an error or exception. Use this to log failures or alert an ops channel.
Parameters
| Parameter |
Type |
Description |
$feature |
string |
The feature that requested AI ('summary', 'spam', 'moderation', 'suggestion') |
$exception |
\Throwable |
The last exception thrown |
Source: jetonomy-pro/includes/extensions/ai/ (class-summarizer.php, class-spam-detector.php, class-moderator.php, class-suggester.php)
jetonomy_create_reply_from_email
Fired by the Pro Reply-by-Email extension to request that the free plugin create a reply from an inbound email. The free plugin listens to this action and routes it through the standard reply creation path so all free-side hooks (moderation, notifications, reputation) still fire.
Parameters
| Parameter |
Type |
Description |
$post_id |
int |
ID of the post to reply to |
$user_id |
int |
ID of the user whose email was matched |
$content |
string |
Cleaned plain-text or HTML content extracted from the email |
$source |
string |
Source label; always 'reply_by_email' for replies created via this hook |
Source: jetonomy-pro/includes/extensions/reply-by-email/class-extension.php
jetonomy_pro_reaction_icon_renderer
Filter (not action). Filters the renderer strategy used for a reaction icon. The default renderer is 'emoji', which uses the native platform emoji. Override with a custom renderer slug to swap in SVG icons or image sprites.
Parameters
| Parameter |
Type |
Description |
$renderer |
string |
Current renderer slug ('emoji' by default) |
$slug |
string |
The reaction slug being rendered (e.g. '+1', 'heart') |
$size |
int |
Requested icon size in pixels |
Return: string Renderer slug to use.
Source: jetonomy-pro/includes/extensions/reactions/class-extension.php
What's Next?


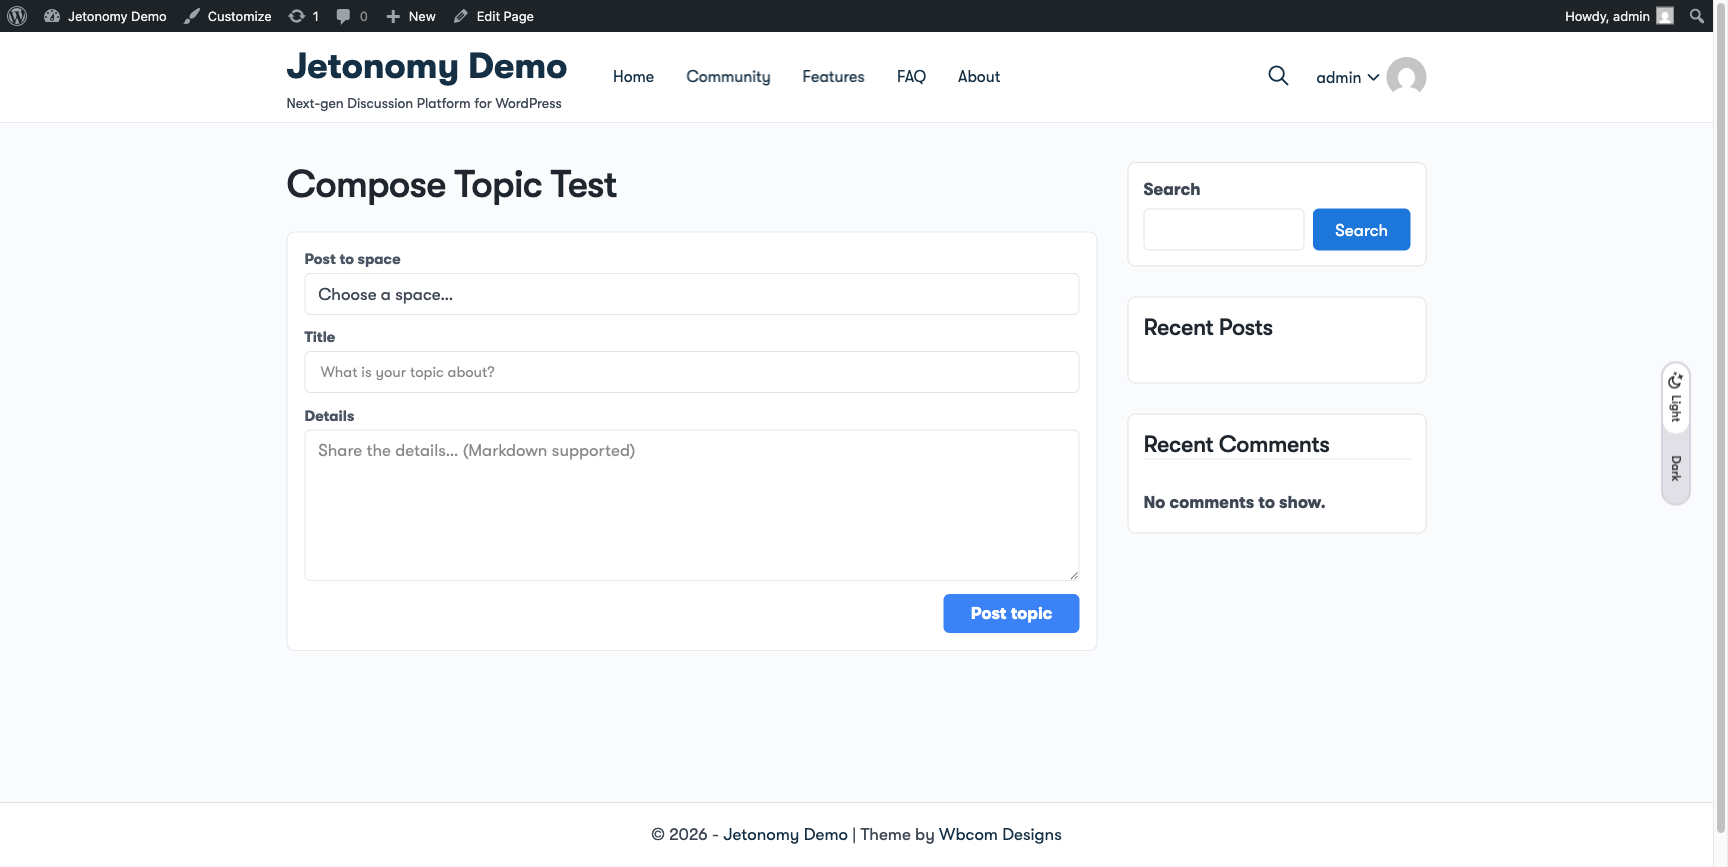
 The poll is attached to the topic and saved together when you click Post. You cannot attach a poll to a reply - only to top-level topics.
 The total vote count appears below the bar chart. If the poll has a close date, a countdown shows how much time remains.