Wbcom Designs Dashboard for LearnDash Docs
Back to product Buy Now

Getting Started

Welcome to LearnDash Dashboard

LearnDash Dashboard gives your LearnDash-powered website a beautiful, fully-featured frontend dashboard - so instructors, students, and group leaders never have to touch the WordPress admin.

Instead of navigating complex backend screens, everyone gets a clean, purpose-built interface that shows them exactly what they need, nothing more.

Who Is It For?

LearnDash Dashboard works for every type of user on your site:

  • Site owners and admins - manage everything from one place: all courses, all students, all reports, all settings
  • Instructors - create and manage courses, track student progress, handle earnings, and communicate with students
  • Group leaders - oversee their assigned student groups, run reports, and send communications
  • Students - track their learning progress, view quiz results, download certificates, and manage assignments

What Can You Do With It?

For Instructors

  • Create and edit courses, lessons, topics, quizzes, and questions - right from the frontend, no admin access needed
  • Duplicate entire courses with one click to save time building new content
  • Track how your students are progressing through your courses
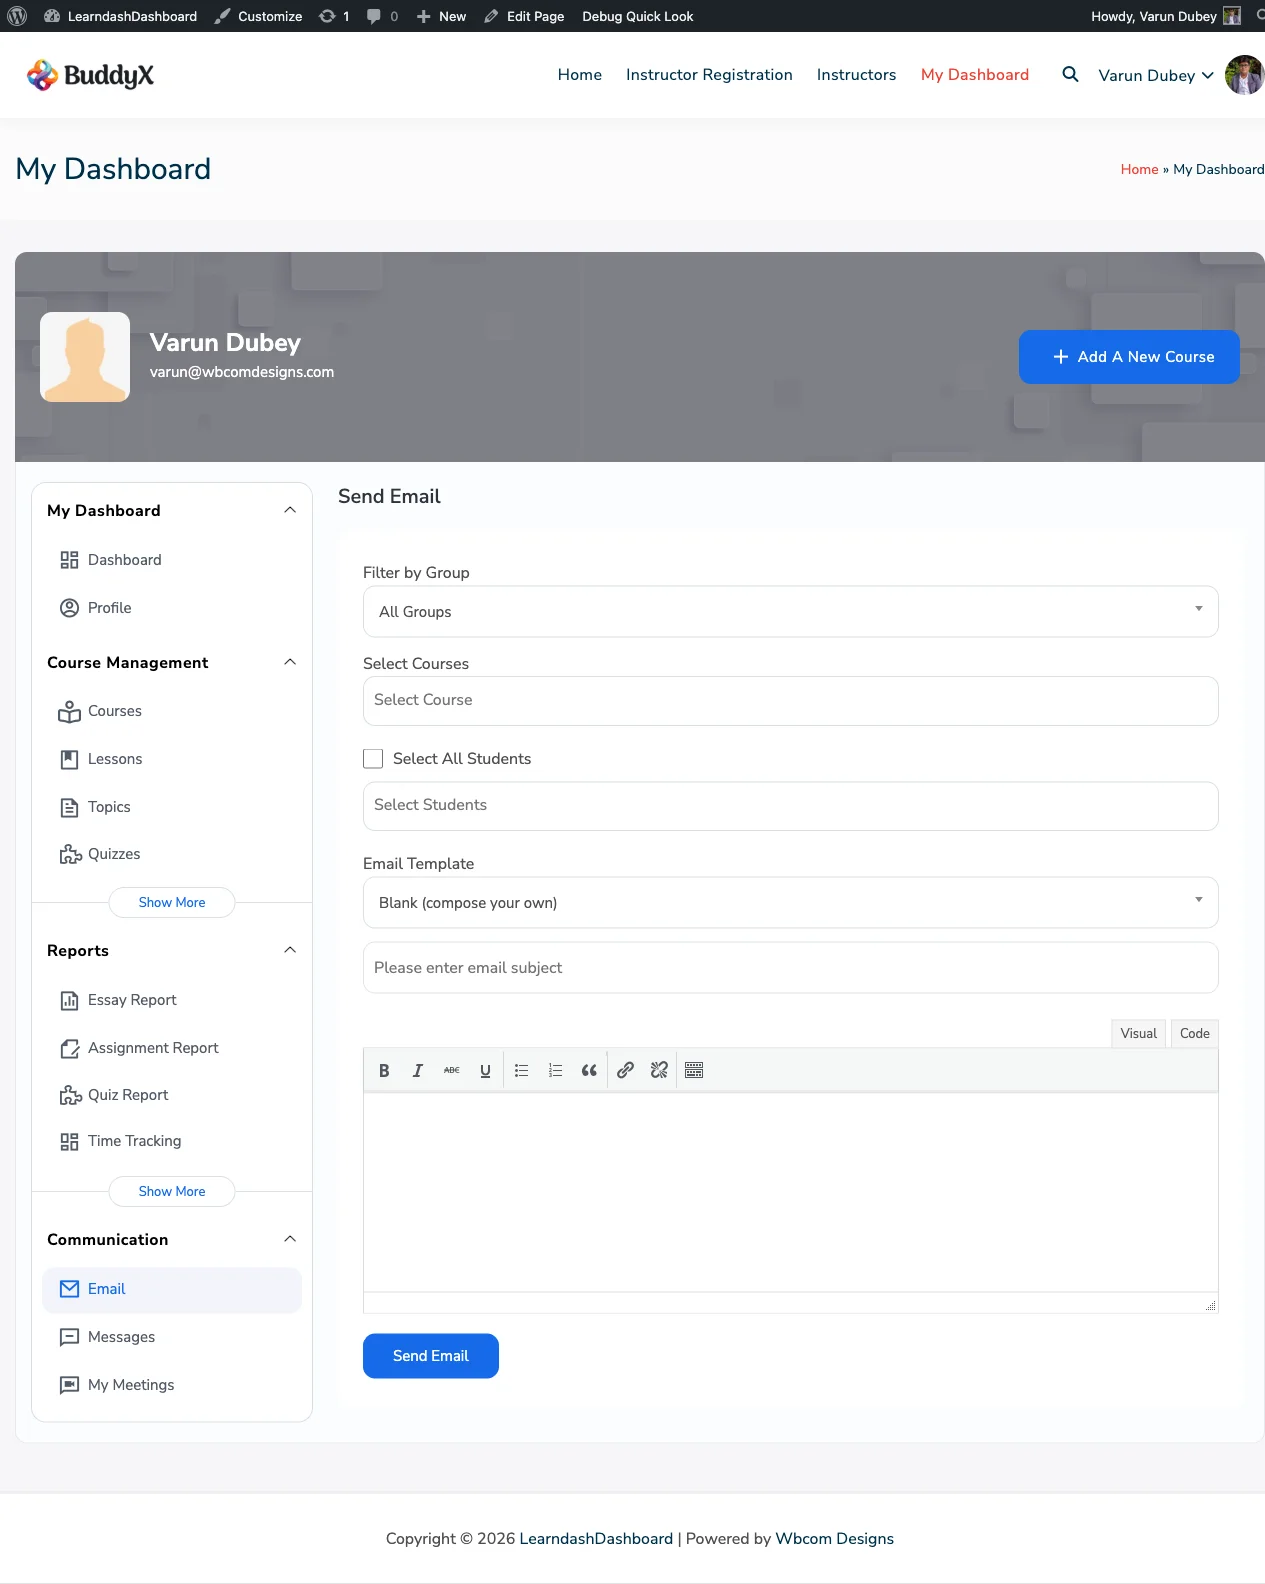
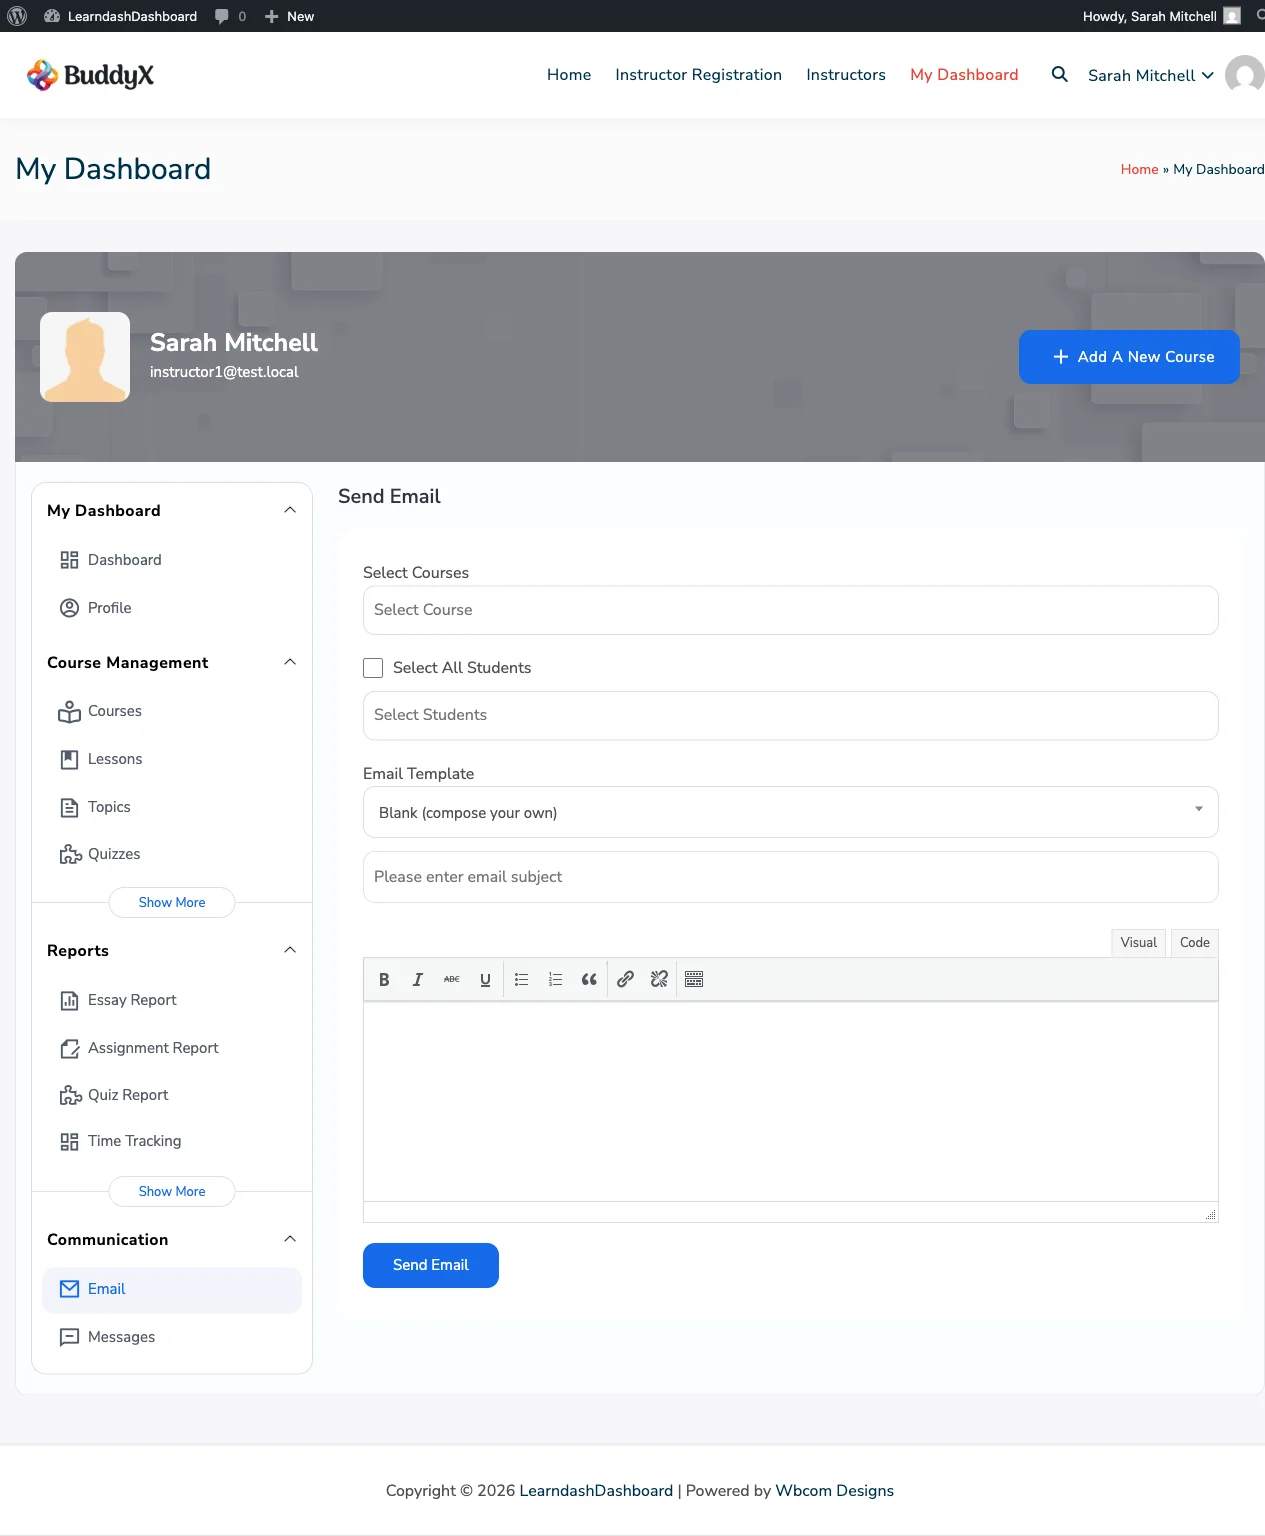
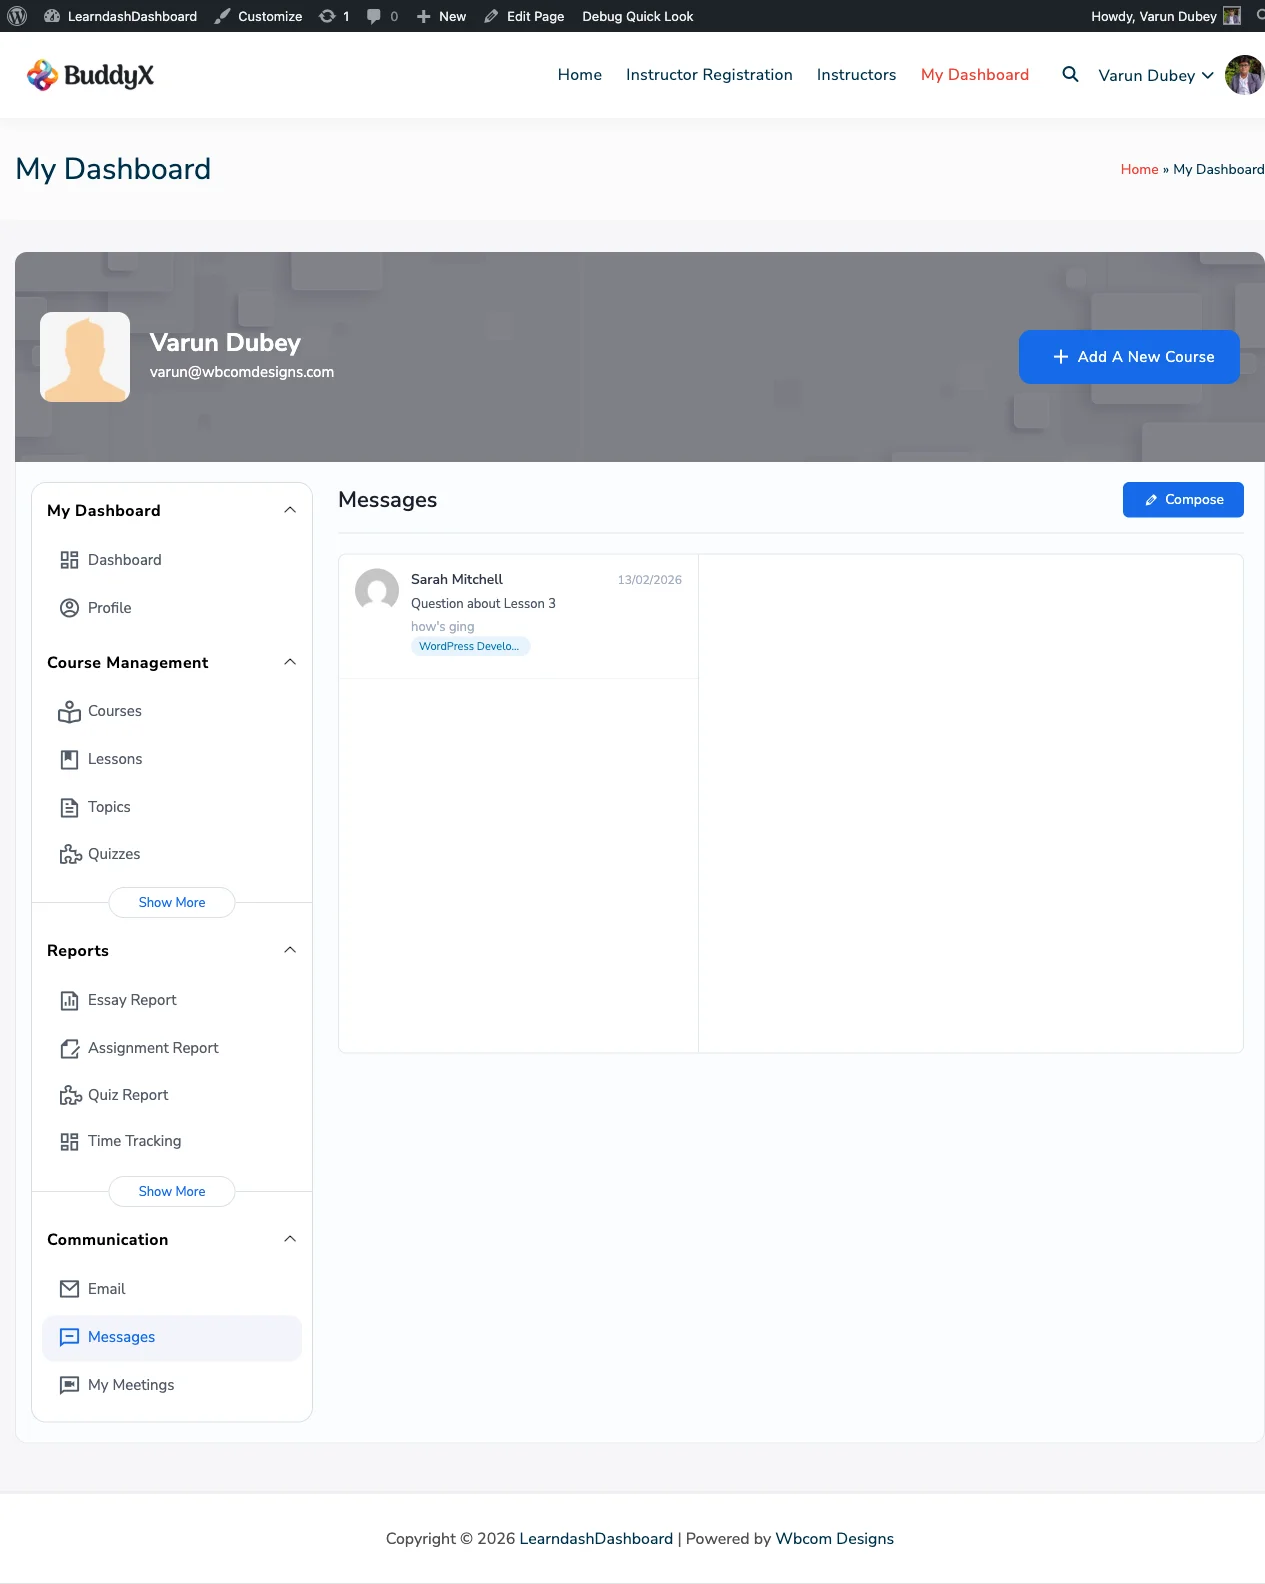
  • Send emails and private messages directly to your students
  • View your earnings, request payouts, and monitor commission history
  • Host live Zoom meetings from inside the dashboard (optional)

For Students

  • See all enrolled courses in one place and pick up right where you left off
  • Review your quiz attempts, scores, and detailed results
  • Download certificates for courses you've completed
  • Submit and track assignments
  • View your personal activity timeline

For Group Leaders

  • Manage group membership - add or remove students easily
  • Run reports on group performance and course completion
  • Generate enrollment codes to invite new members
  • Send messages and emails to everyone in your groups

For Admins

  • Full visibility across all instructors, students, groups, and courses
  • Site-wide reports and insights with visual charts
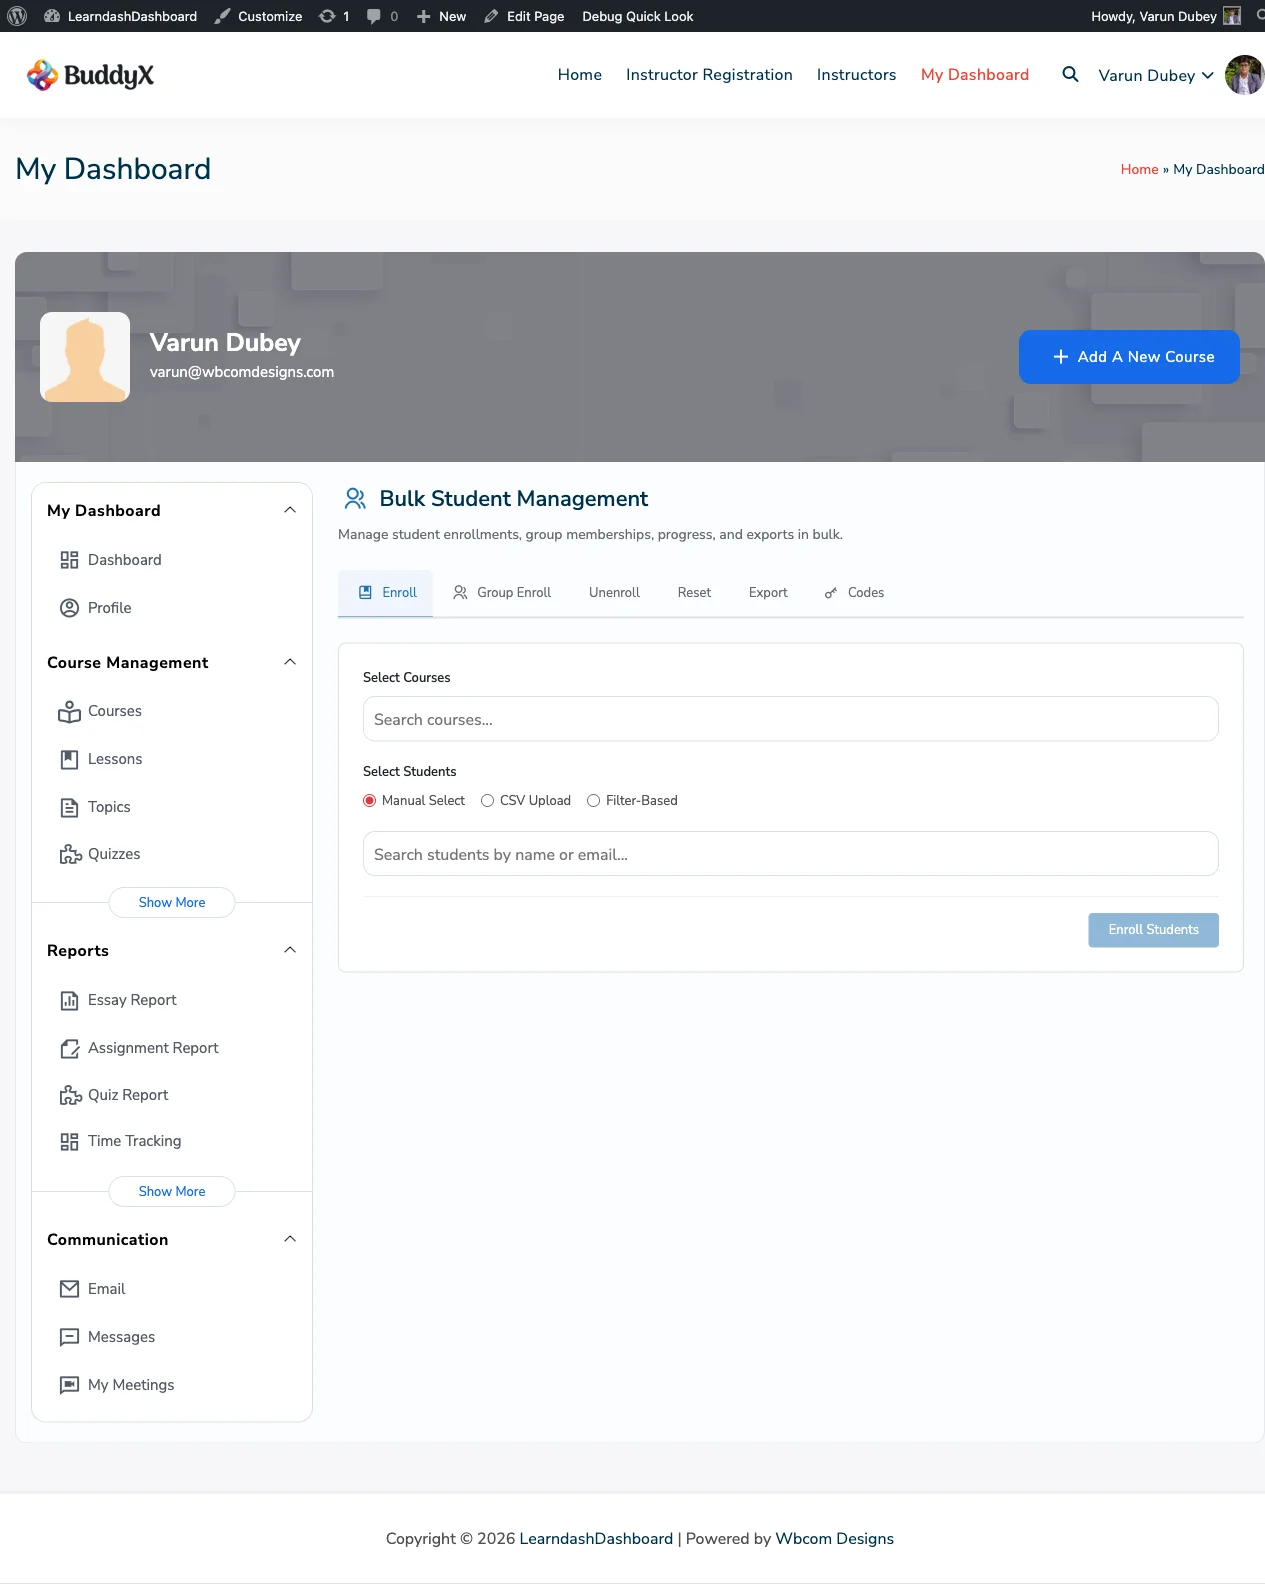
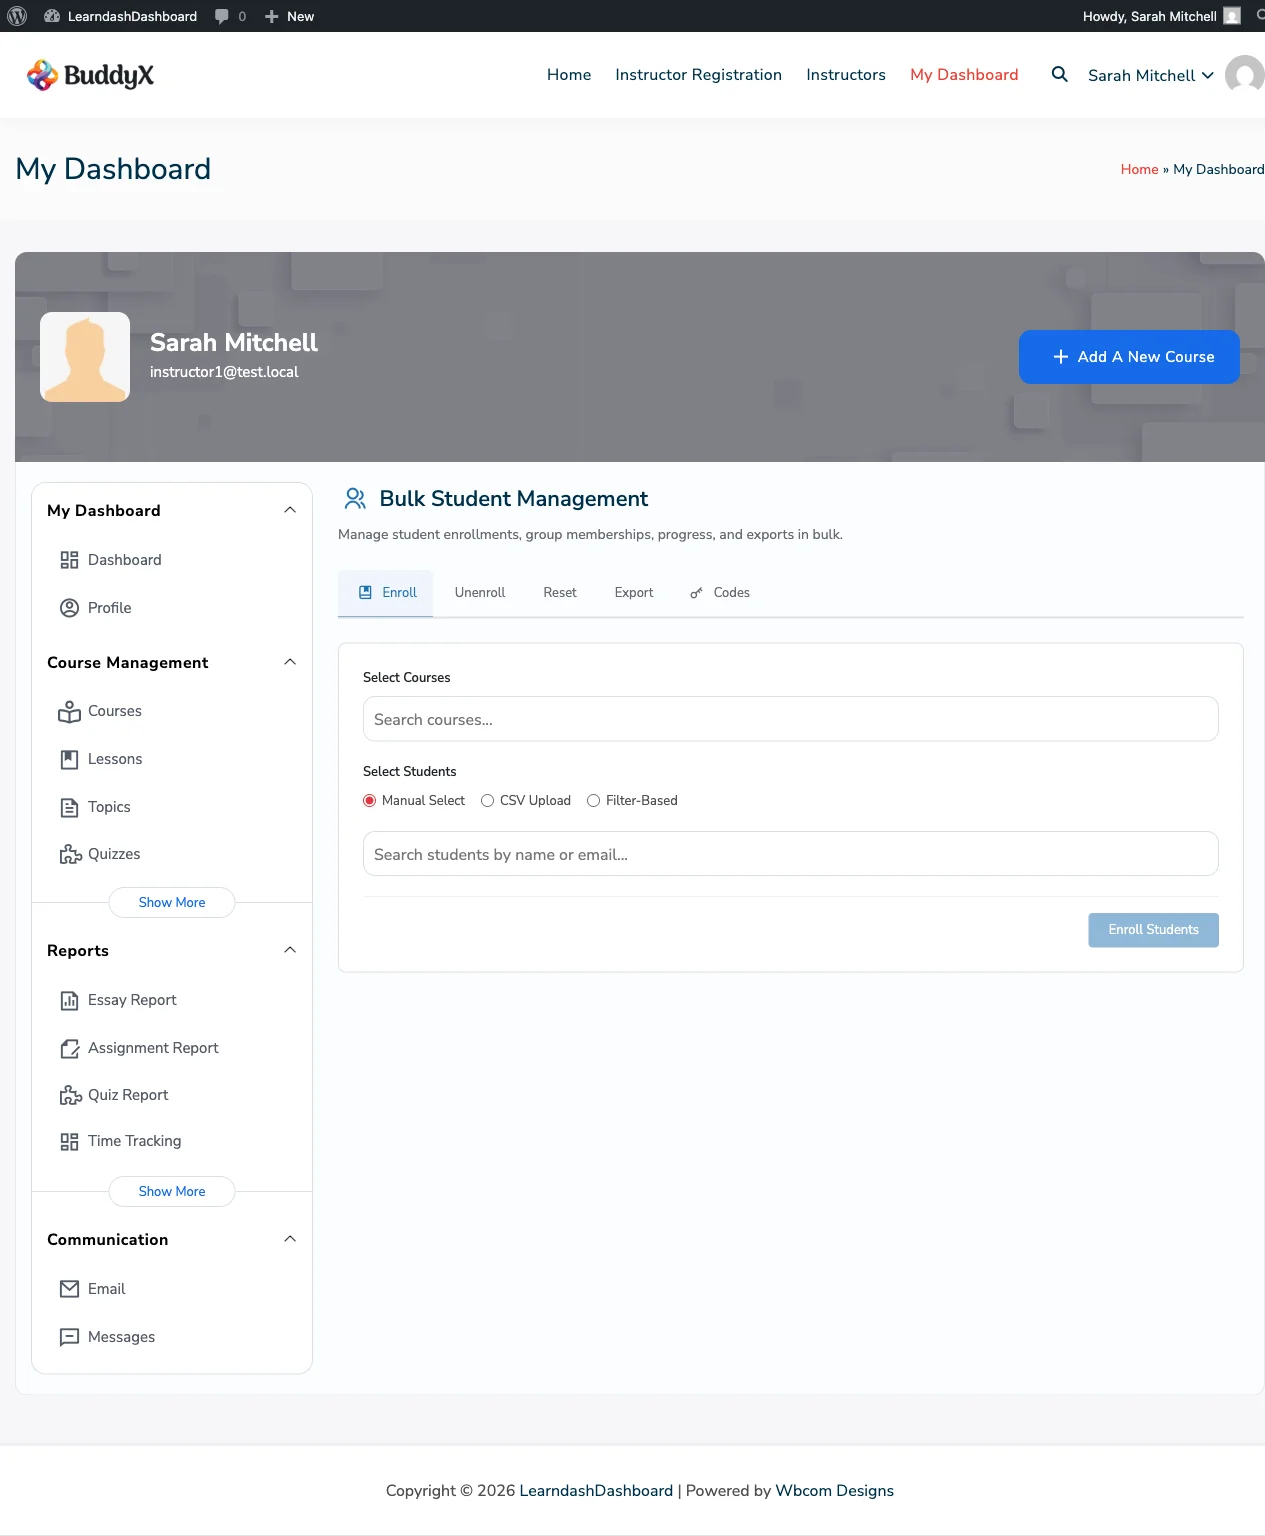
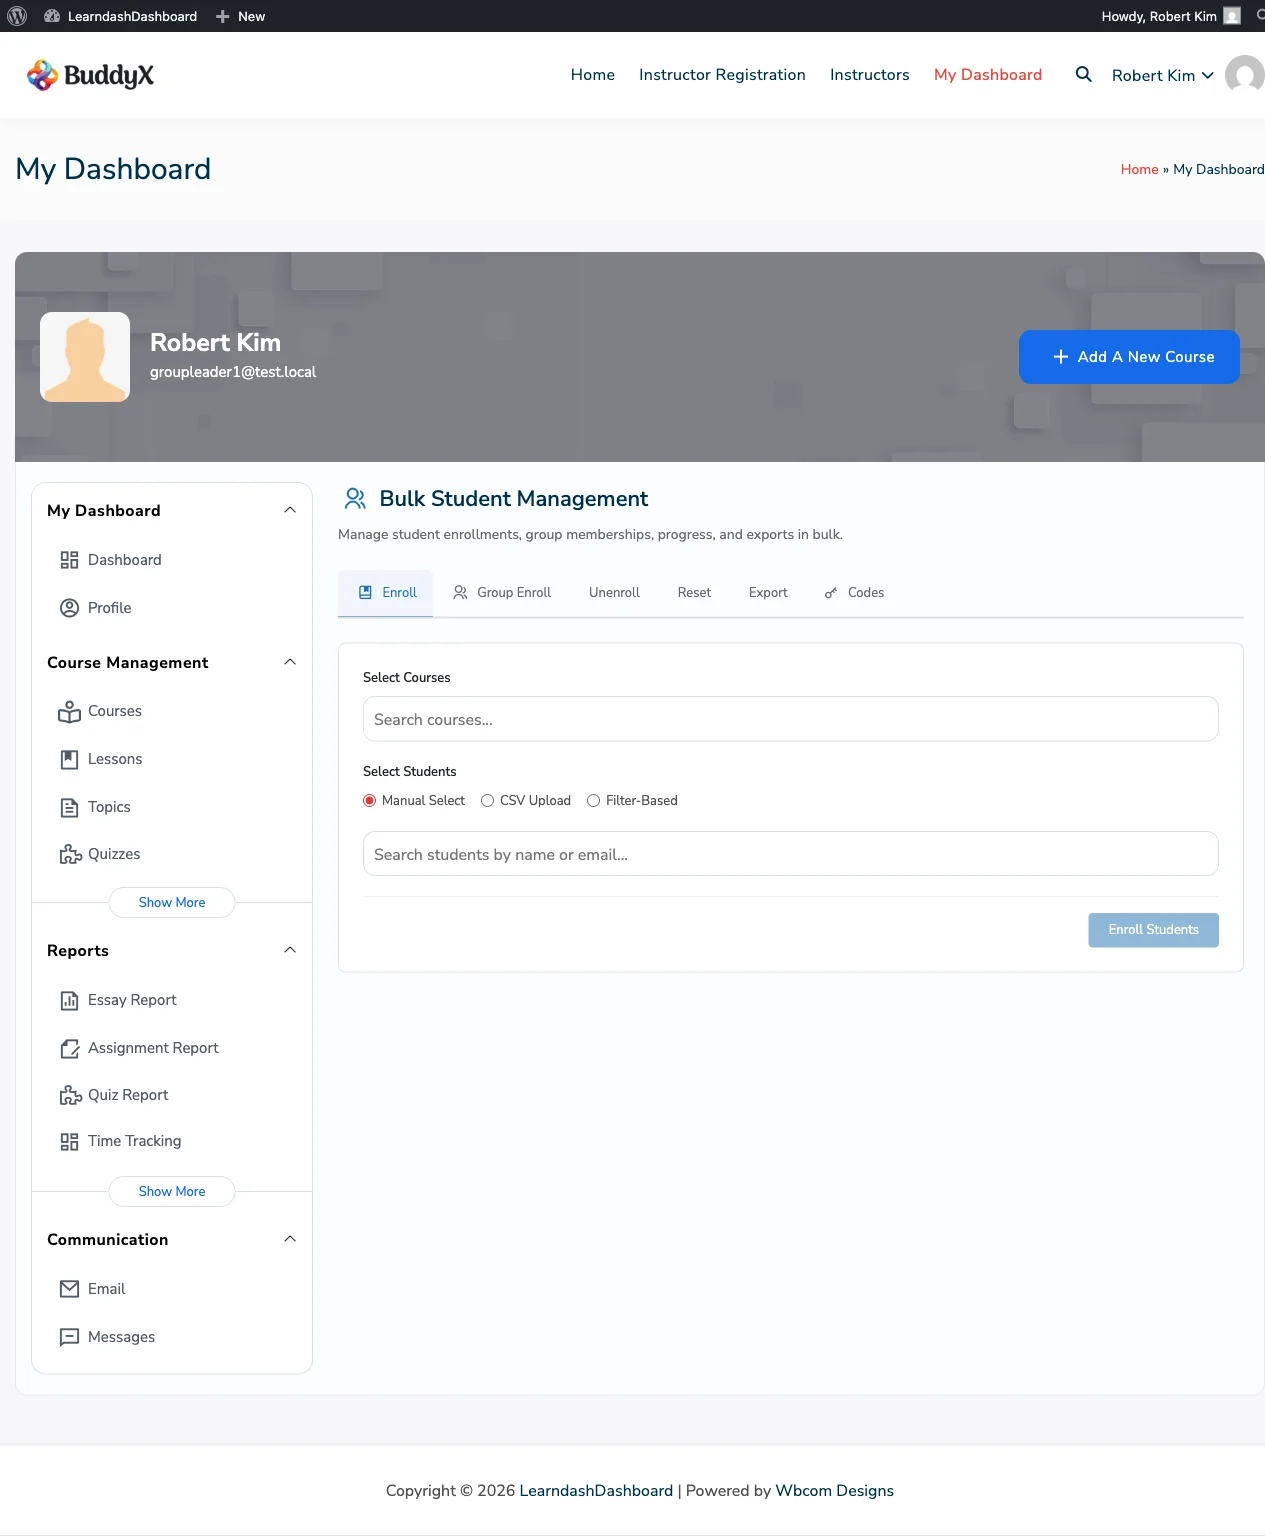
  • Bulk enrollment tools - enroll or unenroll multiple students at once
  • Manage instructor applications and payout requests
  • Control exactly which features each role can see

What Makes It Different?

LearnDash Dashboard puts a full course management workspace on the frontend of your site. Instructors get the tools they need without admin access. Students get a clean learning hub. You get a professional LMS experience your users will love.

How the Dashboard Works

After you install the plugin, you create a single page on your site and add the LearnDash Dashboard shortcode to it. That page becomes the dashboard. Every user who visits it sees a personalized view based on their role - instructors see course management tools, students see their learning activity, and so on.

You control which sections each role can access through the plugin settings.

What's in This Guide

This Getting Started section walks you through everything you need to go from install to a working dashboard:

  • Installation - how to install the plugin and activate your license
  • Quick Start - get your dashboard live in five minutes
  • Requirements - what your site needs before you install
  • Shortcodes - how to use the dashboard and its components on any page
  • User Roles - a plain-language guide to what each role can do

Installation & Activation

This guide walks you through installing LearnDash Dashboard and activating your license so you receive automatic updates.

Before You Install

Make sure the following plugins are already installed and active on your site:

  • LearnDash LMS - the course platform LearnDash Dashboard is built on top of
  • Advanced Custom Fields - bundled with the plugin, powers the frontend forms for creating and editing courses

LearnDash Dashboard includes ACF automatically. No separate installation needed - the plugin loads its own bundled version and handles any conflicts with external ACF installations.

Install the Plugin

  1. Log in to your WordPress admin area.
  2. Go to Plugins > Add New.
  3. Click Upload Plugin at the top of the page.
  4. Click Choose File and select the ld-dashboard.zip file you downloaded from Wbcom Designs.
  5. Click Install Now.
  6. When the upload finishes, click Activate Plugin.

Option 2: Install via FTP

Use this method if you prefer to upload files manually.

  1. Unzip the ld-dashboard.zip file on your computer.
  2. Connect to your server using an FTP client (such as FileZilla).
  3. Upload the ld-dashboard folder to your site's /wp-content/plugins/ folder.
  4. Log in to your WordPress admin area.
  5. Go to Plugins > Installed Plugins.
  6. Find LearnDash Dashboard in the list and click Activate.

Activate Your License

Activating your license connects your site to Wbcom Designs so you receive automatic updates when new versions are released.

  1. After activating the plugin, go to LearnDash Dashboard > Welcome in your WordPress admin.
  2. Find the License Key field.
  3. Enter the license key from your Wbcom Designs purchase confirmation email.
  4. Click Activate License.
  5. The status will update to Active.

If activation fails, check that your server can connect to the internet. Your site needs to be able to reach wbcomdesigns.com to verify the license.

Quick Setup Checklist

After activating the plugin, complete these steps to get your dashboard running:

  • License key entered and status shows Active
  • LearnDash LMS is active with at least one course set up
  • Create a new WordPress page (for example, "My Dashboard")
  • Add the [ld_dashboard] shortcode to that page and publish it
  • Go to LearnDash Dashboard > Page Mapping and select your new page
  • Go to LearnDash Dashboard > Menu Options to choose which sections each role can see
  • Optionally, go to LearnDash Dashboard > Design to set your brand colors

Once you complete these steps, your dashboard is live and ready to use.

Need help with the setup steps? See the Quick Start Guide.

Quick Start Guide

Follow these steps to get your LearnDash Dashboard live and working. The whole process takes about five minutes.

Step 1: Create a Dashboard Page

The dashboard lives on a regular WordPress page. You'll create that page now.

  1. Go to Pages > Add New in your WordPress admin.
  2. Give the page a title - for example, My Dashboard.
  3. In the page content area, type (or paste) this shortcode:
[ld_dashboard]
  1. Click Publish.

That's it - your dashboard page is created.

Step 2: Tell the Plugin Which Page Is Your Dashboard

The plugin needs to know which page you just created so internal navigation links work correctly.

  1. Go to LearnDash Dashboard > Page Mapping.
  2. In the Dashboard Page dropdown, select the page you created in Step 1.
  3. Click Save Changes.

This step is important. Skip it and links inside the dashboard will not work properly.

Step 3: Choose What Each Role Can See

You control which sections appear in the sidebar for each type of user.

  1. Go to LearnDash Dashboard > Menu Options.
  2. You'll see a list of sections grouped by role - Admin, Instructor, Group Leader, and Student.
  3. Check the sections you want each role to see. Uncheck anything you want to hide.
  4. Click Save Changes.

You can come back and adjust these at any time.

Step 4: Add the Dashboard to Your Site Navigation

Help your users find the dashboard by adding it to your site's main menu.

  1. Go to Appearance > Menus.
  2. Select the menu your site uses for navigation.
  3. In the Pages list on the left, find your dashboard page and check the box next to it.
  4. Click Add to Menu.
  5. Click Save Menu.

Logged-in users can now reach the dashboard directly from your site navigation.

Step 5: Visit Your Dashboard

Open the dashboard page in your browser. Log in as an admin, an instructor, or a student to see how it looks for each role.

The sidebar on the left shows the navigation. Click any item to load that section. Each user sees only the sections relevant to their role.

Section Who sees it
Dashboard Home, Enrolled Courses, Quiz Attempts, Certificates, Assignments All logged-in users
Courses, Lessons, Topics, Quizzes, Questions Admins and Instructors
Reports, Insights, Bulk Management Admins, Instructors, Group Leaders
Email, Private Messages Admins and Instructors
My Students, Earnings Instructors
Groups Admins and Group Leaders

Step 6: Create Your First Course from the Dashboard

If you have the Instructor role or are an Admin, you can create courses directly from the dashboard - no WordPress admin needed.

  1. Visit your dashboard and click Courses in the sidebar.
  2. Click Add New Course.
  3. Fill in the course title, description, and settings.
  4. Click Save.

The course is immediately live as a LearnDash course. Add lessons, topics, and quizzes the same way using their sections in the sidebar.

Next Steps

  • Go to LearnDash Dashboard > Design to apply your brand colors and make the dashboard match your site.
  • Go to LearnDash Dashboard > Instructor Settings to set up the instructor registration and approval process.
  • Read the Shortcodes Reference if you want to embed dashboard components on other pages.
  • Read User Roles for a full breakdown of what each role can do.

Requirements

Before installing LearnDash Dashboard, make sure your site meets these requirements.

Required Plugins

These two plugins must be installed and active. LearnDash Dashboard will not work without them.

Plugin Why It's Needed
LearnDash LMS The course platform that LearnDash Dashboard is built on. All courses, students, quizzes, and groups come from LearnDash.
Advanced Custom Fields PRO Powers all the frontend forms for creating and editing courses, lessons, quizzes, and more. The free version of ACF is not supported - PRO is required.

WordPress and Hosting

  • WordPress - any version from the last two years works well
  • PHP - version 7.4 or higher; PHP 8.0 or newer is recommended for best performance
  • Modern hosting (shared, managed WordPress, or VPS) with standard resource limits

If you're unsure what version of PHP or WordPress you're running, you can check it in LearnDash Dashboard > Support after installation.

Optional Plugins

These plugins are not required, but they unlock extra features if they're active on your site.

Plugin What It Unlocks
BuddyPress Social profile avatars and BuddyPress-powered private messaging
WooCommerce Instructor commission tracking tied to WooCommerce sales
Uncanny Groups Enhanced group features including seat limits, hierarchy badges, and advanced enrollment code management
BP User Todo List A to-do list feature for group members

You don't need to install these to use LearnDash Dashboard. They simply extend what's possible if you already have them.

Zoom Meetings

To use the Zoom Meetings feature, you'll need an active Zoom account with API credentials. You configure those credentials in LearnDash Dashboard > Integrations after installation. No extra plugin is required.

Browser Support

The dashboard works on all modern browsers - Chrome, Firefox, Safari, and Edge. It's fully responsive and works on mobile and tablet devices as well.

Multisite

LearnDash Dashboard can be used on WordPress Multisite networks. Activate it on a per-site basis rather than network-wide.

Shortcodes

LearnDash Dashboard uses shortcodes to embed the dashboard and its components on any WordPress page. You can add a shortcode to a page using the block editor, the classic editor, or any page builder.


Main Dashboard

[ld_dashboard]

Displays the full dashboard with the sidebar navigation and all role-appropriate sections.

Place this shortcode on your designated dashboard page - the one you selected in LearnDash Dashboard > Page Mapping. Use it on one page only.

Example:

[ld_dashboard]

Visitors who are not logged in will see a login prompt instead of the dashboard.


Email Widget

[ld_email]

Displays an email composer that lets instructors and group leaders send messages to their students.

Students do not see this widget. You need to enable the email feature in LearnDash Dashboard > General Settings for this to work.

Example:

[ld_email]

Instructor Registration Form

[ld_instructor_registration]

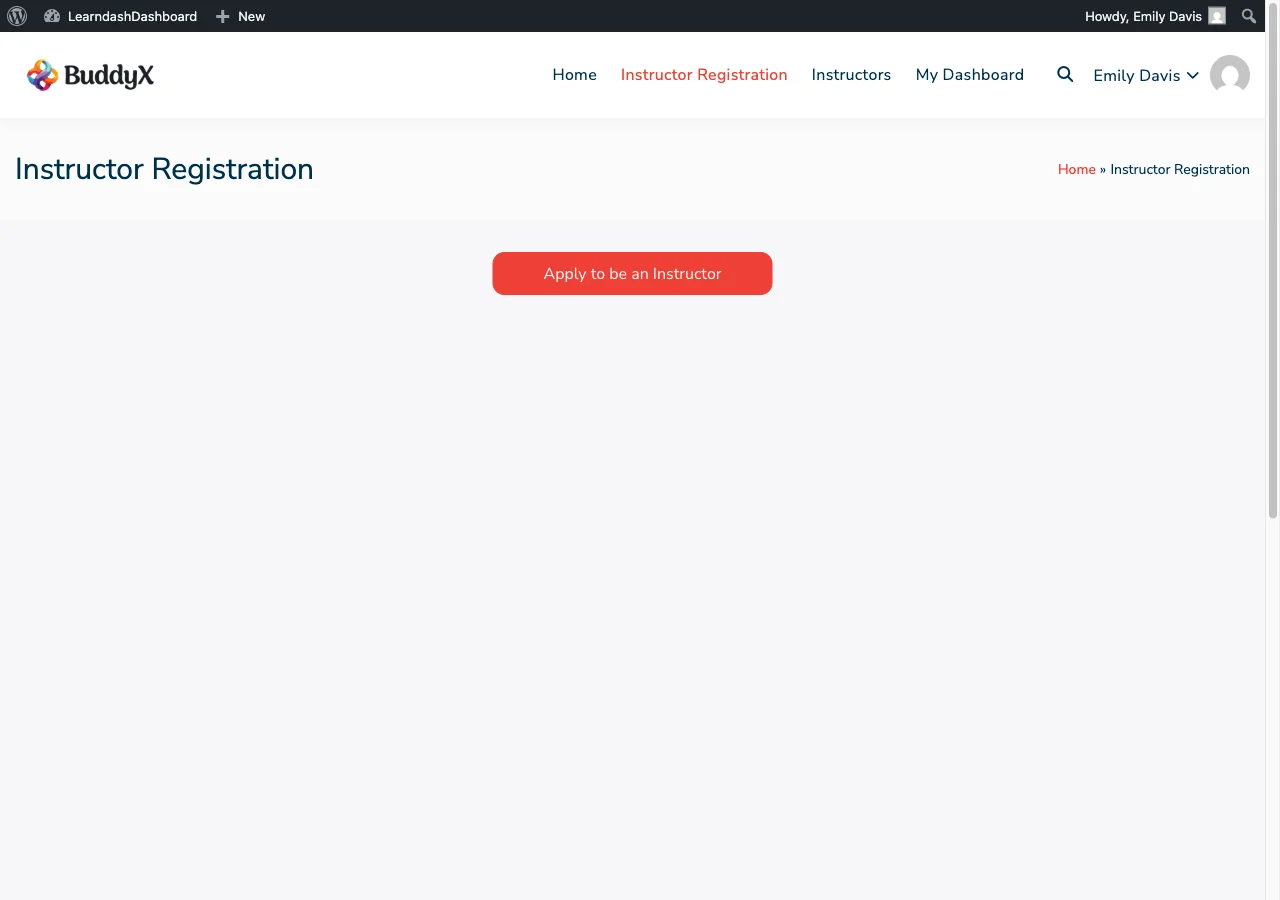
Displays a form that lets users apply to become an instructor on your site.

When someone submits the form, their application goes into a pending queue. You'll receive an email notification. Approve or reject applications from LearnDash Dashboard > Instructor Settings. Approved applicants are automatically granted the Instructor role.

Example:

[ld_instructor_registration]

Place this on a public page - for example, a "Become an Instructor" page on your site.


Student Progress Report

[ld_student_details]

Displays a detailed progress report for an individual student, including their course progress, quiz results, and completion status.

This is visible to admins, instructors, and group leaders only. Instructors reach this page by clicking a student's name in their My Students section.

Example:

[ld_student_details]

Create a dedicated page for this shortcode and assign it in LearnDash Dashboard > Page Mapping so the dashboard can link to it correctly.


Instructor Directory

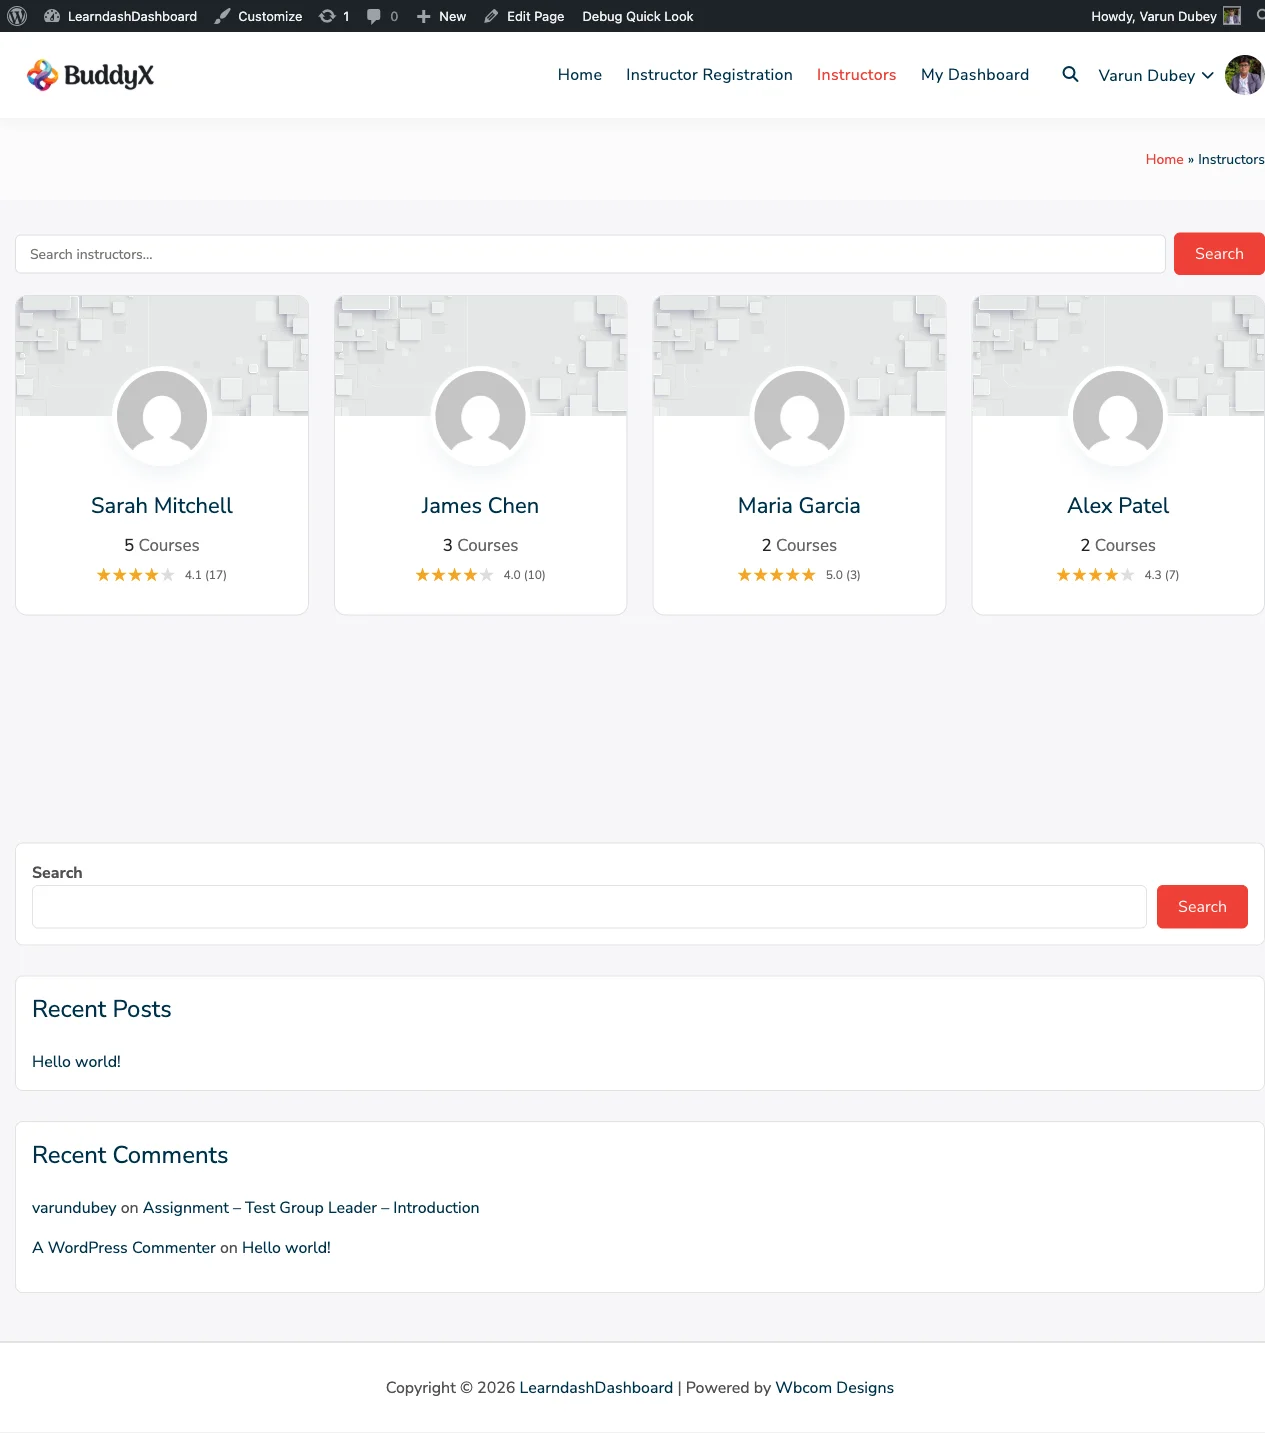
[ld_dashboard_instructors_list]

Displays a searchable, paginated directory of all instructors on your site.

Each instructor card shows their photo, name, number of courses, and review rating (if course reviews are enabled). Visitors can click an instructor's card to view their profile.

Options:

Option Default What it does
col 4 Number of columns in the grid layout

Examples:

[ld_dashboard_instructors_list]
[ld_dashboard_instructors_list col="3"]

Set up an instructors directory page in LearnDash Dashboard > Page Mapping so profile links work correctly.


Zoom Meeting Shortcodes

These three shortcodes are for sites using the Zoom Meetings feature. You need an active Zoom account with API credentials configured in LearnDash Dashboard > Integrations. If Zoom is not enabled, these shortcodes display nothing.

[ld_dashboard_meeting]

Shows the join interface for a specific Zoom meeting.

Option Description
id The ID of the meeting you want to display
title An optional heading shown above the meeting details

Example:

[ld_dashboard_meeting id="123"]

[ld_dashboard_meeting_single]

Shows full details for a single Zoom meeting on its own dedicated page.

Option Description
id The ID of the meeting
title An optional heading

Example:

[ld_dashboard_meeting_single id="123"]

[ld_dashboard_meeting_embed]

Embeds a Zoom meeting directly in the page so participants can join without leaving your site.

Option Default Description
meeting_id - Your Zoom meeting ID number
height 500px The height of the meeting window

Example:

[ld_dashboard_meeting_embed meeting_id="123456789"]
[ld_dashboard_meeting_embed meeting_id="123456789" height="700px"]

Enrollment Code Redemption

[ld_enrollment_code_redeem]

Displays a form where students can enter an enrollment code to gain instant access to a course or group.

Only logged-in users see this form. Logged-out visitors see nothing.

Example:

[ld_enrollment_code_redeem]

Place this on a dedicated page - for example, "Redeem Your Code" - and link to it from your emails or course catalog.

Generate enrollment codes from the Bulk Management section or the Groups section of the dashboard.

User Roles

LearnDash Dashboard shows each user a personalized view based on their role. Everyone sees only the tools and information relevant to them - nothing more, nothing less.

There are four roles: Administrator, Instructor, Group Leader, and Student.


Administrator

Administrators have full access to everything on the dashboard, plus all plugin settings in the WordPress admin.

What an admin can do:

  • View and manage every course, lesson, topic, quiz, and question on the site - regardless of who created it
  • See all students across all instructors and groups
  • Run site-wide reports on essays, assignments, quizzes, and course completion
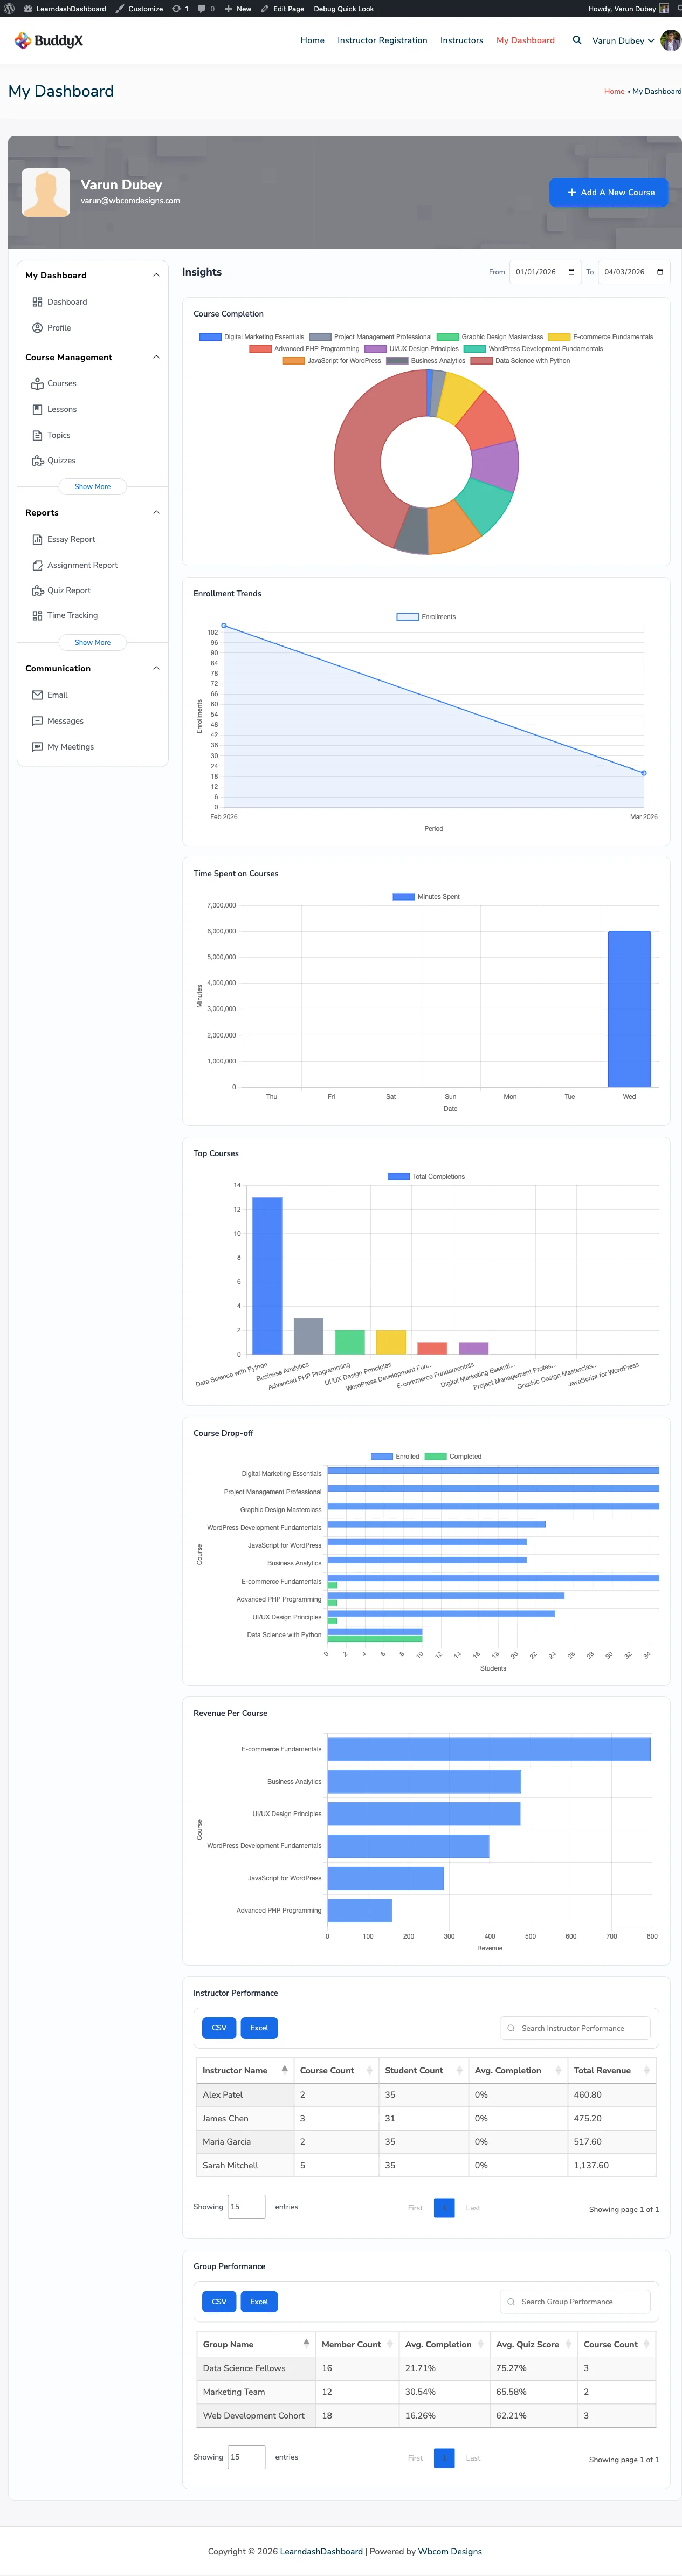
  • View insights and visual charts for the entire site
  • Bulk enroll or unenroll any students from any course or group
  • Reset student progress on any course
  • Export student data
  • Manage all groups and group members
  • Review and approve instructor applications
  • See all instructor earnings and manage payout requests
  • Send emails and messages to anyone on the site
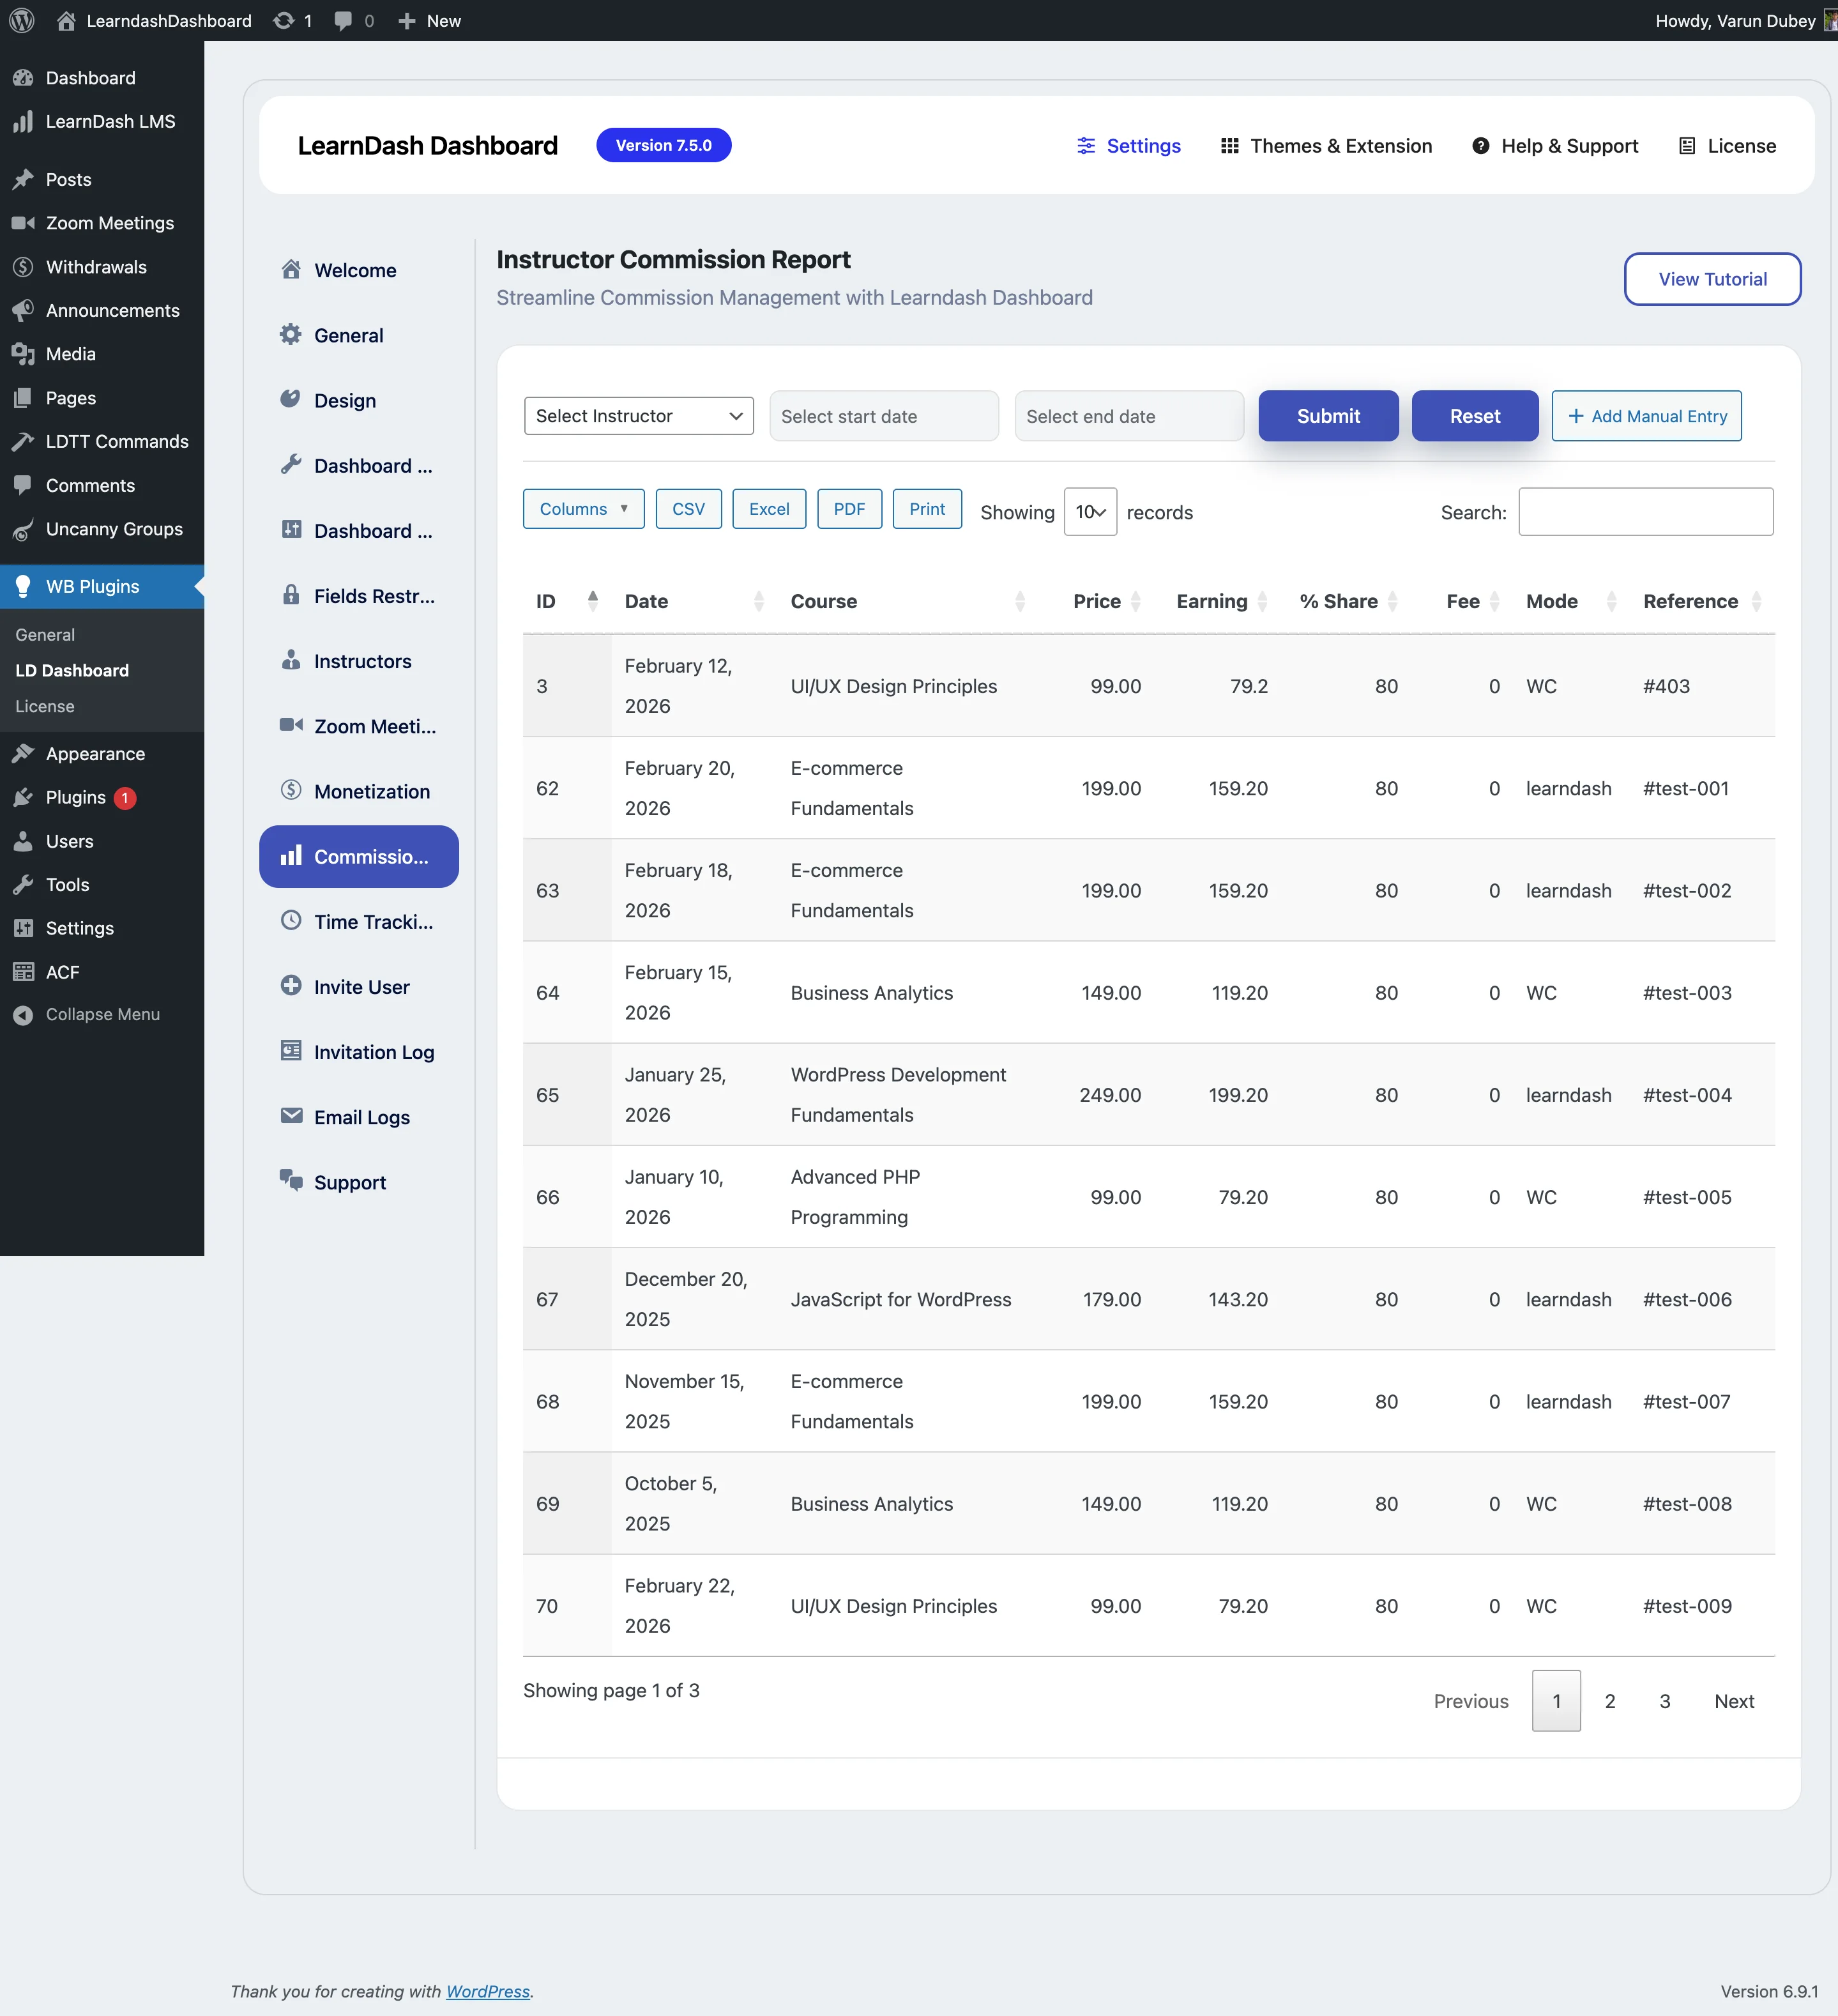
  • Access all plugin settings, commission reports, email logs, and invitation logs

Instructor

Instructors are educators who create and sell courses on your site. They get a full course management workspace without needing admin access.

To become an instructor, a user applies through the instructor registration form. You approve or reject the application from your admin settings.

What an instructor can do:

  • Create, edit, and delete their own courses, lessons, topics, quizzes, questions, certificates, and announcements
  • Duplicate (clone) one of their courses to use as a starting point for a new one
  • View a list of students enrolled in their courses
  • Track individual student progress and quiz results
  • Send emails to their students
  • Exchange private messages with their students
  • View their earnings from course sales
  • Request a payout of their earnings
  • Create and manage Zoom meetings (if Zoom is enabled on your site)
  • Generate enrollment codes for their courses

What an instructor cannot do:

  • See other instructors' courses, students, or earnings
  • Access WordPress admin settings
  • Manage groups (unless an admin grants additional access)

Sharing a course: An instructor can share a course with another instructor. Shared courses appear in the co-instructor's dashboard with a "Shared" badge.


Group Leader

Group Leaders manage specific student groups assigned to them by an admin. They focus on group oversight rather than course creation.

What a group leader can do:

  • View and manage the groups assigned to them
  • Add or remove students from their groups
  • View reports on group member progress and course completion
  • Generate enrollment codes to invite new members to their group
  • Send emails or private messages to students in their groups
  • View course and lesson content inside their assigned groups

What a group leader cannot do:

  • See groups they are not assigned to
  • Create or edit course content
  • Access instructor earnings or commission data
  • Manage site-wide settings

Student

Students are anyone on your site who is enrolled in courses - anyone who is not an admin, instructor, or group leader.

What a student can do:

  • View all the courses they're enrolled in and track their progress
  • Resume a course right where they left off
  • Review their quiz attempts, scores, and question-by-question results
  • Download certificates for courses they've completed
  • View and submit assignments
  • See their activity timeline
  • Read announcements from instructors
  • Track time spent learning
  • Redeem enrollment codes to join a course or group

What a student cannot do:

  • Create or edit any course content
  • See other students' progress or data
  • Access reports, earnings, or admin settings

Quick Comparison

Feature Admin Instructor Group Leader Student
View own enrolled courses Yes Yes Yes Yes
Create and edit courses Yes Own only No No
View student progress All students Own students Own groups No
Run reports All data Own data Own groups No
Bulk enrollment tools Yes Own courses Own groups No
Send emails and messages Everyone Own students Own groups No
Manage earnings and payouts Yes (all) Own earnings No No
Manage groups Yes No Assigned only No
Create Zoom meetings Yes Yes No No
Plugin settings Yes No No No

Controlling What Each Role Sees

You decide which sections appear in the sidebar for each role. Go to LearnDash Dashboard > Menu Options and check or uncheck sections for each role. Changes take effect immediately.

Dashboard Overview

Dashboard Home

Overview

The dashboard home is the first thing you see when you log in. It gives you a live snapshot of everything relevant to your role - whether you're a student tracking your progress, an instructor managing courses, or a group leader overseeing your team.

Screenshots

How It Looks

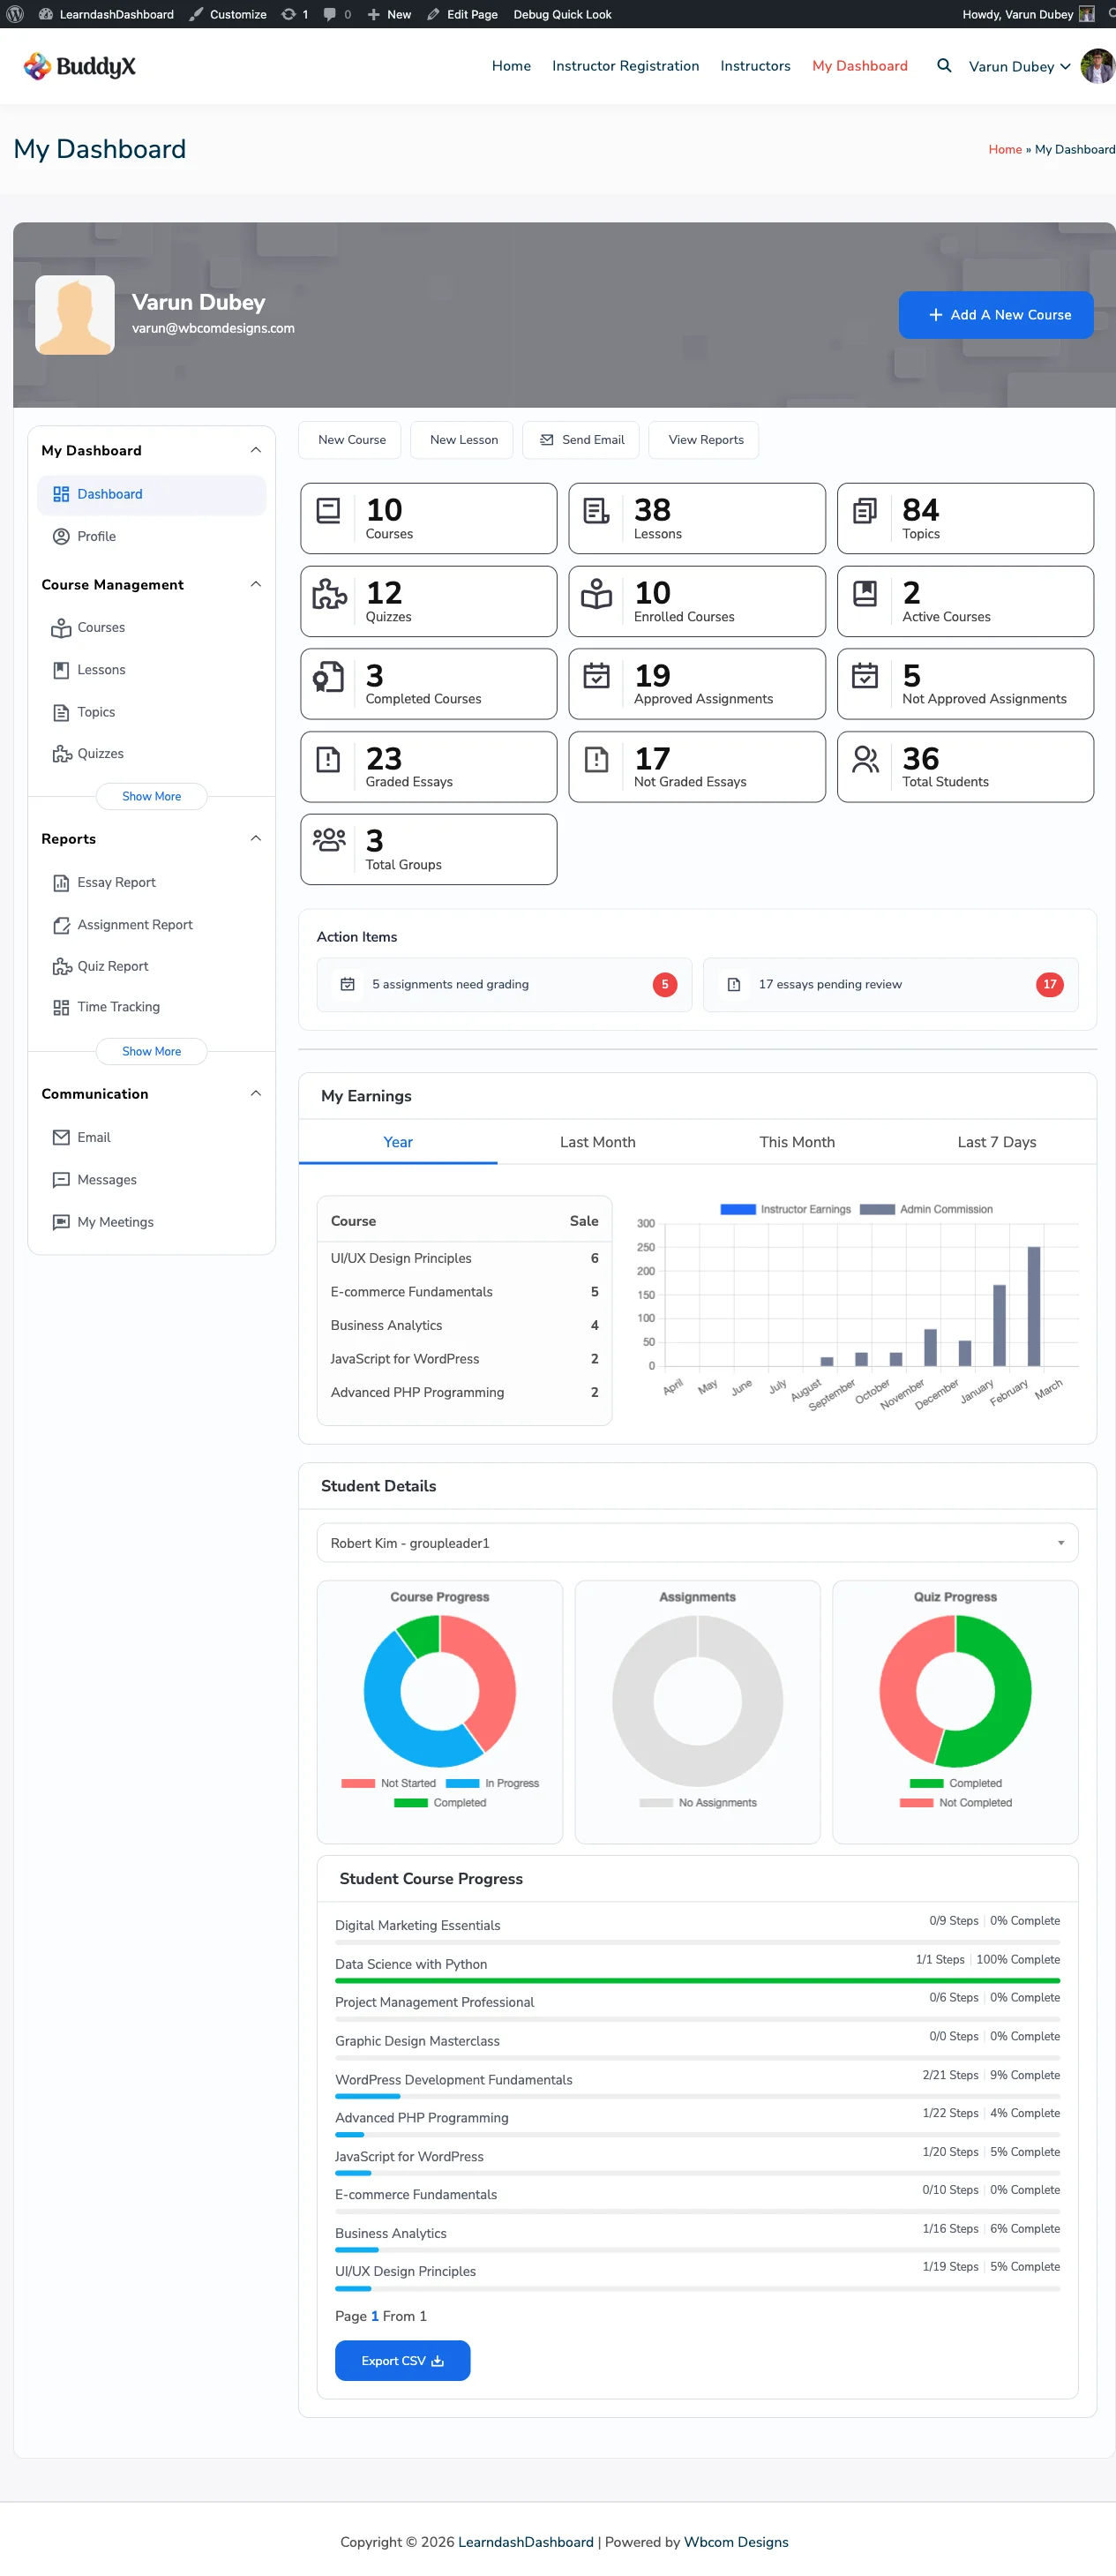
Admin Dashboard Home

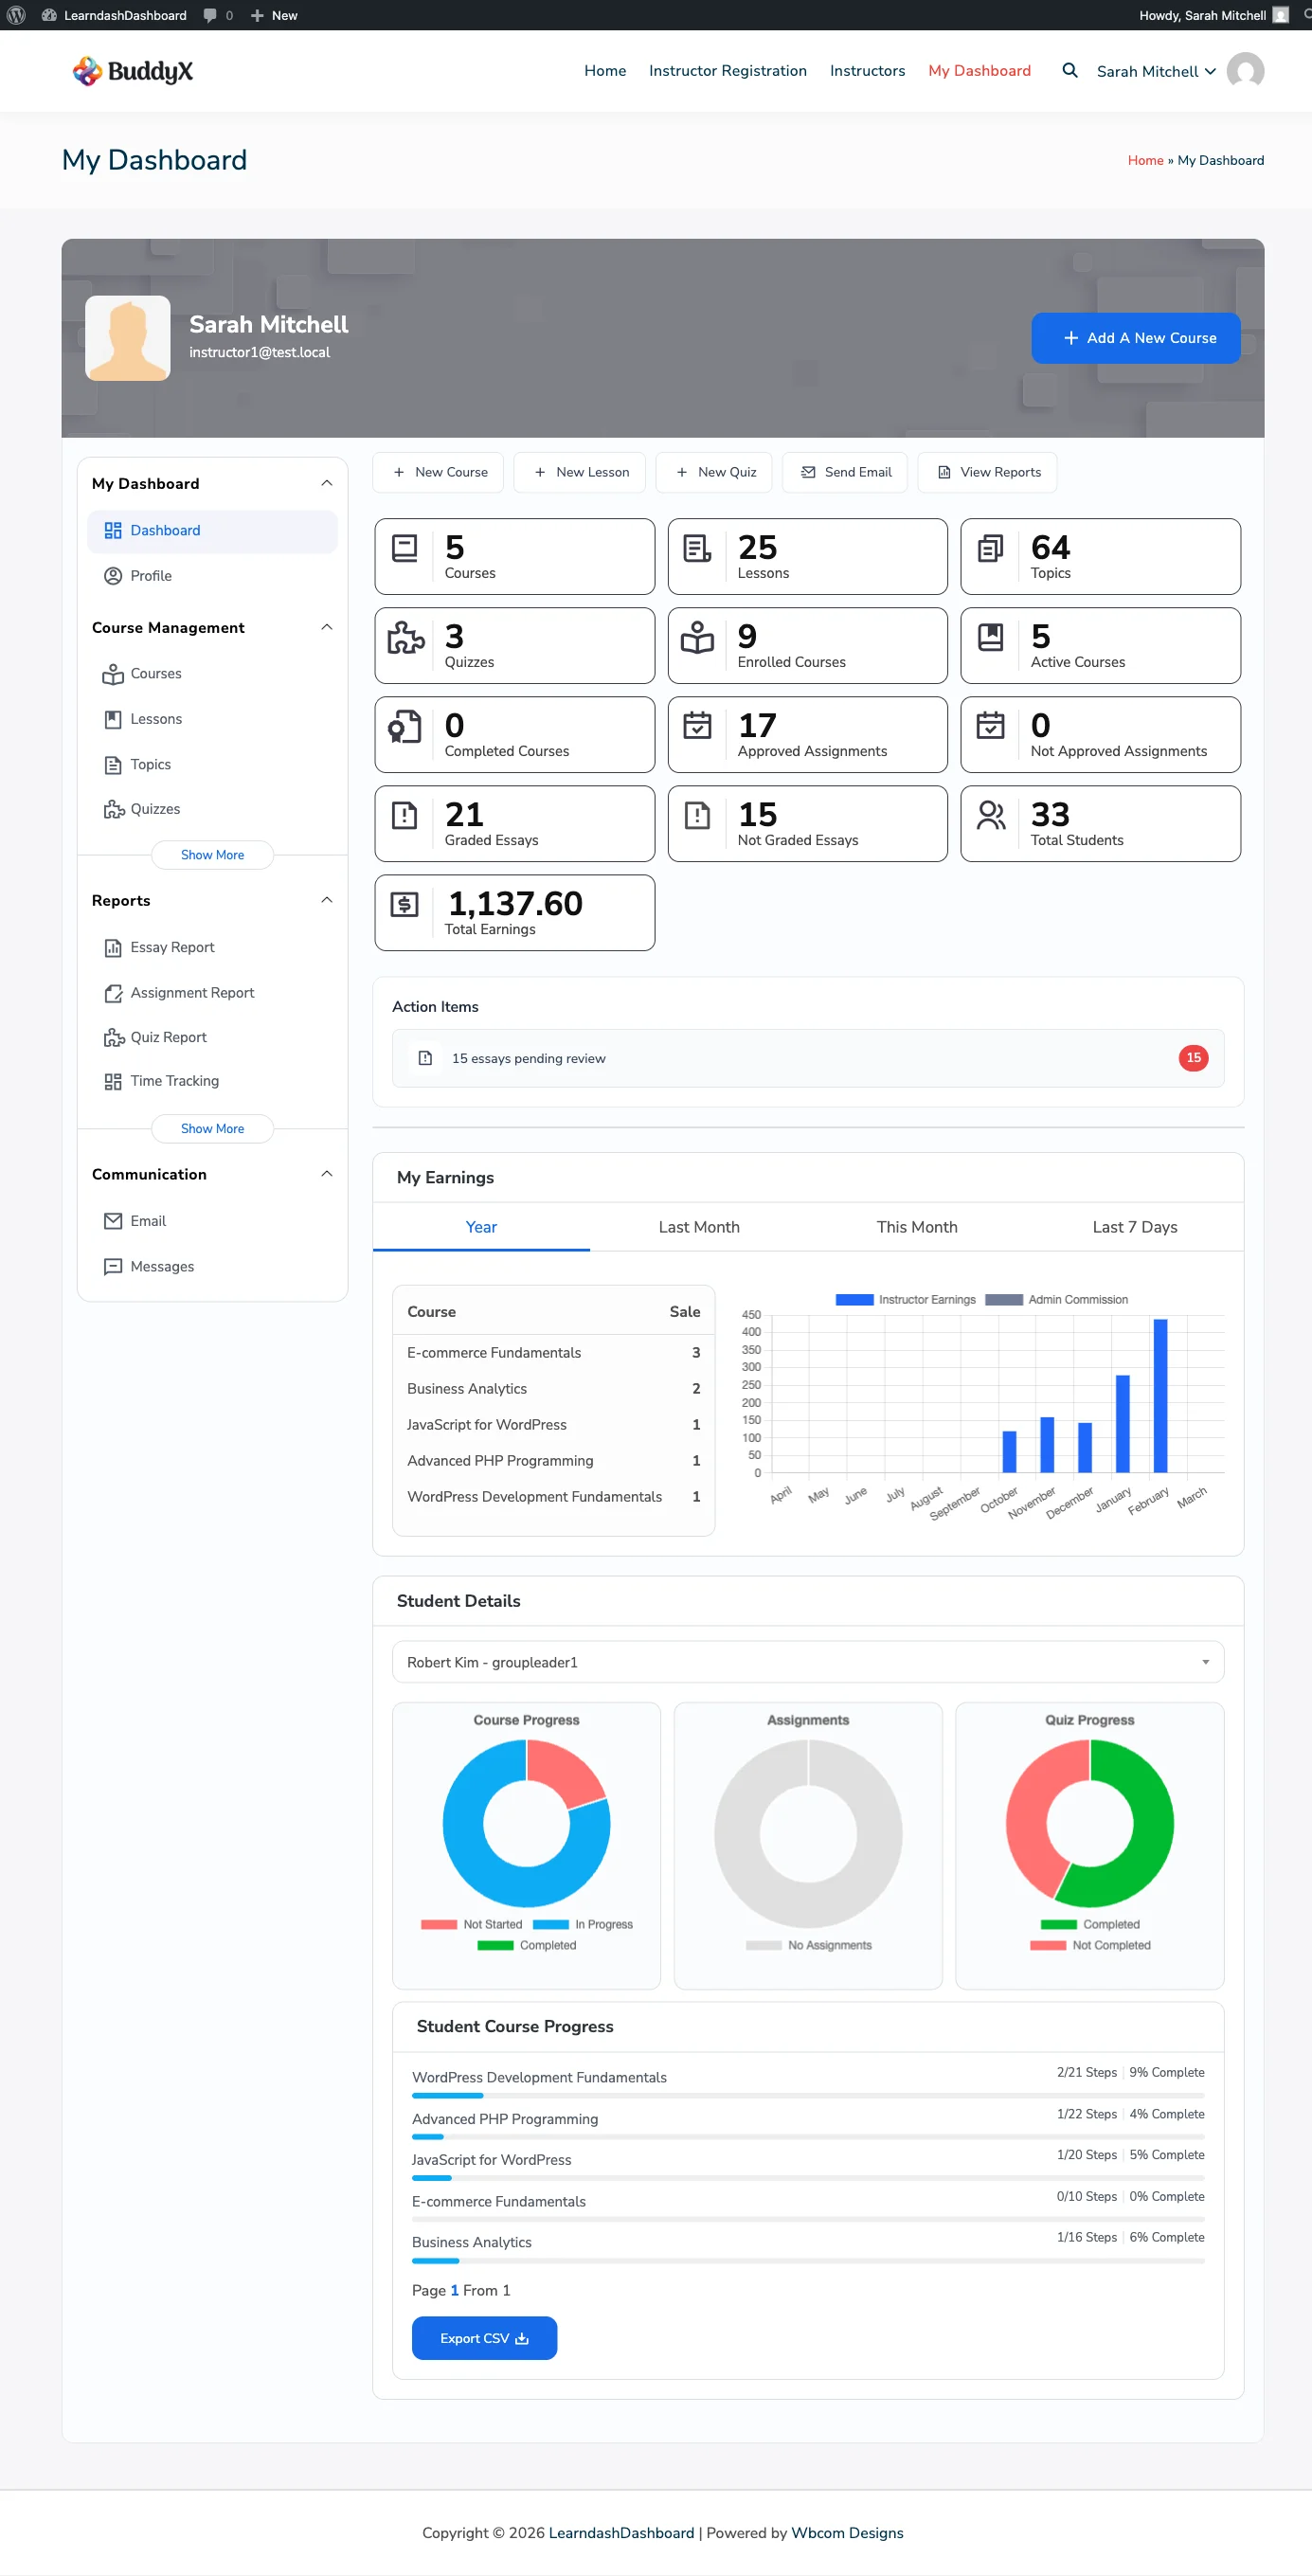
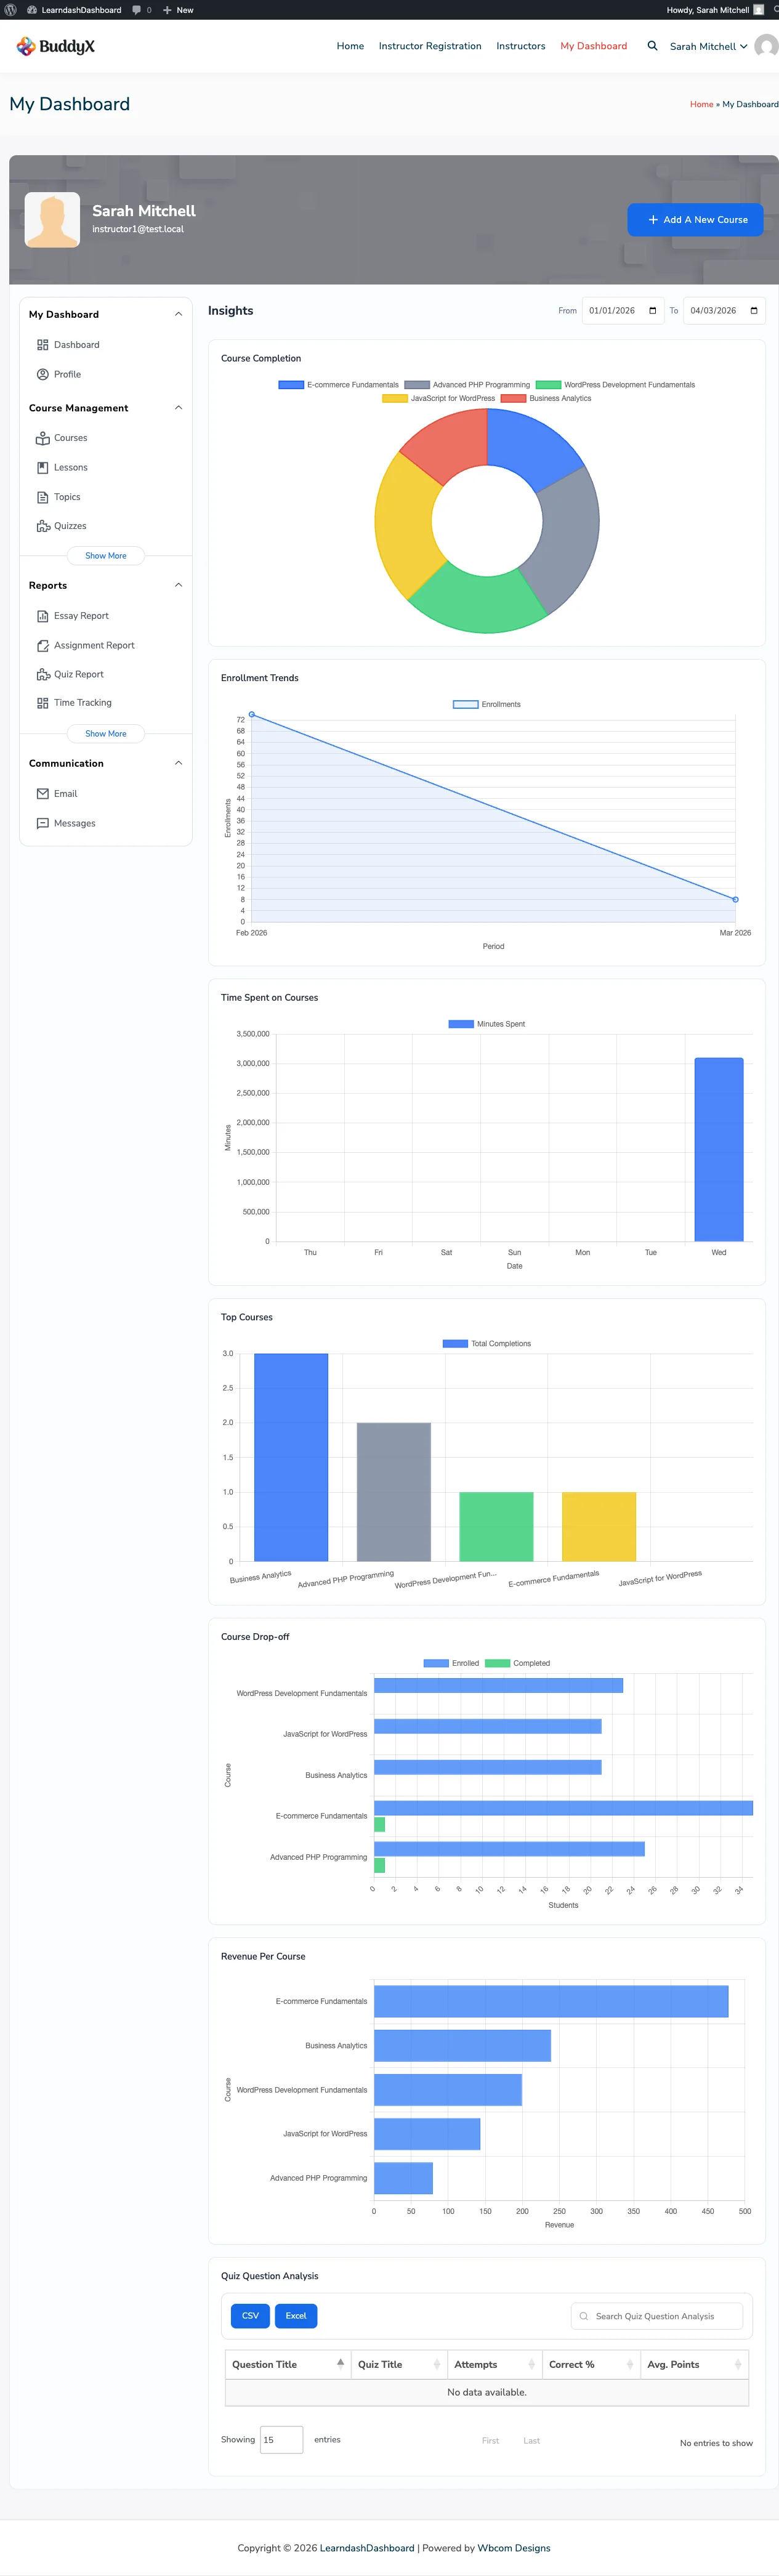
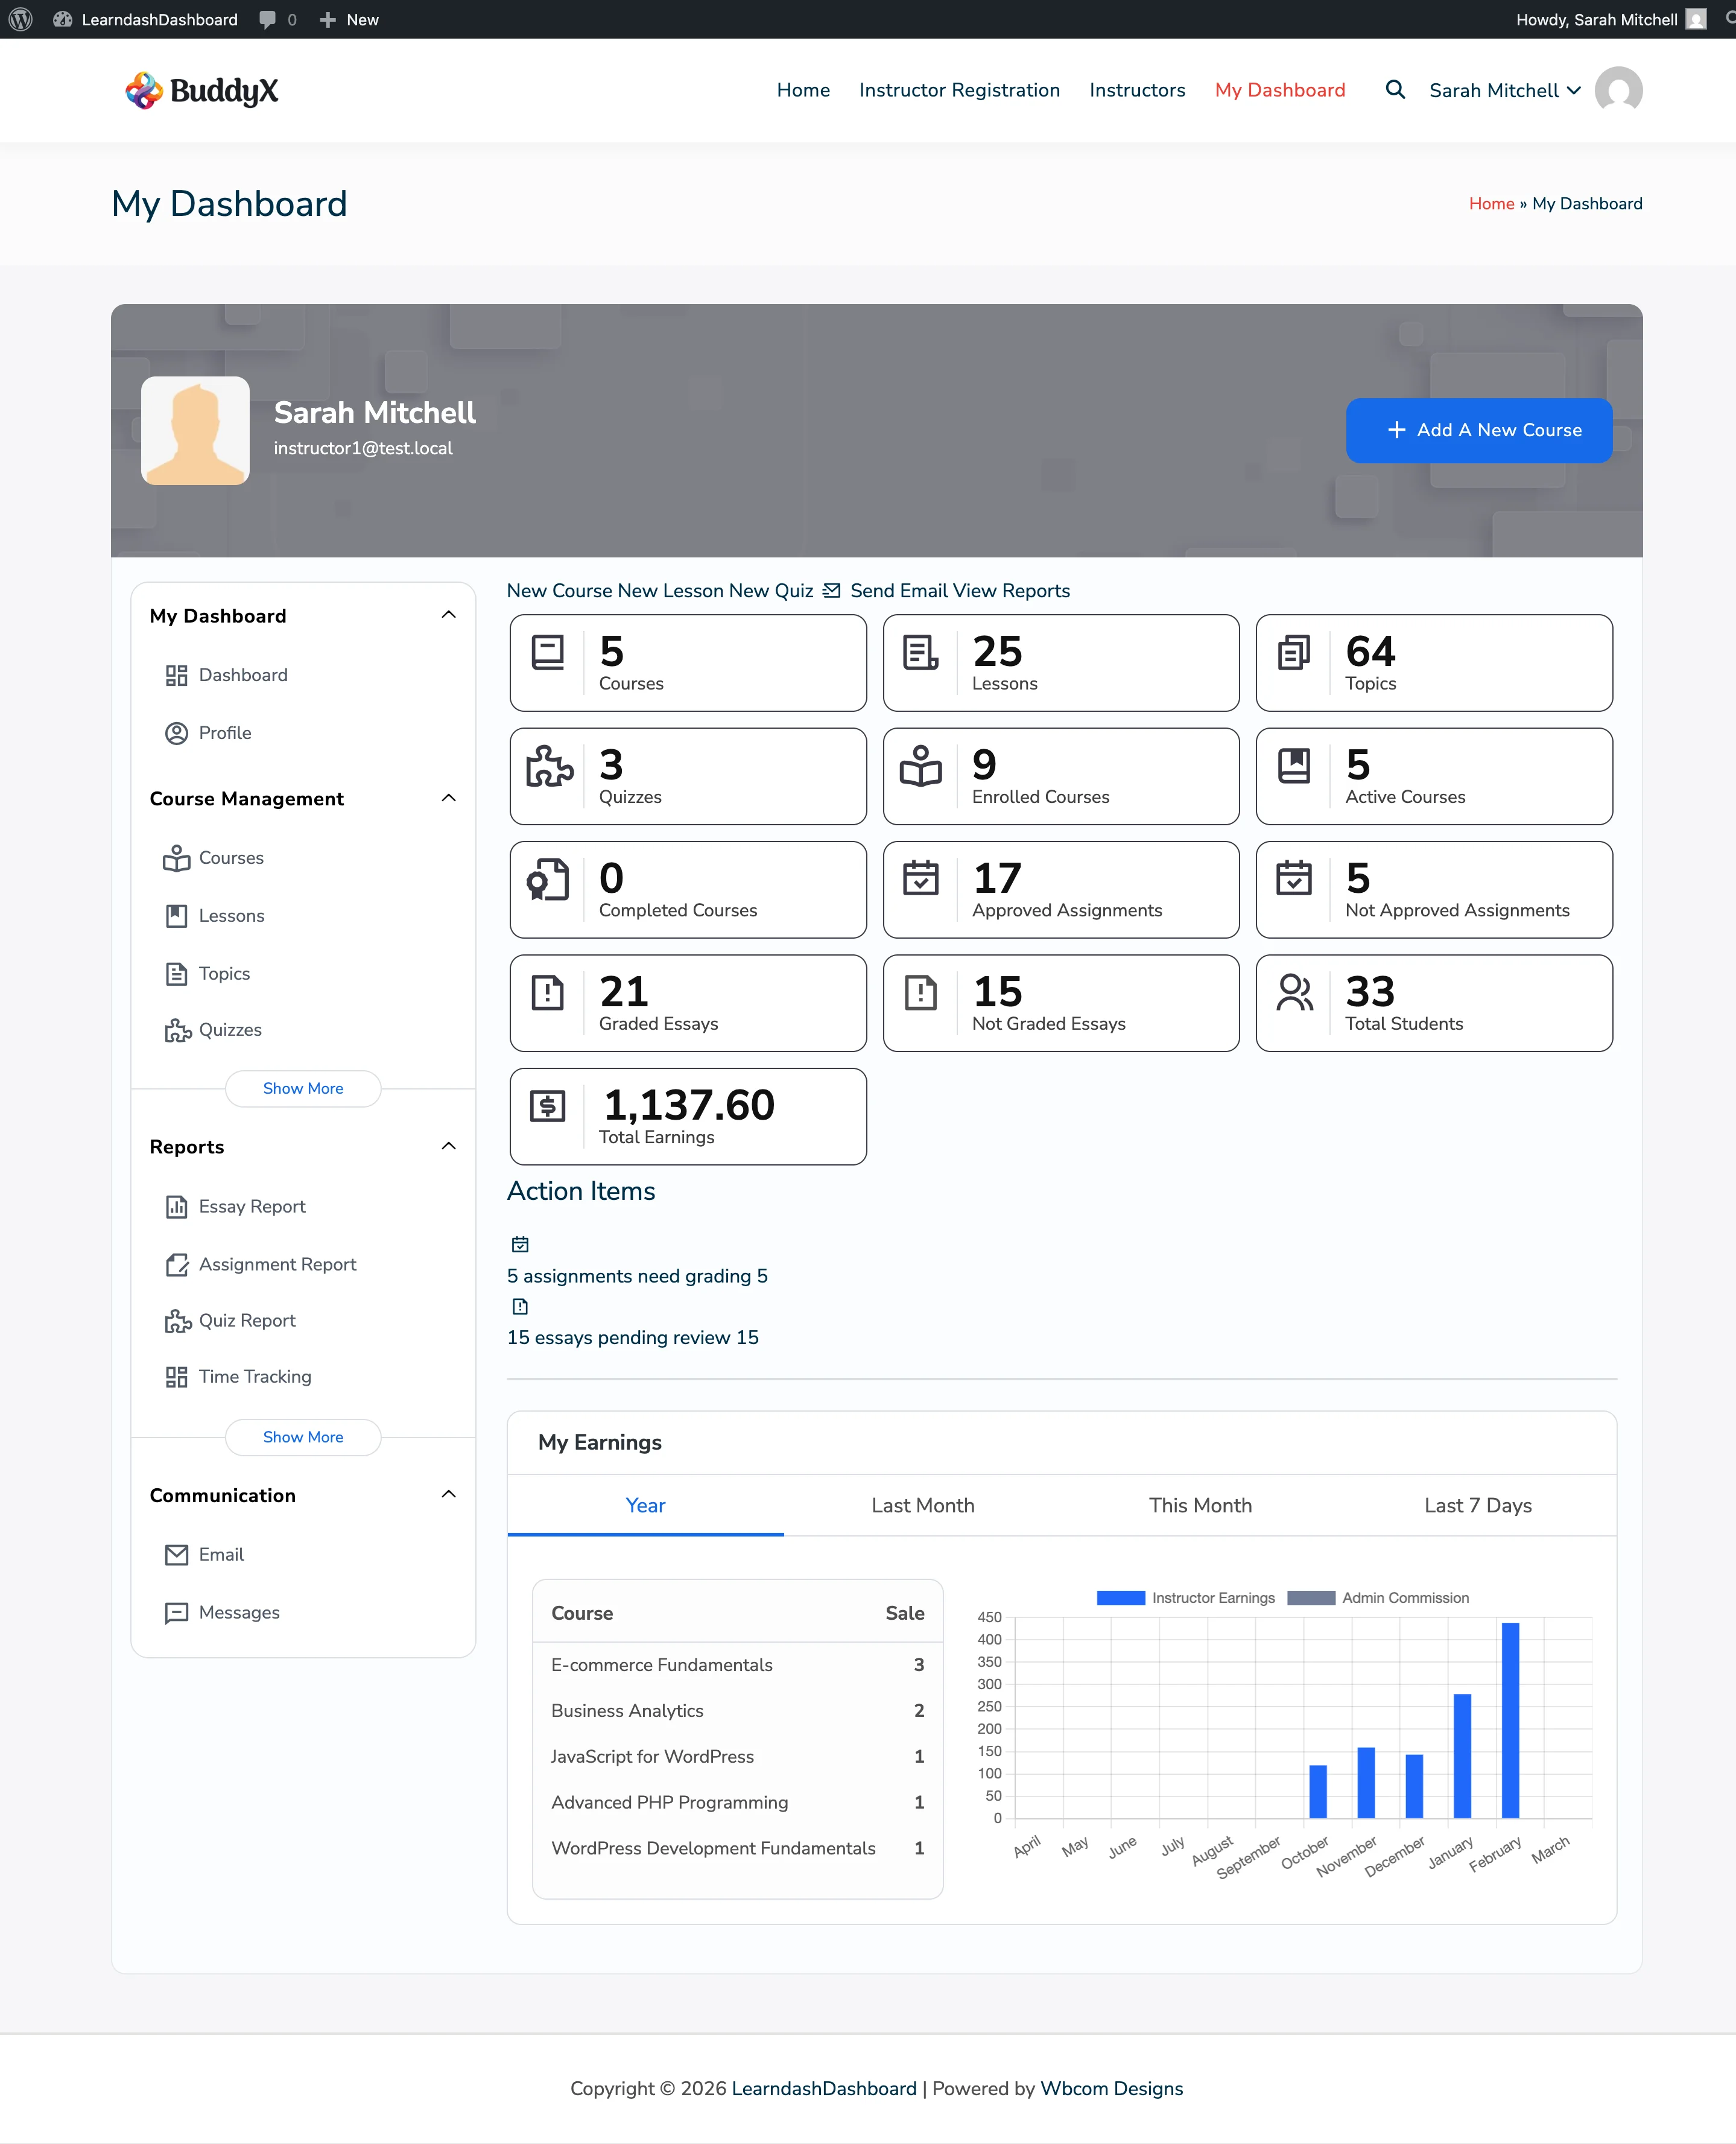
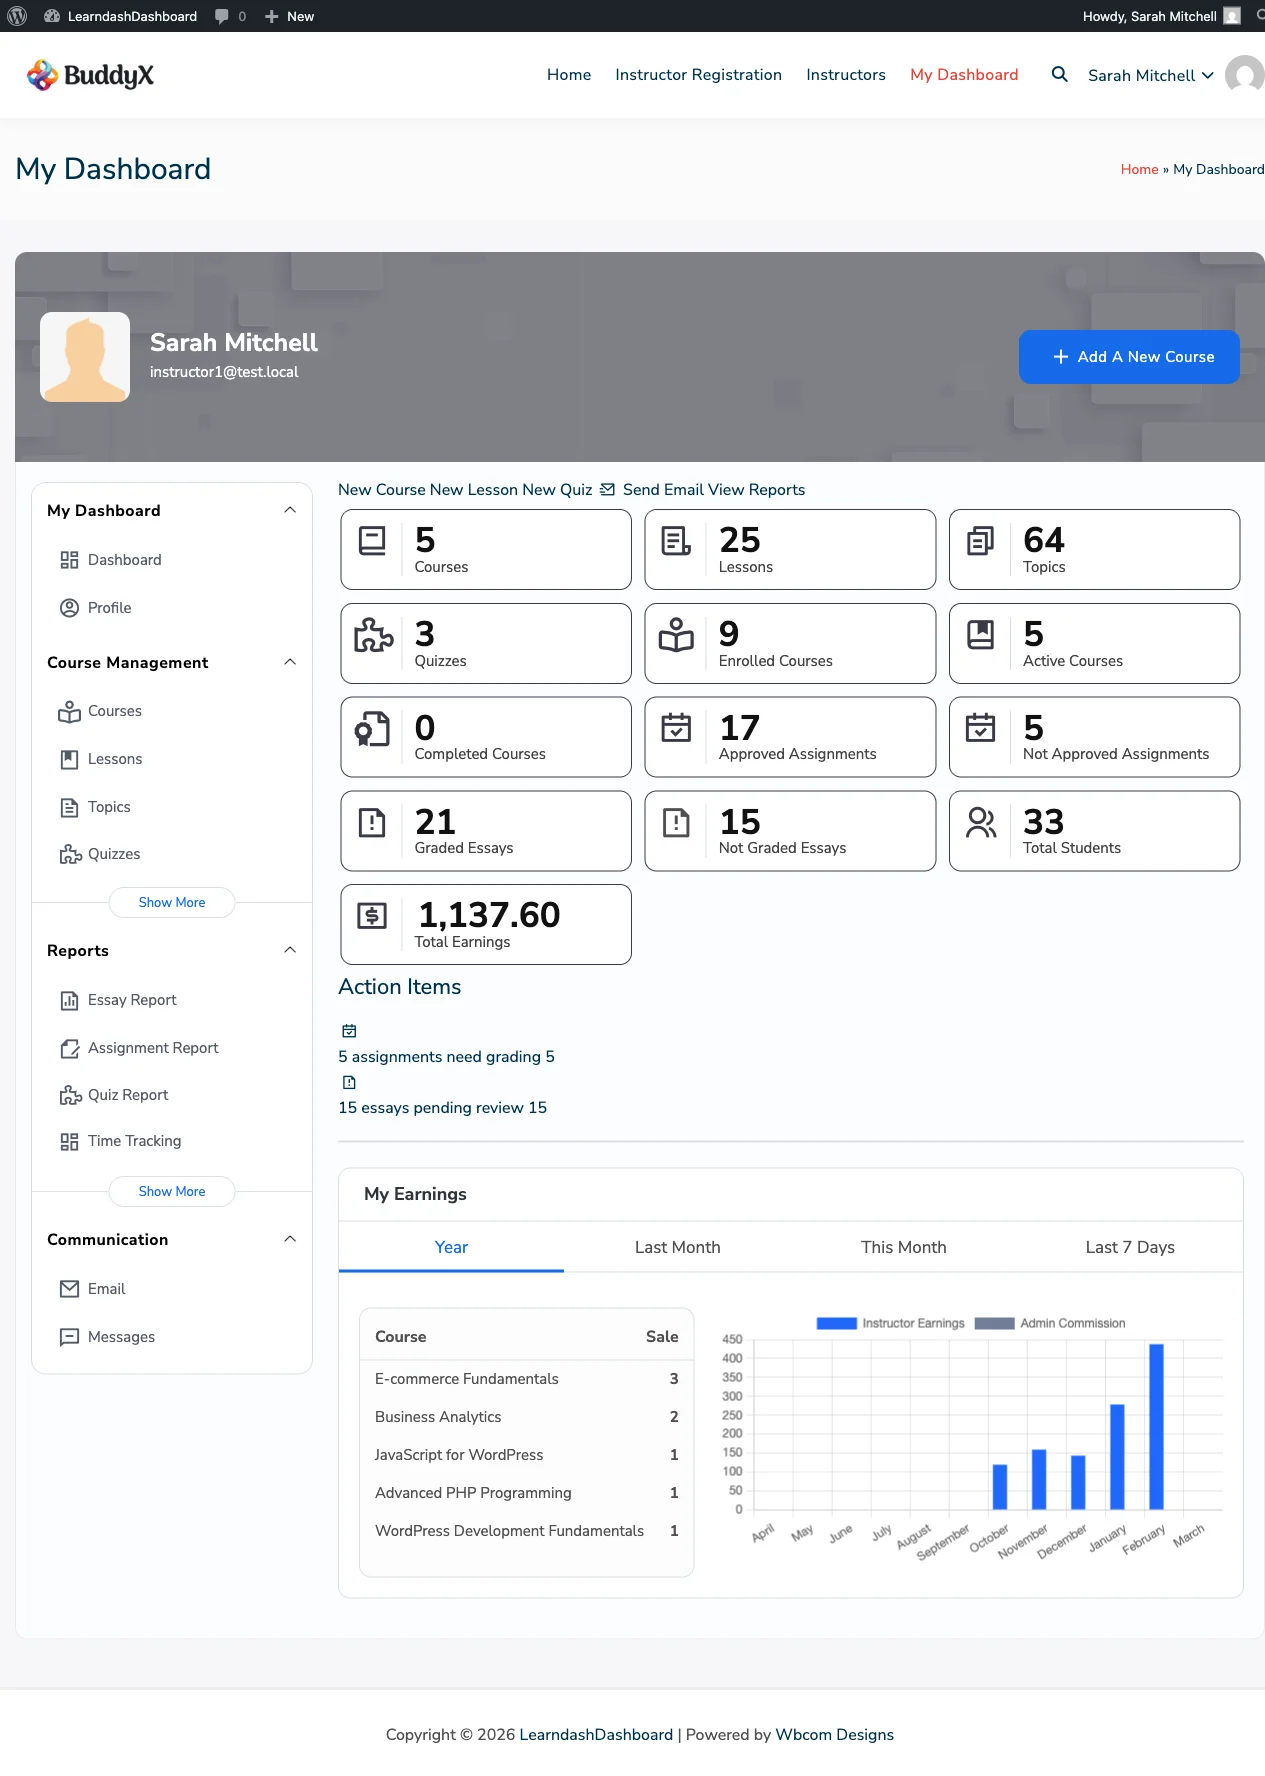
Instructor Dashboard Home

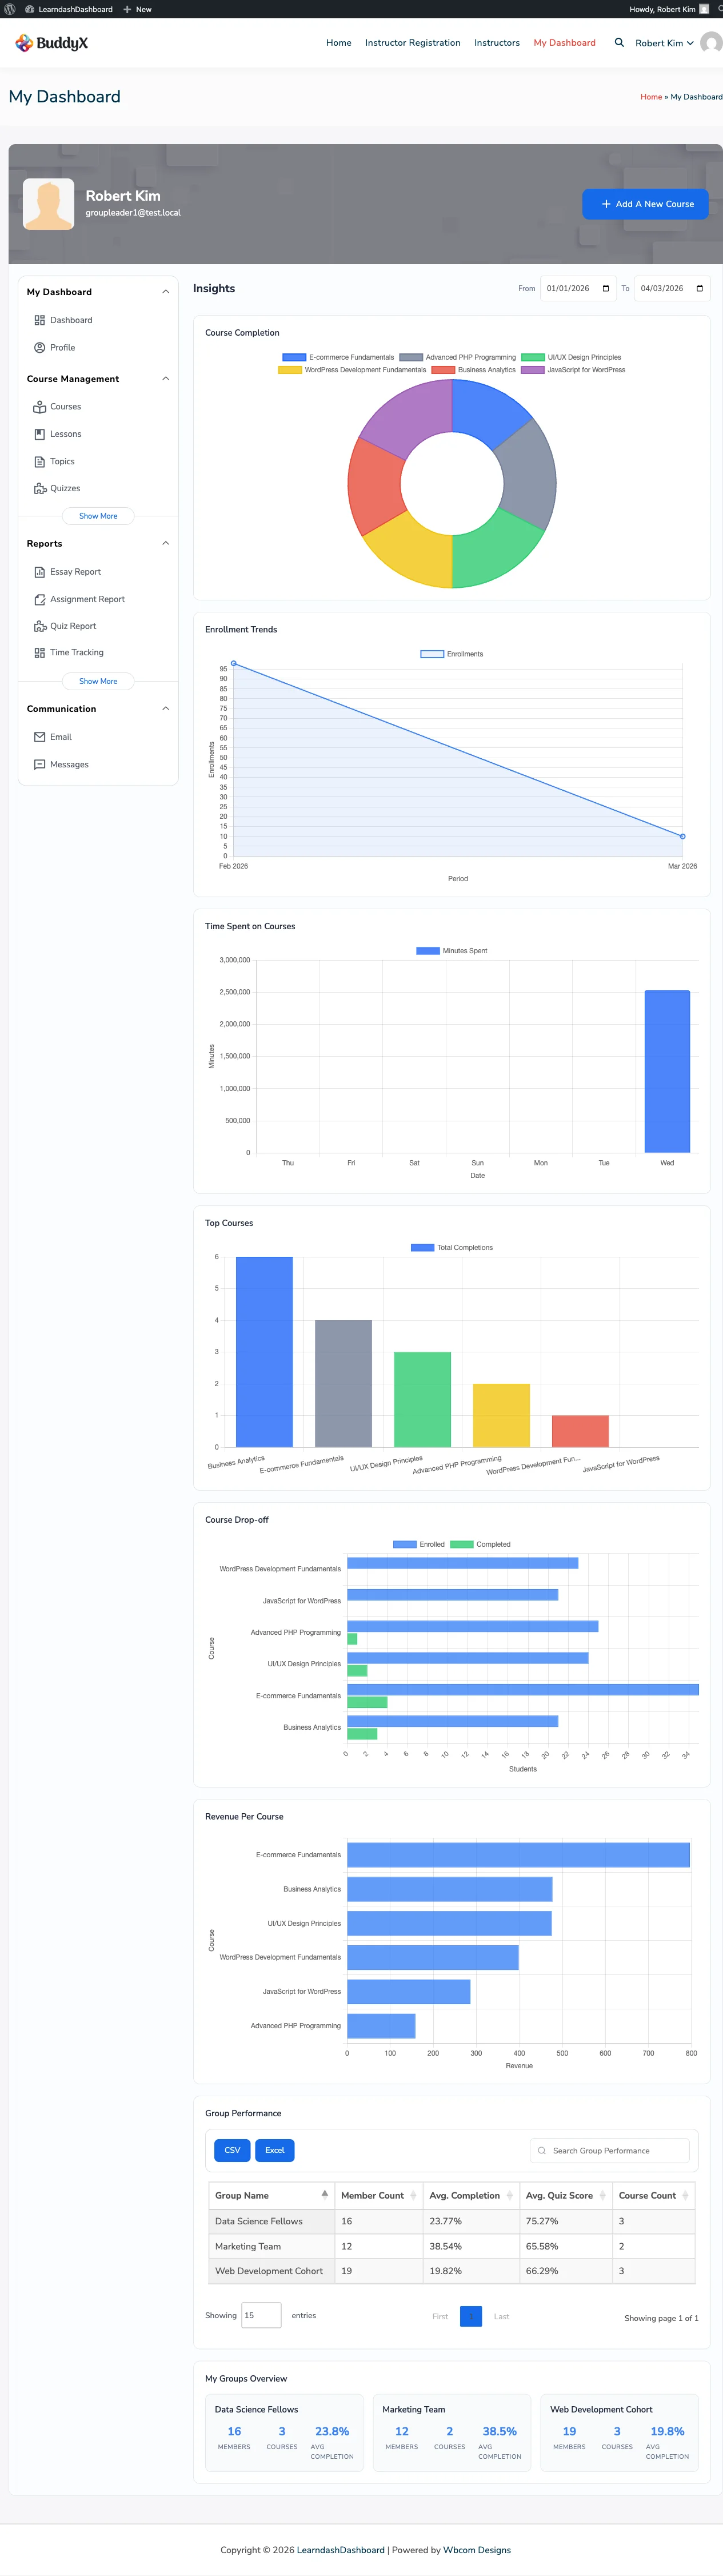
Group Leader Dashboard Home

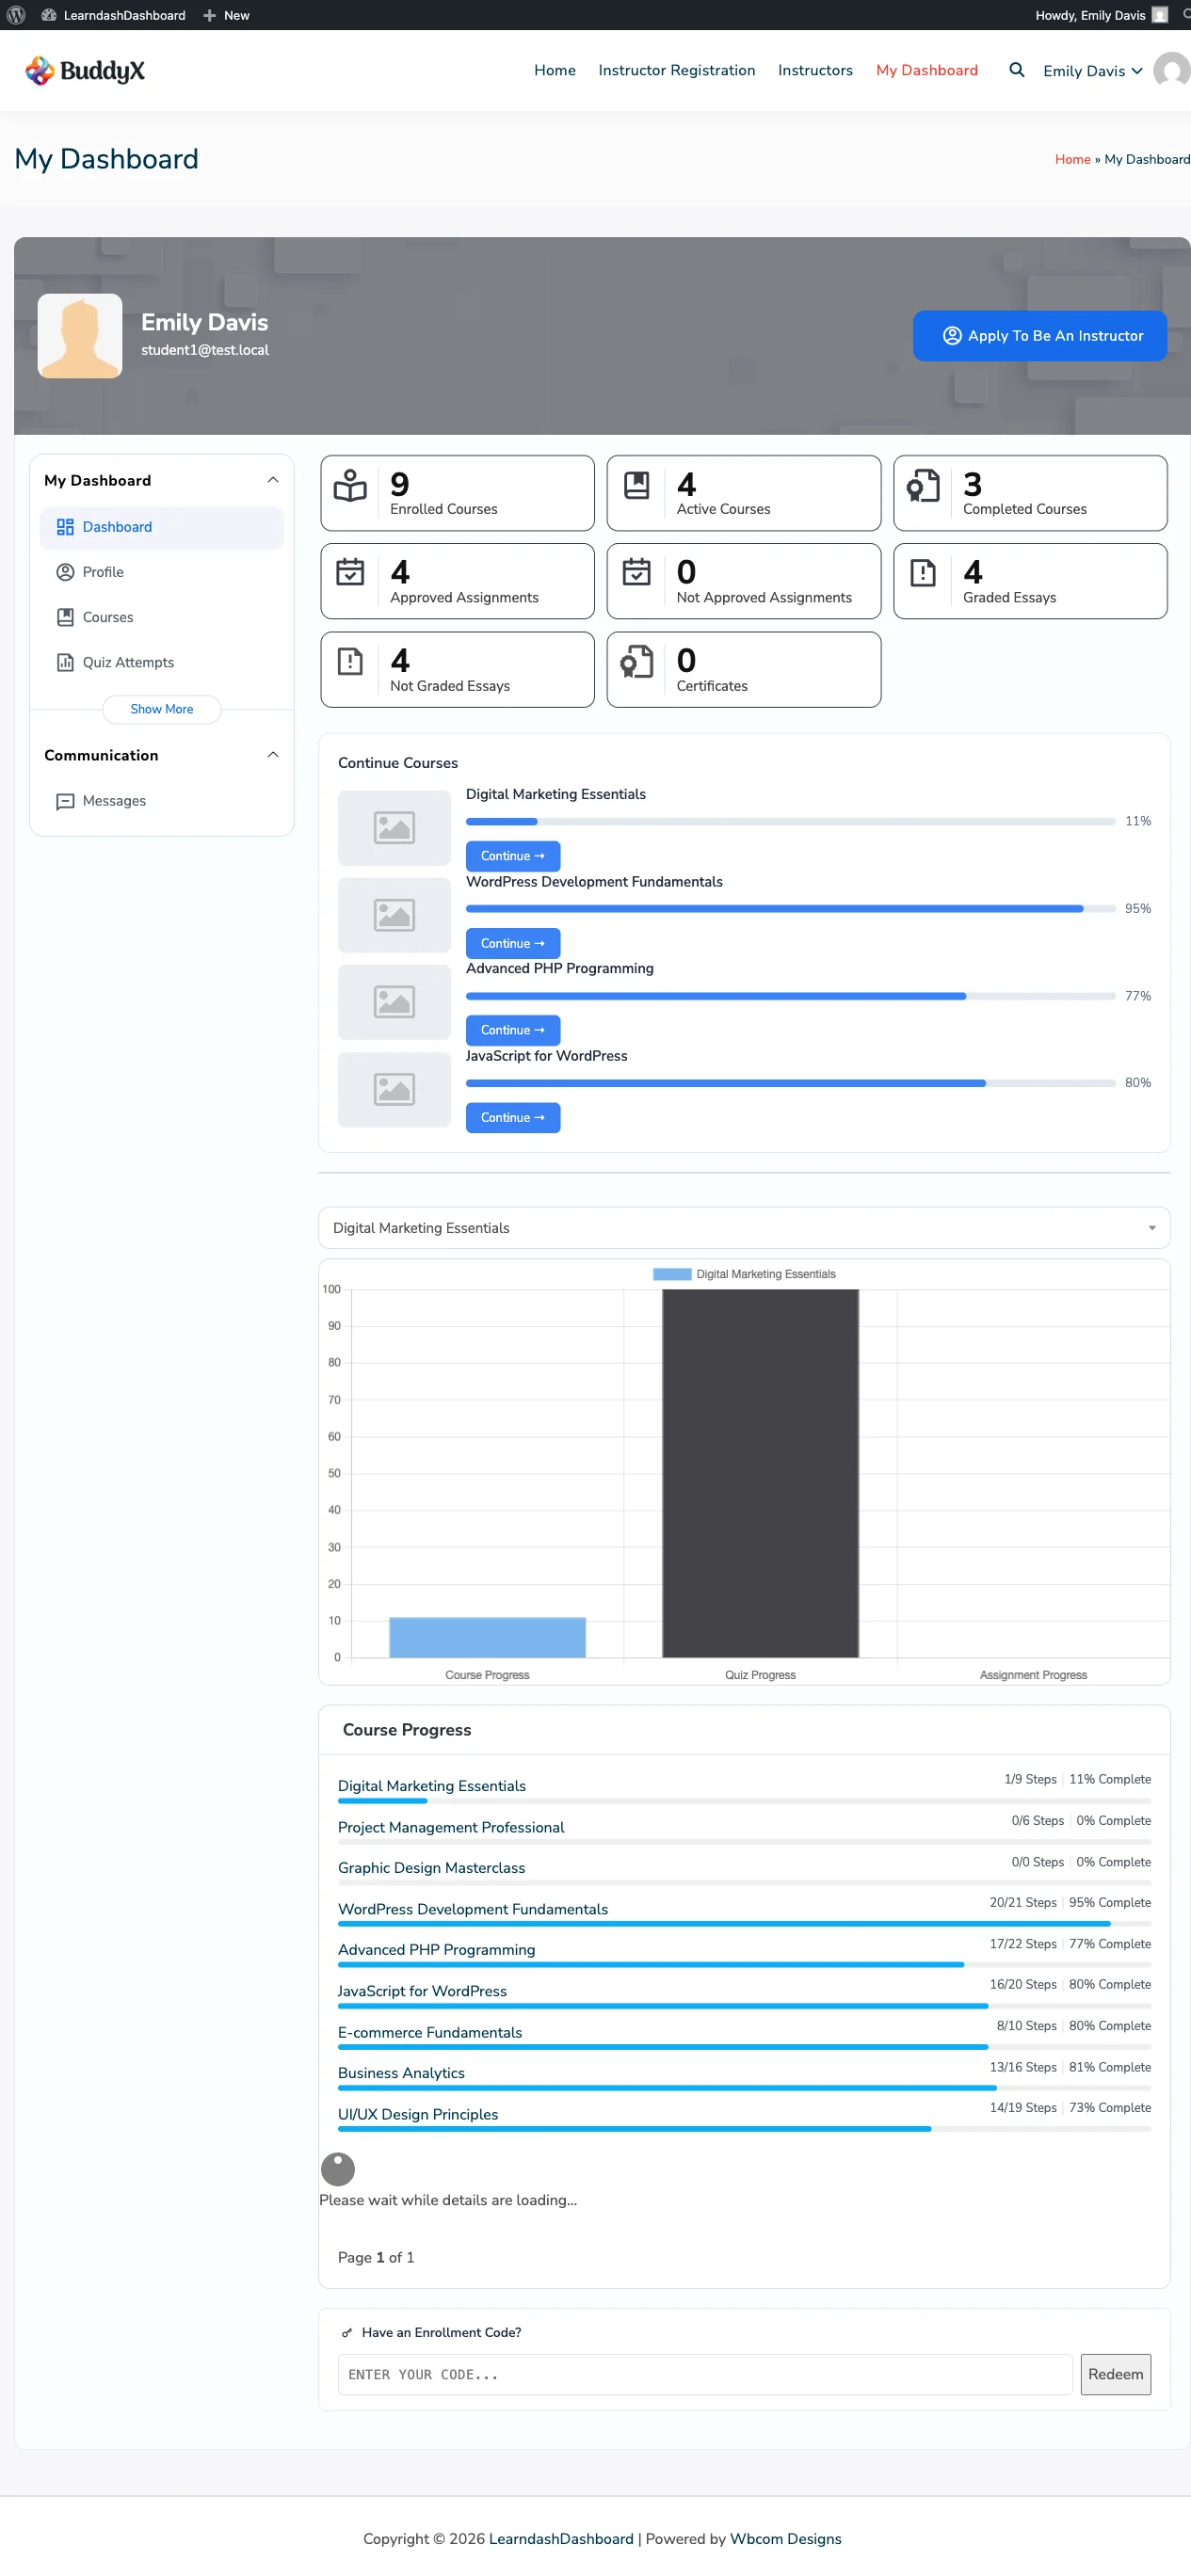
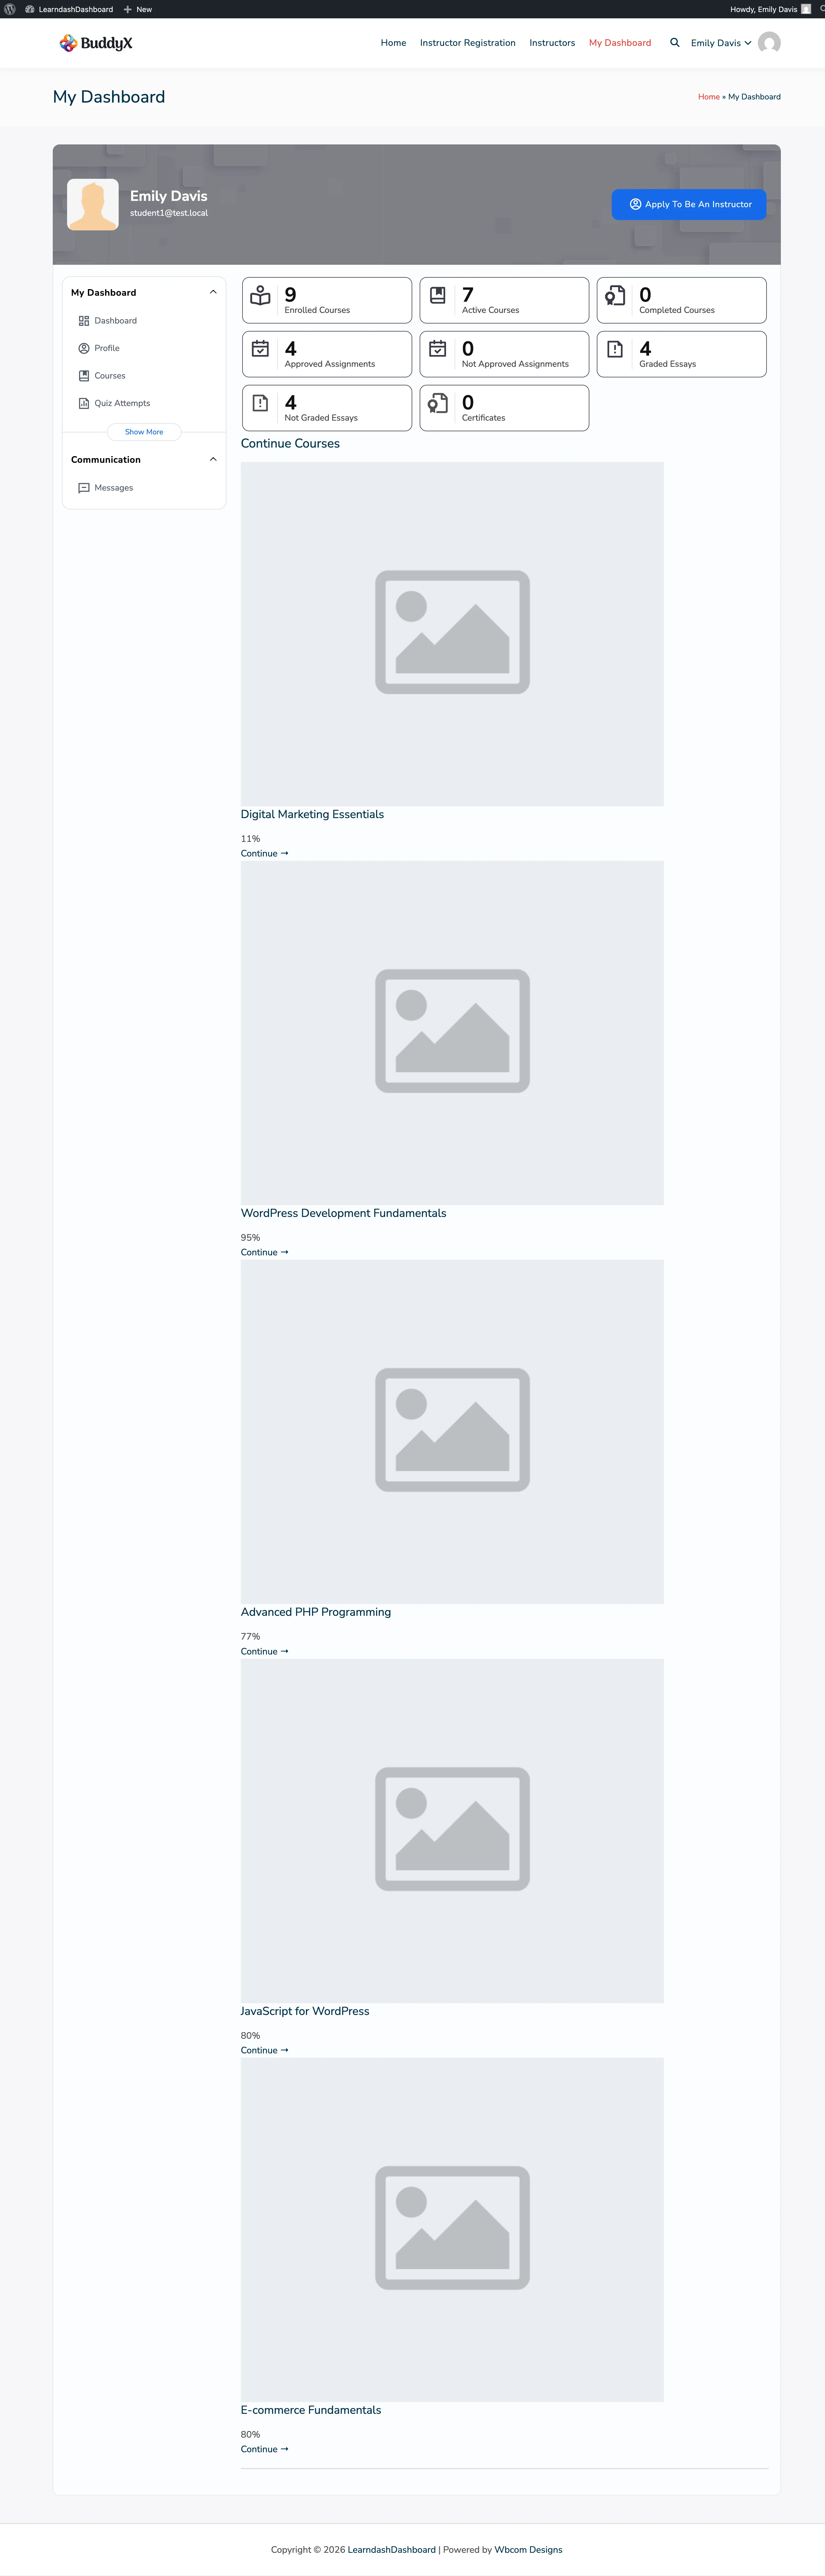
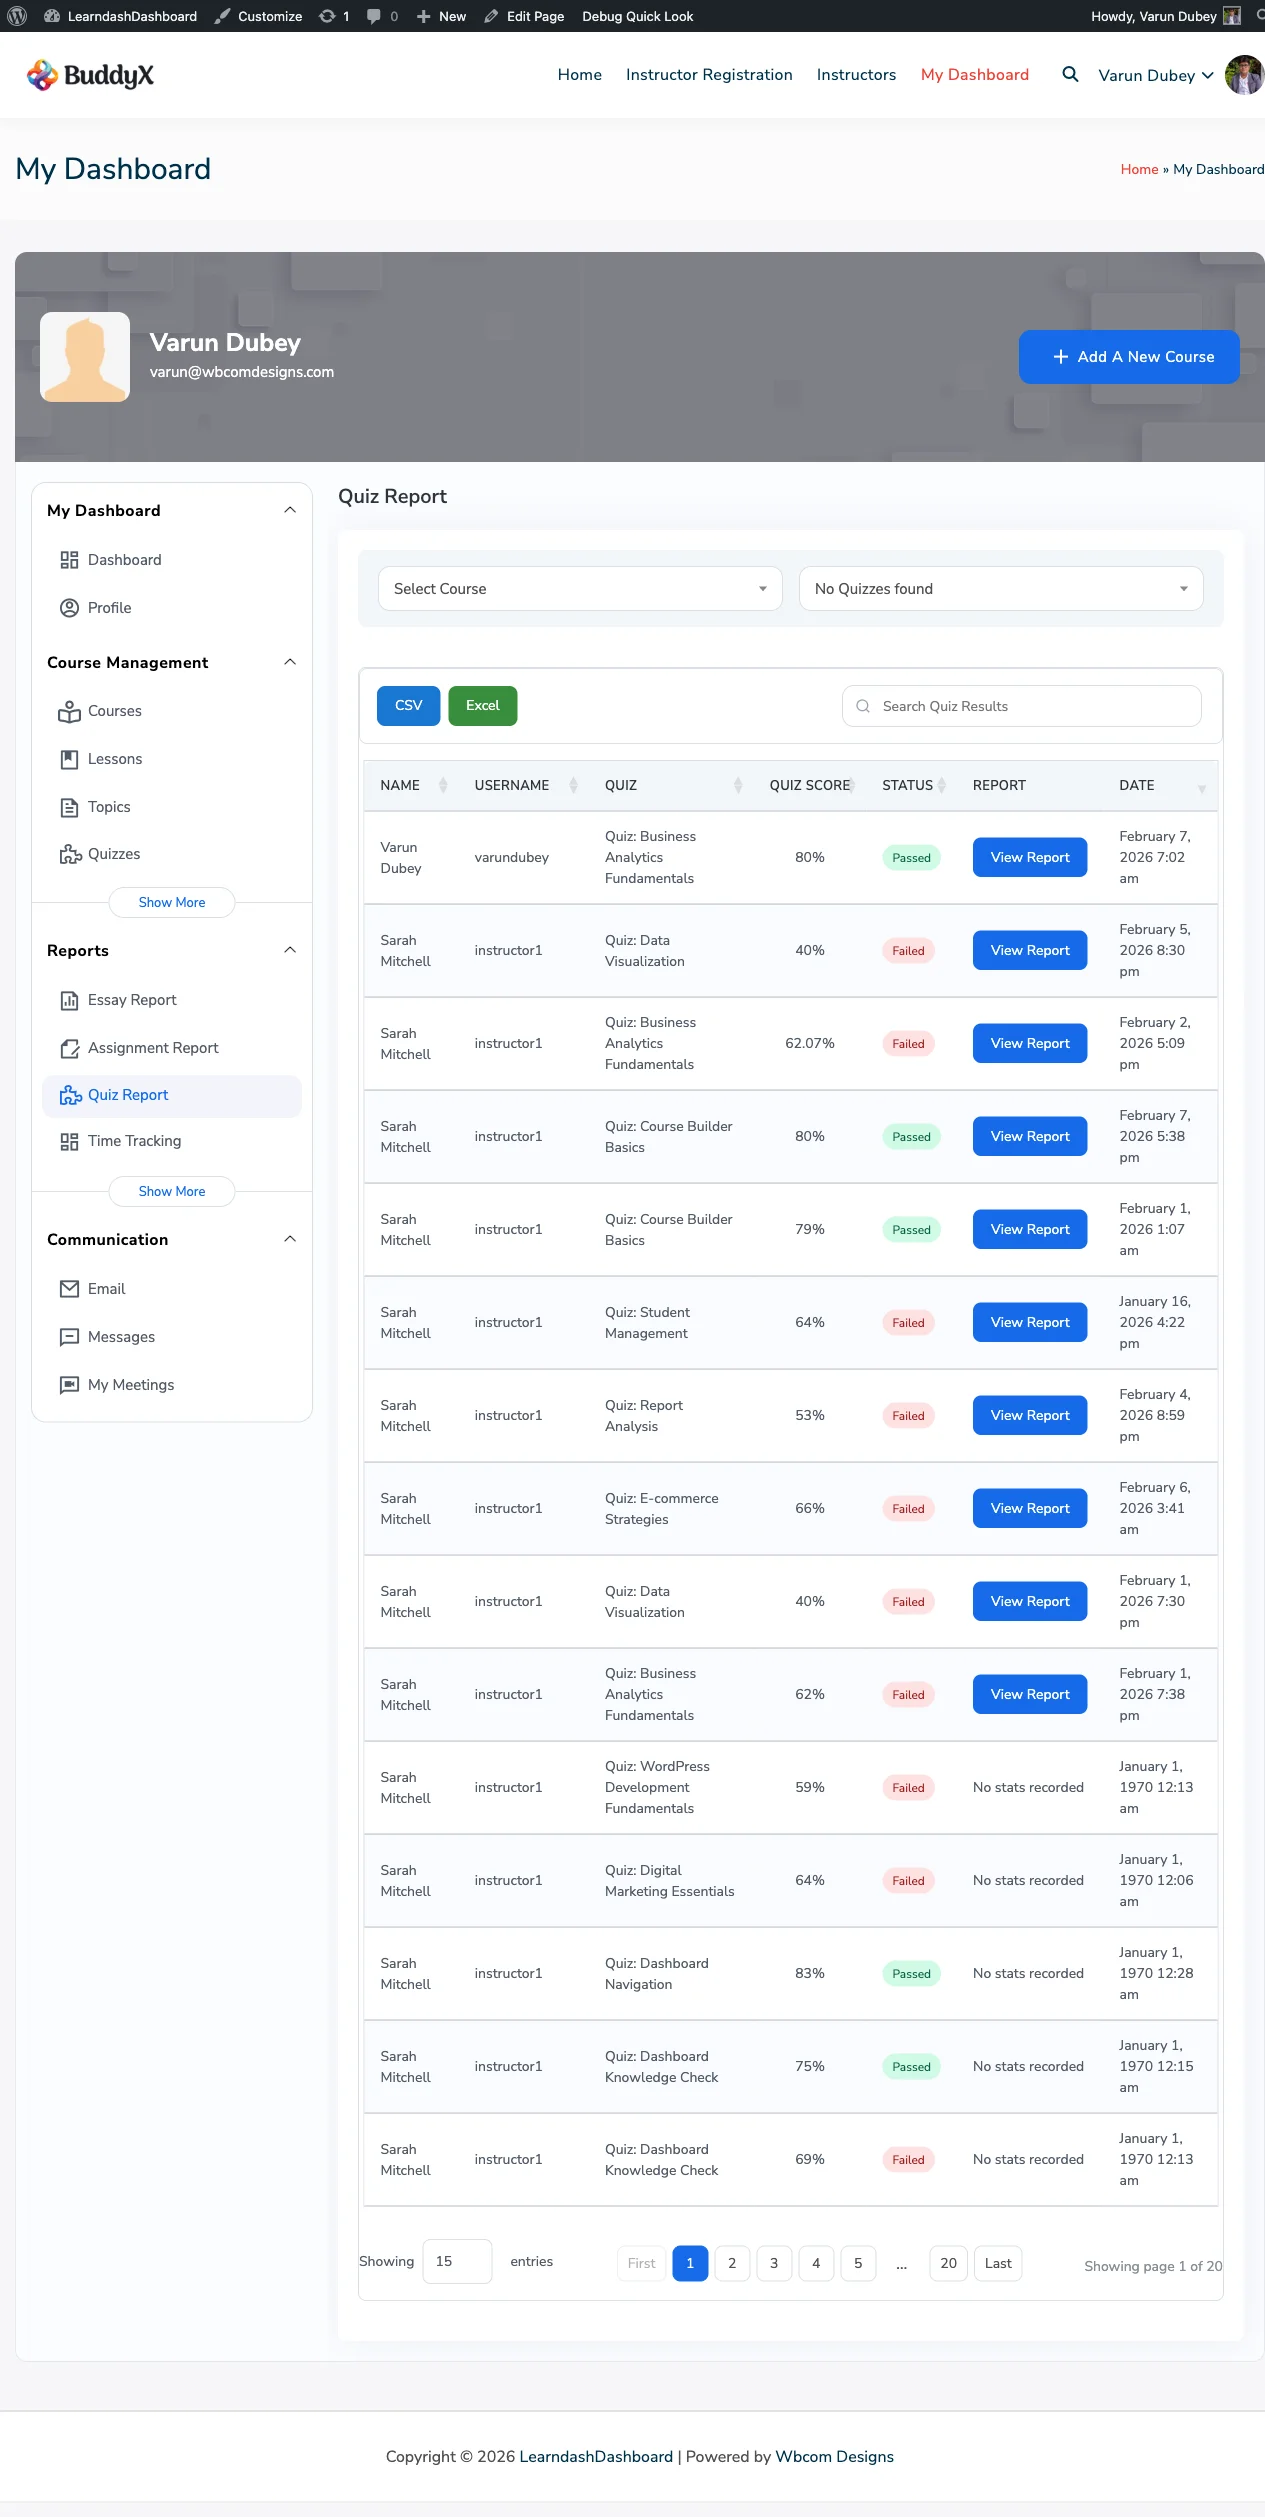
Student Dashboard Home


What You'll See

The dashboard home adapts to who you are. Here's what each role sees.

Students

At the top of your dashboard, four tiles show your learning progress at a glance:

Tile What It Shows
Enrolled Courses Total courses you're enrolled in
In Progress Courses you've started but not finished
Completed Courses you've finished
Certificates Certificates you've earned

Below the tiles, you'll see a list of your enrolled courses with progress bars so you can pick up where you left off.

If your site uses enrollment codes, you'll also see a box where you can enter a code to join a new course instantly.

Instructors

Instructors see tiles for their own courses, lessons, quizzes, and students. Below the tiles, an earnings chart shows your revenue over time. Use the filter to switch between This Month, Last Month, Last 7 Days, or Year.

You also see a student list widget so you can quickly check who's enrolled in your courses.

Group Leaders

Group leaders see tiles for the courses, students, lessons, and quizzes in their assigned groups.

Administrators

Admins see site-wide counts - total courses, lessons, topics, quizzes, students, and assignments - plus an earnings chart covering all instructors on the site.


Quick Action Buttons

Admins and instructors see a row of quick action buttons at the top of the dashboard. These let you jump straight to common tasks:

  • New Course - Start building a new course
  • New Lesson - Add a lesson to an existing course
  • New Quiz - Create a quiz
  • Send Email - Open the email tool to message students
  • View Reports - Go straight to your reports section

Configuring the Dashboard Home

You can control what appears on the dashboard home from your admin panel.

  1. Go to WP Admin > LearnDash Dashboard
  2. Use the settings below to adjust what's shown:
Setting Area What You Can Change
Dashboard Statistics Choose which stat tiles appear (see full list below)
General Settings > Dashboard Components Turn course progress and student details on or off
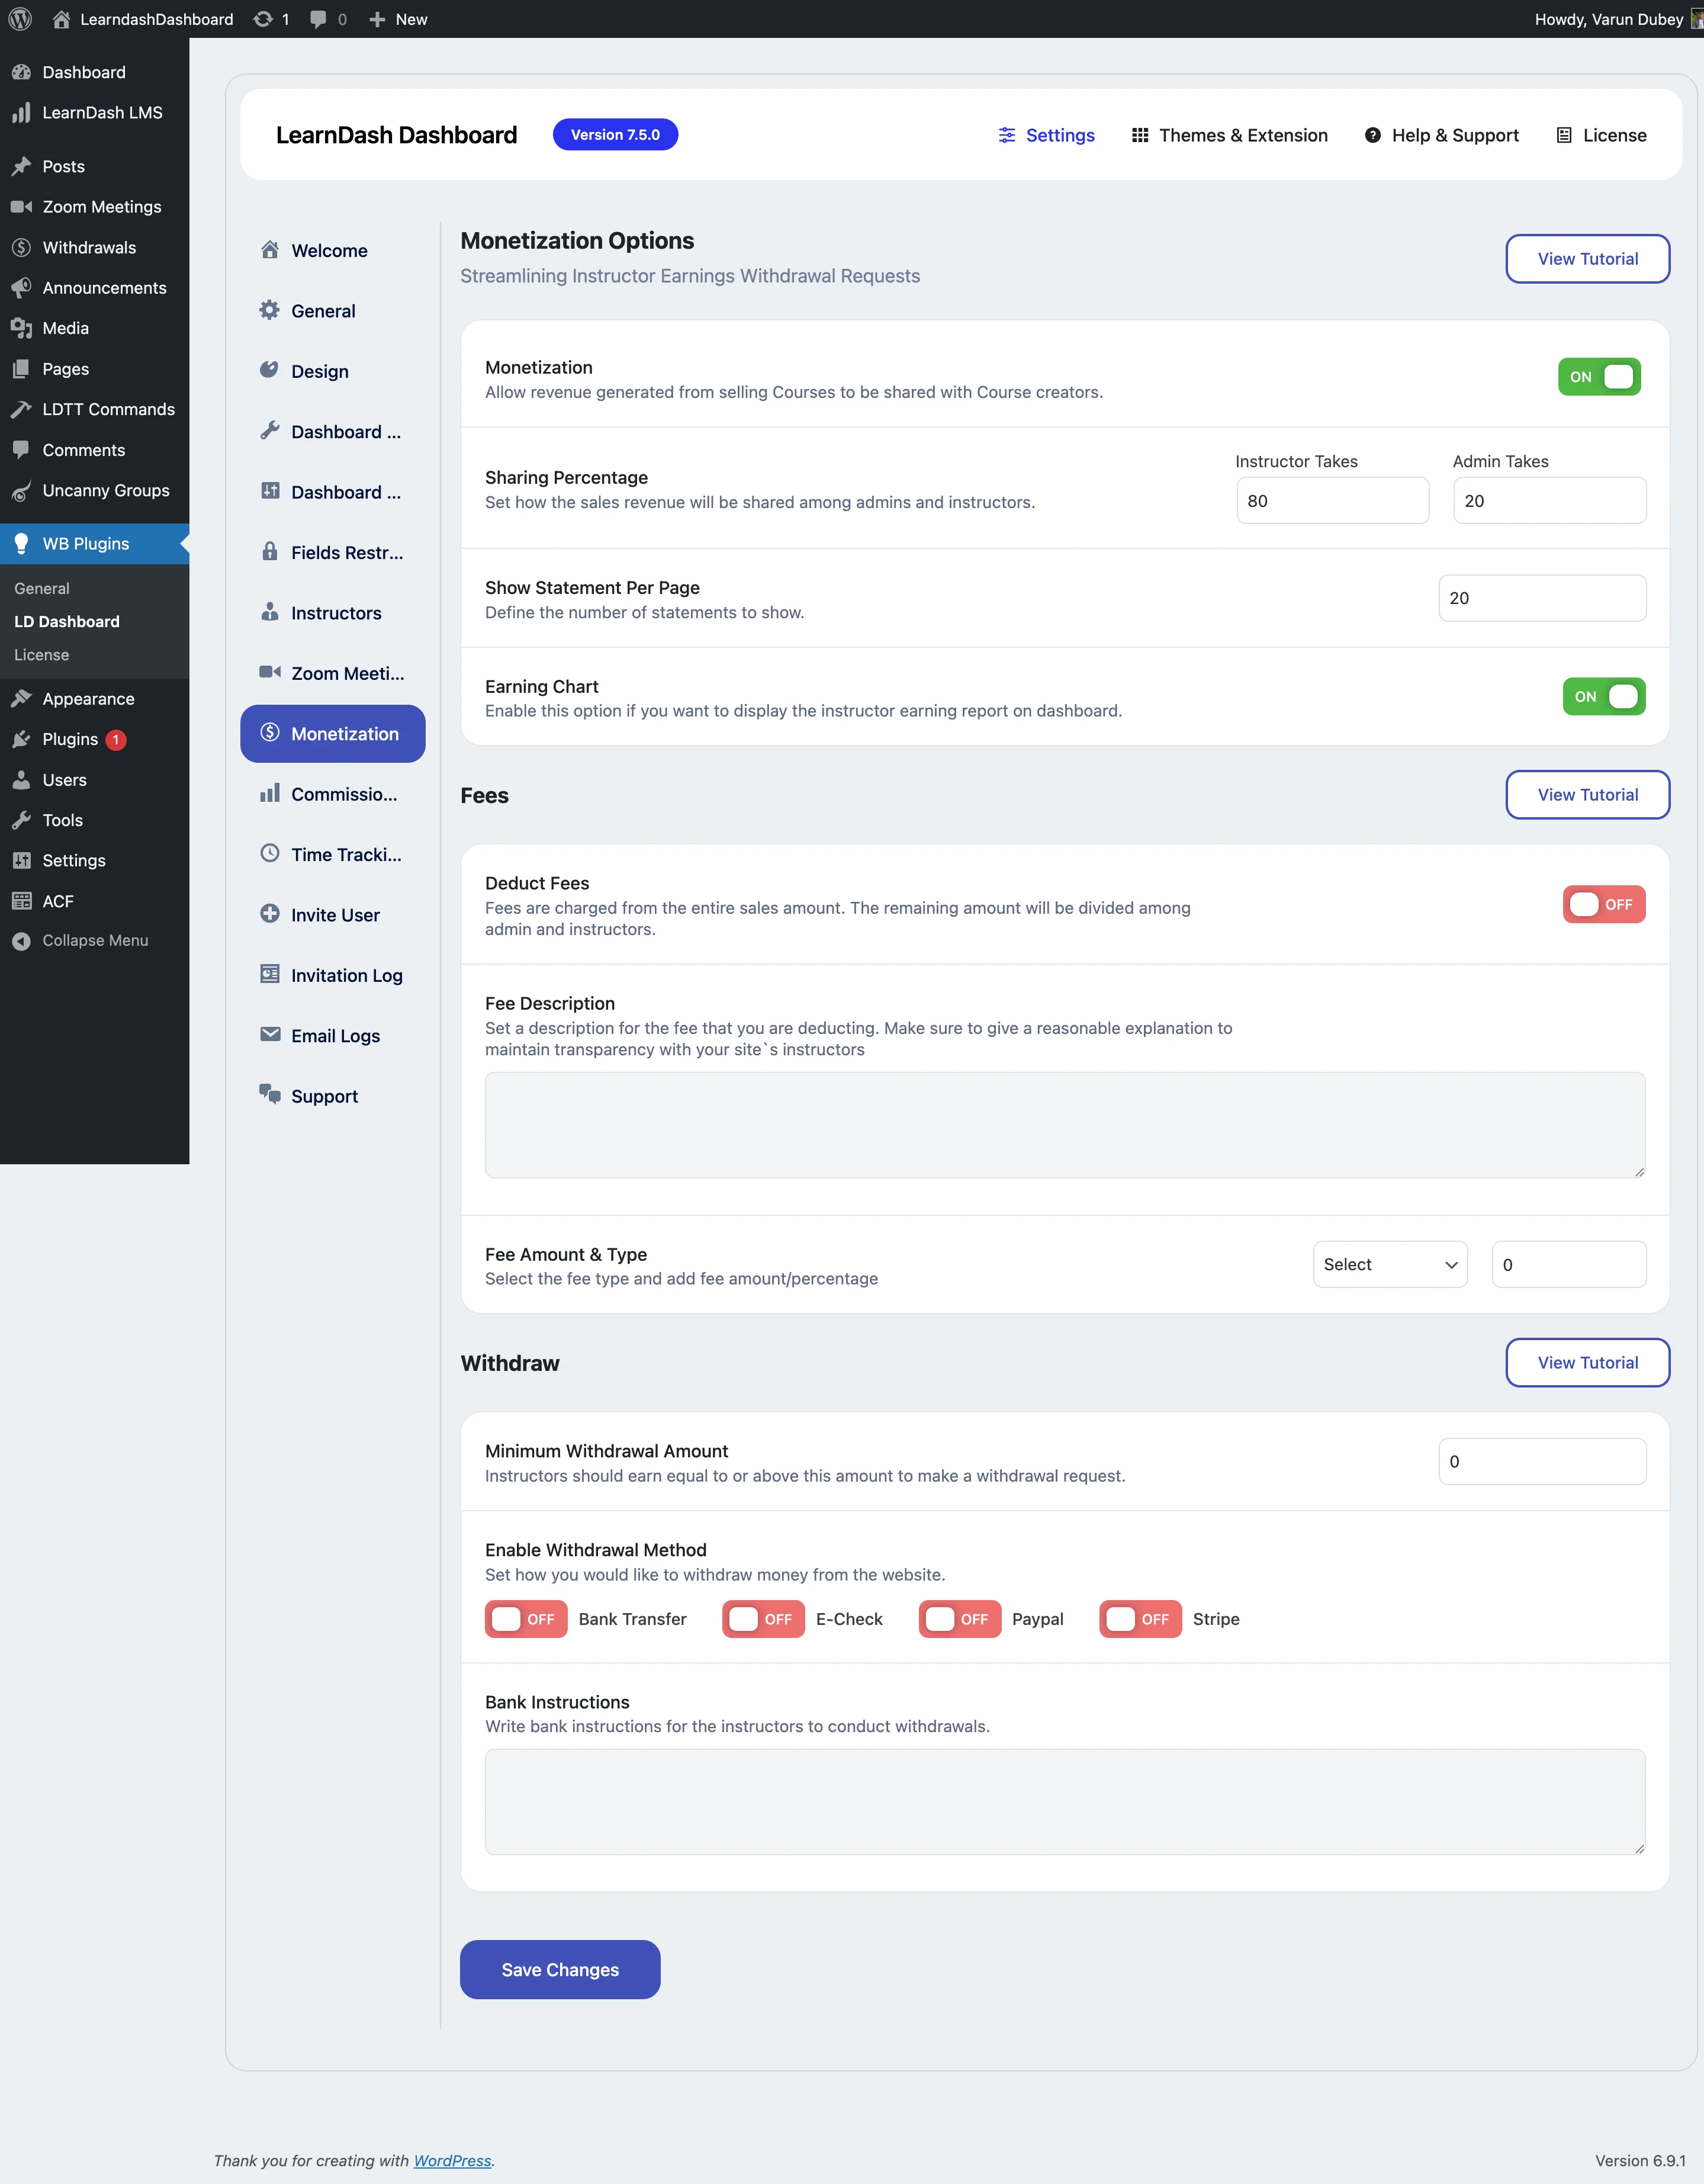
Monetization Enable the earnings chart for instructors
Welcome Screen Customize the profile banner image and text

Dashboard Statistics - All Tile Options

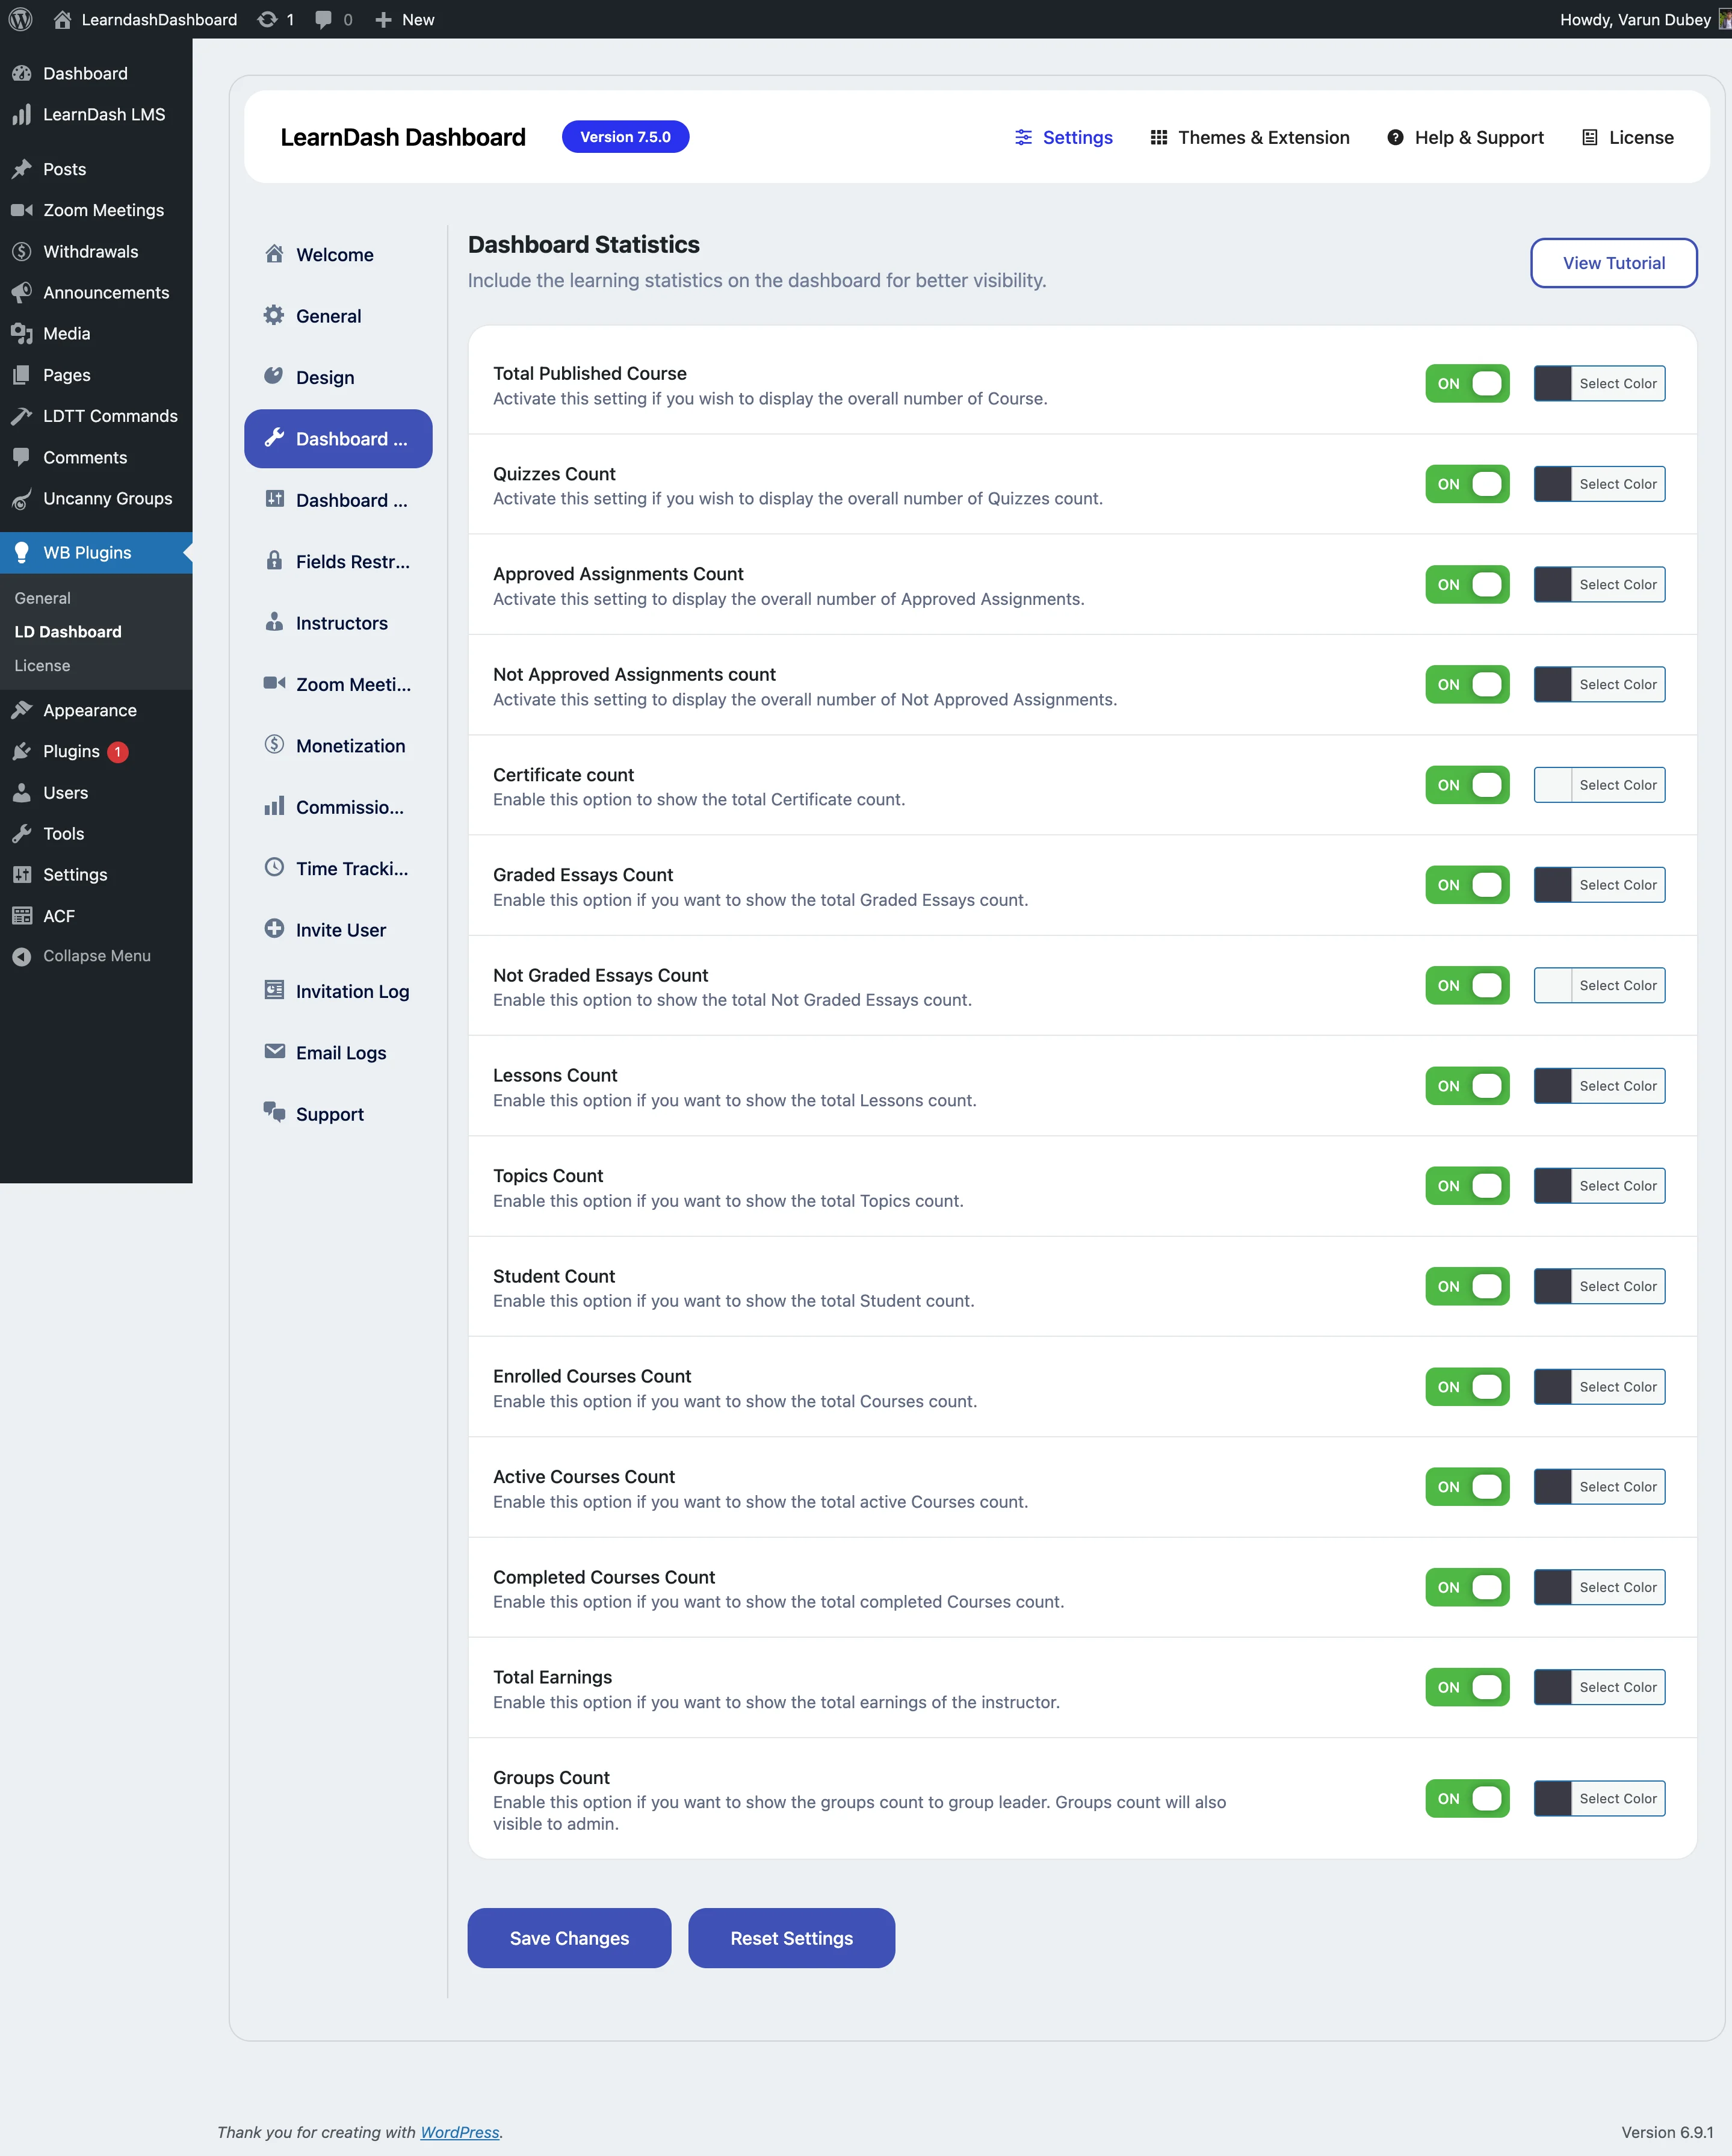
Admin Dashboard Statistics Settings

Go to WP Admin > LearnDash Dashboard > Dashboard Statistics to toggle individual tiles on or off and set each tile's icon color.

Tile What It Shows Visible To
Total Published Courses Total number of published courses on the site Admin, Instructor
Quizzes Count Total number of quizzes Admin, Instructor
Approved Assignments Count Assignments that have been approved Admin, Instructor
Not Approved Assignments Count Assignments still pending approval Admin, Instructor
Certificate Count Total certificates available Admin, Instructor
Graded Essays Count Essays that have been graded Admin, Instructor
Not Graded Essays Count Essays still awaiting grading Admin, Instructor
Lessons Count Total number of lessons Admin, Instructor
Topics Count Total number of topics Admin, Instructor
Student Count Total number of students Admin, Instructor
Enrolled Courses Count Courses the current user is enrolled in Student
Active Courses Count Courses the user has started but not completed Student
Completed Courses Count Courses the user has finished Student
Total Earnings Instructor's total revenue Instructor
Groups Count Number of groups assigned to the user Group Leader, Admin

Each tile also has a color picker to set the icon color, so you can match your site's branding.

Activity Feed

Overview

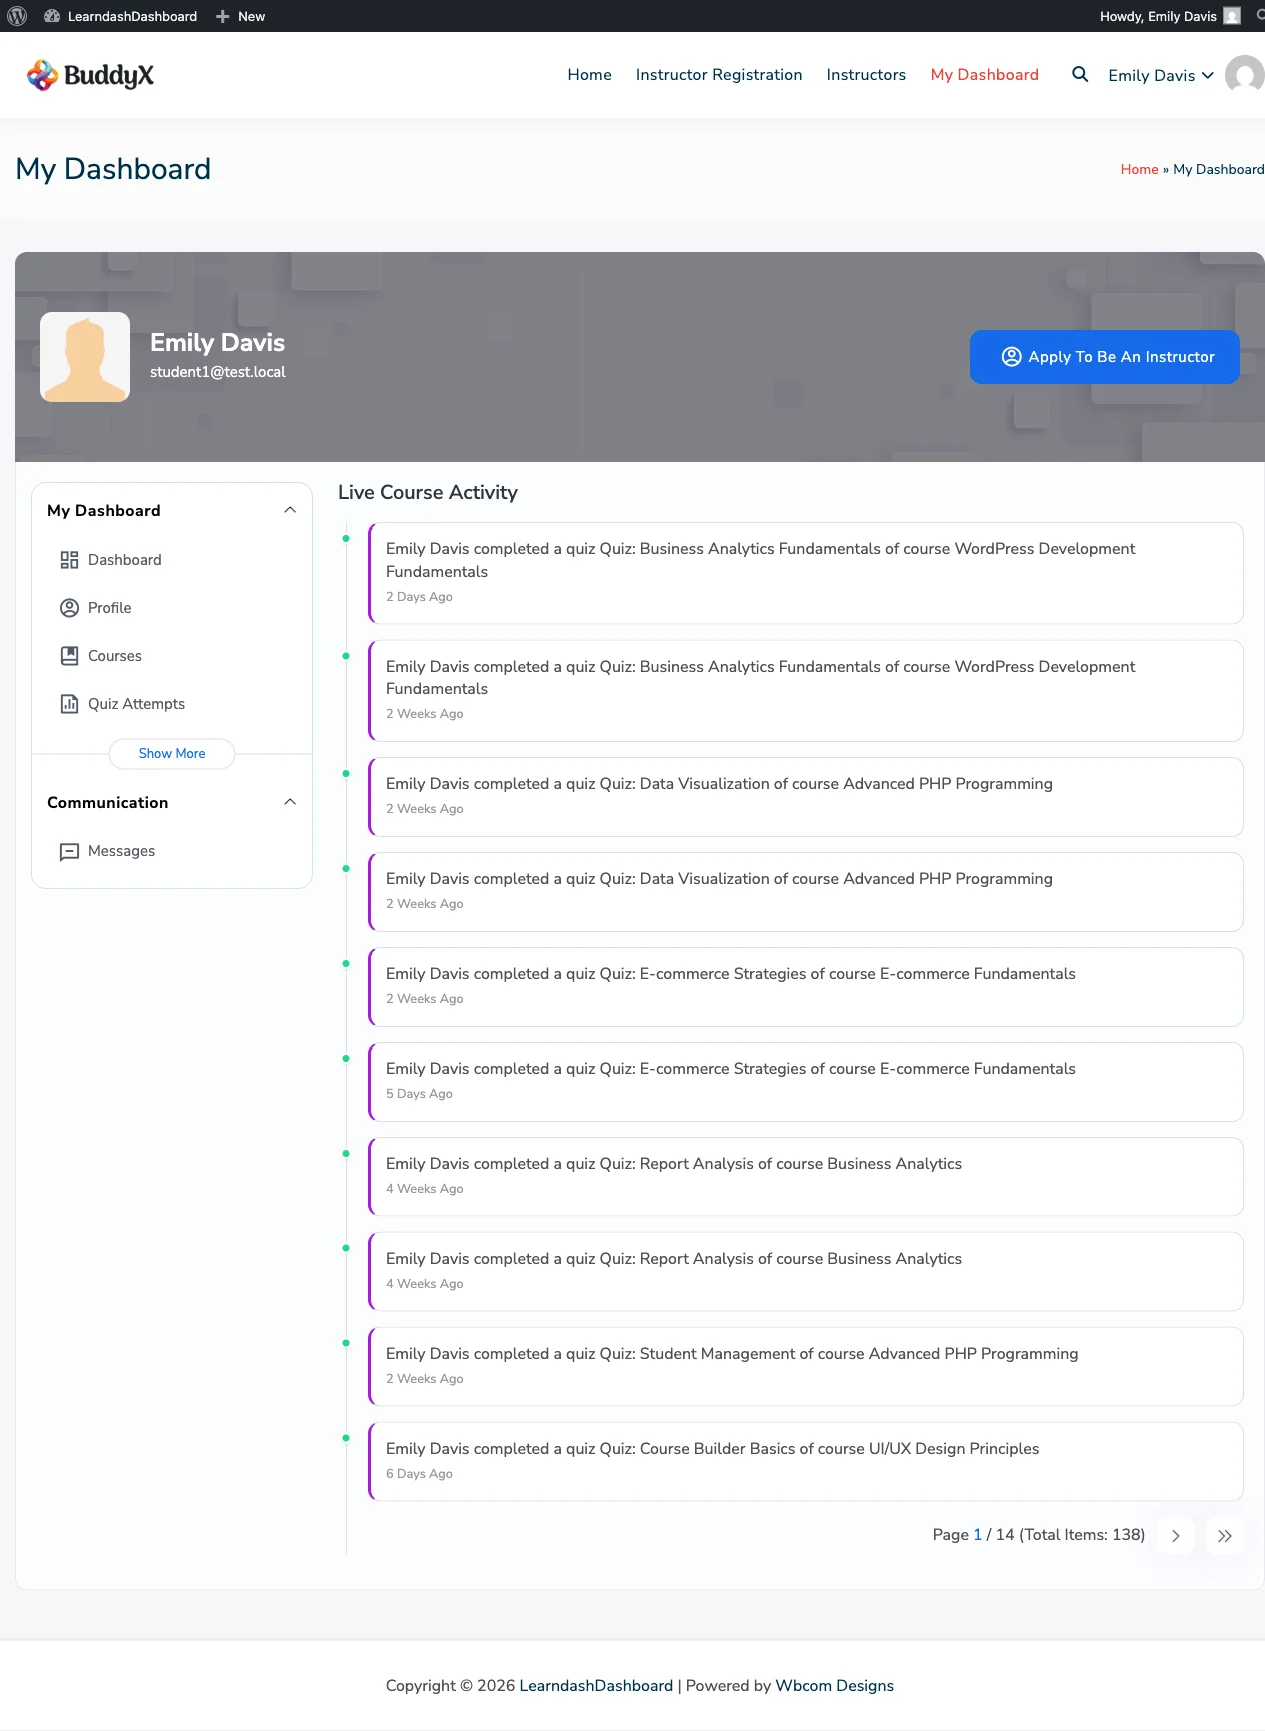
The activity feed shows a live stream of learning activity happening across your site. You can see enrollments, course completions, quiz submissions, assignment uploads, and more - all in one place, updated in real time.

Screenshots

Student Activity Feed


How to Access

Click Activity in your dashboard sidebar to open the activity feed.


What the Feed Shows

Each item in the feed includes the user's photo, a description of what happened, and when it happened.

The feed tracks these types of events:

  • A student enrolled in a course
  • A student completed a course
  • A student completed a lesson
  • A student completed a topic
  • A student submitted a quiz
  • A student uploaded an assignment
  • A student submitted an essay answer

What You See Depends on Your Role

The feed automatically shows you relevant activity:

Your Role What You See
Administrator All activity across the entire site
Instructor Activity from students in your courses
Group Leader Activity from students in your groups
Student Your own activity only

Loading More Activity

The feed loads your most recent activity first. Scroll down and click Load More to see older entries.


The Live Feed Panel

In addition to the dedicated Activity tab, there is also a live feed panel that floats alongside your dashboard on every tab. This lets you keep an eye on activity without navigating away from what you're doing.

Administrators can turn the live feed panel on or off, and can disable it for specific roles.


Enabling and Disabling the Feed

Turn Off the Live Feed for Everyone

  1. Go to WP Admin > LearnDash Dashboard > General Settings
  2. Find Dashboard Components
  3. Check Disable Live Feed
  4. Click Save Changes

Turn Off the Live Feed for Specific Roles

  1. Go to WP Admin > LearnDash Dashboard > General Settings
  2. Find Disable Live Feed for Roles
  3. Select the roles that should not see the live feed panel
  4. Click Save Changes

Users who have the live feed disabled still see their dashboard normally - they just won't see the live feed panel on the side.

Using the Dashboard on Mobile & Tablet

Overview

The LearnDash Dashboard works on any device - desktop, tablet, or phone. The layout adjusts automatically so everything remains easy to read and use, no matter your screen size.


On a Tablet

When you open the dashboard on a tablet, the layout adjusts so everything fits comfortably. Edit forms and sidebars switch to a single-column layout, making them easier to read and fill out without zooming in.


On a Phone

The mobile experience is designed from the ground up for small screens.

The Mobile Navigation Bar

Instead of the desktop sidebar, a compact navigation bar appears at the bottom (or top) of the screen. It gives you quick links to your courses and profile, plus a menu button.

Tap the menu button to open the full navigation - all the same sections you'd see on desktop, in a slide-in panel. Tap outside the menu or tap the button again to close it.

Full-Width Layout

On mobile, all content expands to fill the full screen width. No horizontal scrolling, no content cut off at the edges.


Tables on Mobile

Large data tables - like quiz history, enrollment codes, and reports - reformat into a card-style layout on small screens. Each row becomes its own card with clearly labeled fields, so you can read all the information without scrolling sideways.


Touch-Friendly Design

Every interactive element is sized for easy tapping:

  • Navigation menu items have generous tap areas
  • Filter buttons are spaced apart so it's easy to tap the right one
  • Form buttons expand to full width on small screens for easy submission

Tip for Site Owners

The dashboard is designed to work alongside your existing theme on any device. If you ever notice layout issues on mobile, check whether your theme applies custom overflow or z-index rules that might conflict with the dashboard's navigation bar.

Student Features

Enrolled Courses

Overview

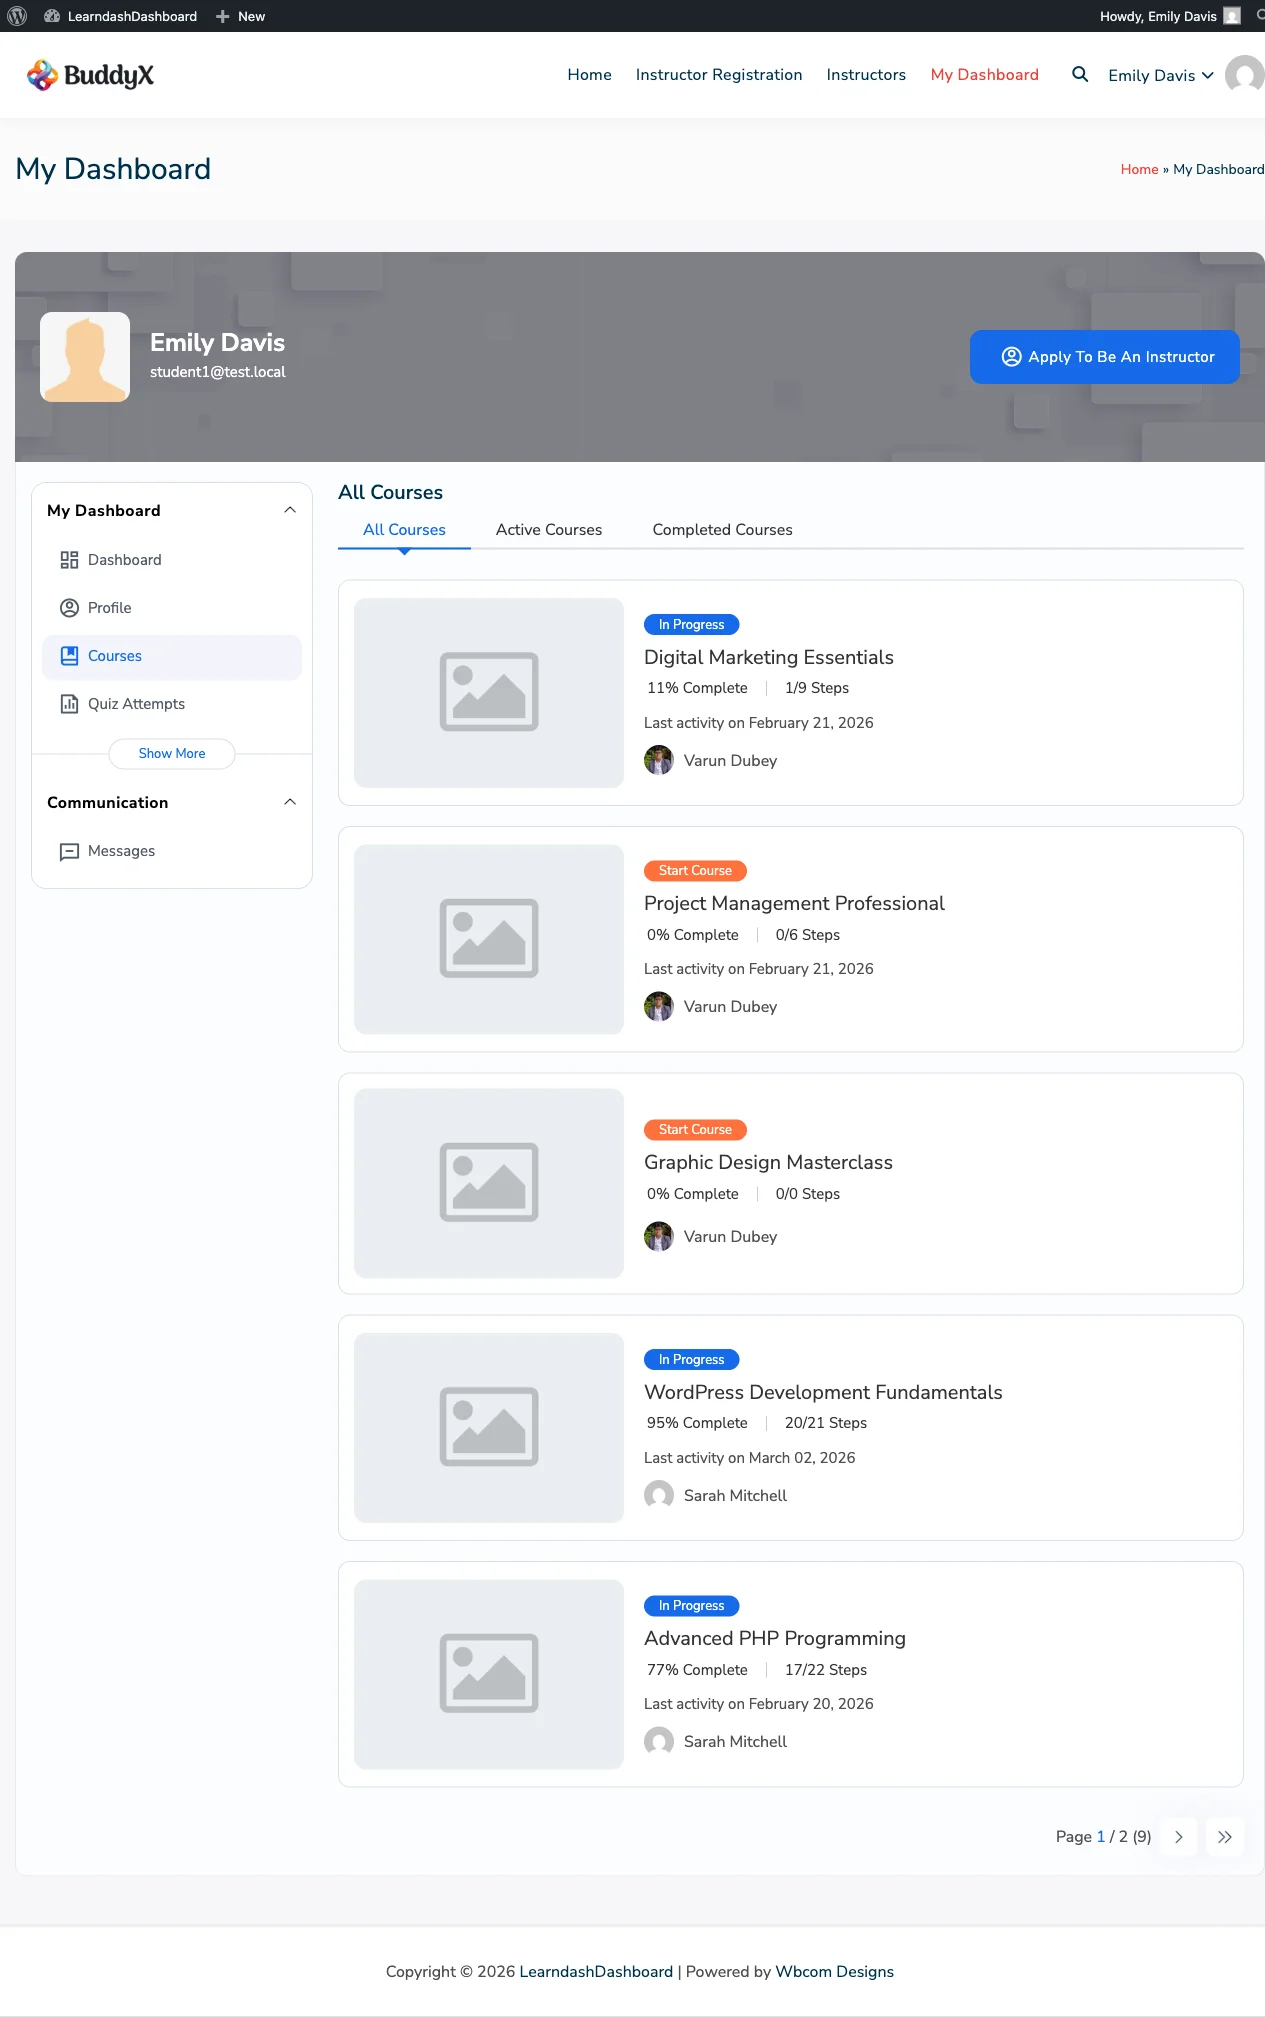
The Enrolled Courses section shows every course you're signed up for. You can check your progress, jump back into a course you've started, and see which ones you've completed.

Screenshots

How It Looks

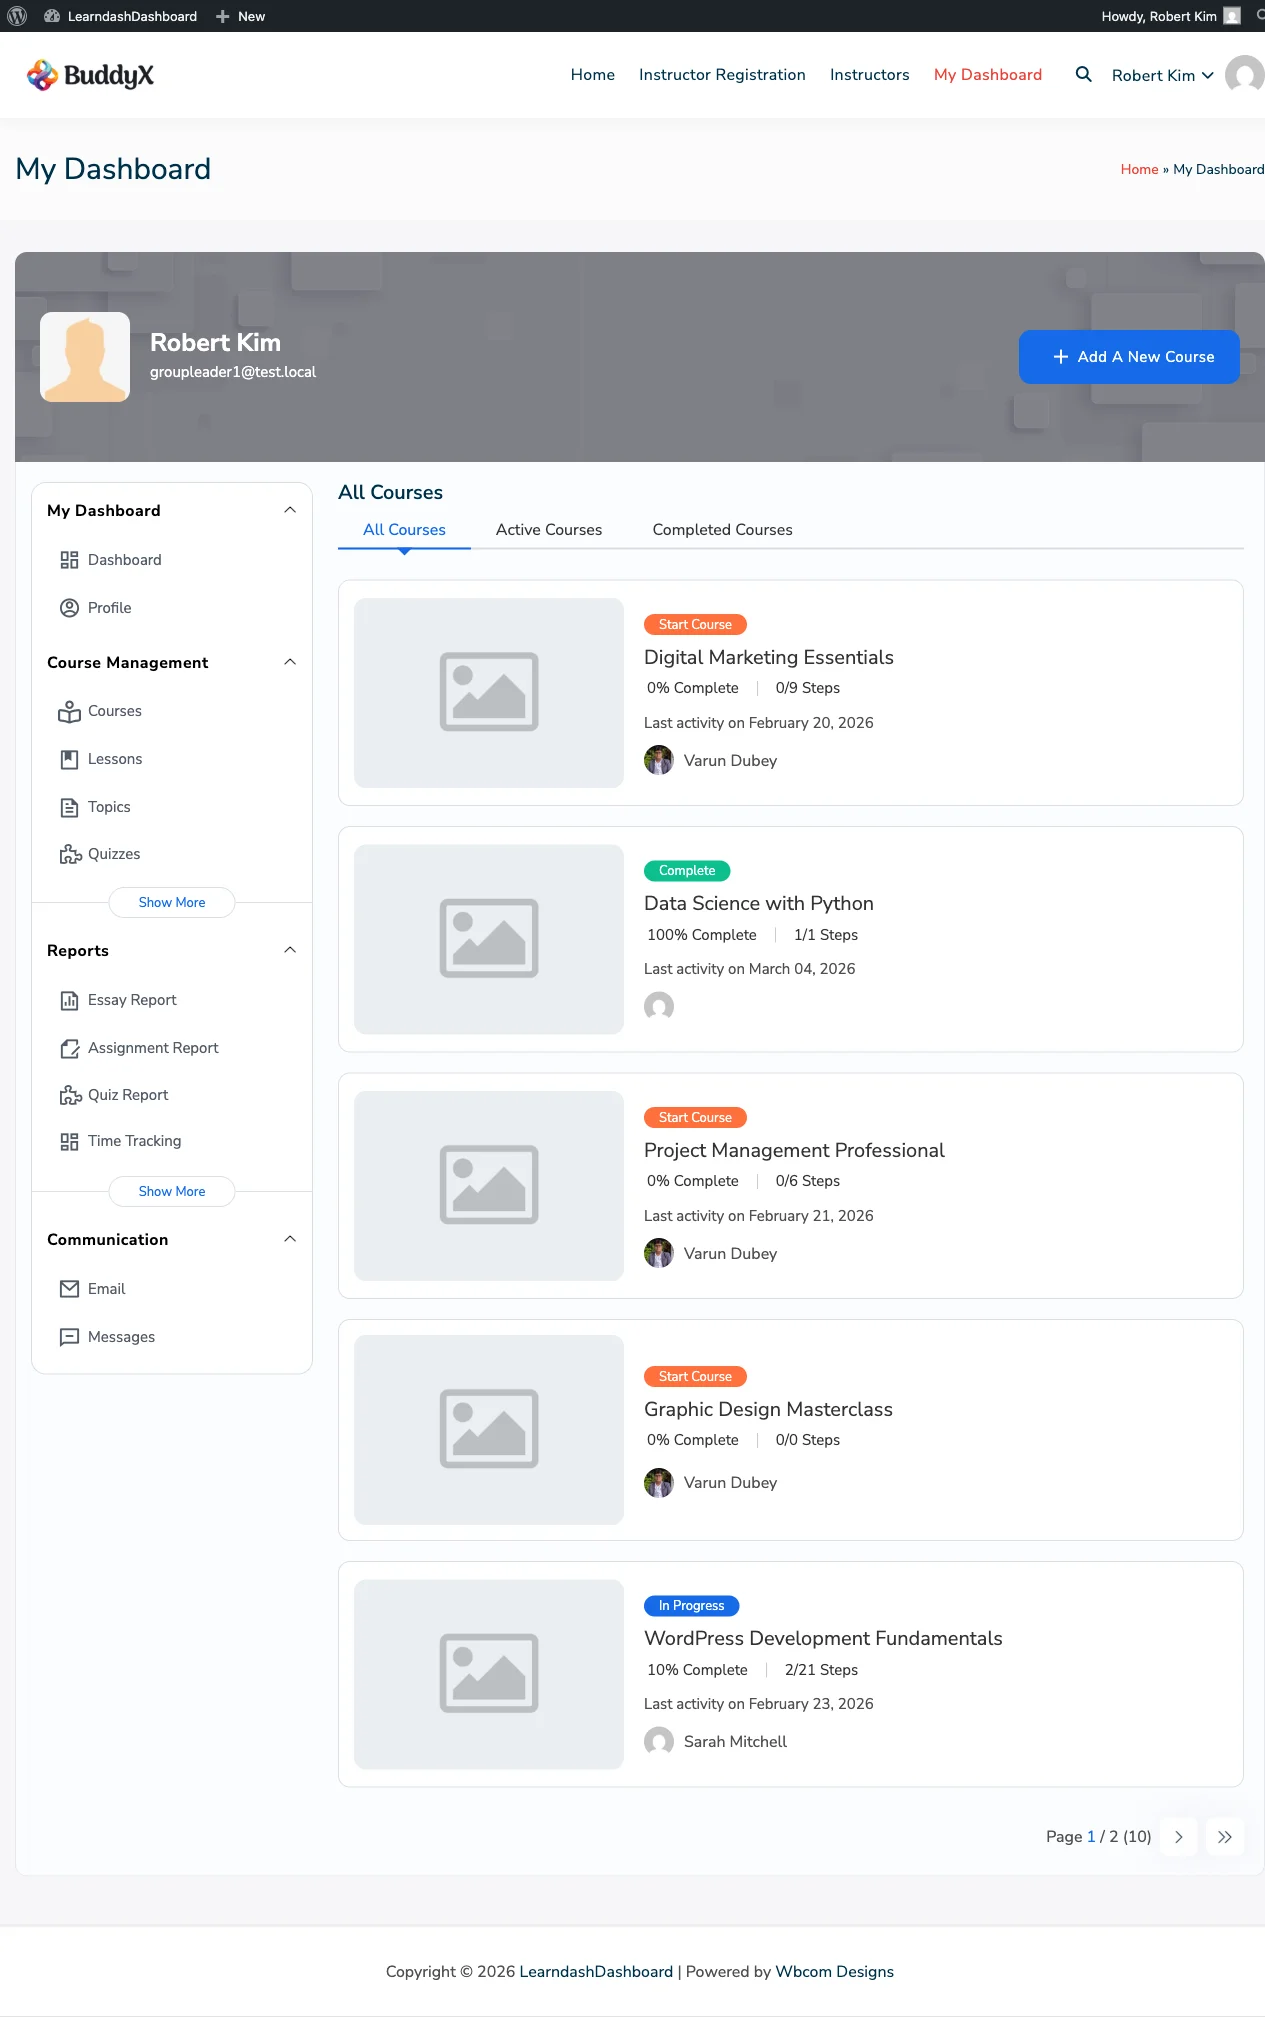
Student Enrolled Courses

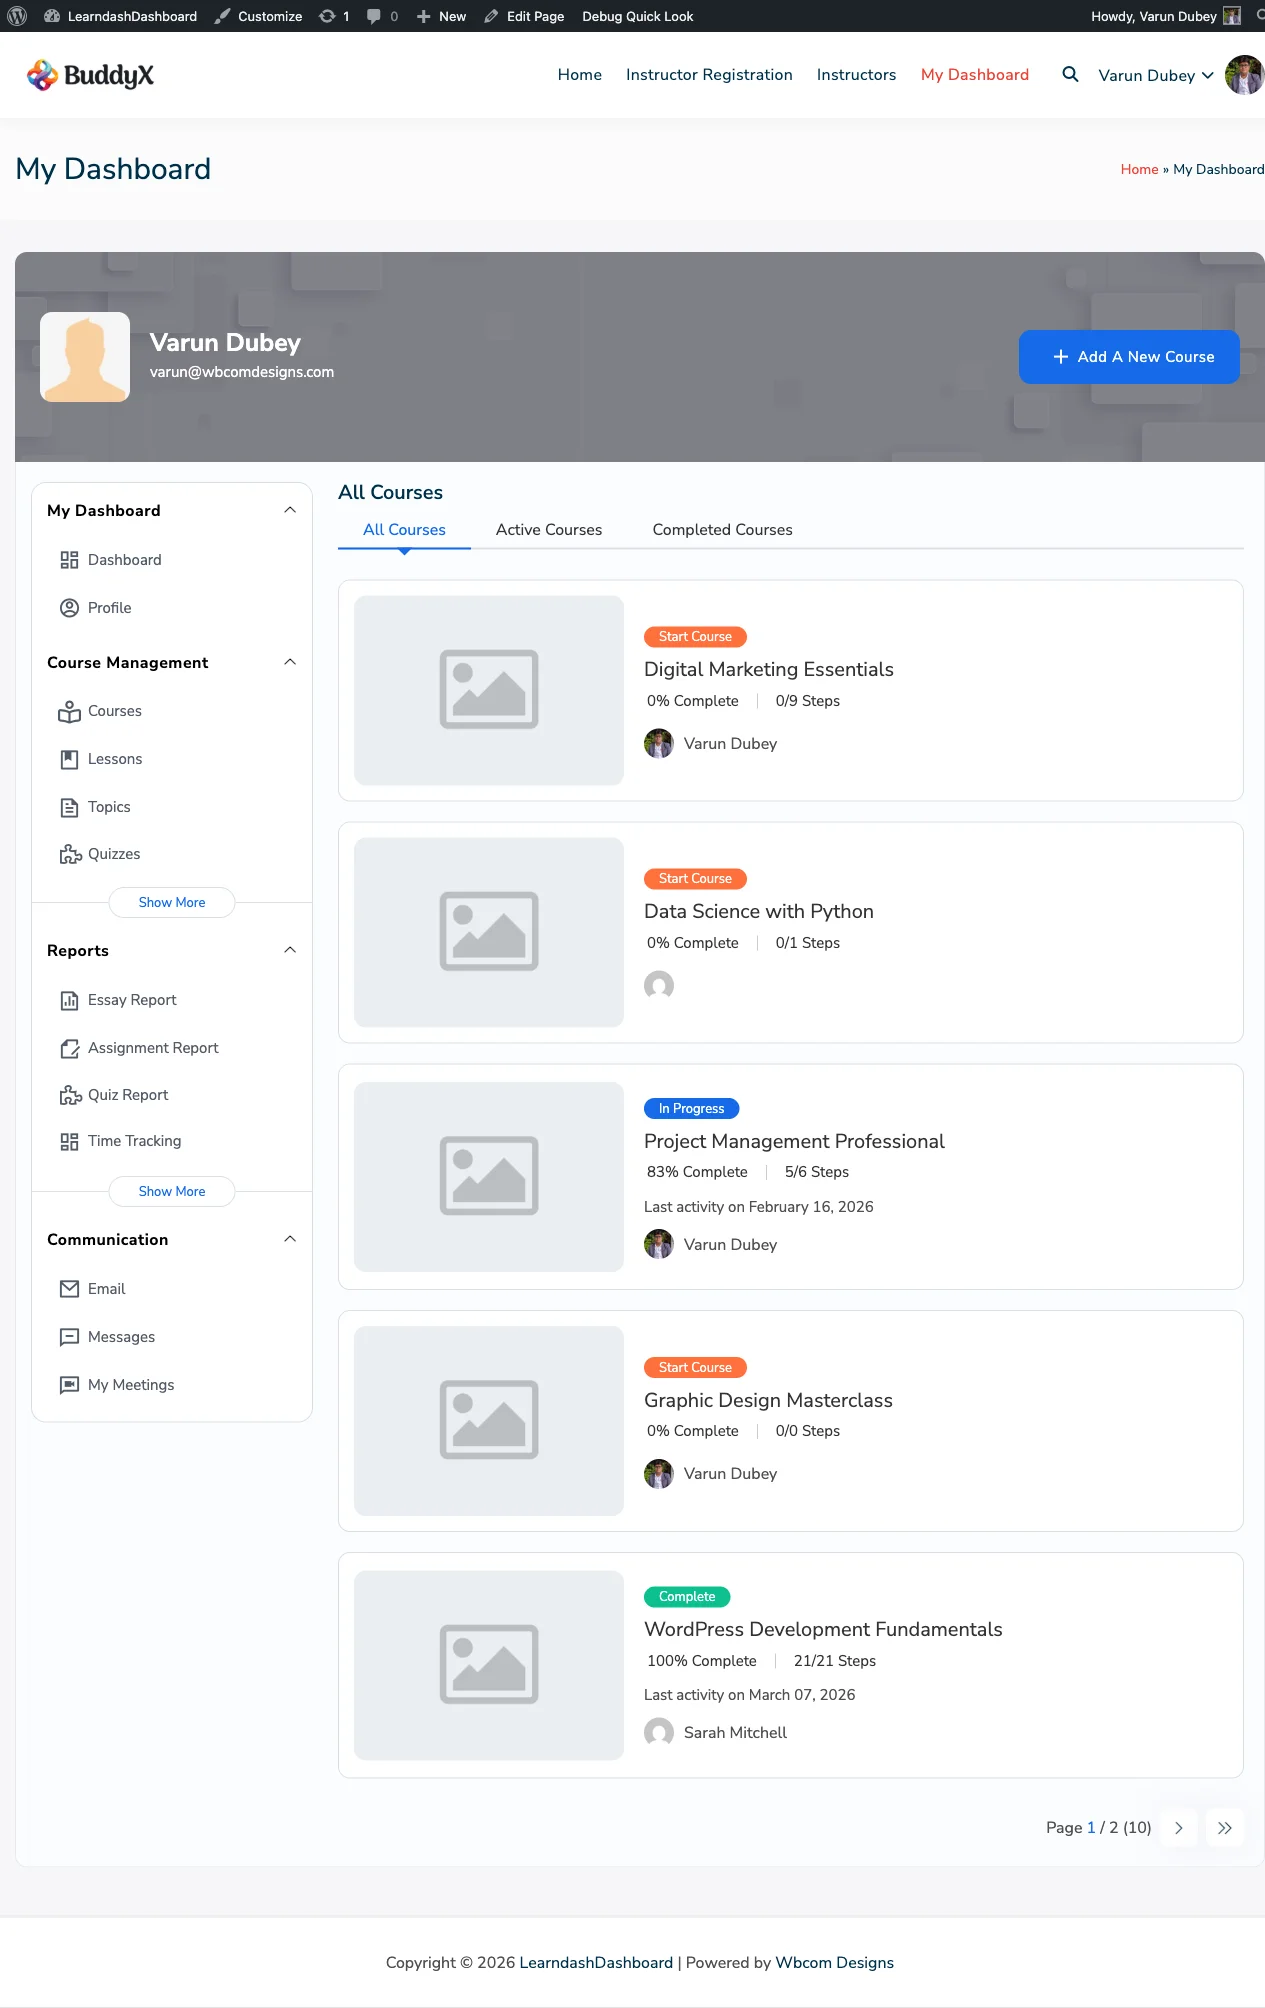
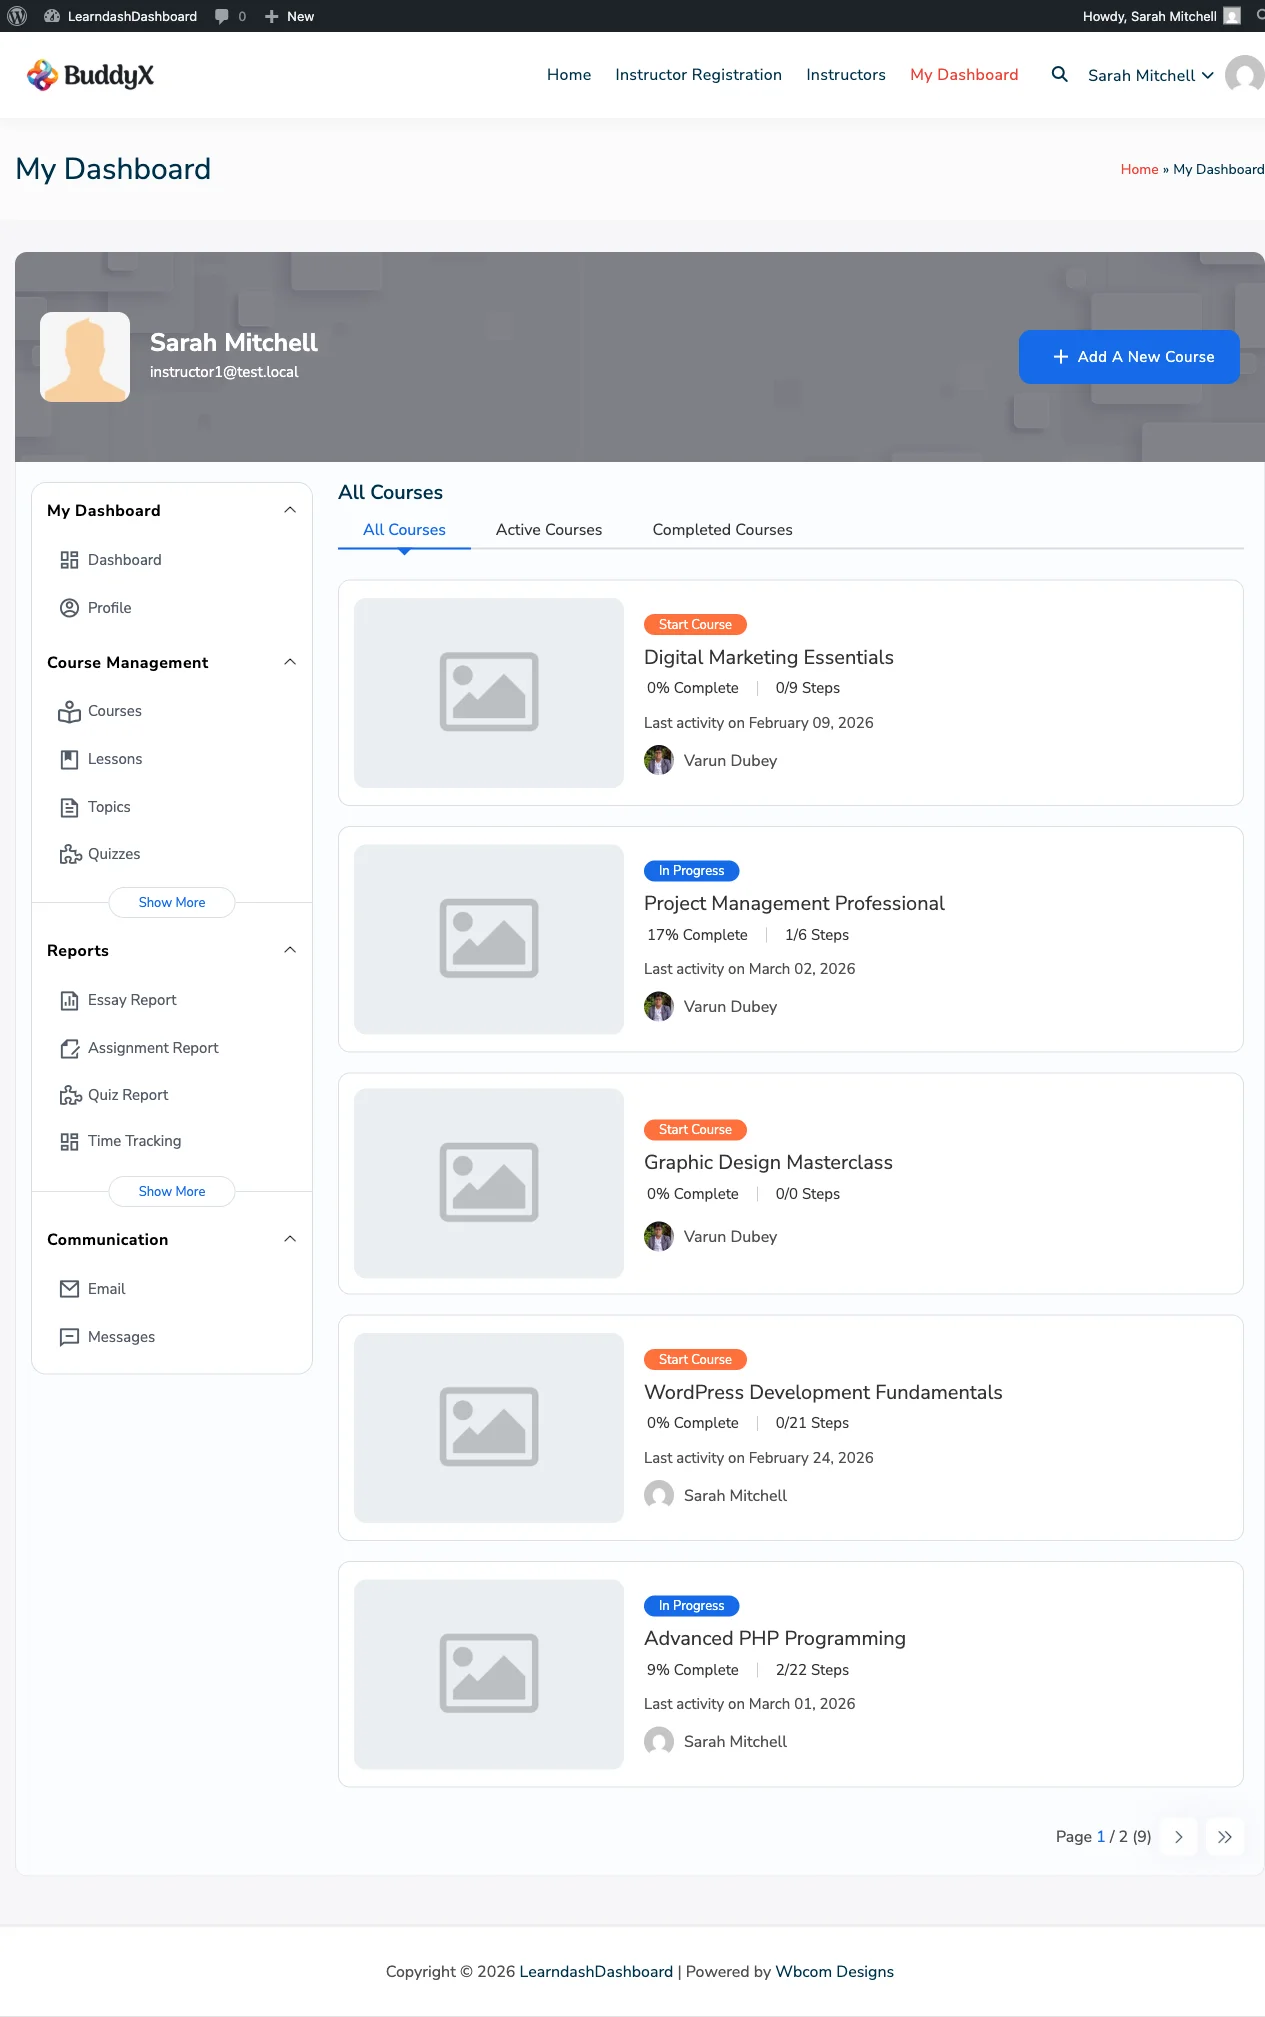
Admin View of Enrolled Courses

Instructor View of Enrolled Courses

Group Leader View of Enrolled Courses


How to Access

Click Enrolled Courses in your dashboard sidebar.


What You'll See

Each course appears as a card showing:

  • Course image and title
  • Your progress - how many steps you've completed out of the total
  • A status badge: Start Course, In Progress, or Complete
  • The date you last worked on the course
  • Your instructor's name and photo

Five courses appear per page. Use the navigation at the bottom to move between pages.


Filtering Your Courses

Three tabs at the top let you quickly find what you're looking for:

  • All Courses - Every course you're enrolled in
  • Active Courses - Courses you've started but haven't finished
  • Completed Courses - Courses you've finished

Click any tab to switch views.


Resuming a Course

If you've already started a course, a Resume button appears on the course card. Click it to go straight back to the lesson or topic you were on last.


Downloading Your Certificate

Once you complete a course, your certificate appears in the My Certificates section. Click My Certificates in the sidebar to find and download it.


For Instructors and Group Leaders

If you're an instructor, you also see courses you've created or co-teach. Group leaders see courses linked to their assigned groups. All courses appear under the same three filter tabs.


Empty States

Situation Message
No courses at all "You have not enrolled in any courses yet."
No active courses "You haven't started any course yet."
No completed courses "You haven't completed any course yet."

Quiz Attempts

Overview

The Quiz Attempts section keeps a full record of every quiz you've taken. You can filter by course, quiz name, or result status - and click any attempt to see a detailed breakdown of your answers.

Screenshots

How It Looks

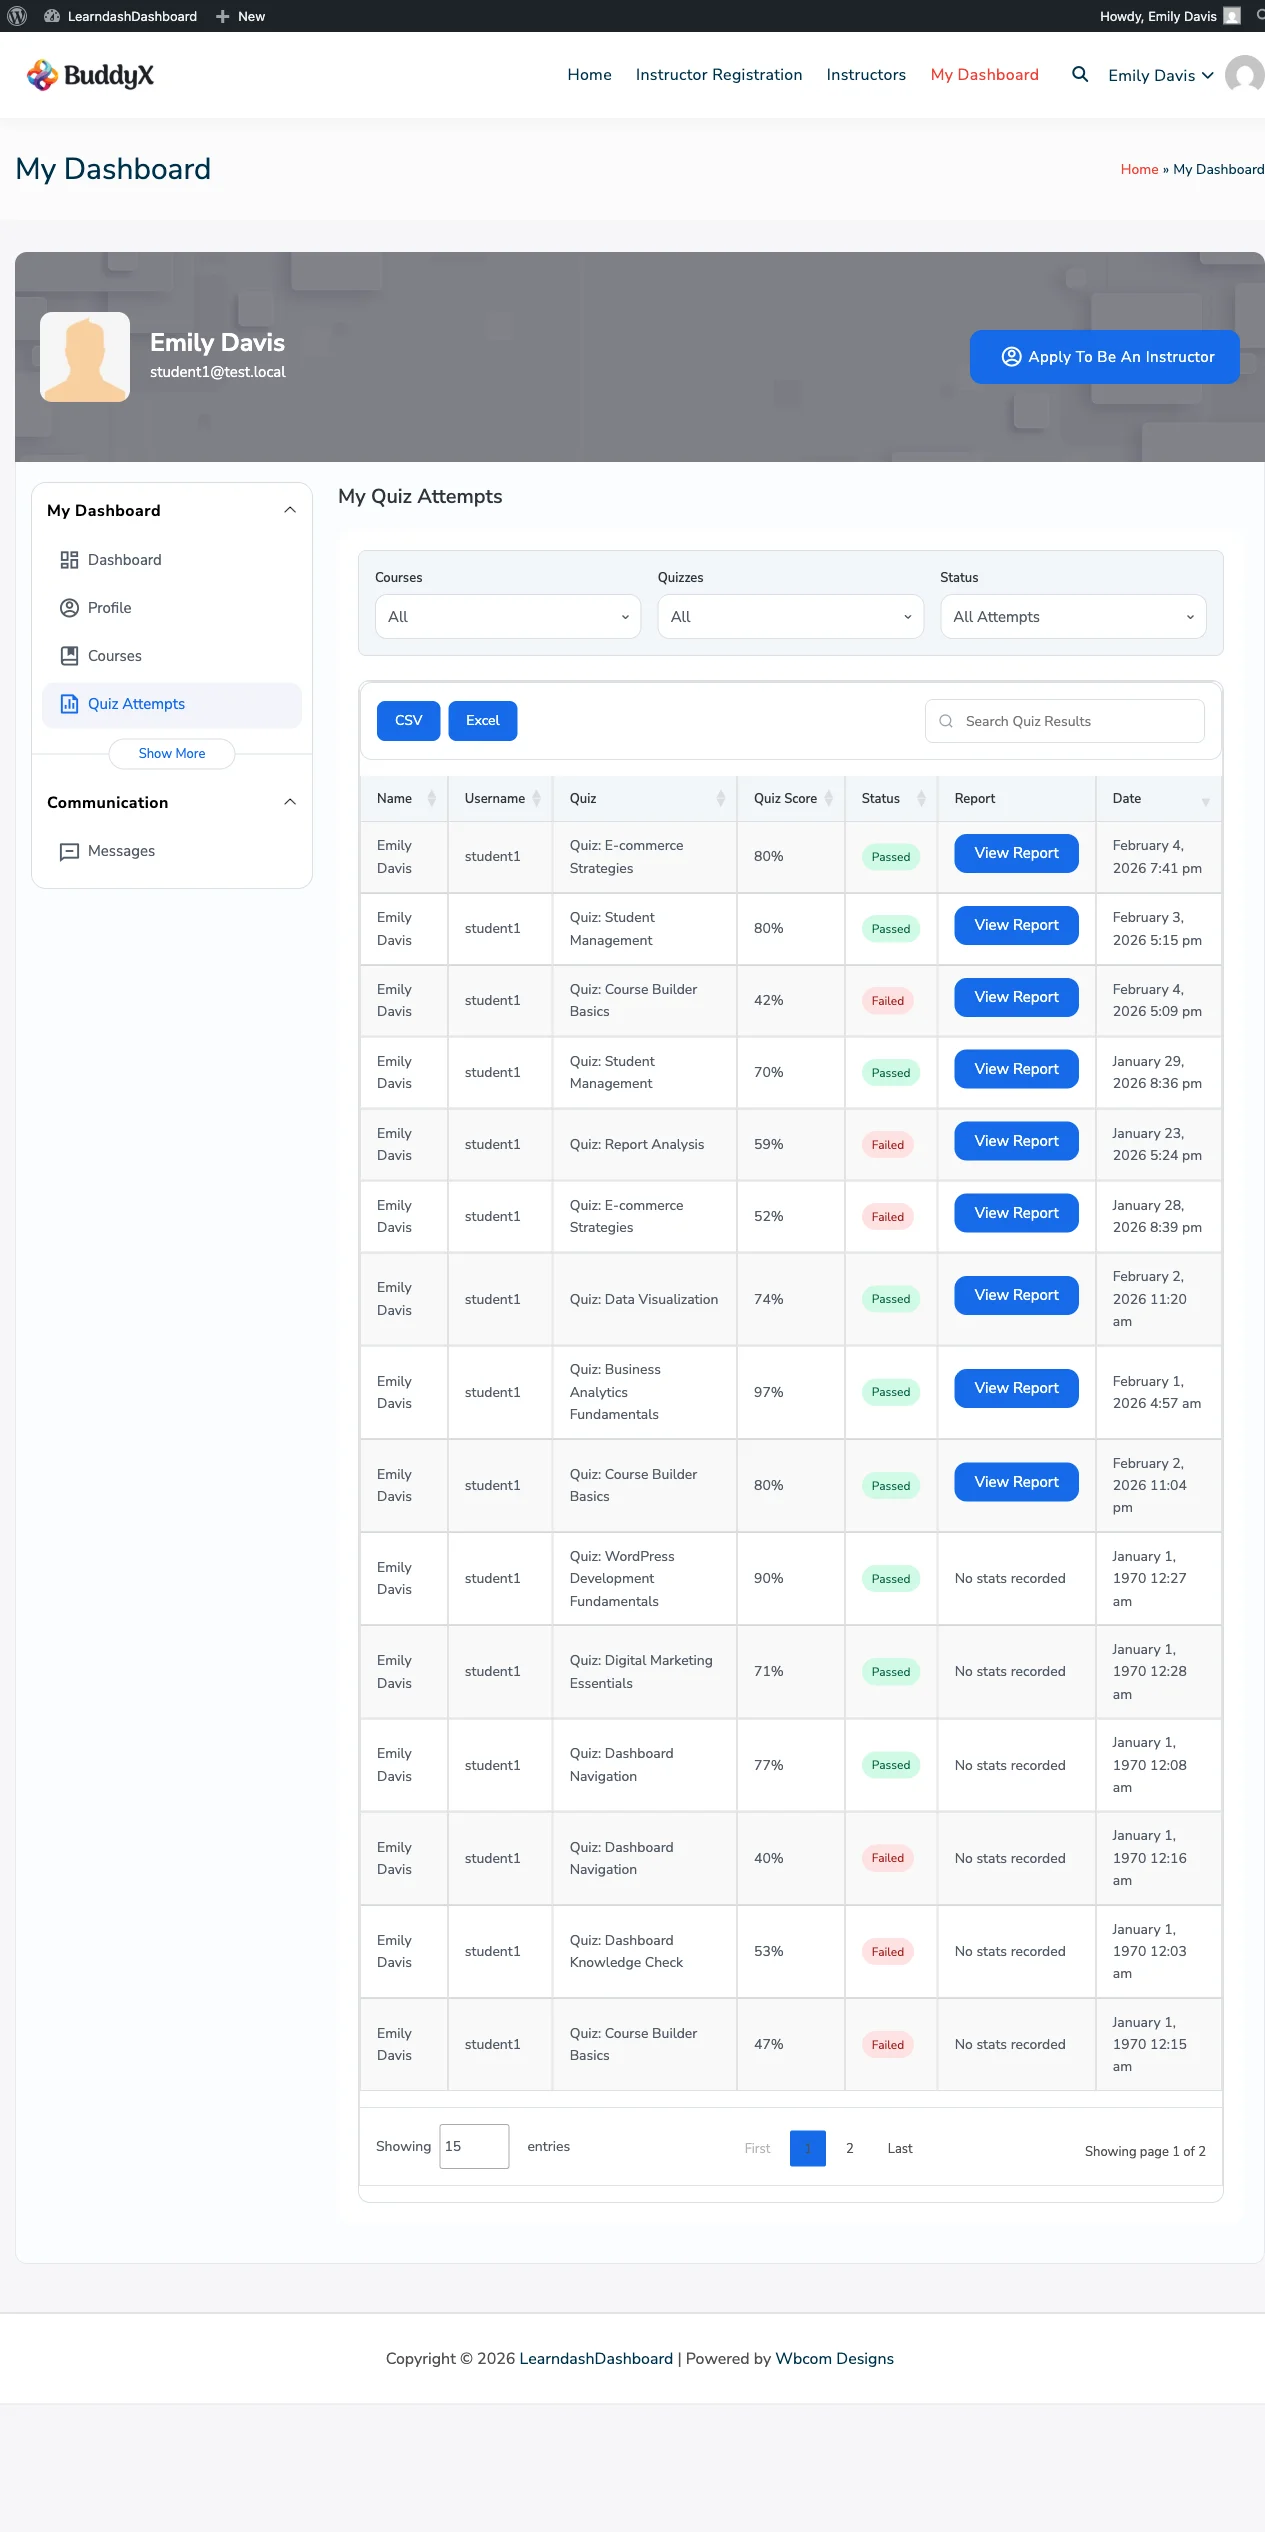
Student Quiz Attempts

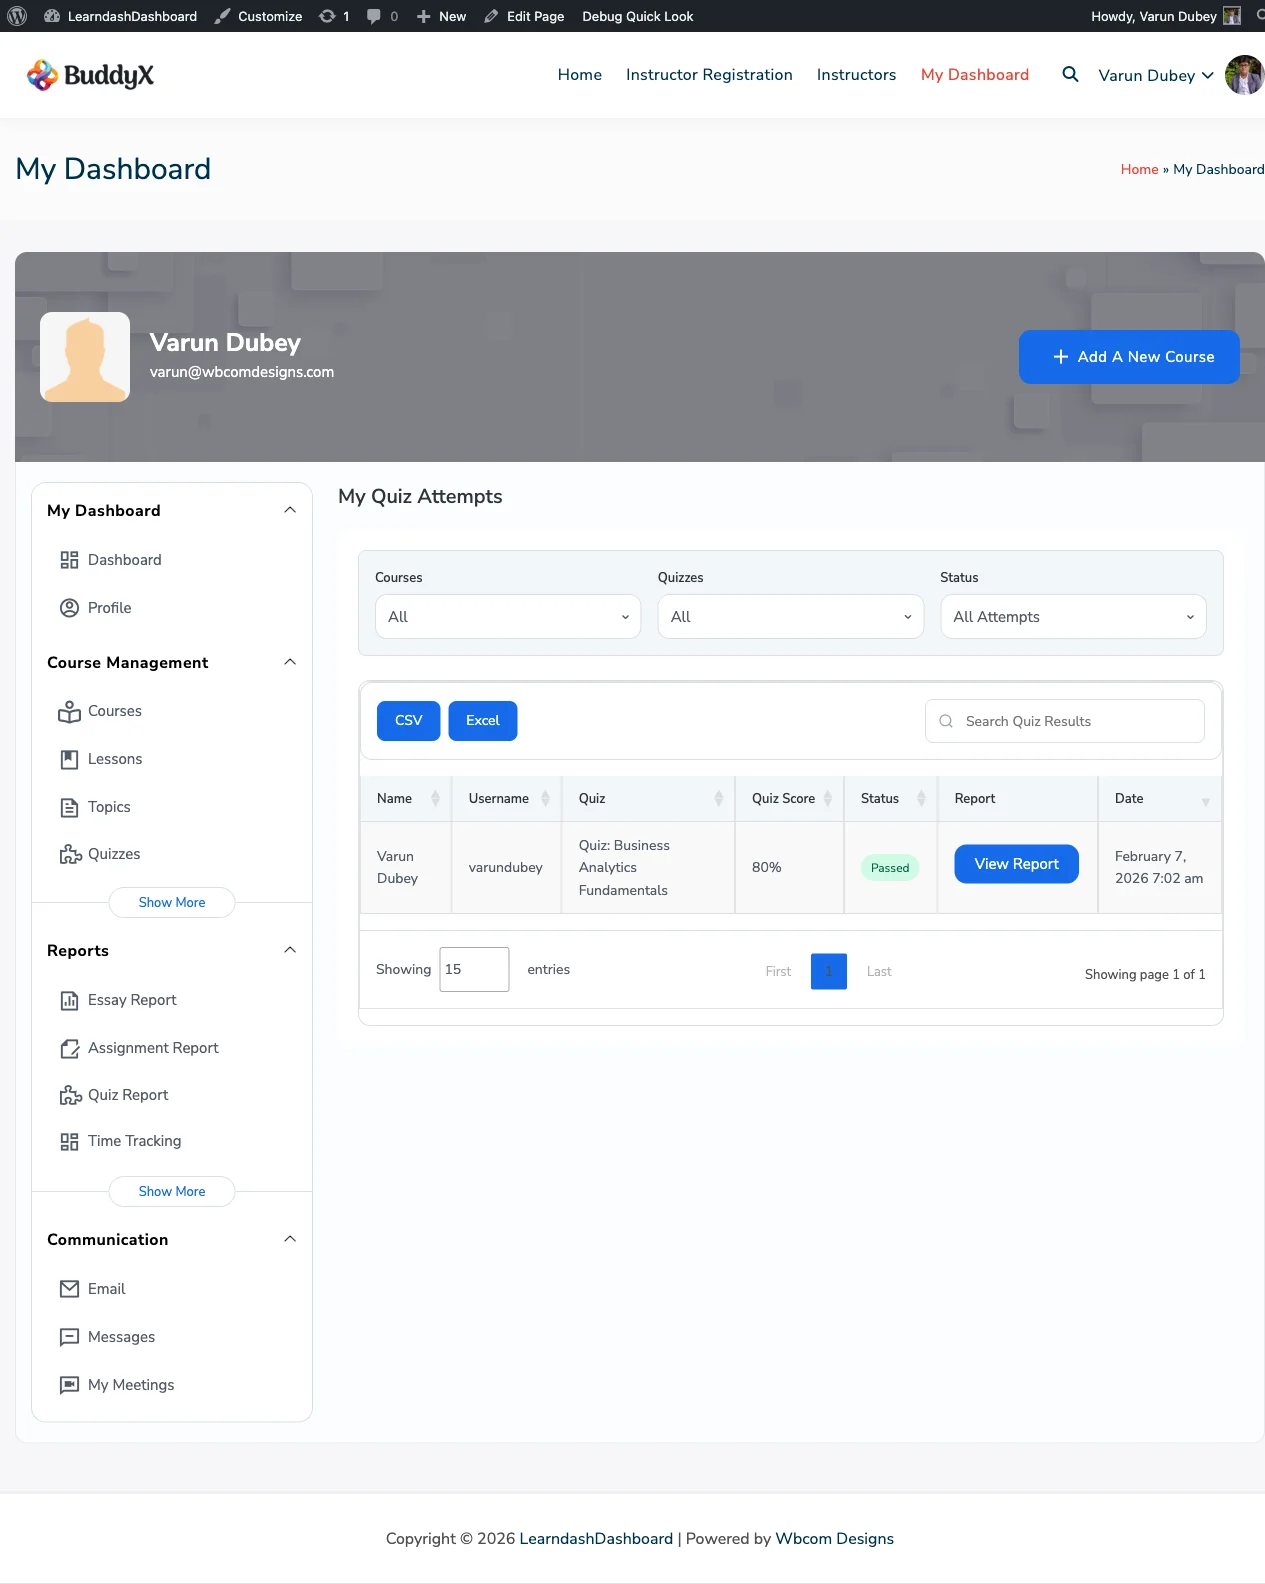
Admin View of Quiz Attempts


How to Access

Click Quiz Attempts in your dashboard sidebar.


What You'll See

Your quiz history appears in a table showing:

  • Quiz name
  • The course it belongs to
  • Your score
  • Whether you passed or failed
  • The date and time of the attempt
  • A status badge

Understanding the Status Badges

Each attempt is marked with a color-coded badge:

Badge Meaning
Passed You met or exceeded the passing score
Failed You did not meet the passing score
Pending An essay or graded answer is awaiting your instructor's review
Not Attempted The quiz is available but you haven't taken it yet

Filtering Your Results

Three dropdowns above the table help you find specific attempts quickly:

  • Course - Filter by a specific course
  • Quiz - Filter by a specific quiz
  • Status - Show only Passed, Failed, or Pending results

Select any combination and the table updates automatically.


Viewing Your Detailed Results

Click the statistics icon on any attempt row to open a detailed view of that quiz. You'll see:

  • A question-by-question breakdown
  • Your answers compared to the correct answers
  • Points earned for each question
  • How long you spent on the attempt

Click Close or click outside the panel to return to your list.

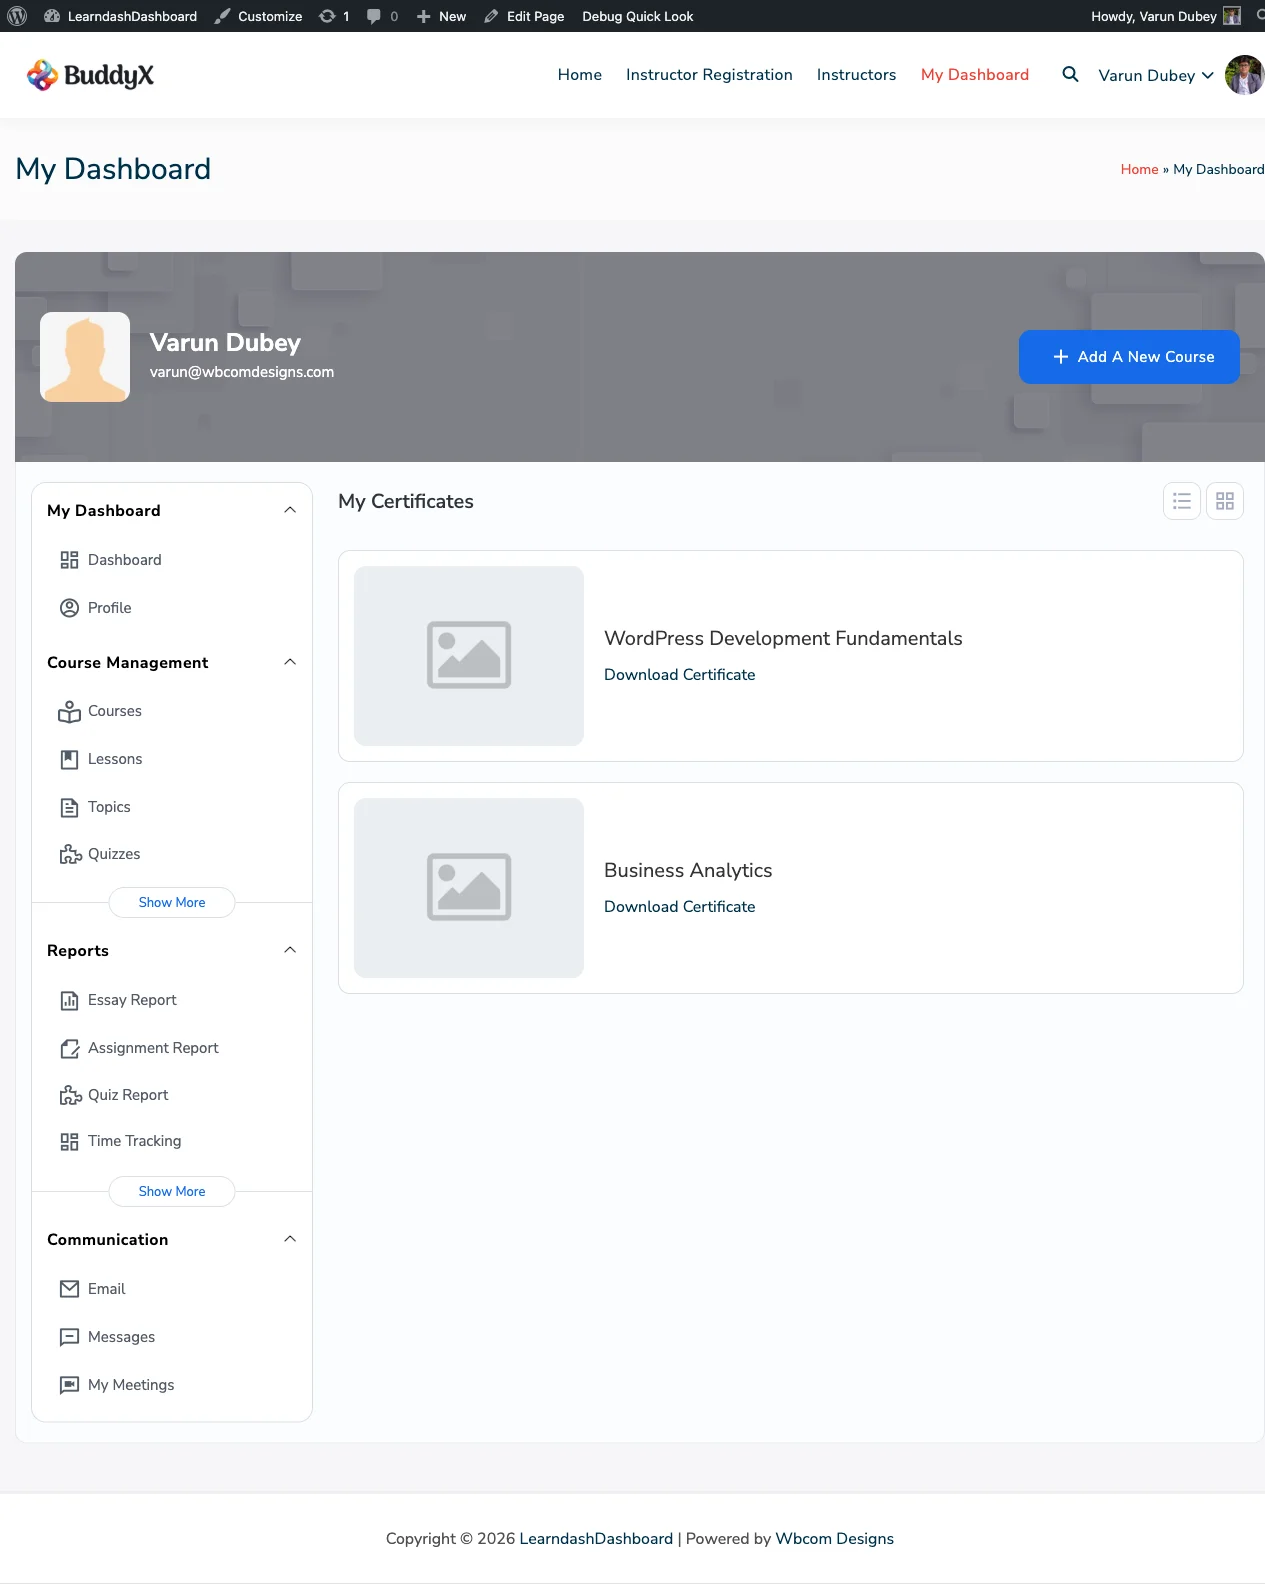
My Certificates

Overview

The My Certificates section collects all the certificates you've earned in one place. You can view and download each certificate as a PDF directly from your dashboard.

Screenshots

How It Looks

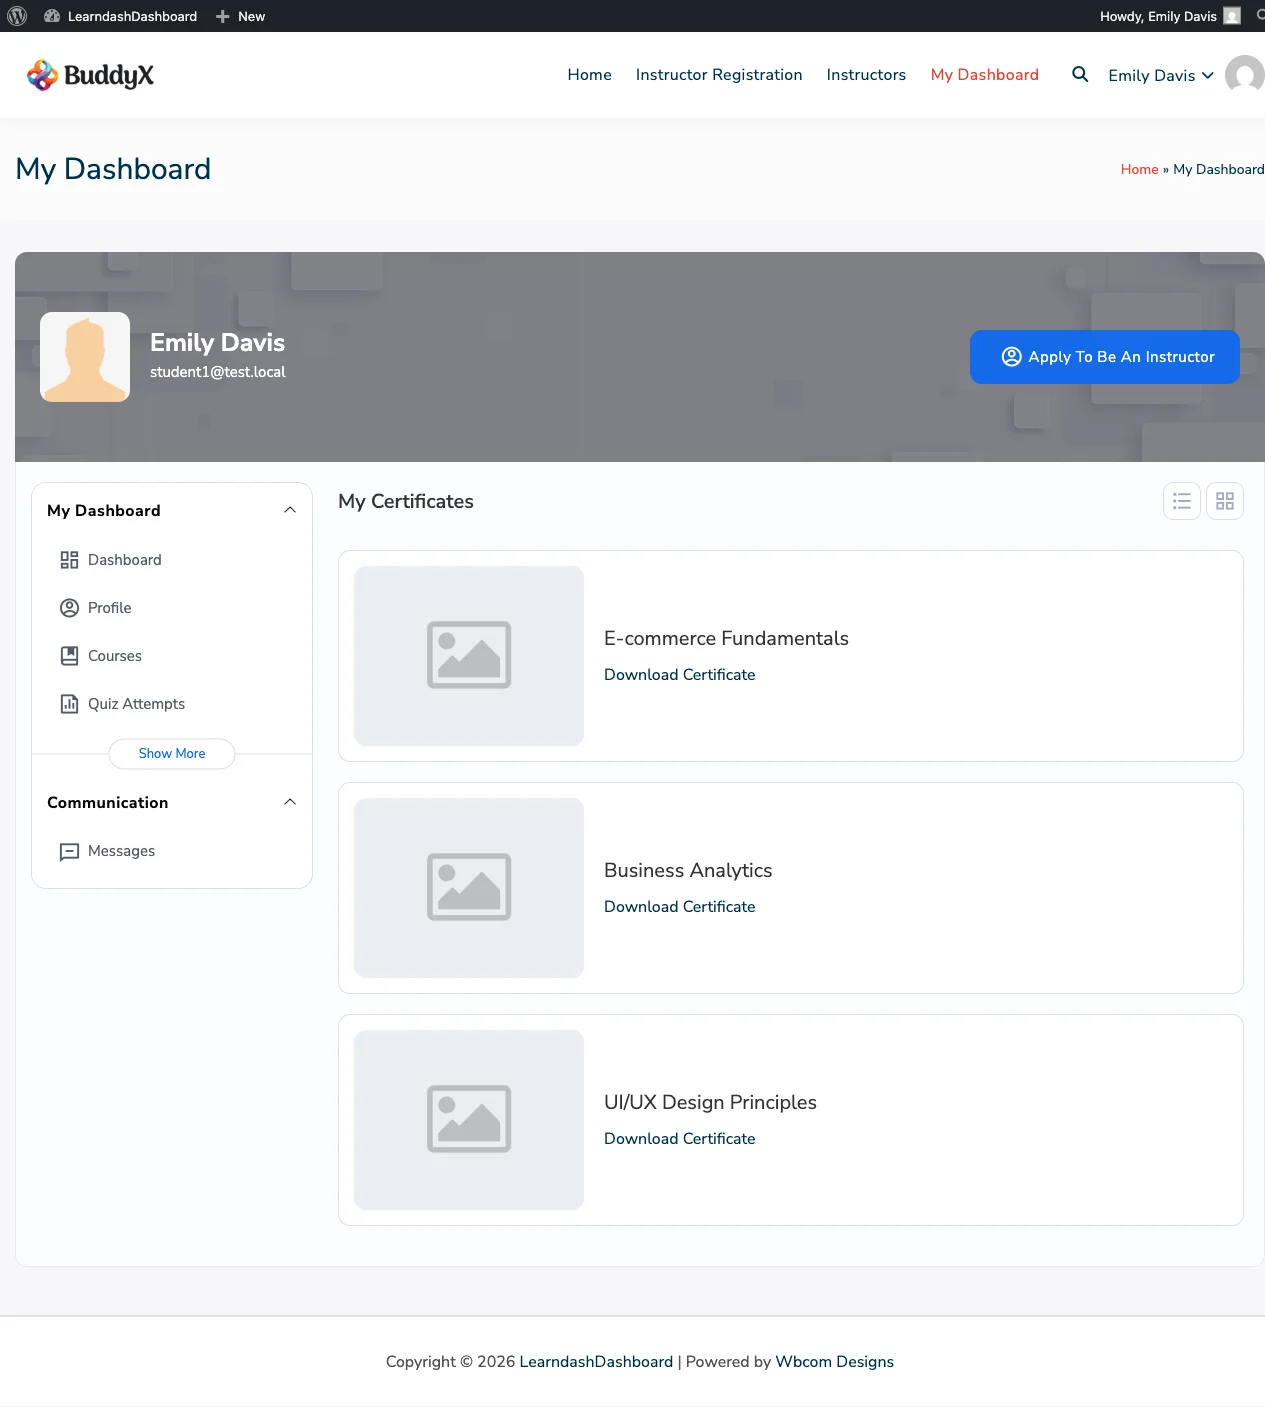
Student Certificates

Admin View of Certificates


How to Access

Click My Certificates in your dashboard sidebar.


When Does a Certificate Appear?

A certificate shows up here when two things are true:

  1. The course or quiz has a certificate attached to it (set up by your instructor or site admin).
  2. You've fully completed that course or passed that quiz.

If you've completed a course but don't see a certificate, the course may not have one assigned. Contact your instructor or site admin to confirm.


What You'll See

Each certificate is shown as a card with:

  • The course image
  • The course name
  • A Download Certificate button

Downloading a Certificate

Click Download Certificate on any card. Your certificate opens as a PDF in a new browser tab, ready to save or print.


Switching Between List and Grid View

Use the view toggles in the top right of the section to switch between:

  • List view - one certificate per row
  • Grid view - multiple certificates shown as cards side by side

No Certificates Yet?

If you haven't earned any certificates yet, the page will say "No certificates found." Complete a course that has a certificate attached and it will appear here automatically.

My Assignments

Overview

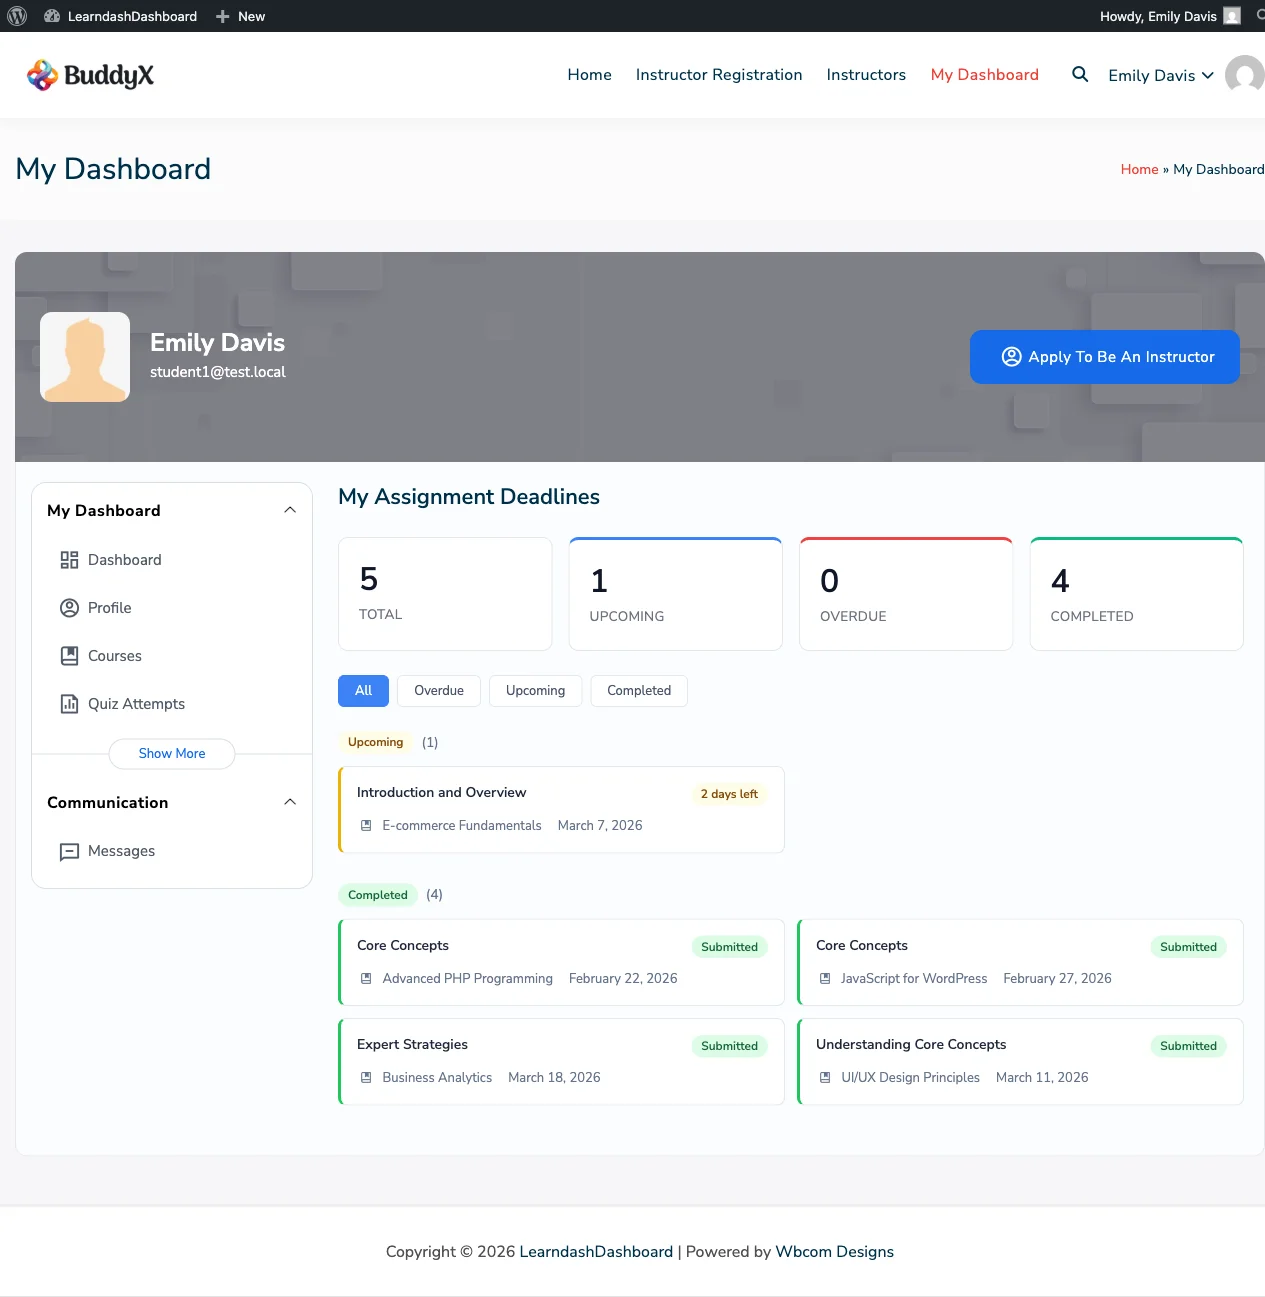
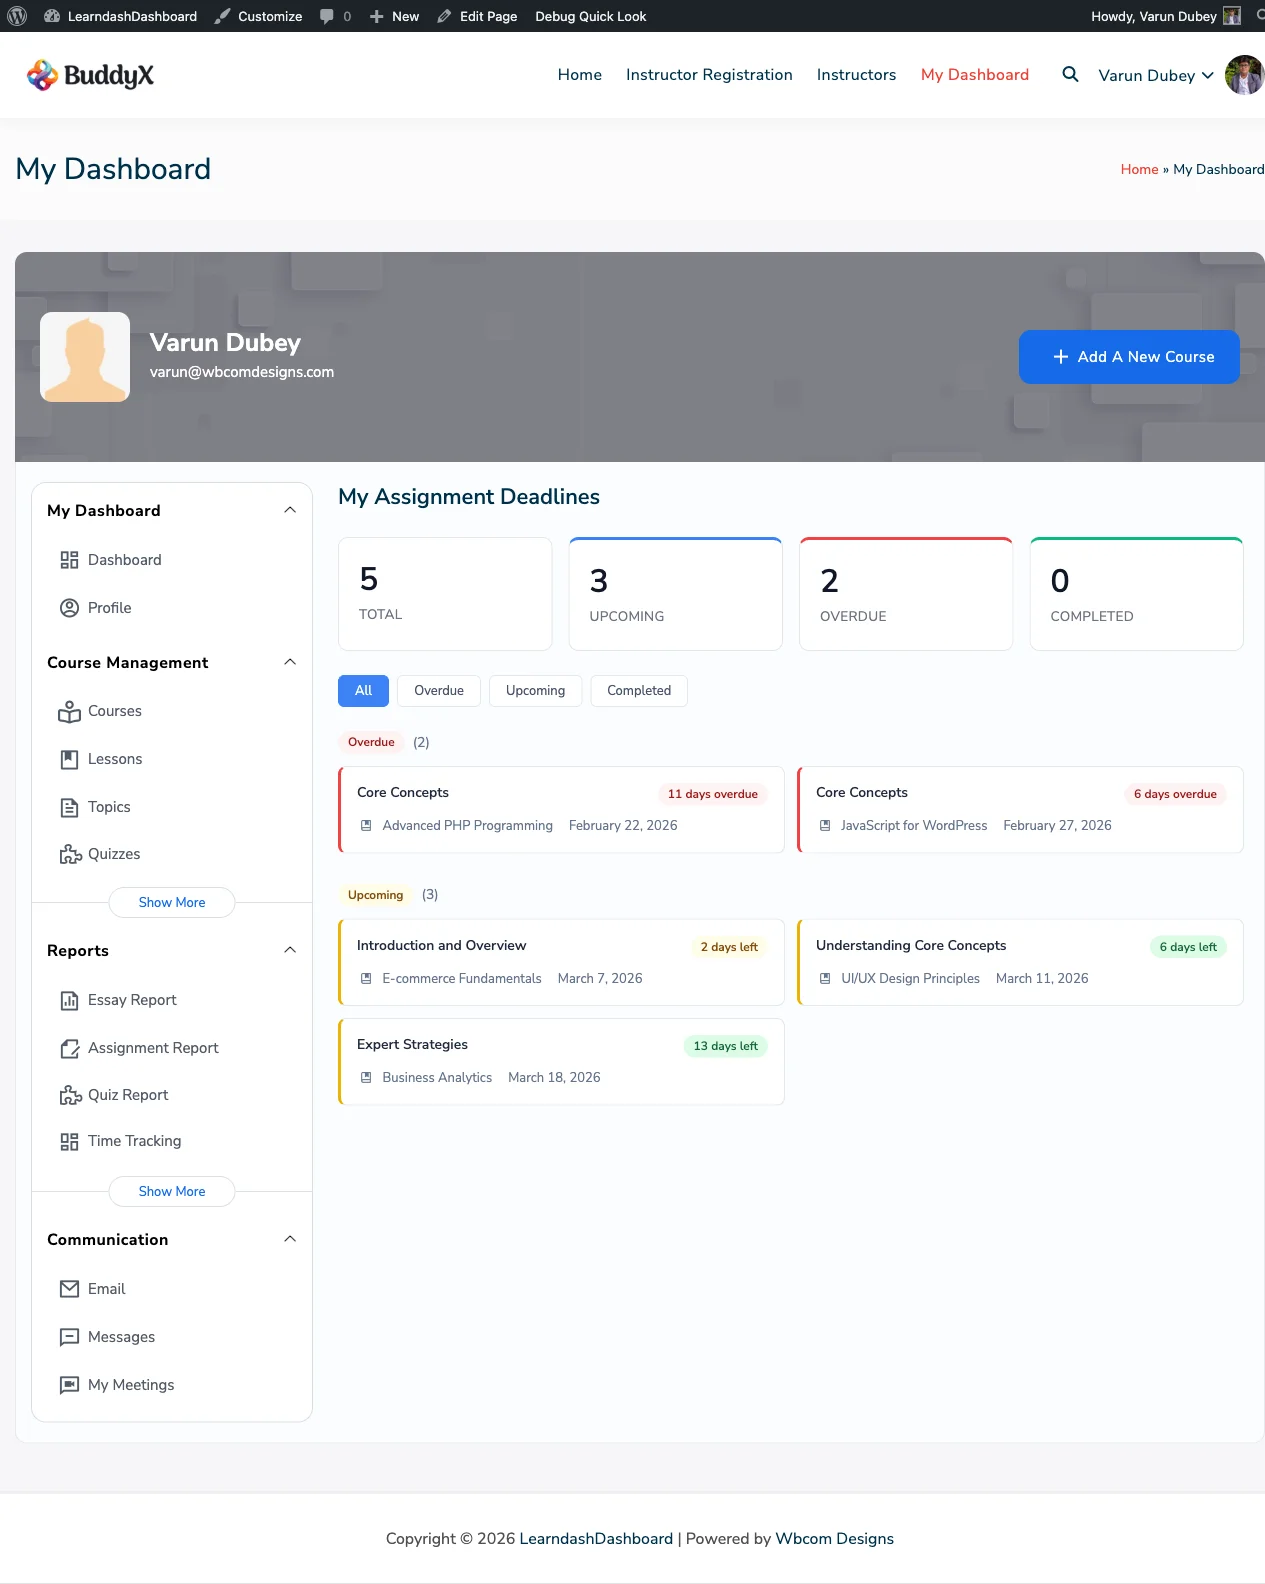
The My Assignments section helps you stay on top of all your assignment deadlines. At a glance, you can see what's overdue, what's coming up, and what you've already submitted.

Screenshots

How It Looks

Student Assignments

Admin View of Assignments


How to Access

Click My Assignments in your dashboard sidebar.


The Summary Tiles

Four tiles at the top give you a quick count of your assignment status:

  • Total - All assignments across your courses
  • Upcoming - Assignments with deadlines still in the future
  • Overdue - Assignments that are past due and not yet submitted
  • Completed - Assignments you've already submitted

Filtering Your Assignments

Click any of the four filter buttons - All, Upcoming, Overdue, or Completed - to show only that group of assignments.


Understanding Each Assignment Card

Each assignment is shown as a card with:

  • The lesson or topic name (click to go directly to it)
  • The course it belongs to
  • The deadline date
  • A deadline badge showing how much time you have left (or how overdue it is)

Deadline Badge Colors

Badge Meaning
Red Assignment is past due
Yellow Deadline is within the next 3 days
Green More than 3 days remaining
Green (Submitted) You've already submitted this assignment

How to Submit an Assignment

You submit assignments from within the course itself - go to the relevant lesson or topic and upload your file there. Click the lesson or topic title on the assignment card to go straight to it.

Your instructor controls which file types and sizes are accepted.


Checking Instructor Feedback

Once your instructor reviews your submission, any feedback they leave will be visible in your course. Check back on the lesson or topic page after submission for comments or a grade.


Why Don't I See All My Assignments?

Only assignments with a deadline set by your instructor appear here. If a lesson doesn't have a deadline configured, it won't show up in this section.

If you have no assignments with deadlines, the section shows: "No assignment deadlines found."

Time Tracking

Overview

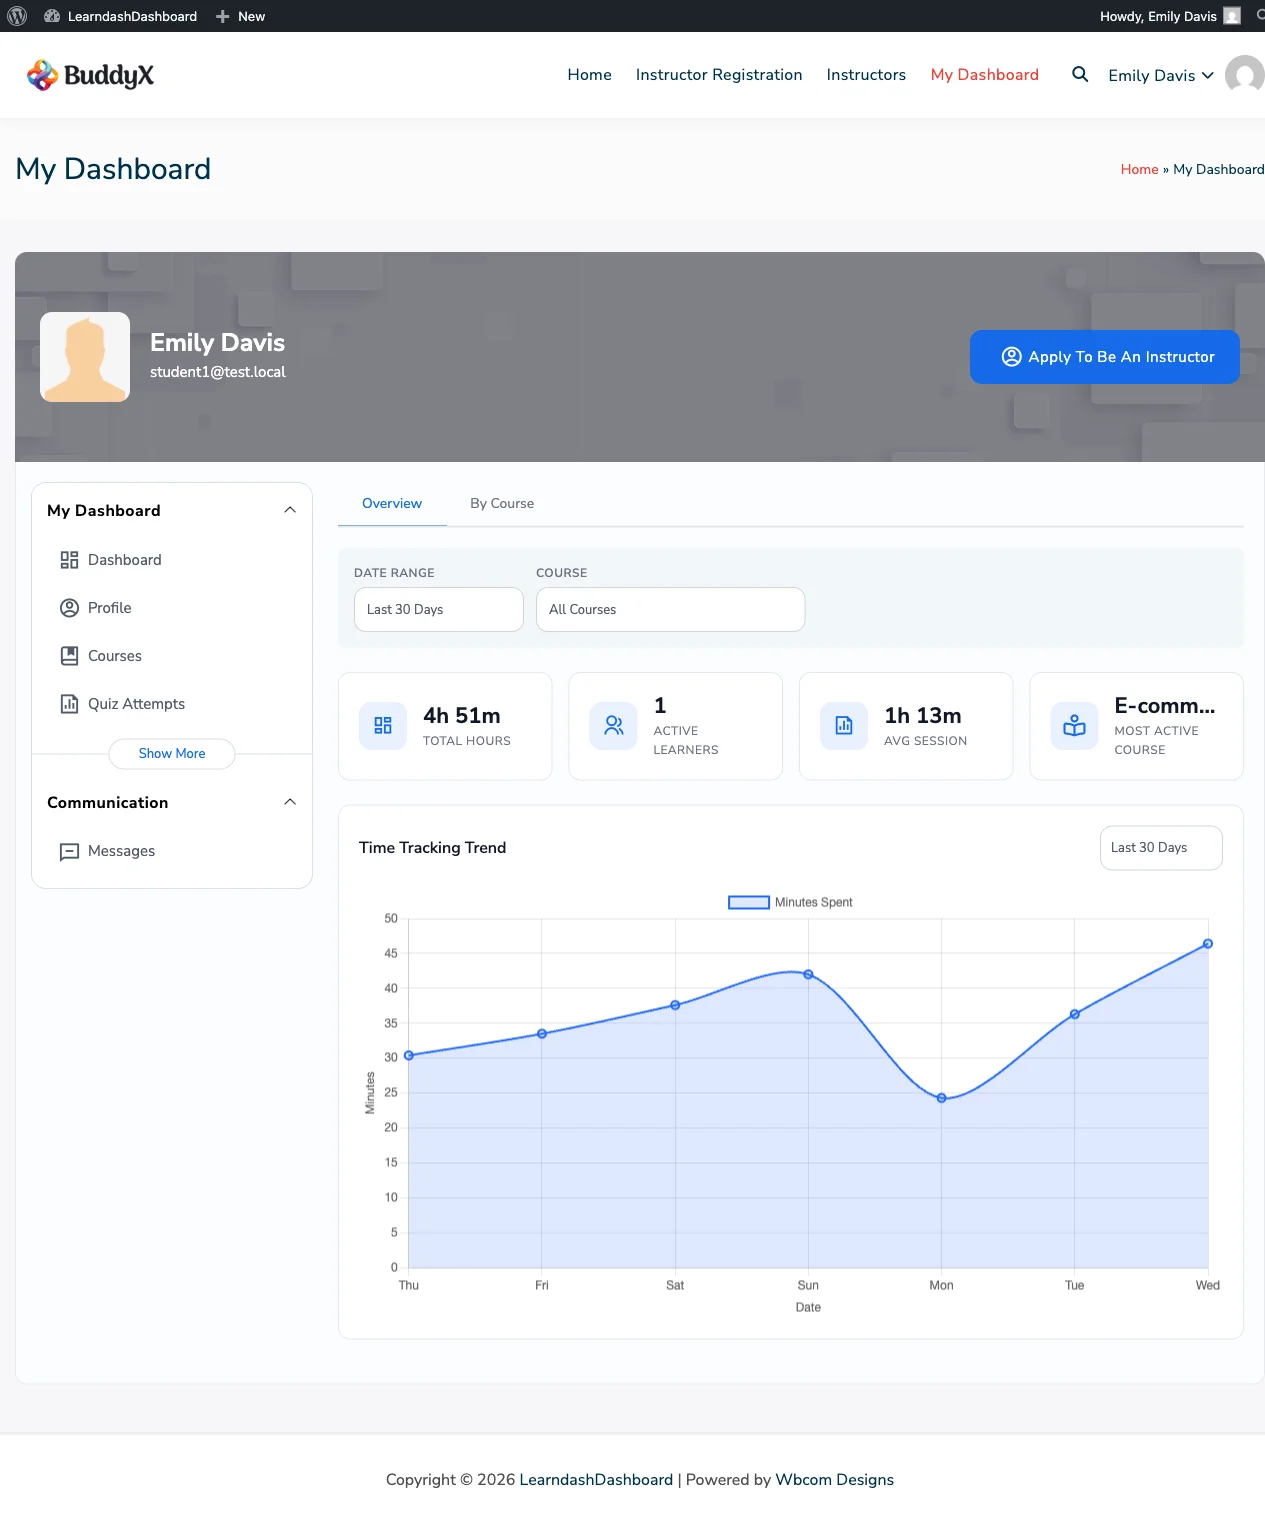
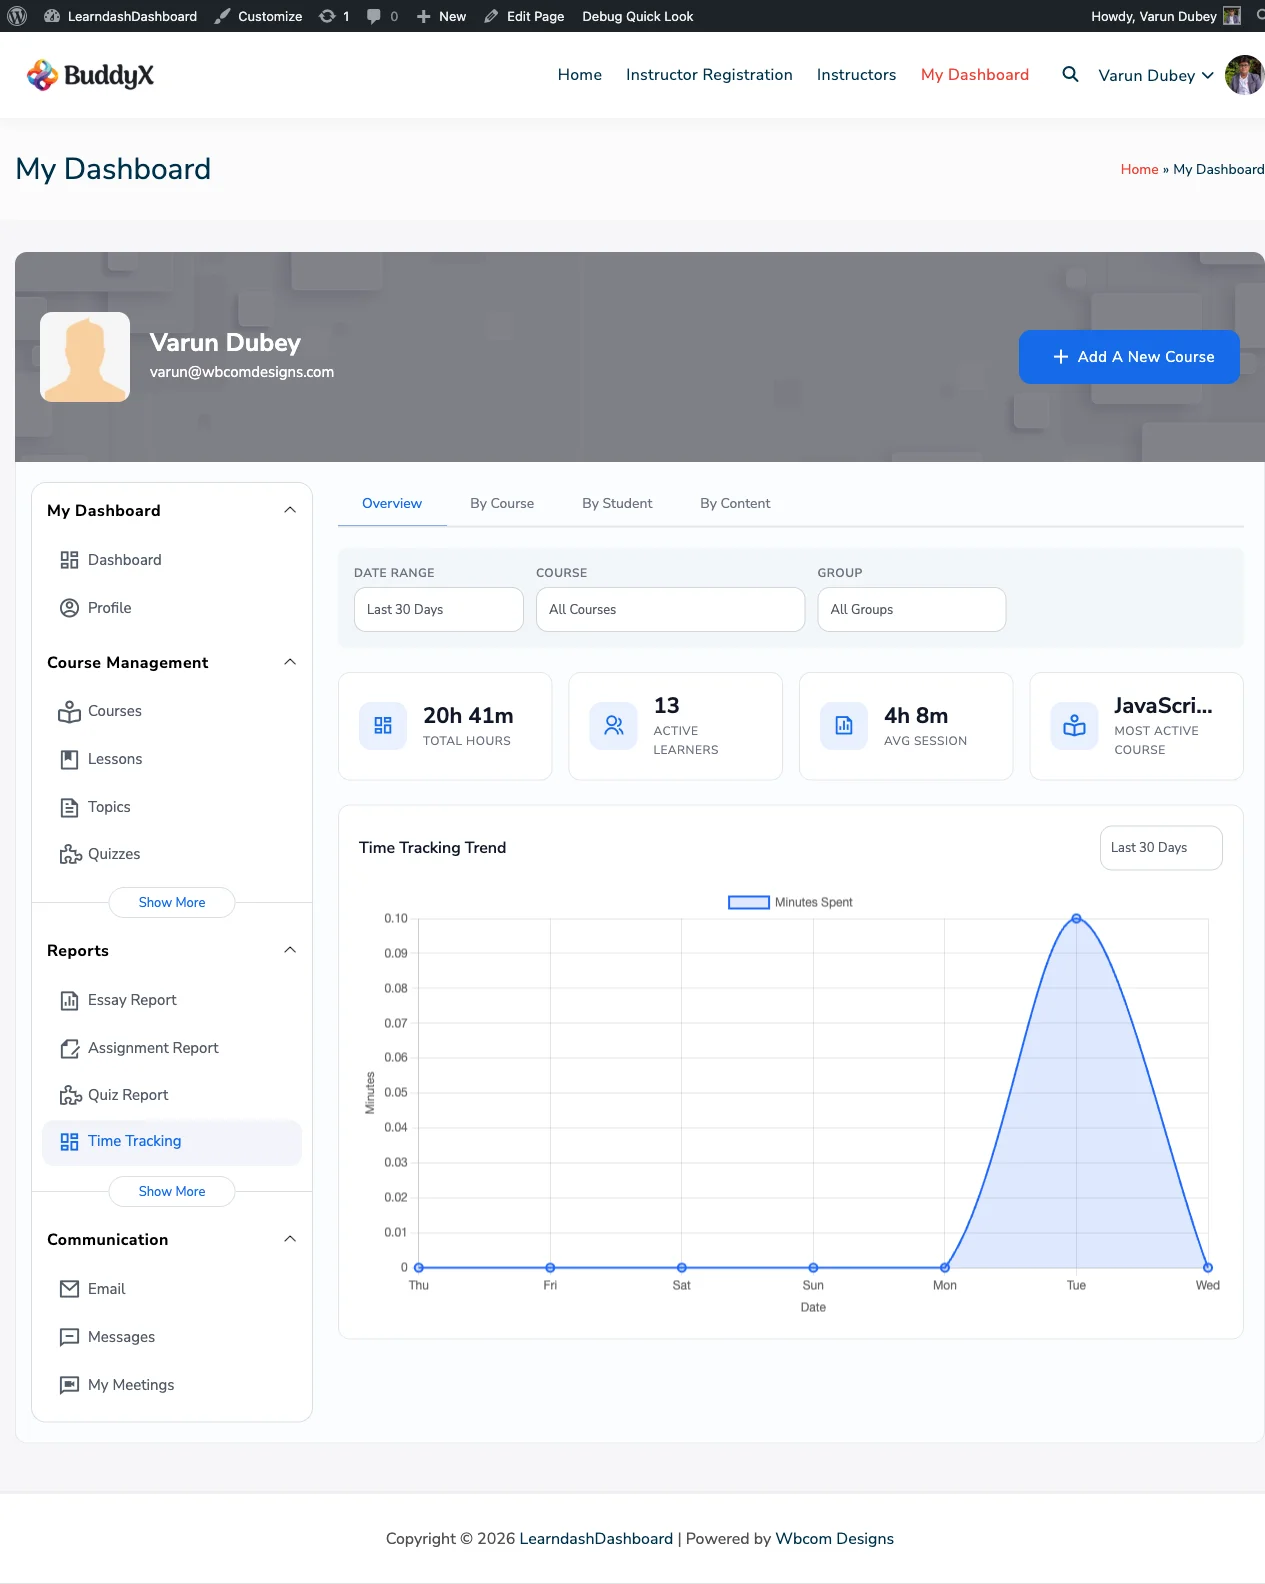
The Time Tracking section shows you exactly how much time you've spent learning. See your total study hours, trends over time, and a breakdown by course - so you can understand your learning habits and stay motivated.

Note: Time Tracking must be enabled by your site administrator before this section appears in your dashboard.

Screenshots

Student View

Student Time Tracking

Report Views

Admin Time Tracking Report

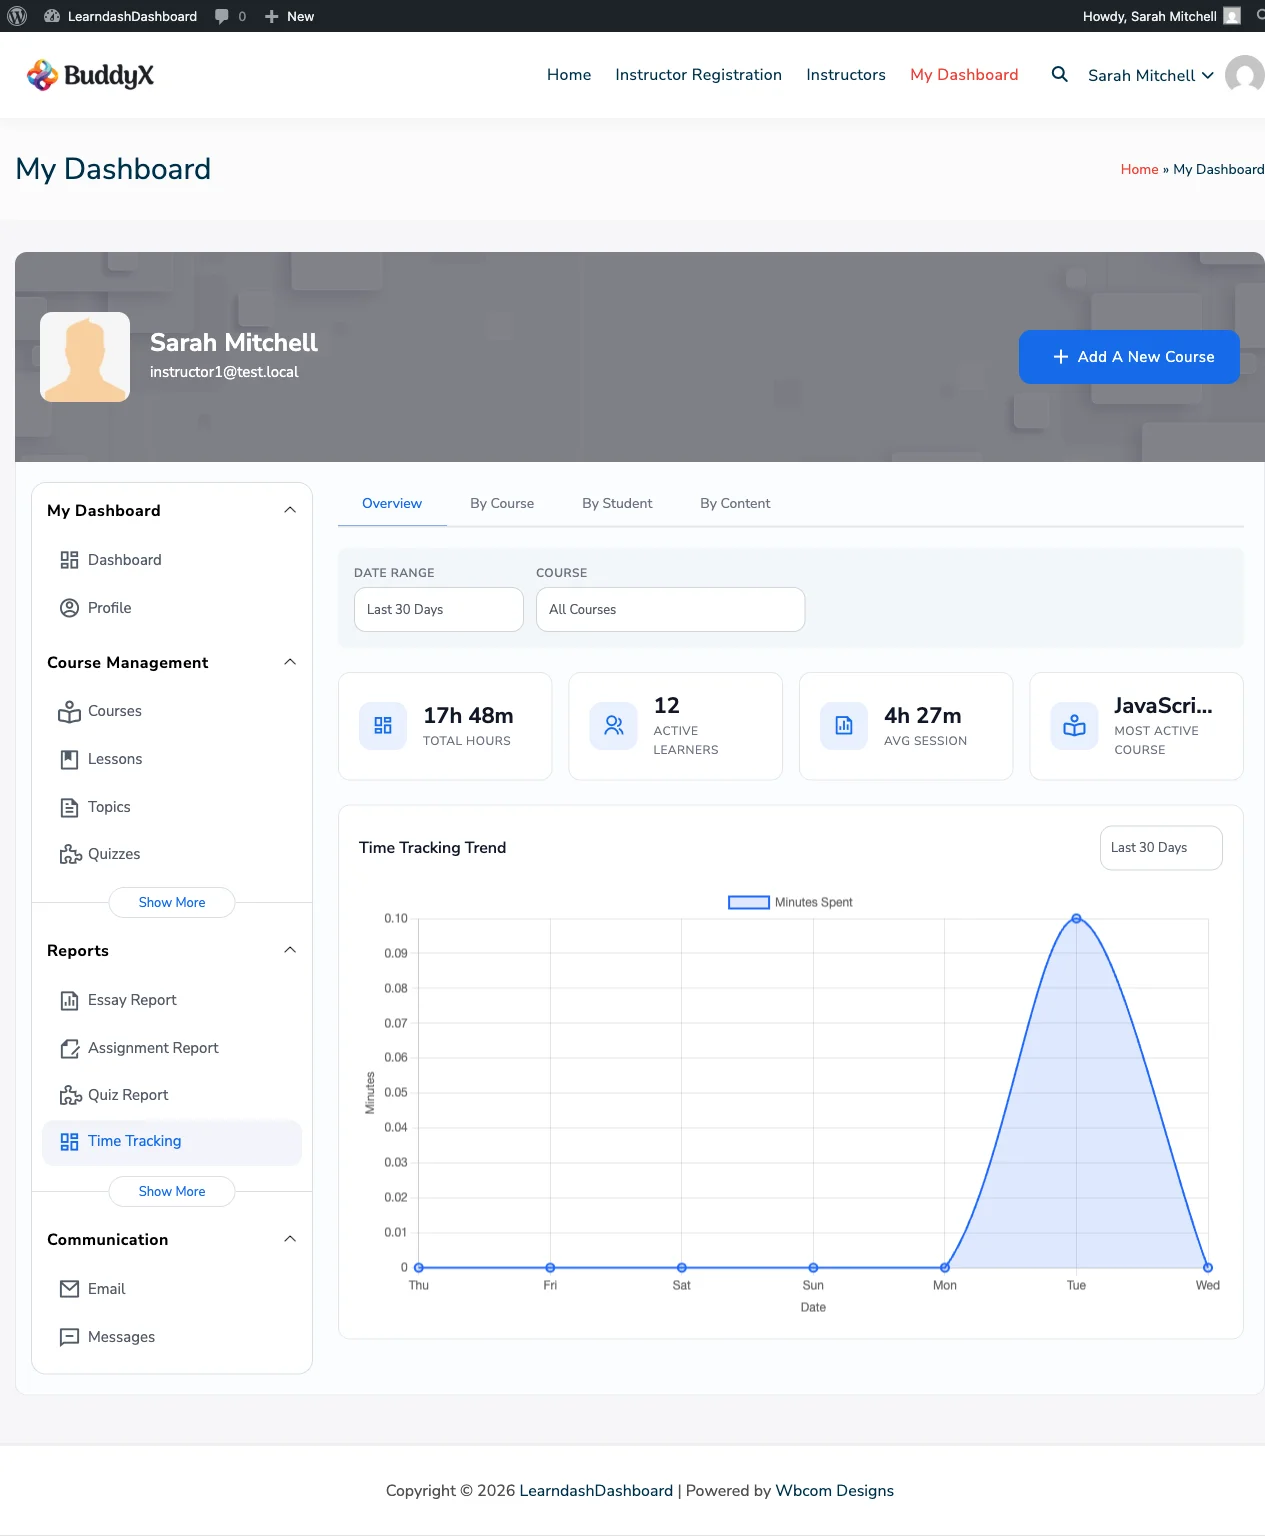
Instructor Time Tracking Report

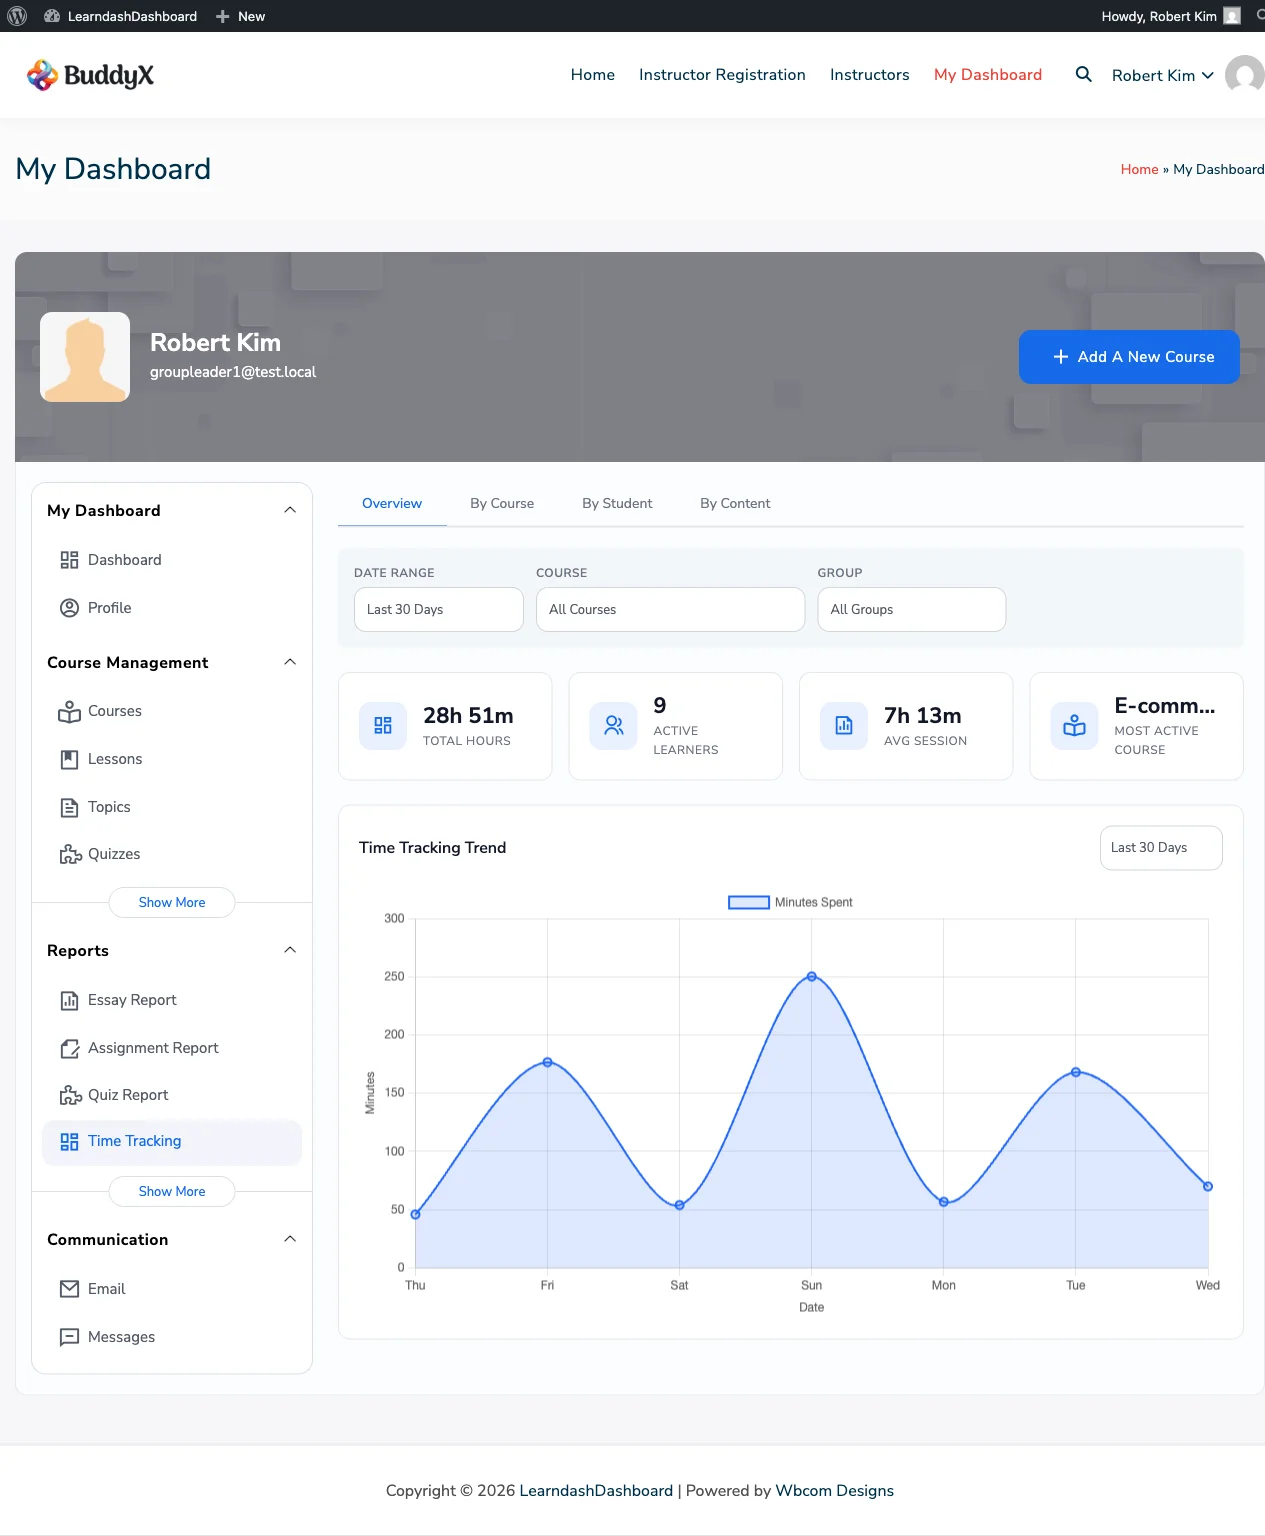
Group Leader Time Tracking Report


How to Access

Click Time Tracking in your dashboard sidebar.


How Your Time Is Recorded

The dashboard automatically starts a timer when you open a lesson, topic, or quiz. It runs quietly in the background and saves your time at regular intervals. You don't need to do anything - just learn, and your time is recorded.


What You'll See

Summary Cards

At the top of the page, four cards give you a quick overview:

Card What It Shows
Total Hours Your total learning time
Avg Session Your average session length
Most Active Course The course you've spent the most time on
Active Learners How many students have active sessions (instructors and admins only)

All cards update when you change the date filter.


Filtering by Date

Use the Date Range dropdown to focus on a specific period:

  • All Time
  • Today
  • This Week
  • This Month
  • Last 30 Days (default)
  • Custom Range - pick your own start and end dates

Filtering by Course

A course dropdown sits next to the date filter. Choose a specific course to see only the time you've spent in that course.


The Trend Chart

The Overview view includes a bar chart showing your learning time over the selected period. Switch between Last 7 Days, Last 30 Days, and Last 12 Months using the chart controls.


By Course Breakdown

Click the By Course tab to see a table showing your total learning time broken down by each course. You can export this data as a spreadsheet using the Export CSV button.


For Instructors and Admins

Instructors, group leaders, and admins have additional views:

  • By Student - See how much time each student has spent learning
  • By Content - See which lessons, topics, and quizzes students spend the most time on

These views help you identify engaged learners and spot content that might need improvement.


Admin Configuration

Admin Time Tracking Settings

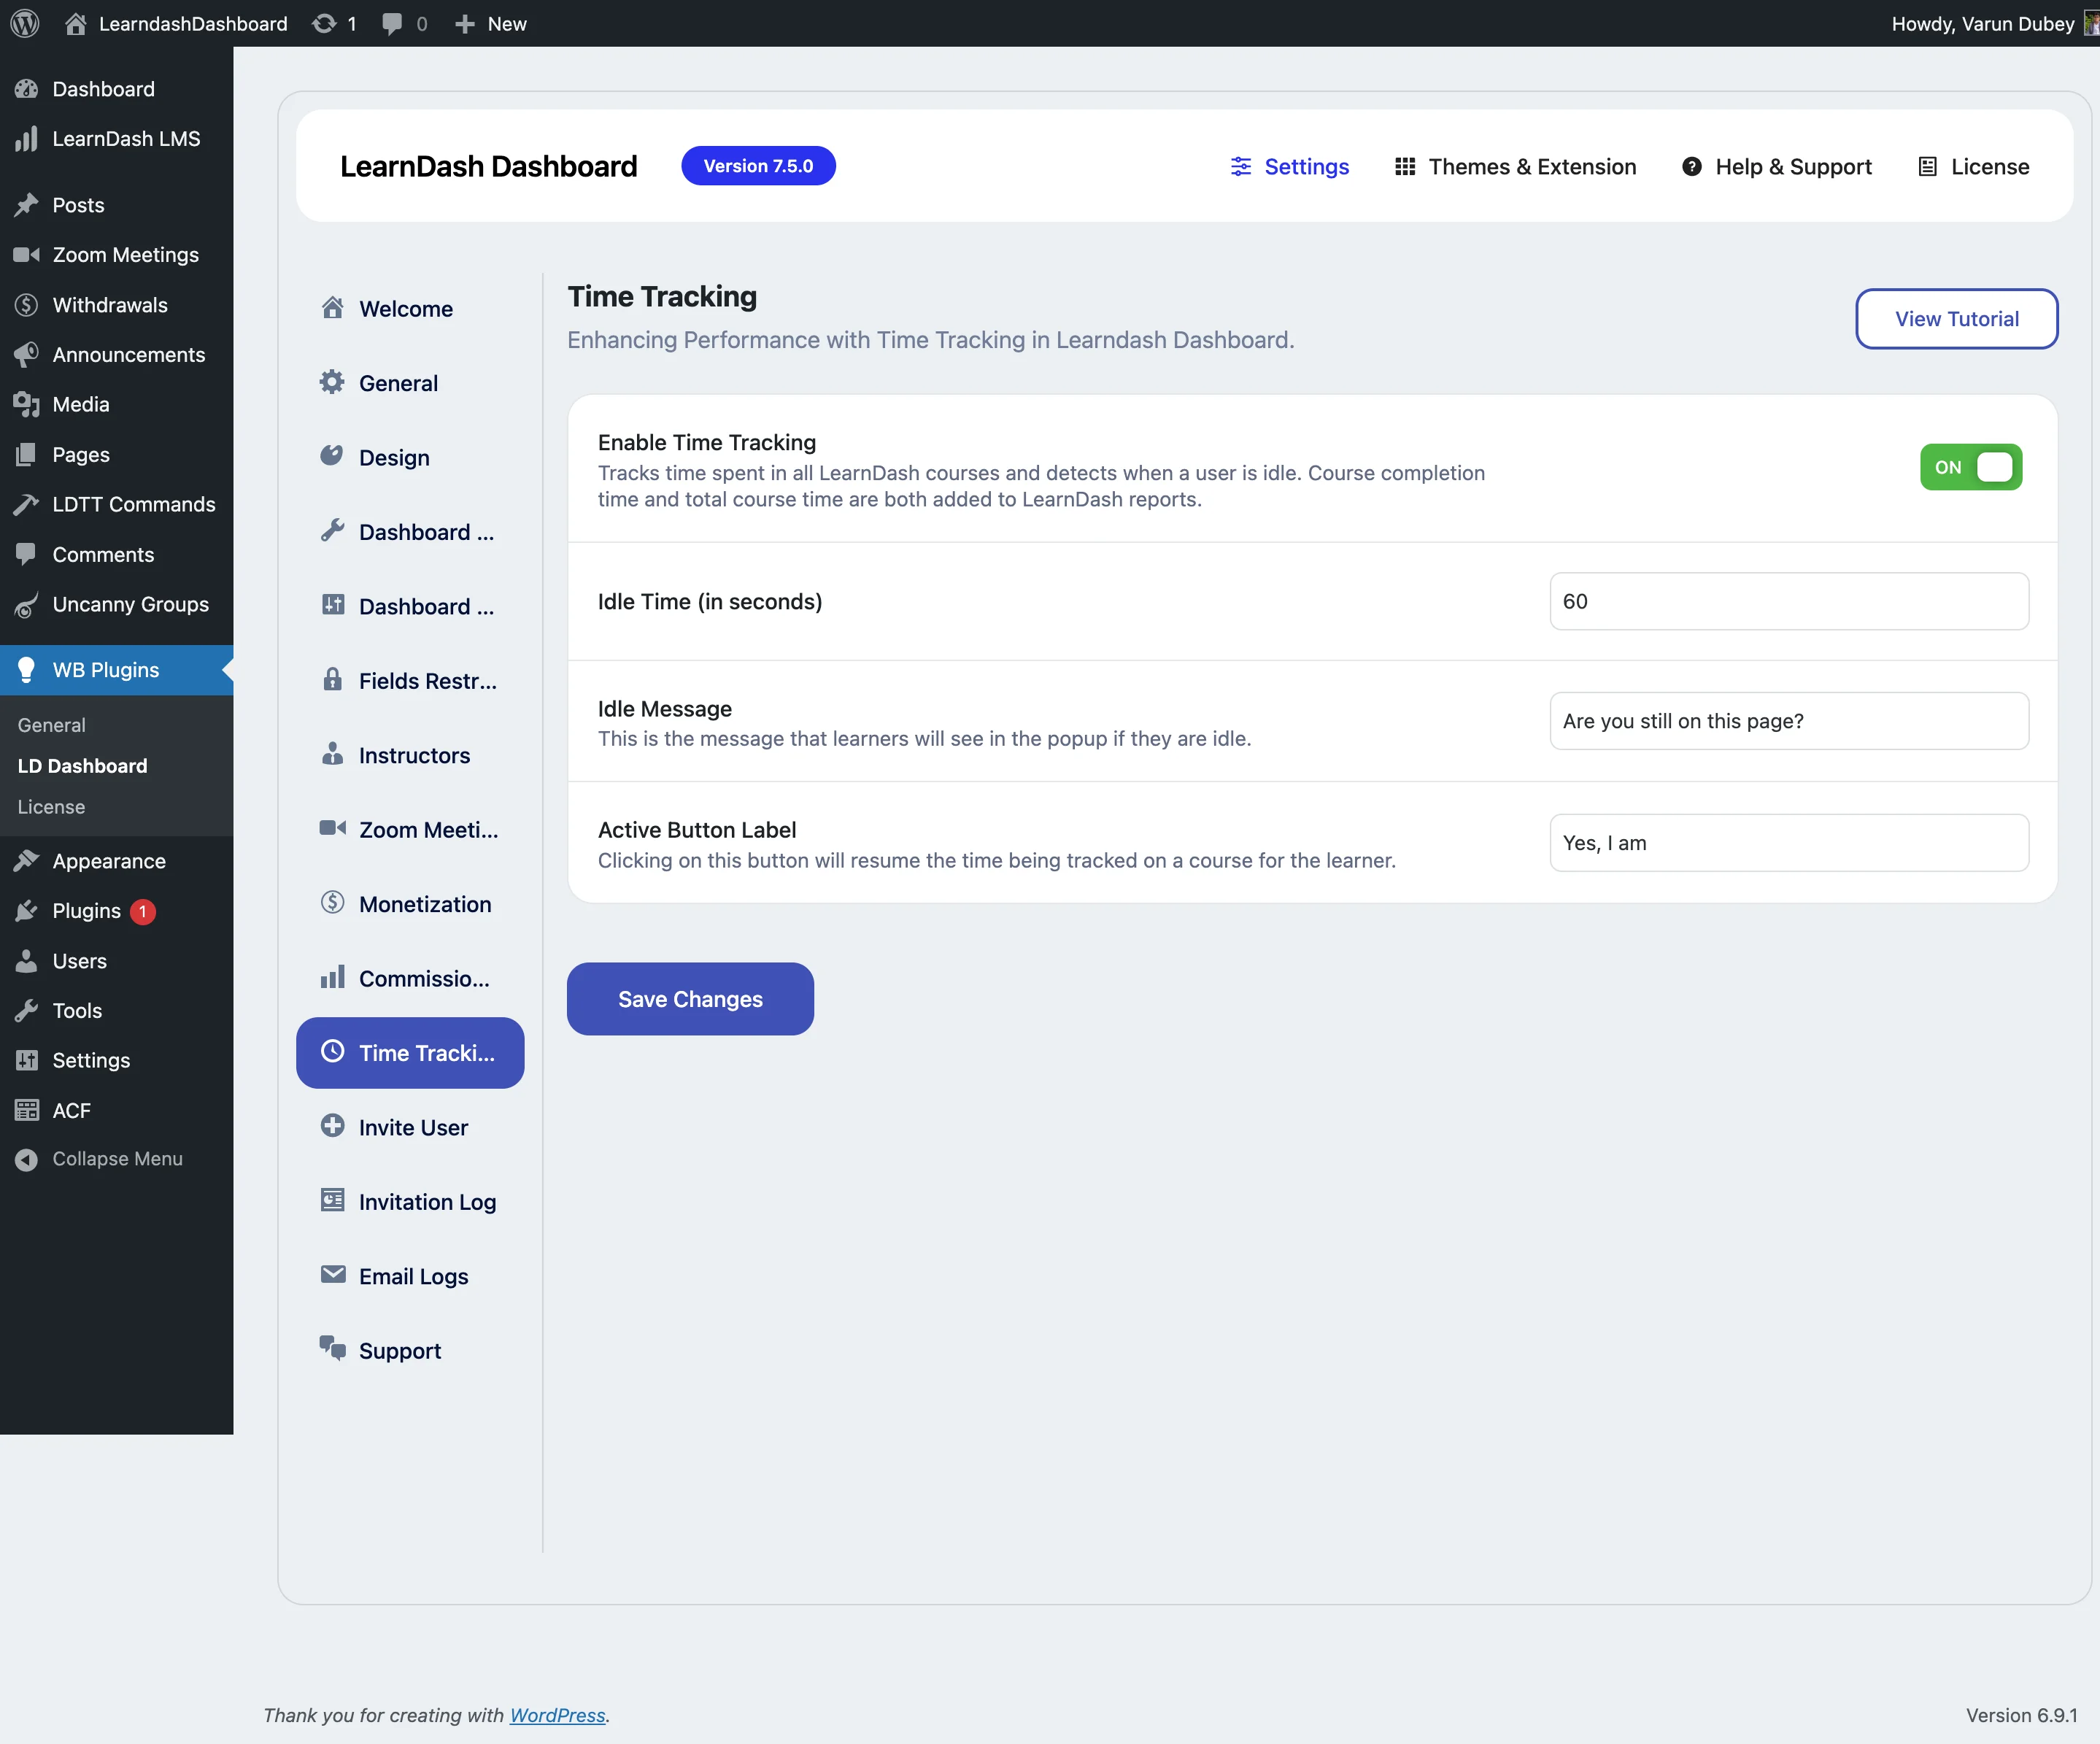
Site administrators configure Time Tracking under WP Admin > LearnDash Dashboard > Time Tracking.

Setting Description Default
Enable Time Tracking Turns the time tracker on or off site-wide. When enabled, the dashboard automatically records time spent on lessons, topics, and quizzes. Course completion time and total course time are both added to LearnDash reports. Off
Idle Time (seconds) How many seconds of inactivity before the tracker pauses and shows an idle popup. Increase this value for users who read slowly; decrease it for shorter attention spans. 60
Idle Message The text displayed in the idle popup. Customize this to match your site's tone. "Are you still on this page?"
Active Button Label The button text in the idle popup. Clicking it resumes the timer. "Yes, I am"

The idle detection settings only appear after you enable Time Tracking. Click Save Changes to apply.

Enrollment Codes

Screenshot

Student Enrollment Code Redemption

Overview

An enrollment code gives you instant access to a course or group. If you've received a code from your instructor or organization, enter it on your dashboard to join right away - no purchase or manual approval needed.


How to Redeem Your Code

From Your Dashboard

If your site has the enrollment code widget, you'll see a box on your dashboard home with the heading "Have an Enrollment Code?"

  1. Type or paste your code into the field.
  2. Click Redeem.
  3. A message confirms whether the code worked and which courses or groups you've been added to.

You must be logged in for the widget to appear.

From a Dedicated Page

Your site may also have a standalone enrollment code page. Your instructor or site admin will share the link with you. Enter your code there in the same way.


What Happens After You Redeem

Once you enter a valid code:

  • You're enrolled in the associated course or added to the group right away.
  • A confirmation message lists exactly what you now have access to.
  • Your new course appears in your Enrolled Courses section.

Common Error Messages

Message What It Means
"You must be logged in to redeem a code." Log in first, then try again.
Code not found Double-check the code - it may have a typo.
Code expired The code's expiration date has passed. Contact whoever gave you the code.
Code fully used The maximum number of people have already used this code. Contact your instructor.
Already enrolled You're already in this course or group. No action needed.

Where Do Codes Come From?

Enrollment codes are created by instructors and administrators. They can be set to:

  • Allow a certain number of uses before expiring
  • Expire after a specific date
  • Grant access to one or more courses or groups

If you need a code, reach out to your instructor or the site administrator.

Profile Management

Viewing Your Profile

Overview

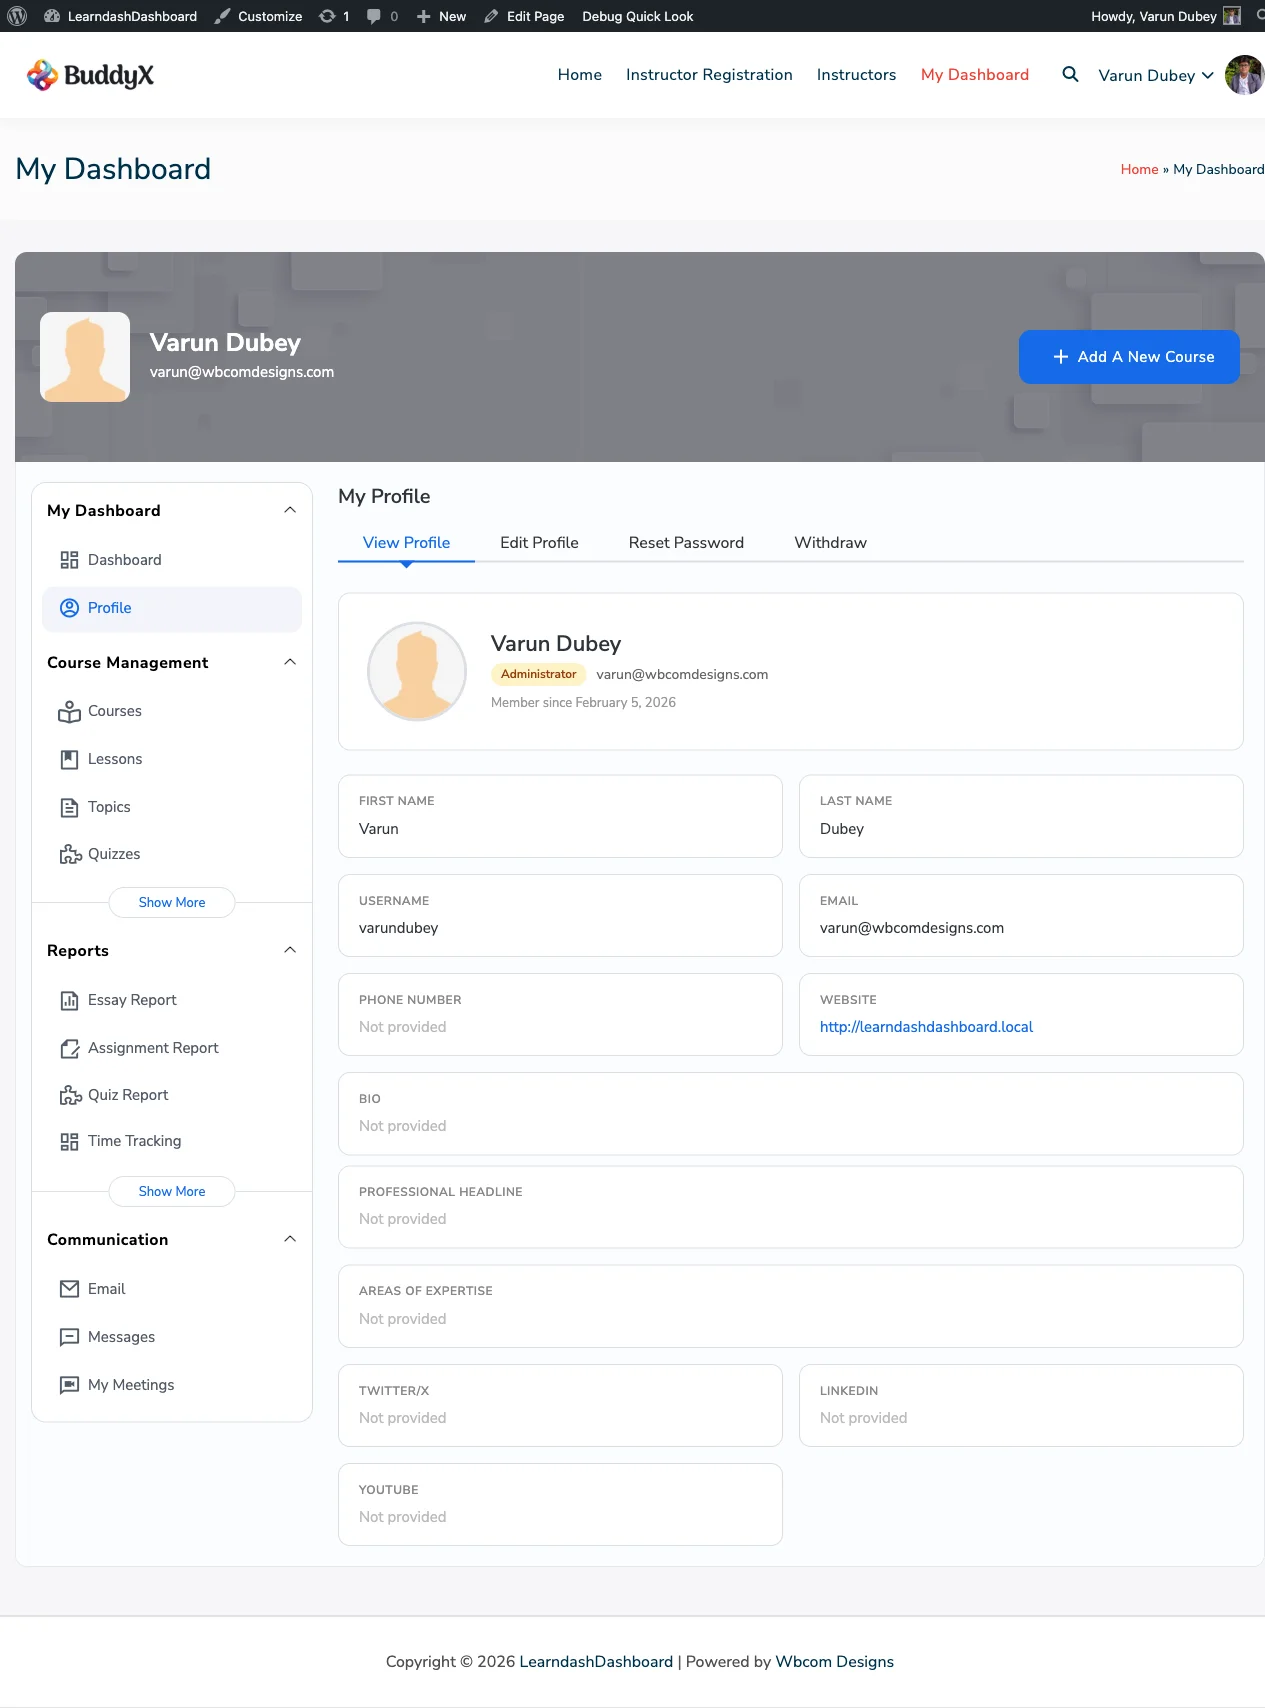
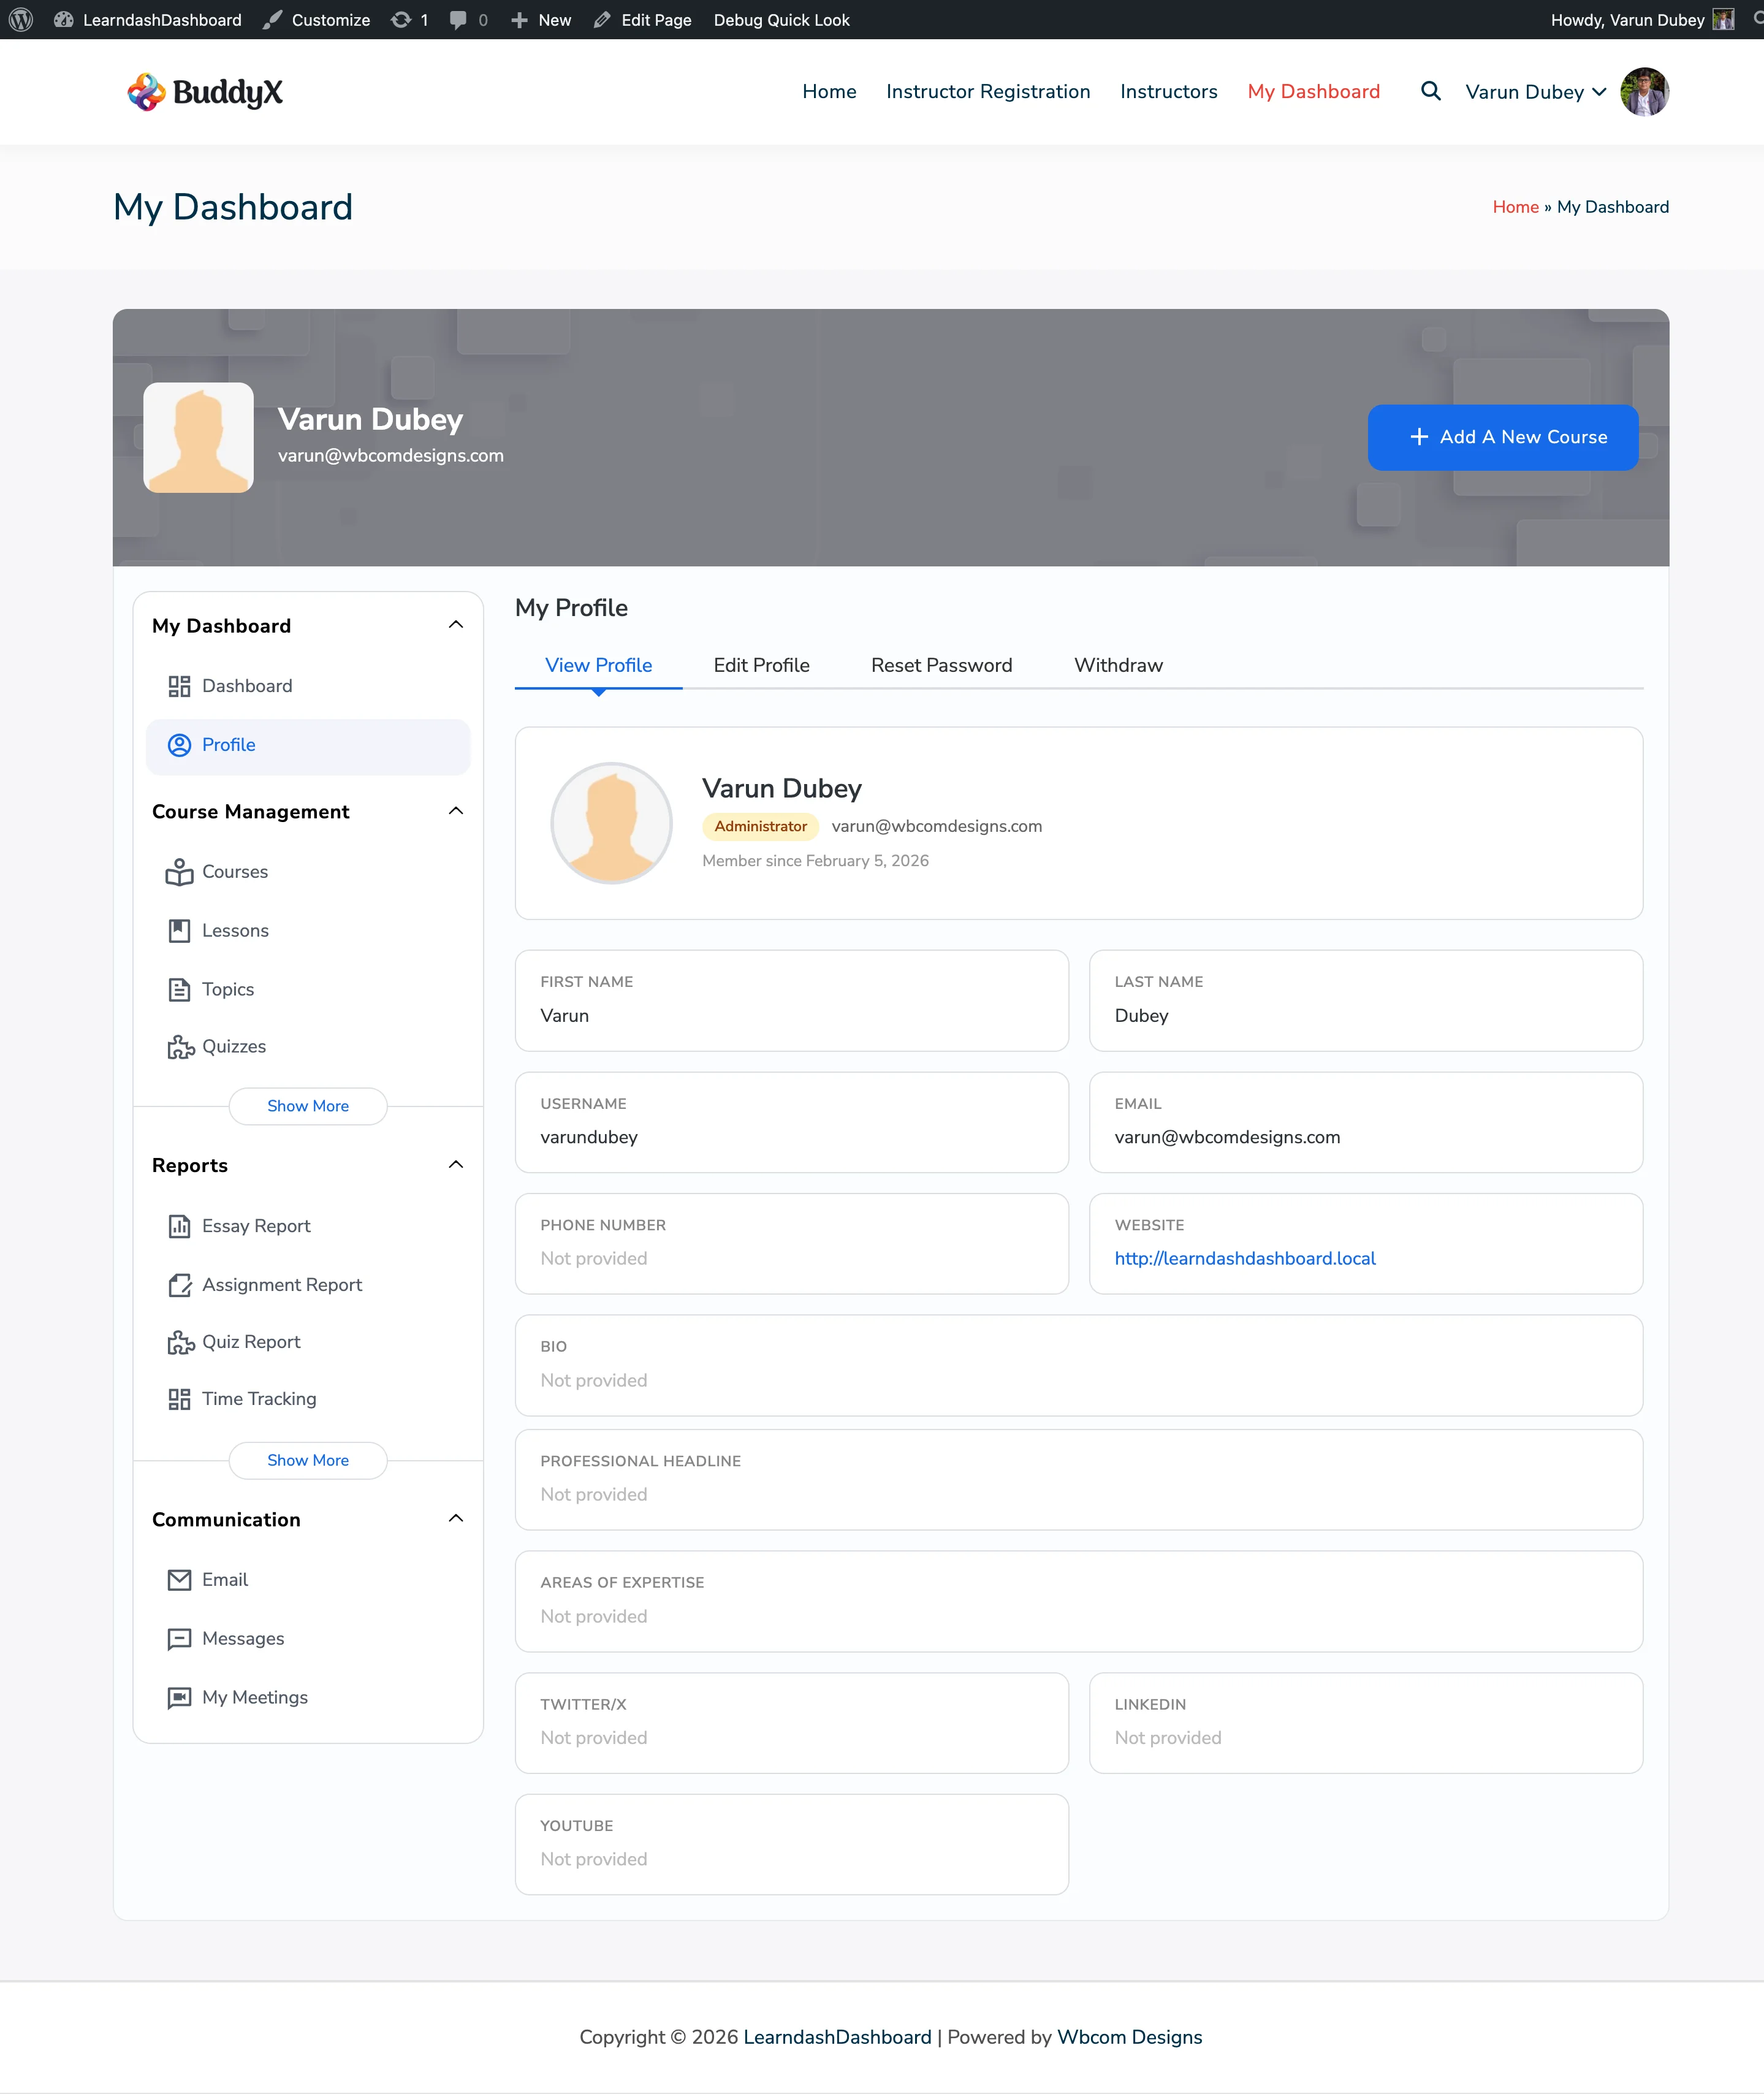
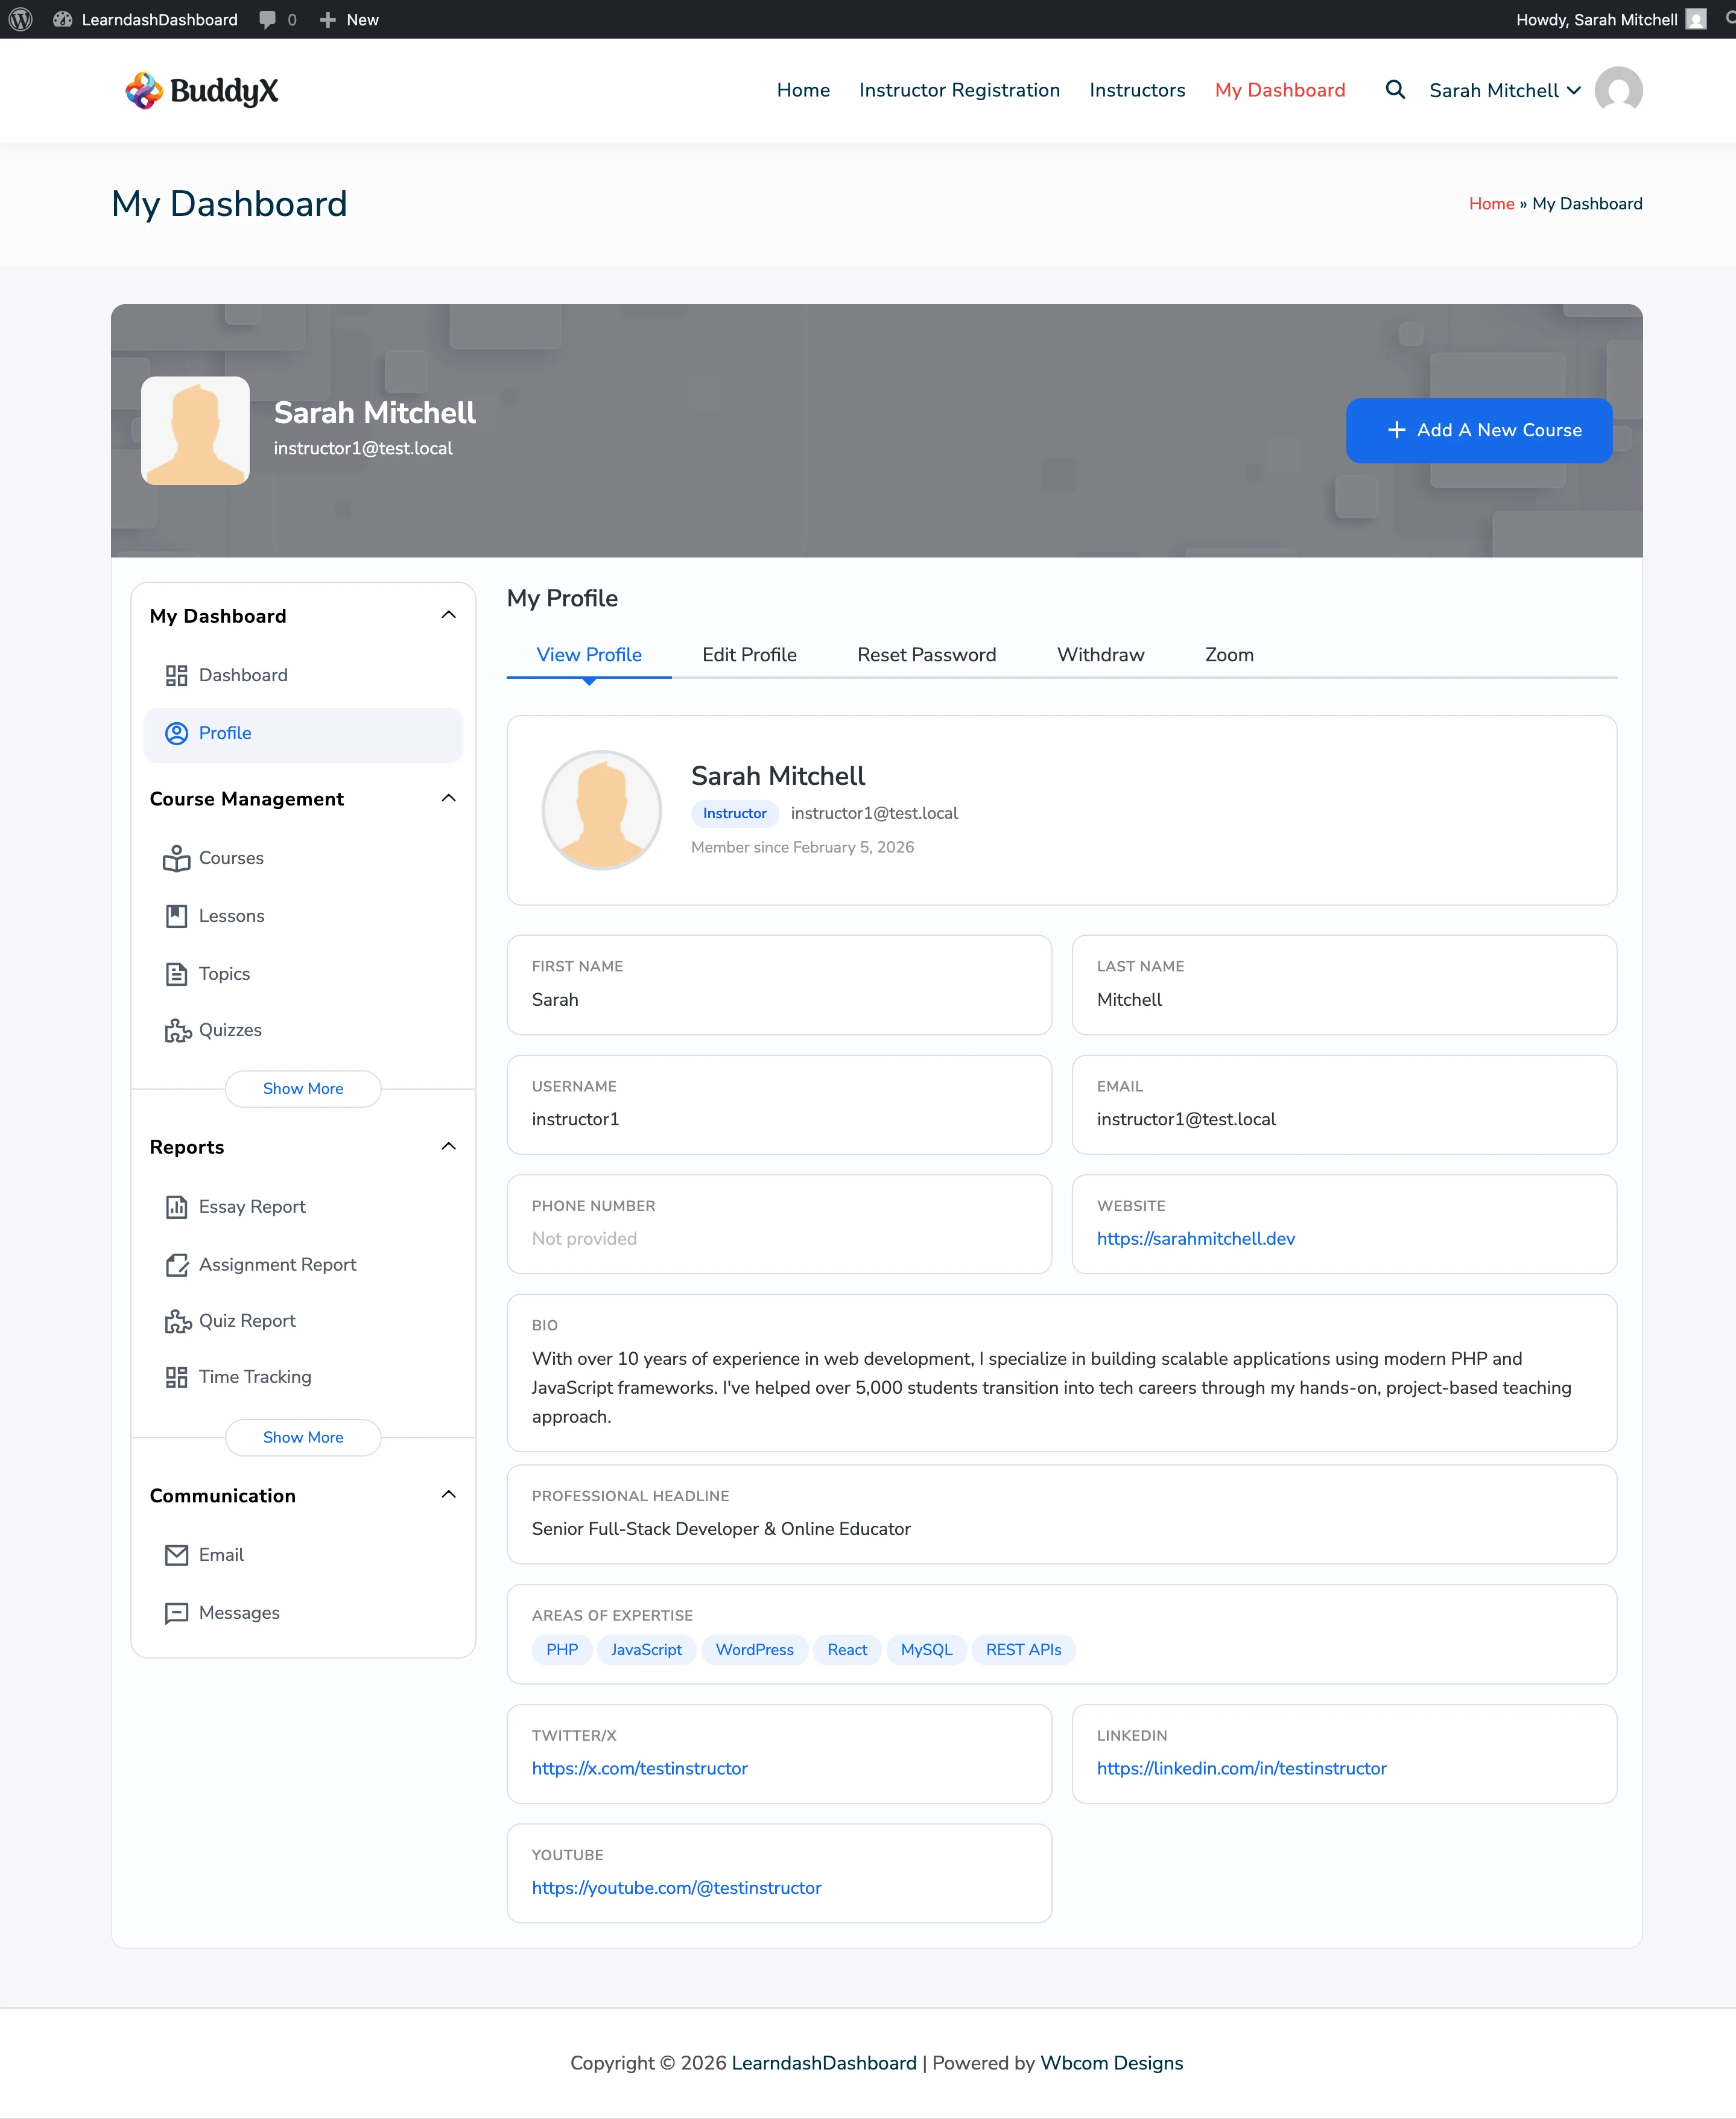
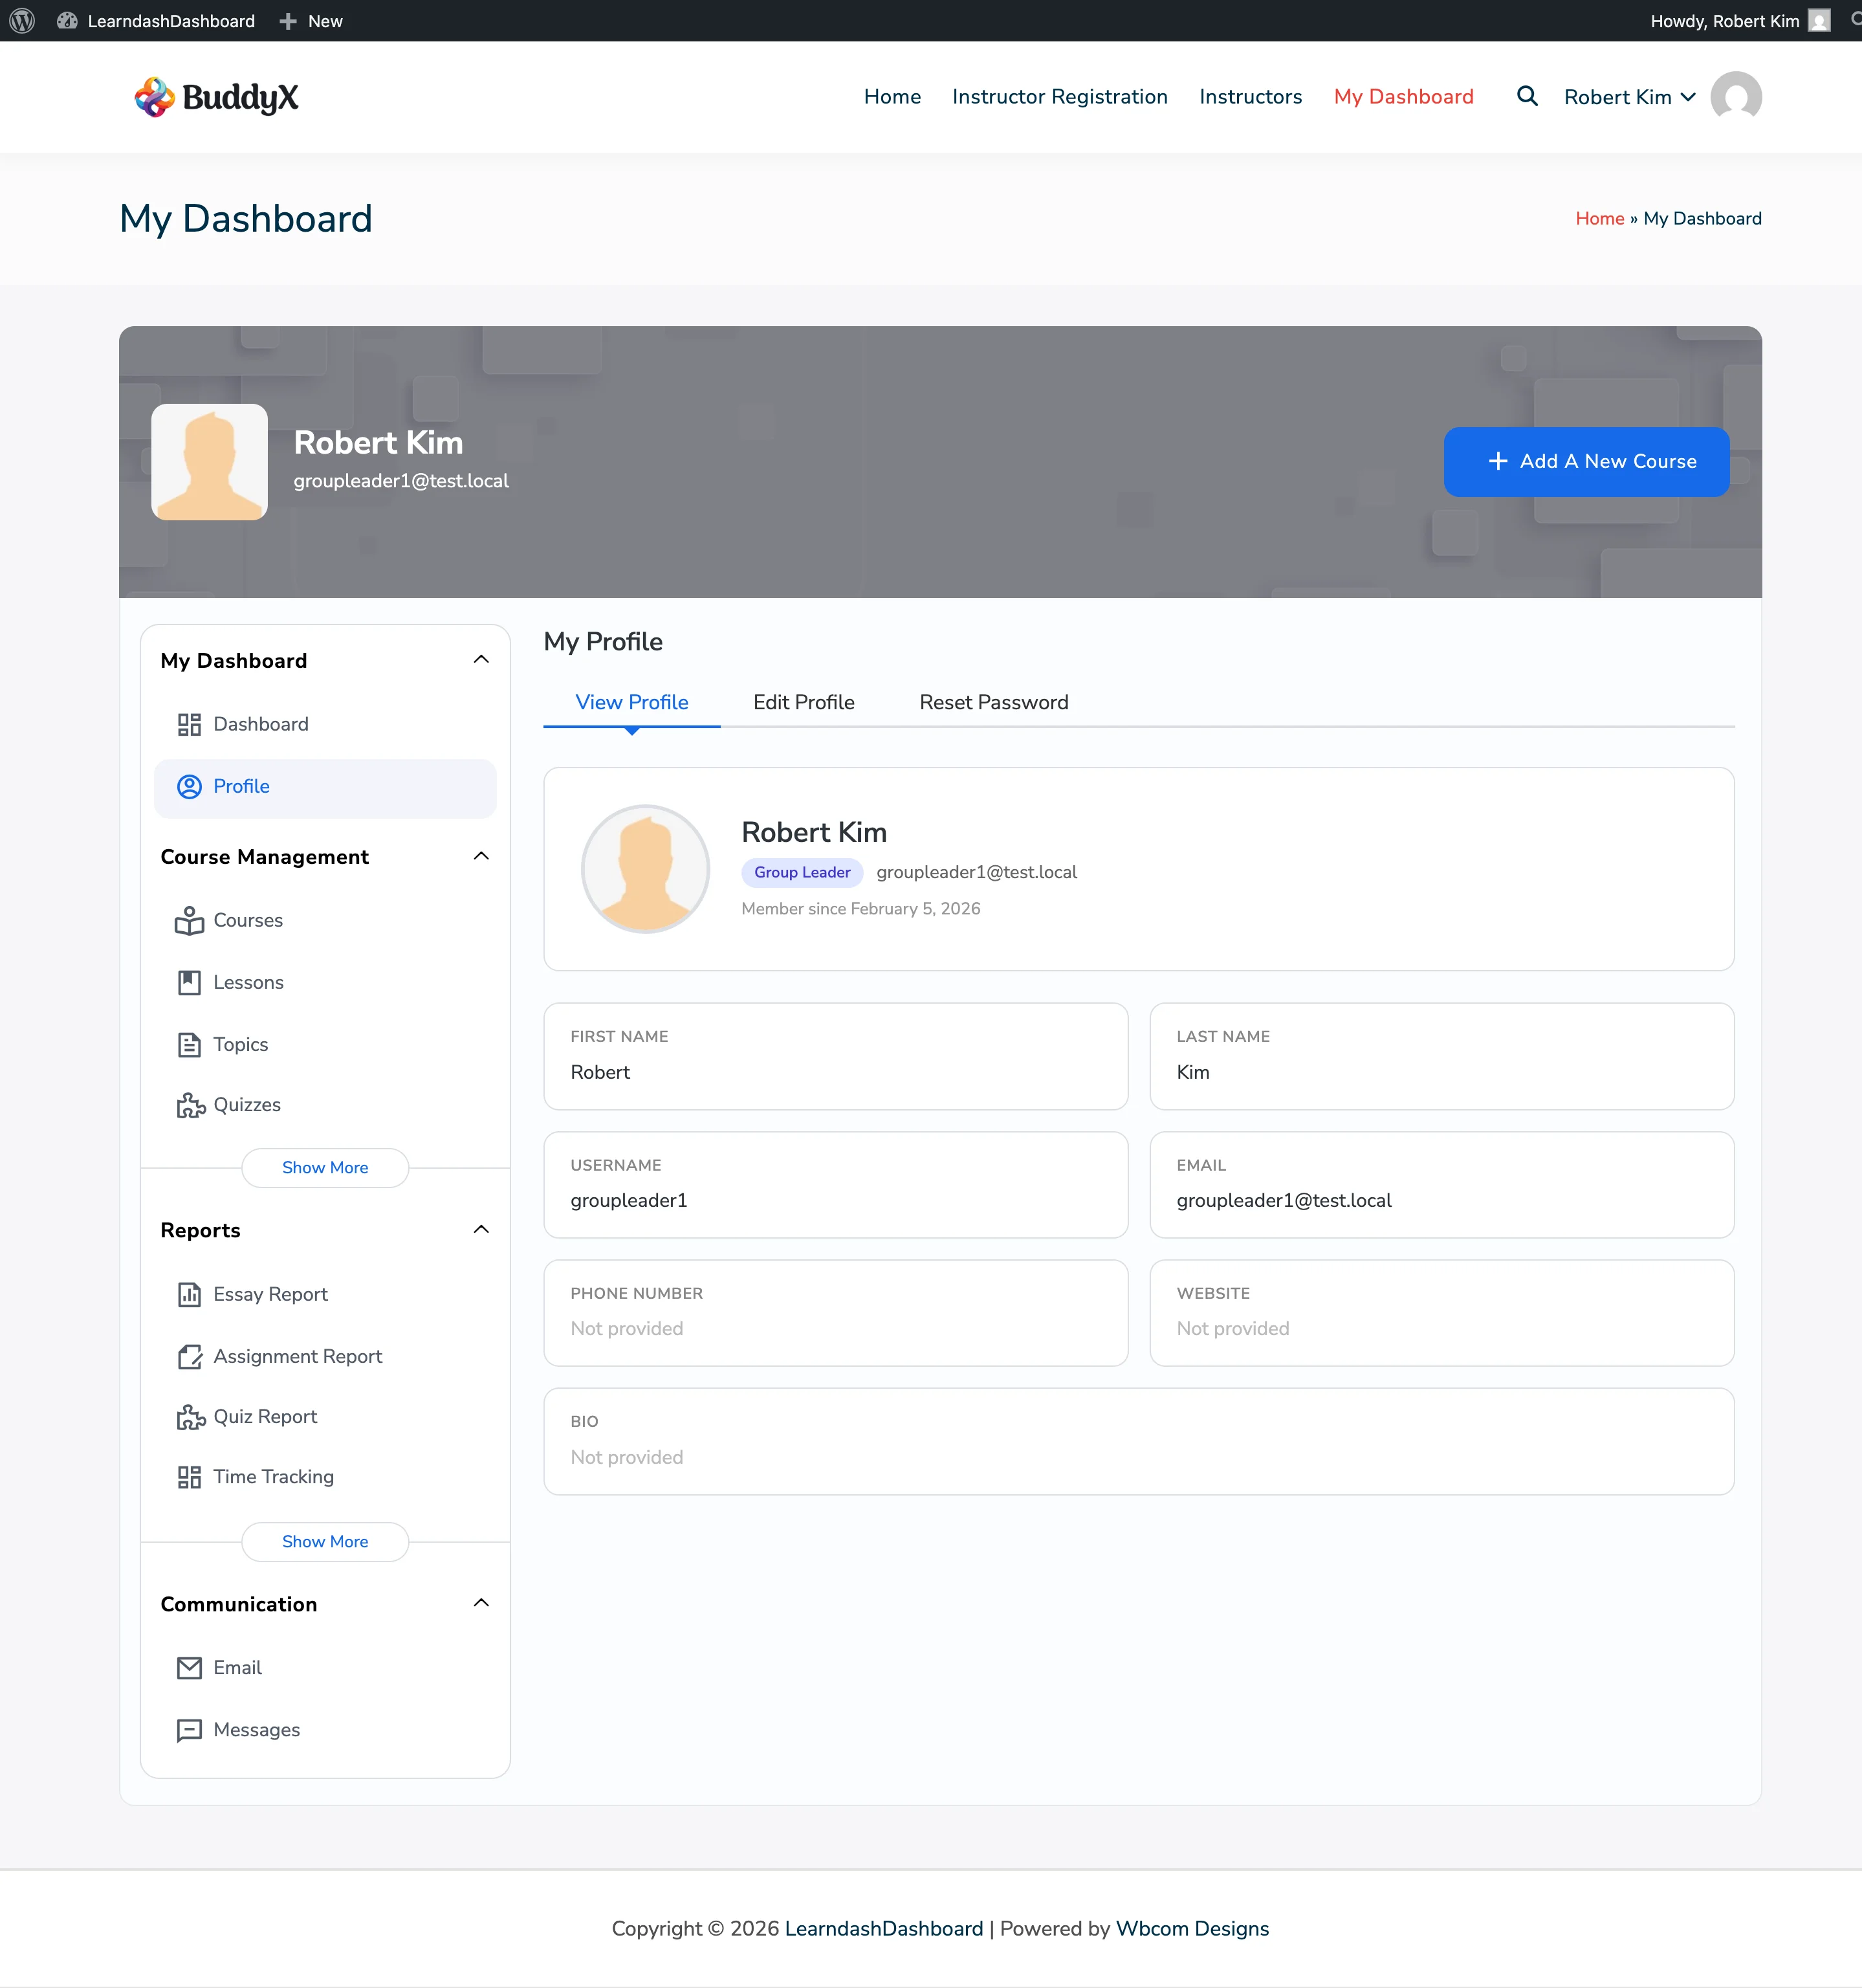
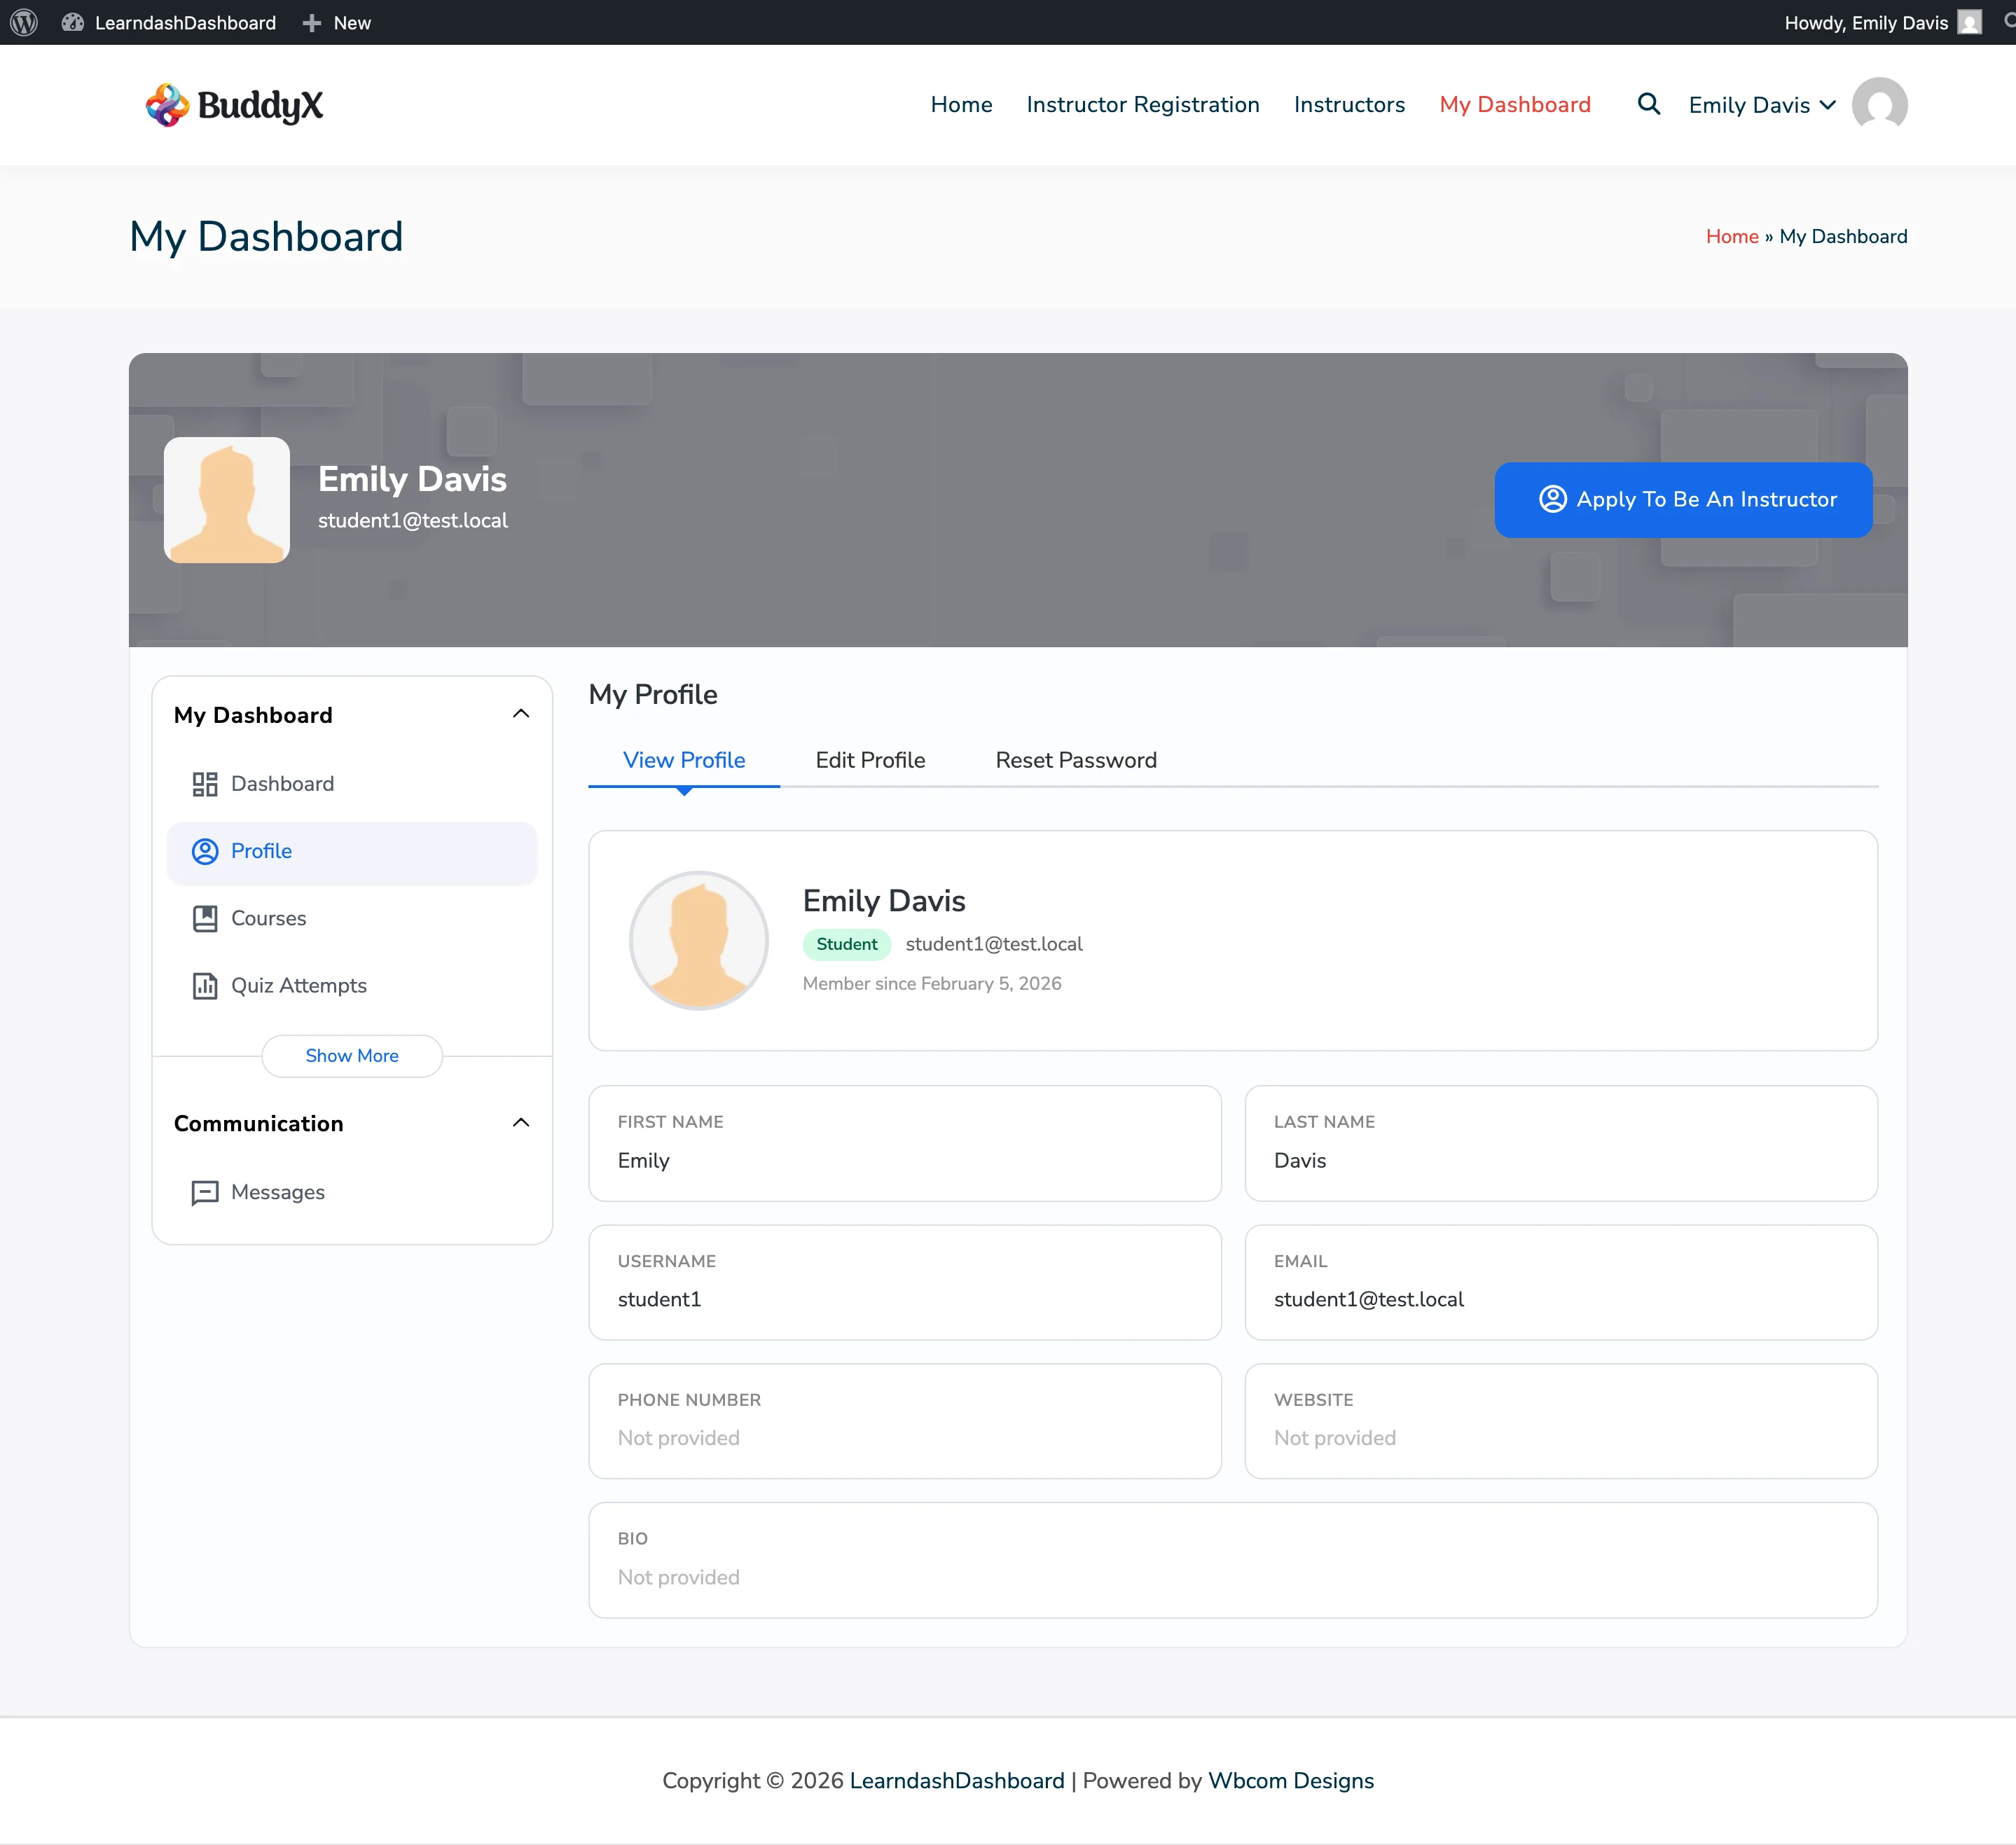
Your profile page shows a summary of your account information. It displays your photo, name, role, contact details, and bio. Instructors also see their professional credentials and social media links here.

How to Access Your Profile

Go to your dashboard and click Profile in the sidebar menu. Your profile opens on the View Profile tab by default.

Screenshots

How It Looks

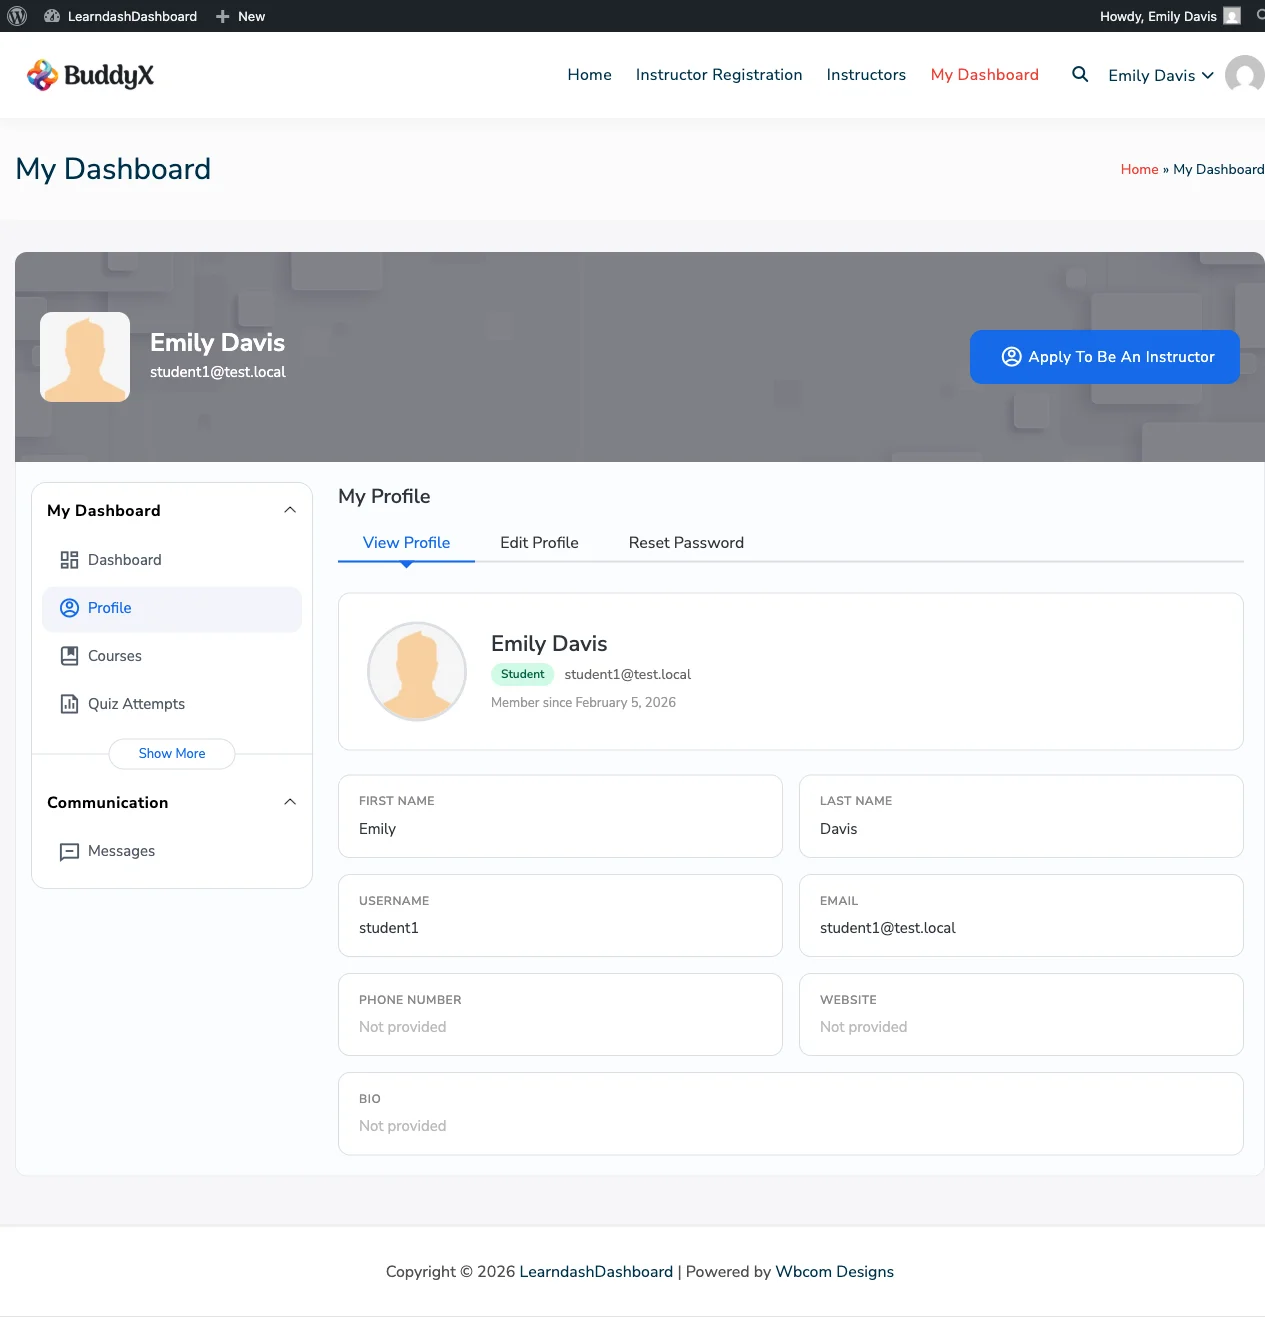
Student Profile

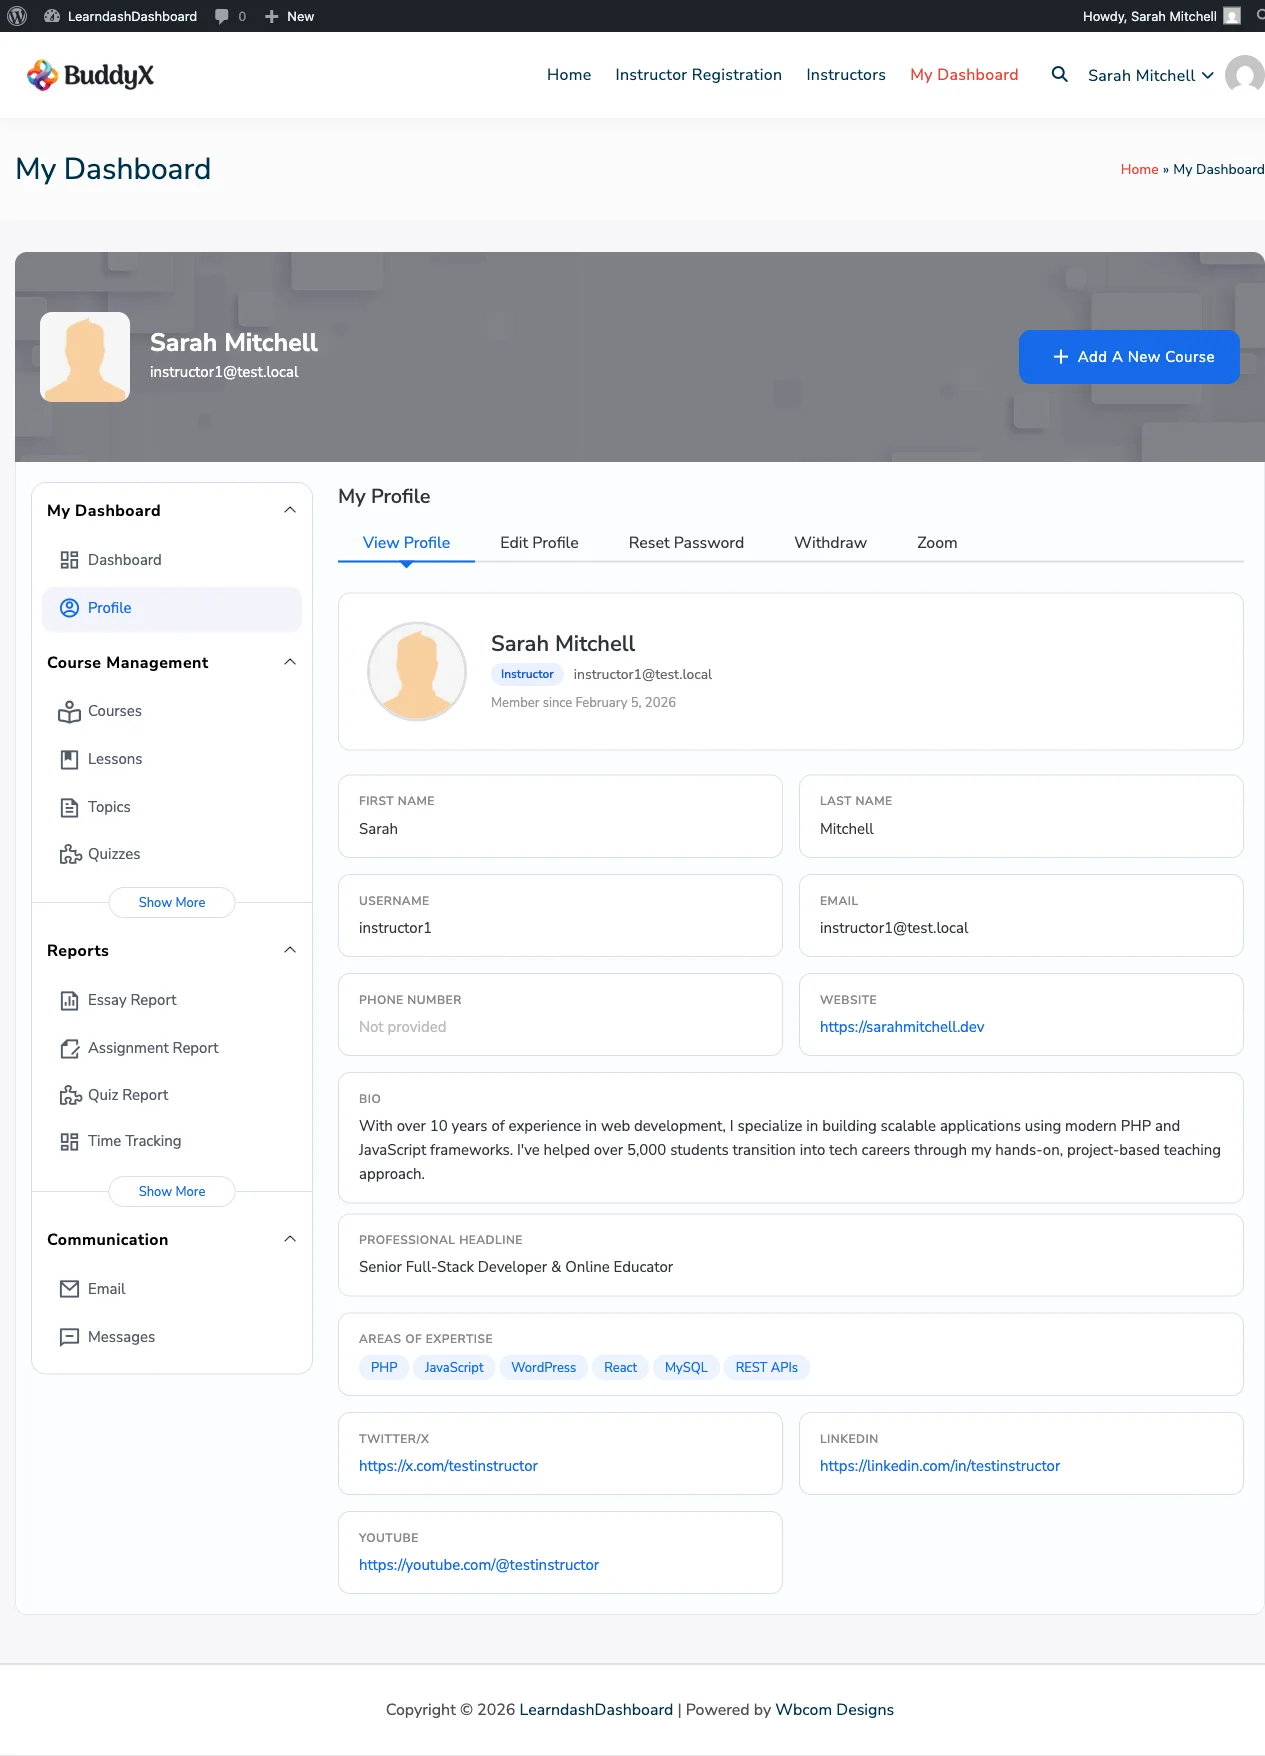
Instructor Profile

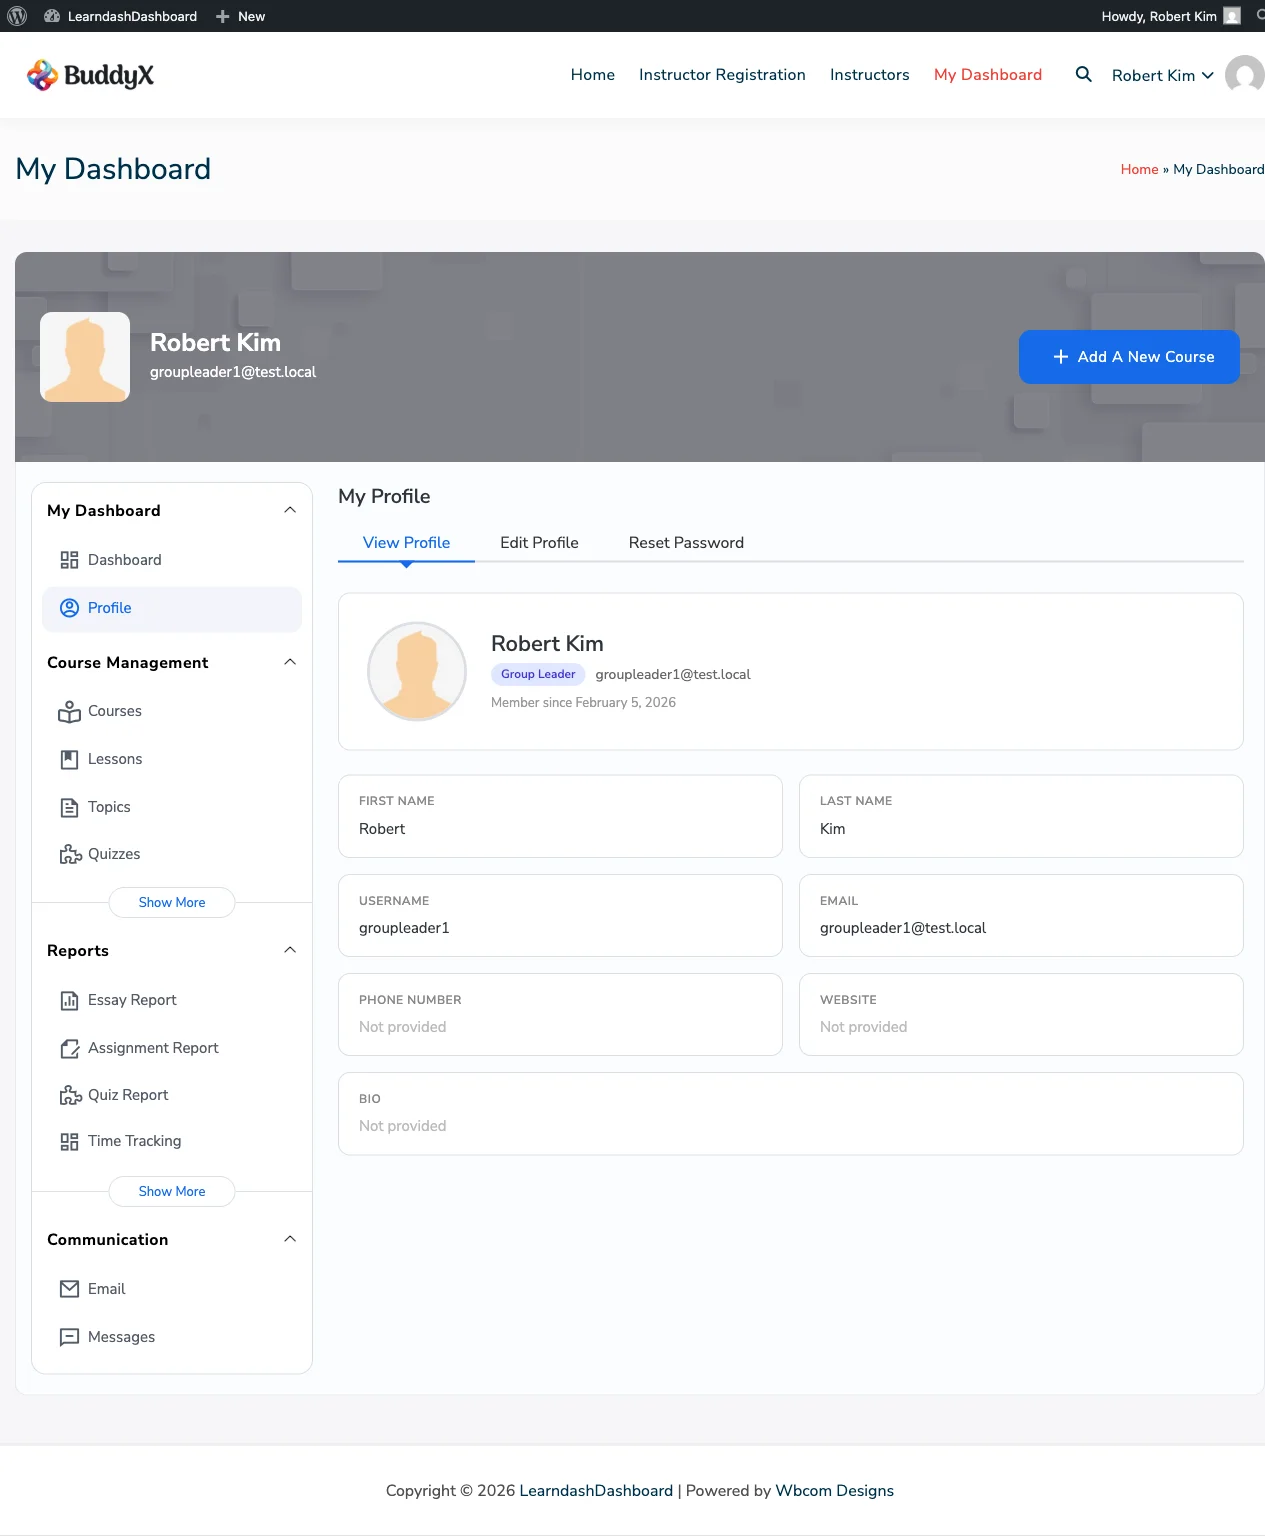
Group Leader Profile

Admin Profile

What You See

Profile Card

At the top of the page you'll see:

Information Details
Profile photo Your uploaded photo or a default avatar
Display name The name shown to others on your site
Role Student, Instructor, Group Leader, or Administrator
Email address Your account email
Member since The date you joined

Your Details

Below the profile card, a grid shows:

Information Details
First Name Shows "Not provided" if you haven't added one
Last Name Shows "Not provided" if you haven't added one
Username Your login username
Email Your account email
Phone Number Your phone number, if added
Website A clickable link, if added
Bio Your biography text

Instructor Section

If you are an instructor or administrator, you'll also see:

  • Professional Headline
  • Areas of Expertise (shown as individual tags)
  • Twitter/X profile link
  • LinkedIn profile link
  • YouTube channel link

Students and group leaders do not see this section.

Profile Tabs

From the Profile section, you can switch between three tabs:

  • View Profile - What you are reading now
  • Edit Profile - Update your information
  • Reset Password - Change your password

Instructors may also see a Withdraw tab (for earnings) or a Zoom tab, depending on your site's settings.

Editing Your Profile

Overview

The Edit Profile page lets you update your personal information, contact details, bio, and profile photo. Instructors can also update their professional headline, areas of expertise, and social media links.

Screenshots

Admin Profile Edit Instructor Profile Edit Group Leader Profile Edit Student Profile Edit

How to Access

Go to Dashboard > Profile, then click the Edit Profile tab. You must be logged in to see this page.

Updating Your Information

Personal Information

Field Description
First Name Your first name
Last Name Your last name
Display Name Choose how your name appears to others - you can pick from combinations of your username, first name, last name, or nickname

Contact Information

Field Description
Phone Number Your phone number
Website URL Your personal or business website

About

Field Description
Bio A short description about yourself

Instructor Profile

If you are an instructor or administrator, you'll also see:

Field Description
Professional Headline A short tagline shown on your public instructor profile
Areas of Expertise Your specialties, separated by commas - displayed as tags
Twitter/X Link to your Twitter/X profile
LinkedIn Link to your LinkedIn profile
YouTube Link to your YouTube channel

Updating Your Profile Photo

Uploading a New Photo

  1. Click Change Avatar below your current photo.
  2. Select an image from your media library or upload a new file.
  3. Click Update Profile to save.

Removing Your Photo

  1. Click Remove next to your photo.
  2. Click Update Profile to save.

After removal, your profile shows a default avatar image.

If You Use BuddyPress

If your site uses BuddyPress and the BuddyPress avatar setting is turned on, the photo upload option is hidden here. Manage your profile photo through your BuddyPress profile instead.

Saving Your Changes

Click Update Profile at the bottom of the form. Your changes save immediately. Click View Profile to see how your profile looks to others.

Changing Your Password

Overview

You can change your account password directly from your dashboard without leaving the page. The form asks for your current password first to keep your account secure.

How to Access

Go to Dashboard > Profile, then click the Reset Password tab. You must be logged in to use this form.

Steps to Change Your Password

  1. Go to Dashboard > Profile > Reset Password.
  2. Enter your Current Password.
  3. Enter your New Password.
  4. Re-enter your new password in the Repeat New Password field.
  5. Click Reset Password.

A success or error message appears on the page without reloading. You stay logged in after the change - no need to sign in again.

Common Error Messages

What you see What it means
"Current password is incorrect." The password you entered doesn't match your current password.
"The passwords you entered did not match. Your password was not updated." Your new password and the repeated password don't match. Try again.
"Fields not found." One or more fields were left blank. Fill in all three fields and try again.
"Your password is updated." Success - your password has been changed.

Password Tips

  • Use at least 12 characters.
  • Mix uppercase letters, lowercase letters, numbers, and symbols.
  • Avoid reusing passwords from other websites.
  • Consider using a password manager to create and store a strong password.

Course Management

Managing Courses

The Courses tab is your central hub for creating and managing LearnDash courses from the frontend dashboard. Admins and instructors can create, edit, clone, and delete courses without going into the WordPress admin area.

Who Can Do What

Action Admin Instructor Group Leader
View courses All courses Own courses only Assigned courses (read-only)
Create course Yes Yes No
Edit course Yes Own courses only No
Delete course Yes Own courses only No
Clone course Yes Own courses only No

Each course card shows an access badge: Your Content (you created it), Shared (you're a co-instructor), or View Only (read access).

Screenshots

Admin View

Admin Course Listing

Instructor View

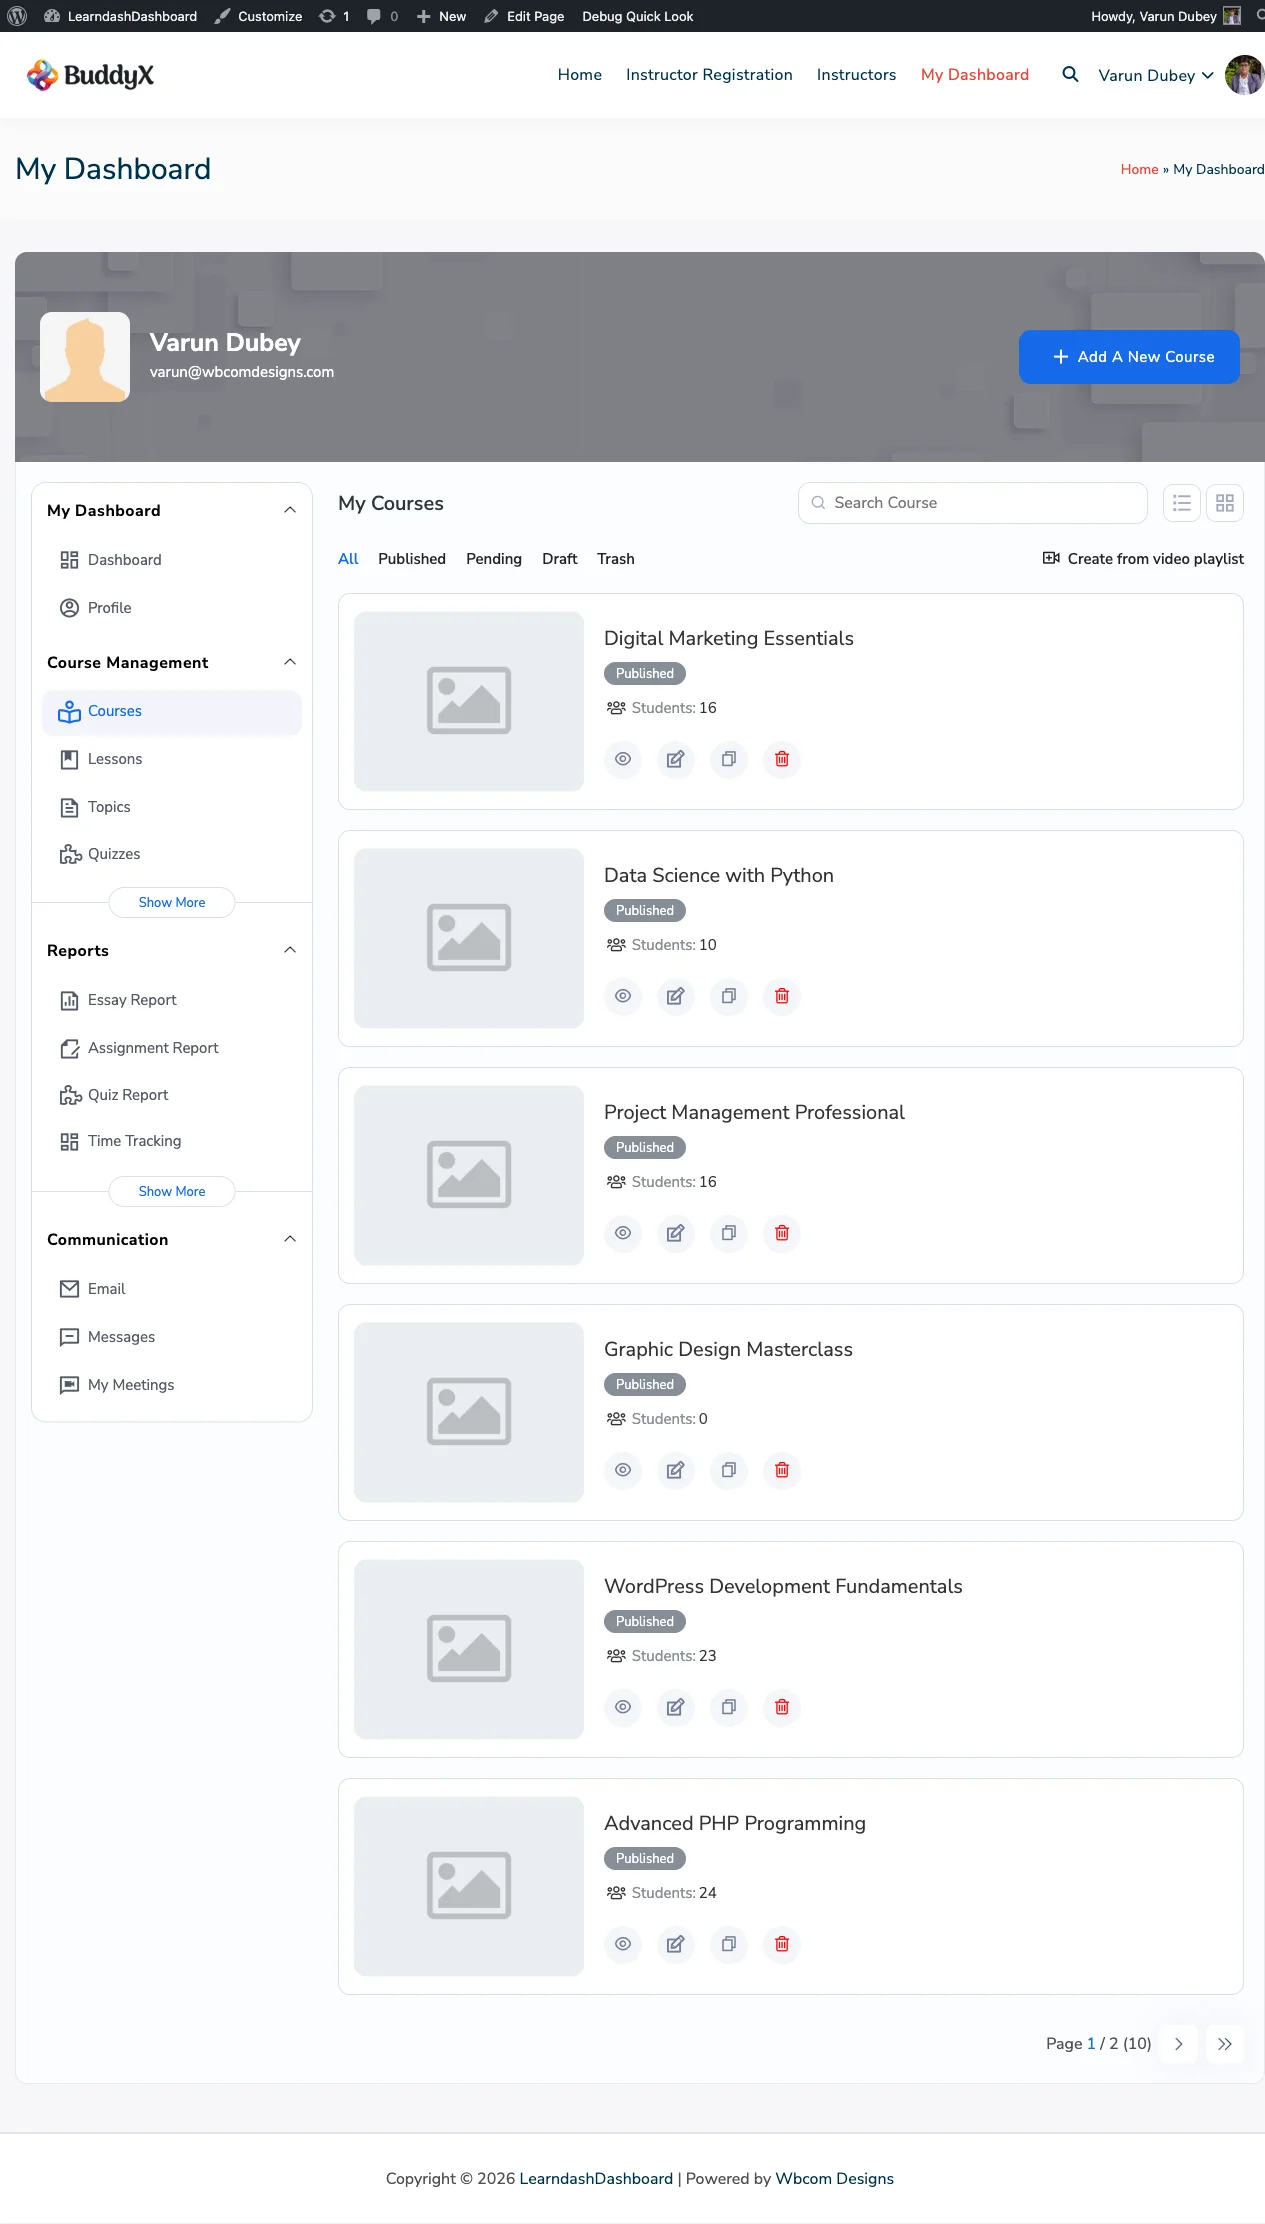
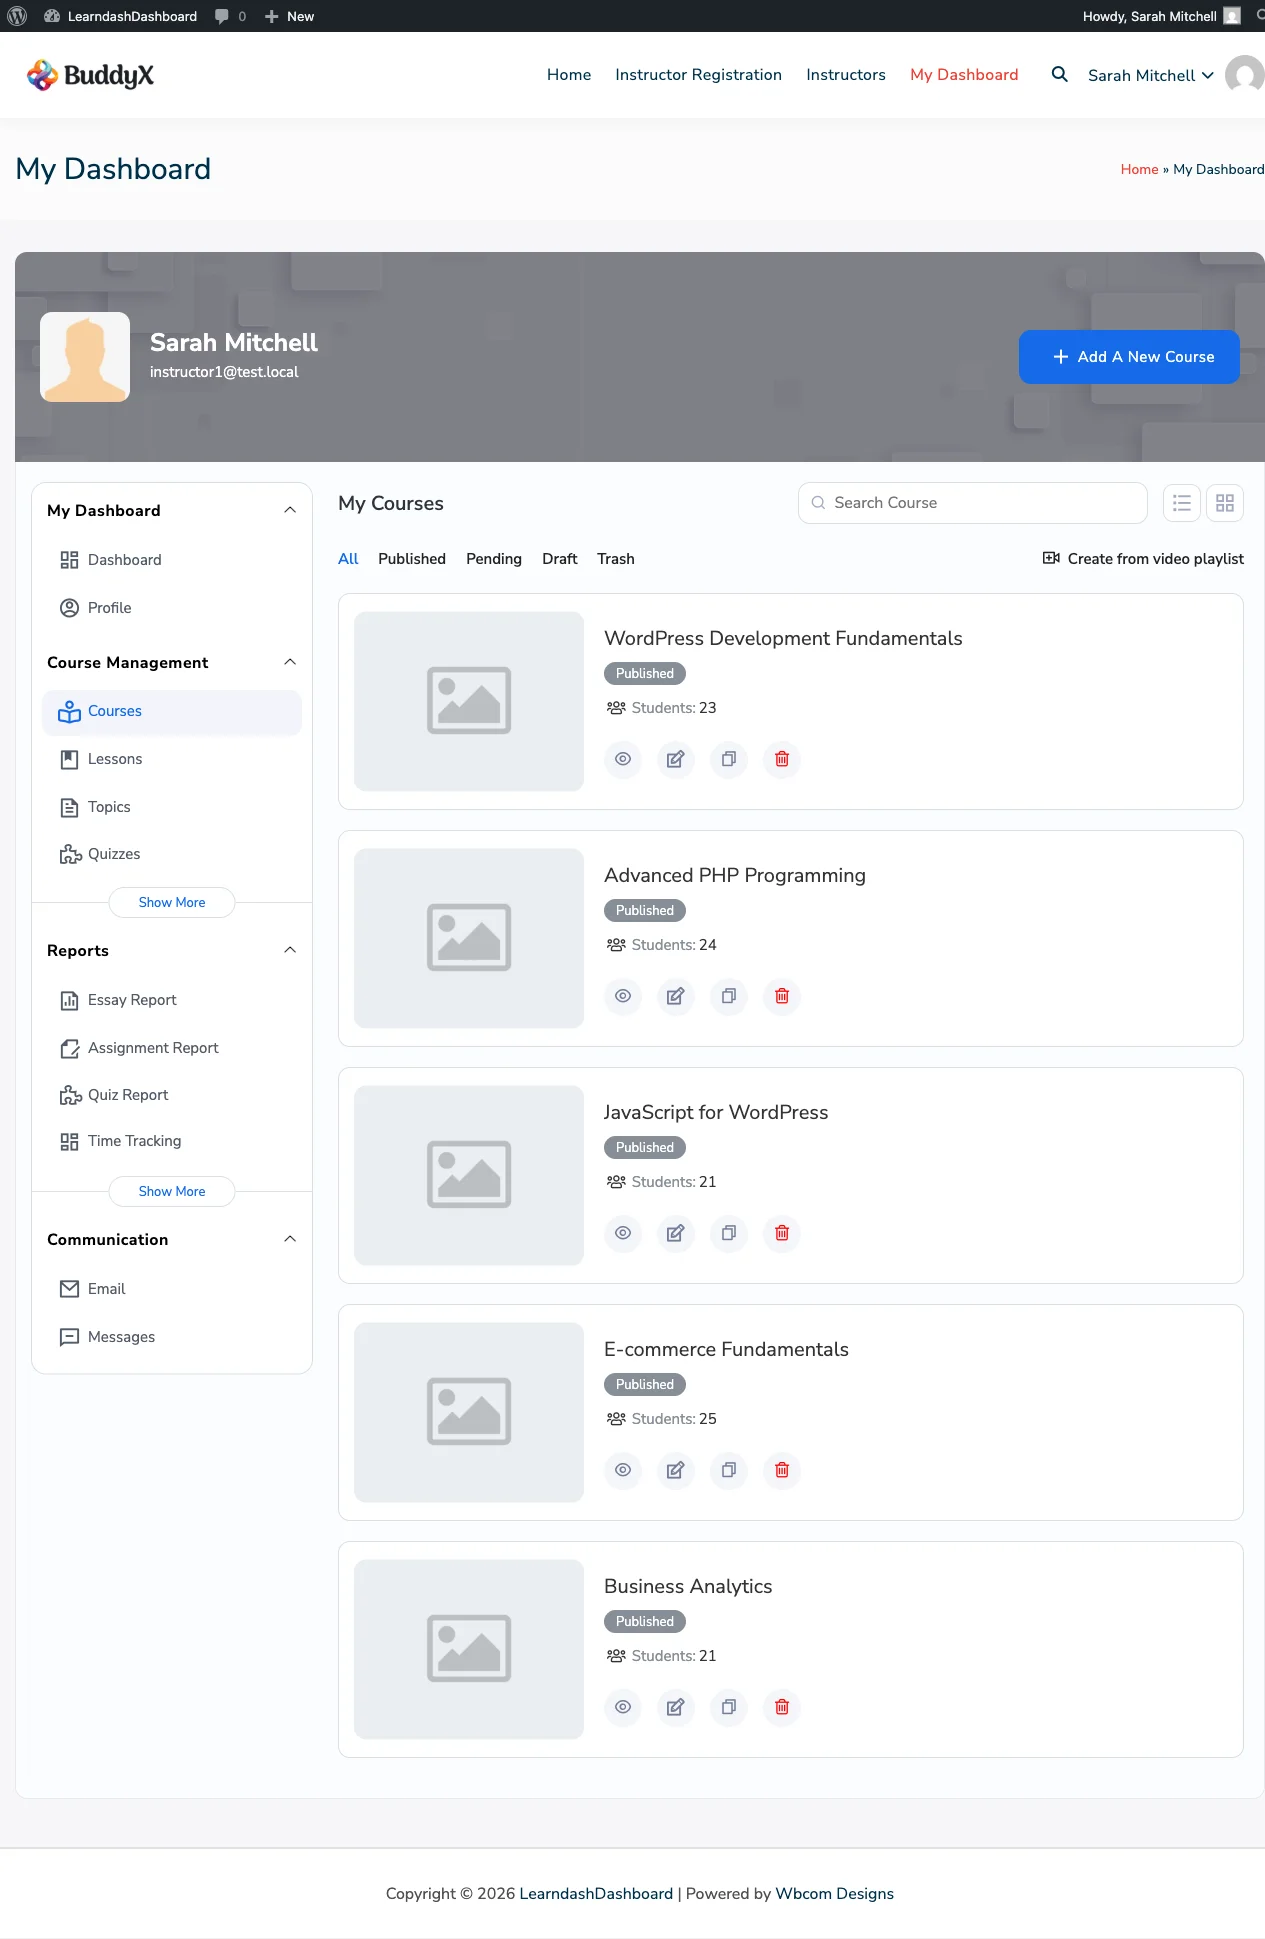
Instructor Course Listing

Course Creation Form

Course Creation Form

Viewing Your Courses

Go to My Dashboard > Courses. Each course shows:

  • Course title
  • Publication status: Published, Draft, or Pending
  • Categories and tags
  • Action buttons: View, Edit, Delete, and Edit with Elementor (if your site uses Elementor)

Use the search bar or status filter above the list to find specific courses. The list shows 7 courses per page.

Creating a Course

  1. Go to My Dashboard > Courses.

  2. Click Add New Course.

  3. Fill in the Post Data tab:

    Field Required Description
    Course Title Yes The name of your course
    Status No Published, Pending, or Draft
    Featured Image No The course thumbnail
    Course Content No The main course description
    Course Categories No Organize courses by category
    Course Tags No Add searchable tags
  4. Switch to the Settings tab and configure:

    Field Description
    Course Materials Add downloadable resources for students
    Course Certificate Choose a certificate students earn on completion
    Challenge Exam Set a quiz students can take to skip the course
    Course Content Visibility Show content to everyone or enrolled students only
    Access Mode Open, Free, Buy Now, Recurring, or Closed
    Course Price Price (shown when Buy Now or Recurring is selected)
    Billing Cycle How often a recurring payment is charged
    Prerequisites Require students to complete other courses first
    Course Points Points awarded when a student completes the course
    Access Expiration Number of days until a student's access expires
    Student Limit Maximum number of students (0 means unlimited)
    Course Start Date The date the course becomes available
    Lesson Pagination Number of lessons shown per page
  5. Click Save Course.

Note for instructors: If your site administrator has restricted instructor publishing rights, your new course saves as Pending and waits for admin approval before going live.

Editing a Course

  1. Find the course in your listing.
  2. Click the Edit icon on the course card.
  3. Make your changes across the Post Data and Settings tabs.
  4. Click Save Course.

Deleting a Course

  1. Click the Delete icon on the course card.
  2. Confirm the deletion.

The course moves to the trash and disappears from your listing immediately. Student progress records are kept - they are not deleted when you remove a course.

Arranging Course Content with the Course Builder

The Course Builder lets you set the order of lessons and topics within a course.

  1. Open a course edit form.
  2. Scroll to the Course Builder section.
  3. Drag and drop lessons and topics to rearrange them.
  4. Click Save to apply the new order.

Courses contain lessons, and lessons can contain topics and quizzes. The Course Builder reflects this structure.

Cloning a Course

Cloning creates an exact copy of a course - including all its lessons, topics, and quizzes - as a new draft.

  1. Find the course in your listing.
  2. Click the Clone button on the course card.
  3. Wait for the confirmation message.

The cloned course appears as a Draft with "(Clone)" added to the title. Edit and publish it when you're ready.

Managing Lessons

The Lessons tab lets instructors and admins create and manage LearnDash lessons from the frontend dashboard. Lessons are the main content sections within a course.

Who Can Do What

Action Admin Instructor Group Leader
View lessons All lessons Own lessons only Assigned lessons (read-only)
Create lesson Yes Yes No
Edit lesson Yes Own lessons only No
Delete lesson Yes Own lessons only No

Each lesson card shows an access badge: Your Content, Shared, or View Only.

Screenshots

Instructor Lessons Listing

Viewing Your Lessons

Go to My Dashboard > Lessons. Each lesson card shows:

  • Lesson title
  • Publication status: Published, Draft, or Pending
  • Categories and tags (if assigned)
  • Action buttons: View, Edit, Delete, and Edit with Elementor (if active)

Use the course filter dropdown to show only lessons from a specific course. Use the search bar to find lessons by title. The list shows 7 lessons per page.

Creating a Lesson

  1. Go to My Dashboard > Lessons.

  2. Click Add New Lesson.

  3. Fill in the Post Data tab:

    Field Required Description
    Lesson Title Yes The name of your lesson
    Status No Published, Pending, or Draft
    Lesson Content No The main lesson content
    Featured Image No The lesson thumbnail
    Lesson Category No Organise lessons by category
    Lesson Tags No Add searchable tags
  4. Switch to the Settings tab and configure:

    Field Description
    Lesson Materials Add downloadable resources for students
    Video Progression Require students to watch a video before they can continue
    Video URL The URL of the required video
    Display Timing Show the video before or after sub-steps are complete
    Lesson Auto-Completion Mark the lesson complete automatically when the video ends
    Autostart Play the video automatically (muted) when the lesson loads
    Video Controls Allow students to pause or skip through the video
    Assignment Upload Let students submit a file as an assignment
    Forced Timer Require students to spend a minimum amount of time before completing
    Sample Lesson Make this lesson visible to anyone, even non-enrolled visitors
    Drip Schedule Set a delay (in days after enrollment) before this lesson becomes available
    External Lesson Link to a virtual or in-person session
  5. Click Save Lesson.

Scheduling Lessons with Drip Content

Drip scheduling controls when a lesson becomes accessible after a student enrolls.

  1. Open a lesson edit form.
  2. Go to the Settings tab.
  3. Turn on the drip option and enter the number of days after enrollment.

Students can see the lesson in the course outline but cannot open the content until the drip date arrives.

Arranging Lesson Order

Lesson order within a course is set using the Course Builder on the Courses tab - not from the lesson form itself. See Managing Courses for instructions.

When you filter lessons by course, they appear in the order defined in the Course Builder.

Editing a Lesson

  1. Find the lesson in your listing, or use the course filter to narrow it down.
  2. Click the Edit icon on the lesson card.
  3. Make your changes in the Post Data or Settings tab.
  4. Click Save Lesson.

Deleting a Lesson

  1. Click the Delete icon on the lesson card.
  2. Confirm the deletion.

The lesson moves to the trash. Student progress records are kept and are not deleted.

Managing Topics

The Topics tab lets instructors and admins create and manage LearnDash topics from the frontend dashboard. Topics are sub-sections within lessons - ideal for breaking a lesson into smaller, focused steps.

Screenshots

Admin Topics Listing Instructor Topics Listing Group Leader Topics Listing

Who Can Do What

Action Admin Instructor Group Leader
View topics All topics Own topics only Assigned topics (read-only)
Create topic Yes Yes No
Edit topic Yes Own topics only No
Delete topic Yes Own topics only No

Each topic card shows an access badge: Your Content, Shared, or View Only.

Viewing Your Topics

Go to My Dashboard > Topics. Each topic card shows:

  • Topic title
  • Publication status: Published, Draft, or Pending
  • Action buttons: View, Edit, Delete, and Edit with Elementor (if active)

Use the course filter to show topics from a specific course. Select a lesson from the dropdown that appears to narrow further. Use the search bar to find topics by title. The list shows 7 topics per page.

Creating a Topic

  1. Go to My Dashboard > Topics.

  2. Click Add New Topic.

  3. Fill in the Post Data tab:

    Field Required Description
    Topic Title Yes The name of your topic
    Status No Published, Pending, or Draft
    Topic Content No The main topic content
    Featured Image No The topic thumbnail
  4. Switch to the Settings tab and configure:

    Field Description
    Topic Materials Add downloadable resources for students
    Video Progression Require students to watch a video before they can continue
    Video URL The URL of the required video
    Display Timing Show the video before or after sub-steps are complete
    Topic Auto-Completion Mark the topic complete automatically when the video ends
    Autostart Play the video automatically (muted) when the topic loads
    Video Controls Allow students to pause or skip through the video
    Assignment Upload Let students submit a file as an assignment
    Forced Timer Require students to spend a minimum amount of time before completing
    Sample Topic Make this topic visible to anyone, even non-enrolled visitors
    Drip Schedule Set a delay (in days after enrollment) before this topic becomes available
    External Topic Link to a virtual or in-person session
  5. Click Save Topic.

Arranging Topic Order

Topic order within a lesson is set using the Course Builder on the Courses tab - not from the topic form itself. See Managing Courses for instructions.

When you filter topics by lesson, they appear in the order defined in the Course Builder.

Editing a Topic

  1. Use the course and lesson filters to locate the topic.
  2. Click the Edit icon on the topic card.
  3. Make your changes in the Post Data or Settings tab.
  4. Click Save Topic.

Deleting a Topic

  1. Click the Delete icon on the topic card.
  2. Confirm the deletion.

The topic moves to the trash. Student progress records are kept and are not deleted.

Managing Quizzes

The Quizzes tab lets instructors and admins create and manage LearnDash quizzes from the frontend dashboard. You can attach quizzes to a course, to a specific lesson, or to a topic.

Screenshots

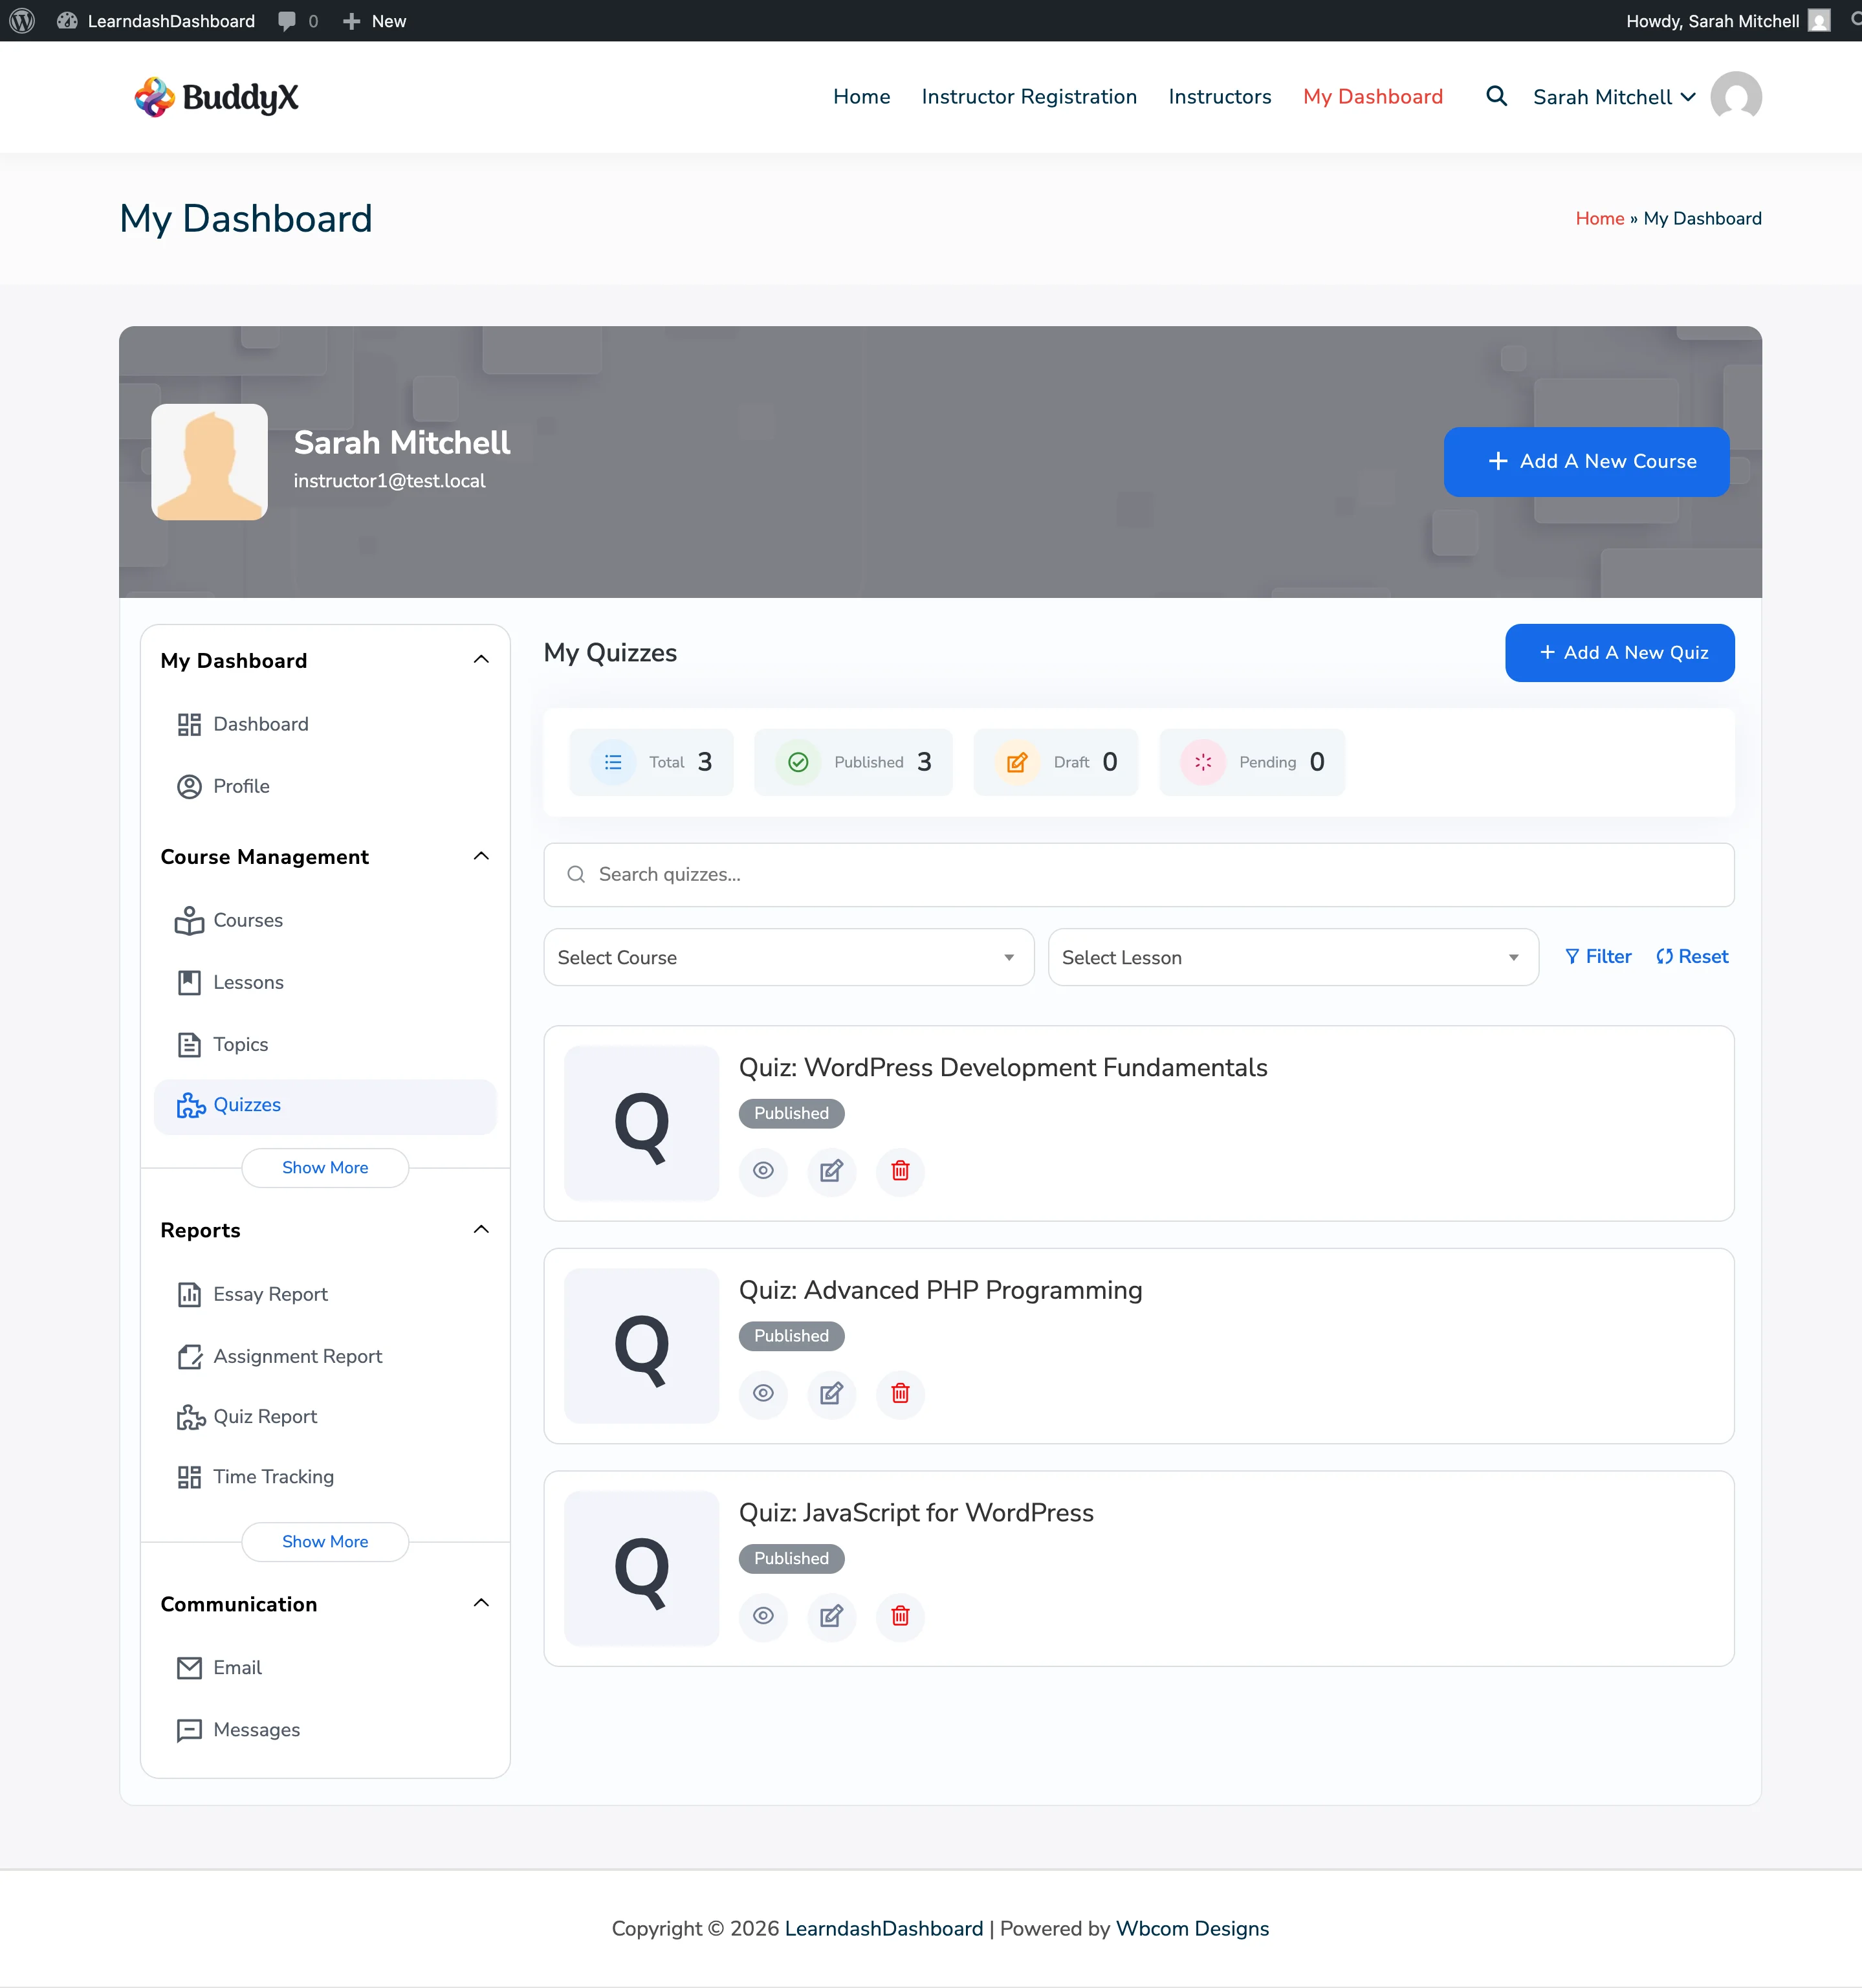
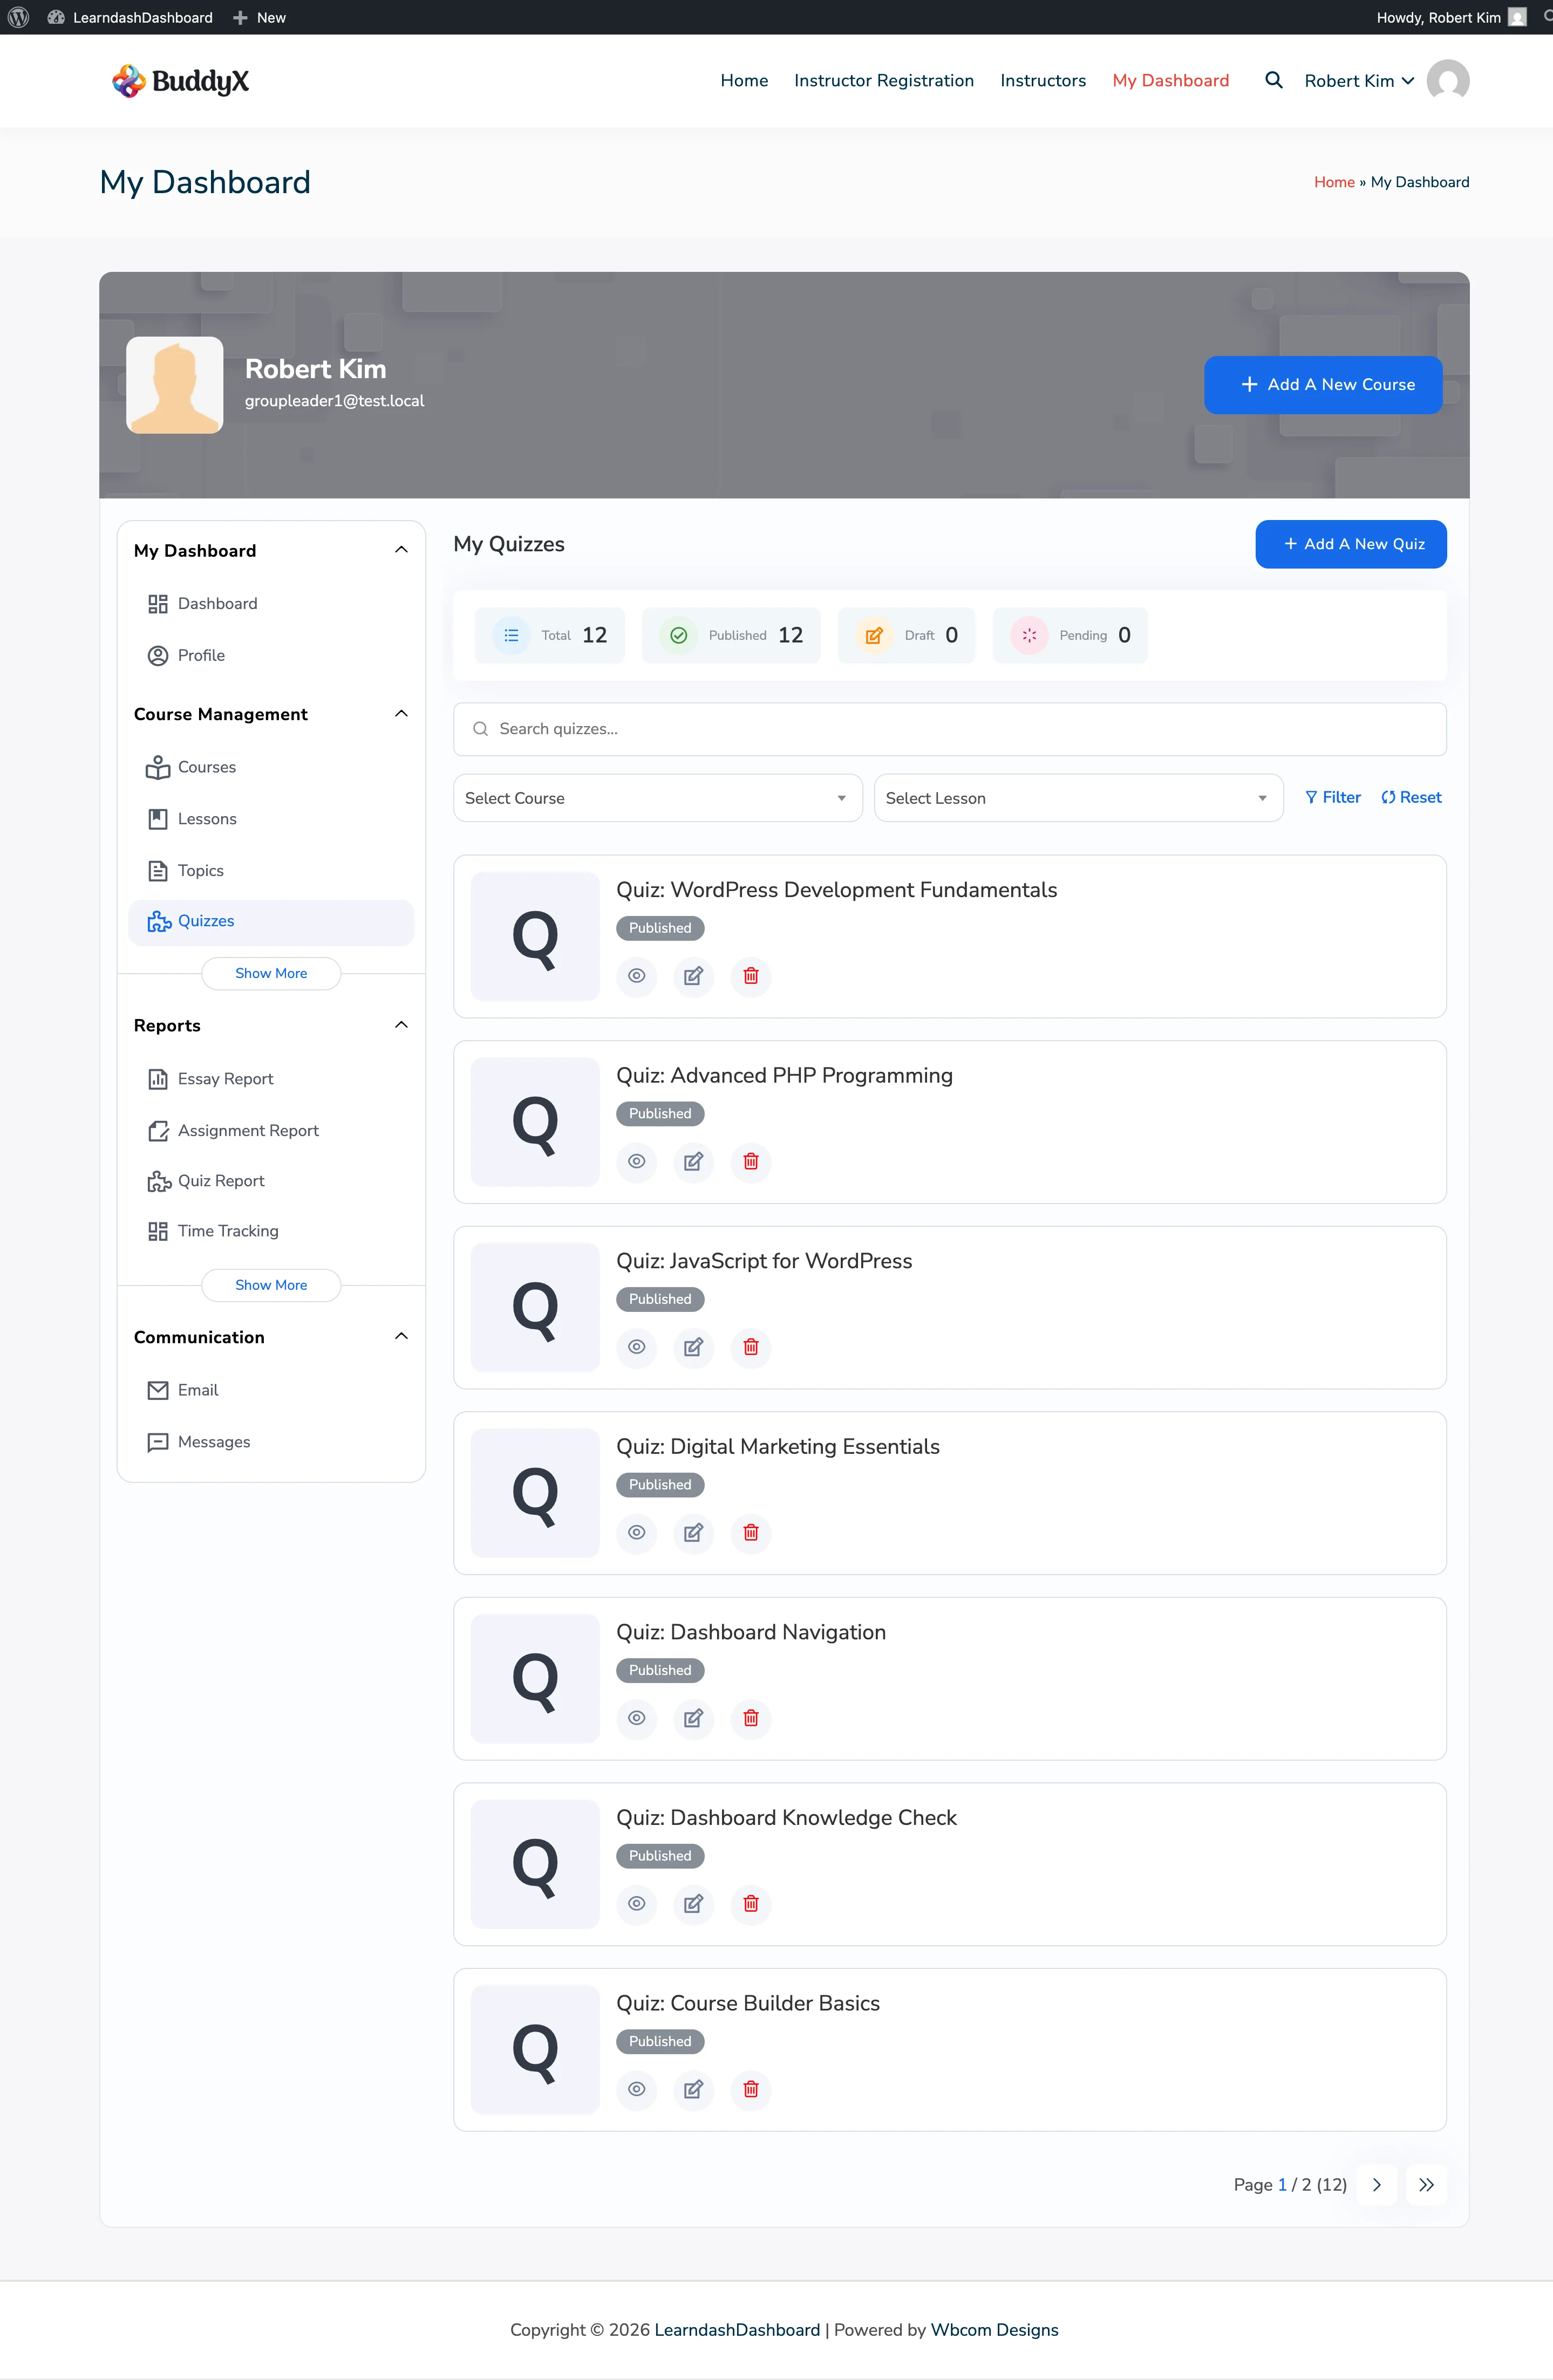
Admin Quizzes Listing Instructor Quizzes Listing Group Leader Quizzes Listing

Who Can Do What

Action Admin Instructor Group Leader
View quizzes All quizzes Own quizzes only Assigned quizzes (read-only)
Create quiz Yes Yes No
Edit quiz Yes Own quizzes only No
Delete quiz Yes Own quizzes only No

Each quiz card shows an access badge: Your Content, Shared, or View Only.

Viewing Your Quizzes

Go to My Dashboard > Quizzes. Each quiz card shows:

  • Quiz title
  • Publication status: Published, Draft, or Pending
  • Action buttons: View, Edit, Delete, and Edit with Elementor (if active)

Use the course filter to show all quizzes in a course (including lesson and topic quizzes). Select a lesson from the filter to narrow further. The list shows 7 quizzes per page.

Creating a Quiz

  1. Go to My Dashboard > Quizzes.

  2. Click Add New Quiz.

  3. Fill in the Post Data tab:

    Field Required Description
    Quiz Title Yes The name of your quiz
    Status No Published, Pending, or Draft
    Quiz Content No Instructions or intro text students see before starting
    Featured Image No The quiz thumbnail
  4. Switch to the Settings tab and configure your quiz options:

Passing and Scoring

Field Description
Passing Score Minimum percentage a student must score to pass
Show Points Display the point value of each question
Question Randomization Shuffle question order for every attempt
Random Questions Count How many questions to show from the full question pool
Question Completion Require students to answer every question before submitting

Time Limit

Field Description
Time Limit Turn on a countdown timer for the quiz
Time Limit (minutes) How many minutes students have to complete the quiz

Attempts and Retries

Field Description
Retry Restriction Limit how many times a student can retake the quiz
Allowed Attempts The maximum number of attempts
Retake Delay How long a student must wait before retrying

Display and Behavior

Field Description
Quiz Auto-Start Begin the quiz immediately when the page loads
Quiz Resume Let students continue an in-progress quiz where they left off
Show Answer Display correct answers after the student submits
Show Points Breakdown Show a detailed score breakdown per question
Quiz Materials Add reference resources students can view during the quiz

Question Display

Field Description
Questions Per Page Show questions one page at a time (0 shows all at once)
Question Overview Table Display a summary table of all questions
Custom Question Ordering Manually arrange questions using the quiz builder
Leaderboard Show a leaderboard of top scores

Results

Field Description
Result Page Send students to a custom page after they submit
Certificate Award a certificate when a student passes
Prerequisites Require students to pass another quiz first
  1. Use the Quiz Builder section to add and arrange questions.
  2. Click Save Quiz.

Adding Questions to a Quiz

Questions are created on the dedicated Questions tab. From a quiz edit form, you can also add questions directly using the Quiz Builder.

  1. Open the quiz edit form.
  2. Scroll to the Quiz Builder section in the Post Data tab.
  3. Add new or existing questions.
  4. Drag to reorder them.
  5. Click Save Quiz.

Editing a Quiz

  1. Use the course or lesson filter to locate the quiz.
  2. Click the Edit icon on the quiz card.
  3. Update any settings across the Post Data and Settings tabs.
  4. Click Save Quiz.

Deleting a Quiz

  1. Click the Delete icon on the quiz card.
  2. Confirm the deletion.

The quiz moves to the trash. Student attempt records are kept and are not deleted.

Managing Certificates

The Certificates tab lets instructors and admins design and manage certificate templates from the frontend dashboard. Students receive certificates when they complete a course or pass a quiz.

Screenshots

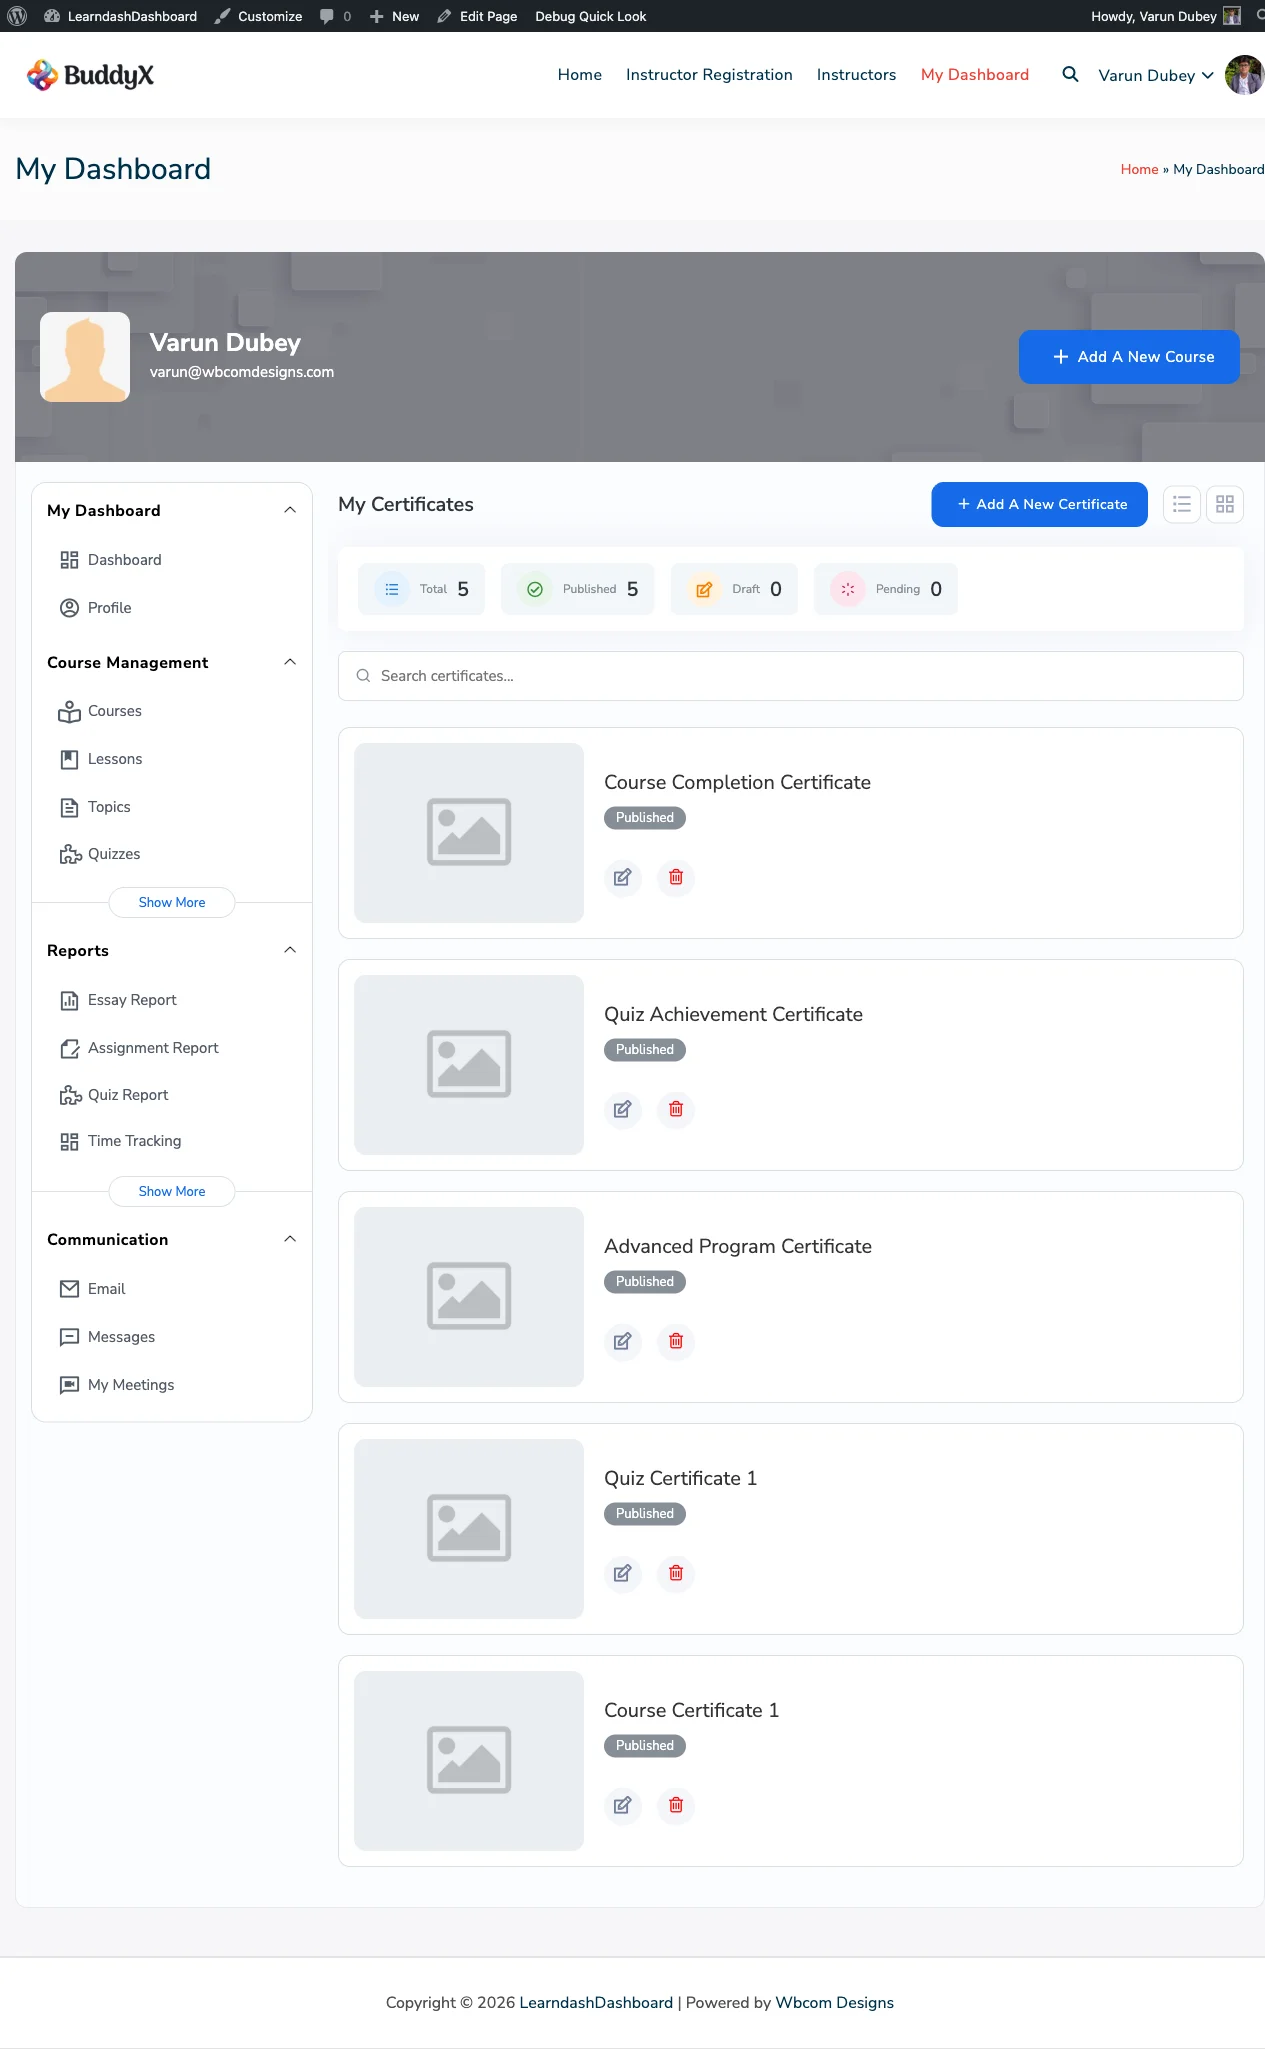
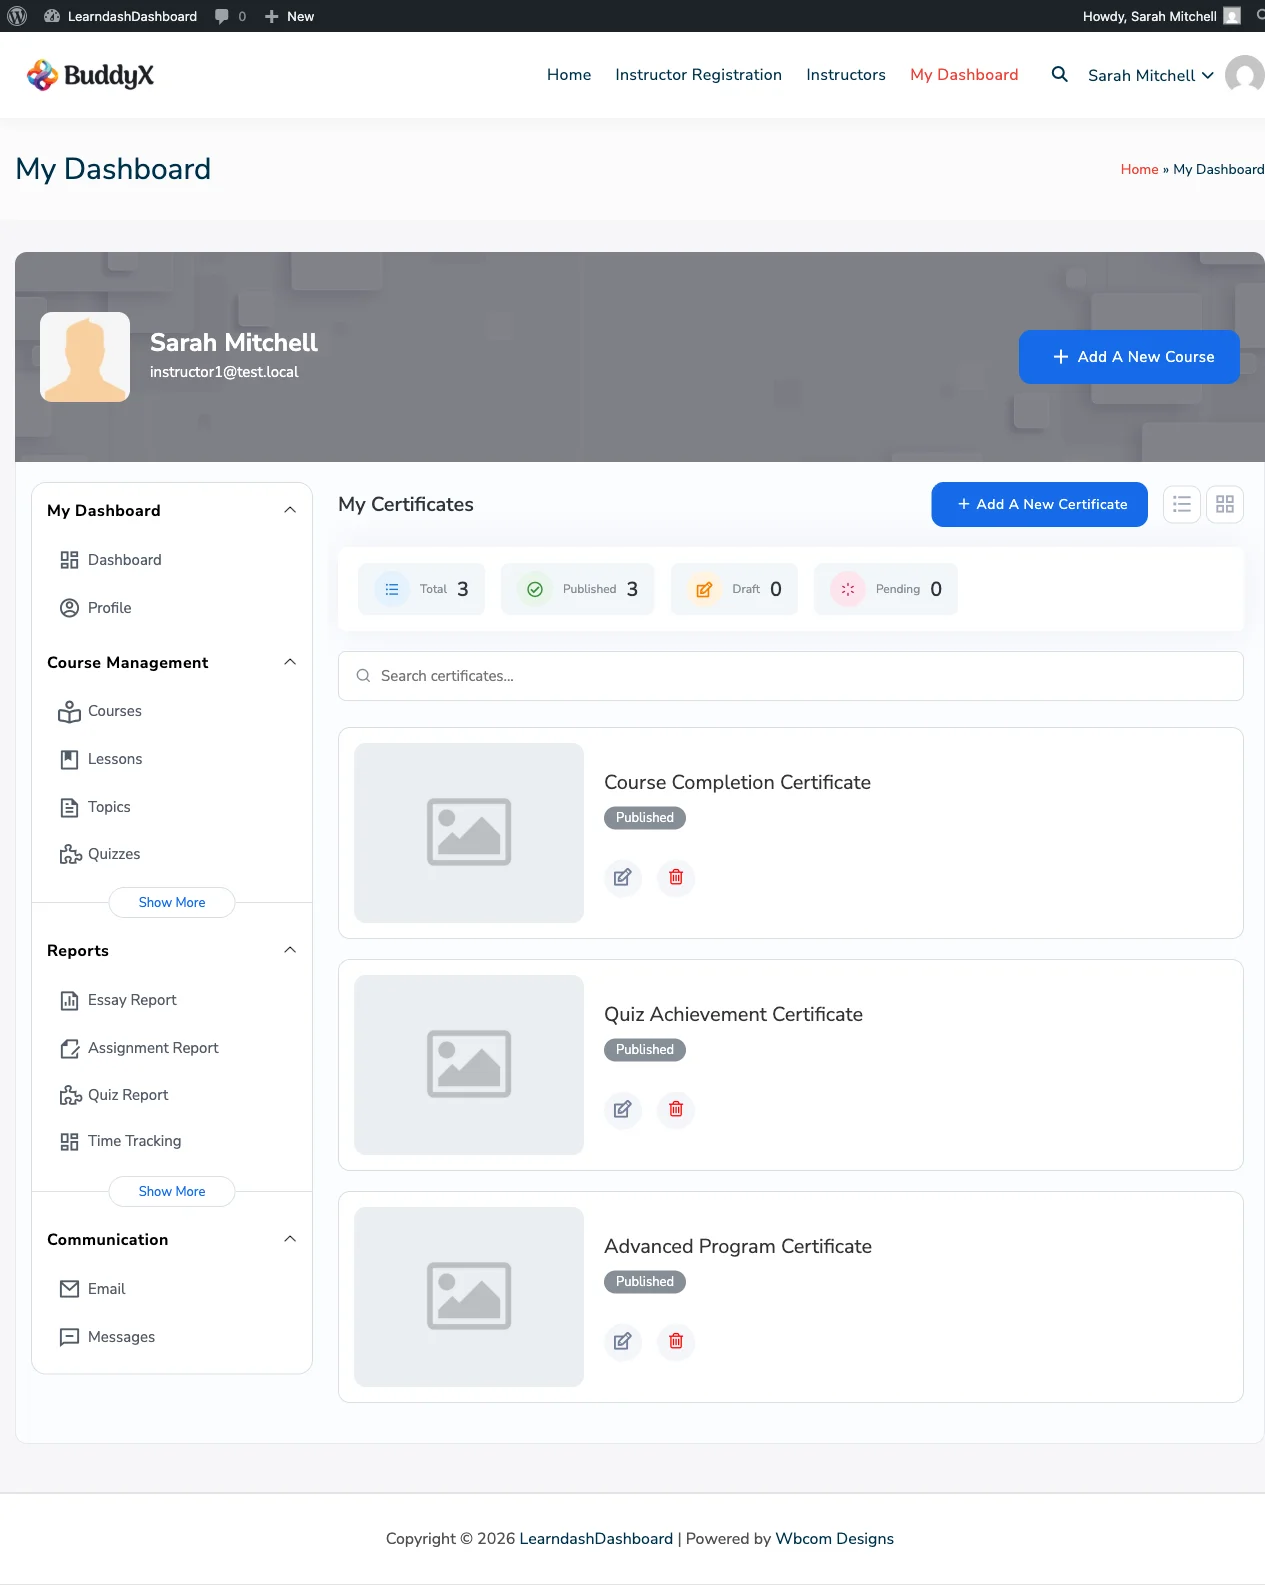
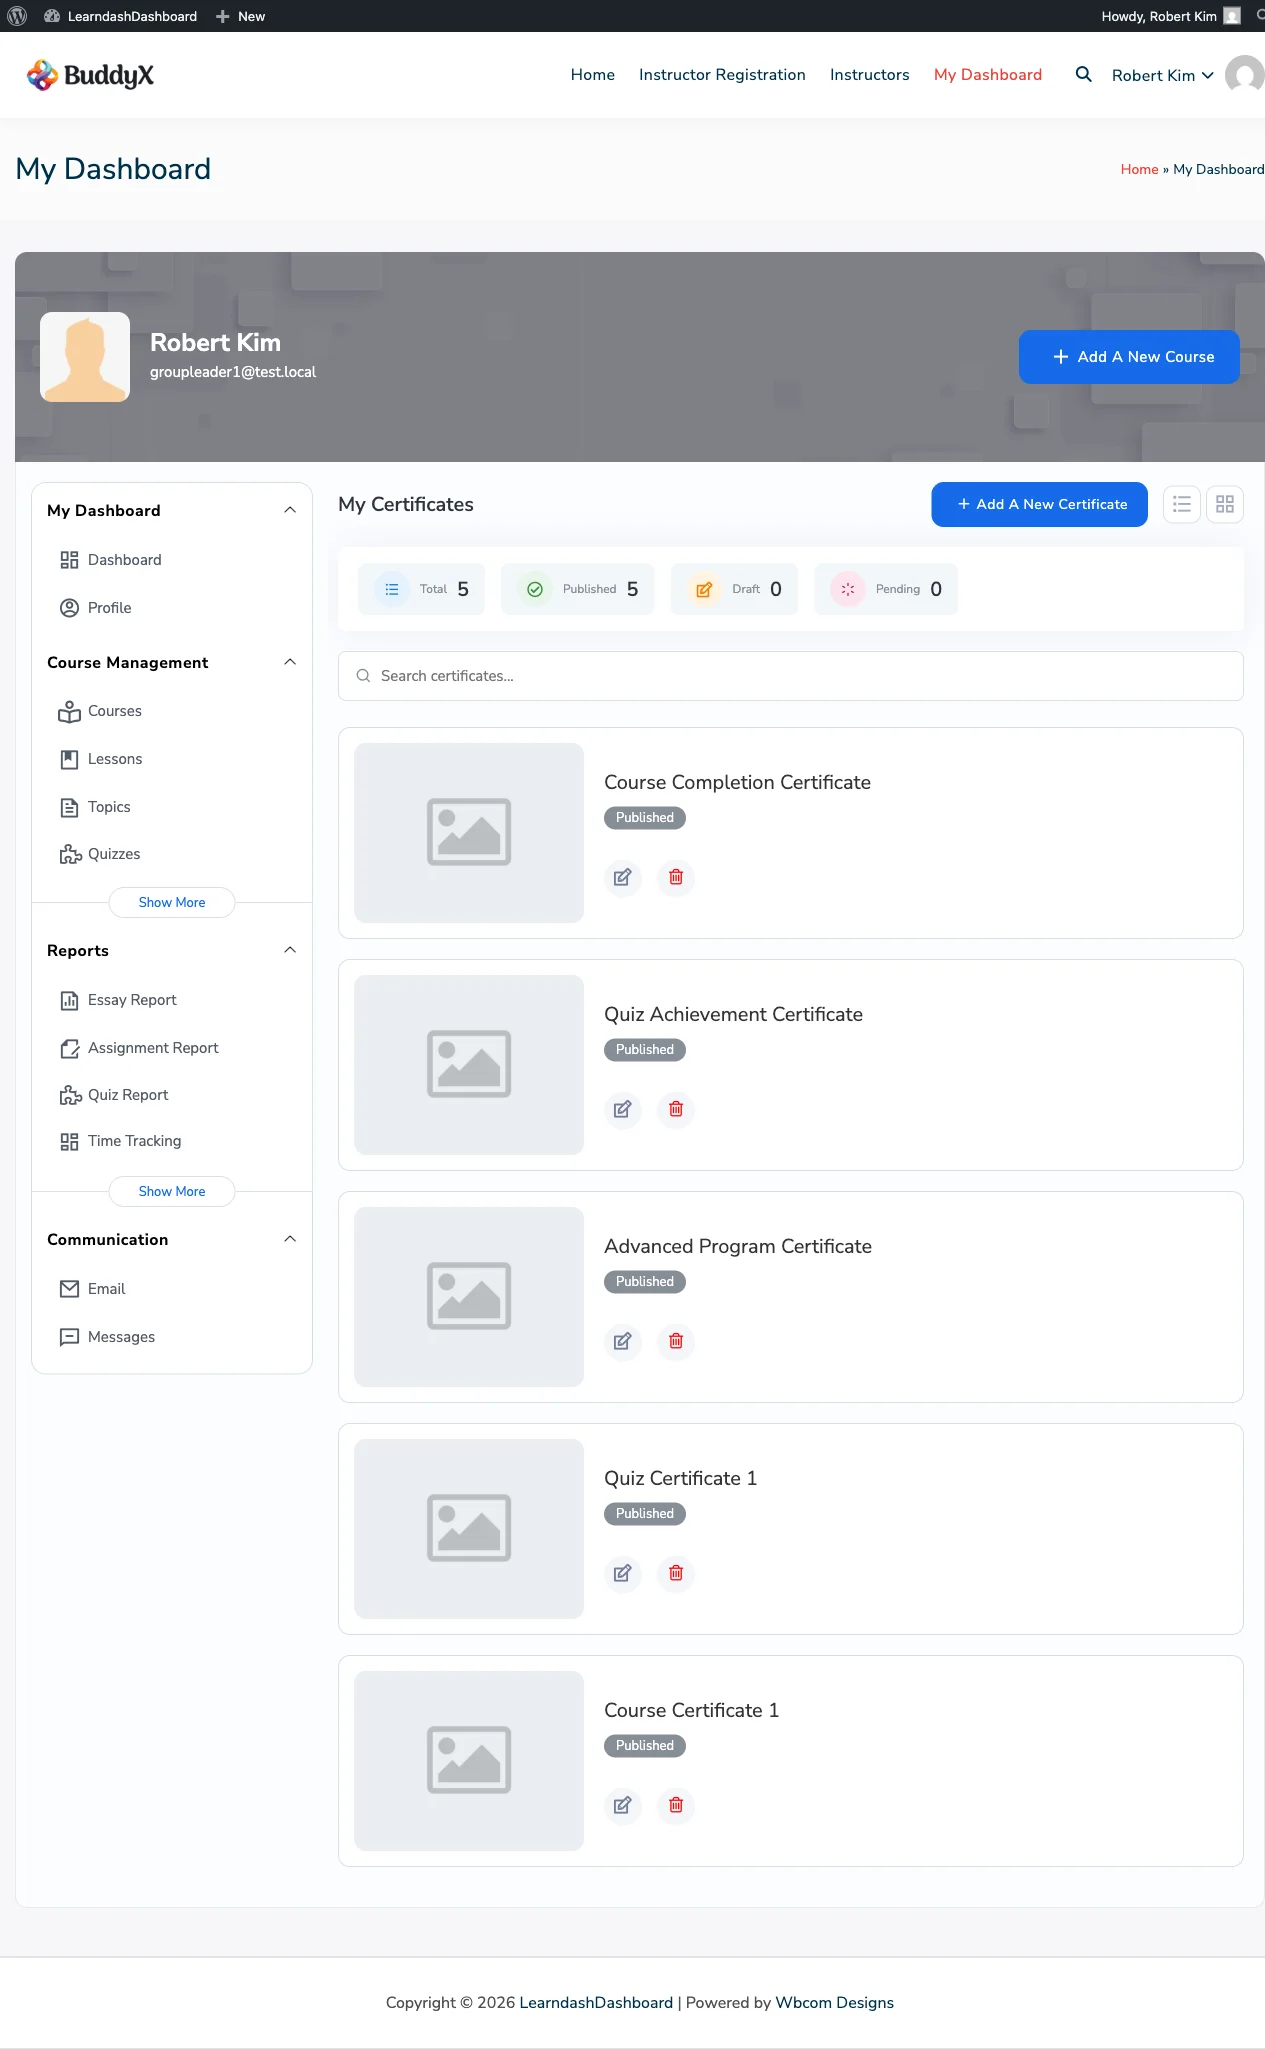
Admin Certificates Listing Instructor Certificates Listing Group Leader Certificates Listing

Who Can Do What

Action Admin Instructor Group Leader Student
View certificate list Yes Own only Assigned (read-only) No
Create certificate Yes Yes No No
Edit certificate Yes Own only No No
Delete certificate Yes Own only No No
View earned certificates - - - Own only

Students view their earned certificates through My Dashboard > My Certificates, not through this tab.

Viewing Your Certificates

Go to My Dashboard > Certificates. Each certificate card shows:

  • Certificate title
  • Publication status: Published, Draft, or Pending
  • Action buttons: View, Edit, Delete

Use the search field to filter by title. The list shows 7 certificates per page.

Creating a Certificate

  1. Go to My Dashboard > Certificates.

  2. Click Add New Certificate.

  3. Fill in the Post Data tab:

    Field Required Description
    Certificate Title Yes The name of the certificate
    Certificate Content No The certificate layout and text
    Featured Image No A background or decorative image
  4. Use the content editor to design the certificate. You can include dynamic information using these placeholders:

    Placeholder What it shows
    {user_login} Student's username
    {display_name} Student's display name
    {first_name} Student's first name
    {last_name} Student's last name
    {course_title} The course name
    {quiz_title} The quiz name
    {certificate_link} A direct link to the certificate
    {site_title} Your site name
    {date Y-m-d} The completion date
    {total_points} Total quiz points earned
    {percentage} The student's score as a percentage
  5. In the Settings tab, configure PDF options such as page orientation, size, and background image (if available).

  6. Click Save Certificate.

Awarding a Certificate When a Student Completes a Course

  1. Go to My Dashboard > Courses.
  2. Open the course edit form.
  3. Click the Settings tab.
  4. In the Course Certificate field, select your certificate template.
  5. Click Save Course.

Students receive the certificate when they complete all steps in the course.

Awarding a Certificate When a Student Passes a Quiz

  1. Go to My Dashboard > Quizzes.
  2. Open the quiz edit form.
  3. Click the Settings tab.
  4. In the Certificate field, select your certificate template.
  5. Set the Passing Score - students must meet or exceed this score to earn the certificate.
  6. Click Save Quiz.

Previewing a Certificate

  1. Find the certificate in your listing.
  2. Click the View icon (the eye icon) on the certificate card.

This opens the certificate page. Placeholders show example values since no real completion record exists during a preview.

Editing a Certificate

  1. Click the Edit icon on the certificate card.
  2. Update the title, content, or settings.
  3. Click Save Certificate.

Changes apply to certificates generated from this point forward. Certificates already issued to students are not affected.

Deleting a Certificate

  1. Click the Delete icon on the certificate card.
  2. Confirm the deletion.

The certificate template moves to the trash. Courses or quizzes that used it will no longer award a certificate until you assign a new one.

Announcements

The Announcements tab lets instructors and admins publish updates for their students directly from the frontend dashboard. Students see announcements on their own dashboard, filtered to the courses they are enrolled in.

Screenshots

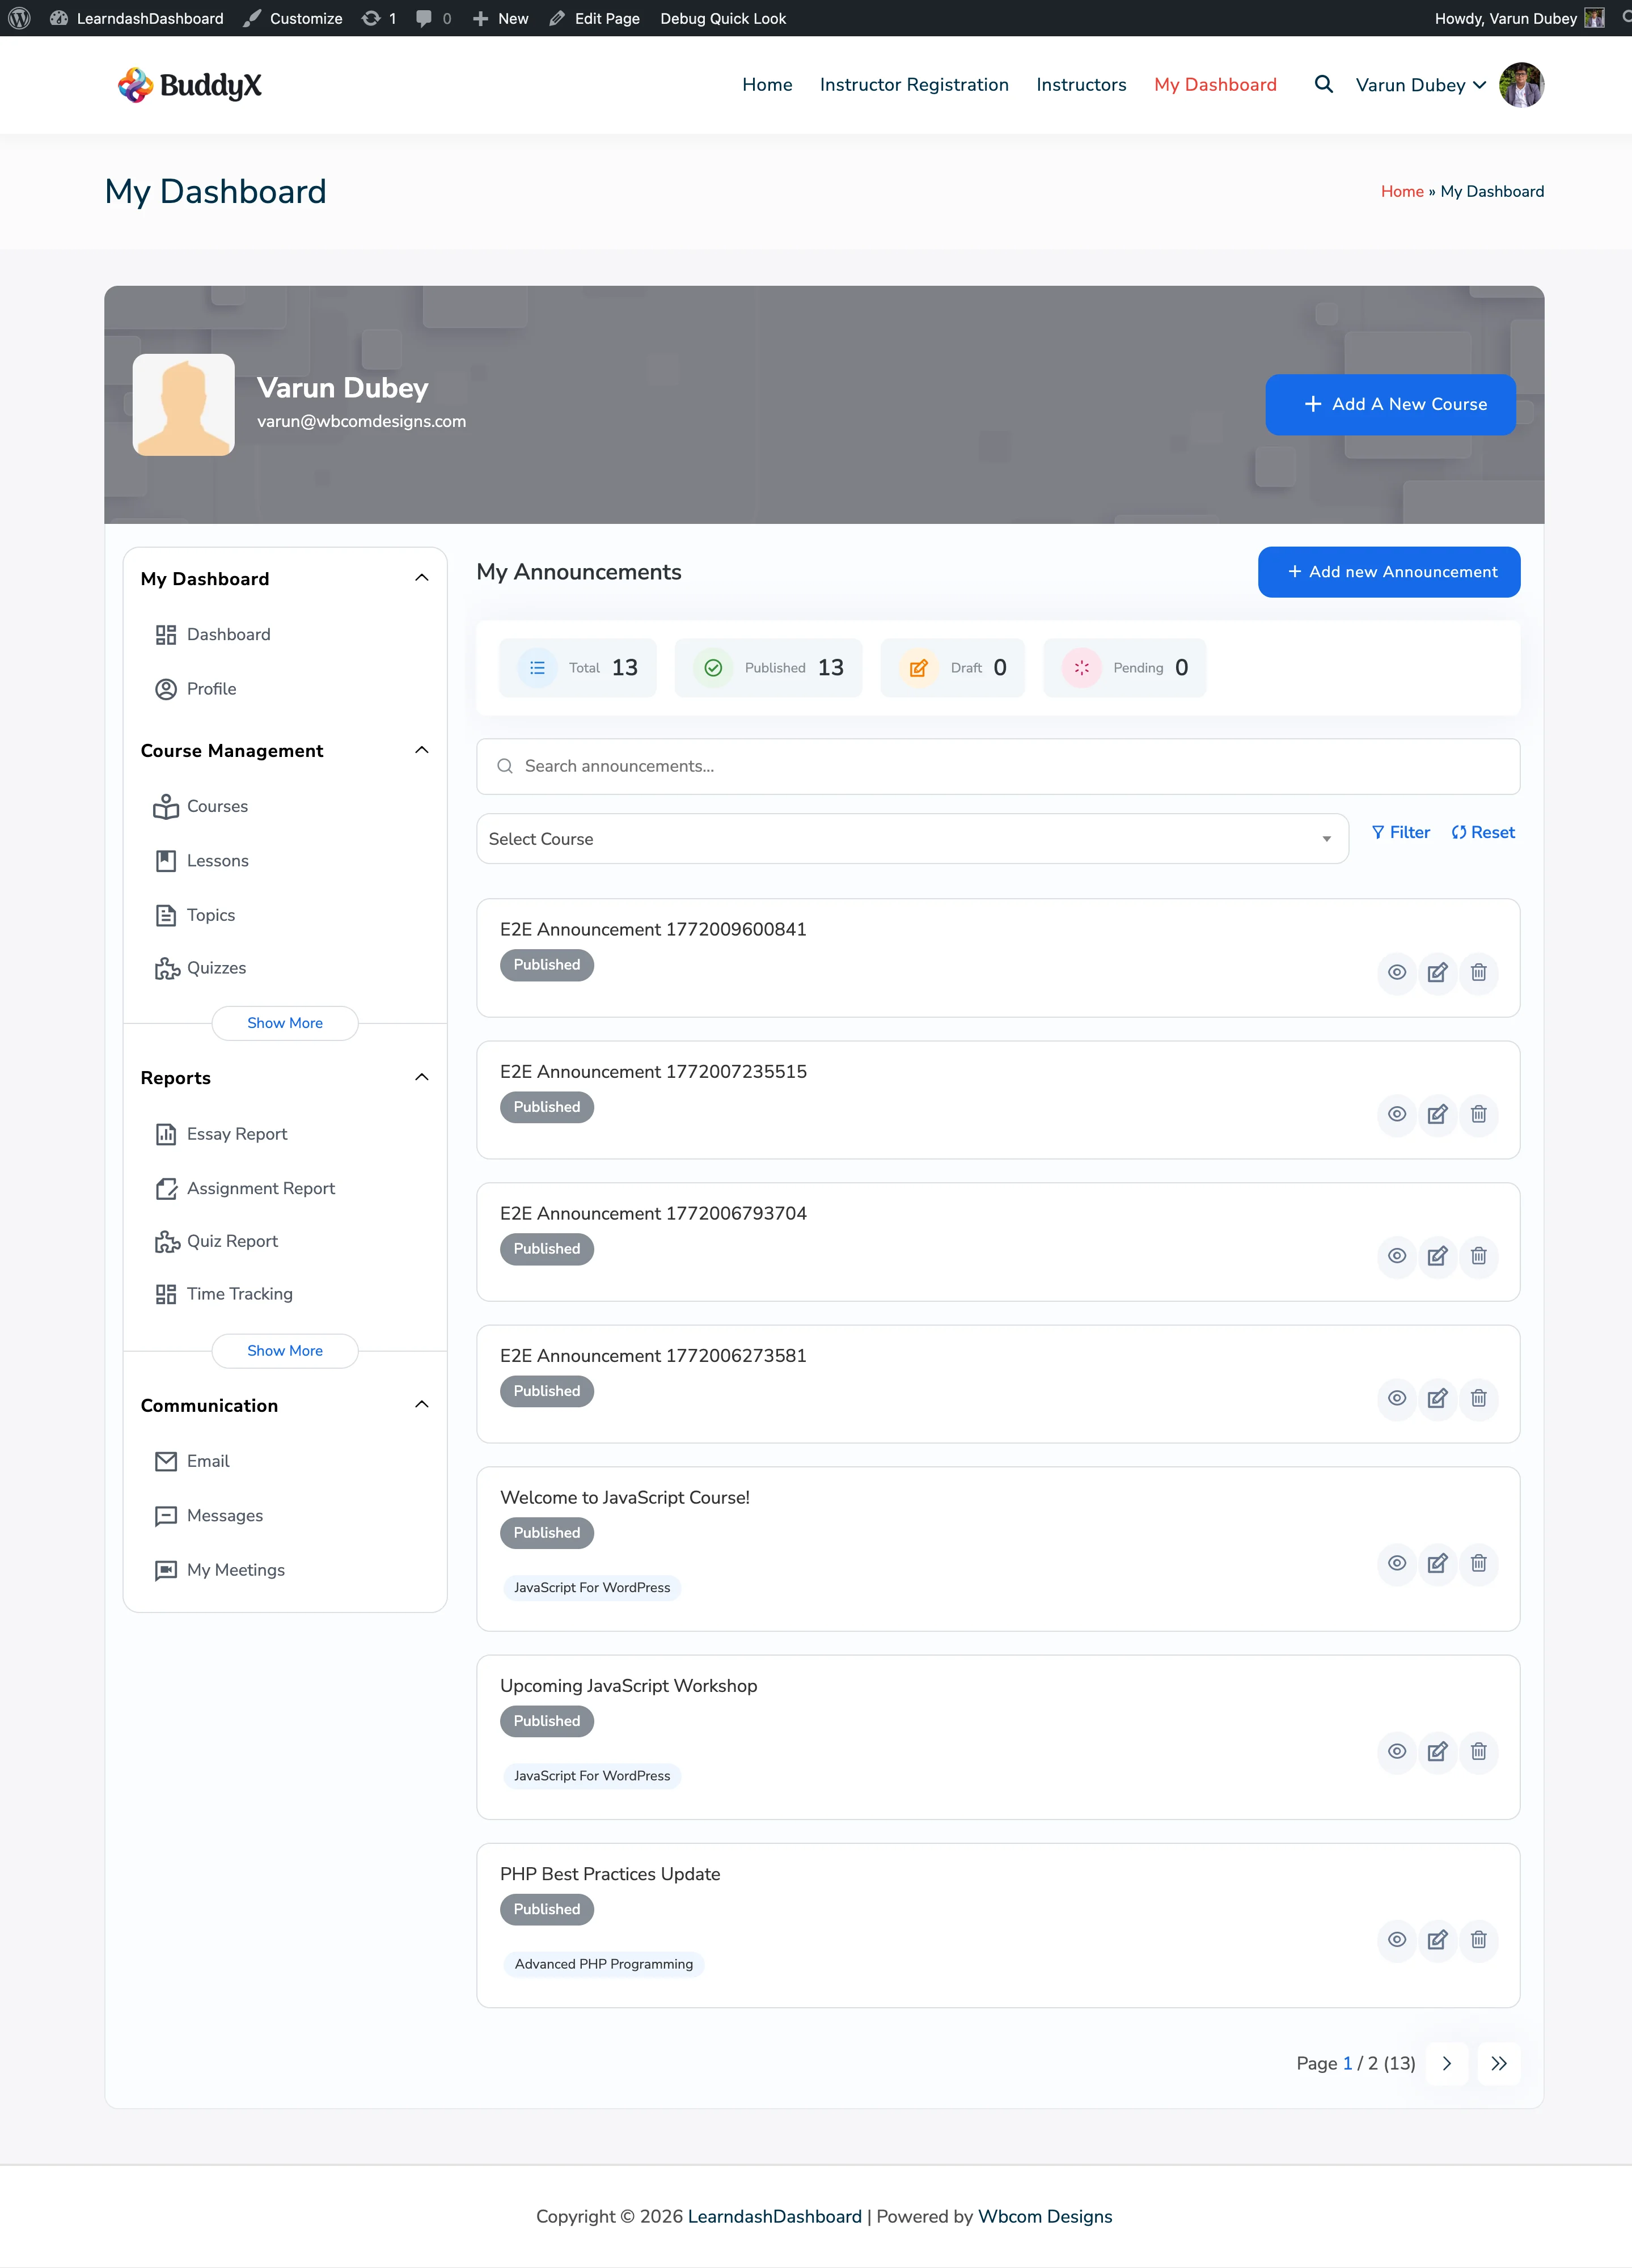
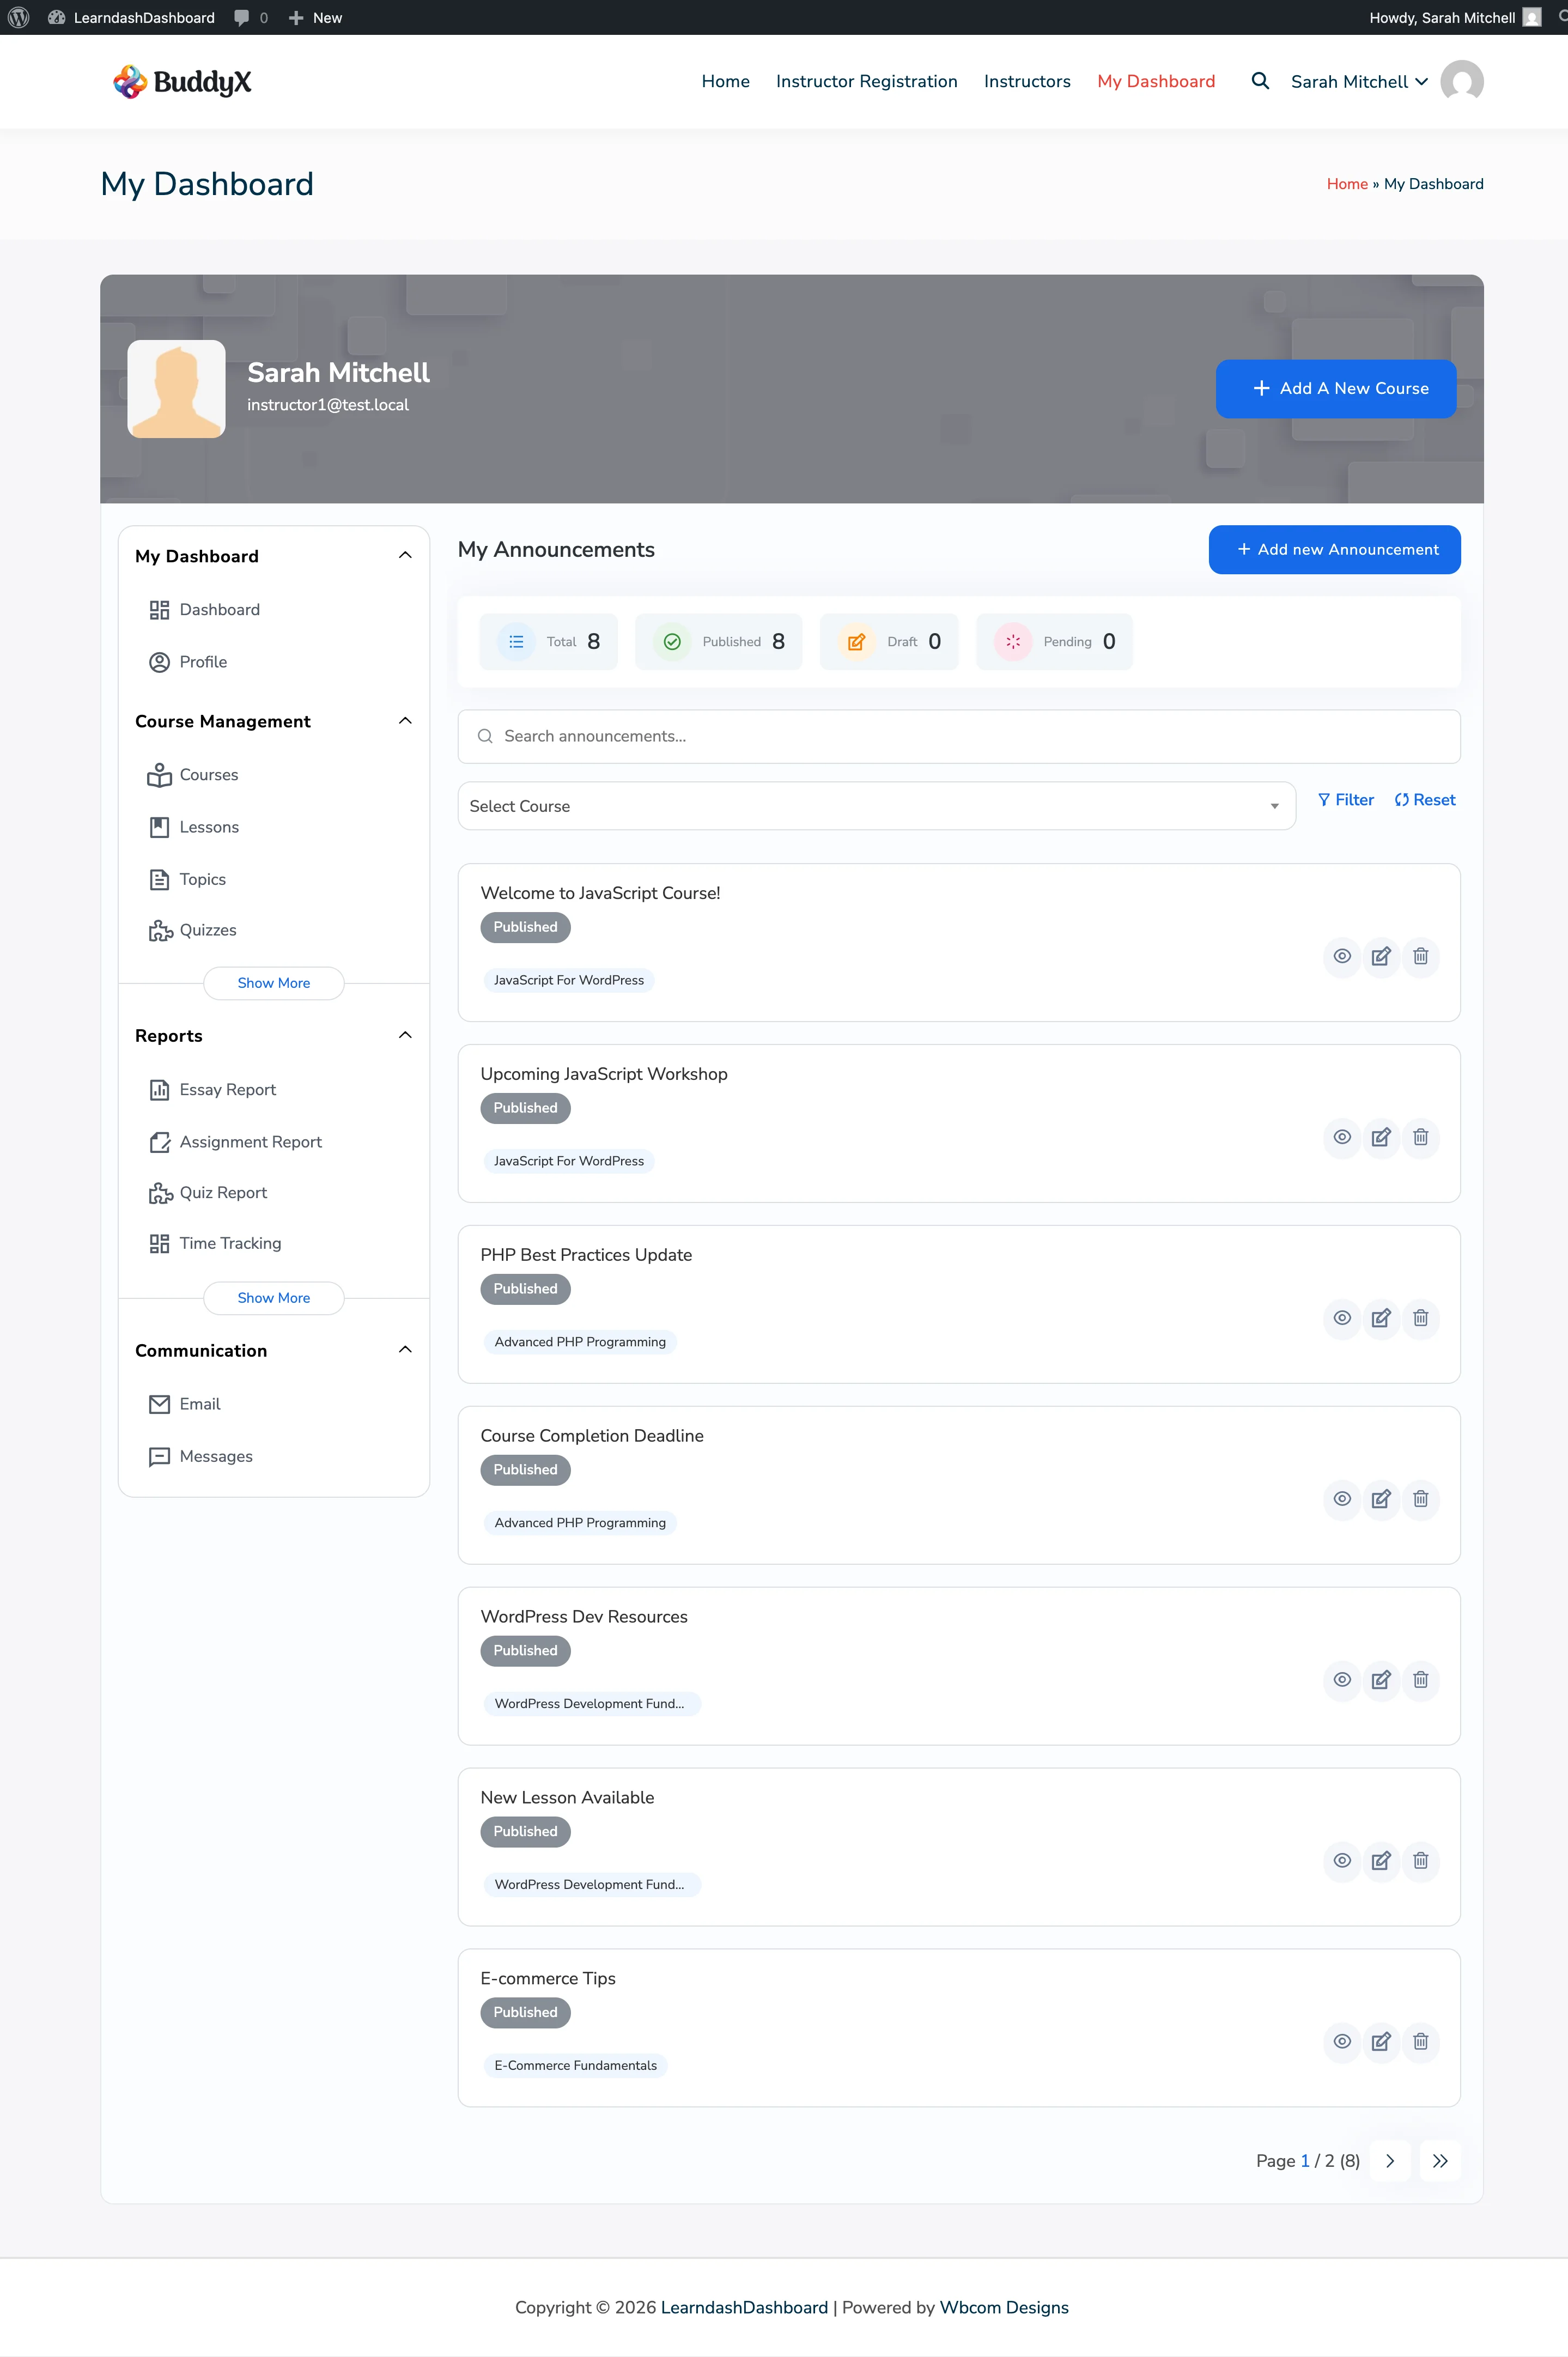
Admin Announcements Listing Instructor Announcements Listing

Who Can Do What

Action Admin Instructor Group Leader Student
View announcement list All announcements Own + course-linked No No
Create announcement Yes Yes No No
Edit announcement Yes Own only No No
Delete announcement Yes Own only No No
View announcements Yes Yes Yes Enrolled students only

Group Leaders do not have access to the Announcements management tab. Students see announcements through their own Announcements tab, showing only updates for courses they are enrolled in.

Viewing Your Announcements

Go to My Dashboard > Announcements. Each announcement card shows:

  • Announcement title
  • Publication status: Published, Draft, or Pending
  • The course it targets
  • Action buttons: View, Edit, Delete

Use the course filter dropdown or the search bar to narrow your list. The list shows 7 announcements per page.

Instructors see announcements they created, plus any announcements tied to courses they manage. Admins see all announcements.

Creating an Announcement

  1. Go to My Dashboard > Announcements.

  2. Click Add New Announcement.

  3. Fill in the fields:

    Field Required Description
    Title Yes The announcement headline your students will see
    Content No The full announcement message
    Select Course No Target this announcement to students enrolled in a specific course
    Notify Enrolled Students No Send an email to all enrolled students when you publish
  4. Click Save Announcement.

The Notify Enrolled Students option only appears after you select a course. When turned on, an email goes out to all students in that course when the announcement is published.

Targeting an Announcement to a Specific Course

When you select a course, only students enrolled in that course see the announcement. If you do not select a course, the announcement is visible to all students on the dashboard.

To change the course after creating an announcement:

  1. Click the Edit icon on the announcement card.
  2. Update the Select Course field.
  3. Click Save Announcement.

Editing an Announcement

  1. Click the Edit icon on the announcement card.
  2. Update the title, content, course, or notification setting.
  3. Click Save Announcement.

Editing a published announcement does not send another email to students. To notify students of a change, use the Email tab to send a separate message.

Deleting an Announcement

  1. Click the Delete icon on the announcement card.
  2. Confirm the deletion.

The announcement moves to the trash and immediately disappears from the student-facing view.

What Students See

Students go to My Dashboard > Announcements to read updates. Only published announcements for their enrolled courses appear here.

Managing Questions

Overview

The Questions tab lets you create and manage quiz questions directly from the dashboard. You can build questions for any quiz in your courses without switching to the WordPress admin.

Find your questions at My Dashboard > Questions in the sidebar.


Who Can Access Questions

Role Access
Administrator All questions on the site
Instructor Questions they created + questions in shared courses
Group Leader Questions in courses assigned to their groups

Viewing Your Questions

The Questions list shows each question with:

  • Question title
  • Status badge (Published, Draft, or Pending)
  • Access badge showing your relationship to the question:
    • Your Content (green) - you created this question
    • Shared (blue) - you have edit access as a co-instructor
    • View Only (gray) - you can see but not edit this question

A stats bar at the top displays counts for Total, Published, Draft, and Pending questions.


Filtering Questions

Use the filter bar above the question list to narrow results:

Filter What it does
Course Show questions from a specific course
Lesson Narrow further to a specific lesson
Quiz Show only questions in a specific quiz
Search Find questions by title

Filters are chained - selecting a course narrows the lesson options, and selecting a lesson narrows the quiz options.


Creating a Question

  1. Click Add New at the top of the Questions tab.
  2. Fill in the question details:

Basic Fields

Field Description
Question Title The title for this question
Question Content The full question text (rich editor with media support)
Featured Image An optional image for the question

Answer Type

Choose from eight question types:

Type Description
Single Choice One correct answer from multiple options
Multiple Choice Multiple correct answers can be selected
Free Choice Student types in a free-text answer
Sorting Choice Student arranges answers in the correct order
Matrix Sorting Student matches items across columns
Fill in the Blank Student completes missing words in a sentence
Assessment Scored on a scale rather than right or wrong
Essay / Open Answer Student writes a long-form response

Points

Field Description
Points The point value for this question (default: 1)
Different points for each answer Toggle to assign individual point values to each answer option

Feedback Messages

Field Description
Message with correct answer Shown when the student answers correctly
Message with incorrect answer Shown when the student answers incorrectly
Same message for both Toggle to use one message regardless of the answer

Hint

Field Description
Activate hint Toggle to enable a hint for this question
Hint content The hint text shown to students who request it
  1. Click Save to create the question.

Editing a Question

  1. Click the Edit (pencil) icon next to any question you have edit access to.
  2. Update the fields and click Save.

You can edit questions you created and questions in courses shared with you as a co-instructor.


Deleting a Question

Click the Delete (trash) icon next to the question. The question is permanently removed from both the dashboard and the associated quiz.


Quiz Association

Each question belongs to a quiz. When you create a question from within a quiz context (for example, by clicking "Add Question" from the quiz edit screen), the quiz association is set automatically. You can also set or change the quiz association manually using the Quiz field on the question form.


Course Cloning

Overview

Course Cloning lets you duplicate an entire course - including all its lessons, topics, quizzes, and questions - in a single click. The clone is saved as a draft so you can review and customize it before publishing.


Who Can Clone Courses

Role Access
Administrator Can clone any course
Instructor Can clone courses they created or are a co-instructor on
Group Leader Cannot clone courses
Student Cannot clone courses

How to Clone a Course

  1. Go to My Dashboard > My Courses.
  2. Find the course you want to clone.
  3. Click the Clone icon (copy icon) in the course card footer.
  4. A confirmation dialog appears showing what will be duplicated:
    • Number of Lessons
    • Number of Topics
    • Number of Quizzes
    • Number of Questions
  5. Click Clone Course to start.
  6. A progress spinner appears while the course is being duplicated. Large courses may take a moment.
  7. When complete, click Edit New Course to open the cloned course directly in the dashboard editor.

What Gets Cloned

The cloning process creates a full deep copy of the course hierarchy:

Content What happens
Course Duplicated with title "(Copy)" appended, saved as Draft
Lessons All lessons duplicated as Drafts, linked to the new course
Topics All topics duplicated as Drafts, linked to the correct new lessons
Quizzes All quizzes duplicated as Drafts, including quiz engine data
Questions All questions duplicated and linked to their new quizzes
Categories & Tags Course categories and tags are copied
Course Settings All course settings are preserved

What Is NOT Cloned

Data Reason
Student enrollments The clone starts with no enrolled students
Co-instructor assignments You are the sole author of the new course
Group associations The clone is not assigned to any groups
Quiz attempt history No student data is carried over

After Cloning

The cloned course is saved as a Draft. Before publishing:

  1. Update the course title (remove "(Copy)" and give it a meaningful name).
  2. Review the course content - all lessons, topics, and quizzes are also drafts.
  3. Update any settings specific to the new course (pricing, access settings, etc.).
  4. Publish the course and its content when ready.

Co-Instructor Sharing

Overview

Co-Instructor Sharing lets a course author invite other instructors to collaborate on their course. Shared instructors get full access to view and edit the course content, see enrolled students, and clone the course - all from their own dashboard.


How to Share a Course

  1. Go to My Dashboard > My Courses.
  2. Click Edit on the course you want to share.
  3. In the course editor, find the Share Course field.
  4. Search for instructors by name and select one or more from the dropdown.
  5. Save the course.

Only users with the Instructor role appear in the sharing dropdown. You cannot add administrators, group leaders, or students as co-instructors through this field.


Who Can Share

Role Can share courses?
Administrator Yes - can share any course
Instructor (course author) Yes - can share their own courses
Co-instructor No - only the original author or an admin can modify sharing

What Co-Instructors Can Do

Once added as a co-instructor, the shared course appears in the instructor's My Courses tab with a blue Shared badge.

Capability Available?
View the course in My Courses Yes
Edit course content (lessons, topics, quizzes, questions) Yes
View enrolled students via My Students Yes
Clone the course Yes
Remove themselves as co-instructor No (only the author or admin can)
Share the course with others No
Delete the course No

Access Badges

Throughout the dashboard, content items show colored badges indicating your relationship:

Badge Color Meaning
Your Content Green You are the original author
Shared Blue You are a co-instructor with edit access
View Only Gray You can see but not edit this content

These badges appear on courses, lessons, topics, quizzes, and questions.


Course Content Library

When editing a course, a Course Content Library sidebar appears. This lets you drag and drop or add previously created lessons, topics, and quizzes into the course.

Role What the library shows
Administrator All lessons, topics, and quizzes on the site
Instructor Only their own authored content

Each item in the library displays its title, category tags, and an Add button. Use the search field to find specific items, and the Load More button to browse further.


Group Management

Groups Overview

The Groups section shows all the LearnDash groups you have access to. Admins see every group on the site. Group Leaders see only the groups they are assigned to manage.

Screenshots

Admin View

Admin Groups Overview

Group Leader View

Group Leader Groups Overview

How to Access Your Groups

Go to your dashboard and click Groups in the sidebar menu.

You can switch between two views:

  • My Groups - groups you are a member of
  • Group Administrations - groups you are assigned to manage

What You See on Each Group Card

Each group displays:

  • Group name and cover image
  • Number of courses assigned to the group
  • Number of students currently enrolled
  • Seat indicator - shows seats used out of the total available. Turns amber when the group is nearly full, and red when completely full. (Requires the Uncanny Groups add-on.)
  • Hierarchy label - shows whether a group is a parent group or a child of another group. (Requires the Uncanny Groups add-on.)

Actions You Can Take

Each group card may show one or more of the following buttons, depending on your role:

Action Who sees it
Edit Admins always; Group Leaders if their account has group management enabled
View Courses Admins always; Group Leaders if course management is enabled for their account
Manage Codes Admins and Group Leaders, only for groups that use enrollment codes

Browsing Multiple Groups

The list shows 10 groups at a time. Use the pagination controls at the bottom of the page to move between pages.

Requirements

  • LearnDash LMS must be active with at least one group created
  • You must be assigned as an admin or group leader to see groups here
  • Seat indicators and hierarchy labels require the Uncanny Groups for LearnDash add-on

Creating a New Group

The group creation wizard walks you through five simple steps to set up a LearnDash group. You do not need access to the WordPress admin area.

Who Can Create Groups

Role Can create groups
Administrator Yes
Group Leader Yes, if your account has group management turned on
Instructor No
Student No

If you do not see the Add a New Group button, ask your site administrator to enable group management for your account.

Starting the Wizard

  1. Go to your dashboard and click Groups in the sidebar.
  2. Click Add a New Group in the top-right area.
  3. The five-step wizard will open.

Step 1 - Basic Info

Enter the group's name, description, and cover image.

  • Group Name - required. This is the name students and leaders will see.
  • Description - optional. Shown to group members on the group page.
  • Cover Image - optional. Displayed on the group listing card.

Step 2 - Courses

Select which courses belong to this group. Students who join the group automatically gain access to all selected courses.

Step 3 - Members

Add students to the group right away. Search for students by name or email address. Students you add here are enrolled immediately and can access all courses from Step 2.

Step 4 - Leaders

Assign Group Leaders who will manage this group. Leaders can view the group in their own dashboard under Group Administrations.

Step 5 - Settings

Configure optional group settings:

  • Pricing and access type (free, paid, or invitation only)
  • Maximum group capacity
  • Redirect page after a student enrolls

Review and Publish

After Step 5, a summary screen shows everything you've entered. Click Publish Group to create it, or use Previous to go back and make changes.

When editing an existing group, the final button reads Update Group instead.

Editing an Existing Group

From the group listing, click Edit on any group card. The same five-step wizard opens with your existing settings pre-filled.

If you have the Uncanny Groups add-on active, the edit screen also shows a Seat Management panel and group hierarchy information above the wizard.

Group Enrollment Codes

Enrollment codes let students join a group on their own - no manual approval needed. Each code can only be used once. When a student redeems a code, they are added to the group and gain access to all courses in it.

Requirements

  • The Uncanny Groups for LearnDash add-on must be installed and active.
  • The group must be set up to use enrollment codes.
  • You must be an administrator or a Group Leader assigned to the group.

If Uncanny Groups is not active, the enrollment codes option will not appear.

How to Open Enrollment Codes

From the group listing, click Manage Codes on a group card. This button only appears for groups that use enrollment codes.

Codes Summary

At the top of the codes screen, three numbers show you the current status at a glance:

Card What it shows
Total Codes All codes ever generated for this group
Available Codes that have not been used yet
Redeemed Codes that students have already used

Generating New Codes

  1. Click Generate Codes.
  2. Enter the number of codes you want to create (between 1 and 500).
  3. Click Generate.

The list updates automatically and the summary counts refresh.

Understanding the Codes List

The codes list shows all codes for this group with the following information:

Column Description
Code The enrollment code string to share with students
Status Available or Redeemed
Redeemed By The name of the student who used the code
Date Creation date for available codes; redemption date for redeemed codes

Exporting Codes

Click Export CSV to download all codes for this group as a spreadsheet. The file includes each code, its status, who redeemed it, and the relevant date.

Sharing Codes with Students

Copy individual codes and send them to your students by email or any other method you prefer. Students enter a code on the enrollment code redemption page on your site to join the group.

Ask your site administrator for the link to the redemption page if you are not sure where it is.

Group Leader Features

As a Group Leader, you see a focused view of the dashboard that shows only the groups, students, and content you are assigned to manage. Your exact capabilities depend on settings your site administrator has configured.

What Your Administrator Controls

Your site administrator sets which actions you can take. Go to WordPress Admin > LearnDash > Groups > Group Leader User to review or update these settings.

Setting What it controls
Manage Groups Shows the Edit button and lets you create new groups
Manage Courses Shows a View Courses button on your group cards
Manage Users Lets you add and remove students within your groups

If none of these settings are enabled, you can still view your groups but will not see any action buttons.

Your Groups View

When you log in, the Groups section shows only the groups you are assigned to lead. Switch to Group Administrations to see just the groups you manage.

Administrators always see all groups on the site regardless of these settings.

Managing Your Group Members

When user management is enabled for your account, you can:

  1. Open a group from your group listing.
  2. Go to Bulk Management > Enroll Group to add students.
  3. Go to Bulk Management > Unenroll to remove students.
  4. Go to Bulk Management > Export Students to download your member list as a CSV file.

When you remove a student from a group, they also lose access to the courses in that group.

Managing Course Content

When course management is enabled, a View Courses button appears on each of your group cards. Click it to browse the courses in that group.

Depending on your level of access, you may be able to view course content only, or also edit lessons, topics, and quizzes from the dashboard.

Creating and Editing Groups

When group management is enabled:

  • An Add a New Group button appears on your group listing.
  • An Edit button appears on the group cards for groups you manage.
  • You use the same five-step wizard as an administrator to create or edit groups.

You cannot edit groups you do not manage, even if you can see them listed.

Reports Available to Group Leaders

You have read access to the following reports, limited to students in your assigned groups:

Report What you can do
Essay Report Review and grade essays from your students
Assignment Report View assignments submitted by your students
Quiz Report View quiz results for your students
Insights See aggregated analytics for your groups
Bulk Management Enroll, unenroll, and export students in your groups

Enrollment Codes

If your site uses Uncanny Groups and your group is set up with enrollment codes, you will see a Manage Codes link on the group card. You can generate and export codes for your assigned groups only.

Reports & Analytics

Insights Dashboard

Overview

The Insights tab gives you a visual snapshot of how your courses and students are performing. Charts update automatically when you change the date range. Each chart can be turned on or off by your site administrator.

Admins, instructors, and group leaders all have access to Insights. Students do not.

Screenshots

Admin View

Admin Insights Dashboard

Instructor View

Instructor Insights Dashboard

Group Leader View

Group Leader Insights Dashboard

How to Access Insights

Go to your dashboard and click Insights in the sidebar menu.

Filtering by Date Range

Use the From and To date fields at the top of the page to focus all charts on a specific time period. The default view covers the current calendar year.

Available Charts

Course Completion Rate

Shows what percentage of students have completed, are in progress, or have not yet started your courses. Summary tiles below the chart display the total number of students, how many completed, how many are in progress, and how many have not started.

A line chart that tracks new enrollments over time. Use this to spot busy periods or measure how well a promotion performed.

Time Spent on Courses

Shows the total time students have spent learning across your courses. Requires the Time Tracking feature to be enabled on your site.

Top Courses

Ranks your courses by the number of completions in the selected date range. Quickly see which courses are most popular.

  • Admins see all courses.
  • Instructors see their own courses.
  • Group Leaders see courses assigned to their groups.

Course Drop-off

Shows the lesson or topic where students most often stop progressing. Use this to identify content that may need improvement.

Revenue Per Course

Shows earnings broken down by course. Only visible when the monetization feature is active on your site.

Instructor Performance

An admin-only table comparing instructors by number of courses, enrolled students, completion rate, and average quiz scores.

Group Performance

Compares groups by enrolled students, average completion, and quiz pass rates. Visible to admins and group leaders.

Quiz Question Analysis

An instructor-only table showing which quiz questions have the lowest correct-answer rates. Helps you spot questions that may be confusing or too difficult.

What Each Role Can See

Chart Admin Instructor Group Leader
Course Completion All courses Own courses Assigned groups
Enrollment Trends All Own Assigned
Time Spent All Own Assigned
Top Courses All Own Assigned
Course Drop-off All Own Assigned
Revenue Per Course Yes Yes Yes
Instructor Performance Yes No No
Group Performance Yes No Yes
Quiz Question Analysis No Yes No

Configuring Chart Visibility

Your site administrator can turn individual charts on or off at Admin > General Settings. Each chart also has a role-visibility setting to control which user types can see it.

Quiz Report

Overview

The Quiz Report shows all quiz attempts across your LearnDash courses. Each row is one attempt by one student. You can filter results, view a detailed question-by-question breakdown, and export the data to a spreadsheet.

Screenshots

Admin View

Admin Quiz Report

Instructor View

Instructor Quiz Report

Group Leader View

Group Leader Quiz Report

How to Access the Quiz Report

Go to your dashboard and click Quiz Report in the sidebar. This section is available to admins, instructors, and group leaders.

What You See in the Report

Each row in the report represents one quiz attempt by a student.

Column Description
Name Student's full name
Username Student's login name
Quiz Name of the quiz
Score Percentage score or points earned
Status Passed, Failed, or Pending
Report Link to view a detailed breakdown
Date Date and time of the attempt

Additional columns (such as email address) are available using the Column Visibility button.

Understanding Status Labels

Status Meaning
Passed The student met the passing score
Failed The student did not meet the passing score
Pending The quiz contains essay or manually graded questions that have not been reviewed yet

Viewing a Detailed Attempt Breakdown

Click View Report on any row to open a detailed view of that attempt. You will see:

  • Each question and the student's answer
  • The correct answer
  • Points awarded for each question
  • Time spent on each question (when available)

Filtering Results

Use the filter bar above the report to narrow down what you see.

Filter What it does
Course Show only quizzes from a specific course
Quiz Show only a specific quiz (updates after you select a course)
Student Search by student name or username
Status Show all, passed only, failed only, or pending only
Date range Limit results to a specific time period

Who Can See What

Role Access
Admin All quiz attempts across all courses
Instructor Attempts from students in your courses
Group Leader Attempts from students in your assigned groups
Student No access (students use the My Quiz Attempts section)

Exporting Quiz Results

  1. Apply any filters to narrow down your results.
  2. Use Column Visibility to choose which columns to include.
  3. Click CSV or Excel to download the file.

The export includes all matching rows, not just the page currently displayed.

Essay Report

Overview

The Essay Report lists all essay submissions from your LearnDash quizzes. You can read full essay responses, assign points, and mark essays as graded - all without leaving the dashboard.

Screenshots

Admin View

Admin Essay Report

Instructor View

Instructor Essay Report

Group Leader View

Group Leader Essay Report

How to Access the Essay Report

Go to your dashboard and click Essay Report in the sidebar. This section is available to admins, instructors, and group leaders.

What You See in the Report

Each row represents one essay submitted by a student.

Column Description
Title The essay title
Username The student who submitted the essay
Points Points awarded out of the maximum. Ungraded essays show a points input field.
Status Shows "Graded" or an Approve button for essays awaiting review
Action View More button to read the full essay

Additional columns (such as course, lesson, and quiz name) are available using the Column Visibility button.

Reading an Essay

Click View More on any row to expand it and read the full essay. The expanded view shows:

  • The original question the student was answering
  • The student's full written response
  • The course, lesson, and quiz the essay belongs to
  • A download link if the student uploaded a file with their submission

Grading an Essay

Ungraded essays show an Approve button and a points input field.

  1. Enter the number of points to award (up to the maximum allowed for that question).
  2. Click Approve to save the grade and mark the essay as graded.

Once approved, the status changes to Graded and the Approve button disappears.

Filtering Results

Filter What it does
Course Show essays from a specific course
Lesson Filter by a lesson within the selected course
Quiz Filter by a specific quiz
Student Search by student name or username
Status Show all, graded only, or ungraded only

Who Can See What

Role Access
Admin All essay submissions across all courses
Instructor Submissions from students in your courses
Group Leader Submissions from students in your assigned groups
Student No access

Exporting Essay Data

  1. Apply any filters to focus on the essays you need.
  2. Use Column Visibility to select which columns to include.
  3. Click CSV or Excel to download the file.

The export includes all matching rows and can include columns such as course name, lesson name, question text, and full essay content.

Assignment Report

Overview

The Assignment Report shows all assignment submissions from your LearnDash courses. You can review submitted files, approve assignments, award points, leave feedback, and download submissions - all from the dashboard.

Screenshots

Admin View

Admin Assignment Report

Instructor View

Instructor Assignment Report

Group Leader View

Group Leader Assignment Report

How to Access the Assignment Report

Go to your dashboard and click Assignment Report in the sidebar. This section is available to admins, instructors, and group leaders.

What You See in the Report

Each row represents one assignment submitted by a student.

Column Description
Title The assignment name. Click to download or open the submitted file.
Username The student who submitted the assignment
Points Points awarded out of the maximum
Status Shows a checkmark for approved, an X for not yet approved, and an Approve button for pending assignments
Action View Assignment to preview the file; View More to expand the row
Deadline Shows if the assignment is overdue, due soon, or has no deadline

Additional columns (such as course name, lesson, and submission date) are available using the Column Visibility button.

Previewing a Submitted File

Click View Assignment to open a preview of the submitted file. The preview shows:

  • The file itself (images and PDFs display inline)
  • A download link
  • The assignment title and student name
  • The comments thread

Approving an Assignment

Pending assignments show an Approve button in the Status column.

  1. Optionally enter a point value in the points field.
  2. Click Approve.

The status icon updates to a checkmark and the Approve button disappears. The student's progress advances automatically if the lesson required assignment approval to be marked complete.

Leaving Feedback

Click the comment count in the Comments column to open the full comment thread in a new tab. You can also add a comment directly from within the file preview.

Deadline Indicators

If assignment deadlines are set up on your courses, each row shows a deadline badge:

Badge Meaning
Overdue The deadline has passed
Due Soon The deadline is approaching
None No deadline has been set

Filtering Results

Filter What it does
Course Show assignments from a specific course
Lesson Filter by a lesson within the selected course
Student Search by student name or username
Status Show all, approved only, or not yet approved only

Who Can See What

Role Access Can Approve
Admin All assignments across all courses Yes
Instructor Assignments from students in your courses Yes
Group Leader Assignments from students in your assigned groups No (view only)
Student No access N/A

Exporting Assignment Data

  1. Apply any filters to focus on the assignments you need.
  2. Use Column Visibility to choose which columns to include.
  3. Click CSV or Excel to download the file.

The export includes all matching rows and can include columns such as course name, lesson, and submission date.

My Students

Overview

The My Students tab gives instructors, admins, and group leaders a way to look up any student and see their complete progress across courses. Search for a student by name, view their course completion, assignment status, quiz results, and export the data as a CSV.

Find your students at My Dashboard > My Students in the sidebar.


Who Can Access My Students

Role Which students they can view
Administrator All students on the site
Instructor Students enrolled in their own courses (including shared courses)
Group Leader Students in their assigned groups
Student Not available

Finding a Student

Type a student's name or email into the Search students dropdown. Results appear as you type. Select a student to load their progress data.

Group Leaders also see a Group filter dropdown above the search field. Select a specific group to narrow the student search to members of that group.


What You See for Each Student

Once you select a student, the dashboard displays:

Progress Summary Charts

Three doughnut charts provide a quick visual overview:

Chart Segments
Course Progress Not Started, In Progress, Completed
Assignment Status Approved, Unapproved, Pending
Quiz Status Completed, Not Completed

Course Progress List

For each course the student is enrolled in (that falls within your access scope), you see:

  • Course name (linked to the course)
  • Completion percentage
  • Steps completed out of total (e.g., "3/10 Steps")
  • A visual progress bar

Results are paginated (10 courses per page) with Previous and Next navigation.


Exporting Student Data

Click the Export CSV button to download the selected student's progress data as a spreadsheet file. The export includes course names, completion percentages, and step counts.


How Course Scoping Works

The courses shown for each student depend on your role:

  • Administrators see all courses the student is enrolled in.
  • Instructors see only courses they authored or are a co-instructor on, filtered to those the student is enrolled in.
  • Group Leaders see courses assigned to their groups, filtered to those the student is enrolled in.

This means the same student may show different course data depending on who is viewing.


Student Details

Overview

The Student Details view shows a complete progress snapshot for an individual student. You can access it by clicking a student's name in your student list, or by placing it on any page of your site so students can view their own progress.

How to View a Student's Details

From the My Students tab, click any student's name to open their detailed progress view.

What Is Displayed

Course Progress

For each course the student is enrolled in, you will see:

  • Course name and a link to it
  • Overall progress as a percentage with a visual progress bar
  • Number of lessons completed out of the total
  • Number of topics completed out of the total
  • Number of quizzes taken

Quiz Scores and Attempt History

For each quiz the student has taken:

  • Quiz name
  • Score and whether they passed or failed
  • Date of each attempt
  • A link to a detailed question-by-question breakdown

Multiple attempts are listed with the most recent first.

Time Spent Per Course

When the Time Tracking feature is enabled on your site, you will also see how much total time the student has spent in each course.

Certificate Status

For courses that award certificates, a status badge shows:

  • Earned - the student has completed the course and can download their certificate
  • Not Earned - the course is not yet complete

A download link appears next to certificates the student has earned.

Activity Timeline

A chronological list of the student's recent activity, including:

  • Course enrollments
  • Lesson completions
  • Quiz attempts
  • Assignment submissions
  • Certificates awarded

Who Can View Student Details

Role Access
Administrator All students on the site
Instructor Students enrolled in their own courses
Group Leader Students in their assigned groups
Student Their own progress (when the page is set up for self-service)

Group leaders access student details the same way as instructors - click any student name in the student list. The data shown is limited to courses within the group leader's assigned groups.


Adding Student Details to a Page

You can display a student's progress on any page of your WordPress site. When students visit that page while logged in, they see their own progress automatically.

To add this to a page, ask your site administrator to add the Student Details widget or block to the page.

If you want to display a specific student's progress (for example, on an instructor-facing page), your administrator can configure the page to show a particular student's record.

Exporting Data

Overview

You can export data from every report in your dashboard. Exports are available as CSV files, Excel spreadsheets, or a print-ready view. You can also export student lists from the Bulk Management section.

Exporting from Any Report

Every report tab - Quiz Report, Essay Report, Assignment Report, and Course Progress - has export buttons built in.

How to Export a Report

  1. Go to the report tab you want to export (for example, Quiz Report).
  2. Apply any filters to narrow down the results (by course, status, date range, etc.).
  3. Click Column Visibility to choose which columns to include in your export.
  4. Click CSV or Excel to download the file.

The export includes all rows that match your filters, not just the rows visible on the current page.

Available Export Formats

Button Output
CSV A comma-separated values file you can open in any spreadsheet app
Excel An Excel-compatible spreadsheet file
Print A print-optimised view in your browser

Choosing Columns

Click Column Visibility to see a list of all available columns. Check or uncheck columns to control exactly what appears in your download. Some columns are hidden by default (such as email address or course name) but can be added to your export here.

Bulk Student Export

The Bulk Management section lets you export a full student list for a course or group.

Steps

  1. Go to Bulk Management > Export Students.
  2. Choose what to export:
    • By Course - students enrolled in a specific course
    • By Group - students in a specific group
    • All Students - every student on the site (admin only)
  3. Select the course or group from the search field.
  4. Optionally filter by progress status: All, Not Started, In Progress, or Completed.
  5. Click Download CSV.

What the Student Export Includes

Each row in the file contains:

  • Student first and last name
  • Username and email address
  • Course enrollment date
  • Progress status (Not Started, In Progress, or Completed)
  • Number of lessons completed out of the total
  • Number of quizzes passed out of the total
  • Date of most recent activity

Who Can Export What

Role What you can export
Admin All students, any course or group
Instructor Students from your own courses
Group Leader Students from your assigned groups

Quiz Report Export

The quiz export gives you one row per quiz attempt. Each row includes:

  • Student name, username, and email address
  • Quiz name
  • Score (percentage)
  • Status (Passed, Failed, or Pending)
  • Date and time of the attempt
  • Course

To export only failed attempts, set the Status filter to Failed before downloading.

Enrollment Code Export

If your groups use enrollment codes, you can export a code list from the codes management screen.

  1. Go to your group listing and click Manage Codes on a group.
  2. Click Export CSV.

The file lists each code, whether it has been redeemed, who redeemed it, and the relevant date.

Bulk Management

Bulk Course Enrollment

Enroll multiple students into one or more courses at once - without adding them one by one. Find this feature under My Dashboard > Bulk Management, then click the Enroll tab.

Screenshots

Admin view Admin Bulk Enrollment

Instructor view Instructor Bulk Enrollment

Group Leader view Group Leader Bulk Enrollment

Who Can Use This

Role What You Can Access
Administrator All students and all courses
Instructor Your own courses only
Group Leader Students in your assigned groups only

How to Enroll Students

Step 1: Select Courses

  1. Go to My Dashboard > Bulk Management.
  2. Click the Enroll tab.
  3. In the Select Courses field, type a course name and select one or more courses from the list.

Step 2: Choose Students

Pick how you want to add students - three options are available:

Search by name or email - Type a student's name or email address and select them from the suggestions. You can pick multiple students.

Upload a CSV file - Prepare a spreadsheet with a column named "email" and one student email per row. Upload the file, then click Parse CSV. A preview table shows each student's name, email, and whether they were recognized - review it before continuing.

Filter students - Narrow down students by the course they are already enrolled in, their group membership, or their progress status (Not Started, In Progress, Completed). Click Find Students, then select from the results.

Step 3: Enroll

The bar above the button shows how many students and courses you have selected. Click Enroll Students to begin.

A progress window tracks the enrollment as it runs. When finished, a results summary shows which students were successfully enrolled and flags any that could not be processed.

Tips

  • Students who are already enrolled in a selected course are skipped automatically - no duplicate enrollments are created.
  • Instructors only see their own courses in the course search.
  • Group Leaders only see students from their assigned groups.
  • Adding a student to a group does not automatically enroll them in courses - use this Enroll tab to give direct course access.

CSV File Format

Your CSV file needs one column named email. A second column for names is optional and ignored during enrollment.

email,name
student@example.com,Jane Smith
another@example.com,John Doe

Unrecognized emails are flagged in the preview table before enrollment runs, so you can correct them first.

Bulk Group Enrollment

Add multiple students to one or more LearnDash groups at once. Find this feature under My Dashboard > Bulk Management, then click the Group Enroll tab.

Who Can Use This

Role What You Can Access
Administrator All groups and all students
Group Leader Your assigned groups only

Instructors do not have access to this tab.

How to Add Students to Groups

Step 1: Select Groups

  1. Go to My Dashboard > Bulk Management.
  2. Click the Group Enroll tab.
  3. In the Select Groups field, type a group name and select one or more groups from the list.

Step 2: Choose Students

Three options are available:

Search by name or email - Type a student's name or email address and select them from the suggestions. You can pick multiple students.

Upload a CSV file - Prepare a spreadsheet with a column named "email" and one student email per row. Upload the file, then click Parse CSV. A preview table shows each student's name, email, and whether they were recognized - review it before continuing.

Filter students - Narrow down students by the course they are enrolled in or the group they currently belong to. Click Find Students, then check the students you want to add.

Step 3: Add to Groups

The bar above the button shows how many students and groups you have selected. Click Enroll Students to begin.

A progress window tracks the process as it runs. When finished, a results summary shows which students were successfully added and flags any that could not be processed.

Tips

  • Students who are already in a selected group are skipped automatically.
  • Group Leaders only see their assigned groups in the group search.
  • When you add a student to a group, they gain access to all courses linked to that group - no separate course enrollment is needed.
  • If a group has a seat limit, adding students beyond that limit will be blocked. Check available seats under My Dashboard > Groups before running a bulk enrollment.

Remove Students and Reset Progress

You can remove students from courses or groups, and permanently clear their course progress. Both actions are available under My Dashboard > Bulk Management.

Who Can Do What

Action Administrator Instructor Group Leader
Remove from a course Yes - all courses Yes - own courses only Yes - assigned groups only
Remove from a group Yes - all groups No Yes - assigned groups only
Reset course progress Yes - all courses Yes - own courses only No

Remove Students from a Course or Group

Step 1: Open the Unenroll Tab

  1. Go to My Dashboard > Bulk Management.
  2. Click the Unenroll tab.
  3. Choose whether you want to Remove from Course or Remove from Group using the toggle.

Step 2: Select the Course or Group

Search for and select the course or group. The student list loads automatically, showing each student's name, email, and current progress.

Step 3: Select Students and Confirm

Check the students you want to remove, or use Select All to choose everyone. The bar at the top updates with your selection count.

Click Unenroll Selected. A confirmation prompt appears - confirm to proceed.

A progress window tracks the removal as it runs. A results summary appears when the process is complete.


Reset Course Progress

Warning: This action cannot be undone. Resetting progress permanently deletes a student's lesson completions, quiz scores, and all attempt history for the selected course.

Before resetting, consider exporting a student report from the Export tab if you need to keep a record of their previous progress.

Step 1: Open the Reset Tab

  1. Go to My Dashboard > Bulk Management.
  2. Click the Reset tab.
  3. Search for and select a course.

The student list loads with all enrolled students, showing each person's name, email, and current progress percentage.

Step 2: Select Students and Confirm

Check the students whose progress you want to reset. Click Reset Progress.

A warning prompt appears - you must confirm before any data is deleted.

What Gets Deleted

When you reset a student's progress, the following is permanently removed:

  • All lesson completions
  • All topic completions
  • All quiz scores and attempt history
  • Overall course progress (returned to 0%)
  • Course completion date (if they had finished the course)

What stays the same: The student remains enrolled in the course and can start it again from the beginning.

Tips

  • Group Leaders cannot reset progress. Only Administrators and Instructors (for their own courses) can use the Reset tab.
  • Always export a report first if you need to keep a record of past progress - resets cannot be undone.

Enrollment Code Management

Create shareable codes that students use to enroll themselves in courses or groups. Manage your codes under My Dashboard > Bulk Management > Codes.

Who Can Use This

Role What You Can Access
Administrator All courses and groups, full management
Instructor Your own courses only
Group Leader Your assigned groups only

Generating Codes

Step 1: Choose a Course or Group

  1. Go to My Dashboard > Bulk Management.
  2. Click the Codes tab.
  3. In the Generate Enrollment Codes section, select the course(s) and/or group(s) you want the codes to unlock.

Step 2: Set Your Options

Option Description
Number of Codes How many codes to generate (1-500 at a time)
Code Prefix Optional label added to the start of each code, for example SPRING2026 (up to 20 characters)
Expiry Date Optional date after which the codes stop working
Max Uses Per Code Single use (one student per code), multi-use (set a specific number), or unlimited

Step 3: Generate and Share

Click Generate Codes. Your new codes appear instantly in the Generated Codes panel. Click Copy All to copy the full list to your clipboard, ready to paste into an email or spreadsheet.


Managing Your Codes

The Existing Codes table lists all codes you have access to.

Column What It Shows
Code The unique code string
Course / Group The course or group the code unlocks
Uses How many times it has been used vs. the limit
Expires The expiry date, or blank if none
Status Active, Used, Expired, or Deactivated
Actions Deactivate or view who redeemed it

Filter by Batch

Use the All Batches dropdown to view only codes from a specific generation batch.

Deactivating a Code

Click Deactivate on any active code to stop it from working immediately. This cannot be undone from the dashboard.

Viewing Who Used a Code

Click the redemptions icon on any code to see which students redeemed it and when.

Exporting Your Codes

Click Export CSV to download all visible codes as a spreadsheet. Apply the batch filter first to export only a specific batch.


How Students Redeem Codes

Students enter their code on a redemption page on your site. Your site administrator can add this redemption form to any page. Once a student submits a valid code, they are automatically enrolled in the linked course or group.


Code Status Reference

Status Meaning
Active Valid and ready for students to use
Used The code has reached its maximum number of uses
Expired The expiry date has passed
Deactivated Manually turned off - no longer redeemable

Communication

Sending Emails to Students

The Email tab lets you send messages directly to your students from the LearnDash Dashboard - no external email tool needed. You can reach an individual student, everyone in a course, or all members of a group. Every email you send is logged, and the system retries delivery automatically if something goes wrong.

Find this feature at My Dashboard > Email in the sidebar.

Screenshots

Admin view Admin Email Composer

Instructor view Instructor Email Composer


How to Send an Email

Step 1: Open the Email Composer

  1. Go to My Dashboard.
  2. Click Email in the sidebar.
  3. The email composer opens with fields for recipients, subject, and message.

Step 2: Choose Your Recipients

Select who should receive your email:

Option Who Receives It
Course All students currently enrolled in a specific course
Group All members of a specific group
Individual A single student you search by name or email

Your role determines which options are available:

Your Role Who You Can Email
Administrator Any student, any course, any group
Instructor Students enrolled in your own courses only
Group Leader Members of your assigned groups only

Step 3: Apply a Template (Optional)

Click Select Template to choose from a set of pre-written email templates. Selecting one fills in the subject line and message body for you. You can edit both before sending.

See Email Templates for the full list of templates and how personalization tags work.

Step 4: Write and Send

  1. Fill in the Subject field.
  2. Write your message in the Message body. You can use personalization tags to automatically insert each recipient's name, course title, and other details. See Email Templates for the full list of available tags.
  3. Click Send Email.

The dashboard queues your email immediately and shows a confirmation. Delivery happens within about a minute.


Email Delivery and Logs

Emails are sent through a delivery queue - they do not go out the instant you click send, but they are delivered within approximately one minute. If a delivery fails, the system retries it automatically.

Every email you send is recorded in the logs. Administrators can review the full delivery history, including delivery status and any errors, under Admin > Email Logs.


Invite User Settings (Admin)

Admin Invite User Settings

Administrators can configure how the student invitation feature works under WP Admin > LearnDash Dashboard > Invite User.

Setting Description Default
Number of email invitations users are permitted to send at a time Limits how many invitation emails an instructor or admin can send in a single batch. Set this to prevent bulk spam. 5
Allow users to customize invitation - Subject line When enabled, instructors can edit the invitation email subject before sending. When off, the default subject is used. Off
Allow users to customize invitation - Message body When enabled, instructors can edit the invitation email body before sending. When off, the default message is used. Off

Invitation Log (Admin)

Admin Invitation Log

Administrators can view all invitation activity under WP Admin > LearnDash Dashboard > Invitation Log. This page shows a searchable table of every invitation sent from the dashboard.

Column What It Shows
ID Unique invitation record number
Invited By The instructor or admin who sent the invitation
Invited To The email address or user who received the invitation
User Status Whether the invited person has registered on the site
Invited When Date and time the invitation was sent
Action Options to resend or delete the invitation record

Use this log to track which instructors are actively inviting students and to verify that invitations are being delivered.


Email Templates

LearnDash Dashboard includes ten ready-made email templates for the most common situations - from welcoming a new instructor to notifying a student about a course invitation. Each template is professionally formatted, works on all email clients, and can be personalized using tags that automatically fill in real names, course titles, and more.


Available Templates

Instructor Application Templates

Template Default Subject When It Sends
Instructor Application (Admin) New Instructor Registered - {user_name} Someone applies to become an instructor
Instructor Approved Your Instructor Application Approved Admin approves an application
Instructor Rejected Your Instructor Application Status Admin rejects an application

Student Templates

Template Default Subject When It Sends
Student Course Email Message from {instructor_name} An instructor sends a message to a student
Student Invitation You're Invited to {course_name} A student is invited to a course

Withdrawal Templates

Template Default Subject When It Sends
Withdrawal Request (Admin) New Withdrawal Request from {instructor_name} Instructor requests a payout
Withdrawal Approved Your Withdrawal Request Approved Admin approves a withdrawal
Withdrawal Rejected Your Withdrawal Request Status Admin rejects a withdrawal

Messaging and Announcements

Template Default Subject When It Sends
New Private Message New message from {sender_name} A private message is sent
Announcement Notification New Announcement: {announcement_title} A course announcement is published

Personalization Tags

Use these tags in any email subject line or message body. The system replaces them with real values before the email is sent.

Always Available

Tag Replaced With
{site_name} Your site's name
{site_url} Your site's web address
{admin_email} Your site's admin email address
{admin_url} Link to your WordPress admin area
{date} Today's date

People

Tag Replaced With
{user_name} The recipient's display name
{user_email} The recipient's email address
{instructor_name} The instructor's display name
{student_name} The student's display name
{sender_name} The name of the person who sent a private message

Content

Tag Replaced With
{course_name} The course title
{announcement_title} The announcement title
{amount} A withdrawal or commission amount
{message_url} A direct link to the message thread in the dashboard
{message_preview} A short preview of the message content

Instructor Email Template Library

When composing an email from My Dashboard > Email, use the Email Template dropdown at the top of the compose form to choose from seven pre-built templates. Selecting a template pre-fills both the subject line and message body. You can edit everything before sending.

The first option, Blank (compose your own), leaves the form empty so you can write from scratch.

Available Instructor Templates

Template Subject Line Best Used For
Welcome to Course Welcome to {course_name}! Greeting new students with getting-started tips
Inactivity Nudge We miss you in {course_name}! Re-engaging students who have stopped logging in
Course Completion Congratulations on completing {course_name}! Celebrating students who finish a course
Quiz Retry Encouragement Tips for your next quiz attempt in {course_name} Helping students who failed a quiz prepare for a retake
Assignment Reminder Reminder: Assignment pending in {course_name} Nudging students with overdue assignments
New Content Announcement New content added to {course_name} Letting students know you added new lessons or materials
Monthly Digest Your Monthly Learning Digest - {site_name} A monthly summary encouraging students to check their progress

Tags Used in Library Templates

These templates use the following personalization tags:

Tag Replaced With
{student_name} The recipient's display name
{instructor_name} Your display name
{course_name} The selected course title
{site_name} Your site's name
{site_url} Your site's web address

All tags from the full Personalization Tags list are available when composing emails, but the library templates only use the five above.

See Sending Emails for the full sending workflow.


Private Messaging

Private Messaging lets instructors, students, group leaders, and admins send direct messages to each other from within the dashboard. Conversations are organized by course, your inbox shows unread counts in real time, and every new message triggers an email notification to the recipient.

Find private messages at My Dashboard > Private Messages in the sidebar.

Screenshots

Admin view Admin Messages Inbox

Instructor view Instructor Messages Inbox

Student view Student Messages Inbox


Your Inbox

The inbox lists all your conversations, sorted by the most recent activity. For each conversation you can see:

  • The other person's name and photo
  • The conversation subject
  • Which course the conversation is about
  • A short preview of the last message
  • When the last message was sent
  • A badge showing how many messages you have not read yet

How to Use

Reading a Conversation

  1. Go to My Dashboard > Private Messages.
  2. Click any conversation in the inbox.
  3. The full message thread opens in order, with each person's photo beside their messages.
  4. Unread messages are marked as read automatically when you open the thread.

Starting a New Conversation

  1. Click New Message in the inbox.
  2. Select a Course - this links your conversation to a course and determines who you can message.
  3. In the To field, start typing a name or email address and select the person from the suggestions.
  4. Enter a Subject.
  5. Write your message and click Send.

Replying to a Conversation

  1. Open a conversation.
  2. Write your reply in the box at the bottom of the thread.
  3. Click Send. The reply is added to the thread and the other person receives an email notification.

Deleting a Conversation

Click the delete icon on any conversation to remove it from your inbox. The conversation stays visible to the other person until they also delete it. Once both sides have deleted the thread, it is permanently removed.


Who You Can Message

Who you can reach depends on your role:

Your Role Who You Can Message
Administrator Anyone
Instructor Students enrolled in your courses; co-instructors on the same course
Group Leader All members of your assigned groups; course instructors for group courses
Student Instructors (and co-instructors) of courses you are enrolled in

Every new conversation must be linked to a course. When you reply to a thread, the course and recipient carry over automatically.


Email Notifications

When someone sends you a message, you receive an email notification that includes:

  • The sender's name
  • A short preview of their message
  • A direct link back to the conversation in the dashboard
  • The name of the course the conversation is about

Zoom Meetings

The Zoom Meetings feature lets admins and instructors create and manage Zoom meetings from directly inside the LearnDash Dashboard. You can link meetings to specific courses, and your students can join in-browser without ever leaving your site. Recordings are fetched and displayed automatically.

Find your meetings at My Dashboard > Meetings in the sidebar.

Admin Zoom Meetings


Initial Setup

Before you can create meetings, a Zoom app must be connected to the plugin. This is a one-time setup done by a site administrator.

Step 1: Create a Zoom App

  1. Log in at marketplace.zoom.us.
  2. Click Develop > Build App and choose Server-to-Server OAuth.
  3. Complete the app setup. Copy the Account ID, Client ID, and Client Secret shown on the credentials page.

Step 2: Enter Your Credentials in the Plugin

  1. Go to Admin > LearnDash Dashboard > Zoom Settings.
  2. Enter your Zoom Account ID, Client ID, and Client Secret.
  3. Enter the Zoom host email - the Zoom account that meetings will be created under.
  4. Save your settings.

Admin Setting: Use Admin Account

In Zoom Settings, you'll find a "Create meetings using admin account" checkbox. This controls whose Zoom account is used when instructors create meetings:

  • Checked - All meetings are created under the admin's Zoom account. Instructors do not need their own Zoom apps. The Zoom tab is hidden from instructor profiles.
  • Unchecked - Each instructor uses their own Zoom account. They must set up their own Zoom app and enter their credentials in the dashboard (see below).

Co-hosts

You can designate specific instructors as Zoom Account Co-hosts in the admin Zoom Settings. Co-hosts can start meetings and access recordings for meetings they are assigned to.


Instructor Zoom Setup

This is what makes LearnDash Dashboard unique - instructors can connect their own Zoom accounts and run live sessions independently, without relying on the site admin's Zoom account.

When the admin has not enabled "Use Admin Account," each instructor gets a Zoom tab in their profile settings at My Dashboard > Settings > Zoom.

Step 1: Create a Zoom App

Each instructor needs their own Server-to-Server OAuth app in the Zoom Marketplace:

  1. Go to marketplace.zoom.us and sign in with your Zoom account.
  2. Click Develop > Build App and choose Server-to-Server OAuth.
  3. Complete the app setup.
  4. In the Scopes section, add these permissions:
    • meeting:write:admin
    • meeting:read:admin
    • recording:read:admin
    • user:read:admin
  5. Copy the Account ID, Client ID, and Client Secret.

Step 2: Enter Credentials in the Dashboard

  1. Go to My Dashboard > Settings > Zoom.
  2. Enter your:
    • Account ID - from your Zoom app
    • Client ID - from your Zoom app
    • Client Secret - from your Zoom app
    • Zoom Account Email - the email address associated with your Zoom account
  3. Click Save.

The dashboard includes a built-in setup guide on this page that walks instructors through each step.

Step 3: Verify the Connection

After saving, a status indicator shows whether the connection is working:

  • Connected (green check) - Your Zoom account is linked and ready to use.
  • Invalid credentials (red X) - Double-check your Account ID, Client ID, and Client Secret.
  • Not verified (gray dash) - Credentials have not been entered yet.

Click the Verify Connection button to test the connection at any time.

How It Works

Once an instructor has saved their Zoom credentials:

  • Any meeting they create from My Dashboard > Meetings is hosted under their own Zoom account.
  • Recordings from their meetings are automatically fetched and stored.
  • Students enrolled in the linked course can join the meeting in-browser on your site.
  • The instructor is the host of their meetings, with full control over settings like waiting rooms, recording, and participant permissions.

This means your site can have multiple instructors running live sessions simultaneously, each using their own Zoom account with their own meeting limits and settings.


Creating a Meeting

  1. Go to My Dashboard > Meetings.
  2. Click Create Meeting.
  3. Fill in the meeting details:
Field Description
Topic The meeting title your participants will see
Agenda A short description of what the meeting covers
Start Date / Time When the meeting is scheduled to begin
Timezone The timezone for the meeting
Duration How long the meeting will run
Password Optional password to restrict who can join
Course The LearnDash course this meeting belongs to. Enrolled students can join it from their own Meetings tab, and (if the option below is enabled) are emailed when it is created. Leave as "Not associated with a course" for a standalone meeting.
Email enrolled students When a course is selected, email everyone enrolled once, at the moment the meeting is first created. On by default; editing the meeting later never re-sends.
Participant Video Whether participant cameras are on when they join
Mute Upon Entry Whether participants are muted when they join
Host Video Whether your camera is on when you start the meeting
Waiting Room Hold participants in a waiting room until you admit them
Join Before Host Allow participants to join before you start the meeting
Auto Recording Choose no recording, or save to your computer or Zoom cloud
  1. Click Save Meeting.

Your meeting is created in Zoom and added to your meetings list. The list shows the topic, start time, duration, and action buttons for each meeting.


Editing a Meeting

  1. Go to My Dashboard > Meetings.
  2. Click Edit next to the meeting you want to change.
  3. Update the details and click Save Meeting.

Only the person who created the meeting, or an admin, can edit it.


Deleting a Meeting

  1. Go to My Dashboard > Meetings.
  2. Click Delete next to the meeting.

The meeting is removed from both the dashboard and your Zoom account.


Joining a Meeting

Students enrolled in the associated course can join a meeting directly from your site in their browser - no Zoom app download required.

There are three ways an enrolled student can reach a meeting:

  • My Dashboard > Meetings - students see a read-only list of upcoming and past meetings for the courses they are enrolled in, each with a Join button. They cannot create, edit, or delete meetings.
  • Email notification - if the instructor left Email enrolled students enabled when creating the meeting, each enrolled student receives an email with the meeting details and a join link.
  • Embedded in course content - a meeting embedded in a lesson or topic with the [ld_dashboard_meeting_single] shortcode shows a Join button inline.

Meeting Recordings

Recordings are automatically fetched and displayed on each meeting's detail page. The dashboard checks for new recordings every six hours. You can also refresh recordings manually from the meeting detail view.

Access to recordings is available to admins, the meeting creator, and the assigned co-host.


Who Can Do What

Action Administrator Instructor Student
Create a meeting Yes Yes No
Edit their own meeting Yes Yes No
Delete their own meeting Yes Yes No
View the meeting list Yes (all) Yes (own + co-hosted) Enrolled courses only
Join via browser Yes Yes Enrolled students only
View recordings Yes Yes No

Earnings & Monetization

Commission Setup

Set up revenue sharing so your instructors automatically earn a percentage of every course sale. Once configured, commissions are calculated and recorded without any manual effort.

Instructor Earnings and Commission

Screenshots

Admin view Admin Monetization Settings


Enable Monetization

  1. Go to WordPress Admin > LearnDash Dashboard > Settings > Monetization
  2. Check Monetization to turn on revenue sharing
  3. Click Save Changes

All commission options become visible after you enable monetization.

Set the Revenue Split

Decide how each course sale is divided between your instructors and the platform.

  • Instructor Takes - the percentage paid to the instructor
  • Admin Takes - the percentage kept by the platform

Both values must add up to 100.

Add a Platform Fee (Optional)

A platform fee is deducted from the sale price before the revenue split is applied.

  1. Check Deduct Fees to enable fee deduction
  2. Enter a Fee Description - instructors will see this text to understand the deduction
  3. Choose Fee Type: percentage or fixed amount
  4. Enter the Fee Amount

Example: A $100 course with a 10% platform fee leaves $90. If the instructor takes 70%, they earn $63.

WooCommerce Integration

If you sell courses through WooCommerce, an additional toggle appears:

  • Enable Selling through WooCommerce - tracks commissions from WooCommerce course purchases

Instructors can filter their earnings by which payment method was used.

Earnings Display Options

  • Earning Chart - shows a visual earnings chart on the instructor's dashboard
  • Show Statement Per Page - controls how many earnings rows appear per page in the instructor's history table

Payout Methods

Choose which payout options instructors can select when requesting a withdrawal:

  • Bank Transfer
  • E-Check
  • PayPal
  • Stripe

Set a Minimum Withdrawal Amount so instructors must accumulate a minimum balance before requesting a payout.

Add Bank Instructions text to guide instructors on how bank transfers work on your platform.

All Monetization Settings Reference

Setting Description Default
Monetization Enable or disable the entire revenue sharing system Off
Instructor Takes Percentage of each sale paid to the instructor -
Admin Takes Percentage of each sale kept by the platform -
Show Statement Per Page Number of earnings rows per page in the instructor's history table 20
Earning Chart Show a visual earnings chart on the instructor's dashboard Off
Deduct Fees Enable platform fee deduction before the revenue split Off
Fee Description Text shown to instructors explaining the fee deduction -
Fee Type Whether the fee is a percentage or a fixed amount Percentage
Fee Amount The fee value (percentage or fixed amount) -
Minimum Withdrawal Amount Minimum balance required before an instructor can request a payout -
Bank Transfer Allow bank transfer as a payout method Off
E-Check Allow e-check as a payout method Off
PayPal Allow PayPal as a payout method Off
Stripe Allow Stripe as a payout method Off
Bank Instructions Guidance text for instructors about bank transfer details -

Earnings Dashboard

The Earnings tab gives instructors a complete view of their commission history. Every course sale that generated a commission appears here in one place.

Instructor Earnings Dashboard

How to Access

The Earnings tab is visible only when the site admin has enabled monetization and earning logs. Go to your dashboard and click Earnings in the sidebar menu.

Understanding Your Earnings Table

Each row in the table represents one course sale that generated a commission for you:

Column What it shows
Date When the sale was recorded
Course The course that was sold
Price The full sale price paid by the student
Earning Your commission after any platform fee deduction
% Share Your revenue share percentage
Fee Any platform fee that was deducted
Mode Whether the sale came through LearnDash or WooCommerce
Reference The order number from the payment system

Filter Your Earnings

Use the filter bar to find specific earnings records:

  1. Set a Start Date and/or End Date using the date picker
  2. If WooCommerce is active on your site, select a Payment Mode to filter by sales source
  3. Click Submit to apply

Export Your Earnings

Click Export CSV to download your earnings history as a spreadsheet. The export reflects whatever filters you currently have applied.

Earnings Chart

When your site admin has enabled the earnings chart, a bar chart appears above your history table. It gives you a visual summary of your earnings over time.

Withdrawal Requests

As an instructor, you can request a payout of your available earnings at any time. The site admin reviews each request and approves or rejects it.

Set Your Payout Method First

Before you can submit a withdrawal request, you need to save a preferred payout method.

  1. Go to My Dashboard > Profile > Withdrawal Preference
  2. Choose a payout method from the options your admin has enabled:
    • Bank Transfer
    • E-Check
    • PayPal
    • Stripe
  3. Save your preference

The withdrawal button stays inactive until you have a saved payout method.

Submit a Withdrawal Request

  1. Go to My Dashboard > Profile > Withdrawal
  2. Check your Current Balance - this is your available amount after accounting for previously approved withdrawals
  3. Click Withdraw Request
  4. Enter the amount you want to withdraw (must meet the minimum set by your admin)
  5. Click Submit Request

You can only have one pending request at a time. The submit button is disabled while a request is awaiting review.

What Happens After You Submit

  1. Your request is submitted and marked as Pending
  2. The admin reviews your request
  3. The admin approves or rejects the request
  4. You receive an email notification with the outcome
  5. Your request status updates to Approved or Rejected

View Your Withdrawal History

Below the request panel, the Withdrawal History table shows all your past requests:

Column What it shows
Withdrawal Method The payout method you selected
Requested On When you submitted the request
Amount How much you requested
Status Pending, Approved, or Rejected

Minimum Withdrawal Amount

Your admin sets a minimum balance you must reach before requesting a payout. The current minimum is shown in the withdrawal form.

Commission Reports

The Commission Report gives you a complete view of all instructor earnings across your platform. Filter by instructor or date, add manual entries, export data, and process payout requests - all from one page.

Screenshots

Admin view Admin Commission Report


How to Access

Go to WordPress Admin > LearnDash Dashboard > Commission Report.

This page is only available when Monetization is enabled in your settings.

Reading the Report Table

Every course sale that generated a commission appears as one row in the table:

Column What it shows
Date When the sale was recorded
Course The course that was sold
Price The full sale price
Earning The instructor's commission amount
% Share The revenue share percentage applied
Fee Any platform fee that was deducted
Mode Whether the sale came through LearnDash or WooCommerce
Reference The order or transaction reference number

Filter the Report

Narrow the data to what you need:

  1. Choose a specific instructor from the Select Instructor dropdown
  2. Set a Start Date and/or End Date to filter by sale date
  3. Click Submit to apply, or Reset to clear all filters

When you select an instructor, a summary bar appears showing their total Paid Earnings and Unpaid Earnings.

Add a Manual Commission Entry

Click + Add Manual Entry to record a commission that was not captured automatically. This is useful for offline sales, manual adjustments, or bonus payments to instructors.

How to Add a Manual Entry

  1. Click the + Add Manual Entry button above the report table
  2. A dialog opens with the following fields:
Field Required Description
Instructor Yes Select the instructor who should receive the commission from the dropdown
Course Yes Select the course this commission is associated with
Commission Amount Yes Enter the amount to credit (e.g., 25.00)
Note / Reference No Add an optional note explaining the entry (e.g., "Offline workshop payment" or "Bonus for Q1")
  1. Click Add Commission to save the entry
  2. The new commission appears in the report table with "Manual" as the mode

Export Commission Data

Click CSV in the table header to download the currently filtered data as a spreadsheet.

Process Withdrawal Requests

When an instructor submits a withdrawal request, it appears in your WordPress admin for review.

  1. Go to WordPress Admin > Withdrawals
  2. Open the withdrawal entry
  3. Update the status to Approved or Rejected

The instructor receives an automatic email notification when you change the status.

Instructor Management

Instructor Registration

The instructor registration system lets visitors and existing users apply to become instructors directly from your site's front end. You control whether applications are approved automatically or require your review.

Instructor Registration Form

Adding the Registration Form to a Page

Place the instructor registration form on any page by adding the following shortcode to the page content:

[ld_instructor_registration]

The form automatically adapts to show the right content based on who is viewing it:

Visitor type What they see
Not logged in, open registration Full registration form
Not logged in, registration closed Access denied message
Logged in, not yet an instructor "Apply to be an Instructor" button
Logged in, application pending A notice showing their pending status
Logged in, already approved A notice showing their approved status
Administrator A notice that admins already have full access

Note: The registration form only appears to non-logged-in visitors when Anyone can register is enabled in WordPress Admin > Settings > General.

How New Users Apply

When a visitor submits the registration form, they fill in:

  • First Name and Last Name
  • Username
  • Email address
  • Password and password confirmation

After submitting, their account is created, they are automatically logged in, and you receive an email notification.

How Existing Users Apply

A logged-in user who is not yet an instructor sees an Apply to be an Instructor button. Clicking it submits their application and sends you an email notification.

Require Approval or Auto-Approve

Go to WordPress Admin > LearnDash Dashboard > Settings > General Settings > Instructor Role Status:

  • Unchecked (default): Applicants immediately become instructors with no further action from you
  • Checked: Applicants receive a pending status and wait for your approval before gaining instructor access

Approving a Pending Instructor

When approval is required:

  1. Go to WordPress Admin > LearnDash Dashboard > Settings > Instructor Settings
  2. Filter the instructor table by Pending to find applicants awaiting review
  3. Open the user's account in the WordPress user editor
  4. Change their role from pending to Instructor

Instructor Settings

Instructor Settings is where you manage all instructor accounts on your site - view who has applied, approve pending instructors, add instructors manually, and control how instructor features behave.

How to Access

Go to WordPress Admin > LearnDash Dashboard > Settings > Instructor Settings.

View All Instructors

The page shows a table of everyone with instructor access on your site. You can filter the table by status:

Filter Shows
All Every instructor account
Approved Active instructors
Pending Applicants waiting for your approval

Each row shows the instructor's username, name, email, role, status, and commission rate.

Add an Instructor Manually

  1. Click Add New Instructor
  2. Fill in their First Name, Last Name, Username, Email, Password, and Bio
  3. Click Add Instructor

The new account is created immediately as an active instructor (or as pending if you have the approval requirement enabled).

Instructor Approval Setting

Controls whether new instructor applications need your review before taking effect.

  • Disabled (default): Applicants instantly become active instructors
  • Enabled: Applicants are marked as pending until you manually approve them

Find this setting in Settings > General Settings > Instructor Role Status.

Course Publishing Setting

Controls whether courses created by instructors go live immediately or need your review first.

  • Auto-Approval on: Instructor-created courses publish right away
  • Auto-Approval off: Instructor-created courses save as drafts for you to review

Find this setting in Settings > General Settings > Course Publish Status.

Let Instructors Create Categories and Tags

When this setting is on, instructors can create new course categories and tags from their dashboard. When off, they can only choose from categories and tags that already exist.

Find this in Settings > General Settings > Instructor Course Tags.

Show Earnings to Instructors

When this is on, the Earnings tab appears in each instructor's dashboard so they can view their commission history. This also requires Monetization to be enabled.

Find this in Settings > General Settings > Instructor Earning Logs.

Instructor Access to Their Own Courses

Instructors automatically get access to any course they create or are assigned to as a co-instructor. No configuration is needed for this - it works automatically.

Email Notifications

When someone applies to become an instructor, you receive an automatic email notification. Configure your email delivery settings in Settings > Integration.

Instructors Listing Page

The Instructors Listing page is a public directory of all your approved instructors. Visitors can browse instructors, search by name, and click through to view each instructor's profile and published courses.

Instructors Listing Page

Adding the Directory to a Page

Place the instructor directory on any page by adding the following shortcode to the page content:

[ld_dashboard_instructors_list]

The directory displays automatically with search, pagination, and instructor cards. No further configuration in the shortcode is needed.

Important: After creating the page, go to WordPress Admin > LearnDash Dashboard > Settings > General Settings > Page Mapping and set the Instructors Page to the page you just created. This ensures instructor profile links work correctly.

What Each Instructor Card Shows

  • Profile photo
  • Display name
  • Number of published courses
  • Star rating (if the LearnDash Course Reviews add-on is active)
  • A link to their individual profile page

Visitors can filter the directory by instructor name:

  1. Type a name into the search field
  2. Click Search
  3. The page reloads showing matching instructors
  4. Click Clear to reset and show all instructors

Pagination

The directory shows 12 instructors per page by default. Standard page navigation links appear below the grid when there are more than 12 instructors.

Star Ratings

If you have the LearnDash Course Reviews add-on installed, each instructor card shows an average star rating based on all reviews across their published courses.

Admin Settings

General Settings

General Settings is the central configuration page for LearnDash Dashboard. Use it to control instructor workflows, connect your dashboard pages, choose which features are active, configure chart widgets, and set your welcome screen image.

How to access: Go to WordPress Admin > LearnDash Dashboard > General Settings.


Instructor Options

These settings control how instructors are onboarded and what they can do on your platform.

Setting What it does
Instructor Course Status Choose whether courses created by instructors publish immediately (Auto-Approval) or save as drafts for your review first
Instructors Can Create Categories & Tags When on, instructors can create new course categories and tags from their dashboard. When off, they can only use existing ones.
Apply Instructor Button Shows a "Become an Instructor" button on the student dashboard so students can apply for instructor access
Instructor Role Status When on, new instructor applicants are placed in a pending state until you approve them manually
Set BuddyPress Avatar Uses the BuddyPress profile photo as the dashboard avatar (only visible when BuddyPress is active)
Profile Override Redirects the profile link in the dashboard to the BuddyPress or BuddyBoss member profile page (only visible when BuddyPress is active)
Gravatar Uses Gravatar as the default avatar when no custom photo is set

Page Mapping

Connect your WordPress pages to the dashboard features. Each dropdown shows your published pages.

Setting Which page to select
Dashboard The page containing the main dashboard shortcode
Instructor Registration The page with the instructor registration form
Instructors The public instructor directory page

After selecting a page, click View to confirm it loads correctly.


Dashboard Features

Turn these features on or off for your entire site.

Setting What it does
Announcements Enables the Announcements tab so instructors can post updates and students can view them
Email Integration Enables an Email tab for instructors to send messages directly to their enrolled students
Private Messaging Enables course-aware private messaging between students and instructors
Earning Logs Shows the Earnings tab on the instructor dashboard (also requires Monetization to be enabled)
Disable Live Course Activity Hides the live activity feed for all users across the entire site
Disable Role-wise Live Activity Select specific roles to hide the live activity feed from, while keeping it visible for others

Dashboard Widgets

Control which charts and data panels appear on the dashboard and Insights tab. Each widget can be shown to all roles or restricted to specific ones.

Widget What it shows
Hide Dashboard Page Title Removes the WordPress page title above the dashboard area
Summary of LearnDash Statistics Stat tiles showing totals like enrolled students and completions
Course Completion Chart A chart showing the overall course completion rate
Top Courses Chart A chart showing which courses have the most completions
Student Details A student progress panel with per-course detail
Student Course Progress A progress bar students see on their dashboard home
Instructor Statistics Totals for the instructor's students, courses, and earnings
Enrollment Trends Chart A chart of enrollment activity over time on the Insights tab
Time Spent Chart A chart of how much time students spend on courses
Course Drop-off Chart A chart showing where students stop progressing in a course

For widgets with a role selector, leave the selector empty to show the widget to all eligible users.


This section appears only when Course Tags are enabled in LearnDash and at least one tag exists.

Setting What it does
Featured Course Displays a featured course section on the dashboard
Featured Course Tag Choose which course tag determines which courses appear in the featured section

Welcome Screen

Upload a cover image that appears in the welcome bar at the top of the dashboard.

  • Click Upload Cover Image to choose an image from your media library

For welcome bar text and background color, see Design & Appearance.


Instructor Profile Page

Controls how courses appear on an instructor's public profile page.

Setting What it does
Grid Columns Number of columns in the course grid on the instructor's profile page (default: 4)
Progress Bar Shows a course completion progress bar on each course card
Course Content Shows the course title, short description, and call-to-action button on each course card

Assignment Deadlines

Setting What it does
Grace Period (days) Extra days after an assignment deadline before uploads are blocked. Set to 0 to enforce deadlines immediately.

Saving Your Settings

Click Save Changes to apply your settings. Click Reset Settings to restore all General Settings to their default values. Resetting cannot be undone.

Design & Appearance

Design Settings controls the colors used throughout the LearnDash Dashboard. Choose a ready-made color preset or build your own custom palette to match your brand.

How to access: Go to WordPress Admin > LearnDash Dashboard > Design.


How It Works

  1. The settings page shows a row of color presets as clickable swatches
  2. Click a preset to apply it - all five color slots update to match
  3. Choose Custom to set each color individually using color pickers
  4. Click Save Changes to apply your palette to the frontend

Changes appear on your site immediately after saving.


Choosing a Color Preset

The Choose Preset Colors panel displays all available built-in palettes. Each preset shows five color samples representing the five color roles used across the dashboard.

Click any preset to auto-fill all five color slots with that palette's values. Click Custom to switch back to your own manually chosen colors.


Building a Custom Palette

When Custom is selected, five color pickers become available. Each one controls a specific visual role across the dashboard:

Color slot Used for
Primary Buttons, active tab highlights, links, and accent colors
Hover Button and link colors when you hover over them
Text Body text, labels, and descriptions
Background Dashboard background and card backgrounds
Border Card borders, dividers, and input field borders

Click any color swatch to open the color picker and select your desired color.


Applying and Resetting

  • Click Save Changes to apply the selected palette to your dashboard
  • Click Reset Settings to restore the default color palette

Frontend Field Settings

Frontend Field Settings controls which optional form fields instructors see when creating or editing courses, lessons, topics, quizzes, and questions from the dashboard. Show only the fields that make sense for your workflow.

How to access: Go to WordPress Admin > LearnDash Dashboard > Frontend Fields.


How It Works

Each content type - Course, Lesson, Topic, Quiz, and Question - has its own set of optional fields. You decide which optional fields are visible to instructors when they use the creation and editing forms.

Some fields are always shown because they are required for the content to work. You cannot hide these:

  • Title
  • Content
  • Status (publish/draft)

Everything else is optional and can be turned on or off.

On a fresh install, all optional fields are visible by default. Instructors can use all creation forms right away without any configuration from you.


Configure Fields for Each Content Type

Step 1: Select a content type

Use the Select Field Group dropdown to choose: Course, Lesson, Topic, Quiz, or Question.

Step 2: Toggle optional fields

Each optional field has a checkbox. Check it to show the field to instructors; uncheck it to hide it.

Use Enable/Disable All Optional Fields at the top of the panel to toggle everything at once.

Step 3: Save

Click Save Changes under each content type. Each content type saves independently, so you can configure them in any order.


What You Can Show or Hide

The available optional fields depend on the content type:

Course fields:

  • Featured Image
  • Short Description
  • Course Materials
  • Course Access Mode
  • Co-instructor sharing
  • Video URL and progression settings

Lesson fields:

  • Featured Image
  • Lesson Materials
  • Video progression settings
  • Assignment upload fields

Topic fields:

  • Featured Image
  • Topic Materials
  • Video URL

Quiz fields:

  • Pass mark
  • Time limit
  • Result messages
  • Question randomization settings

Question fields:

  • Question type
  • Points
  • Answer feedback

Saving Your Settings

Click Save Changes under any content type panel to save that panel's field configuration. Each content type saves separately.

Activity Feed Settings

The activity feed shows a live stream of learning events - enrollments, completions, quiz submissions, and assignment uploads - on the dashboard. You control whether the feed is visible and which users can see it.

Note: Activity feed settings have moved to General Settings > Dashboard Components. If you see a redirect notice on the Feed Settings tab, follow it to the new location.

How to access: Go to WordPress Admin > LearnDash Dashboard > General Settings > Dashboard Components.


Turn Off the Activity Feed for Everyone

Enable Disable Live Course Activity to hide the activity feed for all users across your entire site, regardless of their role.


Hide the Feed from Specific Roles

Use Disable Role-wise Live Activity to hide the activity feed from selected roles while keeping it visible for others.

  1. Click into the multi-select dropdown
  2. Select the roles you want to hide the feed from
  3. Save your settings

Administrators always retain access to the feed and cannot be excluded.

Example: Select Student to hide the feed from students while instructors and group leaders can still see it.


What the Activity Feed Shows

The feed displays learning events in order from newest to oldest. Each entry includes:

  • The user's profile photo
  • Their display name
  • A description of what they did, including the course or lesson name
  • A relative timestamp (for example, "2 hours ago")

Events that appear in the feed:

  • Student enrolled in a course
  • Student completed a course
  • Student completed a lesson
  • Student completed a topic
  • Student submitted a quiz (passed or failed)
  • Student uploaded an assignment
  • Student submitted an essay answer

BuddyPress Integration

When BuddyPress is active on your site, the dashboard integrates with the BuddyPress activity stream automatically. No additional settings are required beyond having BuddyPress installed and active.

To use BuddyPress profile photos in the activity feed, go to General Settings and enable Set BuddyPress Avatar.


Integrations

LearnDash LMS Integration

Overview

LearnDash Dashboard is built on top of LearnDash LMS. You must have LearnDash installed and active for the dashboard to work. Everything your students and instructors see - courses, lessons, quizzes, progress, certificates - comes directly from LearnDash.


What the Dashboard Can Manage

LearnDash Dashboard gives instructors and administrators a front-end interface for all LearnDash content:

Content Type What You Can Do
Courses Create, edit, clone, and manage courses
Lessons Add lessons, set drip schedules, manage content
Topics Create topics within lessons, set drip schedules
Quizzes Build and manage quizzes, view quiz reports
Questions Create and edit quiz questions
Certificates Manage certificate templates
Assignments Review and approve student assignment submissions
Groups Manage groups, enrollment codes, and group members

Enrollment and Student Access

When a student gains or loses access to a course, the dashboard updates automatically. You do not need to refresh or manually sync anything.

Group-based enrollment is also fully supported. When a student joins a group, they get access to all courses assigned to that group - no individual course enrollment needed.


Progress Tracking

The dashboard pulls student progress from LearnDash in real time. Instructors can see:

  • Which lessons and topics a student has completed
  • Quiz scores and attempt history
  • Assignment submissions and approval status
  • Overall course completion rates

Progress statistics on the dashboard home refresh automatically throughout the day. If you need the latest numbers right away after a large update, you can manually refresh stats from the admin settings.


Drip Content

If you use LearnDash's drip scheduling to release lessons and topics over time, instructors can view and edit those schedules directly from the dashboard. No need to go into the WordPress admin area to adjust drip settings.


Group Management

Group leaders see only the groups they manage. The dashboard scopes all group data - students, courses, progress, and enrollment codes - to the groups that group leader is responsible for.

Administrators can see and manage all groups on the site.


Course Builder

Instructors can build complete courses from the dashboard without ever entering the WordPress admin area. The built-in course builder lets you:

  1. Create a new course
  2. Add lessons and topics in the desired order
  3. Attach quizzes to lessons or topics
  4. Publish when ready

You can also clone an existing course - useful for reusing a course structure for a new cohort or semester.


Instructor Roles

The dashboard recognises two instructor-level roles:

  • Instructor - Can create and manage their own courses, view reports for their students, and communicate with enrolled students.
  • Group Leader - Can manage their assigned groups, enroll students, and view group-level reports.

Administrators have full access to all content and all students across the site.

WooCommerce Integration

Overview

The WooCommerce integration is optional. When active, it lets you track course sales, calculate instructor commissions, and display earnings data directly in the instructor dashboard.

You need WooCommerce if you want to:

  • Pay instructors a commission on course sales
  • Show instructors an earnings chart and transaction history
  • Allow instructors to request payouts from the dashboard

Requirements

  • WooCommerce must be installed and active.
  • The LearnDash WooCommerce integration addon must also be active. This addon links your WooCommerce products to LearnDash courses.

Setup

  1. Install and activate WooCommerce on your site.
  2. Install and activate the LearnDash WooCommerce integration addon.
  3. Go to WooCommerce > Products and edit each course product. Use the "Related Course" field to link the product to the correct LearnDash course.
  4. Go to WordPress Admin > LearnDash Dashboard > Monetization and enable commission tracking.
  5. Set your commission rate (percentage or fixed amount) and any platform fee you want to deduct.

How Commission Tracking Works

When a student purchases a course through WooCommerce, the dashboard automatically:

  1. Identifies which LearnDash course was purchased.
  2. Finds the instructor who owns that course.
  3. Calculates the instructor's commission based on the actual amount paid (coupons and discounts are reflected automatically).
  4. Deducts any platform fee you configured.
  5. Records the transaction in the instructor's earnings history.

Commission is calculated on the actual sale price, not the listed price. So if a student uses a coupon, the commission reflects the discounted amount.


Refunds and Cancellations

If an order is refunded or cancelled, the commission is automatically reversed. The instructor's earnings balance is updated to reflect the refund.


Currency

The dashboard uses your WooCommerce store currency for all earnings displays. If you change your WooCommerce currency, the dashboard updates automatically.


The Earnings Tab

When commission tracking is enabled, instructors see an Earnings tab in their dashboard. From there they can:

  • View an earnings chart over time
  • Browse individual sale records
  • See commission amounts and platform fees per transaction
  • Submit a withdrawal request

Withdrawal requests are reviewed by an administrator, who can approve or reject them. The instructor receives an email notification when their request is reviewed.


PayPal Support

If you use LearnDash's built-in PayPal payment option instead of WooCommerce, the dashboard also tracks those transactions. Commission recording works the same way - purchases are detected automatically and earnings are logged without any manual setup.


Frequently Asked Questions

Do I need WooCommerce if I don't sell courses? No. If courses are free or managed through group enrollment, you can ignore the WooCommerce integration entirely. The Earnings tab will not appear in the dashboard.

Can I set different commission rates per course? Commission rates are set globally in the Monetization settings. For per-course rates, contact the Wbcom Designs support team.

Does the dashboard handle taxes? Commission is calculated on the order line total as recorded by WooCommerce. Tax handling depends on your WooCommerce tax configuration.

BuddyPress Integration

Overview

The BuddyPress integration is optional. When BuddyPress is active on your site, LearnDash Dashboard adds social profile features that make the instructor and student experience feel more connected to your community.

You do not need to configure anything to activate this integration - it turns on automatically when BuddyPress is detected.


Features

BuddyPress Profile Avatars

When BuddyPress is active, the dashboard displays each user's BuddyPress profile photo throughout the interface - on the dashboard home, in student lists, in messages, and in reports. Users who upload a photo to their BuddyPress profile will see it appear in the dashboard automatically.

If BuddyPress is not active, the dashboard falls back to Gravatar or WordPress profile photos.

Instructors get a dedicated "Instructor Dashboard" link added to their BuddyPress profile navigation. When someone visits an instructor's BuddyPress profile, they can click this link to go directly to the instructor's dashboard page.

This link only appears on profiles of users who have the instructor role. Students and group leaders do not see this link on their profiles.

Private Messaging via BuddyPress

When BuddyPress is active, you can choose to route all private messages through BuddyPress messaging instead of the dashboard's built-in messaging system.

To enable this:

  1. Go to WordPress Admin > LearnDash Dashboard > Integrations.
  2. Enable the Use BuddyPress Messaging option.

When this is enabled, the Private Messages tab in the dashboard opens BuddyPress message threads. Messages sent from the dashboard are stored in BuddyPress and visible in the BuddyPress messages inbox too.

If this option is off, the dashboard uses its own private messaging system and messages are stored separately from BuddyPress.


Settings

Go to WordPress Admin > LearnDash Dashboard > Integrations to control BuddyPress behaviour:

Setting Default Description
BuddyPress Avatars Enabled Show BuddyPress profile photos in the dashboard
Instructor Profile Link Enabled Add "Instructor Dashboard" to BuddyPress profile navigation
Use BuddyPress Messaging Disabled Route private messages through BuddyPress

Instructor Registration with BuddyPress

If your site uses BuddyPress for user registration, the instructor application flow works with BuddyPress sign-up. When a new user applies to become an instructor through the BuddyPress registration page, the application is handled the same way as a standard WordPress registration - an admin reviews and approves the application, and the user receives an email notification.


Frequently Asked Questions

Do I need BuddyPress for the dashboard to work? No. BuddyPress is entirely optional. The dashboard works without it.

Can I disable the BuddyPress integration without deactivating BuddyPress? Yes. Go to LearnDash Dashboard > Integrations and turn off the BuddyPress settings individually.

What if a user has no BuddyPress avatar? The dashboard falls back to the user's Gravatar, then to a default avatar.

Uncanny Groups Integration

Overview

The Uncanny Groups integration is optional. When the Uncanny Groups for LearnDash plugin is active on your site, LearnDash Dashboard adds enhanced group management features - including seat tracking, group hierarchy displays, and enrollment code management - directly in the Groups tab.

This integration activates automatically when Uncanny Groups is detected. No manual setup is required.


Requirements

  • The Uncanny Groups for LearnDash plugin must be installed and active.
  • Your LearnDash groups must be configured in Uncanny Groups (seat limits, enrollment codes, or hierarchy) for the relevant features to appear.

Features

Seat Tracking

If your Uncanny Groups configuration sets a seat limit on a group, the dashboard displays a live seat badge next to each group in the Groups tab.

The badge shows how many seats are used out of the total available:

  • Normal - fewer than 90% of seats are filled
  • Warning - 90% or more of seats are filled (badge turns yellow/amber)
  • Full - all seats are taken (badge turns red)

This gives group leaders an at-a-glance view of capacity across all their groups without needing to open each group individually.

Group Hierarchy

If you use Uncanny Groups' hierarchy feature to create parent and child groups, the dashboard shows hierarchy badges in the Groups tab so you can quickly tell which groups are parent groups and which are sub-groups.

The badge shows:

  • Whether the group is a parent group
  • Which parent group a child group belongs to
  • Whether seats are pooled across the hierarchy

Enrollment Code Management

For groups configured as code-managed groups in Uncanny Groups, the Groups tab in the dashboard lets you:

  • View the total number of codes for a group, how many are available, and how many have been redeemed
  • Generate new enrollment codes in bulk
  • Filter codes by status (all, available, or redeemed)

Generating codes from the dashboard uses Uncanny Groups' own code generator, so codes work exactly the same as codes created from the Uncanny Groups settings area.


How Seat and Code Data Stays Current

Seat counts and enrollment code data refresh automatically. When a student redeems a code, when seats are added or removed, or when you save a group from the dashboard, the displayed numbers update without you needing to refresh the page or clear a cache.

Data is also refreshed on a short timer in the background, so figures shown in the dashboard are always recent.


Frequently Asked Questions

Do I need Uncanny Groups for the Groups tab to work? No. The Groups tab works without Uncanny Groups. The seat badges, hierarchy indicators, and code management panel only appear if Uncanny Groups is installed and active.

Can I use enrollment codes without Uncanny Groups? Yes. LearnDash Dashboard has its own enrollment code system under Dashboard > Bulk Management > Enrollment Codes. The Uncanny Groups integration adds a separate code management view specifically for groups configured in Uncanny Groups.

What happens to the seat badges if I deactivate Uncanny Groups? The badges disappear automatically. The dashboard detects whether Uncanny Groups is active on every page load, so there is nothing to clean up manually.

Can group leaders see the seat and code features? Yes. Group leaders see seat badges and code management for the groups they are assigned to. They cannot see data for groups they do not lead.

Developer Guide

Plugin Architecture

Overview

LearnDash Dashboard is a WordPress plugin that extends LearnDash LMS with a frontend dashboard panel. It provides role-specific interfaces for administrators, instructors, group leaders, and students.

Key stats: 28 frontend tabs, 49 AJAX handlers, 17 REST endpoints, 16 admin pages, 9 database tables, 7 cron jobs, 38+ classes.

Requirements: LearnDash LMS (sfwd-lms), ACF (bundled, included with the plugin).


Directory Structure

ld-dashboard/
├── ld-dashboard.php              # Plugin entry point
├── admin/
│   ├── class-ld-dashboard-admin.php
│   ├── fields/                   # ACF field registration (Field Builder)
│   └── partials/                 # Admin settings templates
├── includes/
│   ├── class-ld-dashboard.php    # Core loader
│   ├── class-ld-dashboard-functions.php
│   ├── emails/                   # Email template system
│   ├── modules/                  # Feature modules (Zoom, BuddyPress, To-Do)
│   ├── reports/                  # Reports + charts architecture
│   ├── save-handlers/            # Form save handlers
│   └── tabs/                     # Instructor tab renderers
├── public/
│   ├── class-ld-dashboard-public.php
│   ├── css/                      # Frontend CSS modules
│   ├── js/                       # Frontend JS modules
│   └── reports/                  # User statistics REST endpoint
├── shortcodes/                   # Legacy shortcode implementations
├── templates/
│   └── emails/                   # Email HTML templates
└── widgets/                      # WordPress widgets

Design Patterns

Singleton

Used for classes that should have only one instance throughout the request lifecycle.

// Access a singleton
$commission = LD_Dashboard_Commission::instance();
$shortcodes = Ld_Dashboard_Shortcodes::instance();
$email      = LD_Dashboard_Email_Template::instance();

Singleton classes: LD_Dashboard_Commission, LD_Dashboard_ACF_Renderer, LD_Dashboard_Activity_Reporter, Ld_Dashboard_Shortcodes, LD_Dashboard_CSS_Generator, LD_Dashboard_Email_Handler, LD_Dashboard_Course_Builder, LD_Dashboard_Instructor_Manager, LD_Dashboard_Assets, LD_Dashboard_Messaging.

Registry

Central registries manage discovery, instantiation, and REST API routing for reports, charts, tabs, and modules. Each registry is a singleton.

Registry Class Registration Hook
Reports + Charts LD_Dashboard_Report_Registry ld_dashboard_register_reports / ld_dashboard_register_charts
Tabs LD_Dashboard_Tab_Registry ld_dashboard_registered_tabs filter
Modules LD_Dashboard_Module_Registry ld_dashboard_register_modules

Template Method

LD_Dashboard_Tab_Base defines the rendering algorithm in its final public function render() method. Subclasses implement the abstract steps (get_accessible_ids, get_filter_args, render_item) without changing the overall flow.

Builder (Field Builder)

LD_Dashboard_Field_Builder uses a fluent API to register ACF field groups:

$builder = new LD_Dashboard_Field_Builder( 'lesson' );
$builder
    ->add_title_field( $label )
    ->add_status_field( $label, $statuses )
    ->add_content_field( $label )
    ->register( 'lesson-field-group', $title, $location );

Static Utility Classes

Stateless helper classes accessed via static methods:

LD_Dashboard_Helper::is_instructor( $user_id );
LD_Dashboard_Course_Helper::get_instructor_courses( $user_id );
LD_Dashboard_Query_Helper::get_activity_table_name();

Class Hierarchy

LD_Dashboard_Report_Base (abstract)
└── LD_Dashboard_Chart_Base (abstract)
    ├── LD_Dashboard_Chart_Course_Completion
    ├── LD_Dashboard_Chart_Top_Courses
    ├── LD_Dashboard_Chart_Instructor_Earnings
    └── LD_Dashboard_Chart_Time_Spent
└── LD_Dashboard_Report_Quiz_Results
└── LD_Dashboard_Report_Essay_Submissions
└── LD_Dashboard_Report_Assignment_Status
└── LD_Dashboard_Report_Course_Progress

LD_Dashboard_Module_Base (abstract)
├── LD_Dashboard_Zoom_Module
├── LD_Dashboard_BP_Module
├── LD_Dashboard_Todo_Module
└── LD_Dashboard_Uncanny_Groups_Module

LD_Dashboard_Tab_Base (abstract)
├── LD_Dashboard_Tab_Lesson
├── LD_Dashboard_Tab_Topic
├── LD_Dashboard_Tab_Quiz
├── LD_Dashboard_Tab_Question
├── LD_Dashboard_Tab_Assignment
├── LD_Dashboard_Tab_Announcement
└── LD_Dashboard_Tab_Certificate

LD_Dashboard_Save_Handler_Base (abstract)
├── LD_Dashboard_Save_Handler_Course
├── LD_Dashboard_Save_Handler_Lesson
├── LD_Dashboard_Save_Handler_Topic
├── LD_Dashboard_Save_Handler_Quiz
├── LD_Dashboard_Save_Handler_Question
├── LD_Dashboard_Save_Handler_Certificate
├── LD_Dashboard_Save_Handler_Announcement
└── LD_Dashboard_Save_Handler_Group

Key Entry Points

The plugin boots from ld-dashboard.php which instantiates Ld_Dashboard (the core loader).

ld-dashboard.php
└── Ld_Dashboard (includes/class-ld-dashboard.php)
    ├── loads Admin class       → LD_Dashboard_Admin
    ├── loads Public class      → Ld_Dashboard_Public
    ├── loads Report Registry   → LD_Dashboard_Report_Registry
    ├── loads Module Registry   → LD_Dashboard_Module_Registry
    ├── loads Tab Registry      → LD_Dashboard_Tab_Registry
    ├── loads Messaging         → LD_Dashboard_Messaging
    └── loads REST endpoints    → LD_Dashboard_User_Statistics

Hook Lifecycle

plugins_loaded
  └── Plugin class instantiated
      └── All includes required
          └── Module registry boots (dependency checks)

init (priority 20)
  └── Report Registry initializes
      ├── do_action('ld_dashboard_register_reports', $registry)
      └── do_action('ld_dashboard_register_charts', $registry)

rest_api_init
  └── Report Registry registers REST routes
  └── Messaging registers REST routes
  └── User Statistics registers REST route

wp_enqueue_scripts
  └── LD_Dashboard_Assets enqueues CSS/JS modules

Database Tables

The plugin creates 9 custom tables on activation via dbDelta(). All tables use the WordPress table prefix.

Table Purpose
{prefix}ld_dashboard_emails Email log - records emails sent by instructors to students
{prefix}ld_dashboard_instructor_commission_logs Commission transaction records per course sale
{prefix}ld_dashboard_time_tracking Per-user, per-post time-on-page tracking data
{prefix}ld_dashboard_invite_user Course invitation records with acceptance status
{prefix}ld_dashboard_users_statistics Cached aggregate stats per user (courses, students, etc.)
{prefix}ld_dashboard_email_queue DB-backed email queue with retry logic and status tracking
{prefix}ld_dashboard_messages Private messaging threads and replies
{prefix}ld_dashboard_enrollment_codes Enrollment code batches with usage limits and expiry
{prefix}ld_dashboard_code_redemptions Records of code redemptions per user

Tables are created or updated safely on every plugin activation using dbDelta(), which is safe to re-run on existing tables.

Hooks & Filters Reference

All hooks use the ld_dashboard_ prefix. Hooks are available since version 7.5.0 unless noted.


Actions

ld_dashboard_register_reports

Fires during init (priority 20) to allow registration of custom table reports.

Parameters:

Parameter Type Description
$registry LD_Dashboard_Report_Registry The report registry instance

Location: includes/reports/class-ld-dashboard-report-registry.php

Example:

add_action( 'ld_dashboard_register_reports', function( $registry ) {
    LD_Dashboard_Report_Registry::register( 'my-report', 'My_Custom_Report' );
} );

ld_dashboard_register_charts

Fires during init (priority 20) to allow registration of custom Chart.js charts.

Parameters:

Parameter Type Description
$registry LD_Dashboard_Report_Registry The report registry instance

Location: includes/reports/class-ld-dashboard-report-registry.php

Example:

add_action( 'ld_dashboard_register_charts', function( $registry ) {
    LD_Dashboard_Report_Registry::register( 'my-chart', 'My_Custom_Chart' );
} );

ld_dashboard_register_modules

Fires when the module registry boots, before built-in modules are initialized. Register custom modules here.

Parameters:

Parameter Type Description
$registry LD_Dashboard_Module_Registry The module registry instance

Location: includes/modules/class-ld-dashboard-module-registry.php

Example:

add_action( 'ld_dashboard_register_modules', function( $registry ) {
    $registry->register( 'my-module', 'My_Custom_Module' );
} );

ld_dashboard_module_loaded

Fires after a module successfully boots (dependencies met and boot() called).

Parameters:

Parameter Type Description
$module LD_Dashboard_Module_Base The loaded module instance

Location: includes/modules/class-ld-dashboard-module-base.php

Example:

add_action( 'ld_dashboard_module_loaded', function( $module ) {
    if ( 'zoom' === $module->get_id() ) {
        // Zoom is active.
    }
} );

There is also a module-specific variant: ld_dashboard_module_{module_id}_loaded.


ld_dashboard_before_modules_boot

Fires before the module registry iterates and boots registered modules.

Parameters:

Parameter Type Description
$registry LD_Dashboard_Module_Registry The registry instance

ld_dashboard_modules_booted

Fires after all modules have been booted.

Parameters:

Parameter Type Description
$registry LD_Dashboard_Module_Registry The registry instance
$modules array Array of active module instances

ld_dashboard_email_sent

Fires after an email is sent via ld_dashboard_send_email().

Parameters:

Parameter Type Description
$sent bool Whether the email was sent successfully
$template_id string Email template ID
$to string Recipient email address
$args array Template arguments passed to the email

Location: includes/emails/class-ld-dashboard-email-template.php

There is also a template-specific variant: ld_dashboard_email_sent_{template_id}.


ld_dashboard_after_save

Fires after any save handler completes. This generic hook fires for every content type.

Parameters:

Parameter Type Description
$post_id int Saved post ID
$form array Full sanitized form data submitted
$meta_data array Meta data saved to the post
$handler string Handler ID (e.g., course, lesson, quiz)

Location: includes/save-handlers/class-ld-dashboard-save-handler-base.php

Example:

add_action( 'ld_dashboard_after_save', function( $post_id, $form, $meta_data, $handler ) {
    if ( 'course' === $handler ) {
        // Run after any course save.
    }
}, 10, 4 );

ld_dashboard_after_course_save

Fires after a course is saved via the save handler.

Parameters:

Parameter Type Description
$post_id int Saved course post ID
$meta_data array Meta data saved to the post

Location: includes/save-handlers/class-ld-dashboard-save-handler-course.php

Example:

add_action( 'ld_dashboard_after_course_save', function( $post_id, $meta_data ) {
    // Sync course to external system.
}, 10, 2 );

ld_dashboard_after_lesson_save

Fires after a lesson is saved via the save handler.

Parameters:

Parameter Type Description
$post_id int Saved lesson post ID
$meta_data array Meta data saved to the post
$course_id int Associated course ID

Location: includes/save-handlers/class-ld-dashboard-save-handler-lesson.php


ld_dashboard_after_topic_save

Fires after a topic is saved via the save handler.

Parameters:

Parameter Type Description
$post_id int Saved topic post ID
$meta_data array Meta data saved to the post
$course_id int Associated course ID
$lesson_id int Associated lesson ID

Location: includes/save-handlers/class-ld-dashboard-save-handler-topic.php

Example:

add_action( 'ld_dashboard_after_topic_save', function( $post_id, $meta_data, $course_id, $lesson_id ) {
    // React to topic save with full hierarchy context.
}, 10, 4 );

ld_dashboard_after_quiz_save

Fires after a quiz is saved via the save handler.

Parameters:

Parameter Type Description
$post_id int Saved quiz post ID
$meta_data array Meta data saved to the post
$course_id int Associated course ID

Location: includes/save-handlers/class-ld-dashboard-save-handler-quiz.php


ld_dashboard_after_question_save

Fires after a question is saved via the save handler.

Parameters:

Parameter Type Description
$post_id int Saved question post ID
$meta_data array Meta data saved to the post
$quiz_id int Associated quiz post ID

Location: includes/save-handlers/class-ld-dashboard-save-handler-question.php


ld_dashboard_after_certificate_save

Fires after a certificate is saved via the save handler.

Parameters:

Parameter Type Description
$post_id int Saved certificate post ID
$meta_data array Meta data saved to the post

Location: includes/save-handlers/class-ld-dashboard-save-handler-certificate.php


ld_dashboard_after_group_save

Fires after a LearnDash group is saved via the save handler.

Parameters:

Parameter Type Description
$post_id int Saved group post ID
$meta_data array Meta data saved to the post

Location: includes/save-handlers/class-ld-dashboard-save-handler-group.php


ld_dashboard_after_announcement_save

Fires after an announcement is saved via the save handler.

Parameters:

Parameter Type Description
$post_id int Saved announcement post ID
$meta_data array Meta data saved to the post
$course_id int Associated course ID (0 if none or unauthorized)

Location: includes/save-handlers/class-ld-dashboard-save-handler-announcement.php


ld_dashboard_reports_registered

Fires after all built-in reports and charts are registered. Use this hook to register custom reports.

Parameters:

Parameter Type Description
$registry LD_Dashboard_Report_Registry The report registry instance

Location: includes/reports/index.php

Example:

add_action( 'ld_dashboard_reports_registered', function( $registry ) {
    LD_Dashboard_Report_Registry::register( 'my-report', 'My_Custom_Report' );
} );

Filters

ld_dashboard_report_data

Filters report row data after role-based access filtering but before the response is built. Applies to all table reports.

Parameters:

Parameter Type Description
$data array Report data rows
$report_id string Report identifier (e.g., quiz-results)
$args array Query arguments used to fetch the data

Returns: array Modified report rows.

Location: includes/reports/class-ld-dashboard-report-base.php

Example:

add_filter( 'ld_dashboard_report_data', function( $data, $report_id, $args ) {
    if ( 'quiz-results' === $report_id ) {
        // Remove rows with zero score.
        return array_filter( $data, fn( $row ) => $row['score'] > 0 );
    }
    return $data;
}, 10, 3 );

There is also a report-specific variant: ld_dashboard_report_{report_id}_data.


ld_dashboard_registered_tabs

Filters the array of registered tab classes. Use this to add, replace, or remove tabs.

Parameters:

Parameter Type Description
$tabs array Array of tab_id => class_name pairs

Returns: array Modified tabs array.

Location: includes/tabs/class-ld-dashboard-tab-registry.php

Example:

add_filter( 'ld_dashboard_registered_tabs', function( $tabs ) {
    $tabs['gradebook'] = 'My_Gradebook_Tab';
    return $tabs;
} );

ld_dashboard_{tab_id}_content_args

Filters WP_Query arguments before the tab executes its query. Replace the tab ID placeholder with the tab slug (e.g., lesson, quiz).

Parameters:

Parameter Type Description
$args array WP_Query arguments

Returns: array Modified query arguments.

Location: includes/tabs/class-ld-dashboard-tab-base.php

Example:

add_filter( 'ld_dashboard_lesson_content_args', function( $args ) {
    $args['meta_key']   = 'featured';
    $args['meta_value'] = '1';
    return $args;
} );

ld_dashboard_{tab_id}_content

Filters the rendered HTML content for a tab after all items are rendered.

Parameters:

Parameter Type Description
$content string Rendered HTML

Returns: string Modified HTML.


ld_dashboard_email_types

Filters the registered email type configurations. Use this to add custom email types or modify existing ones.

Parameters:

Parameter Type Description
$email_types array Array of email type configurations

Returns: array Modified email types.

Location: includes/emails/class-ld-dashboard-email-template.php

Example:

add_filter( 'ld_dashboard_email_types', function( $types ) {
    $types['my_custom_email'] = array(
        'title'    => __( 'My Custom Email', 'my-plugin' ),
        'template' => 'custom/my-email.php',
        'subject'  => __( 'Hello, {user_name}', 'my-plugin' ),
    );
    return $types;
} );

ld_dashboard_email_recipient_{template_id}

Filters the recipient email address for a specific template before sending. Replace the template ID placeholder with the template ID (e.g., instructor_approved).

Parameters:

Parameter Type Description
$to string Recipient email address
$template_id string Email template ID
$args array Template arguments

Returns: string Modified recipient address.

There is also a generic variant ld_dashboard_email_recipient that fires for every template (same parameters).

Location: includes/emails/class-ld-dashboard-email-template.php

Example:

add_filter( 'ld_dashboard_email_recipient_instructor_approved', function( $to, $template_id, $args ) {
    // Redirect approvals to a custom address in staging.
    if ( defined( 'WP_DEBUG' ) && WP_DEBUG ) {
        return 'dev@example.com';
    }
    return $to;
}, 10, 3 );

ld_dashboard_email_subject_{template_id}

Filters the email subject for a specific template before sending. Replace the template ID placeholder with the template ID.

Parameters:

Parameter Type Description
$subject string Email subject with merge tags replaced
$template_id string Email template ID
$args array Template arguments

Returns: string Modified subject.

There is also a generic variant ld_dashboard_email_subject that fires for every template (same parameters).

Location: includes/emails/class-ld-dashboard-email-template.php

Example:

add_filter( 'ld_dashboard_email_subject_instructor_approved', function( $subject ) {
    return '[' . get_bloginfo( 'name' ) . '] ' . $subject;
} );

ld_dashboard_email_content_{template_id}

Filters the rendered email body HTML for a specific template before the header/footer wrapper is applied. Replace the template ID placeholder with the template ID.

Parameters:

Parameter Type Description
$content string Rendered HTML content
$template_id string Email template ID
$args array Template arguments

Returns: string Modified HTML content.

There is also a generic variant ld_dashboard_email_content that fires for every template (same parameters).

Location: includes/emails/class-ld-dashboard-email-template.php


ld_dashboard_email_headers_{template_id}

Filters email headers for a specific template. Replace the template ID placeholder with the template ID.

Parameters:

Parameter Type Description
$headers array Email headers array
$template_id string Email template ID
$args array Template arguments

Returns: array Modified headers.

There is also a generic variant ld_dashboard_email_headers that fires for every template (same parameters).

Location: includes/emails/class-ld-dashboard-email-template.php

Example:

add_filter( 'ld_dashboard_email_headers_instructor_approved', function( $headers ) {
    $headers[] = 'CC: admin@example.com';
    return $headers;
} );

ld_dashboard_email_merge_tags

Filters all available merge tag values before replacement in email content and subjects.

Parameters:

Parameter Type Description
$tags array Merge tag key-value pairs
$content string Content being processed
$args array Original template arguments

Returns: array Modified merge tags.

Example:

add_filter( 'ld_dashboard_email_merge_tags', function( $tags, $content, $args ) {
    $tags['custom_field'] = get_option( 'my_custom_value' );
    return $tags;
}, 10, 3 );

ld_dashboard_email_header

Filters the HTML of the email header wrapper (output of email-header.php).

Parameters:

Parameter Type Description
$header string Email header HTML

Returns: string Modified HTML.


ld_dashboard_email_footer

Filters the HTML of the email footer wrapper (output of email-footer.php).

Parameters:

Parameter Type Description
$footer string Email footer HTML

Returns: string Modified HTML.


ld_dashboard_chart_{chart_id}_data

Filters the complete chart response array for a specific chart.

Parameters:

Parameter Type Description
$response array Chart response with id, chartData, options, meta
$args array Query arguments

Returns: array Modified chart response.


ld_dashboard_email_from_address

Filters the From email address used in all plugin emails.

Parameters:

Parameter Type Description
$from_email string From email address (defaults to WordPress admin email)

Returns: string Modified From address.


ld_dashboard_email_from_name

Filters the From name used in all plugin emails.

Parameters:

Parameter Type Description
$from_name string From name (defaults to site name)

Returns: string Modified From name.
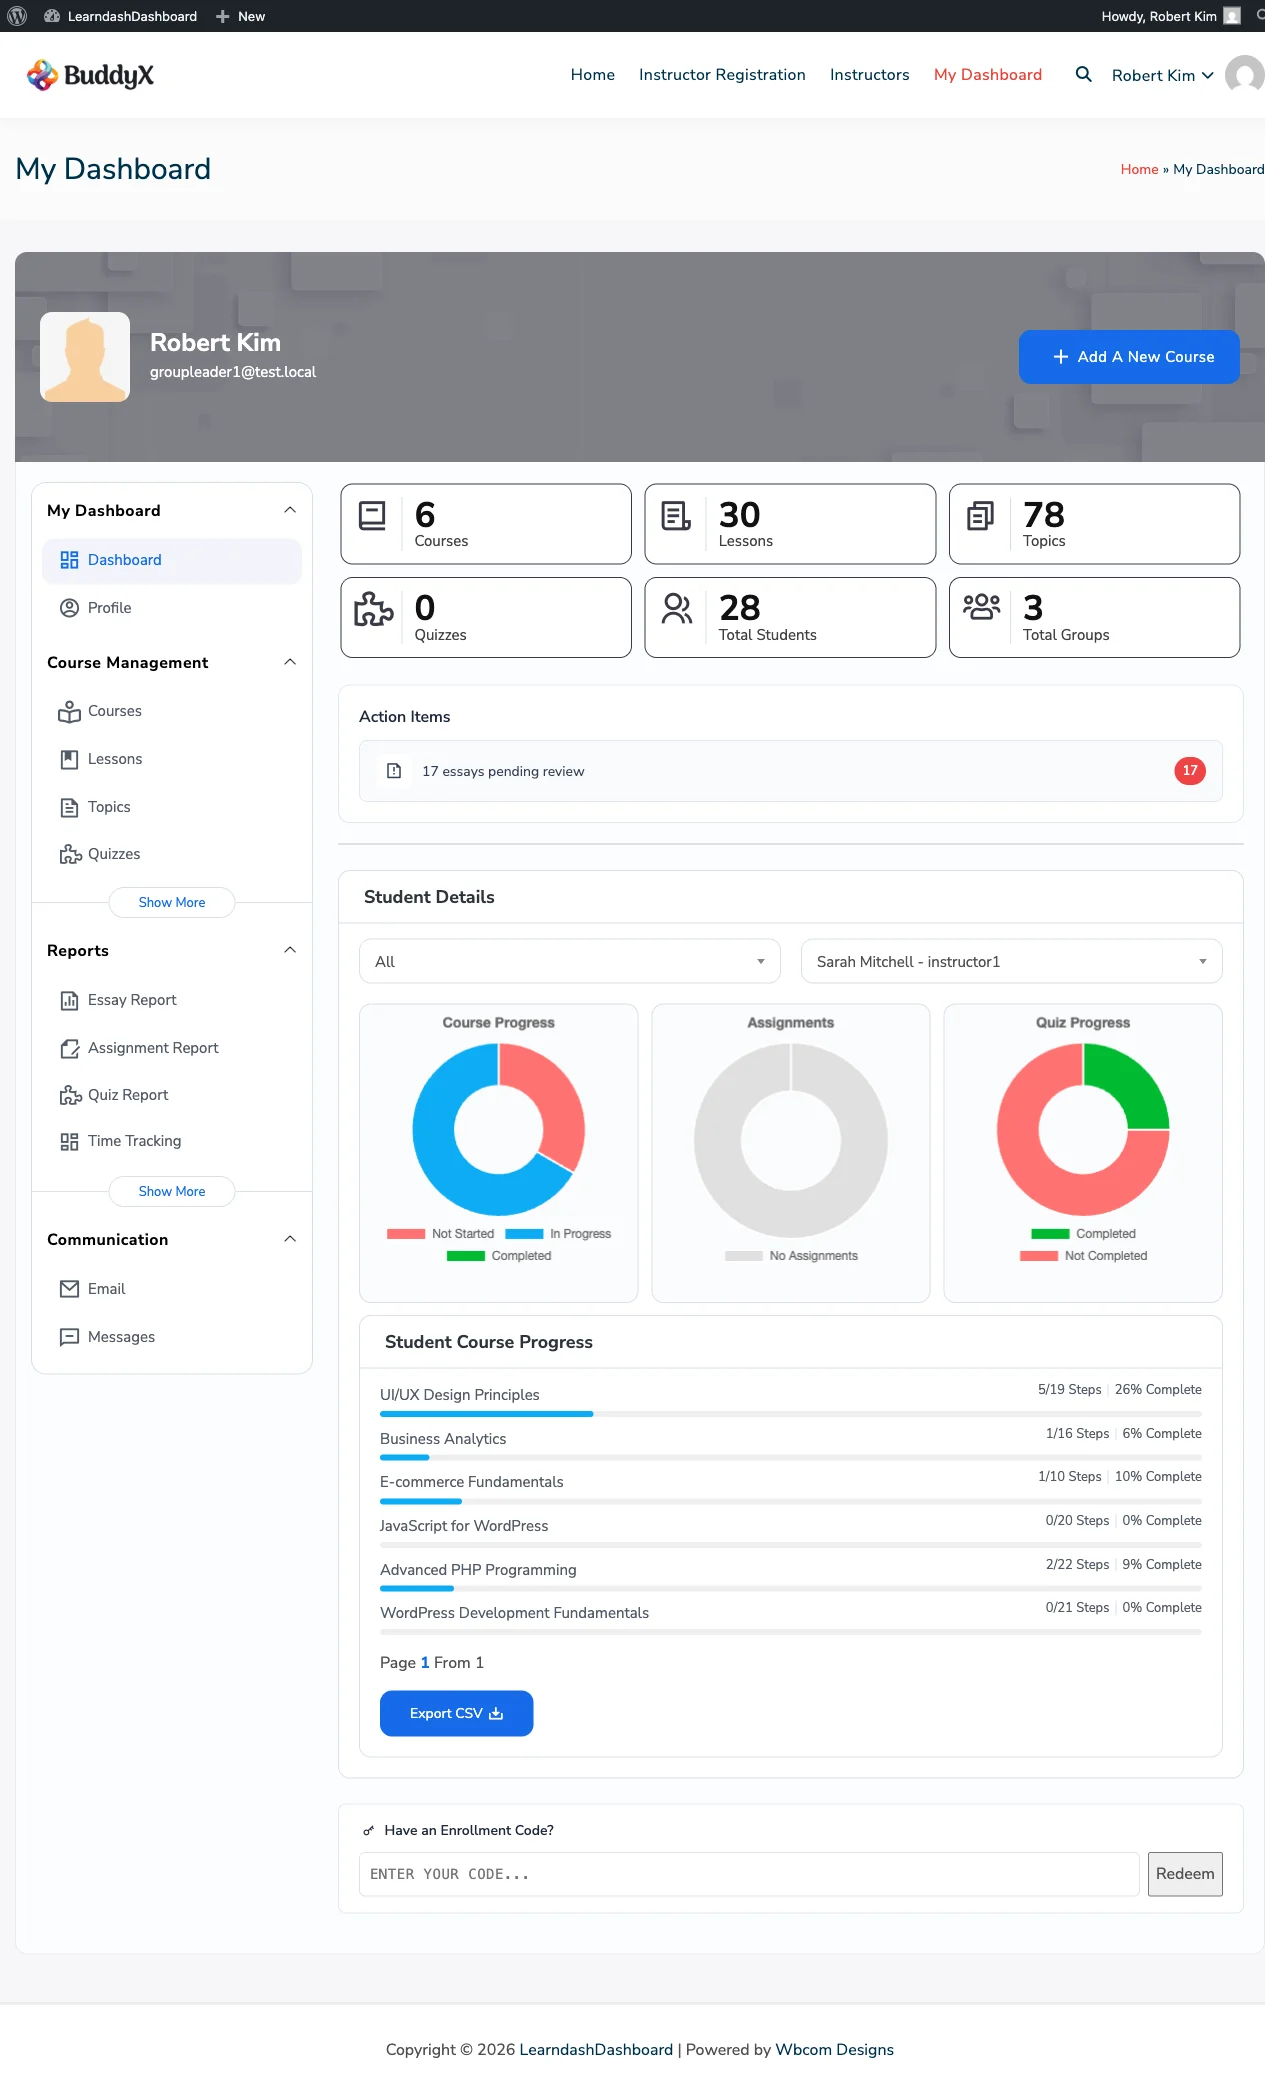
REST API Reference

LearnDash Dashboard exposes two REST API namespaces:

  • ldd_report/v1 - User statistics
  • ld-dashboard/v2 - Reports, charts, and private messaging

Base URL: {site_url}/wp-json/


Authentication

All endpoints require a logged-in WordPress session. Use cookie-based authentication with the X-WP-Nonce header.

// Get nonce from localized data
const nonce = ldReportData.nonce; // or ld_dashboard_public_js.nonce

fetch( '/wp-json/ld-dashboard/v2/reports', {
    headers: {
        'X-WP-Nonce': nonce,
        'Content-Type': 'application/json',
    },
    credentials: 'same-origin',
} );

The nonce is generated with wp_create_nonce( 'wp_rest' ).


Messaging Endpoints

Namespace: ld-dashboard/v2

Messaging requires the enable-private-messaging setting to be enabled. All messaging endpoints require the user to be logged in.


GET /messages

Retrieve conversations (inbox) for the current user.

Permission: Logged in

Parameters:

Parameter Type Default Description
page int 1 Page number
per_page int 20 Conversations per page (max 50)

Response:

{
    "conversations": [
        {
            "thread_id": 42,
            "subject": "Question about Lesson 3",
            "course_id": 100,
            "course_name": "Introduction to PHP",
            "other_user": {
                "id": 5,
                "name": "Jane Smith",
                "avatar": "https://example.com/avatar.jpg"
            },
            "last_message": "Thanks for the clarification!",
            "last_message_at": "2026-02-20 14:32:00",
            "unread_count": 2
        }
    ],
    "total": 15,
    "pages": 1
}

POST /messages

Send a new message or reply to an existing thread.

Permission: Logged in

Body parameters:

Parameter Type Required Description
recipient_id int Yes WordPress user ID of the recipient
course_id int Yes Course ID for context (required for new threads)
subject string Yes* Subject line (*required for new threads only)
message string Yes Message body (HTML allowed via wp_kses_post)
parent_id int No Thread ID to reply to (omit for new conversations)

Messaging rules:

  • Admins can message anyone.
  • Instructors can message students enrolled in their courses and co-instructors.
  • Group leaders can message members of their groups.
  • Students can only message instructors of their enrolled courses.

Response (201):

{
    "id": 57,
    "message": "Message sent successfully.",
    "thread_id": 42
}

Error (403):

{
    "code": "rest_forbidden",
    "message": "You cannot message this user. You must share a course relationship.",
    "data": { "status": 403 }
}

GET /messages/{id}

Get all messages in a thread.

Permission: Must be the sender or recipient of the thread

URL parameters:

Parameter Type Description
id int Thread ID (root message ID)

Response:

{
    "thread_id": 42,
    "subject": "Question about Lesson 3",
    "course_id": 100,
    "course_name": "Introduction to PHP",
    "other_user": {
        "id": 5,
        "name": "Jane Smith",
        "avatar": "https://example.com/avatar.jpg"
    },
    "messages": [
        {
            "id": 42,
            "sender_id": 5,
            "sender": {
                "id": 5,
                "name": "Jane Smith",
                "avatar": "https://example.com/avatar.jpg"
            },
            "message": "<p>Hi, I have a question...</p>",
            "read_at": null,
            "created_at": "2026-02-20 12:00:00",
            "is_mine": false
        }
    ]
}

DELETE /messages/{id}

Soft-delete a thread for the current user.

Permission: Must be the sender or recipient

Deletion is user-specific: the other participant still sees the conversation. The row is permanently deleted only when both users have deleted it.

Response (200):

{
    "deleted": true
}

PUT /messages/{id}/read

Mark all messages in a thread as read for the current user.

Permission: Must be the sender or recipient

Response (200):

{
    "success": true
}

GET /messages/unread-count

Get the total unread message count for the current user.

Permission: Logged in

Response:

{
    "count": 3
}

GET /messages/recipients

Get eligible message recipients for the current user.

Permission: Logged in

Parameters:

Parameter Type Default Description
course_id int 0 Filter recipients by course context
search string "" Search by display name, login, or email

Response:

[
    {
        "id": 12,
        "name": "John Doe",
        "email": "john@example.com",
        "avatar": "https://example.com/avatar.jpg",
        "role": "Instructor"
    }
]

Report Endpoints

Namespace: ld-dashboard/v2

Report endpoints require the user to pass LD_Dashboard_REST_Permissions::check(). Administrators, instructors, and group leaders have access. Students are automatically scoped to their own data.


GET /reports

List all reports and charts available to the current user.

Permission: Administrator, instructor, or group leader

Response:

{
    "success": true,
    "data": {
        "tables": {
            "quiz-results": {
                "id": "quiz-results",
                "title": "Quiz Results",
                "type": "table",
                "exports": ["csv", "excel"]
            }
        },
        "charts": {
            "course-completion": {
                "id": "course-completion",
                "title": "Course Completion",
                "type": "chart",
                "chartType": "doughnut"
            }
        }
    }
}

GET /reports/{report_id}

Get data for a specific table report.

Also accepts POST (for large filter payloads).

Permission: Administrator, instructor, or group leader

URL parameters:

Parameter Type Description
report_id string Report ID (e.g., quiz-results, essay-submissions)

Query parameters:

Parameter Type Default Description
course_id int 0 Filter by course ID
group_id int 0 Filter by group ID
lesson_id int 0 Filter by lesson ID
user_id int 0 Filter by user ID (auto-set for students)
status string all Filter by status
per_page int -1 Items per page (-1 for all)
page int 1 Page number

Response:

{
    "success": true,
    "data": {
        "id": "quiz-results",
        "title": "Quiz Results",
        "type": "table",
        "columns": [
            {
                "data": "student_name",
                "title": "Student",
                "visible": true,
                "orderable": true
            }
        ],
        "data": [ /* row objects */ ],
        "exports": ["csv", "excel"],
        "meta": {
            "report_id": "quiz-results",
            "report_type": "table",
            "total": 42,
            "cached_at": "2026-02-20 14:00:00"
        }
    }
}

Report data is cached in WordPress transients for 1 hour (by default per get_cache_duration()).


DELETE /reports/{report_id}/cache

Clear cached data for a specific report.

Permission: Administrator only

Response:

{
    "success": true,
    "message": "Cache cleared successfully."
}

Chart data via reports endpoint

Charts are served through the same /reports/{id} endpoint. The response structure differs for chart types.

Example chart response:

{
    "success": true,
    "data": {
        "id": "course-completion",
        "title": "Course Completion",
        "type": "chart",
        "chartType": "doughnut",
        "chartData": {
            "labels": ["Completed", "In Progress", "Not Started"],
            "datasets": [
                {
                    "label": "Course Completion",
                    "data": [45, 30, 25],
                    "backgroundColor": ["rgba(46,204,113,0.8)", "rgba(241,196,15,0.8)", "rgba(113,125,150,0.8)"],
                    "borderColor": ["rgba(46,204,113,1)", "rgba(241,196,15,1)", "rgba(113,125,150,1)"],
                    "borderWidth": 1
                }
            ]
        },
        "options": {
            "responsive": true,
            "maintainAspectRatio": true,
            "plugins": {
                "legend": { "display": true, "position": "top" }
            }
        },
        "meta": {
            "report_id": "course-completion",
            "report_type": "chart",
            "chart_type": "doughnut",
            "total": 3,
            "cached_at": "2026-02-20 14:00:00"
        }
    }
}

Chart query parameters:

Parameter Type Default Description
course_id int 0 Filter by course
group_id int 0 Filter by group
filter string year Time range: year, month, or week
date_from string "" Start date in YYYY-MM-DD format
date_to string "" End date in YYYY-MM-DD format

Available Reports

Use these IDs as the report_id parameter in /reports/{report_id} requests.

Table Reports

Report ID Title Description
quiz-results Quiz Results Quiz attempt scores and pass/fail status per student
essay-submissions Essay Submissions Student essay submissions with grading status
assignment-status Assignment Status Assignment submissions with approval status
course-progress Course Progress Student progress through enrolled courses
time-by-course Time by Course Learning time totals broken down by course
time-by-student Time by Student Learning time totals broken down by student
time-by-content Time by Content Learning time broken down by lesson or topic
instructor-performance Instructor Performance Course completion rates and student counts per instructor
group-performance Group Performance Completion rates and activity per LearnDash group
quiz-question-analysis Quiz Question Analysis Per-question pass/fail rates across all attempts

Chart Reports

Chart ID Title Chart Type Description
course-completion Course Completion Doughnut Completed vs. in-progress vs. not started
top-courses Top Courses Bar Courses ranked by enrollment or completion count
instructor-earnings Instructor Earnings Bar Commission earnings per instructor over time
time-spent Time Spent Bar Total learning time with week/month/year filter
time-trend Time Trend Line Learning time trend over a selected period
enrollment-trends Enrollment Trends Line New enrollments over time
revenue-per-course Revenue per Course Bar Revenue broken down by course
course-dropoff Course Drop-off Bar Where students stop progressing in a course

Registering Custom Reports

Use the ld_dashboard_reports_registered action to register your own report class after built-in reports load:

add_action( 'ld_dashboard_reports_registered', function( $registry ) {
    LD_Dashboard_Report_Registry::register( 'my-report', 'My_Custom_Report_Class' );
} );

Your class must extend LD_Dashboard_Report_Base (table) or LD_Dashboard_Chart_Base (chart).


User Statistics Endpoint

Namespace: ldd_report/v1

GET /user/{id}/statistics

Get aggregate statistics for a specific user.

URL: /wp-json/ldd_report/v1/user/{id}/statistics

Permission: Administrator, instructor, or the user themselves

URL parameters:

Parameter Type Description
id int WordPress user ID

Query parameters:

Parameter Type Default Description
force bool false Bypass transient cache and recalculate fresh statistics

Response:

{
    "success": true,
    "cached": true,
    "data": {
        "user_id": 5,
        "course_count": 12,
        "lessons_count": 48,
        "topics_count": 96,
        "quizzes_count": 24,
        "enrolled_course_count": 3,
        "active_course_count": 2,
        "completed_course_count": 1,
        "approved_assignment_count": 7,
        "not_approved_assignment_count": 3,
        "graded_essays_count": 5,
        "not_graded_essays_count": 2,
        "students_count": 143,
        "group_count": 4,
        "certificate_count": 1,
        "calculated_at": "2026-02-20 14:00:00"
    }
}

cached is true when the response was served from the transient cache. Pass ?force=true to recalculate and refresh the cache. Statistics are cached for 1 hour per user.

Response field reference:

Field Description
course_count Courses created (instructors/admins) or completed quizzes (students)
lessons_count Lessons in the user's courses
topics_count Topics in the user's courses
quizzes_count Quizzes in the user's courses (or completed quizzes for students)
enrolled_course_count Total courses the user is enrolled in
active_course_count Enrolled courses with status in_progress
completed_course_count Enrolled courses with status completed
approved_assignment_count Assignments with approval_status = 1
not_approved_assignment_count Assignments pending approval
graded_essays_count Essays marked as graded
not_graded_essays_count Essays pending grading
students_count Students enrolled in the user's courses or groups
group_count LearnDash groups the user belongs to or manages
certificate_count Certificates earned by the user
calculated_at MySQL timestamp of when statistics were last calculated

Error Responses

All endpoints return standard WordPress REST error objects on failure:

{
    "code": "ld_dashboard_forbidden",
    "message": "You do not have permission to view this report.",
    "data": { "status": 403 }
}
HTTP Status Code Meaning
401 rest_forbidden Not logged in
403 ld_dashboard_forbidden Insufficient permissions
404 ld_dashboard_not_found Report or message not found
500 ld_dashboard_error Server error during data fetch

Shortcode Development

LearnDash Dashboard registers 9 shortcodes through the Ld_Dashboard_Shortcodes singleton. All shortcodes use output buffering and support theme template overrides.


Available Shortcodes

[ld_dashboard]

Renders the main frontend dashboard panel.

Attributes: None

Behavior:

  • Shows a login notice and link for logged-out users (filterable via ld_dashboard_login_notice and ld_dashboard_login_link).
  • Loads templates/ld-dashboard.php (or theme override).
  • Displays role-appropriate tabs and content.

Template: templates/ld-dashboard.php

echo do_shortcode( '[ld_dashboard]' );

[ld_instructor_registration]

Displays the instructor application/registration form.

Attributes: None (delegates to LD_Dashboard_Instructor_Manager::registration_form())

Behavior: Shows the registration form to non-instructors. Logged-in instructors see a message that they are already registered.


[ld_dashboard_instructors_list]

Displays a paginated, searchable grid of all instructors.

Attributes:

Attribute Default Description
col 4 Number of grid columns

Filters available:

  • ld_dashboard_instructors_columns - Modify column count.
  • ld_dashboard_instructors_per_page - Items per page (default: 12).
  • ld_dashboard_instructors_list - Filter the instructor WP_User array.
  • ld_dashboard_instructor_data - Filter individual instructor data.
  • ld_dashboard_instructor_courses - Filter courses shown per instructor.
  • ld_dashboard_instructor_avatar - Filter instructor avatar HTML.
  • ld_dashboard_instructor_name - Filter instructor display name.
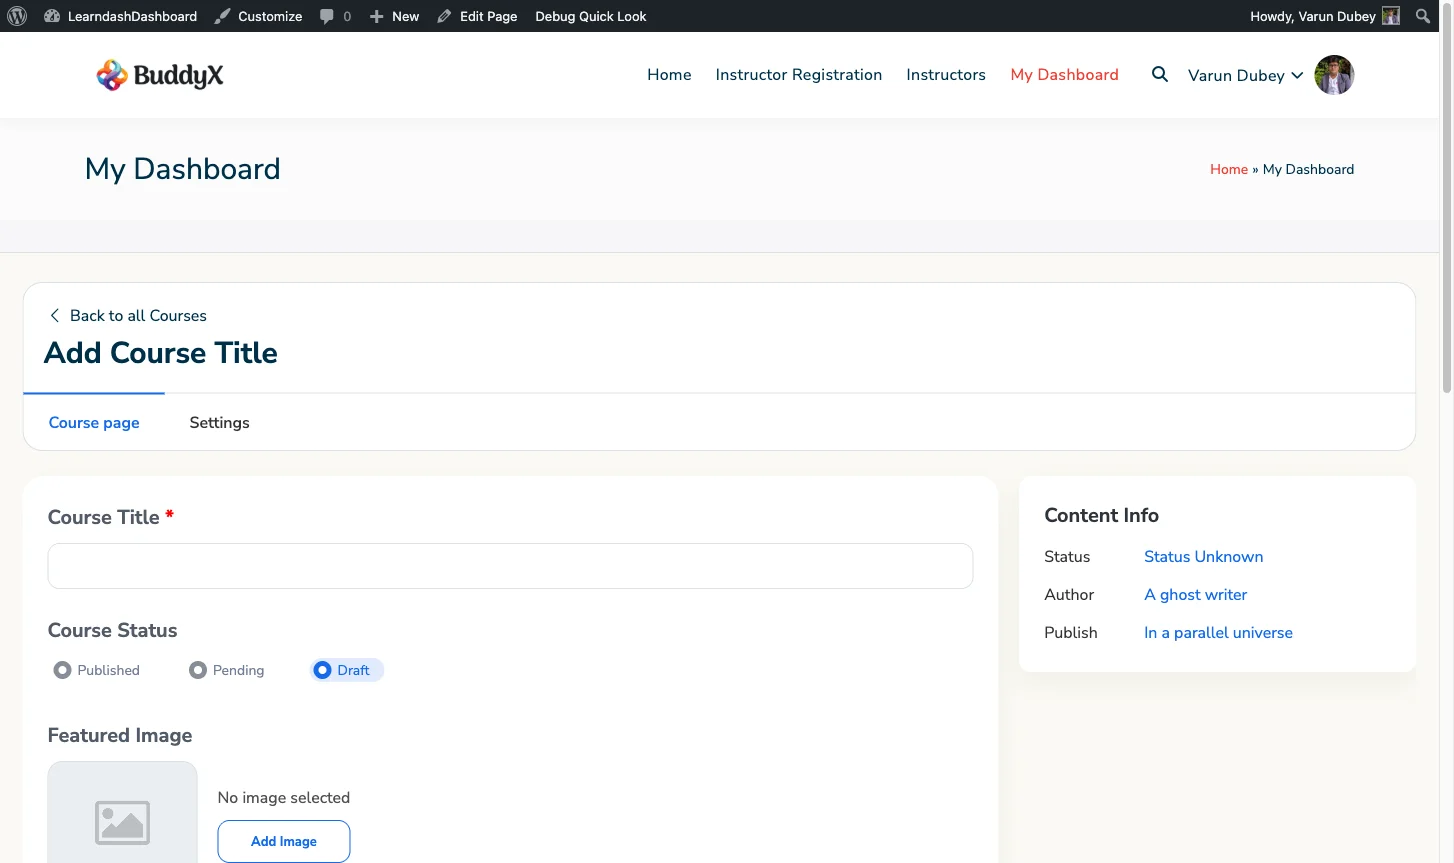
If the URL matches an instructor profile (via instructor_username query var), a single instructor profile is shown instead of the grid.

Actions:

  • ld_dashboard_before_single_instructor - Fires before single instructor template.
  • ld_dashboard_after_single_instructor - Fires after single instructor template.

Templates:

  • Grid: No template file (inline output).
  • Single profile: templates/ld-dashboard-single-instructor.php.

[ld_student_details]

Displays student progress details. Visible to instructors, group leaders, and administrators only.

Attributes: None

Template: templates/ld-dashboard-student-status.php


[ld_email]

Displays the email integration interface for sending bulk emails to students.

Attributes: None

Visibility: Only shown when the enable-email-integration general setting is enabled and the user is an instructor, group leader, or administrator.

Template: templates/ld-dashboard-email-integration.php


[ld_enrollment_code_redeem]

Displays an enrollment code redemption widget for logged-in users.

Attributes: None

Behavior: Returns empty string for logged-out users. Enqueues ld-dashboard-enrollment-codes style and script.

Template: templates/dashboard-widgets/enrollment-code-redeem.php


[ld_dashboard_meeting]

Displays a list of Zoom meetings. Requires the Zoom module to be active.

Attributes:

Attribute Default Description
id - Meeting post ID
title Details Section title

Template: templates/ld-dashboard-meeting-shortcode.php


[ld_dashboard_meeting_single]

Displays a single Zoom meeting detail view.

Attributes:

Attribute Default Description
id - Meeting post ID
title Details Section title

Template: templates/ld-dashboard-single-meeting.php


[ld_dashboard_meeting_embed]

Embeds a Zoom meeting via iframe or SDK.

Attributes:

Attribute Default Description
meeting_id - Zoom meeting ID
height 500px Frame height
iframe yes Enable iframe embed
disable_countdown no Disable pre-join countdown

Zoom shortcodes only render when ld_dashboard_is_zoom_enabled() returns true.


Template Override System

All shortcodes use Ld_Dashboard_Shortcodes::locate_template() to find templates. The lookup order is:

  1. Active child theme: {child-theme}/ld-dashboard/{template-name}
  2. Active parent theme: {parent-theme}/ld-dashboard/{template-name}
  3. Plugin: {plugin}/templates/{template-name}

To override a template, copy it from the plugin's templates/ directory to your theme's ld-dashboard/ directory.

mytheme/
└── ld-dashboard/
    └── ld-dashboard.php          # Overrides main dashboard template
    └── ld-dashboard-student-status.php

Output Buffering Pattern

All shortcode render methods use WordPress's recommended output buffering pattern:

public function render_my_shortcode( $atts, $content = '' ) {
    ob_start();

    // Template or inline output.
    $template = $this->locate_template( 'my-template.php' );
    if ( $template ) {
        include $template;
    }

    return ob_get_clean();
}

This ensures shortcodes return HTML rather than echo it directly, which is required for correct WordPress shortcode behavior.


Permission Checks

Shortcodes perform role checks before rendering content:

// Check if user is an instructor, group leader, or admin.
if (
    ! learndash_is_group_leader_user()
    && ! learndash_is_admin_user()
    && ! LD_Dashboard_Helper::is_instructor()
) {
    return ''; // Return empty for students.
}

The [ld_dashboard] shortcode shows a login prompt for logged-out users rather than returning empty.


Adding Custom Shortcodes

You can add custom shortcodes that integrate with the dashboard's template system by hooking into WordPress's add_shortcode during init. You can also extend Ld_Dashboard_Shortcodes if you need access to locate_template().

add_action( 'init', function() {
    add_shortcode( 'my_dashboard_widget', function( $atts ) {
        // Only for logged-in users.
        if ( ! is_user_logged_in() ) {
            return '';
        }

        $atts = shortcode_atts(
            array( 'title' => __( 'My Widget', 'my-plugin' ) ),
            $atts
        );

        ob_start();

        // Check theme override first.
        $theme_template = get_stylesheet_directory() . '/ld-dashboard/my-widget.php';
        $plugin_template = MY_PLUGIN_DIR . 'templates/my-widget.php';

        if ( file_exists( $theme_template ) ) {
            include $theme_template;
        } elseif ( file_exists( $plugin_template ) ) {
            include $plugin_template;
        }

        return ob_get_clean();
    } );
} );

Within your template file, you have access to $atts (shortcode attributes) and all standard WordPress globals.

Creating Custom Reports

LearnDash Dashboard provides a unified reports architecture since version 7.5.0. You can create custom table reports and Chart.js charts that integrate with the REST API, DataTables, and access control system.


Report Types

Type Base Class Output
Table LD_Dashboard_Report_Base DataTable with CSV/Excel export
Chart LD_Dashboard_Chart_Base Chart.js visualization

LD_Dashboard_Chart_Base extends LD_Dashboard_Report_Base. Charts inherit all caching, permission, and REST API infrastructure.


LD_Dashboard_Report_Base

Located at includes/reports/class-ld-dashboard-report-base.php.

Abstract Methods (required)

Method Return Description
get_id(): string string Unique identifier (e.g., my-revenue-report). Used for REST endpoint and cache keys.
get_title(): string string Human-readable translated title.
get_columns(): array array DataTables column definitions.
fetch_data( array $args ): array array Raw data fetch. Do not apply role filtering here.

Override Methods (optional)

Method Default Description
get_type(): string 'table' Report type identifier.
filter_data_by_role( array $data, int $user_id ): array Returns data unchanged Apply role-based row filtering.
user_can_view( int $user_id = 0 ): bool Checks LD_Dashboard_REST_Permissions Custom permission logic.
get_cache_duration(): int HOUR_IN_SECONDS Transient cache TTL in seconds.
get_export_formats(): array ['csv', 'excel'] Supported export formats.
get_allowed_roles(): array ['administrator', 'ld_instructor', 'group_leader'] Roles that can access this report.
get_rest_args(): array Standard filter params REST API parameter schema.
get_meta(): array Report ID and type Additional metadata in the response.

Built-in Infrastructure

The base class handles automatically:

  • Caching - get_cached_data() stores results in WordPress transients. Cache key includes report ID, user ID, and a hash of the query args.
  • Role scoping - get_accessible_course_ids() and get_accessible_user_ids() return ID arrays restricted by role (admin gets empty = no restriction).
  • REST callback - rest_callback( WP_REST_Request $request ) enforces permissions, extracts args, and returns a WP_REST_Response.
  • Student scoping - Students are automatically scoped to user_id = current_user_id in the REST callback.

LD_Dashboard_Chart_Base

Located at includes/reports/class-ld-dashboard-chart-base.php.

Extends LD_Dashboard_Report_Base. Override get_type() returns 'chart' automatically.

Additional Abstract Methods

Method Return Description
get_chart_type(): string string Chart.js type: 'bar', 'pie', 'doughnut', or 'line'.

Additional Override Methods

Method Default Description
format_chart_data( array $data ): array Expects labels and values keys Transform raw data to Chart.js dataset format.
get_chart_options(): array Responsive, legend top Chart.js configuration options.
get_filter_options(): array year, month, week Time period filter options for the frontend.
get_export_formats(): array [] Charts do not export by default.

Registering Reports

Register your report class using LD_Dashboard_Report_Registry::register() inside the ld_dashboard_register_reports or ld_dashboard_register_charts action hook.

add_action( 'ld_dashboard_register_reports', function( $registry ) {
    LD_Dashboard_Report_Registry::register( 'course-revenue', 'My_Course_Revenue_Report' );
} );

add_action( 'ld_dashboard_register_charts', function( $registry ) {
    LD_Dashboard_Report_Registry::register( 'revenue-trend', 'My_Revenue_Trend_Chart' );
} );

register() instantiates your class and validates it extends the correct base. If the class does not exist or extends an incorrect base, it calls _doing_it_wrong().


REST API Auto-Registration

When you register a report, the REST endpoint is automatically created:

GET  /wp-json/ld-dashboard/v2/reports/course-revenue
POST /wp-json/ld-dashboard/v2/reports/course-revenue
DELETE /wp-json/ld-dashboard/v2/reports/course-revenue/cache

Your report's get_rest_args() defines the accepted parameters. The cache clearing endpoint requires administrator access.


JavaScript Auto-Initialization

Render a report container in PHP templates using the registry helpers:

// Table report
echo LD_Dashboard_Report_Registry::render_table( 'course-revenue', array( 'course_id' => 123 ) );

// Chart
echo LD_Dashboard_Report_Registry::render_chart( 'revenue-trend', array( 'filter' => 'month' ) );

// Global function aliases
echo ld_dashboard_render_table( 'course-revenue' );
echo ld_dashboard_render_chart( 'revenue-trend' );

The rendered HTML uses data-ld-report or data-ld-chart attributes for JavaScript auto-initialization:

<!-- Table -->
<div class="ld-dashboard-report-table-wrapper">
    <table id="ld-report-table-course-revenue"
           class="ld-dashboard-table display ld-dashboard-datatable"
           data-ld-report="course-revenue"
           data-options='{"course_id":123}'
           cellspacing="0" width="100%">
    </table>
</div>

<!-- Chart -->
<div class="ld-dashboard-chart-wrapper">
    <div id="ld-report-chart-revenue-trend"
         class="ld-dashboard-chart-js"
         data-ld-chart="revenue-trend"
         data-options='{}'>
    </div>
</div>

The LDReportManager JavaScript module detects these attributes and initializes DataTables or Chart.js automatically.


Complete Example: Course Revenue Report

<?php
/**
 * Custom Course Revenue Report.
 *
 * @since 1.0.0
 */
class My_Course_Revenue_Report extends LD_Dashboard_Report_Base {

    /**
     * Get report ID.
     *
     * @since 1.0.0
     * @return string
     */
    public function get_id(): string {
        return 'course-revenue';
    }

    /**
     * Get report title.
     *
     * @since 1.0.0
     * @return string
     */
    public function get_title(): string {
        return __( 'Course Revenue', 'my-plugin' );
    }

    /**
     * Get column definitions.
     *
     * @since 1.0.0
     * @return array
     */
    protected function get_columns(): array {
        return array(
            array(
                'data'      => 'course_name',
                'title'     => __( 'Course', 'my-plugin' ),
                'visible'   => true,
                'orderable' => true,
            ),
            array(
                'data'      => 'sales',
                'title'     => __( 'Sales', 'my-plugin' ),
                'visible'   => true,
                'orderable' => true,
            ),
            array(
                'data'      => 'revenue',
                'title'     => __( 'Revenue', 'my-plugin' ),
                'visible'   => true,
                'orderable' => true,
            ),
        );
    }

    /**
     * Fetch revenue data.
     *
     * @since 1.0.0
     * @param array $args Query arguments.
     * @return array
     */
    protected function fetch_data( array $args ): array {
        global $wpdb;

        $course_id = isset( $args['course_id'] ) ? absint( $args['course_id'] ) : 0;

        // Example: join commission logs to course data.
        $query = $wpdb->prepare(
            "SELECT
                p.post_title AS course_name,
                COUNT(*) AS sales,
                SUM(l.course_price) AS revenue
            FROM {$wpdb->prefix}ld_dashboard_instructor_commission_logs l
            INNER JOIN {$wpdb->posts} p ON p.ID = l.course_id
            WHERE p.post_status = 'publish'
            " . ( $course_id ? $wpdb->prepare( 'AND l.course_id = %d', $course_id ) : '' ) . "
            GROUP BY l.course_id
            ORDER BY revenue DESC",
            // Note: prepare() args are only needed if course_id filter is active.
            ...( $course_id ? array( $course_id ) : array() )
        );

        return $wpdb->get_results( $query, ARRAY_A ) ?: array();
    }

    /**
     * Filter data by role — instructors see only their own courses.
     *
     * @since 1.0.0
     * @param array $data    Raw data.
     * @param int   $user_id User ID.
     * @return array
     */
    protected function filter_data_by_role( array $data, int $user_id ): array {
        // Admins see all.
        if ( learndash_is_admin_user( $user_id ) ) {
            return $data;
        }

        $accessible_ids = $this->get_accessible_course_ids( $user_id );

        if ( empty( $accessible_ids ) ) {
            return array();
        }

        return array_filter(
            $data,
            fn( $row ) => in_array( $row['course_id'], $accessible_ids, true )
        );
    }

    /**
     * Override cache duration to 30 minutes.
     *
     * @since 1.0.0
     * @return int
     */
    protected function get_cache_duration(): int {
        return 30 * MINUTE_IN_SECONDS;
    }
}

// Register the report.
add_action( 'ld_dashboard_register_reports', function() {
    LD_Dashboard_Report_Registry::register( 'course-revenue', 'My_Course_Revenue_Report' );
} );

Then render in a template:

// Render in a tab template or custom page.
echo ld_dashboard_render_table( 'course-revenue', array( 'course_id' => 0 ) );

Access the data via REST:

GET /wp-json/ld-dashboard/v2/reports/course-revenue?course_id=123

Filtering Report Data

Use the ld_dashboard_report_data filter to modify any report's data after role filtering:

add_filter( 'ld_dashboard_report_data', function( $data, $report_id, $args ) {
    if ( 'course-revenue' === $report_id ) {
        // Format revenue as currency.
        foreach ( $data as &$row ) {
            $row['revenue'] = '$' . number_format( (float) $row['revenue'], 2 );
        }
    }
    return $data;
}, 10, 3 );

Use the report-specific filter for targeted changes:

add_filter( 'ld_dashboard_report_course-revenue_data', function( $response, $args ) {
    // Modify the full response array (columns, data, meta, etc.)
    return $response;
}, 10, 2 );

Creating Custom Modules

Modules are self-contained feature extensions that boot conditionally based on enabled status and dependency availability. The module system was introduced in version 7.5.0.


LD_Dashboard_Module_Base

Located at includes/modules/class-ld-dashboard-module-base.php.

All custom modules must extend this abstract class.

Abstract Methods (required)

Method Return Description
get_id(): string string Unique module identifier (e.g., my-analytics). Must be a valid slug.
get_name(): string string Human-readable module name for display in settings.
get_description(): string string Short description of what the module does.
boot(): void void Module initialization - register hooks, load files, enqueue assets. Called only when all dependencies pass.

Dependency System

Declare dependencies in the $requires property. The module will not boot if any dependency is missing.

protected $requires = array(
    'plugin:woocommerce',       // Check if WooCommerce class exists
    'class:WooCommerce',        // Check for specific class
    'function:wc_get_product',  // Check for function
    'constant:WOOCOMMERCE_VERSION', // Check for constant
);

Dependency types:

Prefix Check Example
plugin: Class lookup for known plugins, then is_plugin_active() plugin:buddypress
class: class_exists() class:BuddyPress
function: function_exists() function:bp_is_active
constant: defined() constant:BP_VERSION

Known plugins with class-based checks: buddypressBuddyPress, bp-user-todo-listBP_User_Todo_List, learndashSFWD_LMS, woocommerceWooCommerce.

Initialization Flow

The registry calls init() on each module. You cannot override init() - it is declared final.

init() is called by registry
  ├── is_enabled()? (checks ld_dashboard_module_settings option)
  │   └── false → skip (module disabled by user)
  ├── check_dependencies()? (iterates $requires)
  │   └── false → skip (missing plugin/class/function/constant)
  └── boot() is called
      └── do_action('ld_dashboard_module_loaded', $module)
      └── do_action('ld_dashboard_module_{id}_loaded', $module)

Optional Override Methods

Method Default Description
is_enabled(): bool Reads ld_dashboard_module_settings option Override to use a different settings source.
get_settings_config(): array Base config with id, name, description, requires, enabled Override to add module-specific settings fields for the admin UI.

Protected Helpers

Method Description
get_module_path(): string Returns the module's directory path with trailing slash.
get_module_url(): string Returns the module's URL with trailing slash.

LD_Dashboard_Module_Registry

Located at includes/modules/class-ld-dashboard-module-registry.php.

The registry is a singleton that manages all module registration and lifecycle.

Registration

Register modules inside the ld_dashboard_register_modules action hook, which fires during the registry's private constructor before built-in modules boot.

add_action( 'ld_dashboard_register_modules', function( $registry ) {
    $registry->register( 'my-analytics', 'My_Analytics_Module' );
} );

You must register modules before the registry calls boot(). Registering after boot triggers _doing_it_wrong().

Global Helpers

// Get the registry instance
$registry = ld_dashboard_modules();

// Check if a module is active (loaded, deps met, and booted)
if ( ld_dashboard_is_module_active( 'zoom' ) ) {
    // Zoom is running.
}

// Get a module instance
$zoom = ld_dashboard_modules()->get( 'zoom' );

// Get all active modules
$active = ld_dashboard_modules()->get_active_modules();

// Check if a module is registered (not necessarily active)
$registered = ld_dashboard_modules()->is_registered( 'my-analytics' );

Module Settings

Modules can be toggled in the admin via Settings → Integrations. The enabled state is stored in the ld_dashboard_module_settings WordPress option as an associative array of module_id => bool.

// Programmatically enable/disable a module
ld_dashboard_modules()->set_module_enabled( 'my-analytics', true );

// Check if a module is enabled (not the same as active — dependency check not run)
$module = ld_dashboard_modules()->get( 'my-analytics' );
if ( $module && $module->is_enabled() ) {
    // Enabled in settings.
}

Complete Example: Analytics Module

This example creates an "Analytics" module that requires a custom analytics plugin to be active.

<?php
/**
 * Analytics Module for LD Dashboard.
 *
 * @since 1.0.0
 */
class My_Analytics_Module extends LD_Dashboard_Module_Base {

    /**
     * Module dependencies.
     *
     * @var array
     */
    protected $requires = array(
        'plugin:my-analytics-plugin',   // Must be active
        'class:My_Analytics',           // Class must exist
    );

    /**
     * Get module ID.
     *
     * @since 1.0.0
     * @return string
     */
    public function get_id(): string {
        return 'my-analytics';
    }

    /**
     * Get module name.
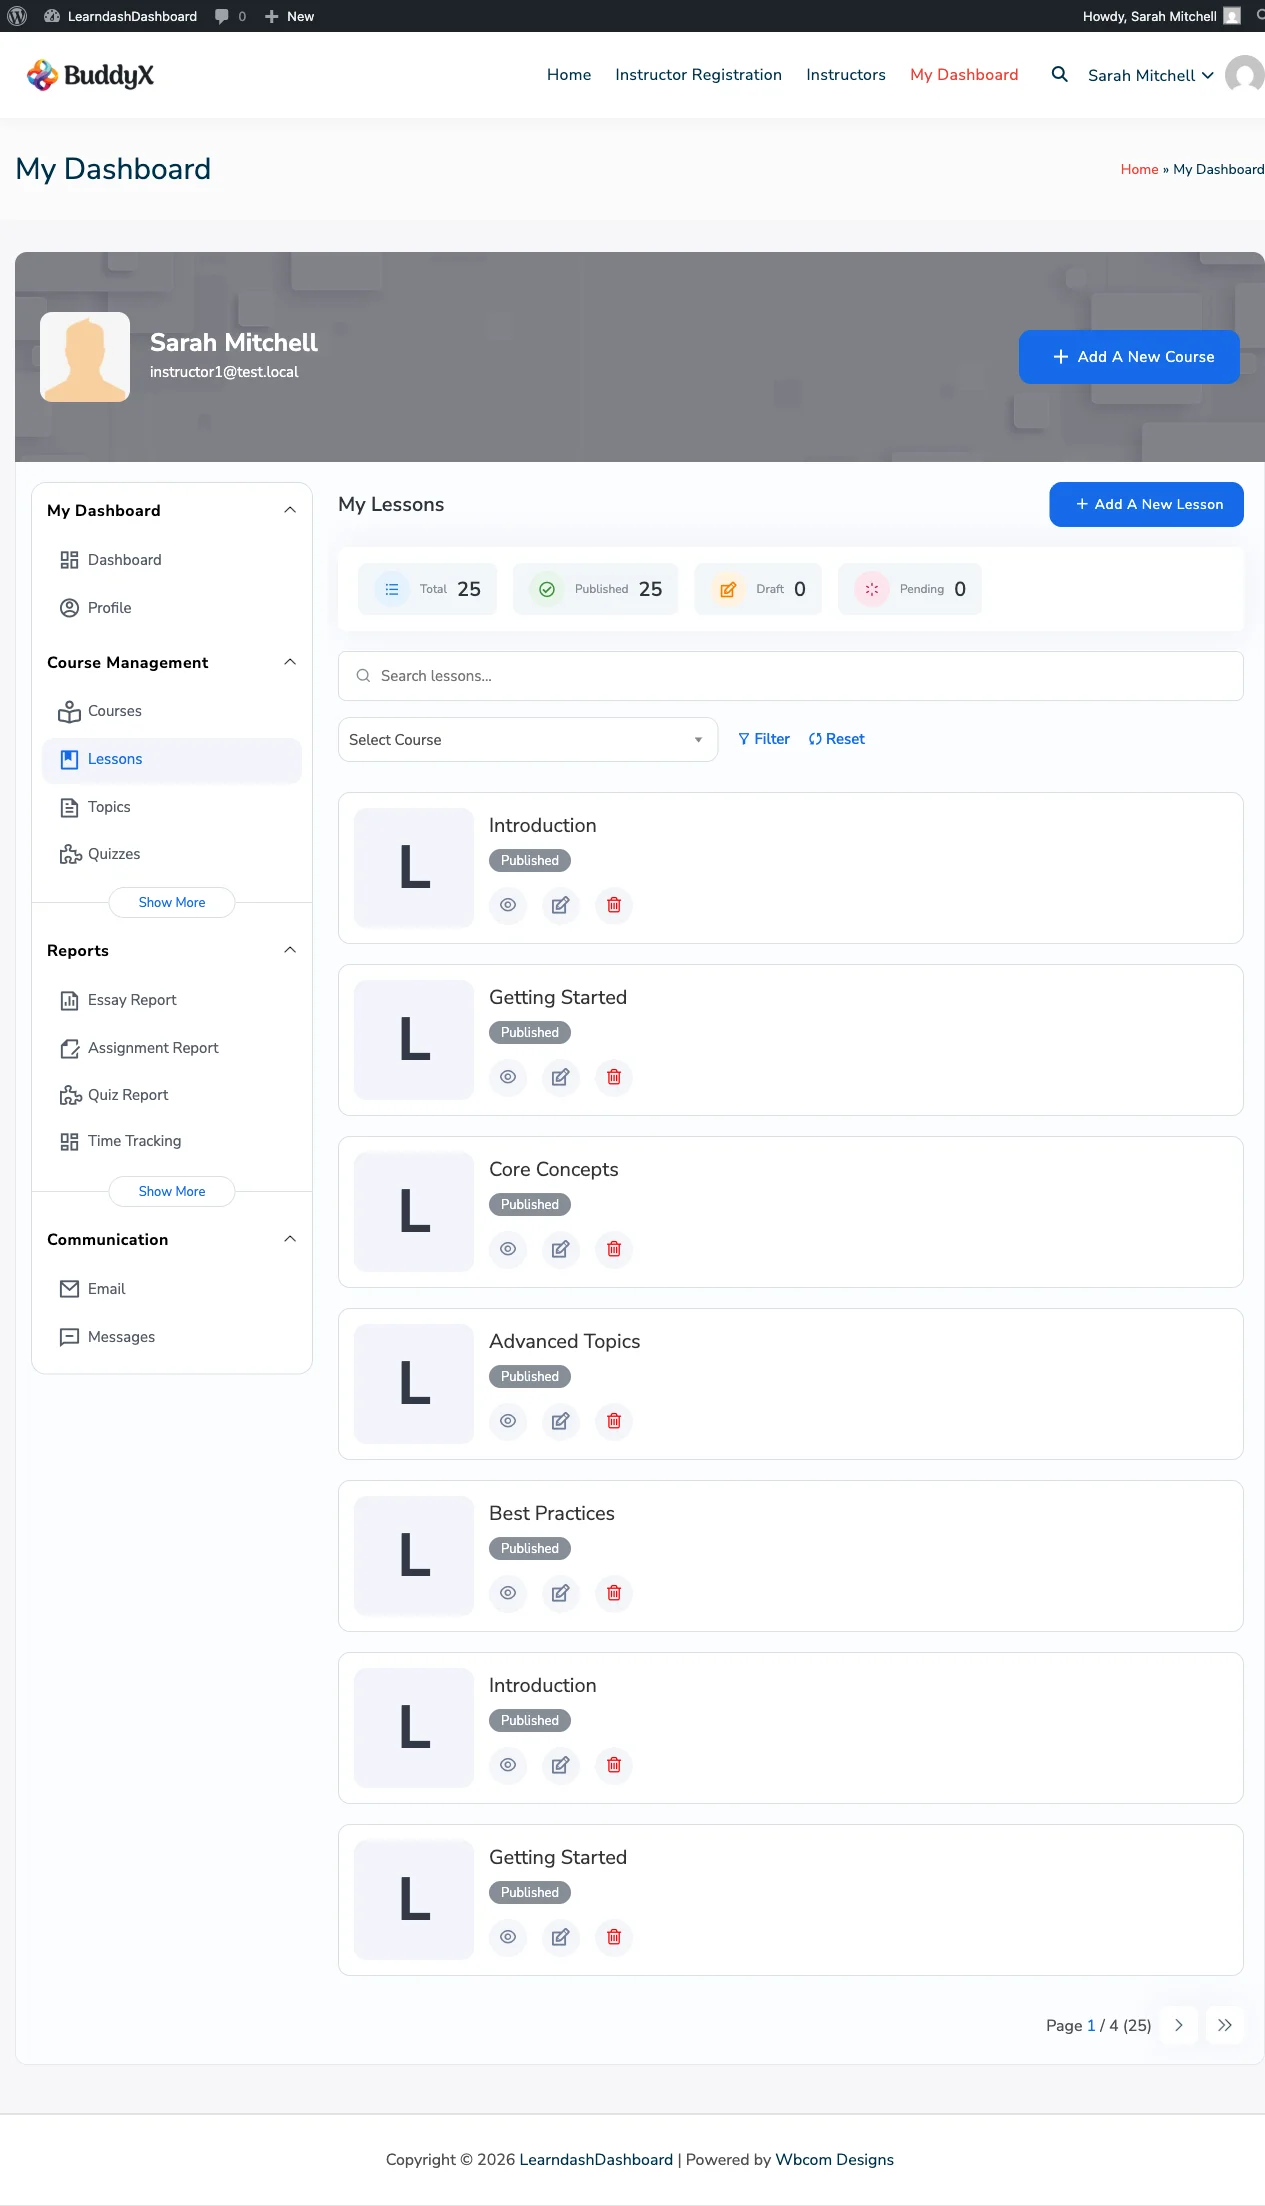
     *
     * @since 1.0.0
     * @return string
     */
    public function get_name(): string {
        return __( 'My Analytics', 'my-plugin' );
    }

    /**
     * Get module description.
     *
     * @since 1.0.0
     * @return string
     */
    public function get_description(): string {
        return __( 'Adds advanced analytics tracking to the LearnDash Dashboard.', 'my-plugin' );
    }

    /**
     * Boot the module.
     *
     * Called only when enabled and all dependencies are met.
     *
     * @since 1.0.0
     * @return void
     */
    protected function boot(): void {
        // Load module files.
        require_once $this->get_module_path() . 'class-analytics-tracker.php';

        // Register hooks.
        add_action( 'ld_dashboard_register_reports', array( $this, 'register_reports' ) );
        add_action( 'wp_enqueue_scripts', array( $this, 'enqueue_assets' ) );

        // Register REST route.
        add_action( 'rest_api_init', array( $this, 'register_rest_routes' ) );
    }

    /**
     * Register analytics reports with the report registry.
     *
     * @since 1.0.0
     * @return void
     */
    public function register_reports(): void {
        LD_Dashboard_Report_Registry::register( 'analytics-overview', 'My_Analytics_Overview_Report' );
    }

    /**
     * Enqueue module assets.
     *
     * @since 1.0.0
     * @return void
     */
    public function enqueue_assets(): void {
        if ( ! is_page() ) {
            return;
        }

        wp_enqueue_script(
            'my-analytics-module',
            $this->get_module_url() . 'assets/analytics.js',
            array( 'jquery' ),
            '1.0.0',
            true
        );
    }

    /**
     * Register REST routes.
     *
     * @since 1.0.0
     * @return void
     */
    public function register_rest_routes(): void {
        register_rest_route(
            'my-plugin/v1',
            '/analytics',
            array(
                'methods'             => WP_REST_Server::READABLE,
                'callback'            => array( $this, 'rest_get_analytics' ),
                'permission_callback' => function() {
                    return current_user_can( 'manage_options' );
                },
            )
        );
    }

    /**
     * REST callback.
     *
     * @since 1.0.0
     * @param WP_REST_Request $request REST request.
     * @return WP_REST_Response
     */
    public function rest_get_analytics( WP_REST_Request $request ): WP_REST_Response {
        $data = My_Analytics::get_summary();
        return rest_ensure_response( array( 'success' => true, 'data' => $data ) );
    }

    /**
     * Provide settings configuration for the admin UI.
     *
     * @since 1.0.0
     * @return array
     */
    public function get_settings_config(): array {
        $config = parent::get_settings_config();

        // Add module-specific fields.
        $config['fields'] = array(
            array(
                'id'      => 'tracking_enabled',
                'label'   => __( 'Enable Tracking', 'my-plugin' ),
                'type'    => 'checkbox',
                'default' => true,
            ),
        );

        return $config;
    }
}

// Register the module via the action hook.
add_action( 'ld_dashboard_register_modules', function( $registry ) {
    $registry->register( 'my-analytics', 'My_Analytics_Module' );
} );

Using the Module Elsewhere

// Check if active before using module features.
if ( ld_dashboard_is_module_active( 'my-analytics' ) ) {
    $module = ld_dashboard_modules()->get( 'my-analytics' );
    // Use module methods.
}

// React to module loading.
add_action( 'ld_dashboard_module_my-analytics_loaded', function( $module ) {
    // Module is active — extend or decorate it.
} );

Built-in Modules

ID Class Dependency
zoom LD_Dashboard_Zoom_Module None (uses bundled Zoom API class)
buddypress LD_Dashboard_BP_Module plugin:buddypress (BuddyPress class)
todo LD_Dashboard_Todo_Module plugin:bp-user-todo-list (BP_User_Todo_List class)
uncanny-groups LD_Dashboard_Uncanny_Groups_Module Uncanny Groups plugin

Module files are autoloaded from includes/modules/{id}/class-ld-dashboard-{id}-module.php.

Creating Custom Tabs

Instructor content tabs use a Template Method pattern introduced in version 7.5.0. The LD_Dashboard_Tab_Base abstract class defines the rendering algorithm; subclasses implement the content-specific steps.


LD_Dashboard_Tab_Base

Located at includes/tabs/class-ld-dashboard-tab-base.php.

All custom tabs must extend this class. The render() method is declared final - you cannot override it. Instead, implement the abstract methods that render() calls internally.

Required Properties

protected $post_type;     // WordPress post type for this tab (e.g., 'sfwd-lessons')
protected $tab_name;      // Tab identifier string

Abstract Methods (required)

Method Return Description
get_id(): string string Unique tab ID (e.g., gradebook).
get_learndash_label_key(): string string LearnDash custom label key (e.g., lesson, quiz). Used by LearnDash_Custom_Label::get_label().
get_accessible_ids( array $params ): array array Return an array of post IDs the current user can see. Return empty array for admins (no restriction).
get_filter_args( array $args, array $params ): array array Modify the WP_Query args array with tab-specific filters (status, course, etc.).
render_item( WP_Post $post, array $params ): string string Render a single list item's HTML. Must return a string.

render() - Template Method

The final public function render( array $params ): array method executes the tab rendering algorithm:

render( $params )
  ├── get_accessible_ids( $params )   → restrict posts to user's scope
  ├── build_query_args( $params, $ids )  → WP_Query base args
  ├── get_filter_args( $args, $params )  → tab-specific filters
  ├── apply_filters('ld_dashboard_{id}_content_args', $args)  → developer hook
  ├── new WP_Query( $args )           → execute query
  ├── render_items( $query, $params ) → calls render_item() per post
  ├── get_stats( $ids )               → count totals by status
  └── build_response( $content, $query, $page, $stats )
      → apply_filters('ld_dashboard_{id}_content', $content)
      → apply_filters('ld_dashboard_{id}_content_data', $response)

The response array contains:

array(
    'content'     => string,  // Rendered HTML
    'next'        => bool,    // Has next page
    'prev'        => bool,    // Has previous page
    'first'       => bool,    // Is not first page
    'last'        => bool,    // Is not last page
    'maxpages'    => int,
    'currentpage' => int,
    'totalitems'  => int,
    'stats'       => array(   // Counts by post status
        'total'     => int,
        'published' => int,
        'draft'     => int,
        'pending'   => int,
    ),
)

Access Control Helpers

The base class provides access control methods you can call inside render_item():

// Get full access status for a post
$access = $this->get_access_status( $post );
// Returns:
// array(
//     'can_edit'   => bool,
//     'can_delete' => bool,
//     'badge'      => 'your-content' | 'shared' | 'view-only',
//     'badge_text' => string,
// )

// Individual checks
$can_edit   = $this->user_can_edit( $post );
$can_delete = $this->user_can_delete( $post );

Badge values:

  • your-content (green) - User is the post author.
  • shared (blue) - User can edit via course co-instructor relationship.
  • view-only (gray) - User can see but not edit.

Edit permission logic:

  1. Administrator → always true.
  2. Group leader with admin capability → always true.
  3. Post author → always true.
  4. Co-instructor on the associated course → true.

Built-in Helper Methods

Method Description
build_action_links( $post, $nonce, $access ) Returns HTML for view/edit/delete action links.
get_elementor_edit_link( $post ) Returns an Elementor edit link if the post type supports it.
render_empty_state( $search_term ) Returns empty-state HTML with a "Clear Filters" button.
get_status_label( $status ) Returns a translated status label for publish, draft, pending.
get_associated_course_id( $post_id ) Retrieves the course ID associated with a post via meta or learndash_get_course_id().
get_nonce_action() Returns {id}-nonce as the nonce action.
get_edit_action() Returns edit-{id}.
get_delete_action() Returns delete-{id}.
get_tab_param() Returns my-{id}s.
get_post_param() Returns ld-{id}.

LD_Dashboard_Tab_Registry

Located at includes/tabs/class-ld-dashboard-tab-registry.php.

The singleton registry manages tab instances and dispatches AJAX requests.

Registering Custom Tabs

// Via filter (preferred — runs before any tab is instantiated)
add_filter( 'ld_dashboard_registered_tabs', function( $tabs ) {
    $tabs['gradebook'] = 'My_Gradebook_Tab';
    return $tabs;
} );

// Via registry method (must run before AJAX dispatch)
add_action( 'init', function() {
    LD_Dashboard_Tab_Registry::instance()->register( 'gradebook', 'My_Gradebook_Tab' );
} );

AJAX Dispatch

The registry handles the ld_dashboard_get_instructor_tab_content and ld_dashboard_tab_content_filter AJAX actions. Your tab is automatically included in AJAX dispatch when registered.

// The registry dispatches to your tab via:
$response = LD_Dashboard_Tab_Registry::instance()->render( 'gradebook', $params );

AJAX params passed to render():

Param Type Description
course_id int Filter by course
lesson_id int Filter by lesson
topic_id int Filter by topic
quiz_id int Filter by quiz
page int Pagination page
search string Search term
grade_type string Grade type filter

Complete Example: Gradebook Tab

<?php
/**
 * Gradebook Tab for LD Dashboard.
 *
 * @since 1.0.0
 */
class My_Gradebook_Tab extends LD_Dashboard_Tab_Base {

    /**
     * Constructor.
     *
     * @since 1.0.0
     */
    public function __construct() {
        parent::__construct();
        $this->post_type = 'sfwd-quiz';
        $this->tab_name  = 'gradebook';
    }

    /**
     * Get the unique tab ID.
     *
     * @since 1.0.0
     * @return string
     */
    public function get_id(): string {
        return 'gradebook';
    }

    /**
     * Get the LearnDash custom label key.
     *
     * @since 1.0.0
     * @return string
     */
    protected function get_learndash_label_key(): string {
        return 'quiz';
    }

    /**
     * Get post IDs accessible to the current user.
     *
     * @since 1.0.0
     * @param array $params Request parameters.
     * @return array Post IDs the user can access.
     */
    protected function get_accessible_ids( array $params ): array {
        $user_id = $this->current_user_id;

        // Admins see all quizzes — return empty to skip post__in.
        if ( learndash_is_admin_user( $user_id ) || LD_Dashboard_Helper::group_leader_has_admin_cap() ) {
            return array();
        }

        // Instructors see quizzes attached to their courses.
        $course_ids = LD_Dashboard_Course_Helper::get_instructor_courses( $user_id );

        if ( empty( $course_ids ) ) {
            return array( 0 ); // Force empty result.
        }

        $quiz_ids = array();
        foreach ( $course_ids as $course_id ) {
            $quizzes = learndash_get_course_quiz_list( $course_id );
            foreach ( $quizzes as $quiz ) {
                $quiz_ids[] = $quiz['post']->ID;
            }
        }

        return array_unique( $quiz_ids ) ?: array( 0 );
    }

    /**
     * Apply tab-specific filter args.
     *
     * @since 1.0.0
     * @param array $args   Base WP_Query args.
     * @param array $params Request parameters.
     * @return array Modified args.
     */
    protected function get_filter_args( array $args, array $params ): array {
        // Filter by course.
        if ( ! empty( $params['course_id'] ) ) {
            $course_quizzes = learndash_get_course_quiz_list( absint( $params['course_id'] ) );
            $course_quiz_ids = wp_list_pluck(
                array_column( $course_quizzes, 'post' ),
                'ID'
            );

            // Intersect with already-restricted IDs.
            if ( ! empty( $args['post__in'] ) && ! empty( $course_quiz_ids ) ) {
                $args['post__in'] = array_intersect( $args['post__in'], $course_quiz_ids );
            } elseif ( ! empty( $course_quiz_ids ) ) {
                $args['post__in'] = $course_quiz_ids;
            }
        }

        // Filter by status.
        if ( ! empty( $params['grade_type'] ) && 'all' !== $params['grade_type'] ) {
            $args['post_status'] = sanitize_key( $params['grade_type'] );
        }

        return $args;
    }

    /**
     * Render a single quiz item.
     *
     * @since 1.0.0
     * @param WP_Post $post   Quiz post object.
     * @param array   $params Request parameters.
     * @return string HTML content.
     */
    protected function render_item( WP_Post $post, array $params ): string {
        $access   = $this->get_access_status( $post );
        $nonce    = wp_create_nonce( $this->get_nonce_action() );
        $attempts = learndash_get_user_quiz_attempts_by_quiz( $this->current_user_id, $post->ID );

        ob_start();
        ?>
        <div class="ld-dashboard-list-item ld-gradebook-item"
             data-post-id="<?php echo esc_attr( $post->ID ); ?>">

            <div class="ld-dashboard-item-badge ld-badge--<?php echo esc_attr( $access['badge'] ); ?>">
                <?php echo esc_html( $access['badge_text'] ); ?>
            </div>

            <h4 class="ld-dashboard-item-title">
                <?php echo esc_html( $post->post_title ); ?>
            </h4>

            <div class="ld-dashboard-item-meta">
                <span class="ld-gradebook-attempts">
                    <?php
                    printf(
                        /* translators: %d: number of attempts */
                        esc_html( _n( '%d attempt', '%d attempts', count( $attempts ), 'my-plugin' ) ),
                        count( $attempts )
                    );
                    ?>
                </span>
                <span class="ld-dashboard-item-status ld-status--<?php echo esc_attr( $post->post_status ); ?>">
                    <?php echo esc_html( $this->get_status_label( $post->post_status ) ); ?>
                </span>
            </div>

            <div class="ld-dashboard-item-actions">
                <?php echo wp_kses_post( $this->build_action_links( $post, $nonce, $access ) ); ?>
            </div>
        </div>
        <?php
        return ob_get_clean();
    }
}

// Register the tab.
add_filter( 'ld_dashboard_registered_tabs', function( $tabs ) {
    $tabs['gradebook'] = 'My_Gradebook_Tab';
    return $tabs;
} );

Using the Tab via Registry

// Render programmatically.
$response = LD_Dashboard_Tab_Registry::render_tab( 'gradebook', array(
    'course_id' => 123,
    'page'      => 1,
    'search'    => '',
) );

// $response['content'] contains the HTML.
// $response['totalitems'] contains the total count.

Extending Built-in Tabs

You can replace a built-in tab by re-registering it with your own class:

add_filter( 'ld_dashboard_registered_tabs', function( $tabs ) {
    // Replace the quiz tab with a custom implementation.
    $tabs['quiz'] = 'My_Enhanced_Quiz_Tab';
    return $tabs;
} );

My_Enhanced_Quiz_Tab can extend the original LD_Dashboard_Tab_Quiz to inherit its logic:

class My_Enhanced_Quiz_Tab extends LD_Dashboard_Tab_Quiz {

    protected function render_item( WP_Post $post, array $params ): string {
        // Add custom fields before the default render.
        $extra_html = '<div class="my-extra-data">...</div>';
        return $extra_html . parent::render_item( $post, $params );
    }
}

Built-in Tab IDs

ID Class Post Type
lesson LD_Dashboard_Tab_Lesson sfwd-lessons
topic LD_Dashboard_Tab_Topic sfwd-topic
quiz LD_Dashboard_Tab_Quiz sfwd-quiz
question LD_Dashboard_Tab_Question sfwd-question
assignment LD_Dashboard_Tab_Assignment sfwd-assignment
announcements LD_Dashboard_Tab_Announcement sfwd-announcements
certificate LD_Dashboard_Tab_Certificate sfwd-certificates

Email Template Customization

LearnDash Dashboard uses a WooCommerce-style email template system introduced in version 7.5.0. Templates support theme directory overrides, merge tags, and multiple filter hooks.


How the System Works

  1. ld_dashboard_send_email( $template_id, $email, $args ) is called.
  2. LD_Dashboard_Email_Template locates the template file (theme override first).
  3. The template file is rendered with output buffering.
  4. Merge tags are replaced in the output.
  5. The content is wrapped in email-header.php and email-footer.php.
  6. Filters run on subject, content, headers, and recipient.
  7. wp_mail() sends the email.

Template Override via Theme

Copy any template from the plugin's templates/emails/ directory to your active theme's ld-dashboard/emails/ directory. The override takes precedence automatically.

Plugin template location:

wp-content/plugins/ld-dashboard/templates/emails/
├── email-header.php
├── email-footer.php
├── email-styles.php
├── instructor/
│   ├── application-admin-notification.php
│   ├── application-approved.php
│   └── application-rejected.php
├── student/
│   ├── course-email.php
│   ├── invitation.php
│   └── announcement-notification.php
├── withdrawal/
│   ├── request-admin-notification.php
│   ├── request-approved.php
│   └── request-rejected.php
└── messaging/
    └── new-message.php

Theme override location:

wp-content/themes/my-theme/ld-dashboard/emails/
└── instructor/
    └── application-approved.php    ← overrides plugin template

Template lookup order:

  1. Child theme: {child-theme}/ld-dashboard/emails/{template-path}
  2. Parent theme: {parent-theme}/ld-dashboard/emails/{template-path}
  3. Plugin: {plugin}/templates/emails/{template-path}

Available Merge Tags

Merge tags are replaced in both the email subject and body. They use curly brace syntax with an underscore-separated name.
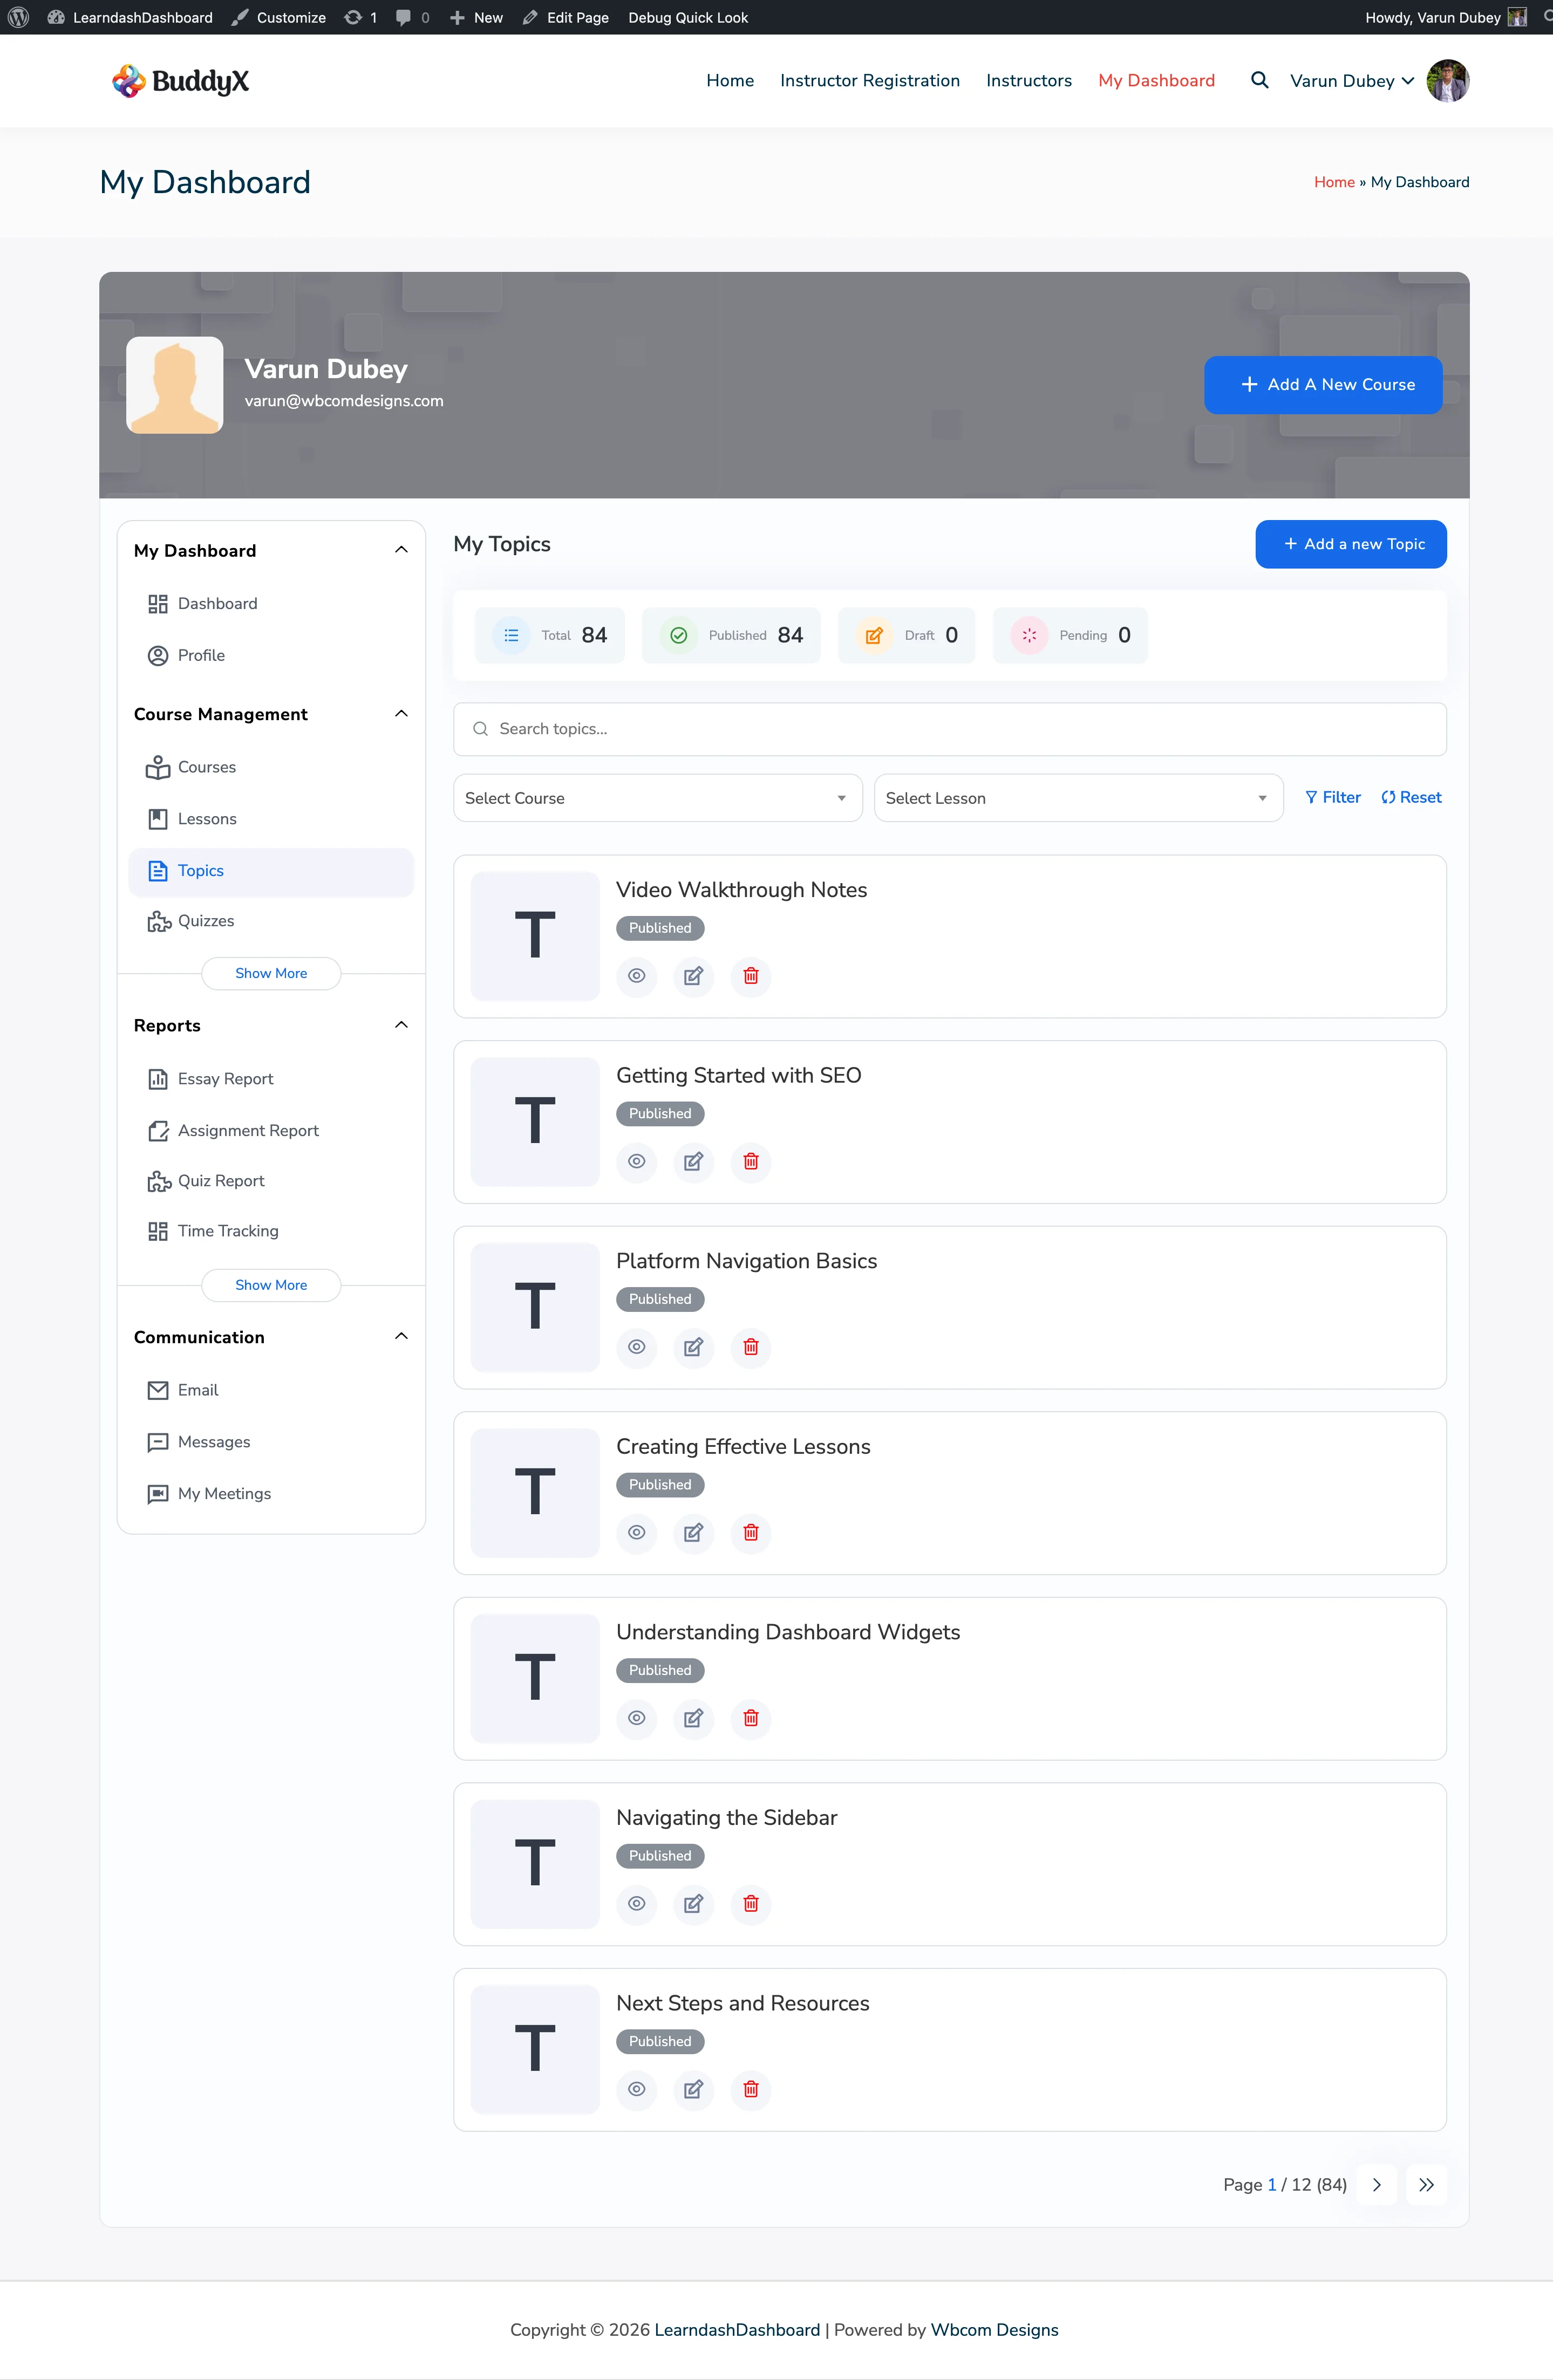
Merge Tag Default Value Description
{site_name} WordPress site title Site name from get_bloginfo('name')
{site_url} WordPress home URL home_url()
{admin_email} WordPress admin email get_option('admin_email')
{admin_url} WordPress admin URL admin_url()
{user_name} "" Recipient display name
{user_email} "" Recipient email address
{instructor_name} "" Instructor display name
{student_name} "" Student display name
{course_name} "" Course title
{amount} "" Commission/payment amount
{date} Current date Formatted with site date format
{sender_name} "" Message sender name (private messaging)
{message_url} "" Direct link to the message thread
{announcement_title} "" Announcement post title

Pass custom values via the $args array:

ld_dashboard_send_email(
    'instructor_approved',
    $user->user_email,
    array(
        'user_name'       => $user->display_name,
        'instructor_name' => $user->display_name,
        'site_name'       => get_bloginfo( 'name' ),
        'custom_field'    => 'My custom value', // Added via ld_dashboard_email_merge_tags
    )
);

Registered Email Types

Template ID Subject Template File
instructor_application_admin New Instructor Registered - {user_name} instructor/application-admin-notification.php
instructor_approved Your Instructor Application Approved instructor/application-approved.php
instructor_rejected Your Instructor Application Status instructor/application-rejected.php
student_course_email Message from {instructor_name} student/course-email.php
student_invitation You're Invited to {course_name} student/invitation.php
withdrawal_request_admin New Withdrawal Request from {instructor_name} withdrawal/request-admin-notification.php
withdrawal_approved Your Withdrawal Request Approved withdrawal/request-approved.php
withdrawal_rejected Your Withdrawal Request Status withdrawal/request-rejected.php
new_message_notification New message from {sender_name} messaging/new-message.php
announcement_notification New Announcement: {announcement_title} student/announcement-notification.php

Filter Hooks

Subject Filters

// Filter subject for ALL emails
add_filter( 'ld_dashboard_email_subject', function( $subject, $template_id, $args ) {
    return '[' . get_bloginfo( 'name' ) . '] ' . $subject;
}, 10, 3 );

// Filter subject for a specific template
add_filter( 'ld_dashboard_email_subject_instructor_approved', function( $subject, $template_id, $args ) {
    return $subject . ' - ' . date( 'Y' );
}, 10, 3 );

Content Filters

// Filter content for ALL emails (before header/footer wrap)
add_filter( 'ld_dashboard_email_content', function( $content, $template_id, $args ) {
    return $content . '<p style="font-size:11px;">Powered by My Site</p>';
}, 10, 3 );

// Filter content for a specific template
add_filter( 'ld_dashboard_email_content_student_invitation', function( $content ) {
    return str_replace( '{custom_promo}', 'Use code WELCOME20 for 20% off', $content );
} );
// Replace the email header HTML
add_filter( 'ld_dashboard_email_header', function( $header ) {
    return str_replace( 'class="ld-email-header"', 'class="ld-email-header my-custom-header"', $header );
} );

// Append to the email footer
add_filter( 'ld_dashboard_email_footer', function( $footer ) {
    $unsubscribe = '<p><a href="' . esc_url( home_url( '/unsubscribe' ) ) . '">Unsubscribe</a></p>';
    return $unsubscribe . $footer;
} );

Header (SMTP) Filters

// Add CC header for admin approval emails
add_filter( 'ld_dashboard_email_headers_instructor_approved', function( $headers ) {
    $headers[] = 'CC: compliance@example.com';
    return $headers;
} );

// Change From address globally
add_filter( 'ld_dashboard_email_from_address', function( $email ) {
    return 'noreply@example.com';
} );

add_filter( 'ld_dashboard_email_from_name', function( $name ) {
    return get_bloginfo( 'name' ) . ' Notifications';
} );

Recipient Filter

// Redirect all plugin emails in staging environments
add_filter( 'ld_dashboard_email_recipient', function( $to, $template_id, $args ) {
    if ( defined( 'WP_DEBUG' ) && WP_DEBUG ) {
        return 'dev@example.com';
    }
    return $to;
}, 10, 3 );

Merge Tag Filter

// Add custom merge tags
add_filter( 'ld_dashboard_email_merge_tags', function( $tags, $content, $args ) {
    $tags['company_name']   = get_option( 'my_company_name', '' );
    $tags['support_email']  = 'support@example.com';
    $tags['current_year']   = date( 'Y' );
    return $tags;
}, 10, 3 );

Add a Custom Email Type

// Register a new email type
add_filter( 'ld_dashboard_email_types', function( $types ) {
    $types['course_completed'] = array(
        'title'    => __( 'Course Completed', 'my-plugin' ),
        'template' => 'student/course-completed.php',
        'subject'  => __( 'Congratulations! You completed {course_name}', 'my-plugin' ),
    );
    return $types;
} );

Then create the template at: my-theme/ld-dashboard/emails/student/course-completed.php

<?php
// $template_args is available — same as $args passed to ld_dashboard_send_email().
$user_name   = isset( $template_args['user_name'] ) ? $template_args['user_name'] : '';
$course_name = isset( $template_args['course_name'] ) ? $template_args['course_name'] : '';
?>
<h2>Well done, <?php echo esc_html( $user_name ); ?>!</h2>
<p>You have successfully completed <strong><?php echo esc_html( $course_name ); ?></strong>.</p>
<p><a href="{site_url}/my-dashboard/" style="background:#2067fa;color:#fff;padding:10px 20px;text-decoration:none;border-radius:4px;">View Your Dashboard</a></p>

Then send it:

ld_dashboard_send_email(
    'course_completed',
    $student->user_email,
    array(
        'user_name'   => $student->display_name,
        'course_name' => $course->post_title,
    )
);

Email Queue System

The plugin uses a database-backed email queue for bulk sends (instructor email broadcasts). The queue is stored in {prefix}ld_dashboard_email_queue.

Queue table columns:

Column Description
id Auto-increment primary key
user_id Sender user ID
recipient_email Recipient email address
recipient_name Recipient display name
email_subject Email subject
email_message Full HTML email body
headers Serialized headers array
template_id Template ID used to generate this email
status pending, sent, or failed
attempts Number of send attempts
max_attempts Maximum retries (default: 3)
error_message Last error message if failed
scheduled_at When the email is scheduled to send
sent_at Timestamp of successful send
created_at Queue insertion timestamp

Processing:

A WordPress cron job processes the queue. Emails are processed in batches. Failed sends are retried up to max_attempts times with exponential backoff. The plugin also runs a daily cleanup cron to remove old sent and failed records.


To customize the shared header and footer that wrap all emails, copy the files to your theme:

my-theme/ld-dashboard/emails/
├── email-header.php    ← wrap start, logo, background
└── email-footer.php    ← copyright, social links, wrap end

The header template receives $email_subject as a local variable (used for the HTML <title> tag).

Both header and footer templates are also filterable via ld_dashboard_email_header and ld_dashboard_email_footer filters (see above).


Enrollment Notification Example

Customize the instructor-approved email to include a direct dashboard link:

  1. Copy templates/emails/instructor/application-approved.php to: my-theme/ld-dashboard/emails/instructor/application-approved.php

  2. Edit the template:

<?php
$user_name     = isset( $template_args['user_name'] ) ? $template_args['user_name'] : '';
$dashboard_url = Ld_Dashboard_Functions::instance()->ld_dashboard_get_url( 'dashboard' );
?>
<h2><?php printf( esc_html__( 'Welcome, %s!', 'ld-dashboard' ), esc_html( $user_name ) ); ?></h2>
<p><?php esc_html_e( 'Your instructor application has been approved.', 'ld-dashboard' ); ?></p>
<p><?php esc_html_e( 'You can now create courses and manage students from your dashboard.', 'ld-dashboard' ); ?></p>
<p style="text-align:center;margin-top:24px;">
    <a href="<?php echo esc_url( $dashboard_url ); ?>"
       style="background:#2067fa;color:#fff;padding:12px 28px;text-decoration:none;border-radius:4px;display:inline-block;">
        <?php esc_html_e( 'Go to Your Dashboard', 'ld-dashboard' ); ?>
    </a>
</p>

The override is detected automatically - no code changes required.

FAQ & Troubleshooting

Common Issues

This page covers the problems reported most often and how to fix them. Work through each solution in the order listed before contacting support.


Edit Forms Are Blank

What you see: When you click to edit a course, lesson, or quiz on the dashboard, the edit form appears empty - no fields, no content.

How to fix it:

  1. Check that Advanced Custom Fields is loaded. LearnDash Dashboard bundles its own ACF. If you have a separate ACF plugin installed, the bundled version will handle it automatically. Forms use the bundled ACF regardless.

  2. Try deactivating other plugins. A conflict with another plugin can prevent edit forms from loading. Deactivate all plugins except LearnDash and LearnDash Dashboard, then test again. Reactivate plugins one at a time to find the conflict.


Dashboard Page Shows Nothing

What you see: You visit your dashboard page and it is completely blank - no sidebar, no content, no stats.

How to fix it:

  1. Add the dashboard shortcode. Edit your dashboard page and make sure it contains [ld_dashboard] in the page content. If you use a page builder, try switching the page to the default editor to confirm the shortcode is present.

  2. Check the page mapping. Go to WordPress Admin > LearnDash Dashboard > General Settings and confirm the Dashboard Page setting points to your dashboard page. Without this, the dashboard cannot build its internal links correctly.

  3. Make sure you are logged in. The dashboard only shows content to logged-in users. If you are browsing as a guest, you will see nothing. Log in and try again.

  4. Check for PHP errors. If there is a PHP error on the page, it can suppress all output. Contact your host or enable WordPress debug logging and check the error log file for any messages related to the dashboard.


A Tab Is Missing from the Sidebar

What you see: You expect to see a particular tab (Courses, Groups, Bulk Management, etc.) but it is not in the sidebar.

How to fix it:

  1. Check the Menu Options settings. Go to WordPress Admin > LearnDash Dashboard > Menu Options. Each user role has its own set of tab visibility checkboxes. Make sure the tab is checked on for the role of the user who cannot see it.

  2. Verify the user's role. Some tabs are only available to certain roles:

    • Course, Lesson, Topic, Quiz, and Question tabs - instructors and administrators only
    • Groups tab - administrators and group leaders only
    • Students do not see instructor management tabs

    To check a user's role, go to WordPress Admin > Users > All Users and look at the role column for that user.

  3. Check optional tab settings. Several tabs have their own on/off switch in General Settings:

    • Activity Feed - enable under General Settings
    • Email - must be enabled in General Settings > Email Integration
    • Private Messages - must be enabled in General Settings > Private Messaging
    • Earnings - must be enabled in General Settings > Earning Logs
    • Time Tracking - must be enabled in the admin settings

Filters and Actions Are Not Working

What you see: You click a filter or button on the dashboard and nothing happens - no spinner, no updated content, no error message.

How to fix it:

  1. Open the browser console. Press F12 on Windows or Command + Option + I on Mac, then click the Console tab. Look for any red error messages that appeared when you clicked the button.

  2. Check for a plugin conflict. Some plugins interfere with how the dashboard sends and receives data. Deactivate all plugins except LearnDash and LearnDash Dashboard. If the filter starts working, reactivate plugins one at a time to find the conflict.

  3. Clear your browser cache. Old cached scripts can cause unexpected behaviour. Try a hard refresh (Ctrl+Shift+R on Windows, Command+Shift+R on Mac) or open the page in a private/incognito window.

  4. Check that your site's REST API is not blocked. Some security or firewall plugins block certain requests. Try temporarily disabling your security plugin and testing again.


Charts Are Empty or Spinning

What you see: The Insights tab or dashboard home shows chart areas with a loading spinner that never stops, or the chart area is completely blank.

How to fix it:

  1. Check if charts are enabled. Go to WordPress Admin > LearnDash Dashboard > General Settings > Dashboard Widgets and confirm the chart you expect to see is turned on and configured for the correct user roles.

  2. Check for browser console errors. Press F12 to open the browser developer tools. Look for red errors in the Console. These often point directly to what is causing the chart to fail.

  3. Try a different browser. If the charts work in another browser, an extension in your current browser (such as an ad blocker) may be interfering.

  4. Clear your caches. If you use a caching plugin, clear all caches and reload the page. Stale cached data can prevent charts from loading correctly.


Emails Are Not Being Sent

What you see: Students or instructors are not receiving notification emails. The email log under Admin > Email Logs shows messages marked as failed.

How to fix it:

  1. Set up an SMTP plugin. WordPress's default email sending often fails or goes to spam. Install a plugin like WP Mail SMTP and connect it to a proper email provider (Gmail, SendGrid, Mailgun, etc.). This is the most common cause of missing emails.

  2. Check your email logs. Go to WordPress Admin > LearnDash Dashboard > Email Logs. Look at the error messages next to any failed entries - they often explain exactly why delivery failed.

  3. Check your spam folder. Ask the recipient to check their spam or junk folder. If emails are arriving there, you need to set up proper email authentication (SPF, DKIM, DMARC) for your sending domain - an SMTP plugin handles this automatically.

  4. Verify scheduled email processing is running. The dashboard queues emails and sends them on a regular schedule. If your site's scheduled tasks are not running, emails will pile up in the queue and never send. Contact your host to confirm scheduled tasks are working, or check with a plugin like WP Crontrol.


Mobile Menu Is Not Opening

What you see: On a phone or tablet, tapping the menu icon does not open the sidebar.

How to fix it:

  1. Check for JavaScript errors. Open the browser console on your phone (or test by narrowing your desktop browser window) and look for red errors. A JavaScript error can prevent the menu toggle from working.

  2. Check for theme conflicts. Your theme's CSS might be overriding the dashboard's sidebar display styles. Try switching to a default WordPress theme temporarily to see if the menu works.

  3. Clear caches. Clear all caching plugin caches and your browser cache, then test again.


Still Need Help?

If none of the solutions above resolve your issue, contact the Wbcom Designs support team at wbcomdesigns.com/support/.

Please include the following when you contact support:

  • Your WordPress version
  • Your PHP version
  • Your LearnDash version
  • Your LearnDash Dashboard version
  • A description of what you see and what you expected to see
  • Any error messages from the browser or error log
  • Steps another person could follow to reproduce the problem

Performance Tips

LearnDash Dashboard is built to handle large LMS sites, but how fast it runs depends on your hosting setup and configuration. These tips will help you get the best performance for your students and instructors.


Use a Good Caching Plugin

The dashboard automatically caches frequently requested data - stat tiles, charts, course lists, and student progress summaries. This caching works with the database by default, but you can make it much faster by adding a memory-based caching layer.

What to do: Ask your hosting provider whether your plan includes Redis or Memcached object caching. Most quality managed WordPress hosts (Kinsta, WP Engine, Flywheel, Pressable) include this by default. If yours does not, ask them to enable it or consider upgrading your plan.

With memory caching enabled, the dashboard serves repeated data requests almost instantly instead of hitting the database each time.
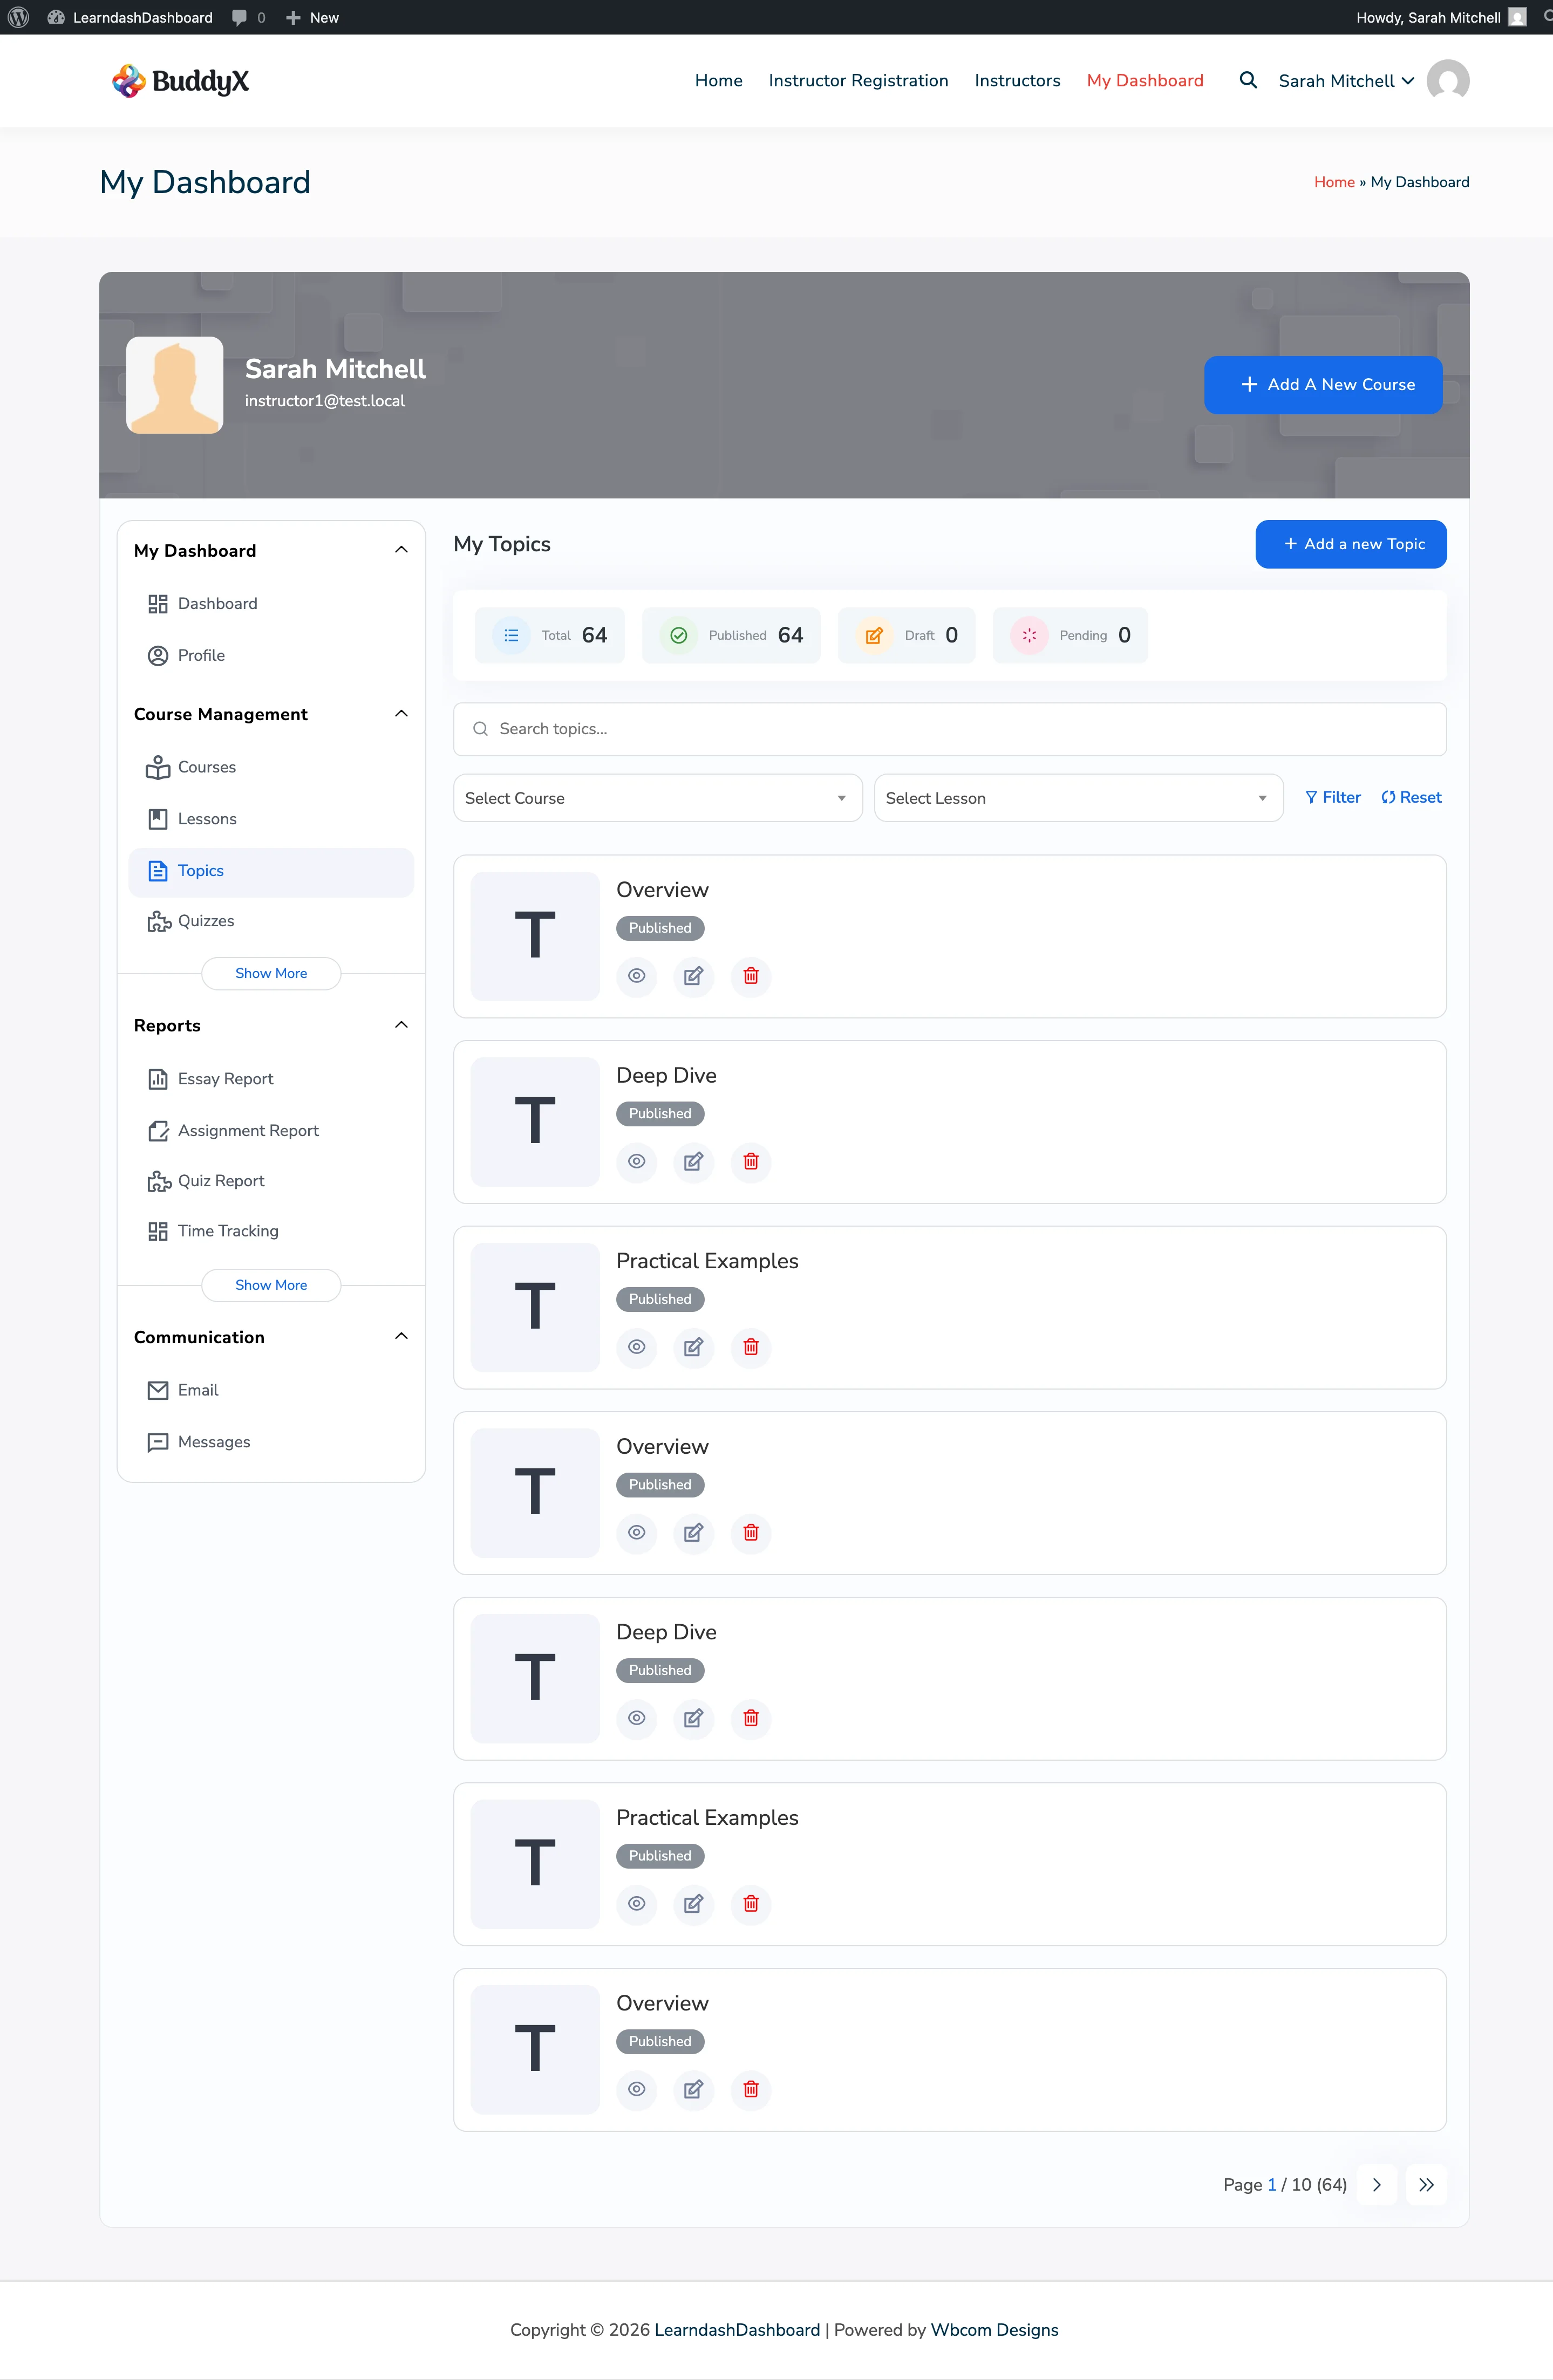

Choose a Faster Hosting Plan

The single biggest performance improvement you can make is choosing hosting with enough resources for your student count.

General guidelines:

  • Under 500 students - Shared or starter managed hosting works fine.
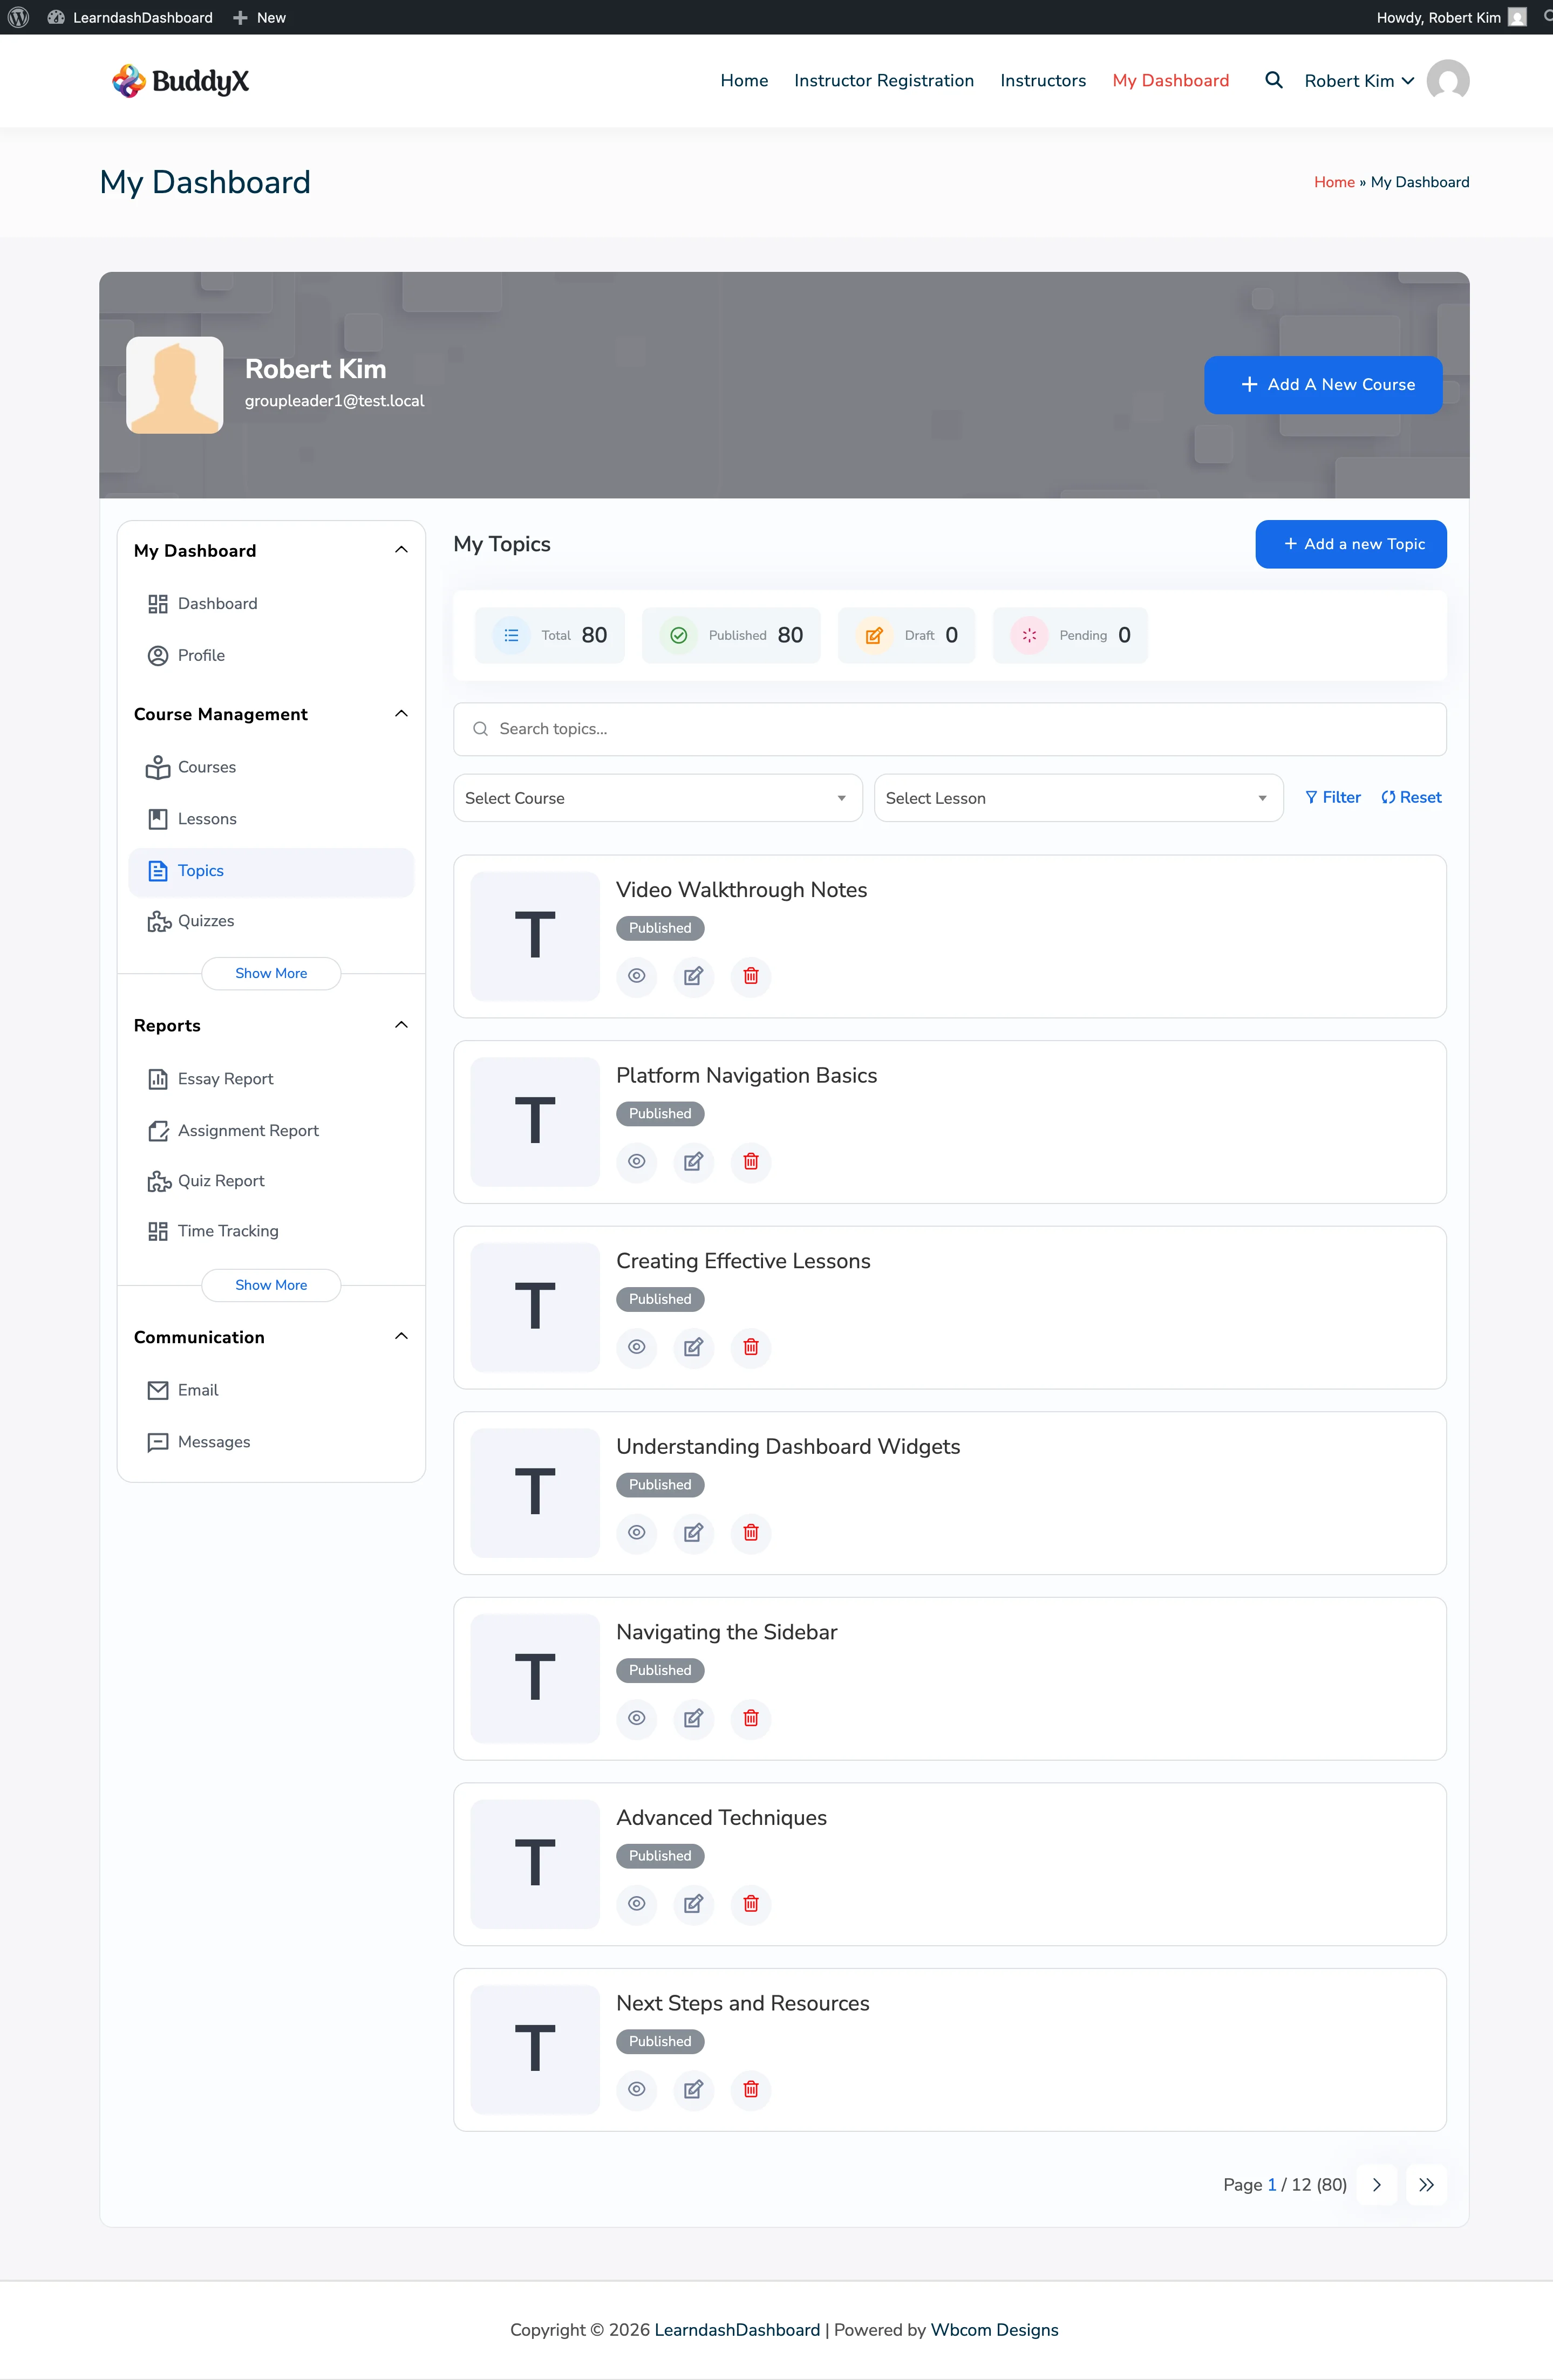
  • 500 to 2,000 students - A VPS or managed WordPress plan with at least 2GB RAM and Redis caching.
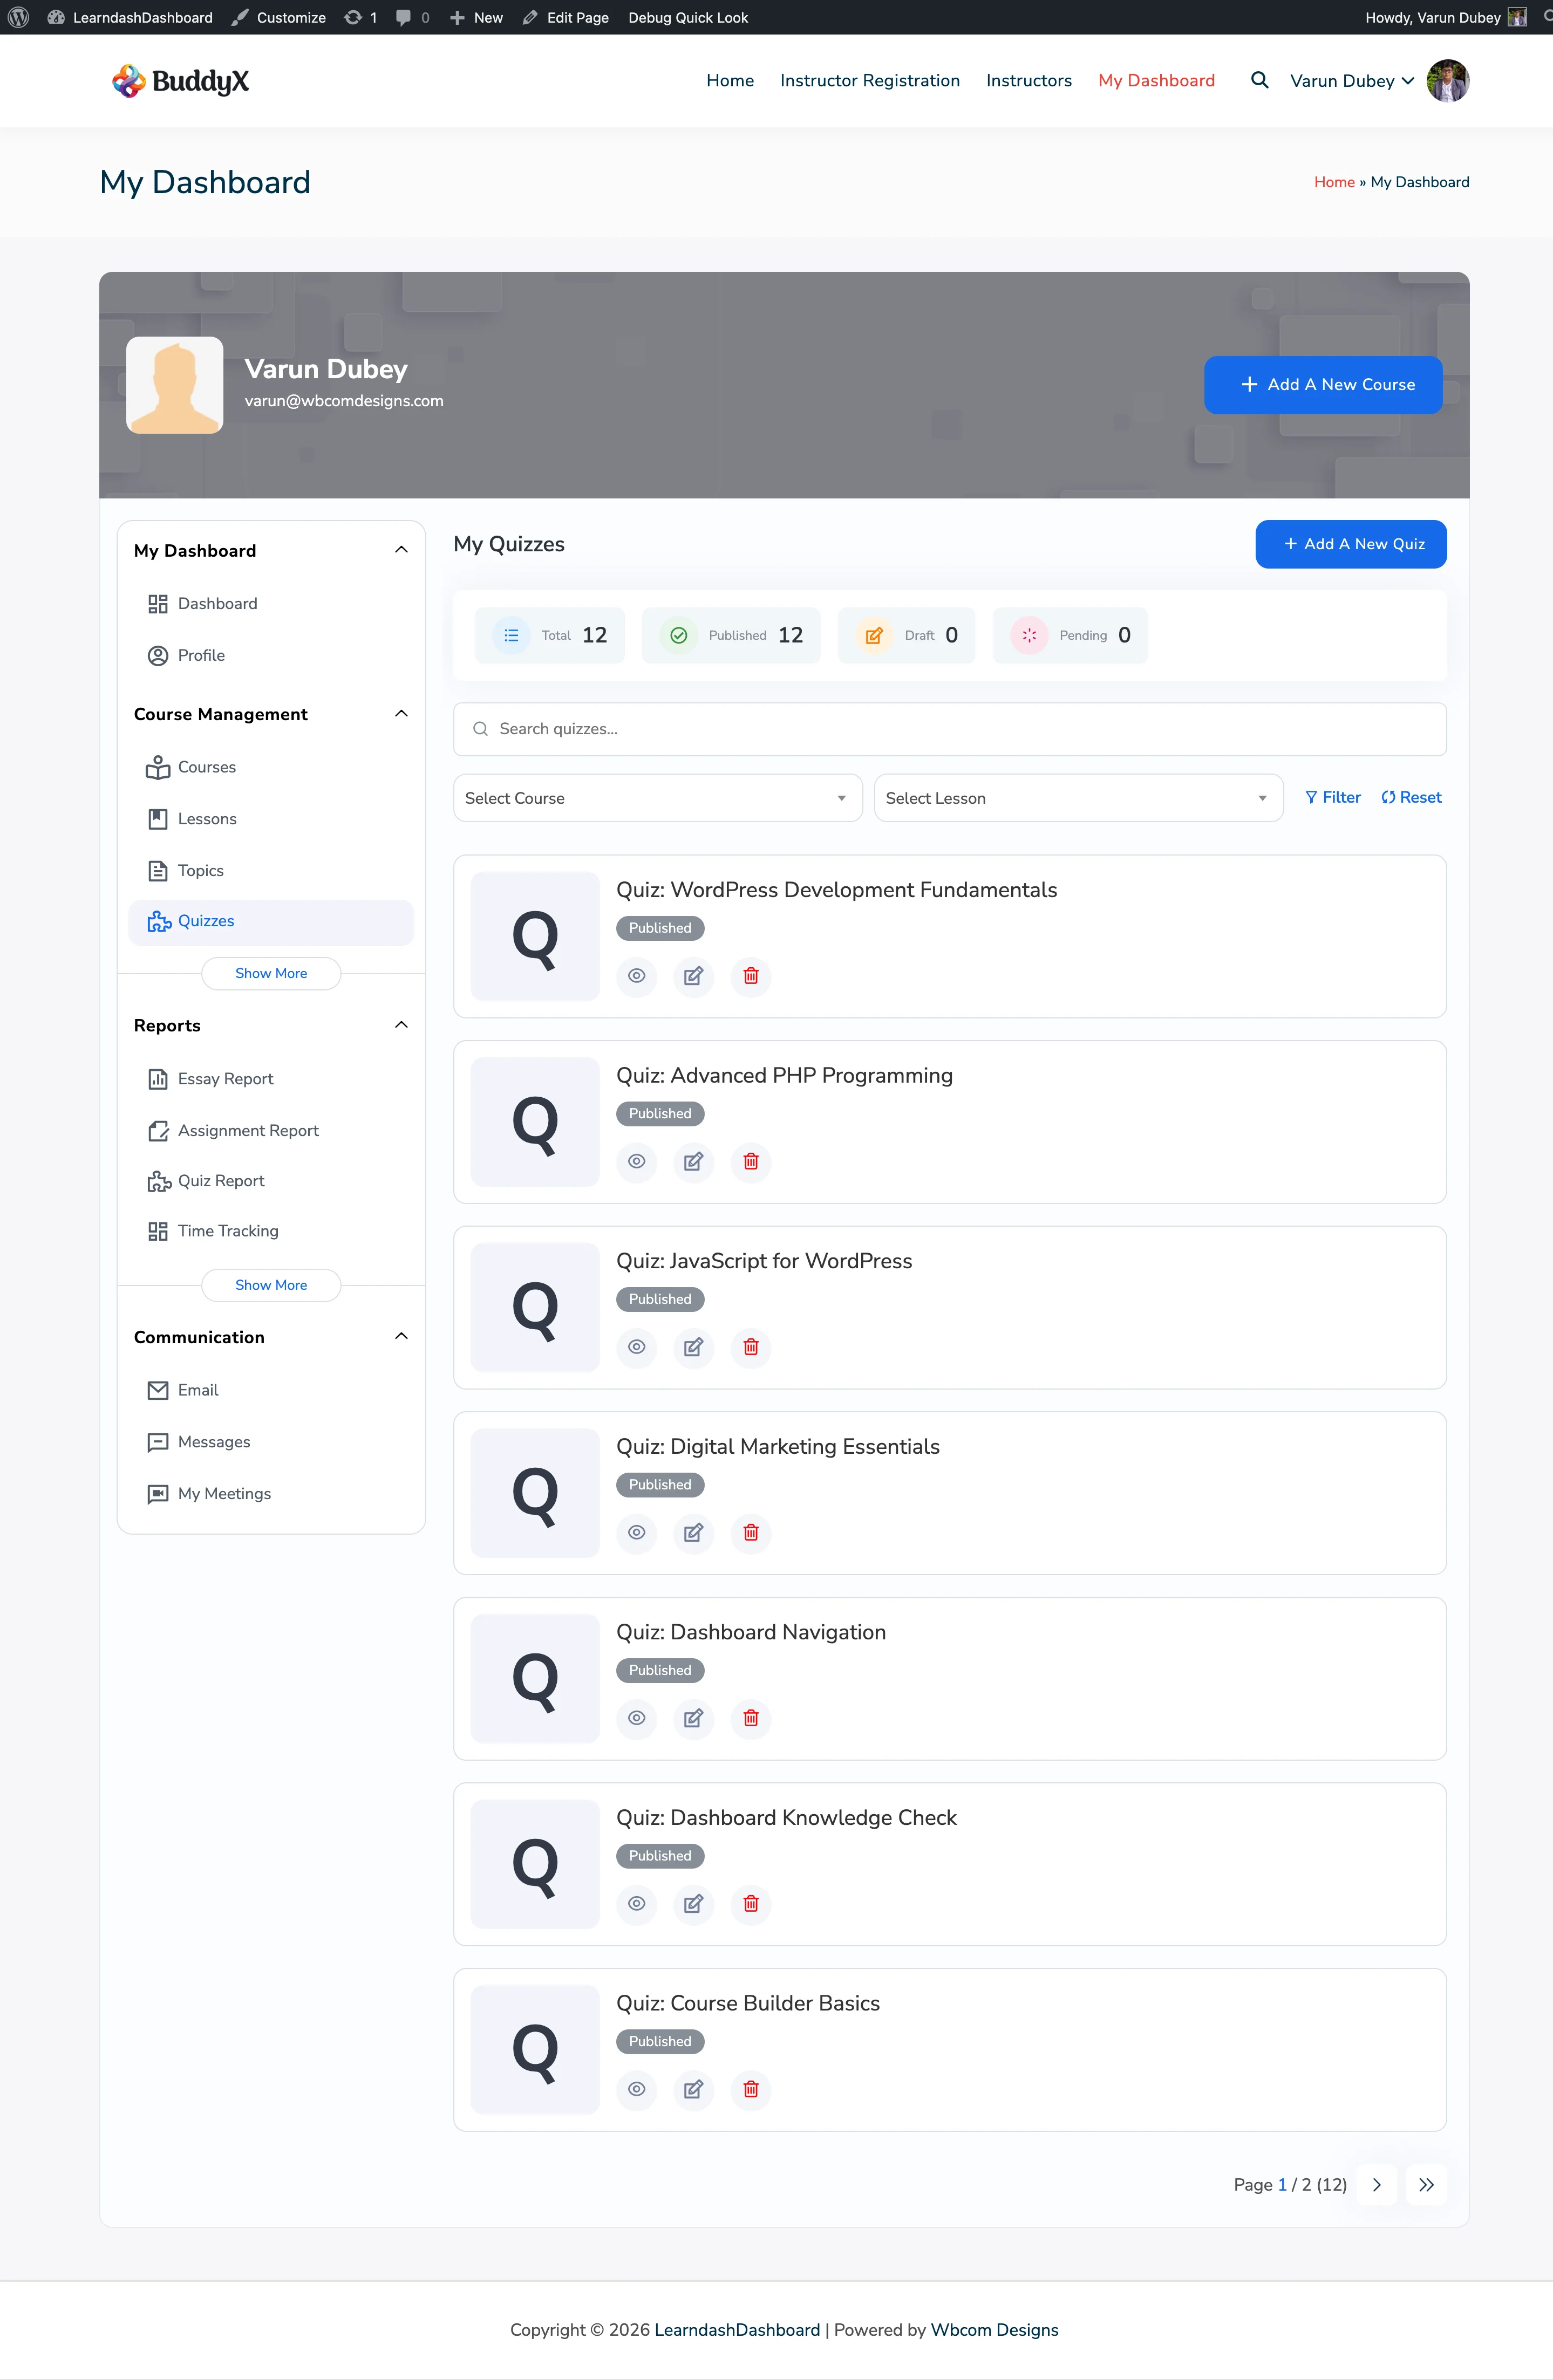
  • 2,000+ students - A dedicated or high-performance managed plan with Redis, a CDN, and a strong database server.

Keep Your Stats Fresh Without Slowing Down the Site

Dashboard statistics (total courses, enrollments, completion rates) update automatically several times a day. You do not need to refresh them manually during normal operation.

If you have just done a large bulk enrollment or import and want to see the latest numbers right away, go to WordPress Admin > LearnDash Dashboard > General Settings and use the Refresh Statistics option. This forces an immediate update.

Avoid refreshing statistics repeatedly in a short period - each refresh runs database queries across your student data.


Use the Built-In Pagination for Reports

The dashboard's report pages (quiz results, assignment status, essay submissions, course progress) are designed to handle large datasets. They load data one page at a time rather than all at once, so even sites with tens of thousands of student records can browse reports smoothly.

Do not try to load all records on one page. Use the page size and filter options to narrow down to the data you need.


Clean Up Old Data Regularly

Over time, some data can accumulate and slow down certain dashboard queries:

  • Email logs - Go to Admin > LearnDash Dashboard > Email Logs and delete old records periodically. The dashboard also cleans up old email queue entries automatically each day.
  • Expired enrollment codes - Go to Dashboard > Bulk Management > Enrollment Codes and delete expired code batches that are no longer needed.

Neither of these cleanups affects student data, course content, or progress records.


Use a CDN for Media

Student assignment uploads, course images, and instructor avatars are stored in your WordPress media library. On sites with many students submitting assignments, this can add up to a large amount of stored files.

Consider using a plugin that offloads media to a content delivery network (CDN) such as Amazon S3 or Cloudflare R2. This keeps your server lean and serves images and files faster to students in different locations.


Avatar Performance

If your instructors and students use profile photos:

  • BuddyPress avatars are served from your own server and are the fastest option.
  • Gravatar requires a request to Gravatar's servers each time. It works fine but adds a small external request per avatar. A full-page caching plugin can reduce this overhead.

To switch avatar sources, go to WordPress Admin > LearnDash Dashboard > General Settings and look for the avatar display options.


Bulk Operations on Large Sites

Bulk enrollments, unenrollments, and progress resets work in batches. If you are managing more than a few thousand students in a single bulk action:

  • Split the operation into smaller batches (for example, 500 students at a time) to avoid timeouts.
  • Run large operations during off-peak hours when fewer students are using the site.
  • Use the Export feature first to confirm you have selected the right group of students before applying a bulk action.

Reliable Scheduled Email Sending

The dashboard queues emails and sends them on a schedule - roughly every minute. On busy sites, the default WordPress scheduler (which triggers on page visits) can be unreliable.

For reliable email delivery, ask your hosting provider about setting up a server-level scheduled task to trigger the WordPress scheduler on a fixed interval. Most managed hosts handle this automatically. If yours does not, a plugin like WP Crontrol can help you monitor whether the scheduler is running correctly.


Monitor Dashboard Performance

If you want to identify specific slow spots:

  1. Install the Query Monitor plugin (free in the WordPress plugin directory).
  2. Load the dashboard as an admin.
  3. Check the Query Monitor toolbar for slow database queries and how long they took.

This will show you exactly which queries are slow so you can address them - often by improving your hosting resources or enabling caching.

Upgrading LearnDash Dashboard

This page explains how to upgrade the plugin safely, what to do if something goes wrong, and what changed in major releases.


Before You Upgrade

Take these steps before applying any update. They take a few minutes and can save hours of recovery time.

  1. Back up your database. Use your host's backup tool or a plugin like UpdraftPlus to create a full database backup. The dashboard stores important data - commission records, email logs, enrollment codes, time tracking, and student statistics - that you want to be able to restore if something goes wrong.

  2. Back up the plugin folder. Copy the ld-dashboard folder from your plugins directory to a safe location. This lets you restore the exact previous version quickly.

  3. Read the release notes. Check the changelog before upgrading. Look for any notes about breaking changes or settings that need to be reconfigured after the update.

  4. Test on a staging site first. If your host provides a staging environment, apply the update there and verify everything works before touching your live site.

  5. Clear your caches before and after. Disable any full-page caching plugin before upgrading and clear all caches immediately after. Stale cached pages can make the site look broken even when it is working correctly.


How to Upgrade

  1. Go to Plugins > Installed Plugins.
  2. If an update is available, you will see an Update Now link below the plugin name.
  3. Click Update Now.
  4. WordPress downloads and installs the new version automatically. Any necessary data updates run in the background on the next page load.

Manually via FTP

If automatic updates are not available:

  1. Download the latest version from your Wbcom Designs account.
  2. Go to Plugins > Installed Plugins and deactivate LearnDash Dashboard.
  3. Connect to your server via FTP and delete the existing ld-dashboard folder from wp-content/plugins/.
  4. Upload the new ld-dashboard folder to the same location.
  5. Go back to Plugins > Installed Plugins and activate the plugin.

Data updates run automatically when the plugin activates.


Your Data Is Safe

Upgrades do not delete your existing data. All student records, commission logs, email history, enrollment codes, time tracking data, and plugin settings are preserved when you upgrade.

The data tables the dashboard uses are:

What It Stores Table Name
Outgoing email queue Email Queue
Sent email history Email Logs
Enrollment codes Enrollment Codes
Code redemption history Code Redemptions
Instructor commissions Commission Records
Payout requests Withdrawals
Dashboard statistics cache Statistics
Student learning time Time Tracking
Group seat allocations Group Seats

If a data update does not complete (for example, because of a server error), simply deactivate and reactivate the plugin to retry it.


Your Settings Are Safe

All your plugin settings are preserved across upgrades, including:

  • General settings
  • Design and color settings
  • Menu visibility settings per role
  • Activity feed settings
  • Monetization and commission settings
  • Instructor settings
  • Module settings (Zoom, BuddyPress, To-Do)

If you have customised the email templates by placing copies in your theme folder, those customisations are not affected by plugin updates.


Upgrading from Version 7.0 to 7.5.0

Version 7.5.0 was a significant update that improved performance and reliability across the board. All your existing data and settings work without any changes on your part.

What improved for site owners:

  • The course, lesson, topic, quiz, and certificate edit forms are faster and more reliable.
  • Reports (quiz results, assignments, essays, course progress) now load one page at a time and handle large student counts without timeouts.
  • Emails are now queued and retried automatically - if delivery fails once, the system tries again rather than dropping the message.
  • The dashboard CSS and JavaScript now loads only the files needed for each section, making pages faster for students and instructors.
  • Email templates can be customised by copying them to your theme folder - updates no longer overwrite your customisations.

What you need to do:

For most site owners, nothing. Just update and verify the dashboard works correctly.

If you have a developer who added custom code to the plugin:

Version 7.5.0 replaced four older report-generating classes with a new unified system. If your developer wrote code that referenced those old report classes, that code will need to be updated. Ask your developer to review the upgrade notes or contact Wbcom Designs support for guidance.


After Upgrading

Run through this checklist after every major upgrade:

  • Visit the dashboard as an administrator and confirm tabs load
  • Log in as an instructor and confirm courses, reports, and messaging work
  • Log in as a student and confirm enrolled courses and quiz history are visible
  • Submit a test assignment as a student and approve it as an instructor
  • Open the Insights tab and verify charts display correctly
  • Check Admin > Email Logs and confirm emails are being sent
  • Clear all caching plugin caches

If the Upgrade Causes a Problem

Restore from Your Backup

  1. Use your host's restore tool or a backup plugin to restore your database from before the upgrade.
  2. Delete the current ld-dashboard folder via FTP.
  3. Upload your backed-up plugin folder.
  4. Confirm the plugin is active and the site is working.

Revert the Plugin Files Only

If the data looks fine but the plugin itself is causing errors:

  1. Go to Plugins > Installed Plugins and deactivate LearnDash Dashboard.
  2. Delete the current ld-dashboard folder via FTP.
  3. Upload the backed-up older version.
  4. Activate the plugin.

Use WP Rollback

Install the free WP Rollback plugin, then go to Plugins > Installed Plugins, find LearnDash Dashboard, and click Rollback to select and install a previous version.


Upgrading on WordPress Multisite

If your site is a WordPress Multisite network, upgrade LearnDash Dashboard on each site individually rather than network-activating it. The plugin creates database tables separately for each site, so each site needs to run its own activation process.

After uploading the new plugin files, visit each site's Plugins page and activate or update the plugin there.

Frequently Asked Questions


Requirements and Compatibility

What plugins do I need for the dashboard to work?

Two plugins are required:

  1. LearnDash LMS - the e-learning platform that your courses, students, and progress data live in.
  2. Advanced Custom Fields - bundled with the plugin. It powers the frontend edit forms for courses, lessons, quizzes, and other content.

Everything else - BuddyPress, WooCommerce, Zoom, Uncanny Groups - is optional.

Can I use the dashboard without LearnDash?

No. LearnDash is a hard requirement. The dashboard reads and writes all course, student, and progress data through LearnDash. Without LearnDash installed and active, the plugin will not activate.

Is WooCommerce required?

No. WooCommerce is only needed if you want instructor commission tracking and earnings reporting. If you do not sell courses through WooCommerce, you can ignore the earnings and commission settings entirely.

Does it work on WordPress Multisite?

Yes, with one important note: activate the plugin on each site individually rather than network-activating it. Each site in your network maintains its own separate dashboard data, settings, and records.

Which version of LearnDash is supported?

LearnDash 4.x and newer. If you are running an older version of LearnDash, upgrade LearnDash before updating this plugin.

Is the dashboard available in other languages?

Yes. The dashboard supports translation into any language. The plugin includes a translation template file that you or a translator can use with tools like Poedit or the Loco Translate plugin. Once translated, place the language files in your WordPress languages folder and the dashboard will display in the correct language based on your site settings.


Setting Up the Dashboard

How do I add the dashboard to my site?

  1. Create a new WordPress page (for example, "My Dashboard").
  2. Add [ld_dashboard] to the page content.
  3. Publish the page.
  4. Go to WordPress Admin > LearnDash Dashboard > General Settings and set the Dashboard Page to the page you just created.

Your dashboard is now live at that page's URL.

How do I add the dashboard to my site navigation?

  1. Go to Appearance > Menus.
  2. Select the menu you want to edit.
  3. Find your dashboard page in the Pages list and add it to the menu.
  4. Save the menu.

Can I change the dashboard URL?

Yes. The dashboard URL is simply the URL of the WordPress page that contains the dashboard shortcode. To change it, edit that page and change the page slug under Permalink settings in the editor. After changing it, go to LearnDash Dashboard > General Settings and confirm the Dashboard Page mapping still points to the correct page.

How many tabs can I show in the sidebar?

You can show as many tabs as you need. Go to Admin > LearnDash Dashboard > Menu Options to control which tabs are visible for each user role. The dashboard supports up to 28 different tabs across all user roles.


Instructors and Students

Can students create courses?

No. Only users with the instructor or administrator role can create and edit courses. Students see a read-only view of their enrolled courses, quiz attempts, assignments, and certificates.

How do I make a user an instructor?

You have two options:

  1. Manually: Go to WordPress Admin > Users > All Users, edit the user, and change their role to LD Instructor.

  2. Self-service: Go to Admin > LearnDash Dashboard > General Settings and enable the Apply Instructor Button. This adds a "Become an Instructor" button to the student dashboard. Students submit an application, you review it, and approve or reject it. Approved applicants receive an email and are upgraded to the instructor role automatically.

Can an instructor manage a course they did not create?

Yes, through course sharing. The course owner can share their course with another instructor directly from the course edit form on the dashboard. The co-instructor can then view and edit the course. They cannot delete it.

Shared courses are clearly labelled in the co-instructor's dashboard so they know at a glance which courses they own and which are shared with them.

What is the difference between a Group and a Course?

A Course is a single LearnDash learning unit - it contains lessons, topics, quizzes, and assignments.

A Group is a container that bundles multiple courses together and assigns them to a set of students. When a student joins a group, they get access to all courses in that group automatically. Group leaders are responsible for managing their groups - adding or removing students, viewing progress, and generating enrollment codes.


Enrollment Codes

How do enrollment codes work?

Enrollment codes let students enroll themselves in a course or group without an admin doing it manually. You generate a batch of codes from Dashboard > Bulk Management > Enrollment Codes. Students enter a code on the dashboard to gain instant access.

Can I limit how many times a code can be used?

Yes. When generating a code batch, set the Maximum Redemptions value. Use 1 for single-use codes (useful for individual invitations). A higher number lets multiple students use the same code - useful for a class or cohort.

Can codes expire?

Yes. When generating codes you can set an expiry date. Codes entered after that date will not work.


Reports and Analytics

How do I view student progress?

Instructors can see student progress from several places:

  • The Insights tab shows course-level completion rates, top courses by enrollment, and time spent learning.
  • The Quiz Report tab shows individual student quiz scores and attempts.
  • The Assignment Report tab shows submitted assignments and their approval status.
  • The Essay Report tab shows open-ended quiz question submissions.
  • Click into any course from the Courses tab to see per-student progress for that course.

Why is my statistics data out of date?

Dashboard statistics are cached and refresh automatically several times a day. If you need fresh data right now - for example, after a bulk enrollment - go to Admin > LearnDash Dashboard > General Settings and use the Refresh Statistics option.

Can I export reports?

Yes. The admin report pages for quiz results, assignment status, essay submissions, and course progress each have an Export button. You can export in CSV or Excel format. Apply your filters first, then export - the export matches what is currently displayed.

How many students can the dashboard handle?

The dashboard is designed to scale. Reports load data one page at a time, so even sites with tens of thousands of student records can browse them smoothly. For best performance on large sites, use a hosting plan with Redis caching enabled. See the Performance Tips page for detailed guidance.


Communication

Can instructors email their students from the dashboard?

Yes. The Email tab (when enabled in settings) lets instructors compose and send emails to any or all of their students. Instructors can address a whole course, a specific group, or individual students. There are seven ready-made email templates available - welcome messages, quiz retry prompts, inactivity reminders, and more - to save time.

Do private messages work without BuddyPress?

Yes. The dashboard has its own built-in private messaging system. Students and instructors can exchange private messages from the Private Messages tab without BuddyPress. If BuddyPress is active on your site, you can optionally route messages through BuddyPress messaging instead.


Customisation

Can I change the dashboard colors and design?

Yes. Go to WordPress Admin > LearnDash Dashboard > Design Settings to customize colors, fonts, and layout options to match your brand.

Can I override email templates?

Yes. Copy the email template files from the plugin's templates folder into a folder called ld-dashboard/emails/ inside your active theme. The dashboard will use your theme copies instead of the built-in templates. Plugin updates will not overwrite your customisations.

Can I add custom fields to courses and lessons?

Yes. You can create custom ACF field groups and configure them to appear on the dashboard's course or lesson edit forms. This lets you collect any additional information from instructors when they create or edit content. Contact the Wbcom Designs support team if you need guidance on setting this up.


Licensing and Updates

How do I receive automatic updates?

Enter your license key at WordPress Admin > LearnDash Dashboard > Welcome. With an active license, plugin updates appear in the standard WordPress update notifications. Click Update Now to apply them.

What happens if my license expires?

The plugin keeps working. You lose access to automatic updates and priority support until you renew. Renew your license at wbcomdesigns.com to restore both.


Support

How do I report a bug or get help?

Visit wbcomdesigns.com/support/ and open a support ticket. Include:

  • Your WordPress, PHP, LearnDash, and LearnDash Dashboard version numbers
  • A description of what you see and what you expected
  • Steps to reproduce the problem
  • Any error messages you have noticed

Where is the full documentation?

Something unclear? Open a support ticket → · Refund policy

Buy Dashboard for LearnDash