Organize businesses with categories and custom taxonomies.
Business Categories
Accessing Categories
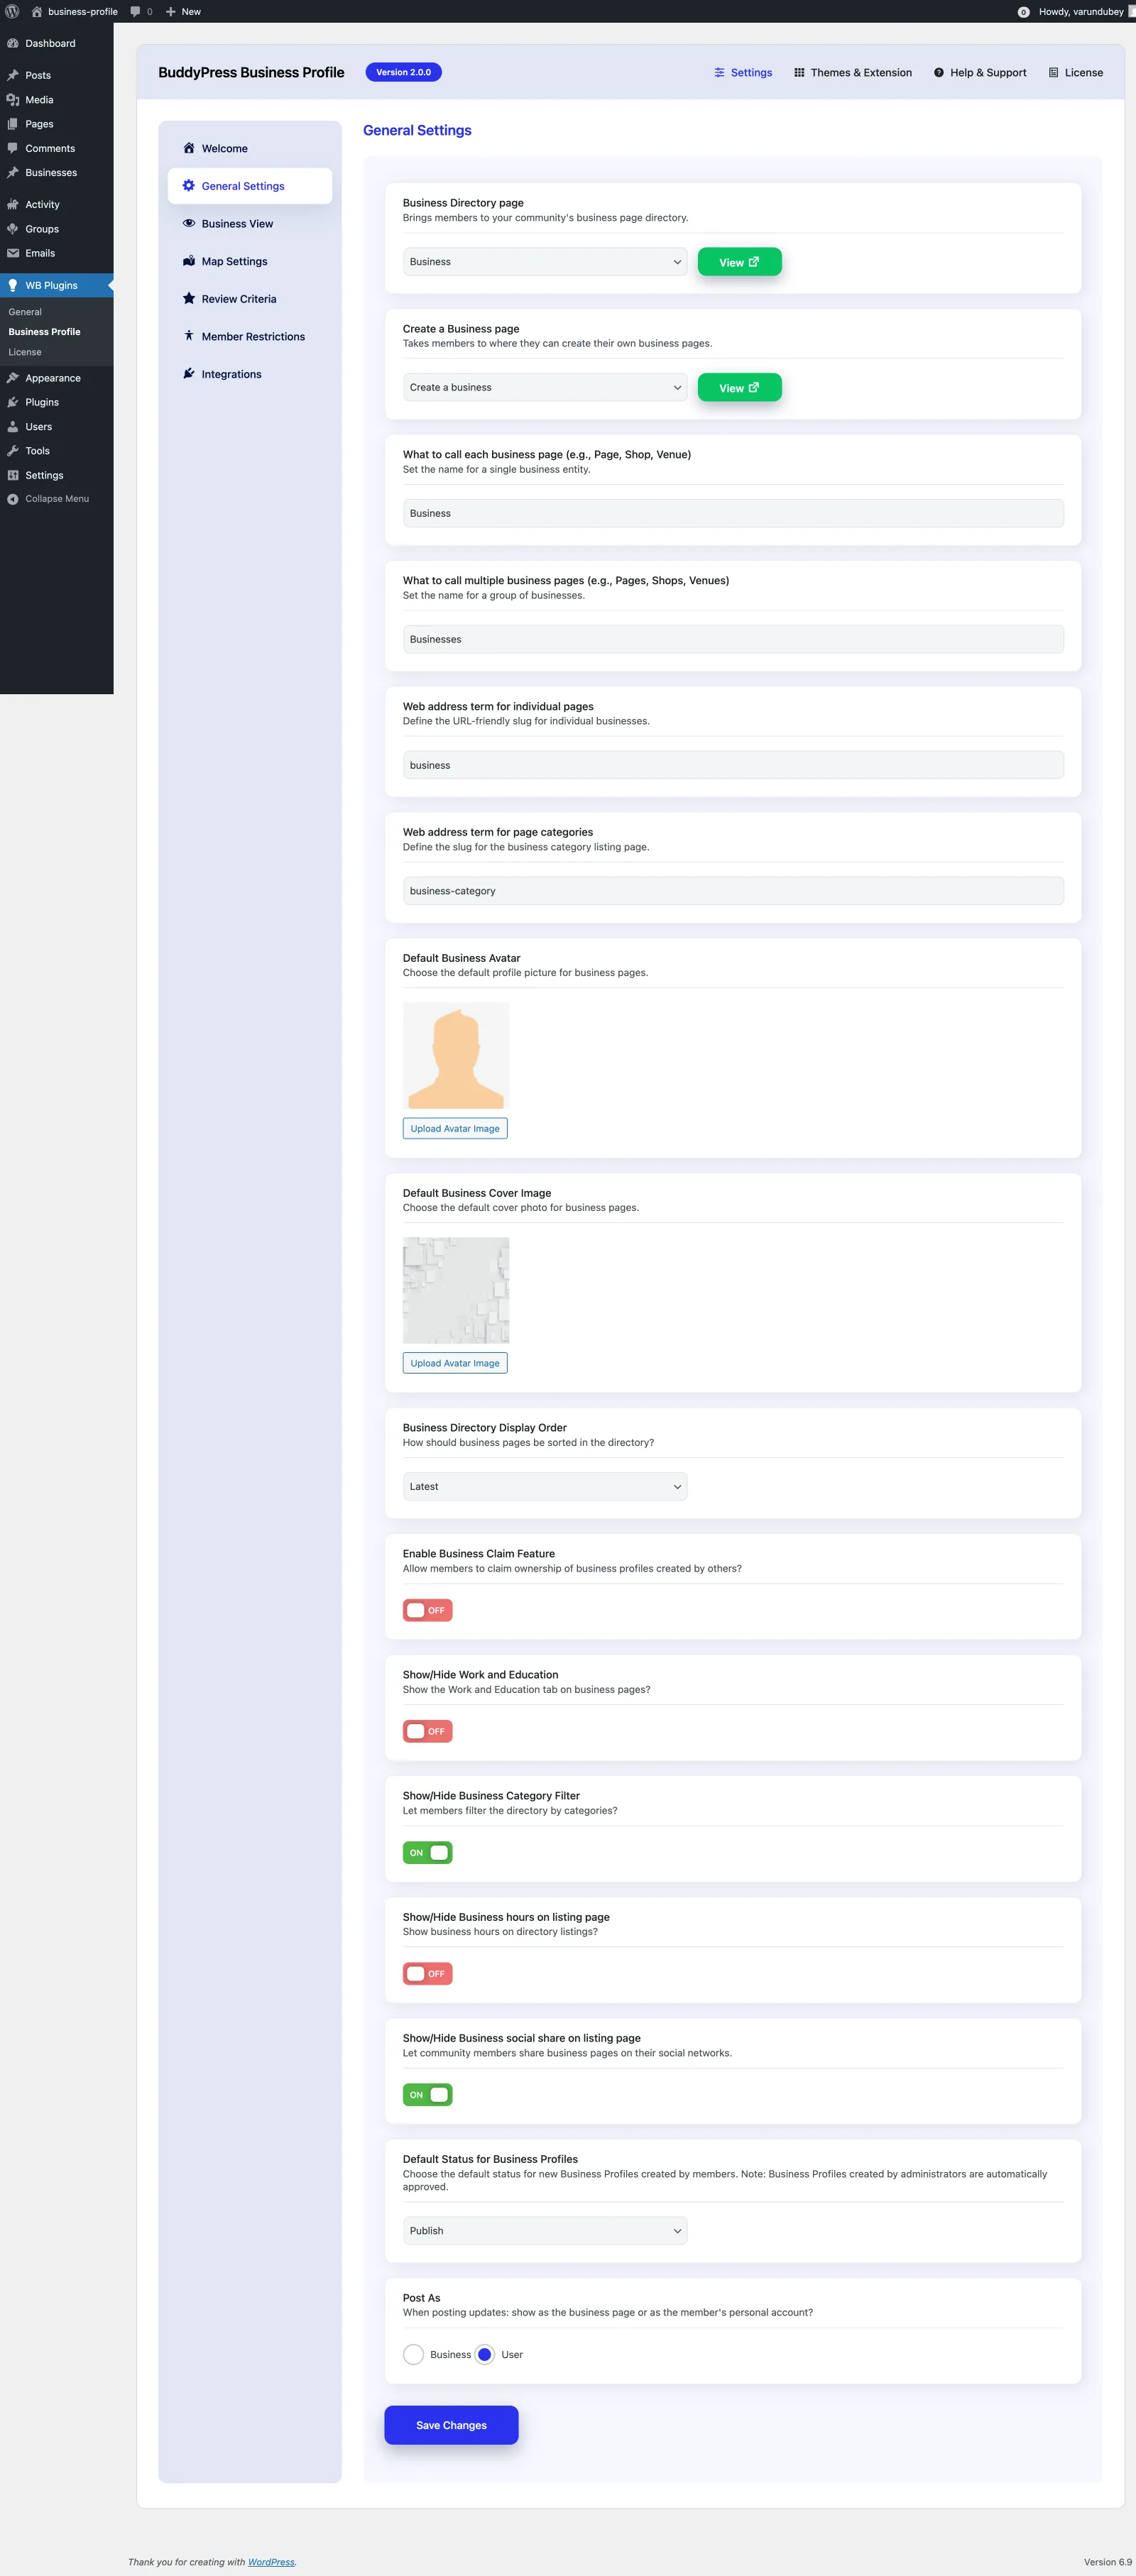
Navigate to Business > Categories in the WordPress admin.
Managing Categories
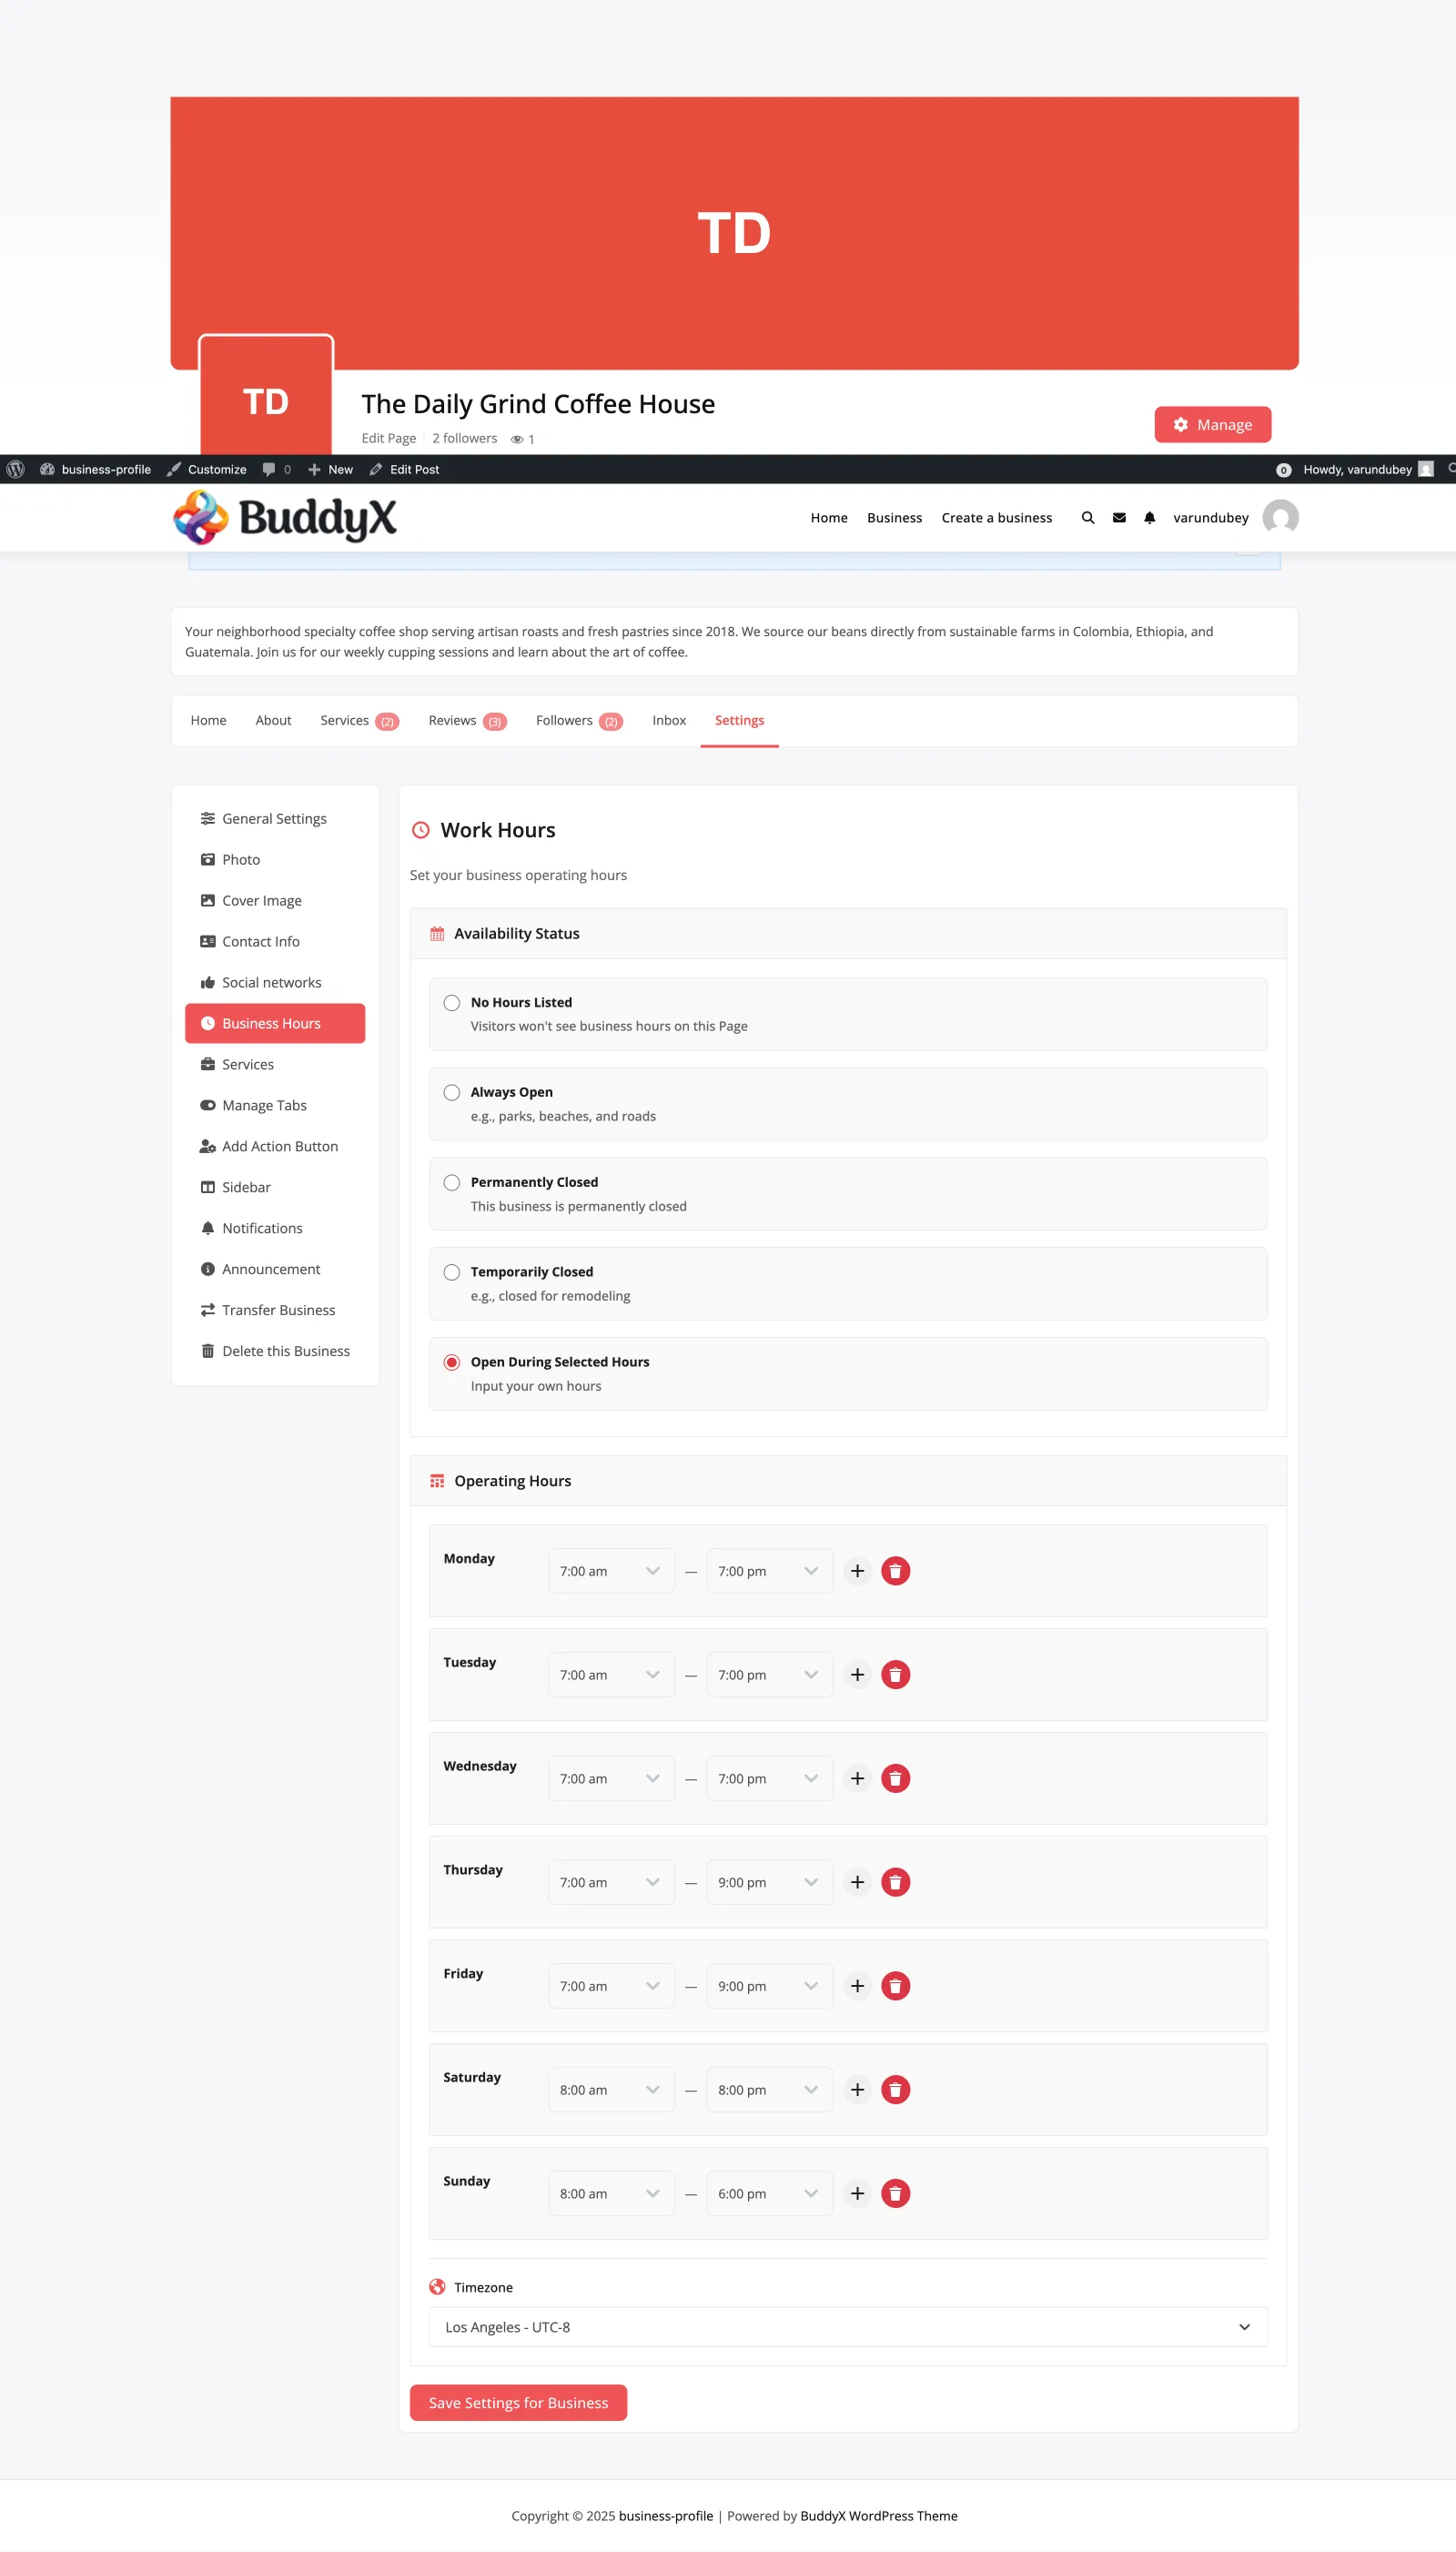
Adding a Category
- Enter Name - Display name (e.g., "Restaurants")
- Enter Slug - URL-friendly version (e.g., "restaurants")
- Select Parent - For hierarchical organization
- Add Description - Optional category description
- Click Add New Category
Category Fields
| Field |
Description |
Example |
| Name |
Display name |
"Food & Drink" |
| Slug |
URL path |
"food-drink" |
| Parent |
Parent category |
"Services" |
| Description |
Category description |
"Restaurants, cafes, bars..." |
| Count |
Number of businesses |
25 |
Category Hierarchy
Create a hierarchical structure for better organization:
Services
├── Professional
│   ├── Legal
│   ├── Accounting
│   └── Consulting
├── Home Services
│   ├── Plumbing
│   ├── Electrical
│   └── Cleaning
└── Health & Wellness
    ├── Medical
    ├── Fitness
    └── Spa & Beauty

Food & Drink
├── Restaurants
│   ├── Fine Dining
│   ├── Casual
│   └── Fast Food
├── Cafes
└── Bars & Nightlife
Default Categories
The plugin creates default categories on activation:
- Communities
- Fashion & Clothing
- Food & Drink
- Hobbies & Interests
- Medical
- Technology
You can rename, reorganize, or delete these as needed.
Category Actions
Edit Category
- Hover over category name
- Click Edit
- Modify fields
- Click Update
Quick Edit
- Hover over category name
- Click Quick Edit
- Change name or slug
- Click Update Category
Delete Category
- Hover over category name
- Click Delete
- Confirm deletion
Note: Deleting a category doesn't delete the businesses in it.
Bulk Actions
Select multiple categories and:
- Delete - Remove selected categories
Category Images
To add category images, use a plugin like:
- Categories Images
- Flavor (Category Thumbnails)
Or add custom fields via code:
// Add category image field
add_action( 'business-category_add_form_fields', function() {
    ?>
    <div class="form-field">
        <label><?php esc_html_e( 'Category Image', 'my-plugin' ); ?></label>
        <input type="text" name="category_image" id="category_image" />
    </div>
    <?php
});
Category Display
In Directory
Categories appear in the search filter widget:
- Dropdown selector
- Checkbox list (configurable)
- Category counts
On Business Pages
Assigned categories display on:
- Business cards in directory
- Single business page sidebar
- Business meta information
Category Archives
Each category has an archive page:
yoursite.com/business-category/restaurants/
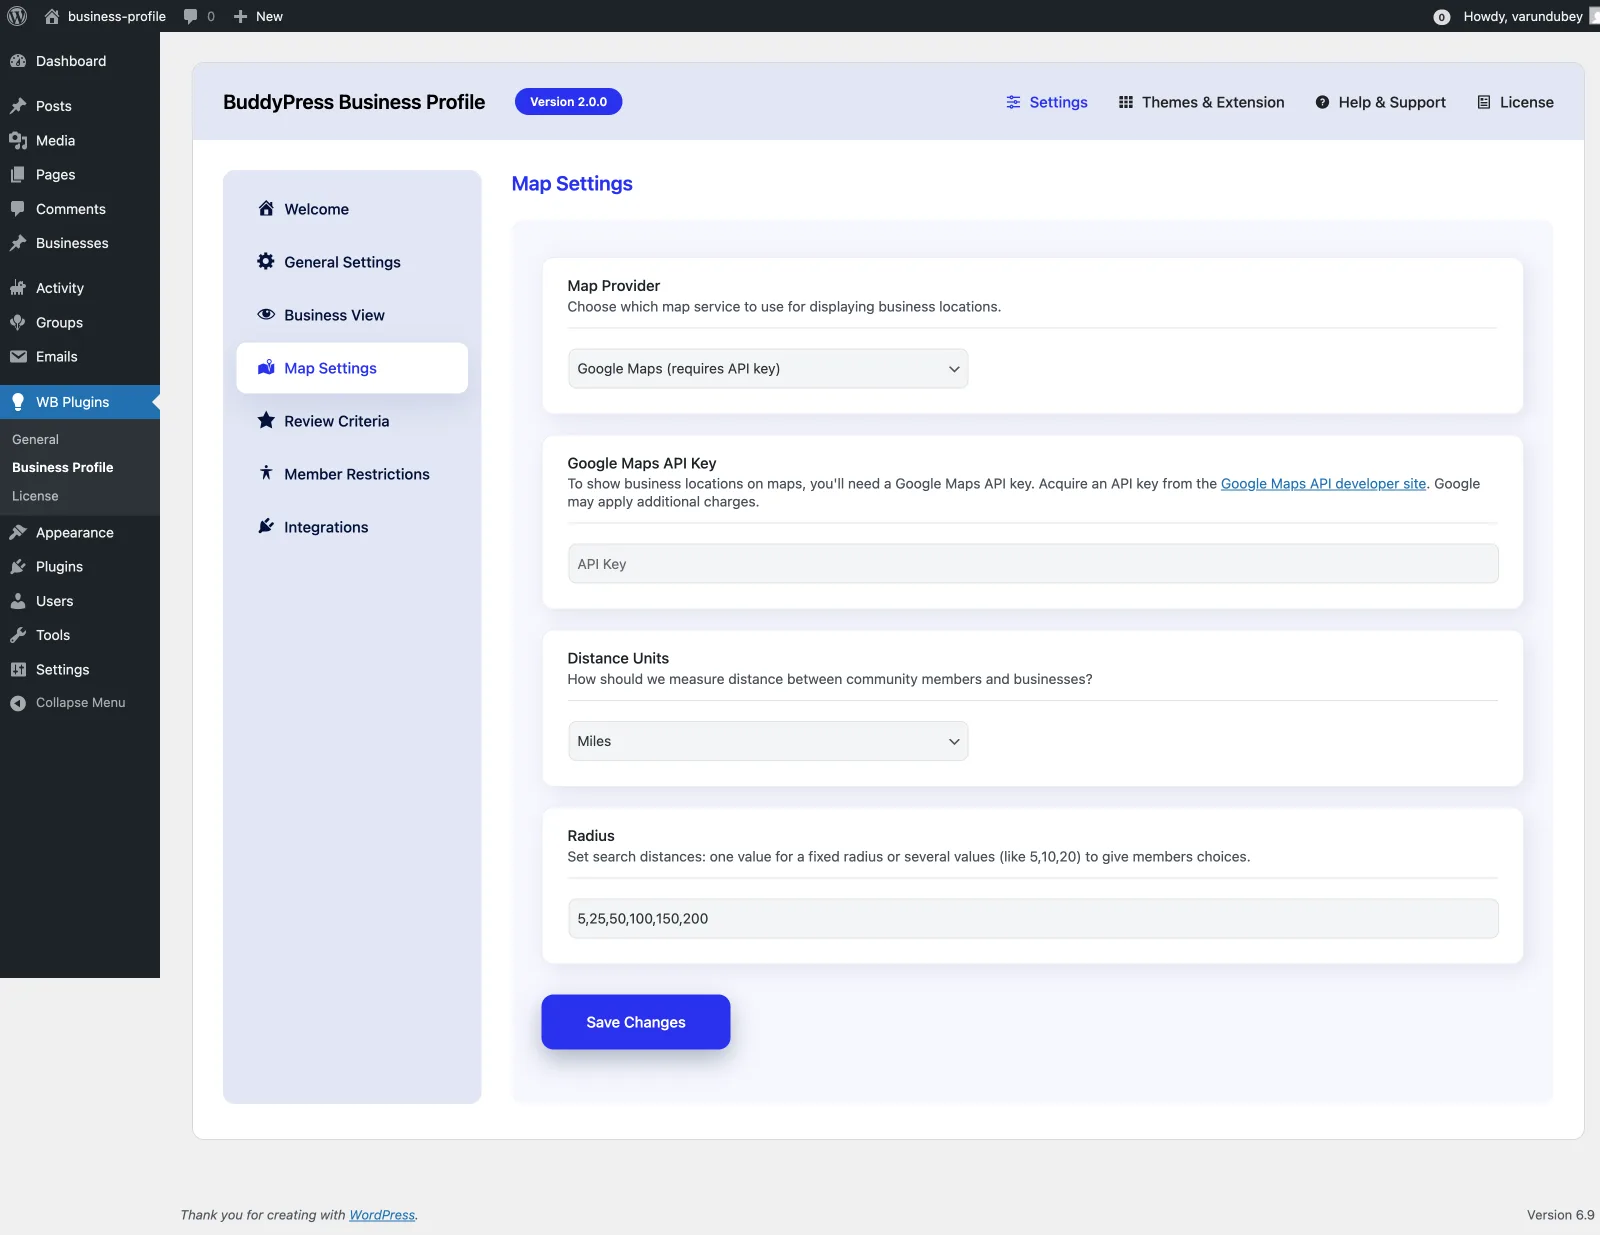
Custom Taxonomies
Adding Custom Taxonomies
Register additional taxonomies for businesses:
add_action( 'init', function() {
    register_taxonomy( 'business-tag', 'business', array(
        'label'        => __( 'Business Tags', 'my-plugin' ),
        'hierarchical' => false,
        'public'       => true,
        'show_ui'      => true,
        'rewrite'      => array( 'slug' => 'business-tag' ),
    ));
});
Custom Taxonomy Filter
If you have custom taxonomies, enable them in:
WB Plugins > Business Profile > Custom Taxonomy Filter
This adds them to the directory search filters.
SEO Considerations
Category Pages
- Each category creates an archive page
- Add descriptions for SEO value
- Use clear, keyword-rich names
URL Structure
Default: yoursite.com/business-category/category-name/
Customize via Settings > Permalinks after modifying the category slug in General Settings.
Best Practices
- Keep it simple - 10-15 top-level categories maximum
- Use hierarchy - Group related categories under parents
- Be specific - "Italian Restaurants" vs just "Restaurants"
- Avoid overlap - Clear boundaries between categories
- Add descriptions - Help users understand each category
- Review regularly - Merge underused categories
- Consider your audience - Use terms they'd search for